Summer Memories Week: Combining Your Kits with Jody Compton

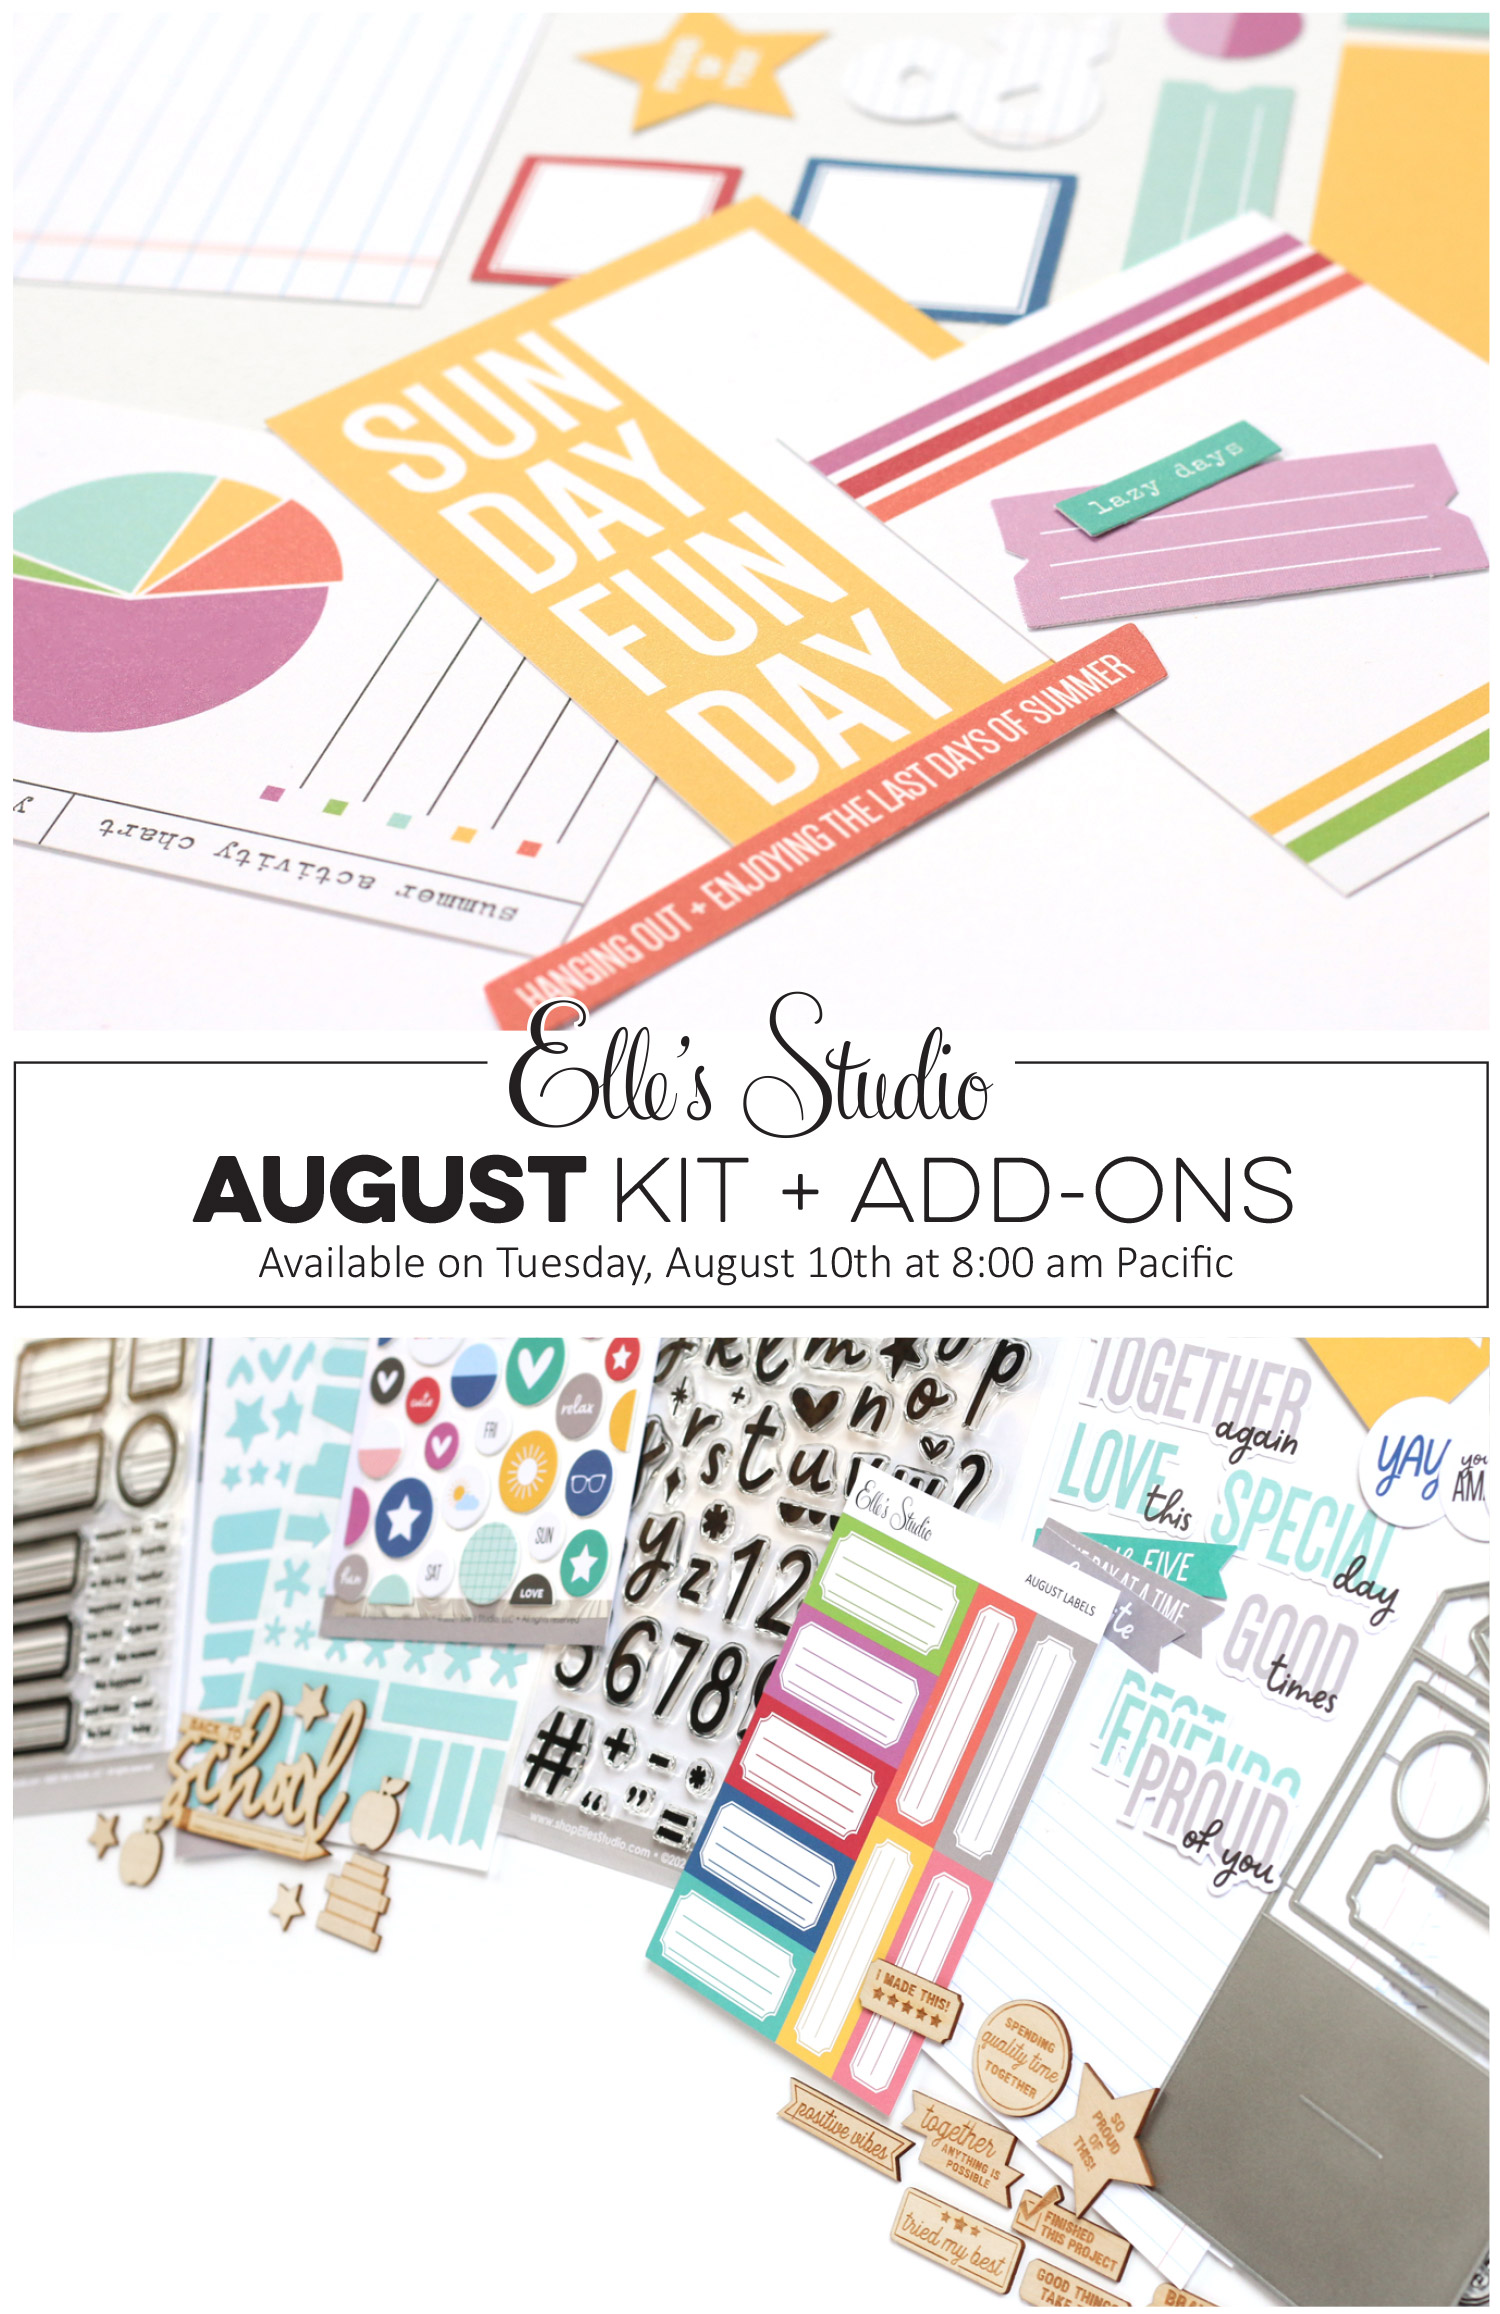
You may have been so busy this summer that your kits have gone a bit… unloved!? Or, you’ve had so much time to create that you have bits and pieces left over from both your June and July kits? Today, design team member Jody Compton is here to show us how perfectly the two kits combine to create one beautiful project. Let’s take a look at what Jody has created: a sweet tag mini!

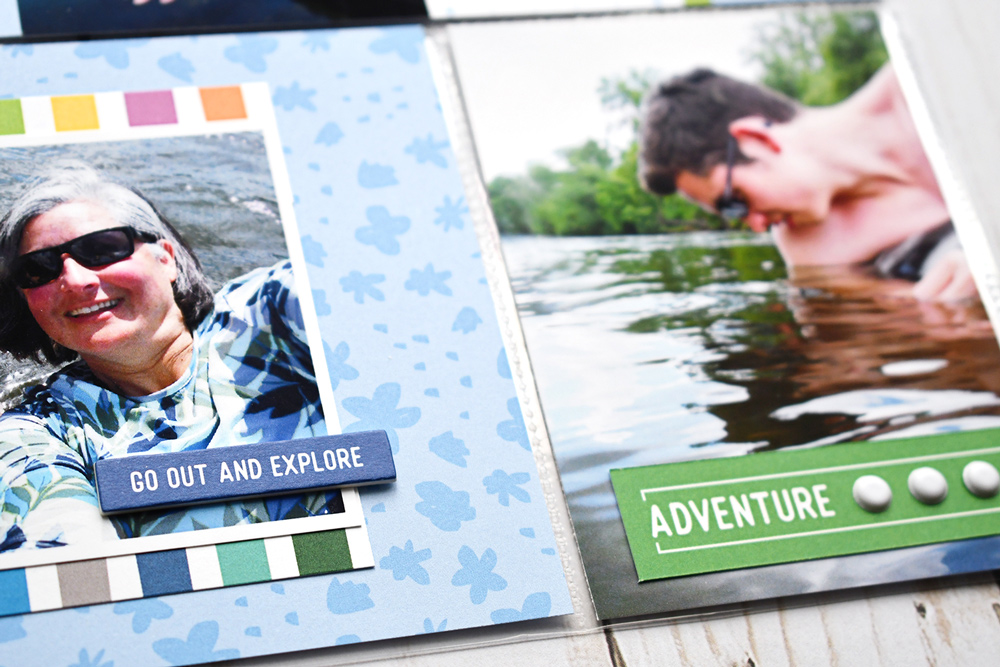
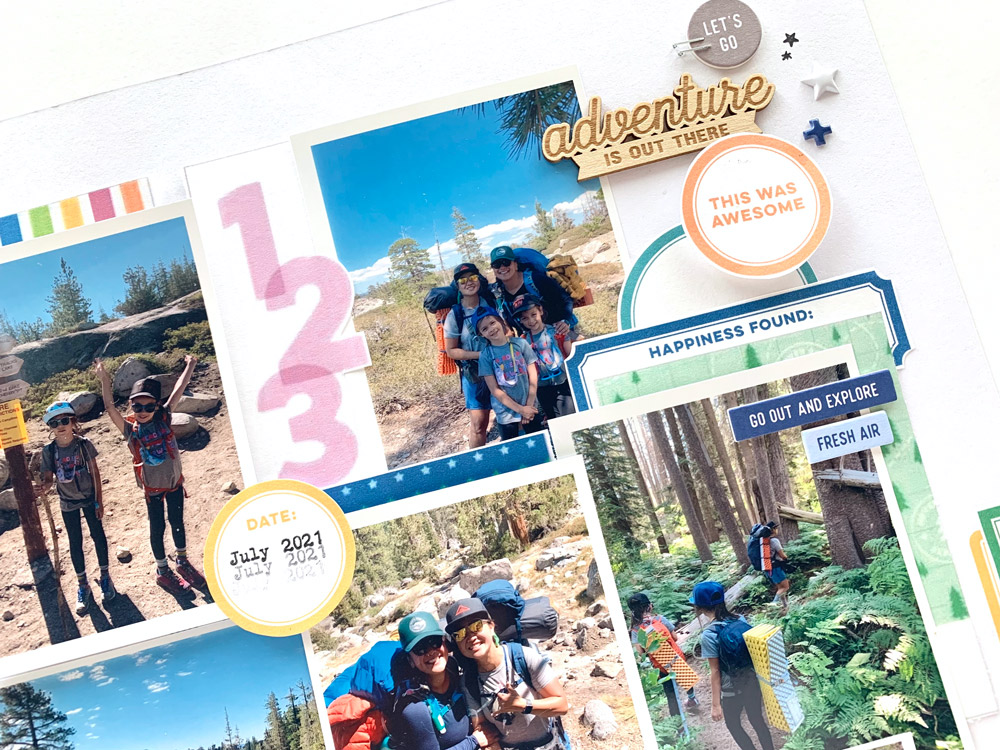
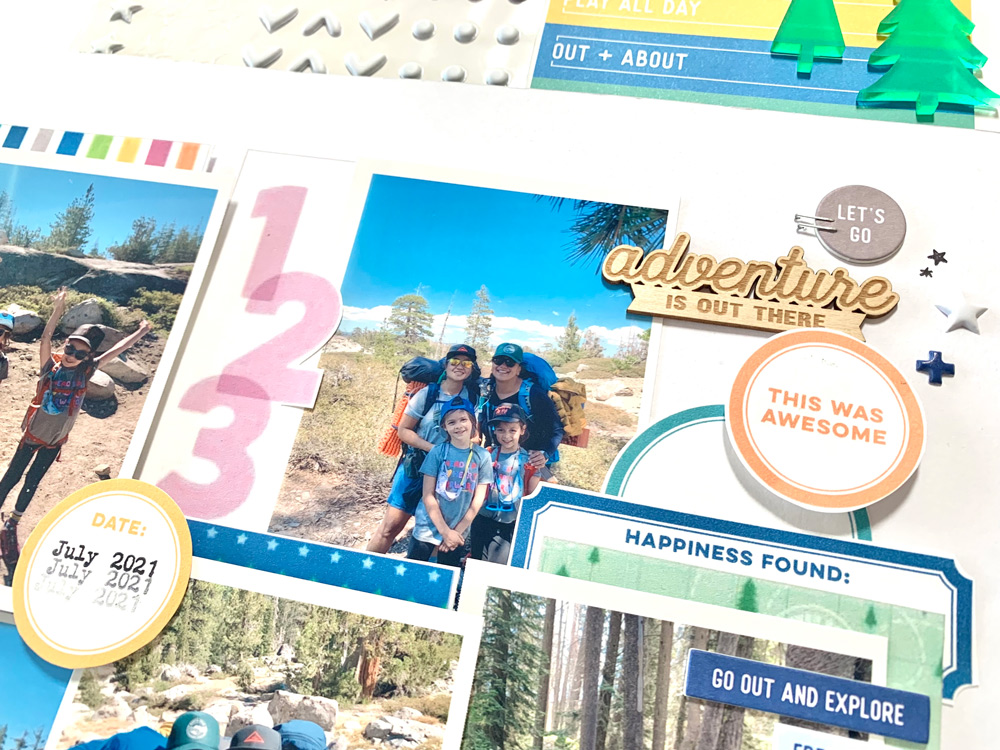
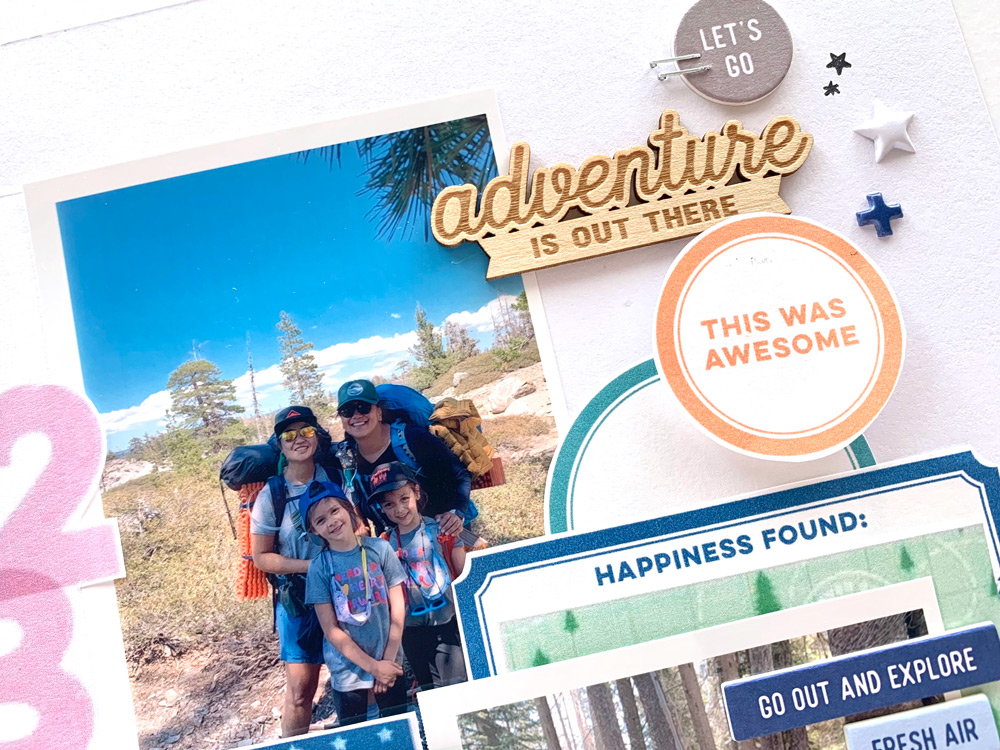
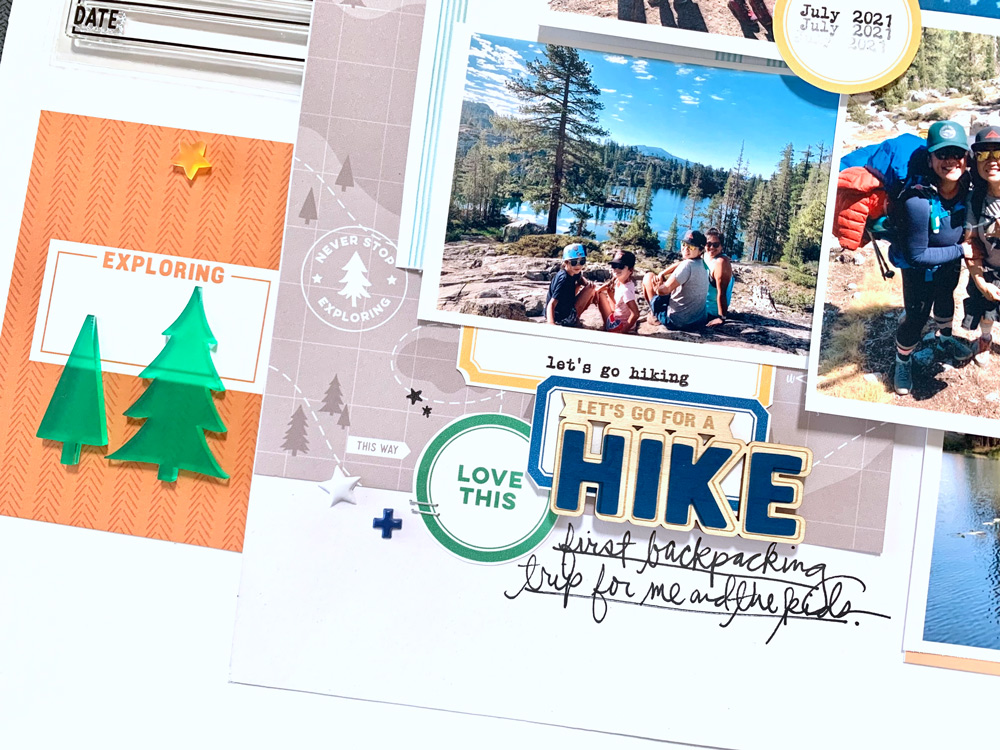
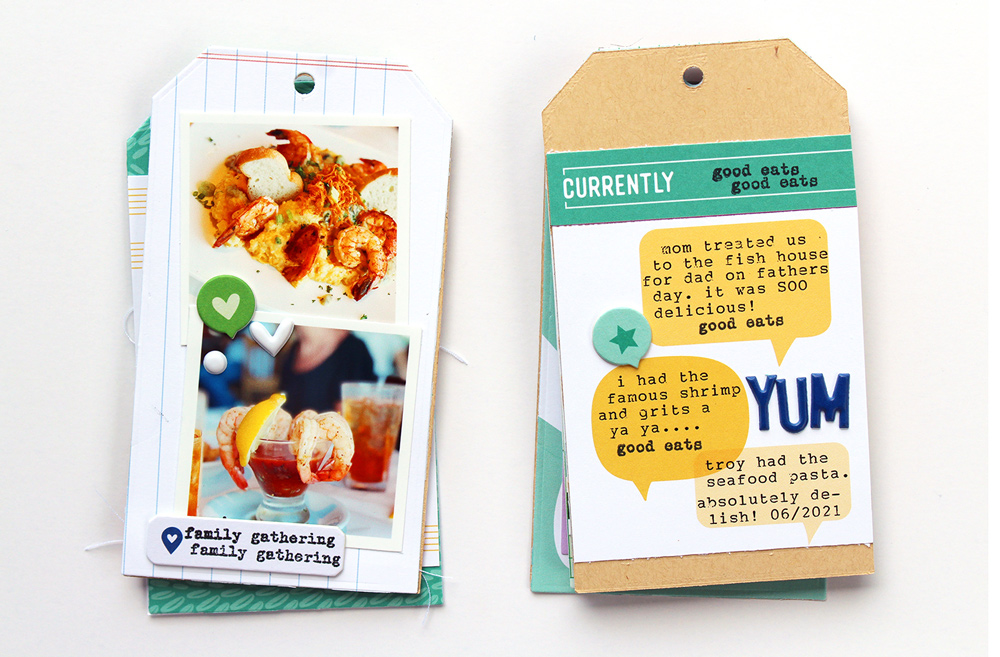
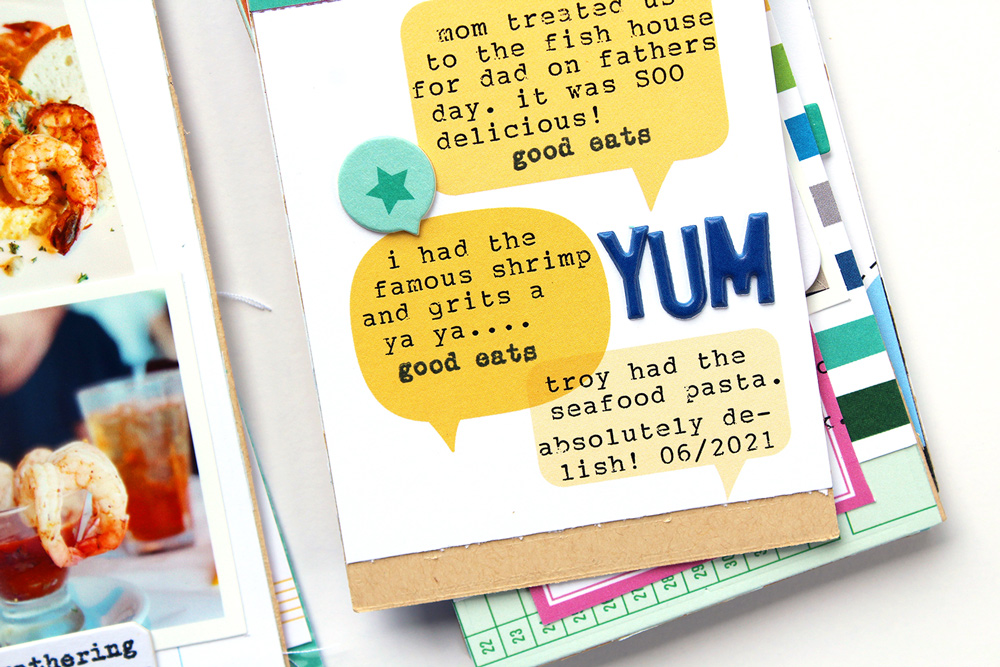
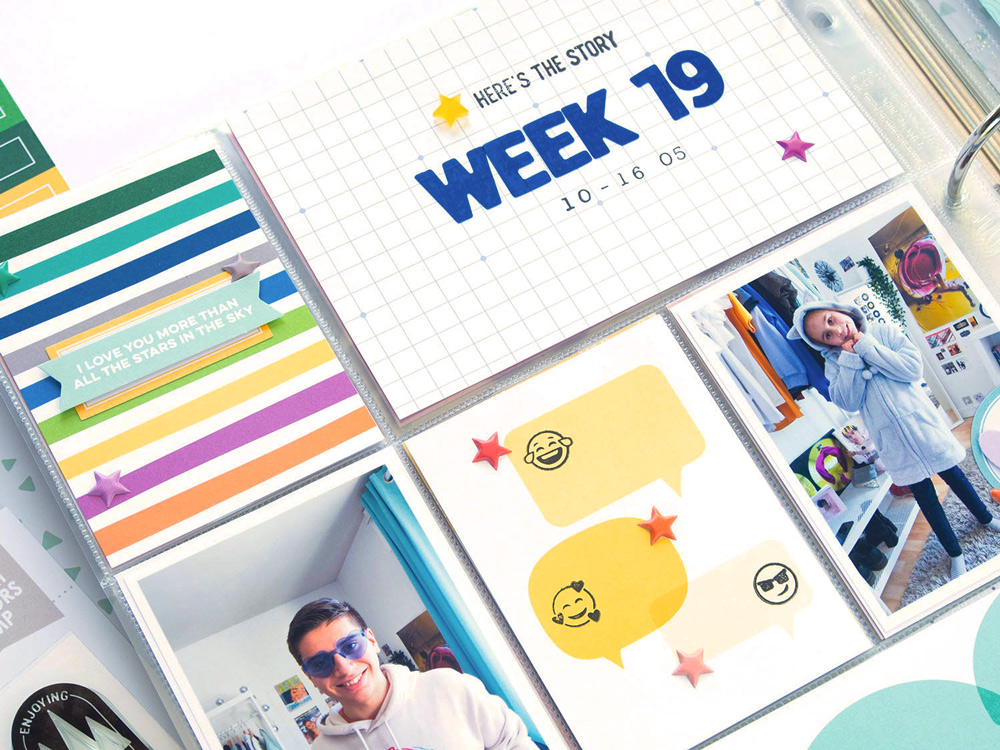
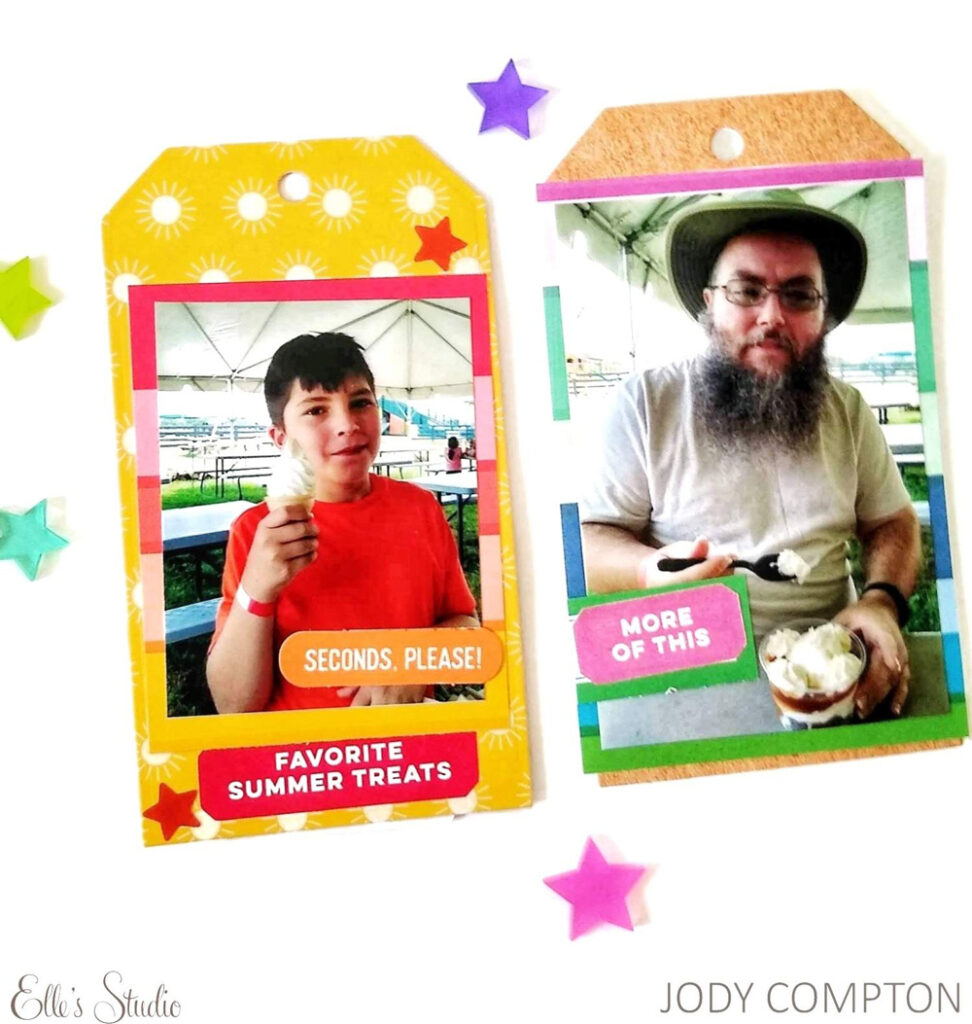
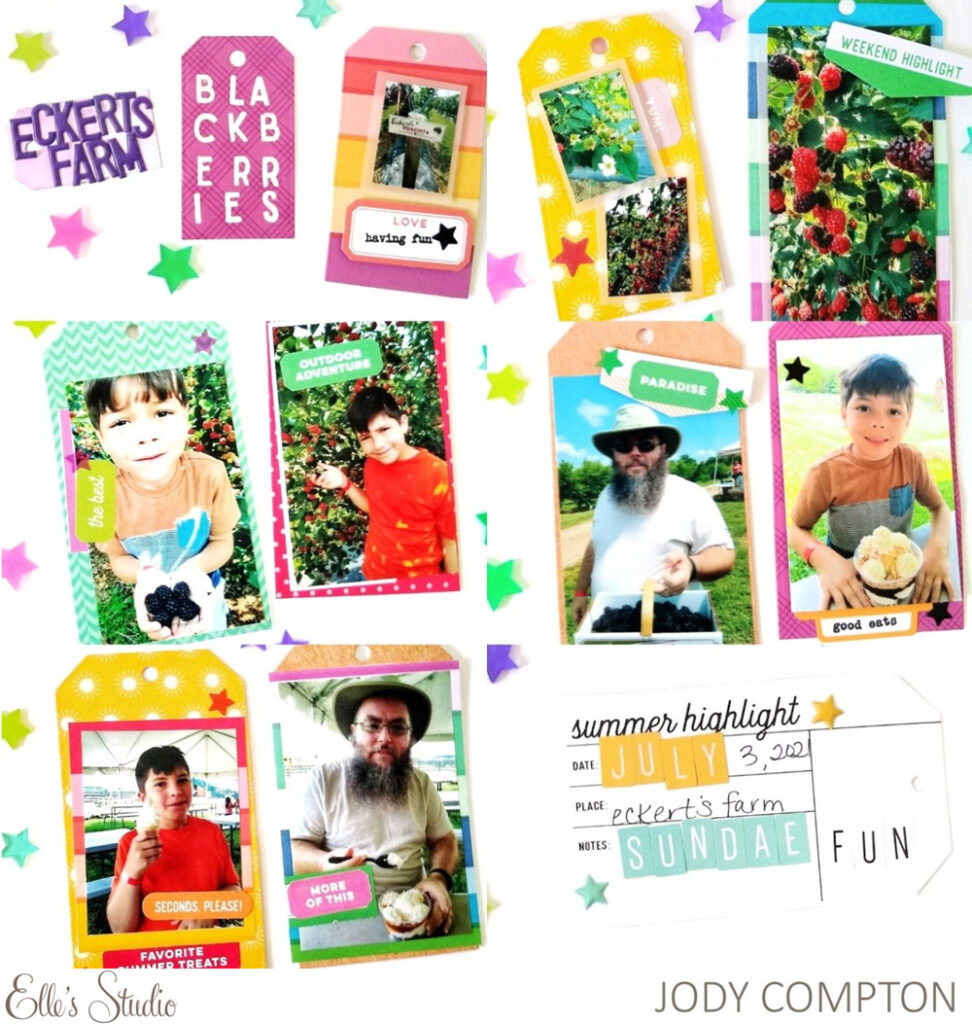
Hello! It’s Jody joining you on the blog today with a Summer Memories project! I used both the June and July 2021 Kit and several add-ons to create a fun mini album. The Good Times Paper Stack and Adventure Paper Stack had every color in the rainbow that I knew they would make great mini album pages! All of the bright colors were perfect to document our wonderful day at a local blackberry farm.   

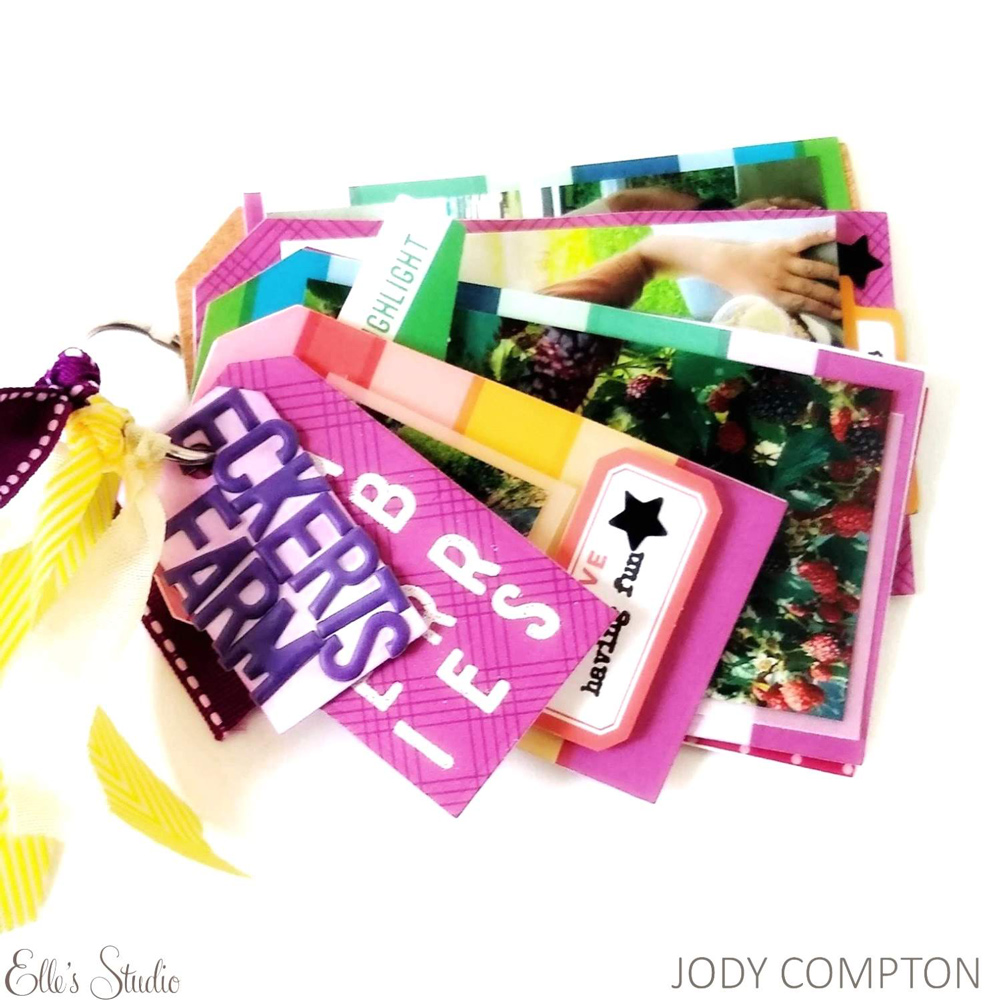
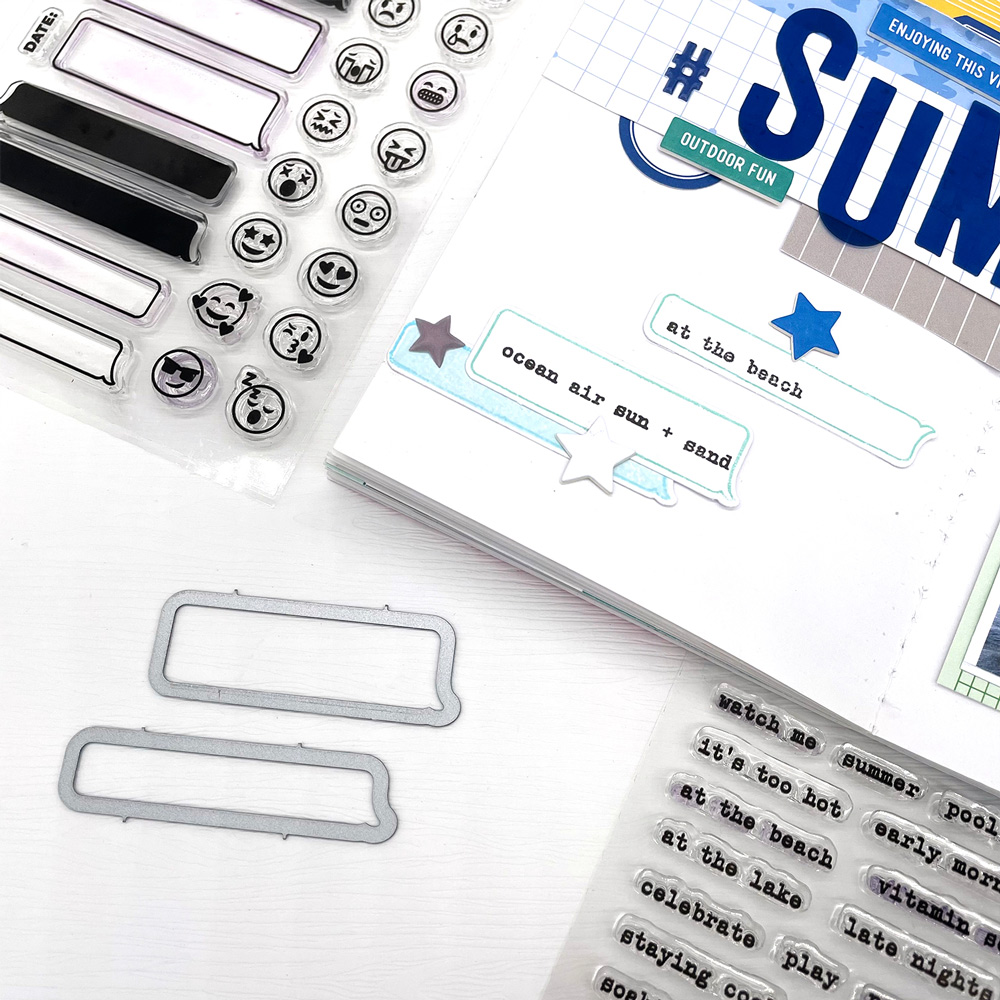
Supplies | July 2021 Kit, June 2021 Kit, Summer Highlights 4 x 6 Inch Journaling Tags, Bright Die Cut Tabs, Summer Label Stickers, Jane Tile Alphabet Cardstock Stickers – Yellow, Jane Tile Alphabet Cardstock Stickers – Light Teal Purple Puffy Alphabet Stickers, Acetate Star Stickers, Adventure Paper Stack, Good Times Paper Stack, Summertime Tabs Stamp, Stanley Jr. Alphabet Stamp, Nesting Tags Metal Die

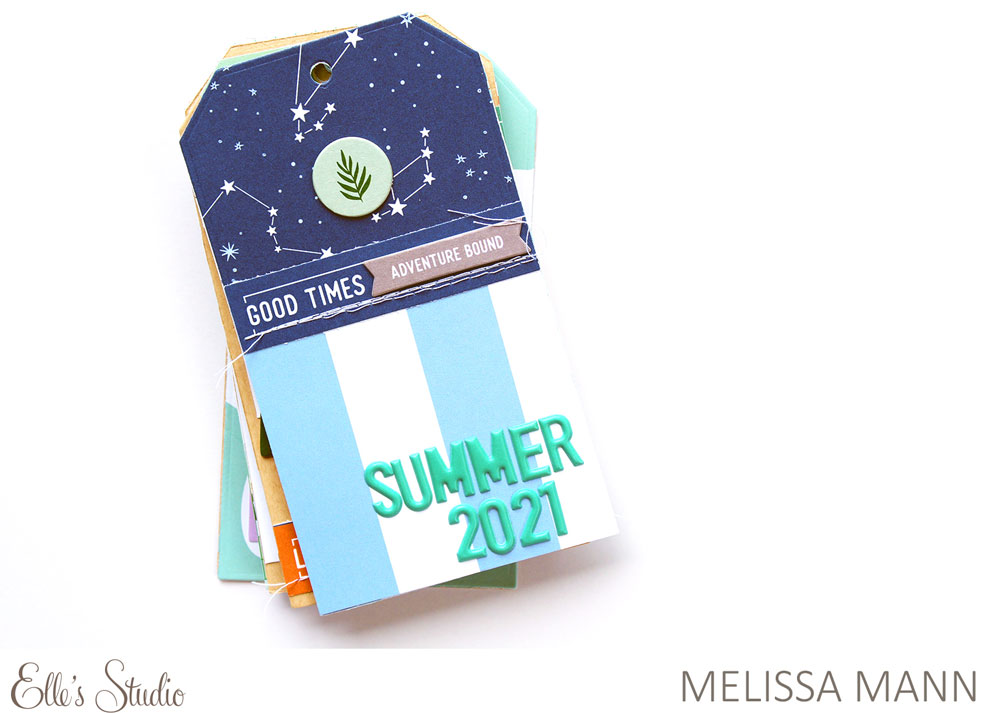
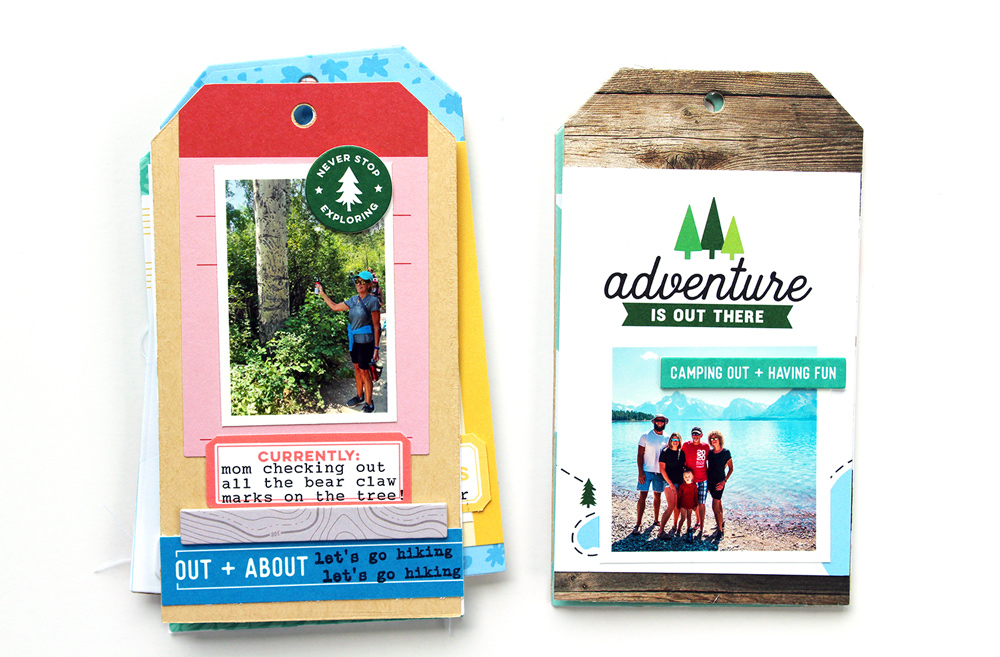
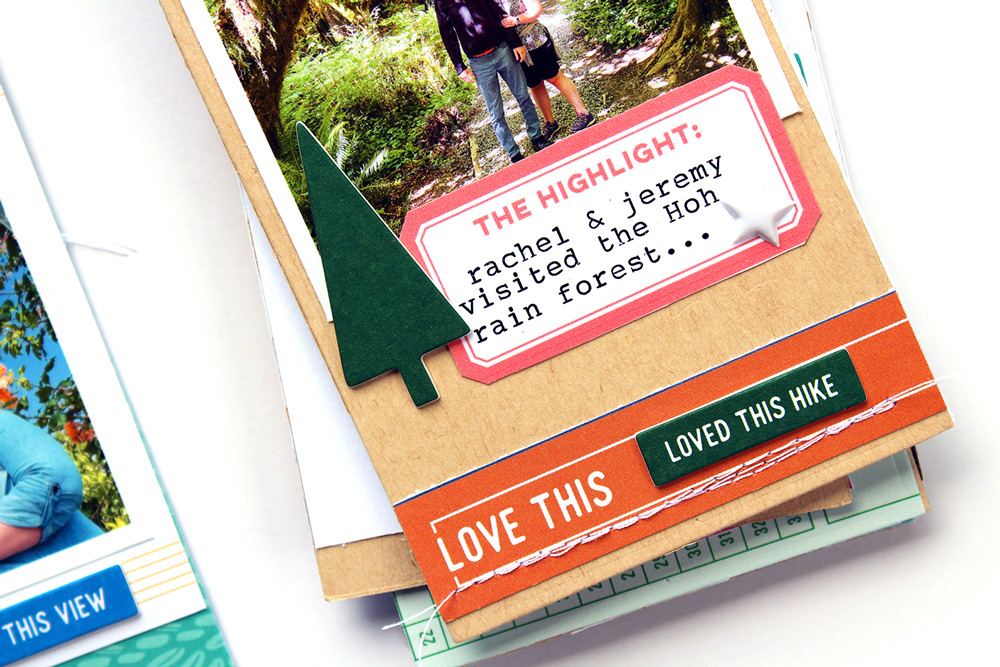
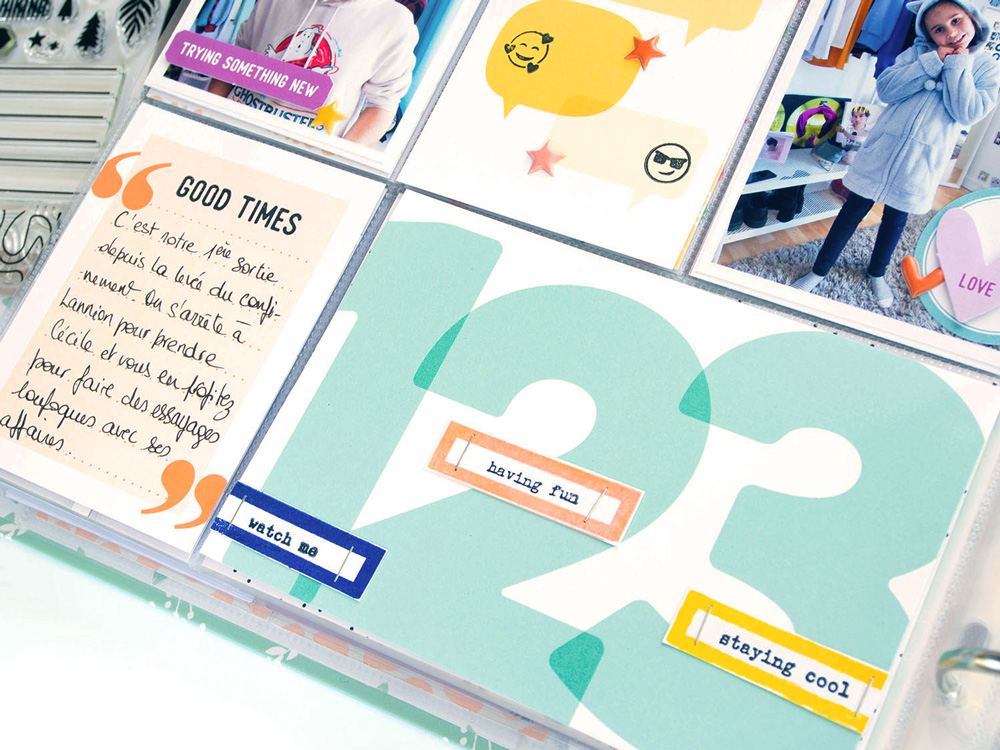
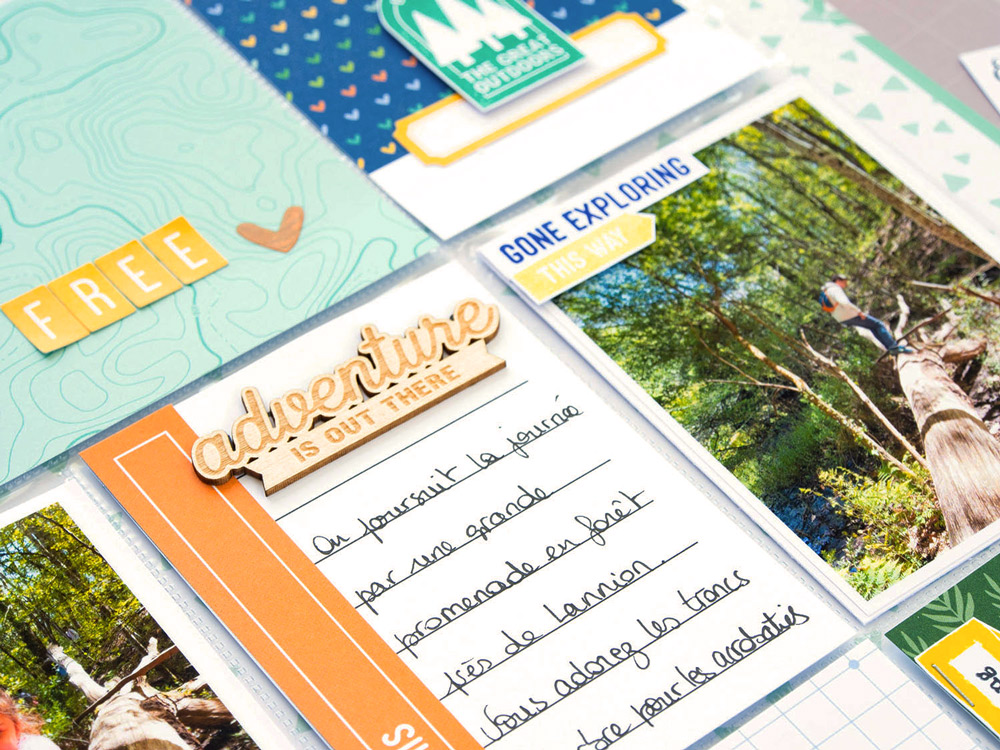
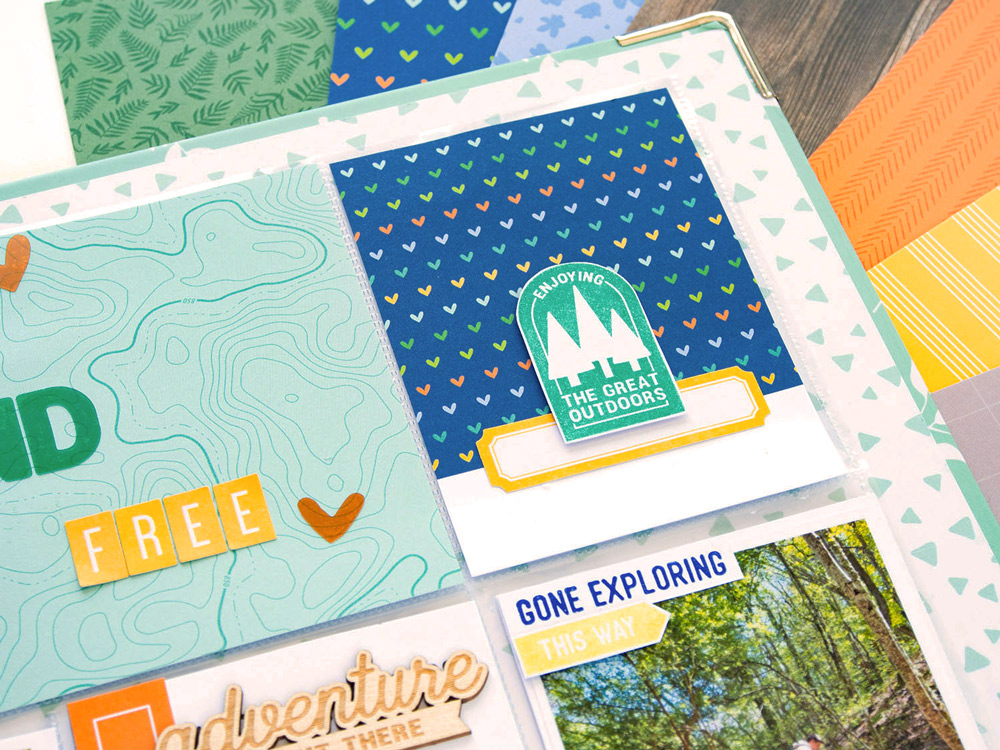
I used the amazing Nesting Tags Metal Die to create the foundation of each page. I love that they go from smallest to largest.  It immediately creates texture and dimension.  

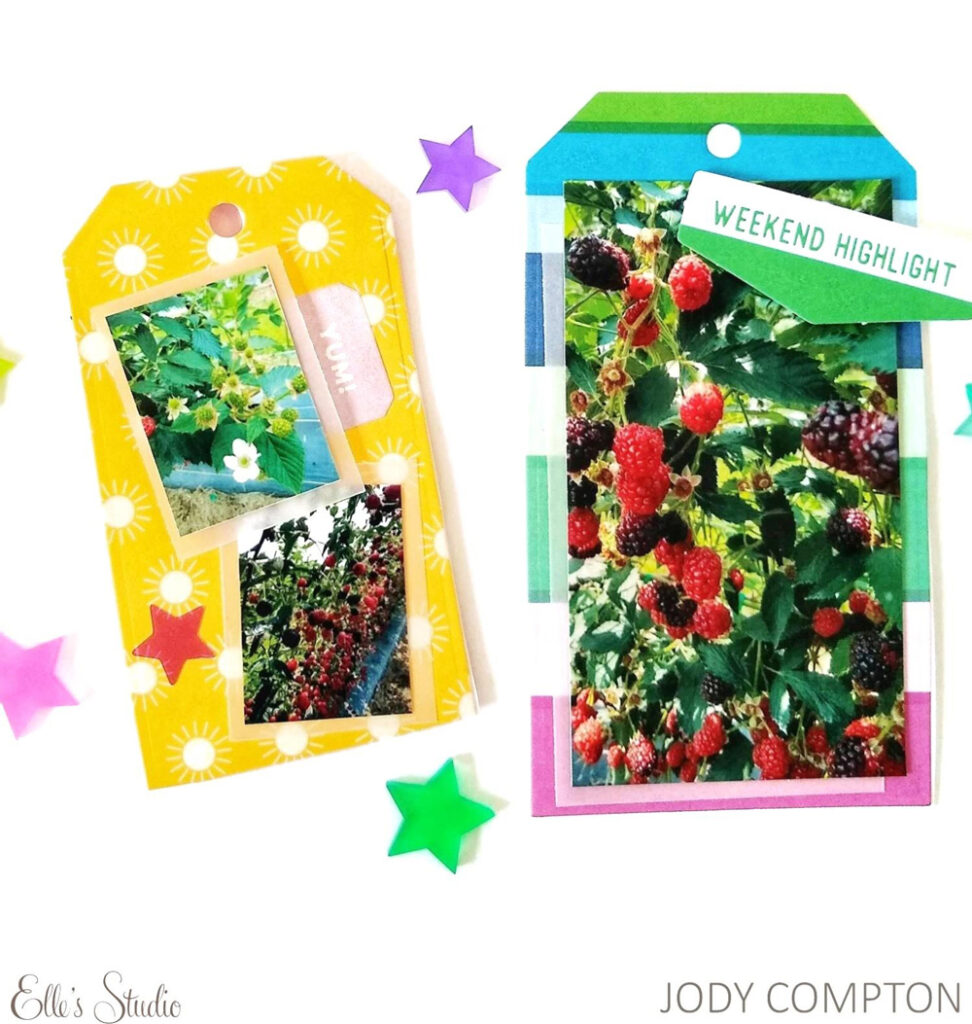
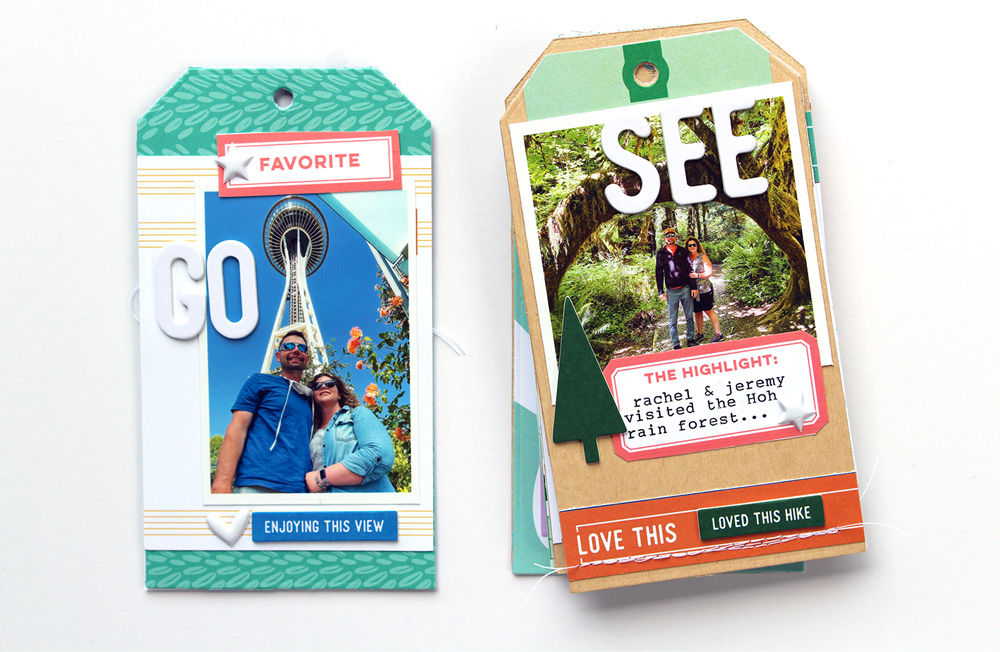
I printed my pictures in a variety of sizes. I also backed them with a little vellum layer.  

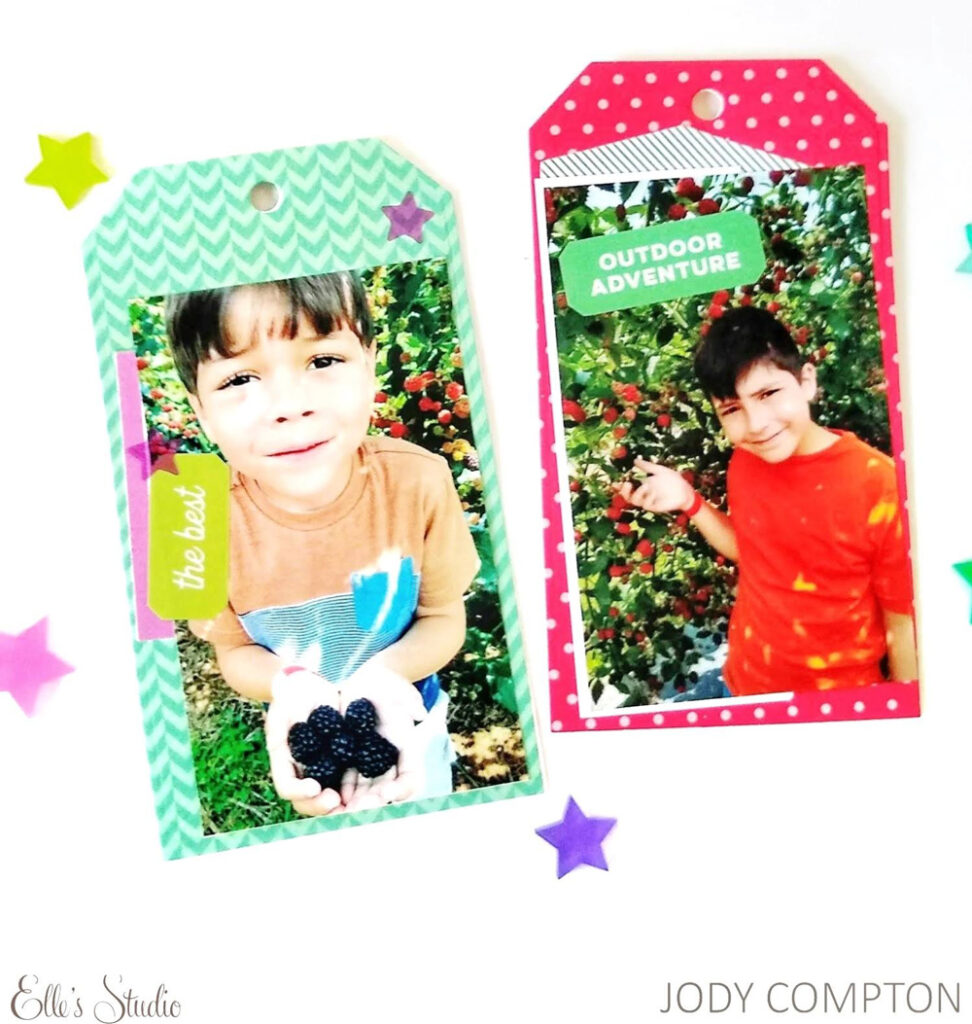
The Acetate Star Stickers were so fun to pop around the pages. They added a little color to help move your eyes around.      

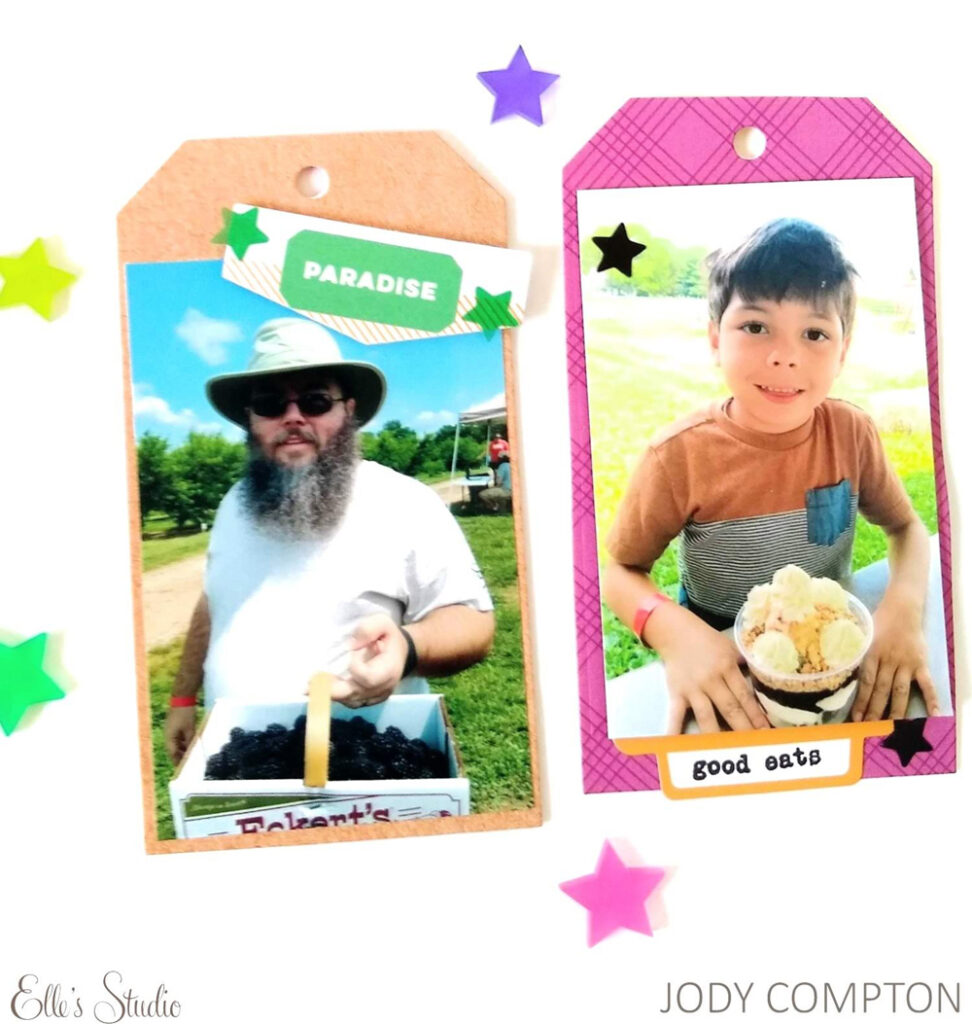
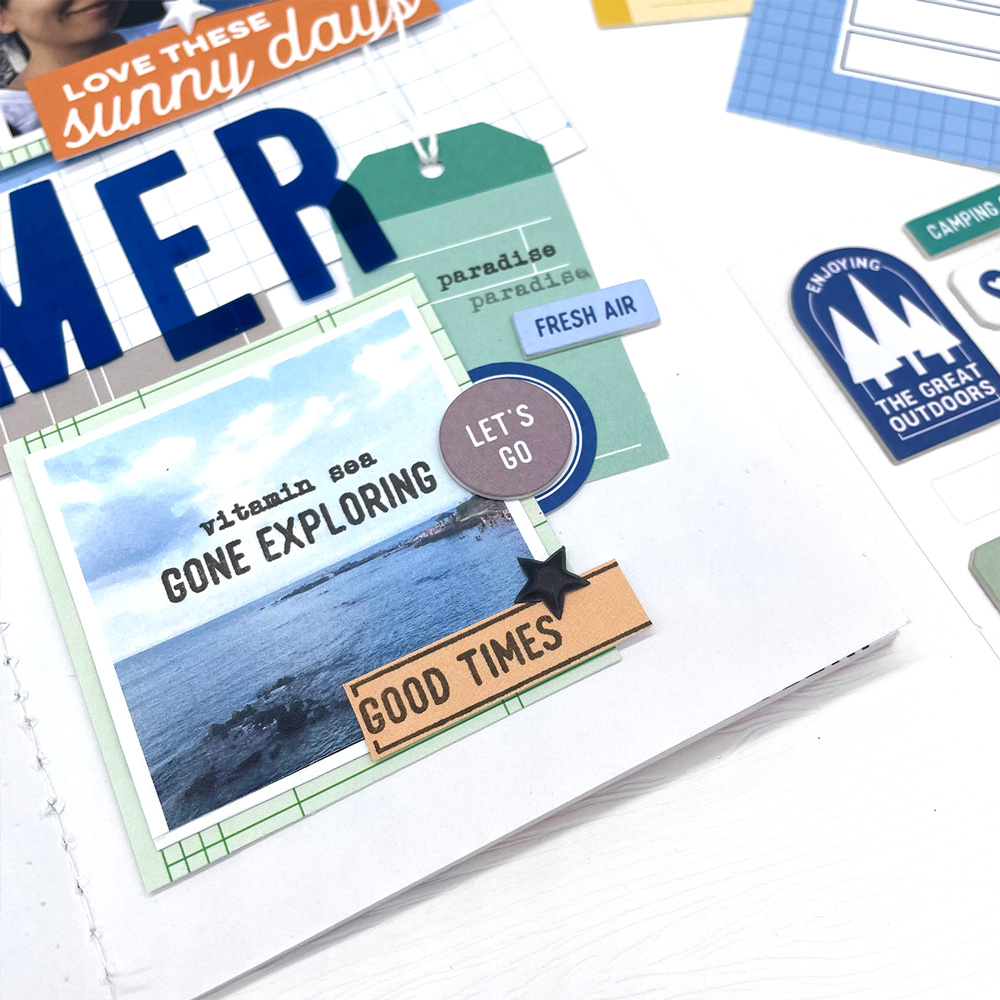
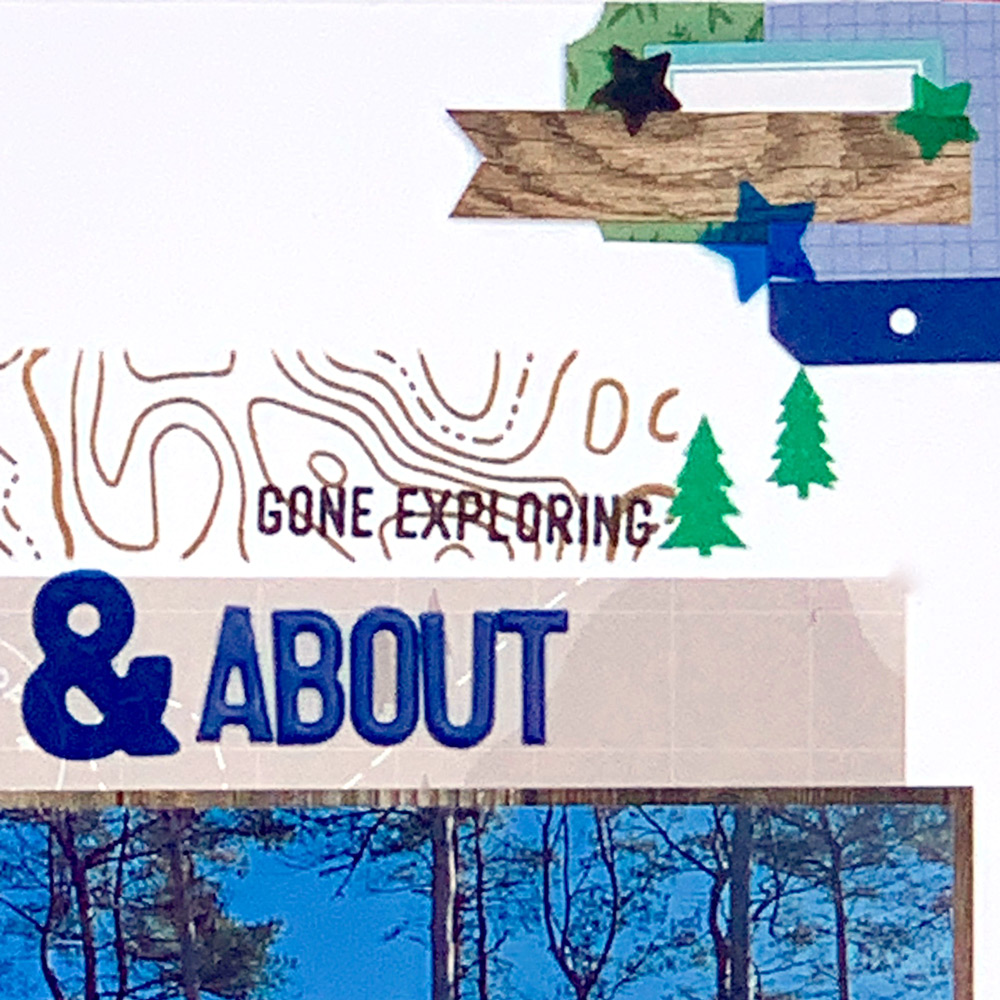
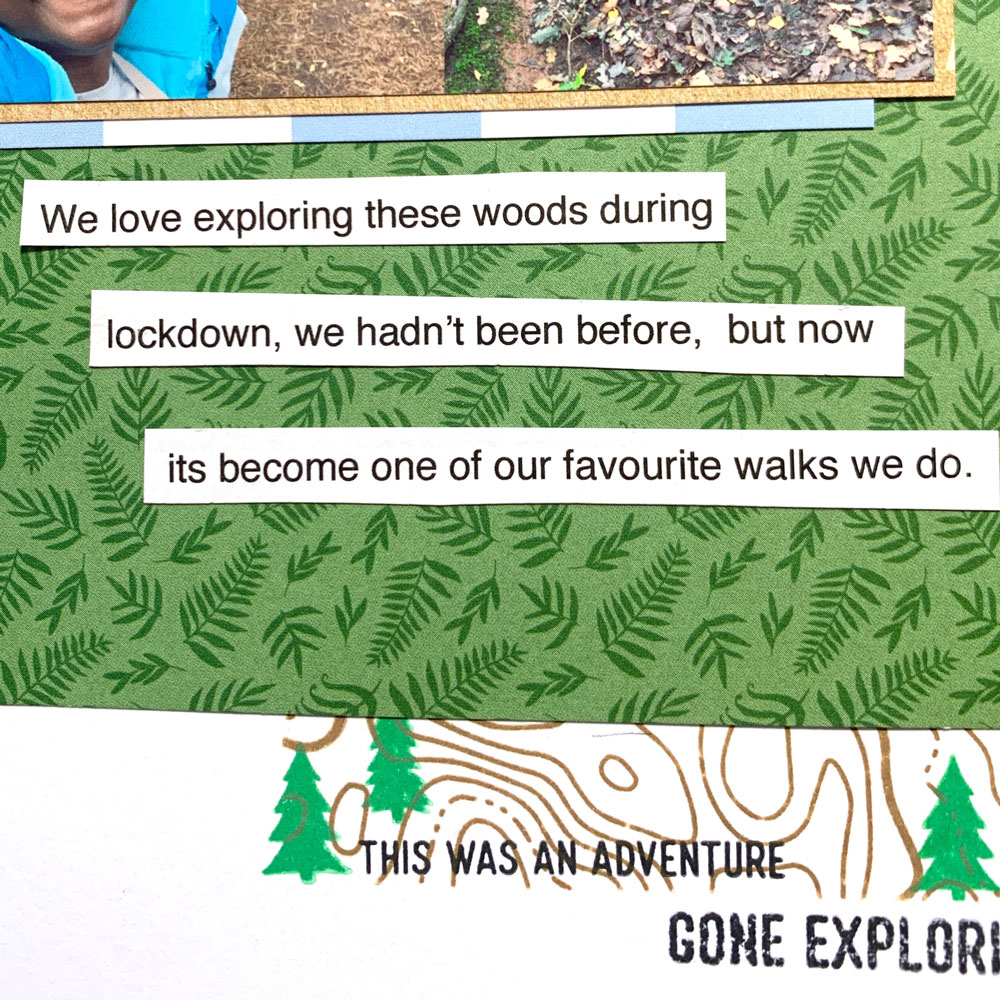
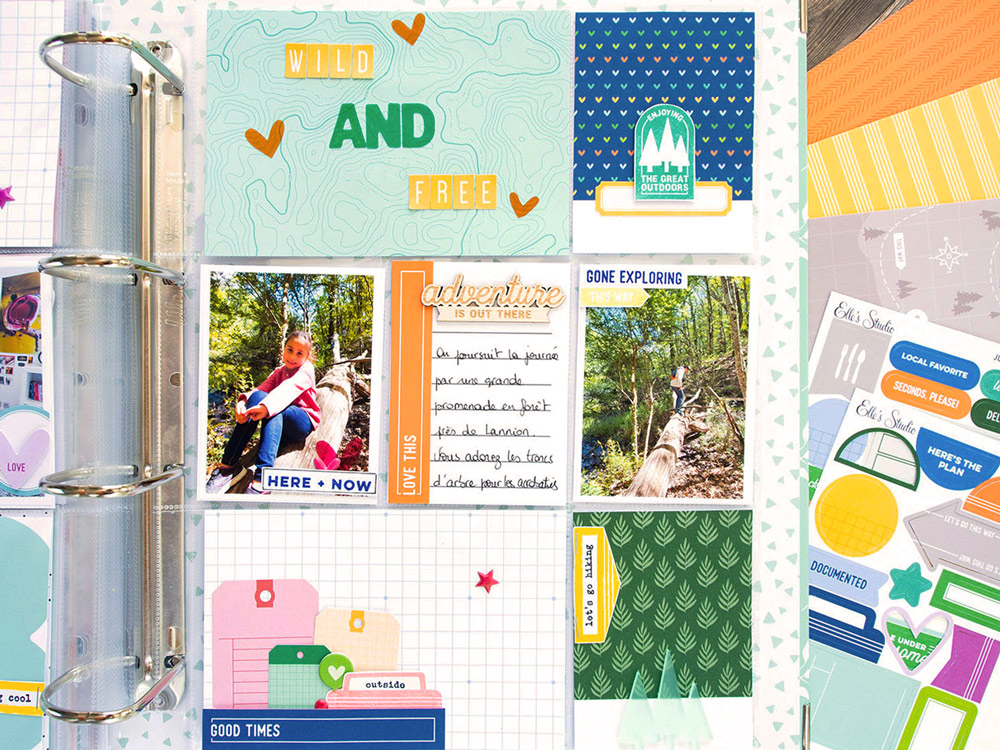
One of my favorite products from both releases is the Summertime Tabs Stamp. It has the a perfect sentiment for every summer picture.  

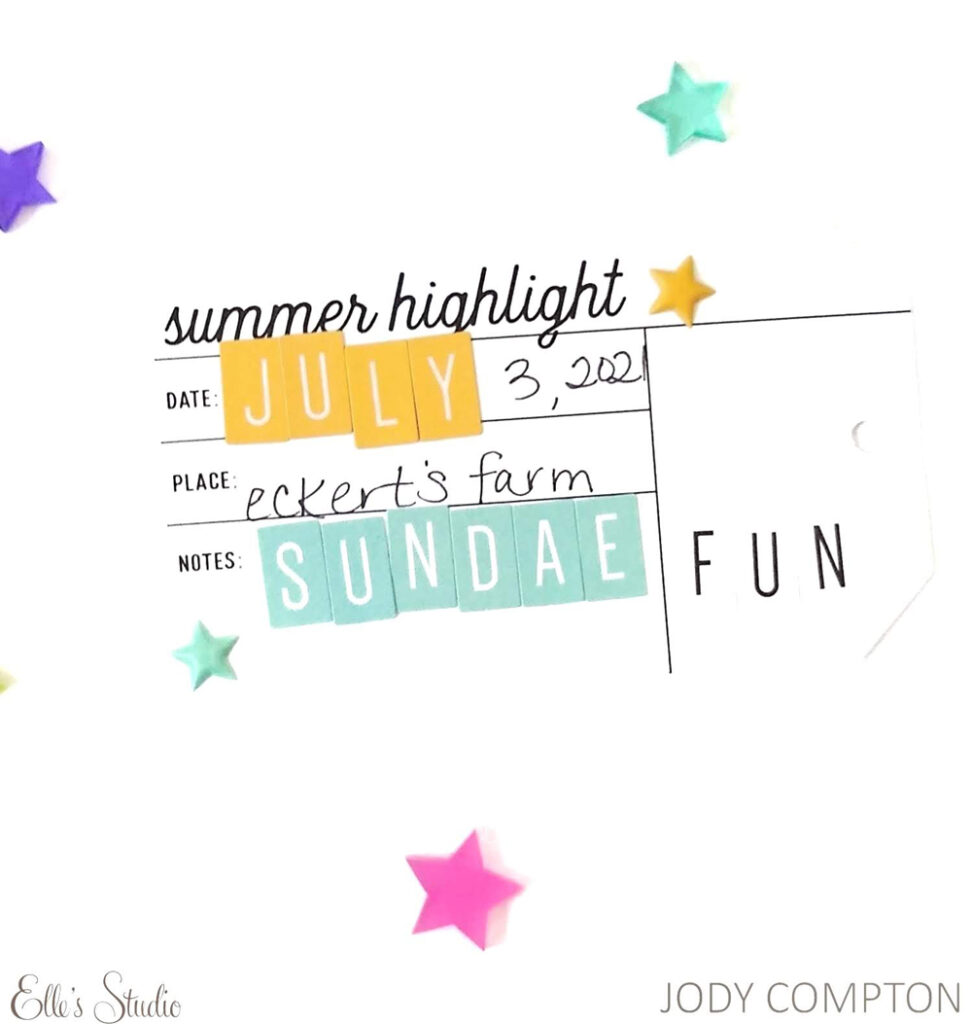
Another top product from these two months are the super versatile Summer Highlights 4 x 6 Inch Journaling Tags. I ran it through the die cutting machine with one of the Nesting Tags Metal Dies, creating a perfect ending page.  

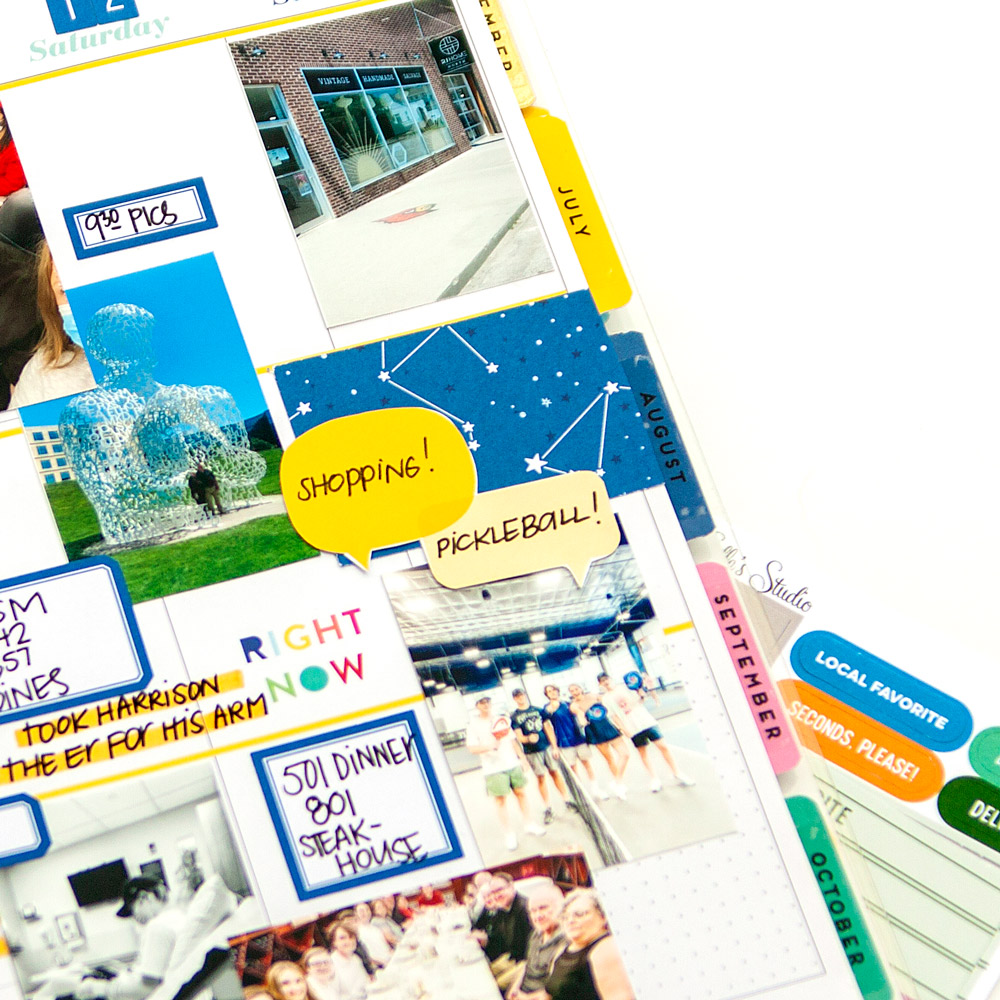
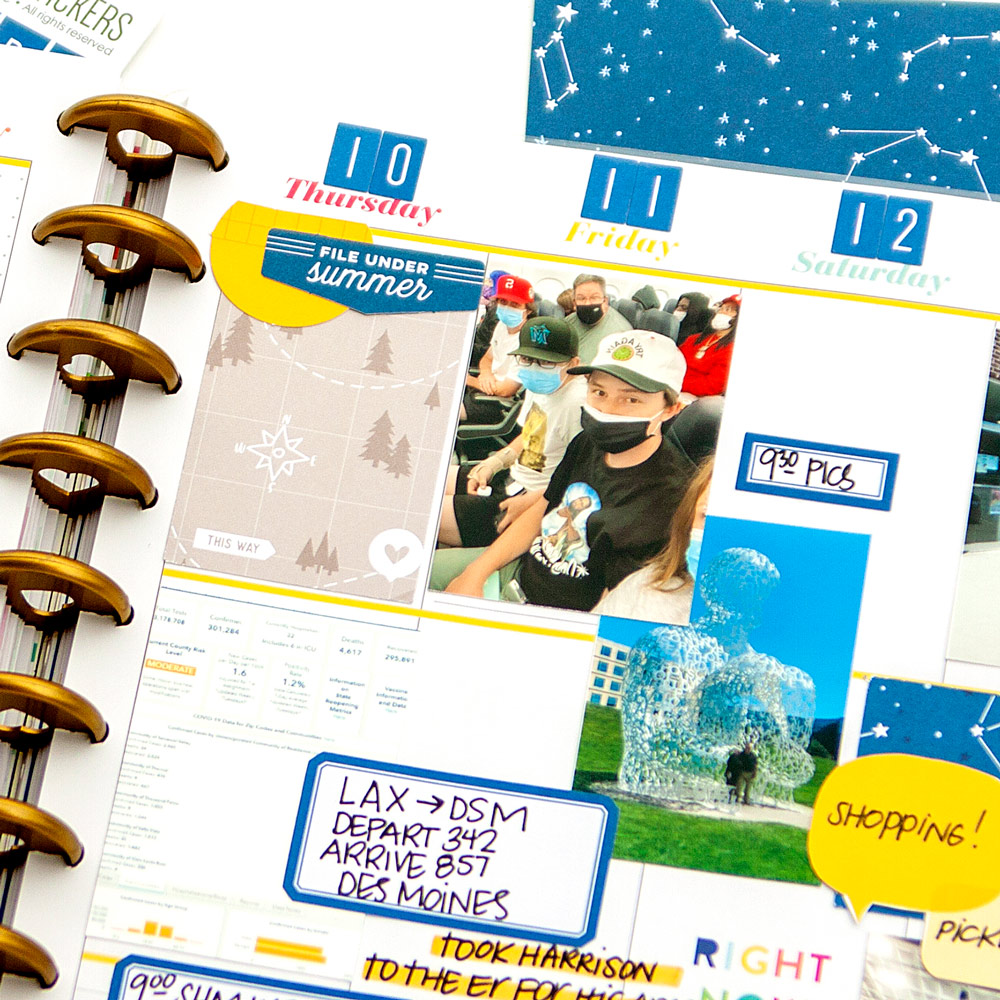
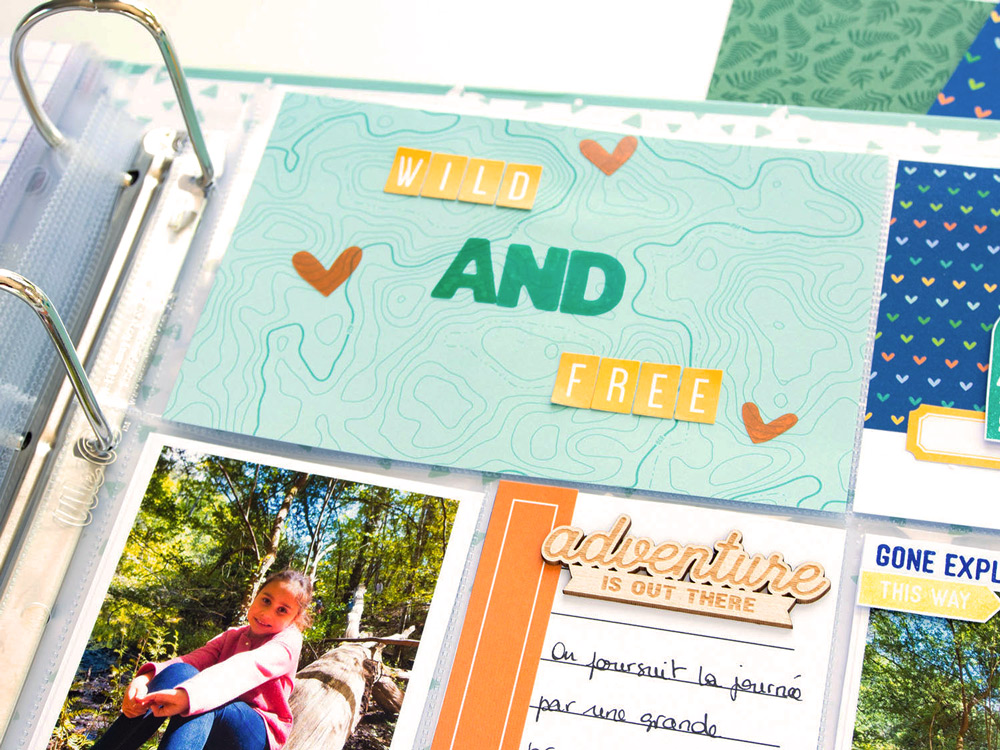
Here’s a look at each of the fun pages of this summer tag mini:

Thank you so much for stopping by today, and I hope you’ve been inspired to create! Remember to use the hashtag #EllesStudio when posting your Elle’s Studio projects to social media so we are sure to see your amazing work!

Summer Memories Week: Pocket Page Fun with Suzanna Lee

Pockets are a great format to use when you have a lot of photos to record from an event, especially the ones you’re making this summer! Today we welcome Suzanna Lee to the blog where she combines a pocket page with her traditional layout to create fantastic results! Let’s see what sunny memory she recorded!

Hiya, Elle’s Studio peeps! It’s Suzanna here today! How has your summer been? Are you kids back at school, leaving you time to document all those summer memories? Having a bit of normalcy meant we could get out and do some of our usual activities, such as tubing down the James River. Today I have a double page spread to share with you about this summer memory created using the July 2021 Kit and add-ons.

Supplies | July 2021 KitJuly 2021 Cut FilesJuly Labels, Navy Cardstock Label Stickers, Adventure Chipboard Stickers, Chipboard Speech Bubble Stickers, Navy Puffy Alphabet Stickers, Tiny Shapes and Dots Puffy Stickers – Neutrals, The Great Outdoors Wood VeneersAdventure Paper Stack, Adventure Notes Stamp, Nesting Tags Metal Die

This 9 x 12 inch format is relatively new to me, especially in pocket form. Although, I did learn that a pocket page is a pocket page so really, nothing different there. Just a different variety of pocket sizes.

The left hand page of this double page spread is my favorite part of this spread. I printed a large photo going horizontally across the page and then had room to embellish with my July 2021 Kit and add-ons. I think I have used the Nesting Tags Metal Die that I used at the bottom for some hidden journaling on EVERY single layout I have created with this kit. Seriously, it’s GOOD!

I love this fun little cluster created using some of the die cuts from the July 2021 Kit, one of the The Great Outdoors Wood Veneers and an Adventure Chipboard Sticker phrase.

This side of the spread is a traditional pocket page, used for a single event. This is truly something I look forward to EVERY year. And, every year we have gone, I have used my waterproof camera to take some really fun pics.

The “Tubin Down the James” 4 x 6 inch tag is my favorite on this side of the spread. I created it myself using cardstock from the Adventure Paper Stack. I love the way it ties the two pages together not only with the color scheme but the use of the striped paper as well.

How are you using the July 2021 Kit and add-ons to get those memories off your camera and onto paper? Thanks for stopping in today!

#Summer in a Traveler’s Notebook with Wei Wei Wang

If creative time is not on your side at the end of this summer, why not think in a smaller format? Today, design team member Wei Wei Wang is here to show us how you can get a lot documented in a traveler’s notebook, and have a lot of fun with the creative process, too! Let’s take a look!

Hey, Elle’s Studio friends! It’s Wei Wei here. Today I’m sharing with you a summertime story in my traveler’s notebook using the amazing July 2021 Kit and add-ons! The colors and sentiments of this month’s release are perfect and so good for summer!

Supplies | July 2021 Kit, Adventure Chipboard Stickers, Navy Cardstock Label Stickers, Navy Puffy Alphabet StickersTiny Shapes and Dots Puffy Stickers – Neutrals, Navy Parker Acetate Alphabet Stickers, Adventure Paper StackSummertime Tabs Stamp, The Great Outdoors StampAdventure Notes Stamp, Text Message Stamp, Text Message Metal Die, Nesting Tags Metal Die

I started by selecting three patterned paper strips from the new Adventure Paper Stack for my background. Using paper strips across two pages gave me a lovely look to the spread, and also provided a perfect place to build my title, which I created using the Navy Parker Acetate Alphabet Stickers and the Navy Puffy Alphabet Stickers. I love how this title turned out! It added a special and eye-catching touch to my pages!

To complete the title area, I added some lovely Adventure Chipboard Stickers and one stamped tab from Summertime Tabs Stamp for embellishment. I used the awesome new Nesting Tags Metal Die to cut out two tags, wrote down my journaling, and tucked them into the paper strips. I didn’t glue them down because this is a good and fun way to hide journaling.

Next, I arranged my photos on the right hand side of the page. My photos here are mostly blue sky and blue sea, the tone is the same as the background. To make my photos pop off of the background, I layered them with light green paper from the Adventure Paper Stack, which distinguished the photos from the background, and brightened the tone of photos.

I wanted some fun and color for this layout, and the July 2021 Kit was perfect for that! I used tags and die cuts from the kit to embellish my top photo. The orange banner trimmed from the kit 3 x 4 inch tag brought more color to my page.

The stamping on the second photo here is from the Summertime Tabs Stamp and The Great Outdoors Stamp. Then, I embellished around my photo with the green tag from the July Kit, Adventure Chipboard Sticker and the circular Navy Cardstock Label Sticker. I stamped the word “paradise” onto the tag using the Summertime Tabs Stamp for more texture. 

For the other side of the page, I used the Text Message Stamp and Text Message Metal Die to create speech bubbles. The stamped tiny phrases on the speech bubbles are from the Summertime Tabs Stamp which is one of my favorites this month. I really love the phrases included in this stamp that are perfect for documenting summertime stories!

For finishing touches, I added little stars from the Tiny Shapes and Dots Puffy Stickers and chipboard stars from the Adventure Chipboard Stickers. I also added more Navy Cardstock Label Stickers to embellish and bring the whole layout together.

I really had a lot of fun with the Elle’s Studio July 2021 Kit and add-ons. I think the possibilities for the kit are endless. I hope these have inspired you to use the kit to create a summer project of your own. Happy creating!

Summer Memories Week: Making the Most of Digitals with Sarah Kee

Today we continue Summer Memories week with a reminder about our awesome digital files! Digitals save you a ton of time, which we all need during these summer months, allowing you to print and customize anything for your project, from digital cut files to journaling cards and so much more! Let’s take a look at how Sarah Kee used her July digital files to document a summer memory today!

Hello, all Elle’s friends! It’s me, Sarah, on the blog, and today I’m talking summer memories! How has your summer been?! Mine’s been splendid, and I have been snapping photos left and right, which means lots of documenting in the works! Anyway, I wanted to show you how to use the July digitals to record some of your best summer memories.

Here’s what I came up with:

Supplies | July 2021 Kit, July 2021 Print and Cut Labels, The Great Outdoors Printables, Adventure Chipboard Stickers, Navy Puffy Alphabet Stickers, Tiny Shapes and Dots Puffy Stickers – Neutrals, Navy Parker Acetate Alphabet Stickers, The Great Outdoors Wood VeneersAdventure Paper Stack, Summertime Tabs Stamp, The Great Outdoors Stamp, Daily Tabs Stamp

I focused on using a couple of July digitals, specifically The Great Outdoors Printables and July 2021 Print and Cut Labels. With these two digital downloads mixed in with the July add-ons, I was able to create a layout about our family’s recent summer backpacking trip.

The Great Outdoors Printables worked as excellent frames for each of my photos. I placed these tags down onto my page, and layered my photos right on top.

The July 2021 Print and Cut Labels made for a great way to embellish around my photos. I cut out the circles and labels and attached them to my layout using foam adhesive. They coordinate so perfectly with all of the July kit and add ons. Plus, there are 25 labels on each sheet—one sheet with words and one without. That means you’ve got 50 labels to play with!

To finish off my layout, I layered some July 2021 Print and Cut Labels and added one of The Great Outdoors Wood Veneers.

I wanted to add color to my title, so I layered the Navy Parker Acetate Alphabet Stickers on top of the wood veneer. You don’t have to apply adhesive to these stickers; they have adhesive books, so they stick right to the wood surface. I love the layered look of the acetate on the wood! 

That’s all I have for today! What do you think? We’d love to see your projects featuring Elle’s digital files. Whether cut files or print and cut labels, these files are a great way to expand your kits. They are jammed packed and ready for you to use, and you can use them over and over again. Each month, there’s new digital files, so don’t forget to check them out! Plus, if you’re a subscriber, you get them for free! It’s just one of the perks to subscribing!

Join us and share your projects with us in our Elle’s Studio Facebook Group or on Instagram using the hashtag #EllesStudio. As always, thanks for reading and letting me share my work here. It’s always a pleasure to be making pretty things with Elle’s! 

Summer Memories Week: A Quick Mini With Melissa Mann

We are so excited to kick off Summer Memories Week today, a week of summer-themed projects to inspire you to get your best memories from the past three months off of your camera or phone and into a project. Today we welcome Melissa Mann, who is sharing a project that she loves to create when she has a certain subject or event to document: a mini album! Melissa shows us that mini albums don’t have to be complicated, and they are a great way to record a lot of photos in one place. Let’s take a look!

Hello, friends! This is Melissa with you today and I’m sharing a new mini “album” that I created using my July 2021 Kit and add-ons.


Supplies | July 2021 KitJuly 2021 Print and Cut Labels, July LabelsCardstock Die Cut TagsAdventure Chipboard Stickers, Chipboard Speech Bubble Stickers, Navy Puffy Alphabet Stickers, Tiny Shapes and Dots Puffy Stickers – NeutralsThe Great Outdoors Wood Veneers, Adventure Paper Stack, Summertime Tabs Stamp, Nesting Tags Metal Die

One of my favorite things about this month’s release was the new Nesting Tags Metal Die. I used this as the core component for each “page” in my mini album.

It was super quick and easy to cut out a bunch of tags using kraft cardstock and then a few more using the Adventure Paper Stack. I even used two of the 4 x 6 inch journaling cards from the July 2021 Kit to cut a couple of tags out of!


I printed up a bunch of photos from the months of June and July that were some special highlights for me and my family. I printed them in the sizes of 2 x 3 inch and 2 x 2 inch. These sizes worked best for the 3″ wide tags that created the base of my tag pages. I layered patterned paper, tags, and 3 x 4 inch journaling tags on each of my die-cut tags. 

Once I had the pages constructed and my photos adhered, I typed up journaling for most of the pictures using the July 2021 Print and Cut Labels. I further embellished using stamps, chipboard stickers, and puffy stickers. I loved how this little project turned out!


How are you documenting your summer? I hope you’ll give this tag mini a try using your Nesting Tags Metal Die—a super versatile die to have in your collection!

Be sure to come back here to the blog tomorrow for our next Summer Memories Week project! Until then, be sure to share your summer memories recorded using our products with us! Post on Instagram using the #EllesStudio hashtag, or in our Elle’s Studio Facebook Group!

A sneak peek of our August 10th reveal!

Our August kit + coordinating add-ons reveal is almost here and we can’t wait to share with you all the new and exclusive products that will be available soon! Our reveal will be full of the perfect products to document your August stories and take you right into the month of September! This month, our August kit will include 3 – 4 x 6 inch tags, 18 – 3 x 4 inch tags, and 27 die cuts!

Not a subscriber? You can pre-order our August kit now and lock in our $9.99 kit price by starting a subscription today! You’ll want to choose our SUBSCRIBE & SAVE option to get signed up and start your subscription with our August kit. We will then hold your kit and you’ll be ready to bundle and save at our August 10th reveal! Details on how to bundle with your subscription order will be emailed to you once you have purchased this product.

Kit subscribers, don’t forget! Along with being able to bundle any products from our shop that will ship for FREE with your kit during our 24-hour bundling period, starting on the 10th at 8:00 am Pacific each month, our subscribers will also have access to special discounts on select items! These discounted items can be found in our SALE section during our 24-hour bundling period, and you must be logged into your kit subscriber account to see them. Quick note: Our kits and add-ons are available without a subscription each month, too.

We are so excited to share all of these new products with you and see how you use them on your projects! Make sure you set your alarm and mark your calendar for Tuesday, August 10th at 8:00 am Pacific! We hope to see you there!

From Sketch to Finish Inspired with Jackie Ashton

Hello, crafters! It’s Jackie here with my post using a sketch found in the From Sketch to Finish Vol. 6 Class as my inspiration. To say I had a hard time choosing which sketch to use first is definitely an understatement! Where do I begin when From Sketch to Finish Vol. 6 is full of great inspiration!?

Supplies | July 2021 Kit, Cardstock Die Cut Tags, Navy Cardstock Label Stickers, Jane Tile Alphabet Cardstock Stickers – Navy, Navy Puffy Alphabet StickersTiny Shapes and Dots Puffy Stickers – Neutrals, Navy Parker Acetate Alphabet Stickers, The Great Outdoors Wood Veneers, Adventure Paper Stack, The Great Outdoors Stamp, From Sketch to Finish Vol. 6 Stamp, Nesting Tags Metal Die

I ended up choosing the sketch used by Tracey Fox on page 5. I loved the placement of the photographs on the sketch and the layout. 

The July 2021 Kit and add-ons theme is all about adventures, and I wanted to document these photographs of a new area we have found to have a walk during lockdown in the UK. As you can see from my layout above, I’ve tried to stay true to the sketch and I also used a few of Tracey’s tips from her layout to incorporate onto my page.

Going through the July 2021 Kit, I picked out three journalling tags that co-ordinated with my theme, and chose several patterned papers from the Adventure Paper Stack that worked perfectly for my woodland walk theme. Once I decided where I wanted my patterned papers to be placed on my cardstock, I lightly marked the area and then I added stamped images from The Great Outdoors Stamp before adhering patterned paper over the top.

The sketch included a tag design at the top left, so using the Nesting Tags Metal Die, I die cut one of the journalling tabs, added The Great Outdoors Wood Veneer piece and stamped a phase from the From Sketch to Finish Vol. 6 Stamp.

When reading Tracey’s description of how she created her layout, I loved that she was able to incorporate smaller sized photographs, without the layout looking too cluttered. After choosing which photographs I wanted, I used an app to resize four of them. I backed these with patterned papers from the Adventure Paper Stack and used two of the journalling tabs as layers behind.

Once all my photographs were all adhered to my background, it was time to add embellishments around the page. I added another The Great Outdoors Wood Veneer to the bottom of my page.

When I look at a layout that has used a sketch as their starting point, I can find a few visual inspirations to add to my page. Tracey had added printed journalling strips at the bottom of her layout, which I copied and added in the same position. She had also used different alphabet fonts for her title, and my title consists of three different sets: Jane Tile Alphabet Cardstock Stickers in navy, Navy Puffy Alphabet Stickers and Navy Parker Acetate Alphabet Stickers. I love this pop of blue accent that these alphabets add to my layout.

To finish off my page, I added some stamped details around the page, something that Tracey’s had done on her layout.

From Sketch to Finish Vol. 6 has really inspired me to try and complete some more layouts using these sketches. Don’t just look at the sketch as a single image, read the hint and tips given by each of the designers, use some visual inspiration from the examples to add to your layouts. I’m sure you will be inspired with each and every sketch in this class!

Want to create using this sketch just like Jackie did? You can find this class now available in our shop with the exclusive 6 x 8 inch stamp, or as a digital download only!

We can’t wait to see what YOU create! Share how any of our new sketches in the class inspire you to create by posting your project in our Elle’s Studio Facebook Group or by posting on Instagram using the hashtag #EllesStudio!

5 Ways with the Cardstock Die Cut Tags!

We love inspiring you to get your products off of your desk and onto your projects, and today we’re excited to give you a few ideas for how you can incorporate your Cardstock Die Cut Tags into what you create! Let’s take a look at 5 different ideas:

1. Repeat the shape

We love how Junell created three rows of tag shapes using our Cardstock Die Cut Tags and her photos, cut using the coordinating Nesting Tags Metal Die. What a perfect way to put that shape to us and coordinate the rainbow of colors in our Die Cut Tags with a rainbow of photos!

2. Emphasize something important

Meghann really wanted the “1st” to stand out in her title, “Baby’s 1st Hike,” so she backed the word with a Cardstock Die Cut Tag in blue. We love the way that this adds a pop of color to her title! Click HERE to see more of this traveler’s notebook spread in our Design Team Inspiration post!

3. Establish a color scheme

Suzanna used the fuchsia and red Cardstock Die Cut Tags to carry her warm color scheme down her page, and she even matched the colors to what the subjects in her photo were wearing. How clever!

4. Put them in your planner!

Melissa added color, matter her photos and used her Cardstock Die Cut Tags as homes for stamping and embellishments on this amazing memory planner spread. What a great place to add these tags for a no-bulk accent!

5. Add them to a card front

These sweet Cardstock Die Cut Tags come in so many colors and sizes, perfect for adding to cards, too! Use them to build up layers on your card and hold your sentiment, the way that Nathalie did here, stamping or embellishment!

Share your projects using the Cardstock Die Cut Tags with us using the #EllesStudio hashtag on Instagram, and in our Elle’s Studio Facebook Group! We can’t wait to get some more ideas from YOU!

Summer Memory Planning with Jennie McGarvey

Hello, there! It’s Jennie McGarvey with another layout in my memory planner. I’m extra excited to share this with you this week because, well, I’m a bit behind in my memory planner thanks to summer. Isn’t that an odd attitude? I love being a little behind (not years or anything!) because it ensures I have plenty to work on—I’m not soon to run out of details to document and stories to tell.

Supplies | July 2021 Kit, Navy Cardstock Label Stickers, Jane Tile Alphabet Cardstock Stickers – Navy, Adventure Paper Stack

I started by adding the dates to the layout. I used the Jane Tile Alphabet Cardstock Stickers in navy to add those dates and the simple stickers did two things. First, they made the dates really stand out. I love that it makes the dates not just a detail that fades into the background, but really something that looks intentional. I also liked that these coordinated perfectly with the Navy Cardstock Label Stickers. They definitely play off each other when you look at this layout.

Now that we’ve discussed the building blocks, what if we discuss the details? You can see I used the Adventure Paper Stack and the striped paper on the lower left-hand corner was the building block for this week. I loved the colors and it was going to work to tie all of the embellishing together. However, you cannot leave the patterned paper alone—you have to add some embellishments which was easy to do with the July 2021 Kit. The arrow die-cut was meant to be the piece of interest, and it really ended up that way. Plus, the soft grey coordinated perfectly with the right-hand side and the map patterned paper from the Adventure Paper Stack. I love it when a layout is well-balanced.

Not only did the grey provide balance for both pages, but obviously the Navy Cardstock Label Stickers as well. I didn’t stop there! I had cut up the speech bubble 3 x 4 inch tag from the monthly kit and used the speech bubbles as accents on both sides of the layout! Did you catch the speech bubbles? I loved them for not only documenting activities, but for layering, as well.

Speaking of layering, it’s a staple in every page. My favorite way to do that is with 3 pieces. I start with a background, often a subtle pattern like the grey paper in this cluster. Then, I add an anchor piece which I did here with the yellow circle. [I did trim it to have the circle sit flush with the planner line.] Finally, the accent piece, which is the perfect tab! I love that it just gives the hint of summer without being over the top!

I’m so happy to have shared this gateway to summer memory planner layout with you. I shared the secret about being behind in my projects and how I build a cluster.  Do you have any unusual thoughts about memory keeping or any techniques or tips you always use in your projects?

Show us your memory planner pages adorned with our products! Join our Facebook Group and post there for other Elle’s Studio fans to “ooh” and “aah” over, or share on Instagram using the hashtag #EllesStudio!

Happy Memories in Pockets with Guest Designer NenaScrap!

Today we welcome July guest Delphine, also known as NenaScrap back to the blog! If you missed her first project, a gorgeous and colorful outdoorsy layout, head to her first blog post to check it out, but come back here to see a completely different project that she’s sharing with us today, still done in her signature colorful style with lots of fun details!

Hi Elle’s Studio friends! It’s NenaScrap here! Are you having as much fun with your July Kit and add-ons as I am? I’m here today to show you how I used the kit and add-ons in my 2021 pocket page album.

Supplies | July 2021 Kit, July Labels, Cardstock Die Cut Tags, Jane Tile Alphabet Cardstock Stickers – Yellow, Chipboard Speech Bubble Stickers, Acetate Heart Stickers, Navy Parker Acetate Alphabet Stickers, Teal Parker Acetate Alphabet Stickers, Tiny Shapes and Dots Puffy Stickers – Warm Tones, The Great Outdoors Wood Veneers, Adventure Paper Stack, Summertime Tabs Stamp, Text Message Stamp, The Great Outdoors Stamp, Documented Stamp, Everyday Tabs Metal Die

I mixed the tags from the July 2021 Kit and the paper from the Adventure Paper Stack together to create two different moods for this spread.

My left page is about two of my kids trying on their older sister’s stuff. I wanted some fun and color for this humorous page. The rainbow-colored tag was perfect for that, and it started the color scheme for the design. I added coordinating die-cuts that went perfectly with the theme of my page, and I added emojis using the Text Message Stamp for more fun.

The “1,2,3” tag is one of my favorites from the kit. To it, I added labels made with the Summertime Tabs Stamp. I stamped a tab, then the text and cut it out to make a label.

For my right page, the theme matched the kit perfectly, although it documented a totally different subject: a hike in the woods.

I chose the topographic map paper from the Adventure Paper Stack to create a 4 x 6 inch tag, to which I added a title using the Yellow Jane Tile Alphabet Cardstock Stickers and Teal Parker Acetate Alphabet Stickers.

To write my journaling, I transformed the “What’s For Dinner” tag: I glued one of the July Labels on the left side and a The Great Outdoors Wood Veneer on top to hide the text.

With The Great Outdoors Stamp, I stamped and fussy cut elements and words that I added to my tags and photos.

There are so many ways to use this July Kit and add-ons—they’re a blast! I hope you enjoyed seeing my creations and that I was able to inspire you. 

I am so thankful to Elle and Meghann for the opportunity to guest among the talented ladies from the Elle’s Studio Design Team. It was a joy and an honor to share this beautiful adventure with you!

Hi, I’m Delphine, aka NenaScrap, coming to you from Brittany, France !  

You can always find me creating colorful mini-albums, layouts and project life pages. I’ve tried a lot of creative activities, but I fell in love with scrapbooking. It allows me to document my family life and, trust me, with 5 children there’s always something happening! My motto is, “A day without creating is a day wasted.” 

Find Delphine’s beautiful designs, which include layouts, pocket pages and more on her Instagram feed and YouTube channel! We are honored to have you create and inspire us, Delphine!