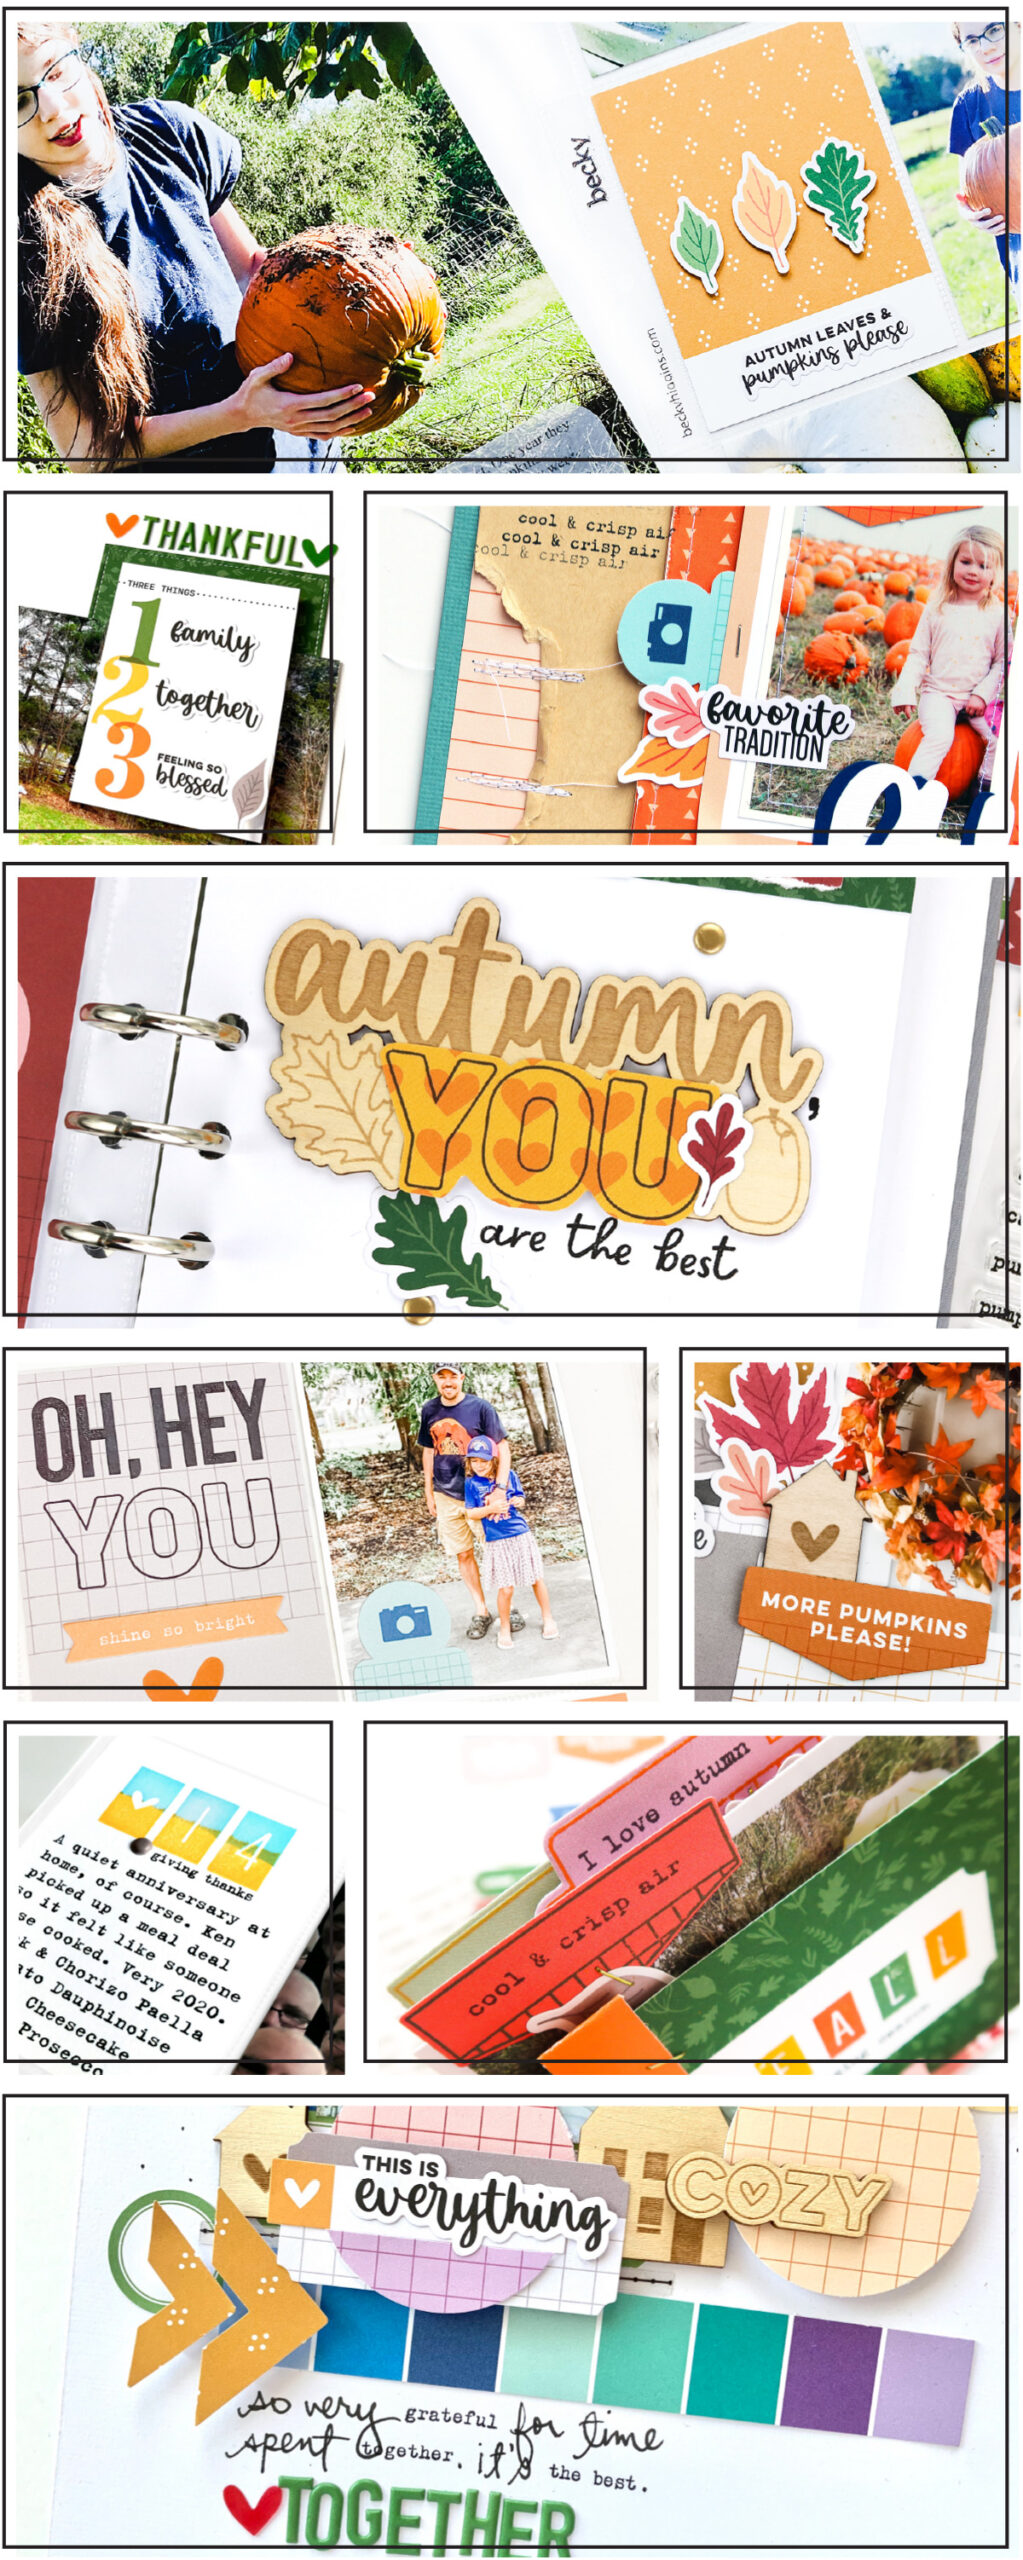
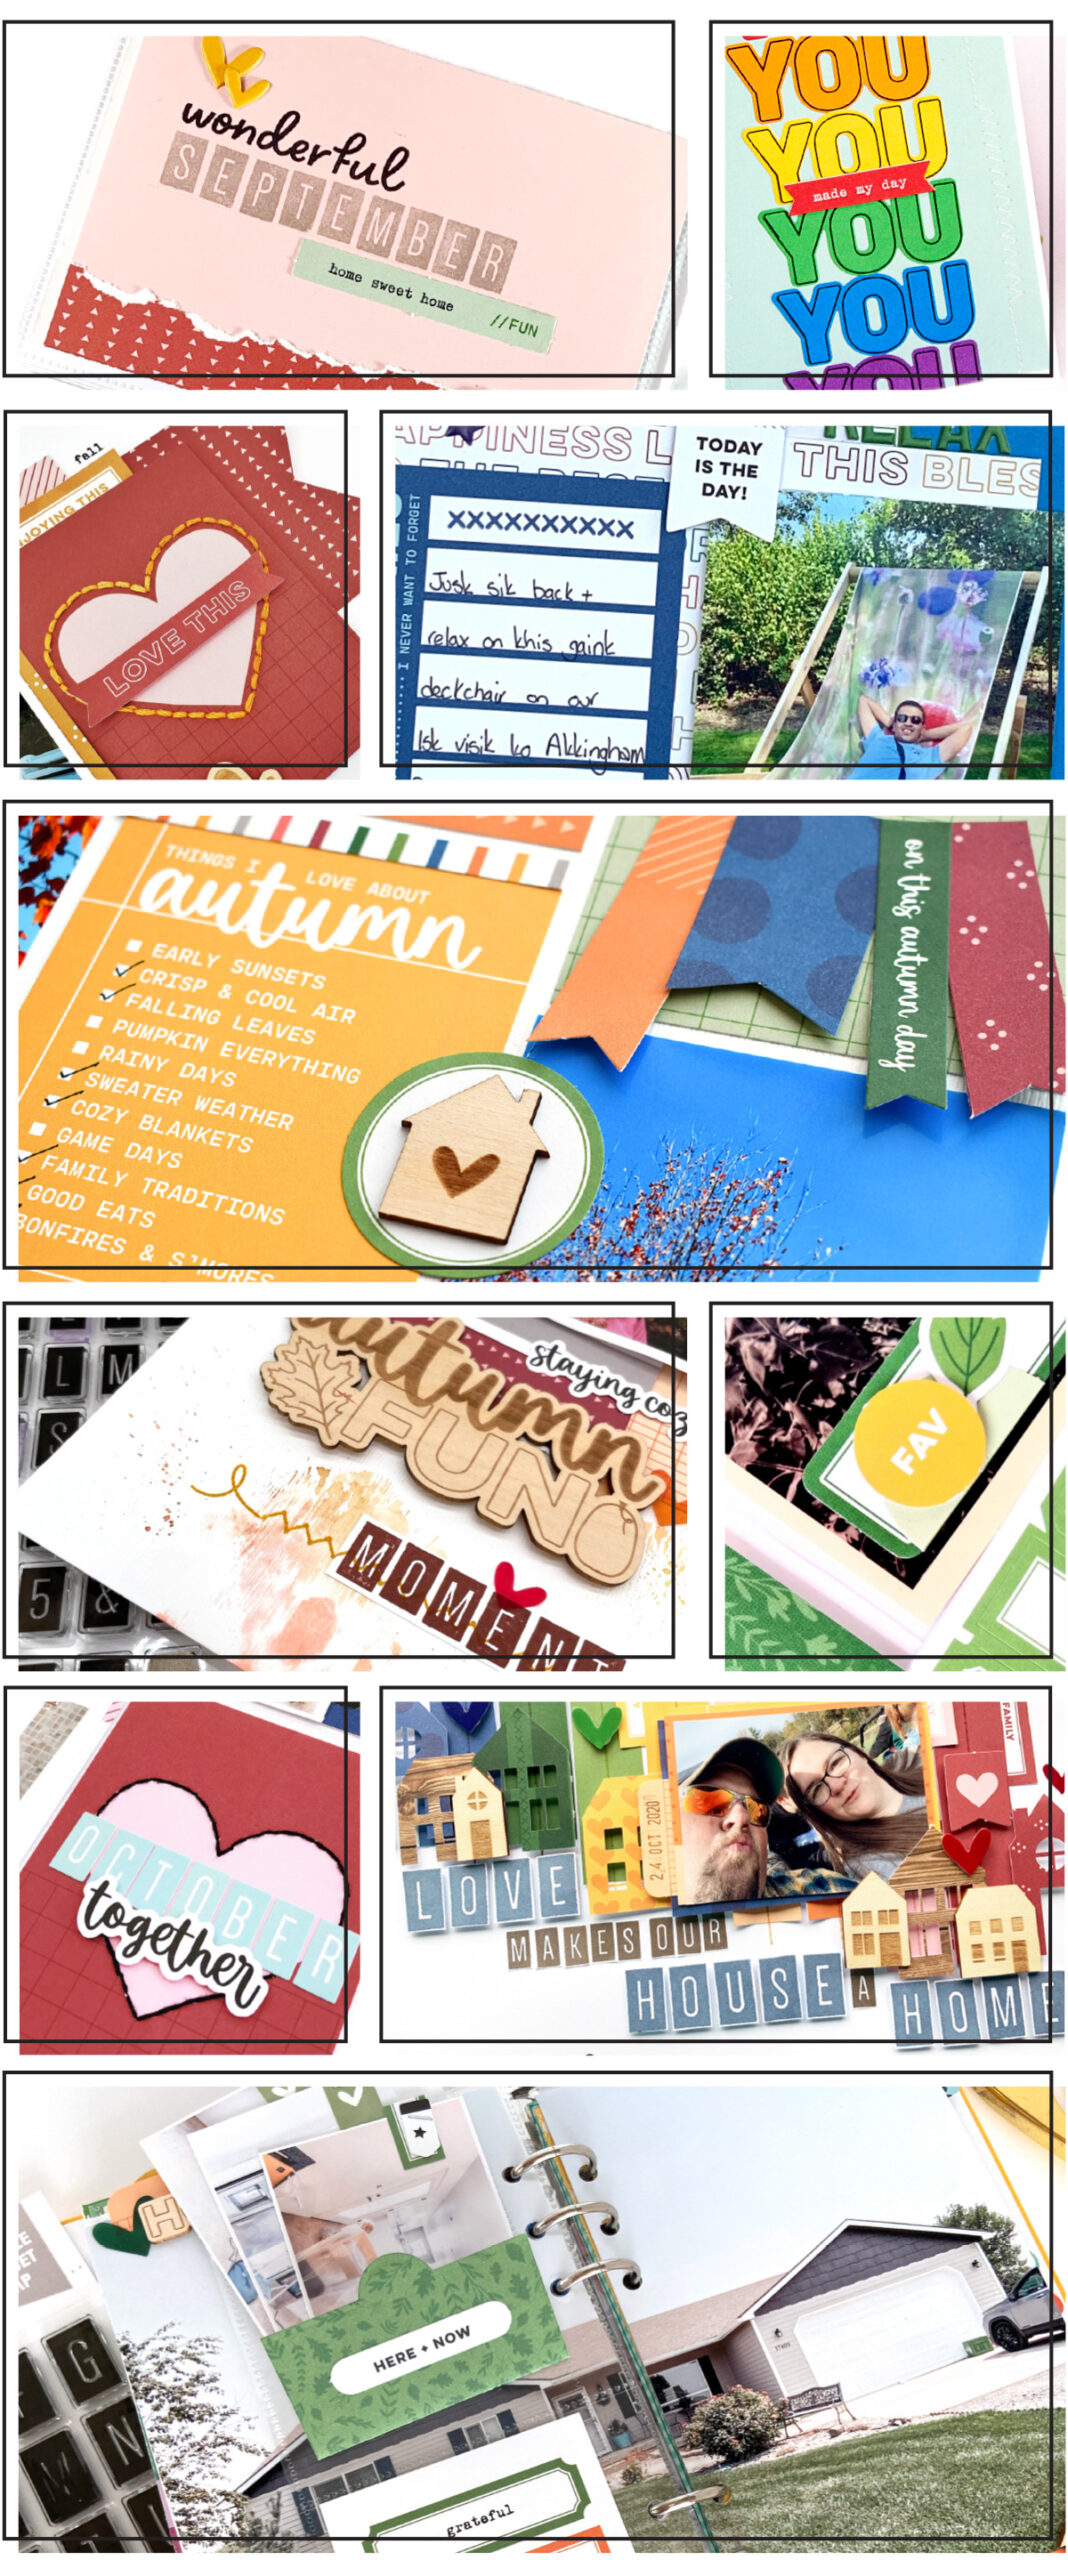
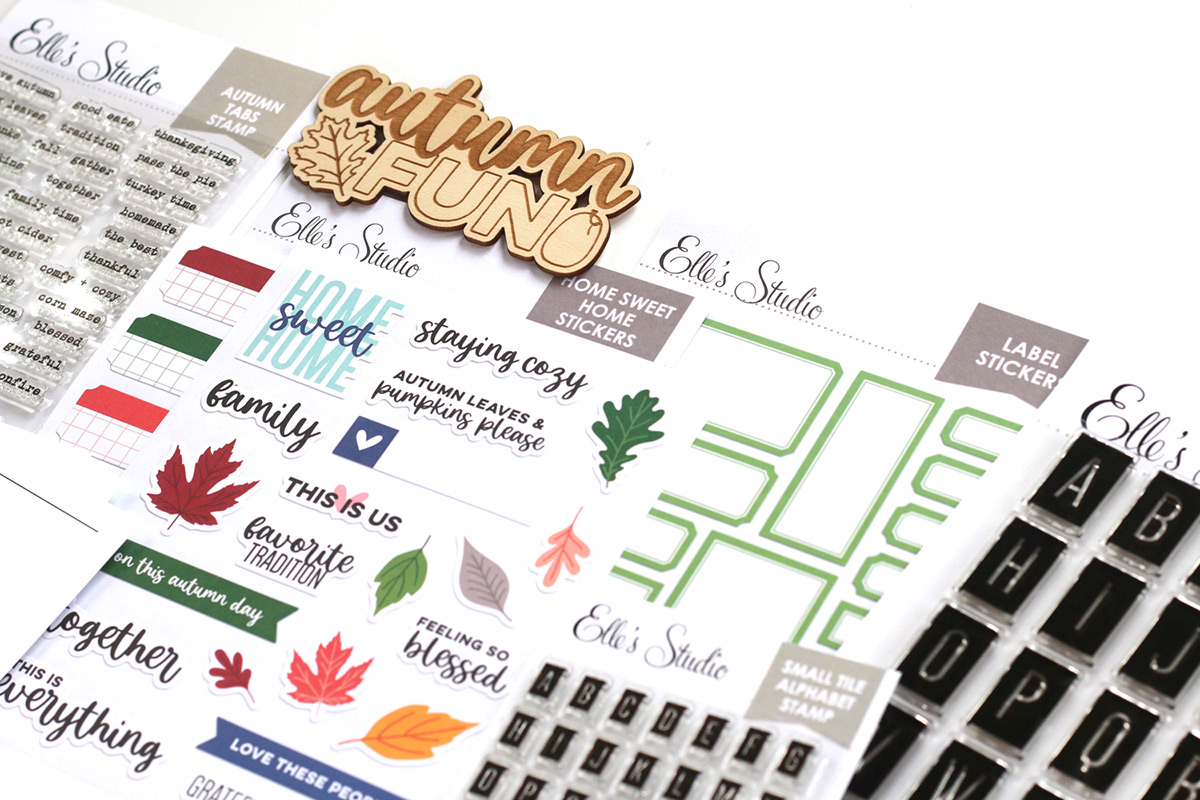
We are just two days away from our October kit and add-ons reveal and we are so excited to be able to share these fun sneak peeks of amazing projects our team made using all the new products that will be available soon! Our October reveal will be full of exclusive products that we’ve designed and will have you ready to document your October stories and take you right into the month of November!
Not a subscriber? Don’t wait any longer! You can pre-order our October kit now and lock in our $9.99 kit price by starting a subscription today! You’ll want to choose our SUBSCRIBE & SAVE option to get signed up and start your subscription with our October kit. We will then hold your kit and you’ll be ready to bundle and save at our October 10th reveal! Details on how to bundle with your subscription order will be emailed to you once you have purchased this product.
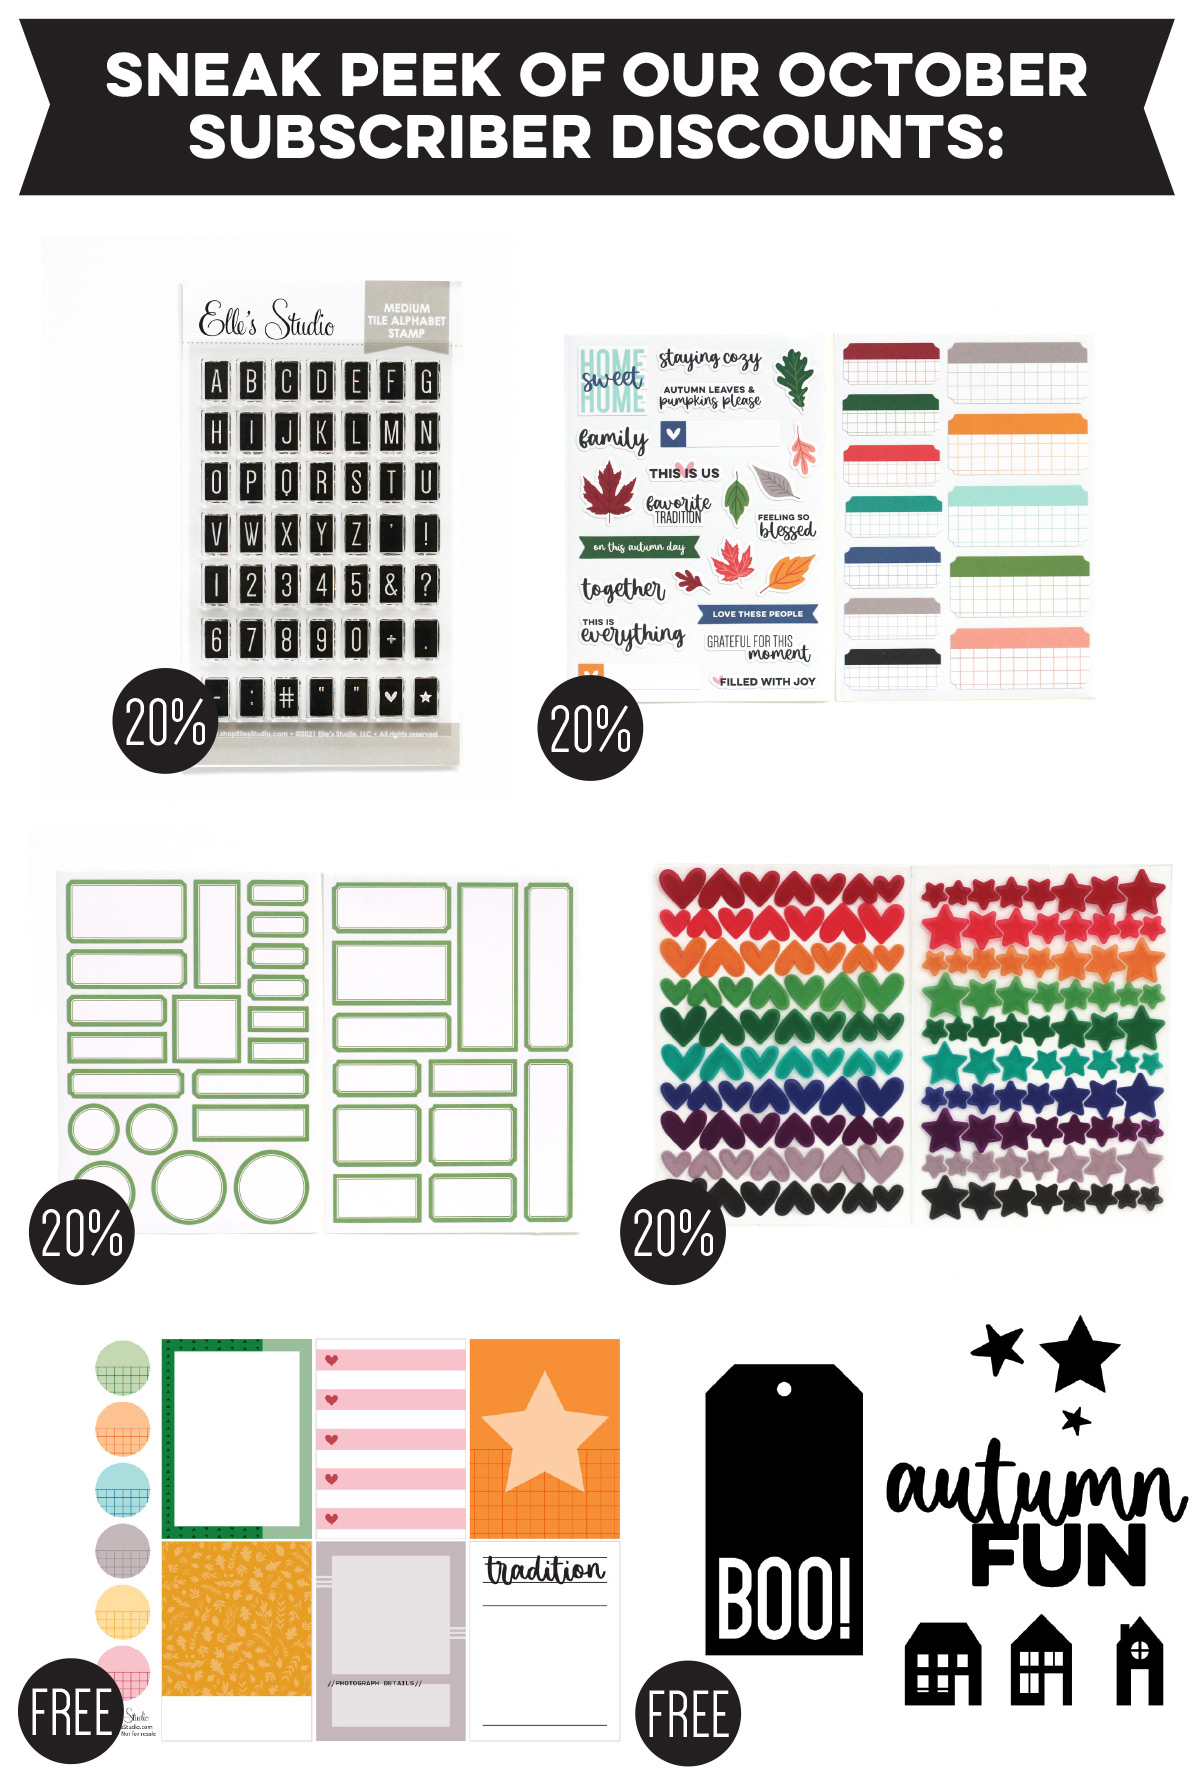
Kit subscribers, don’t forget! Along with being able to bundle any products from our shop that will ship for FREE with your kit during our 24-hour bundling period, starting on the 10th at 8:00 am Pacific each month, our subscribers will also have access to special discounts on select items! Above is a preview of our October discounts and savings that will be available for our subscribers during our October bundling period! These discounted items can be found in our SALE section during our 24-hour bundling period, and you must be logged into your kit subscriber account to see them. If you haven’t subscribed to our kit, sign up now to take advantage of these special offers on October 10th! Quick note: Our kits and add-ons are available without a subscription each month, too.
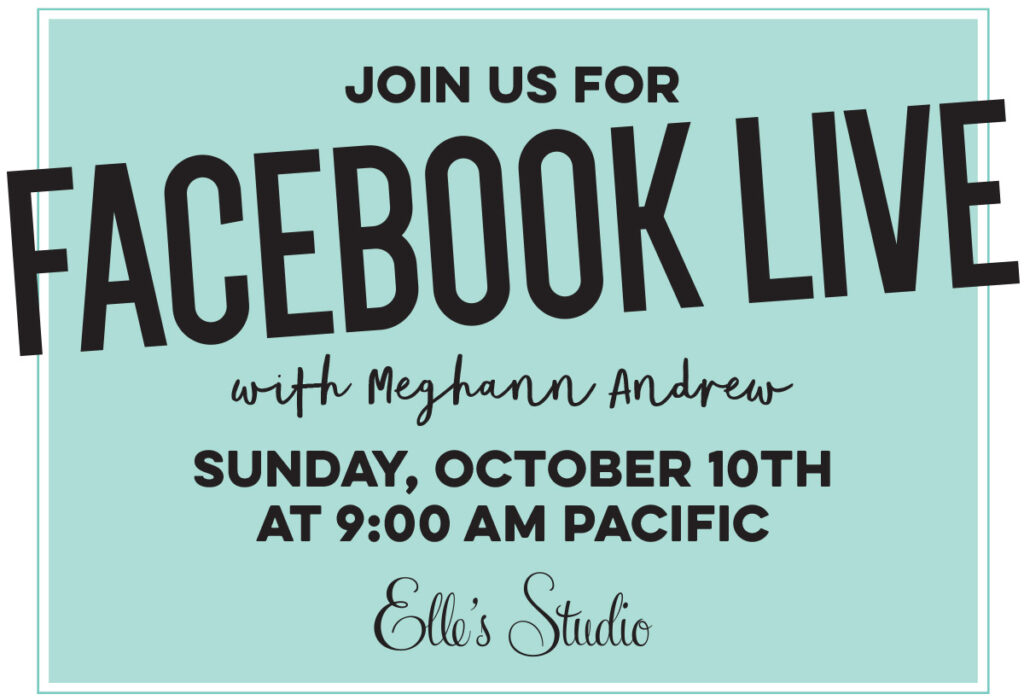
You’re also invited to join us in our Facebook group for our next Facebook LIVE on reveal night! Meghann Andrew will be sharing an up-close look at the new October monthly kit and add-ons, along with our new Sincere Sentiments collection, and create something fun using them! Click here to visit our group, then click on EVENTS and RSVP so you don’t miss it!
We are so excited to share all of these new products with you and to see how you use them on your projects! Make sure you set your alarm and mark your calendar for Sunday, October 10th at 8:00 am Pacific! We hope to see you there!
Comments Off on October Design Team Sneak Peeks | Share This
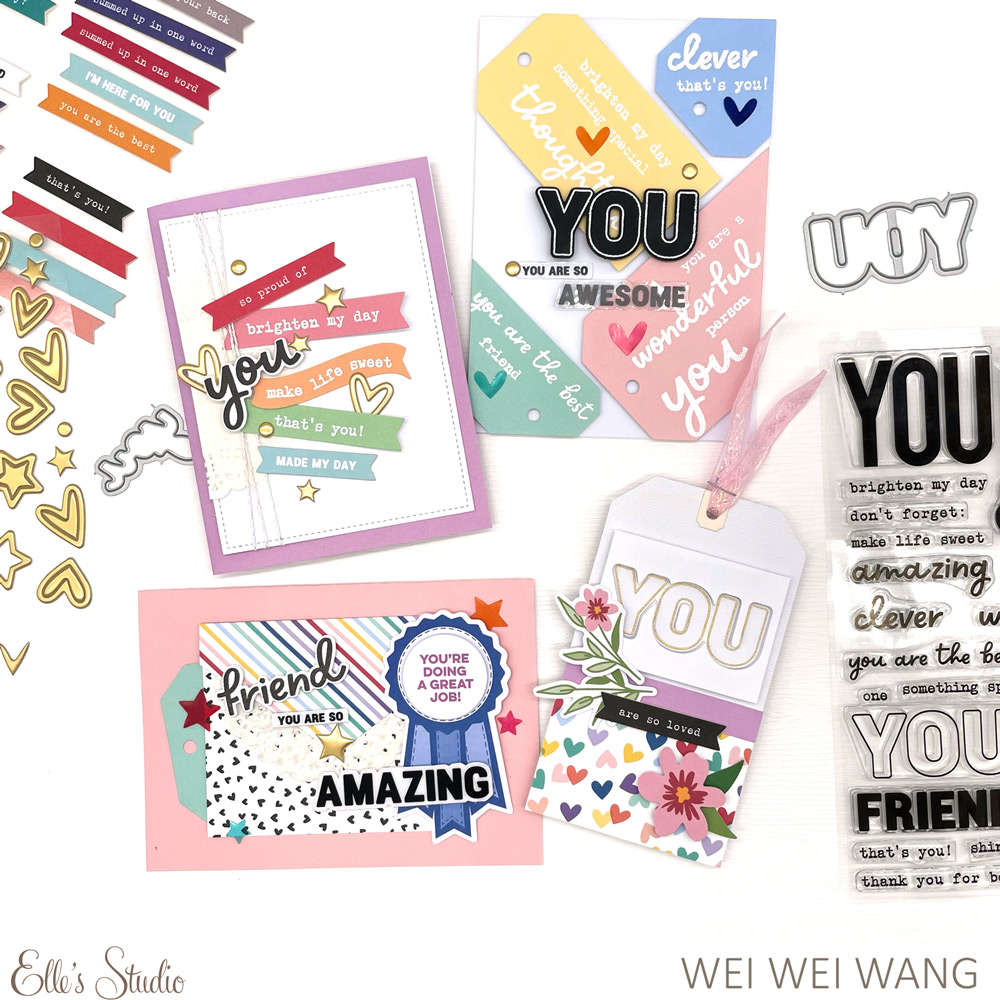
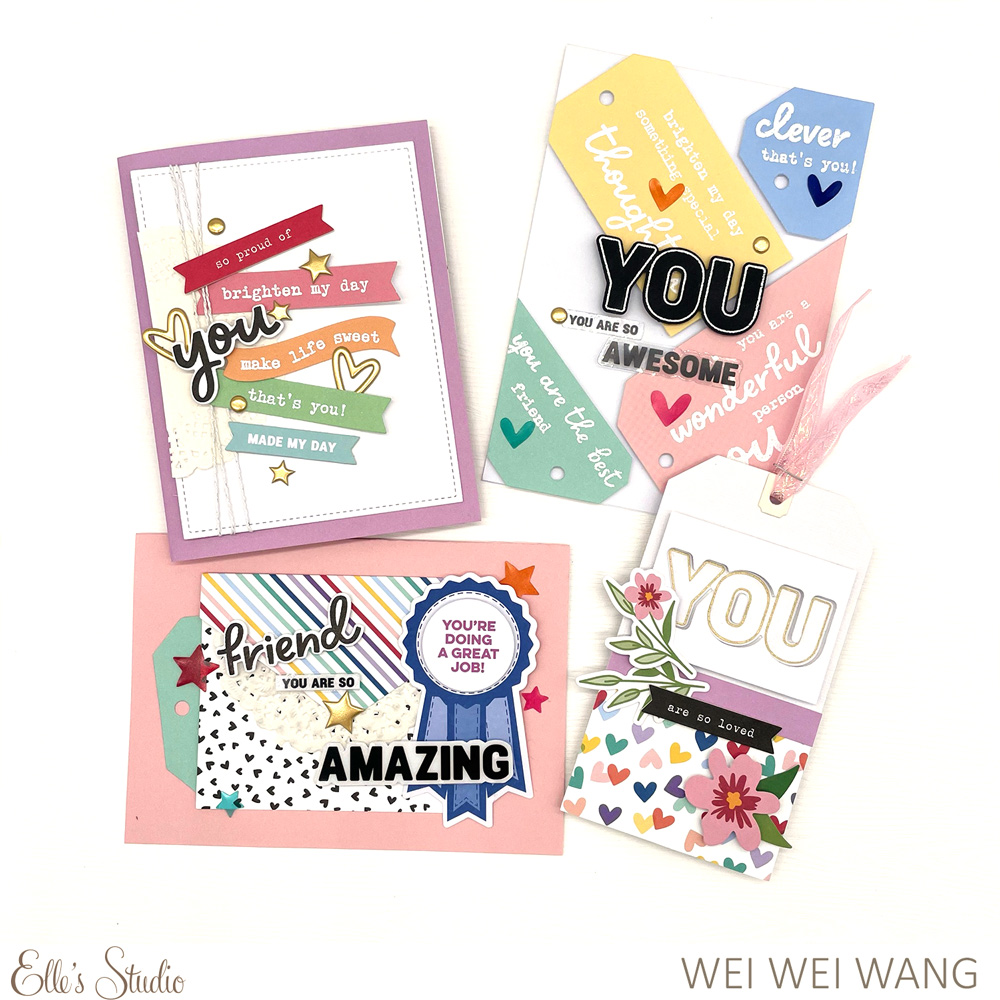
We’re continuing our week of card making inspiration using our new Sincere Sentiments: Wonderful You release with our design team member Wei Wei Wang! We think you’ll love the clever card ideas that Wei Wei came up with using this new release along with other popular and useful metal dies in the shop. Let’s take a look!
I am so excited about the release of Sincere Sentiments! I love this new line so much! There are so many sweet phrases included in the stamps and stickers, perfect for creating different kinds of cards!
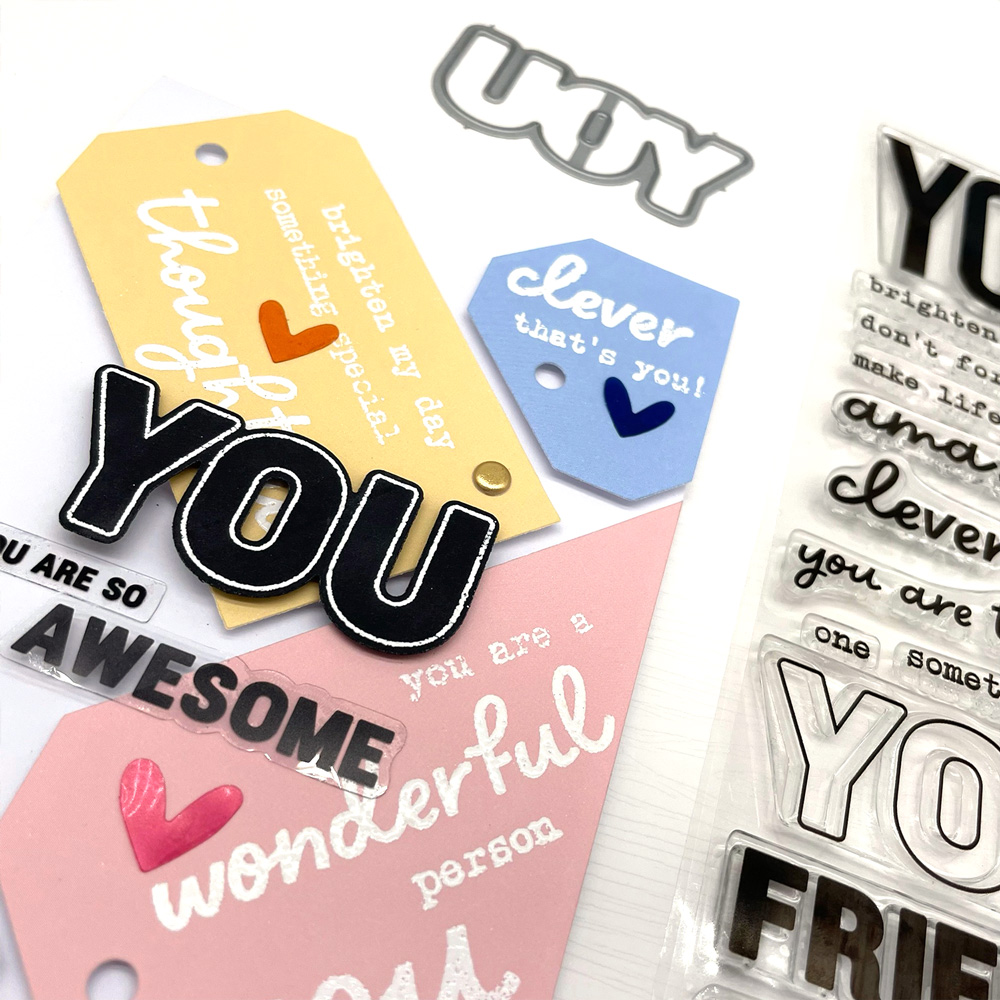
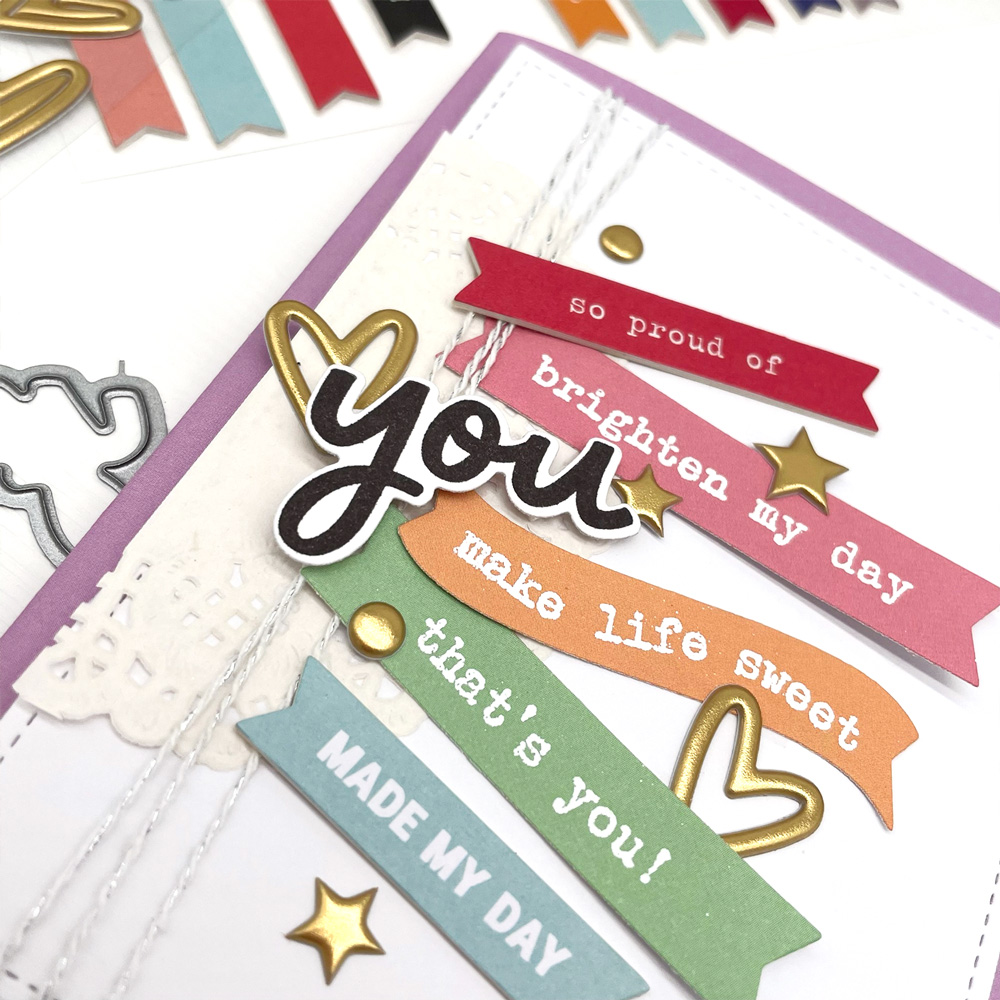
For my second card, I again wanted to showcase the sentiments from the Sincere Sentiments Wonderful You Stamp. I still used the heat embossing technique, but I decided to use banners instead of tags as my main piece.
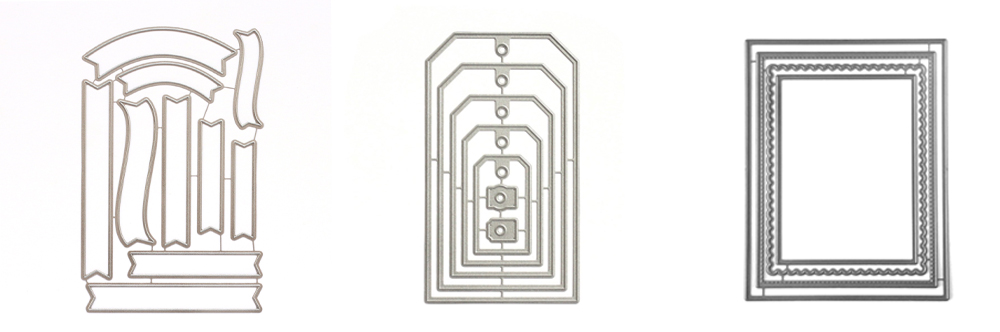
Don’t forget Elle’s Studio has the wonderful Banners Metal Dies and Layered Card Metal Die that work perfectly with this collection! I used the Layered Card Metal Die to cut the purple and white stitched layers and then used the Banners Metal Dies to create colorful banners to which I heat embossed the sentiments in white.
Before placing my banners, I adhered a doily and tied silver and white hemp cord to the left side of the card. Then, I arranged all the banners on the top of the doily and I also added a red and light blue Wonderful You Chipboard Banners for more interest. I popped the “you” up with foam dots and added Gold Puffy Heart and Star Stickers to put the finishing touches on my card.
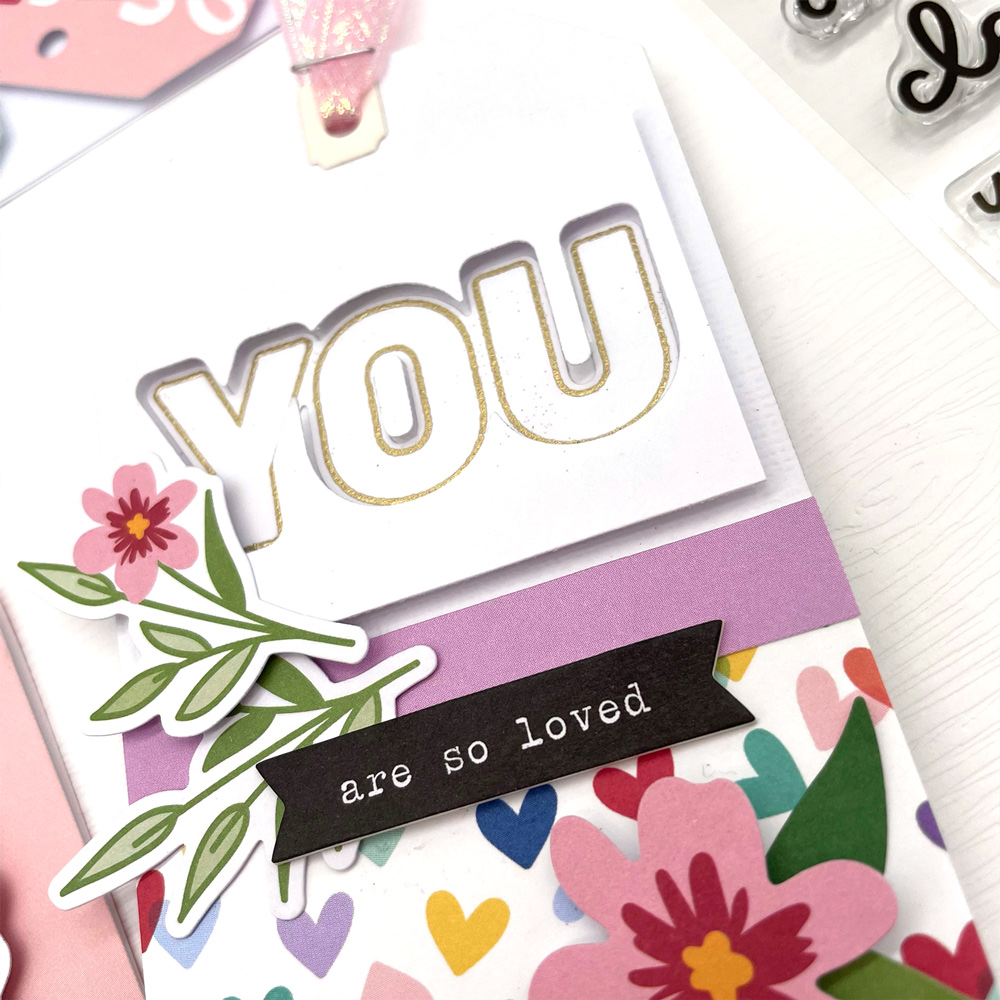
For the third card, I started with a soft pink paper from the Warm Solids Paper Stack and folded it in half to form the base of my card. After that, I used the XOXO Paper Stack and Pocket Envelope Metal Die to create the envelope as my main theme, and began my embellishing.
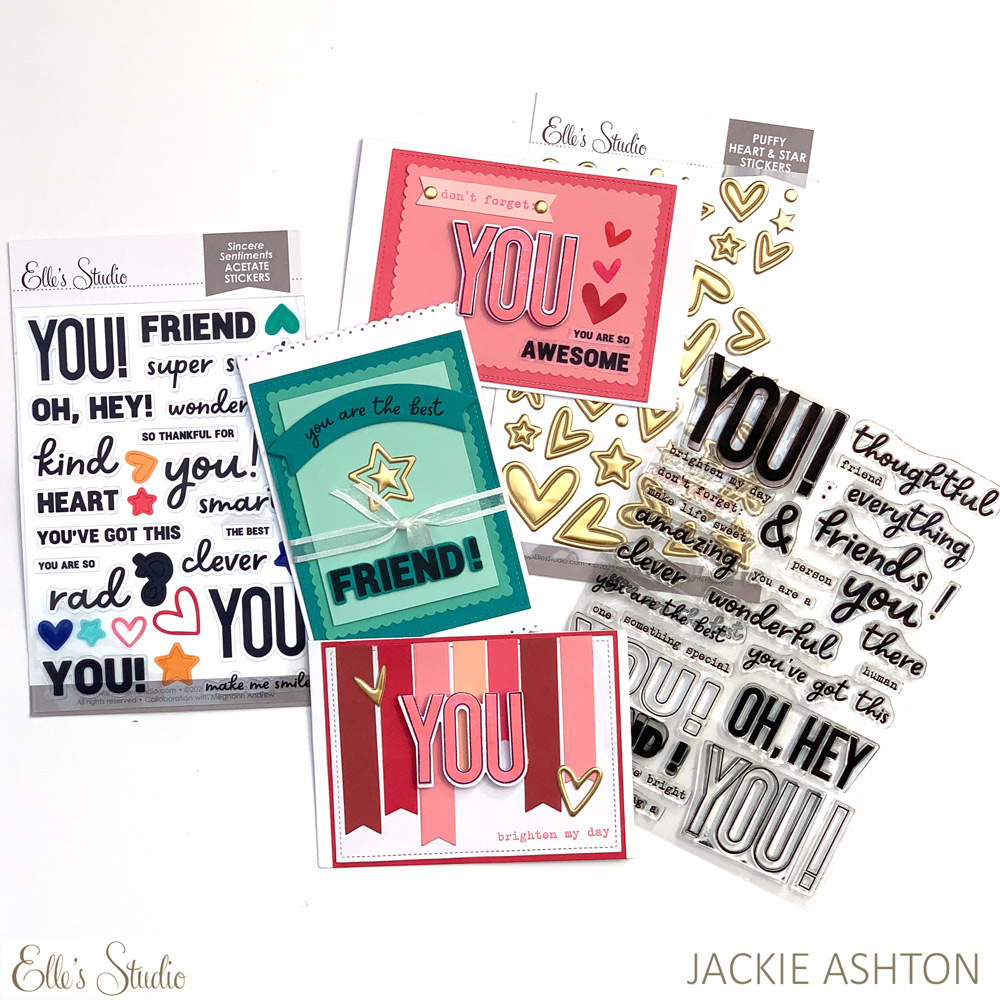
We’re continuing Sincere Sentiments: Wonderful You week with team member Jackie Ashton today! Jackie’s cards just go to show that a card design doesn’t need to be complicated to be lovely, and that simple cards can still show someone how much you care! Let’s take a look!
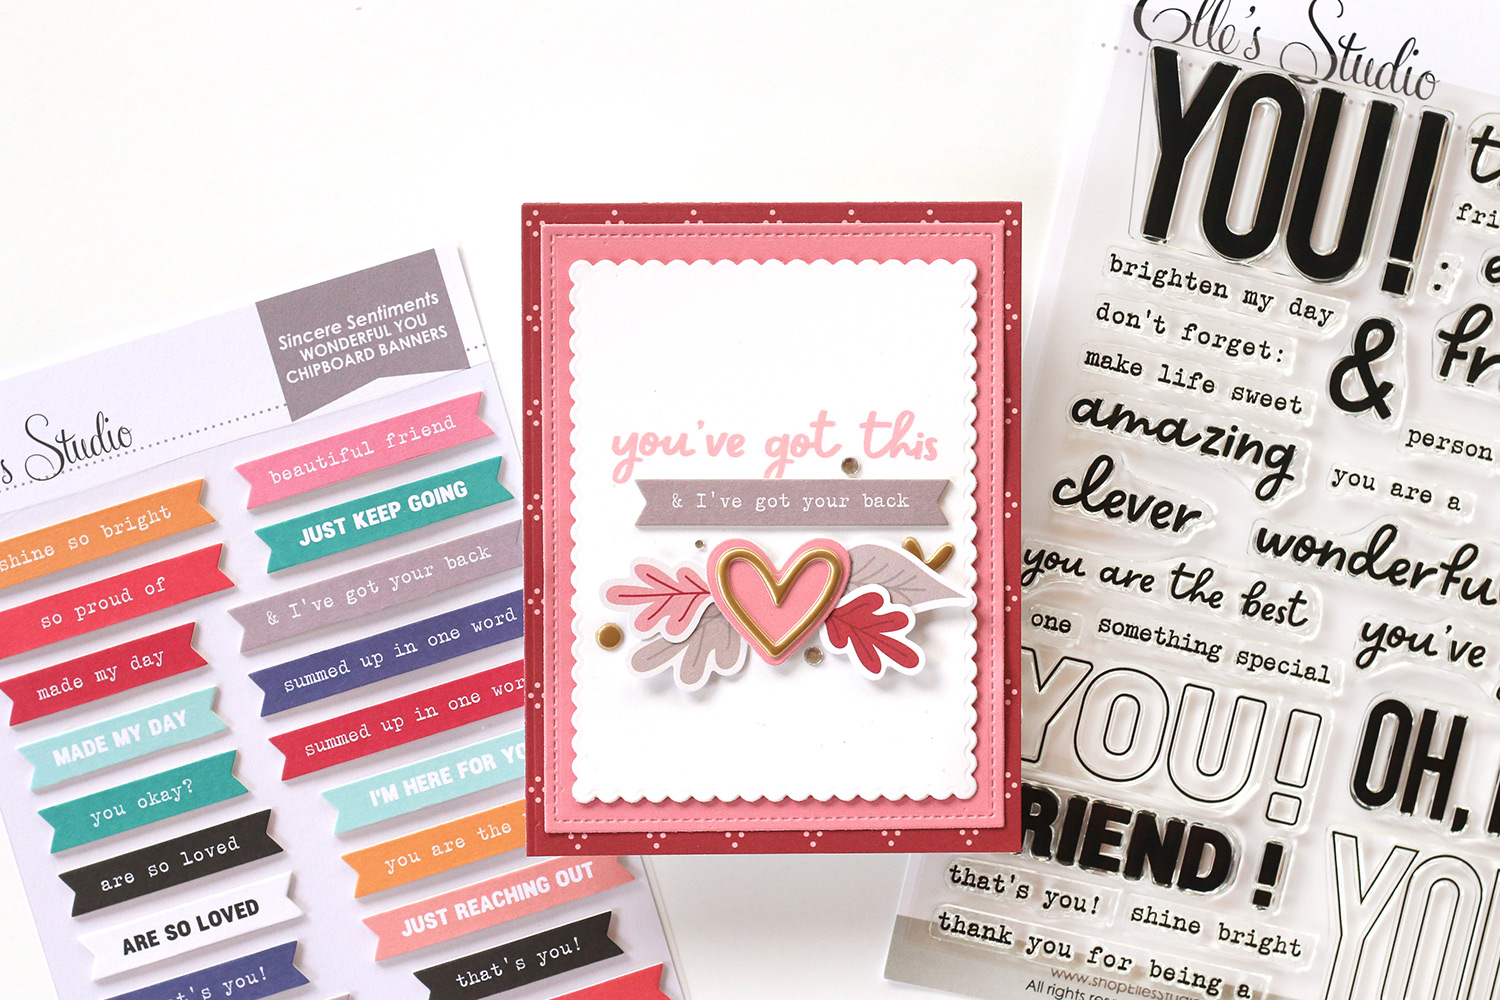
Hi! It’s Jackie here with a few cards I made using the lovely Sincere Sentiments Wonderful You Stamp and add-ons. This new addition to the shop is great to help you create quick cards, suitable for all occasions! Take a look:
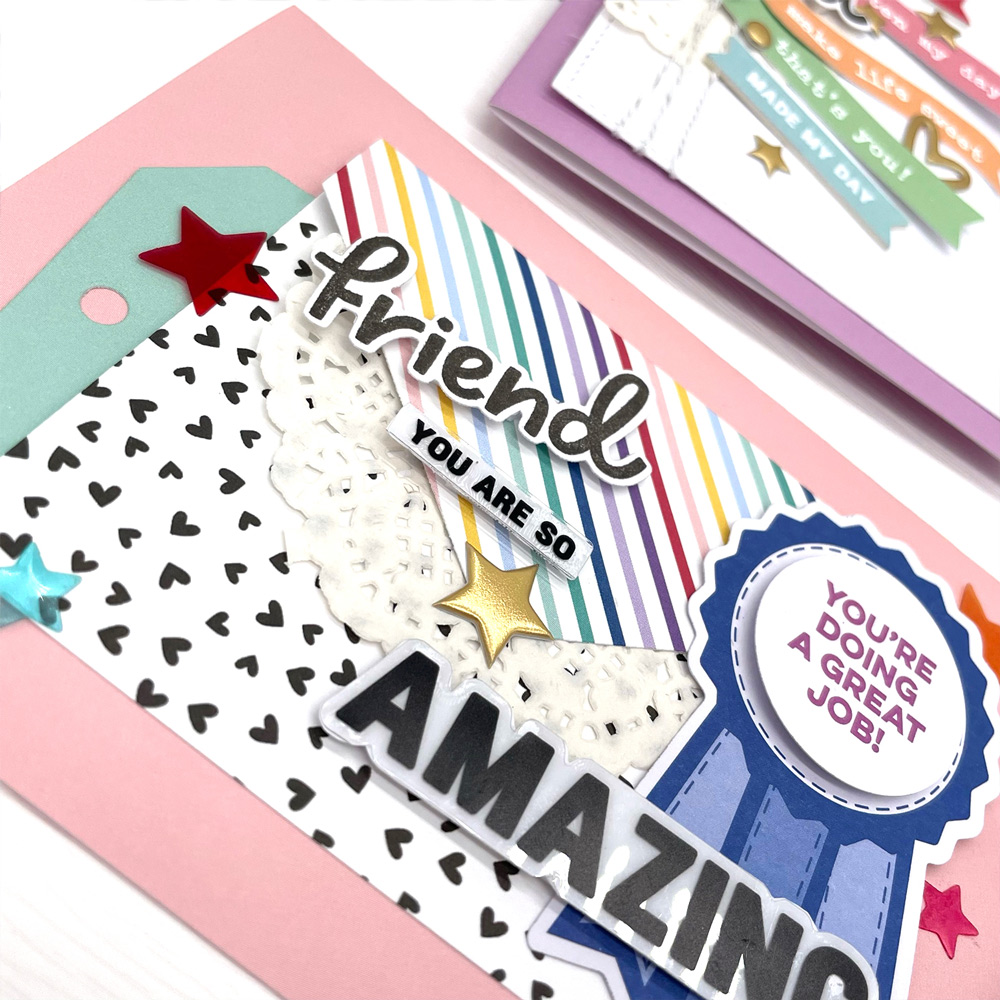
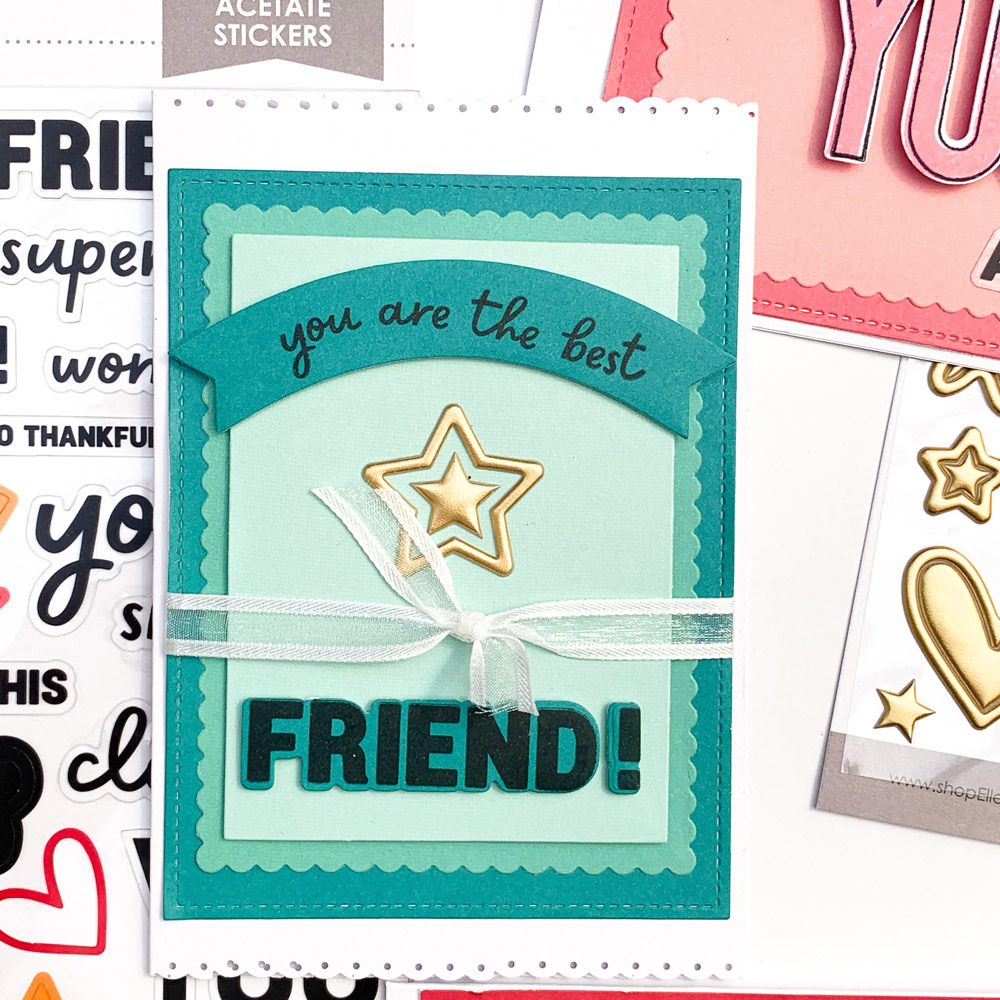
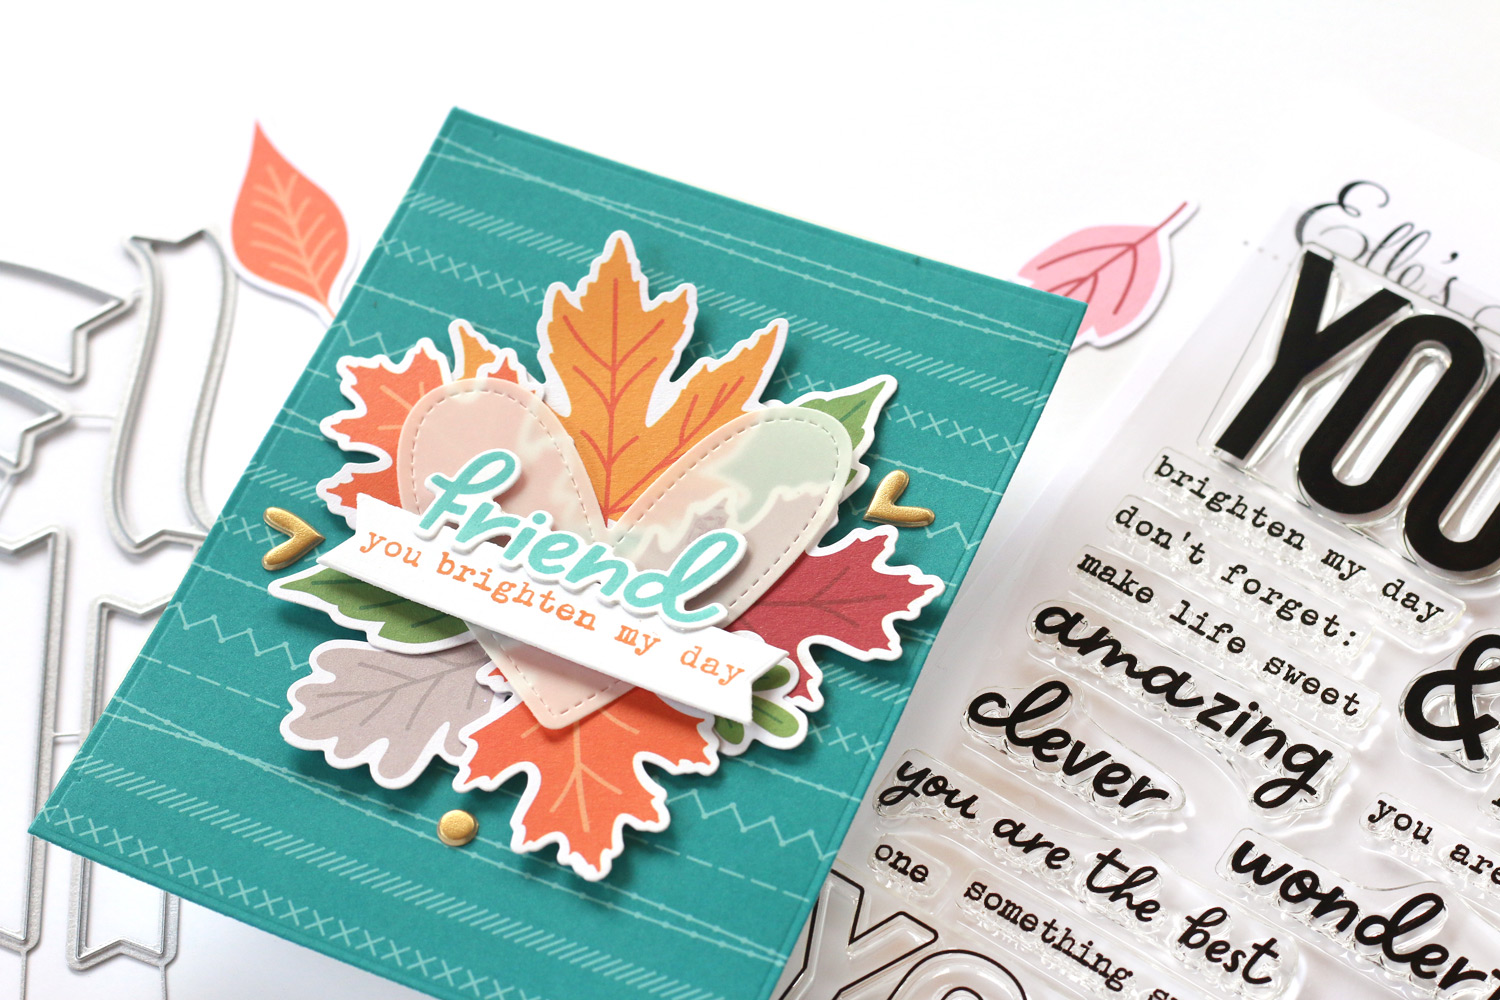
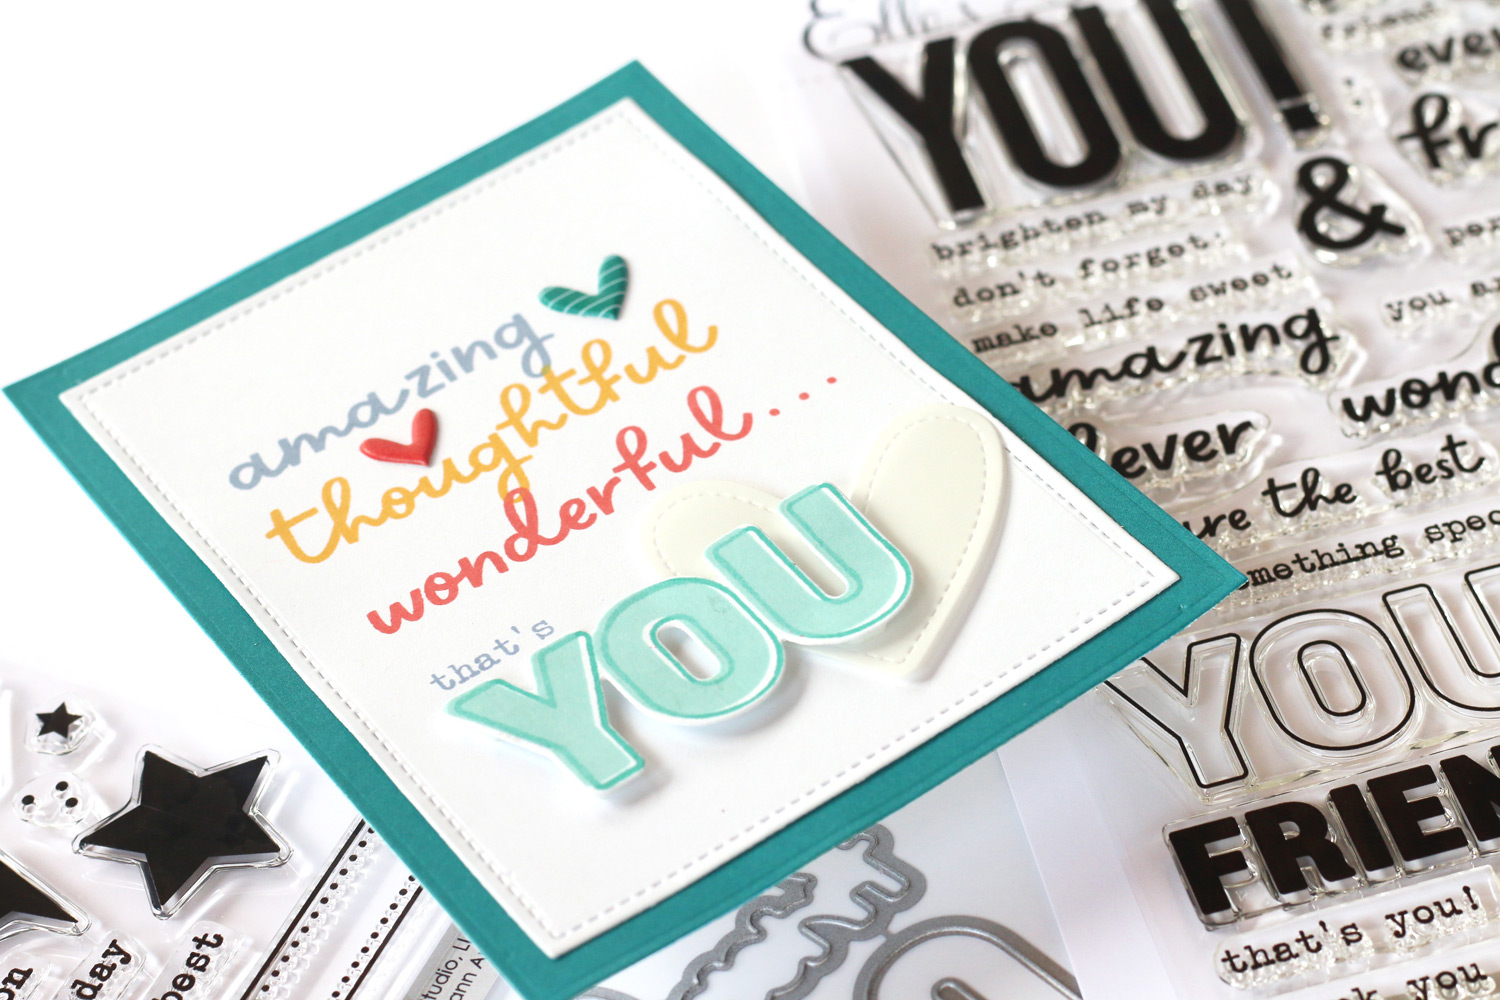
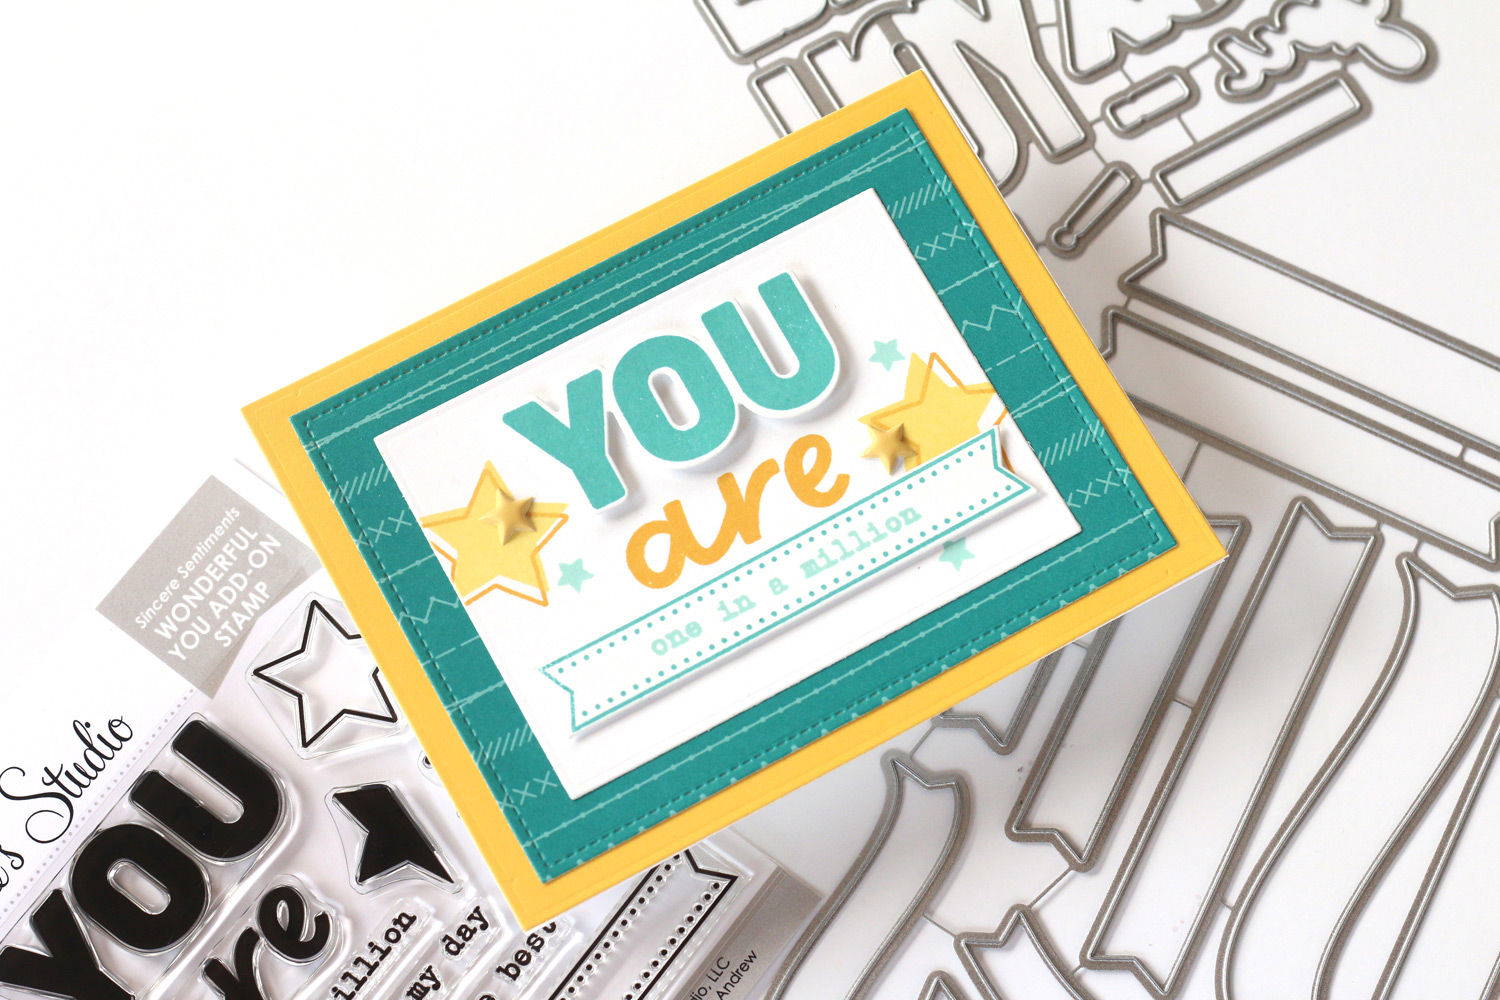
For my first card, I started by using the Layered Card Metal Die with the Cool Solids Paper Stack to make a card panel. I used the teal solid paper to stamp “friend” and die cut the word using the Wonderful You Metal Die. Using the same paper, I die cut a banner using the Banners Metal Dies, and stamped the sentiment on top. I added 3D foam under one of the base layers, as well as behind the banner to give them some dimension.
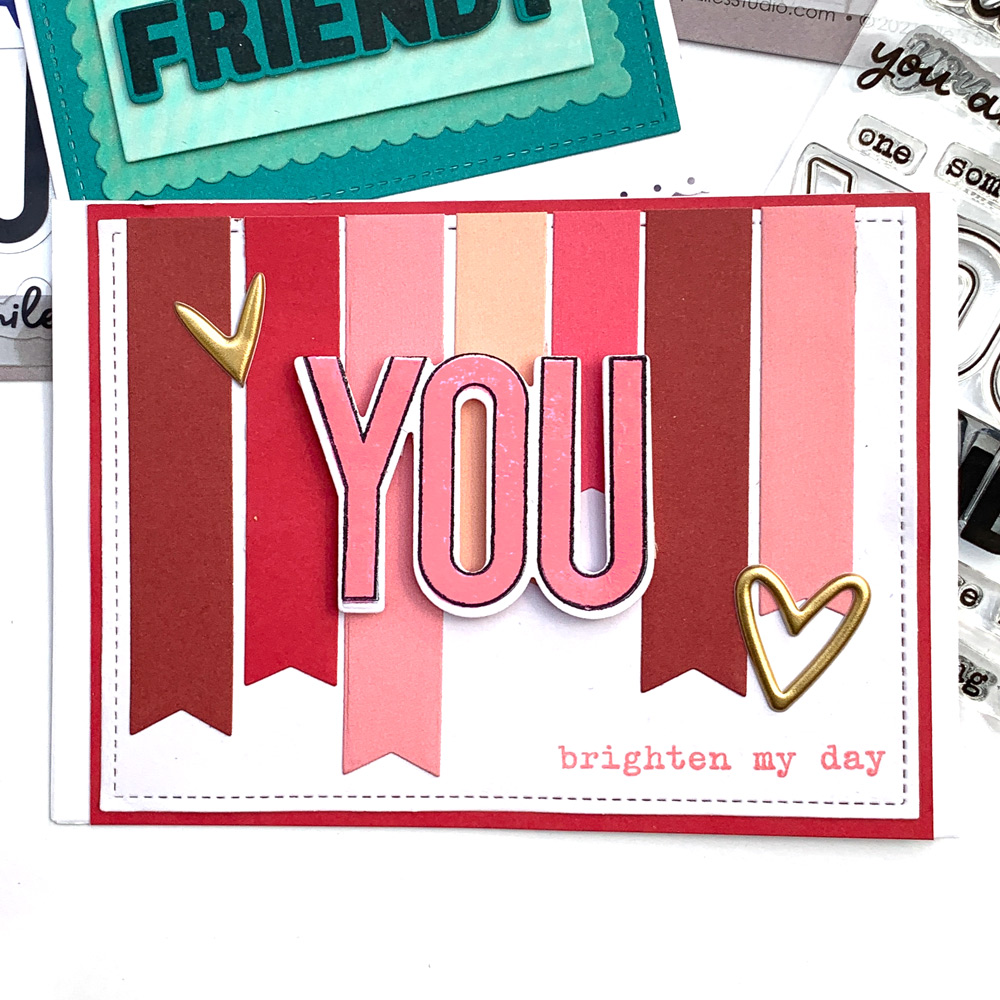
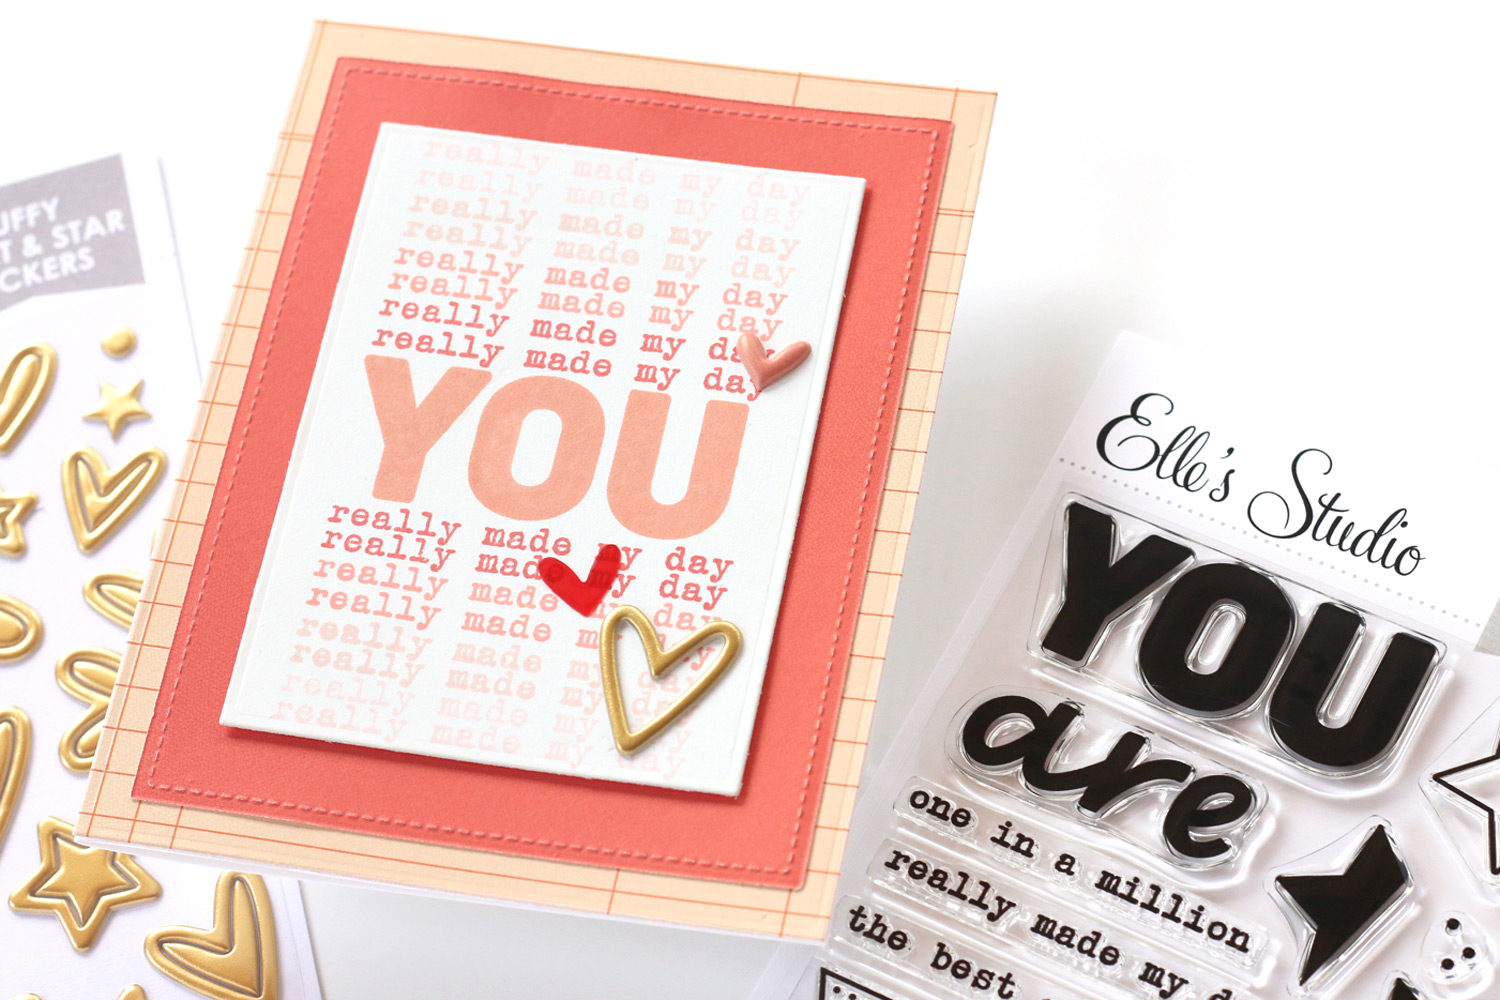
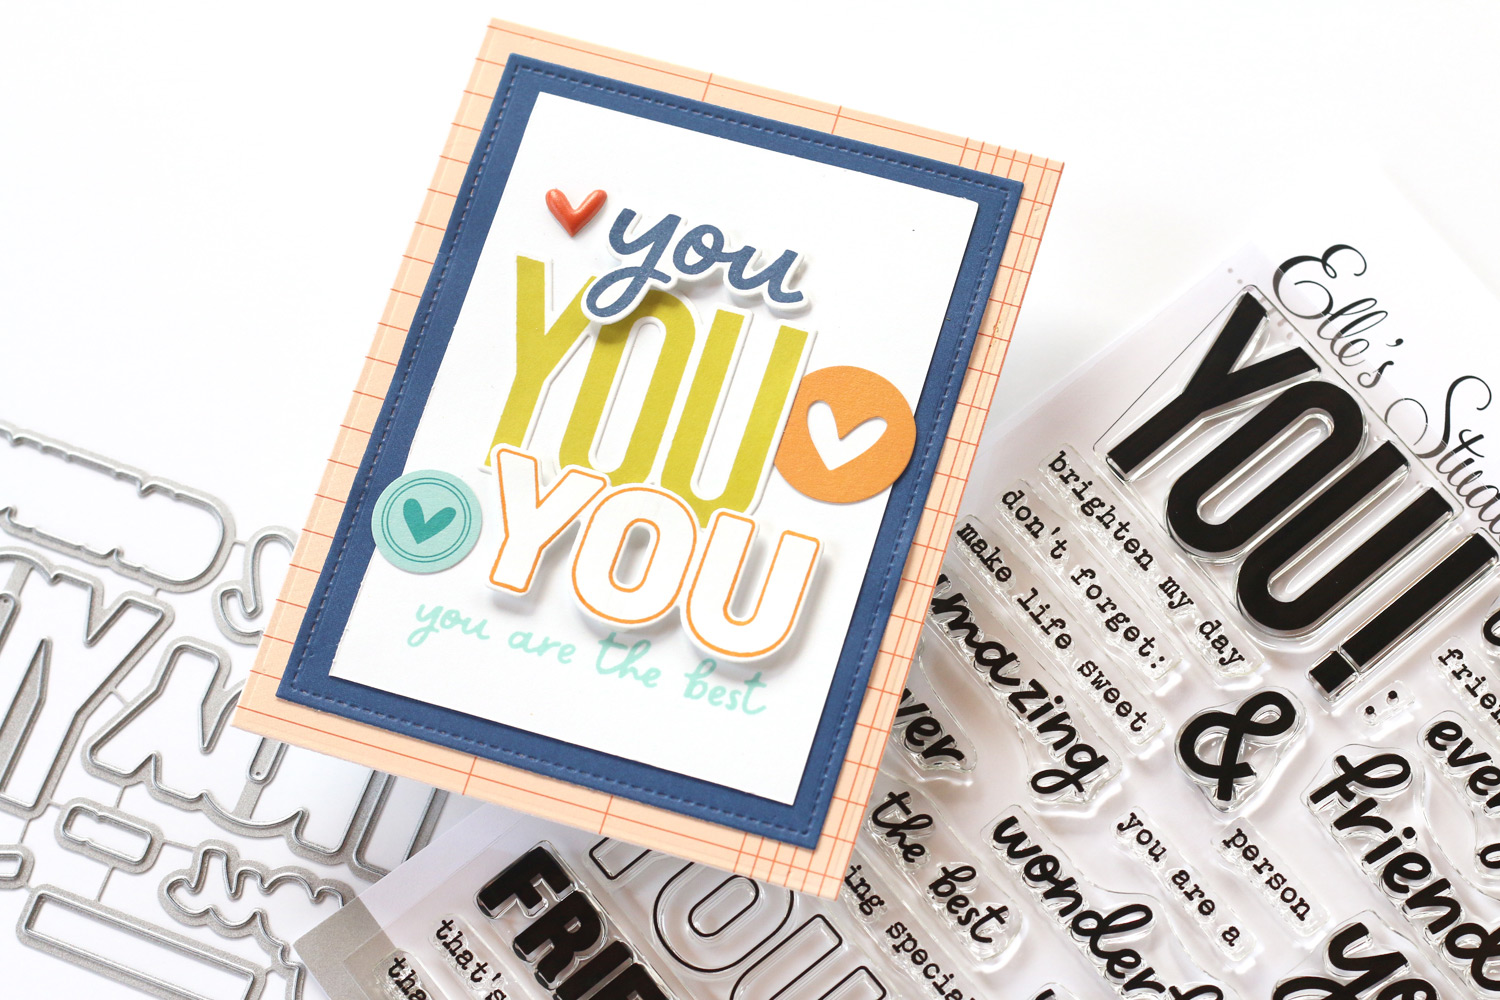
My next card has a totally different look! Using a few sheets of red and coral hues from the Warm Solids Paper Stack, I die cut several banners using the Banners Metal Dies and added them to my card base at different lengths, coming down from the top of the card. I stamped the solid word ‘You’ and the outlined in black from Wonderful You Stamp and die cut using the Wonderful You Metal Die. I finished off the card with hearts from the Gold Puffy Heart and Star Stickers, and a stamped a phase in pink.
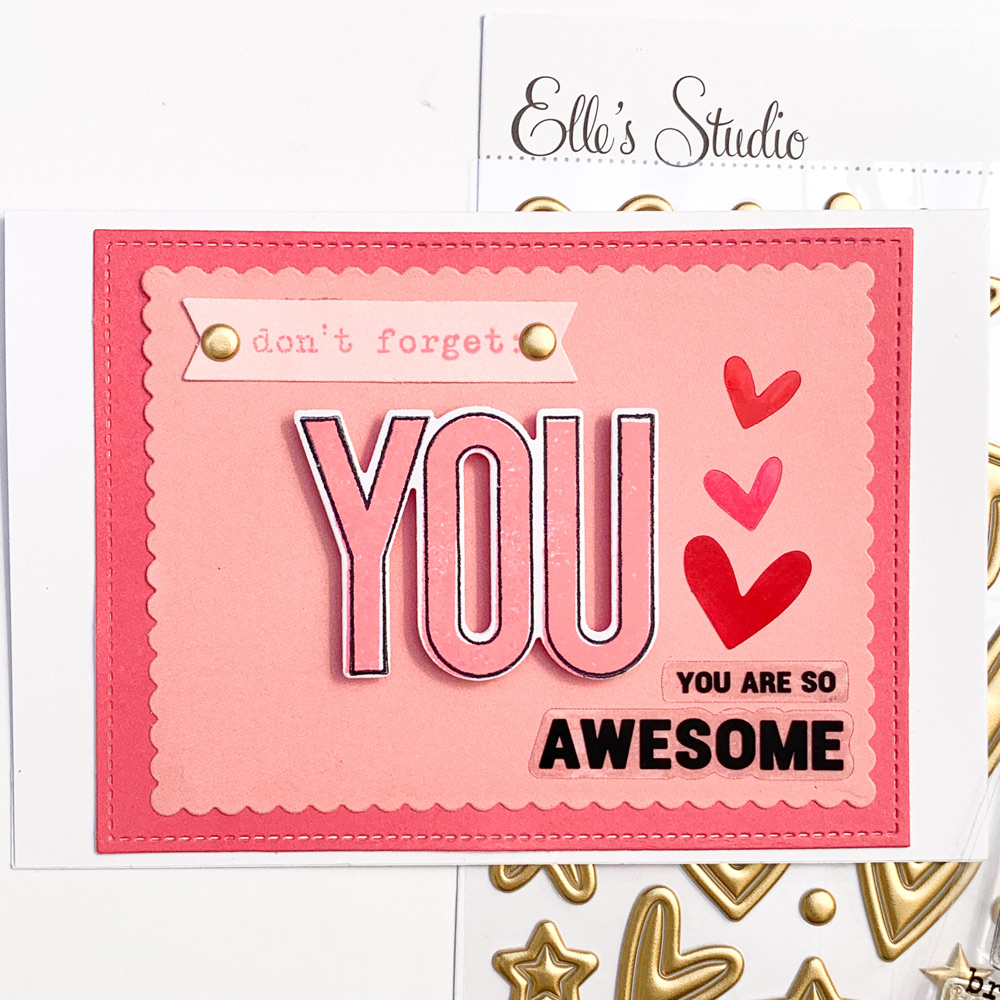
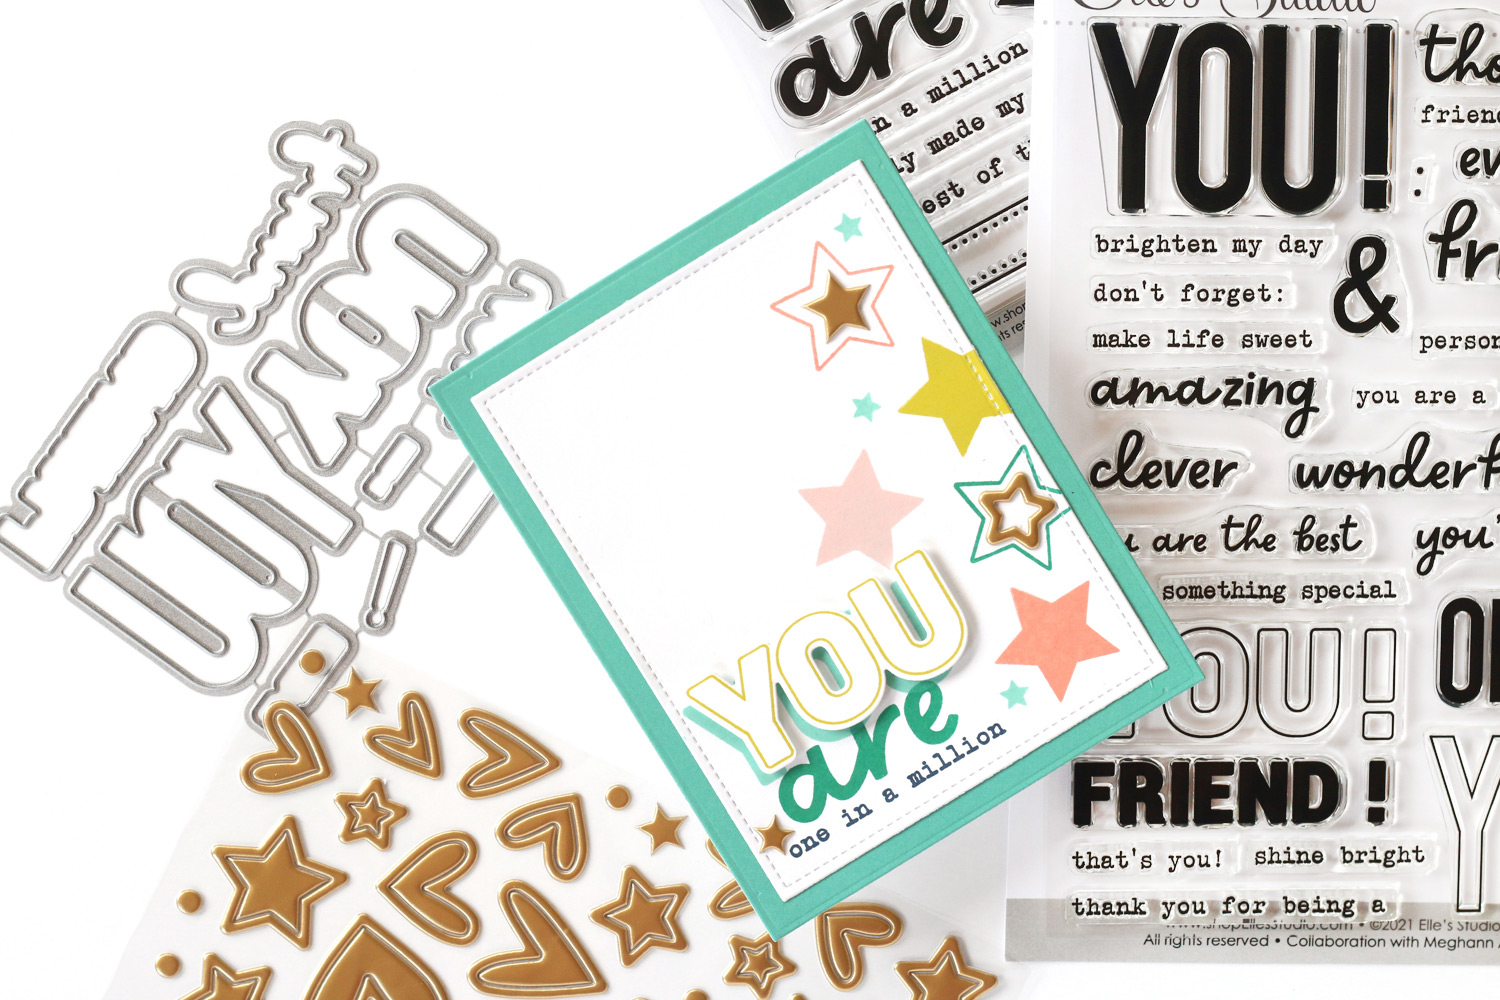
On my third card, I used the Warm Solids Paper Stack and the Layered Card Metal Die to make the background, panel, then stamped and die cut the word ‘YOU’, adding 3D foam behind it before I added to the centre of the card panel.
I stamped the “don’t forget” phase on top of a banner I had left over from my second card and added it to the top of the card panel. Phases and hearts from the Wonderful You Acetate Stickers finished off this simple card.
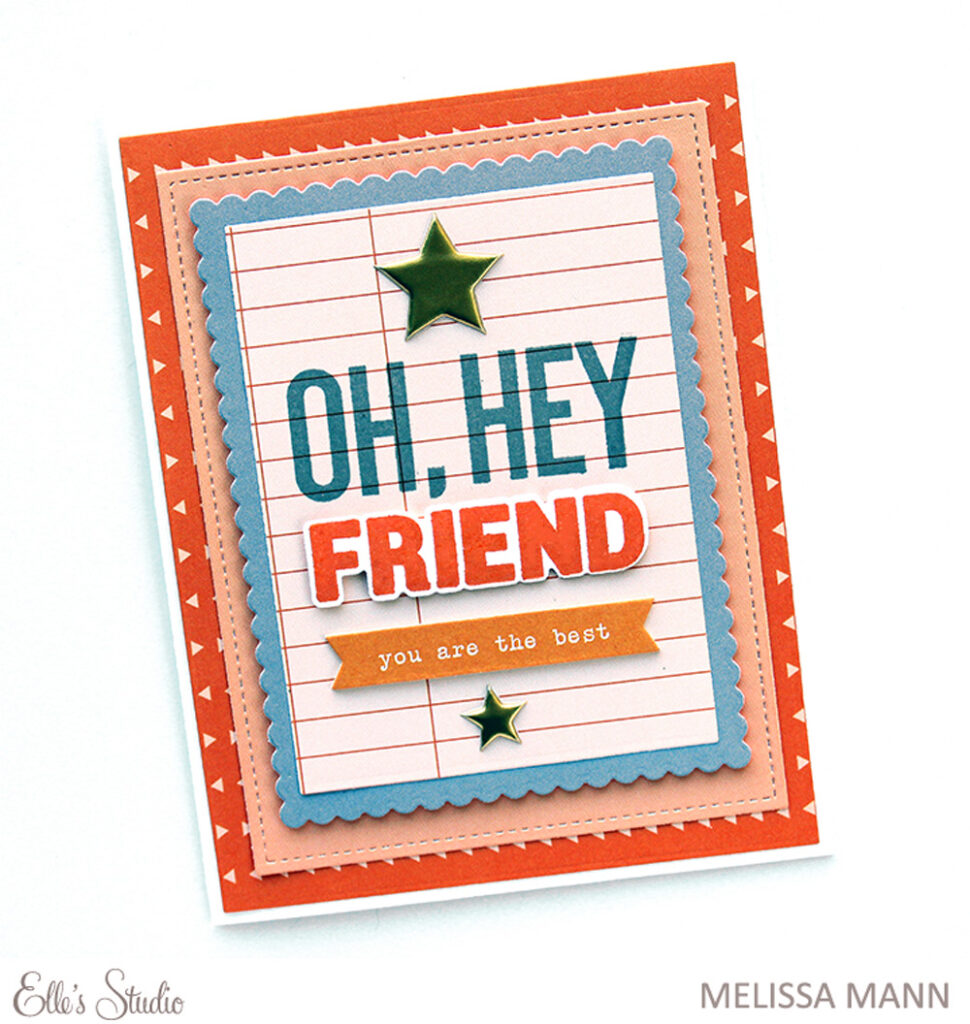
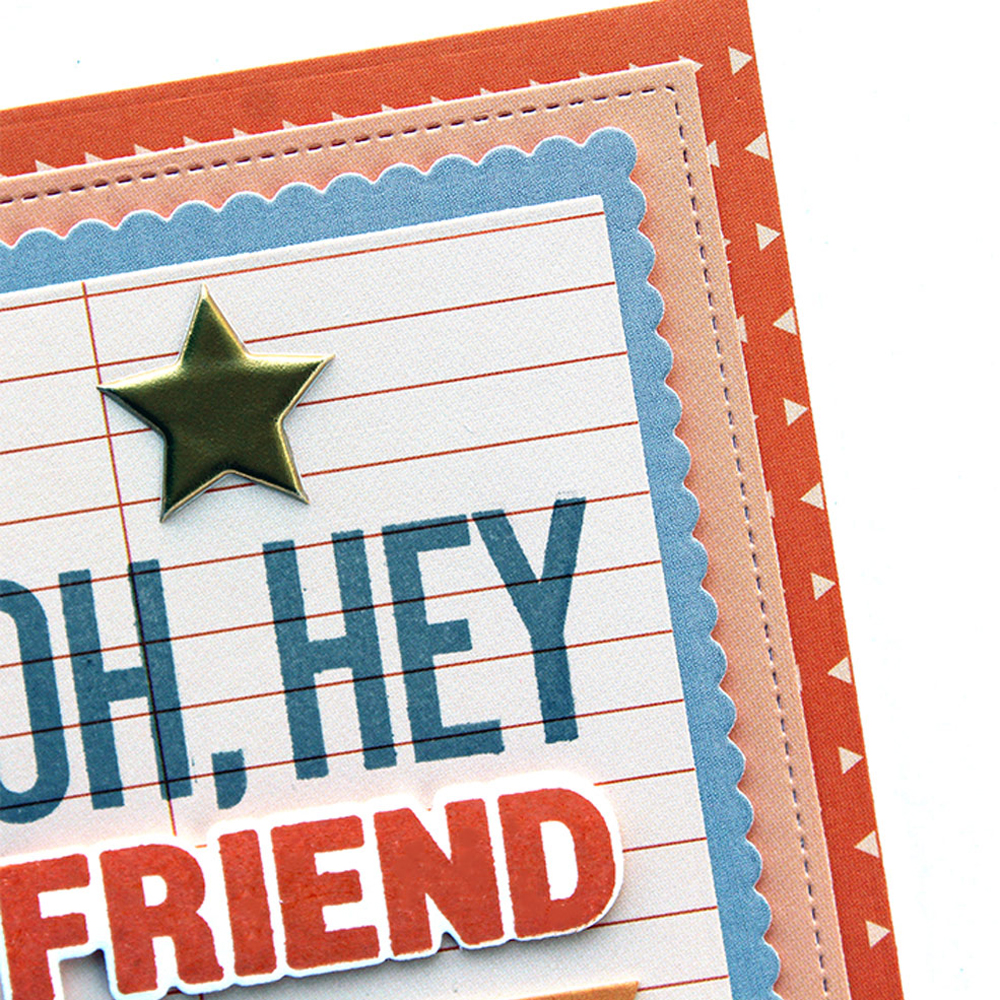
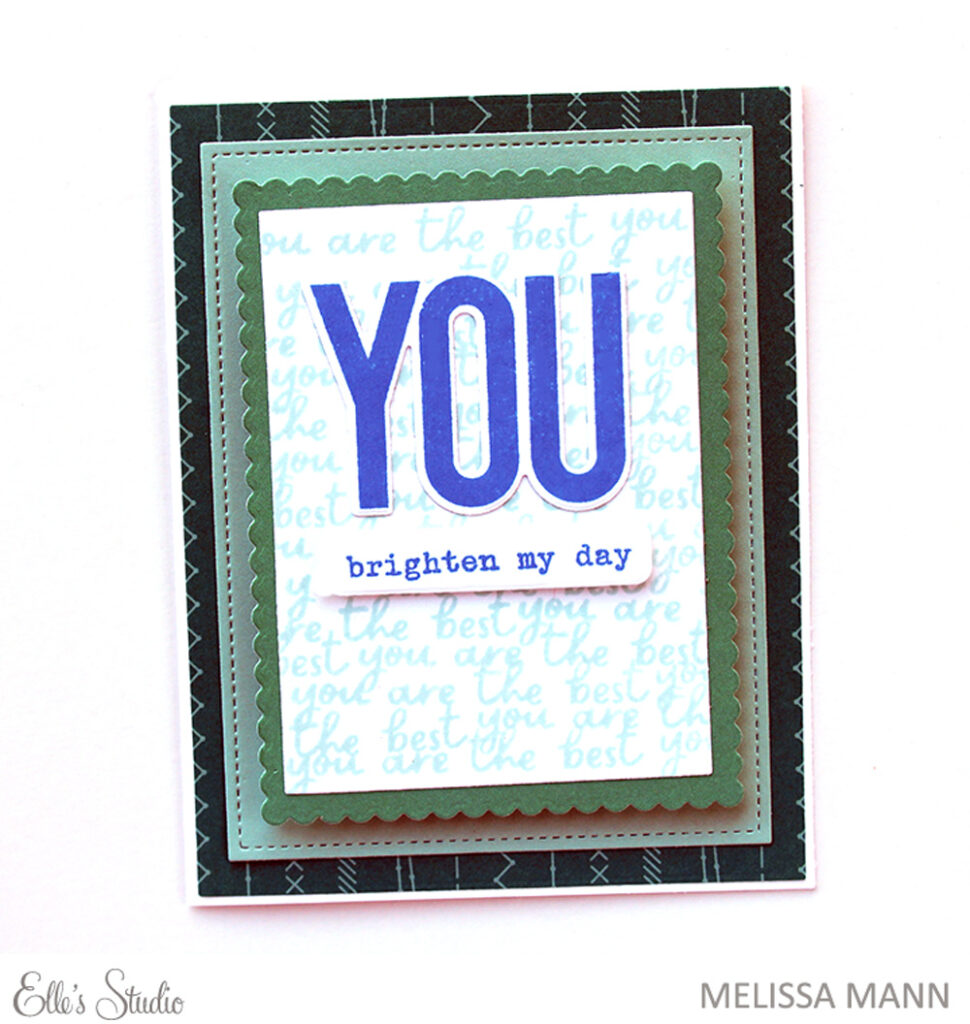
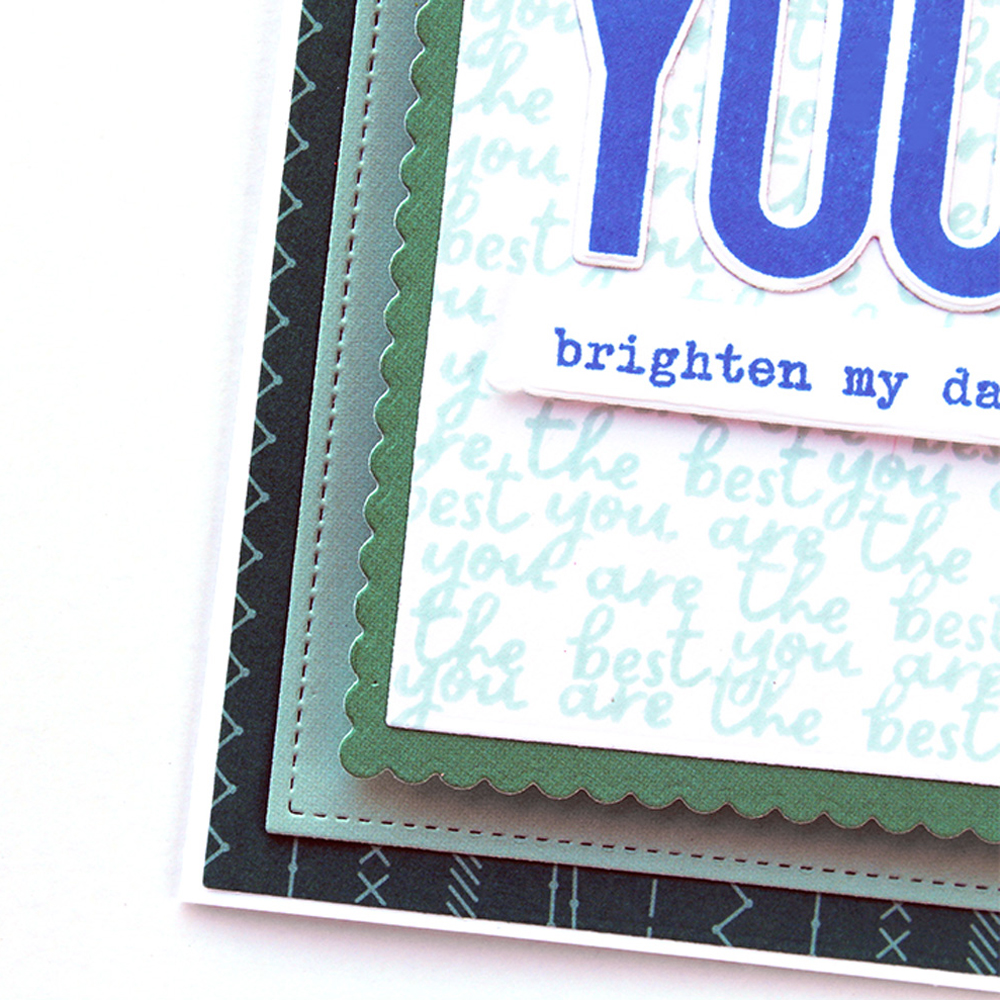
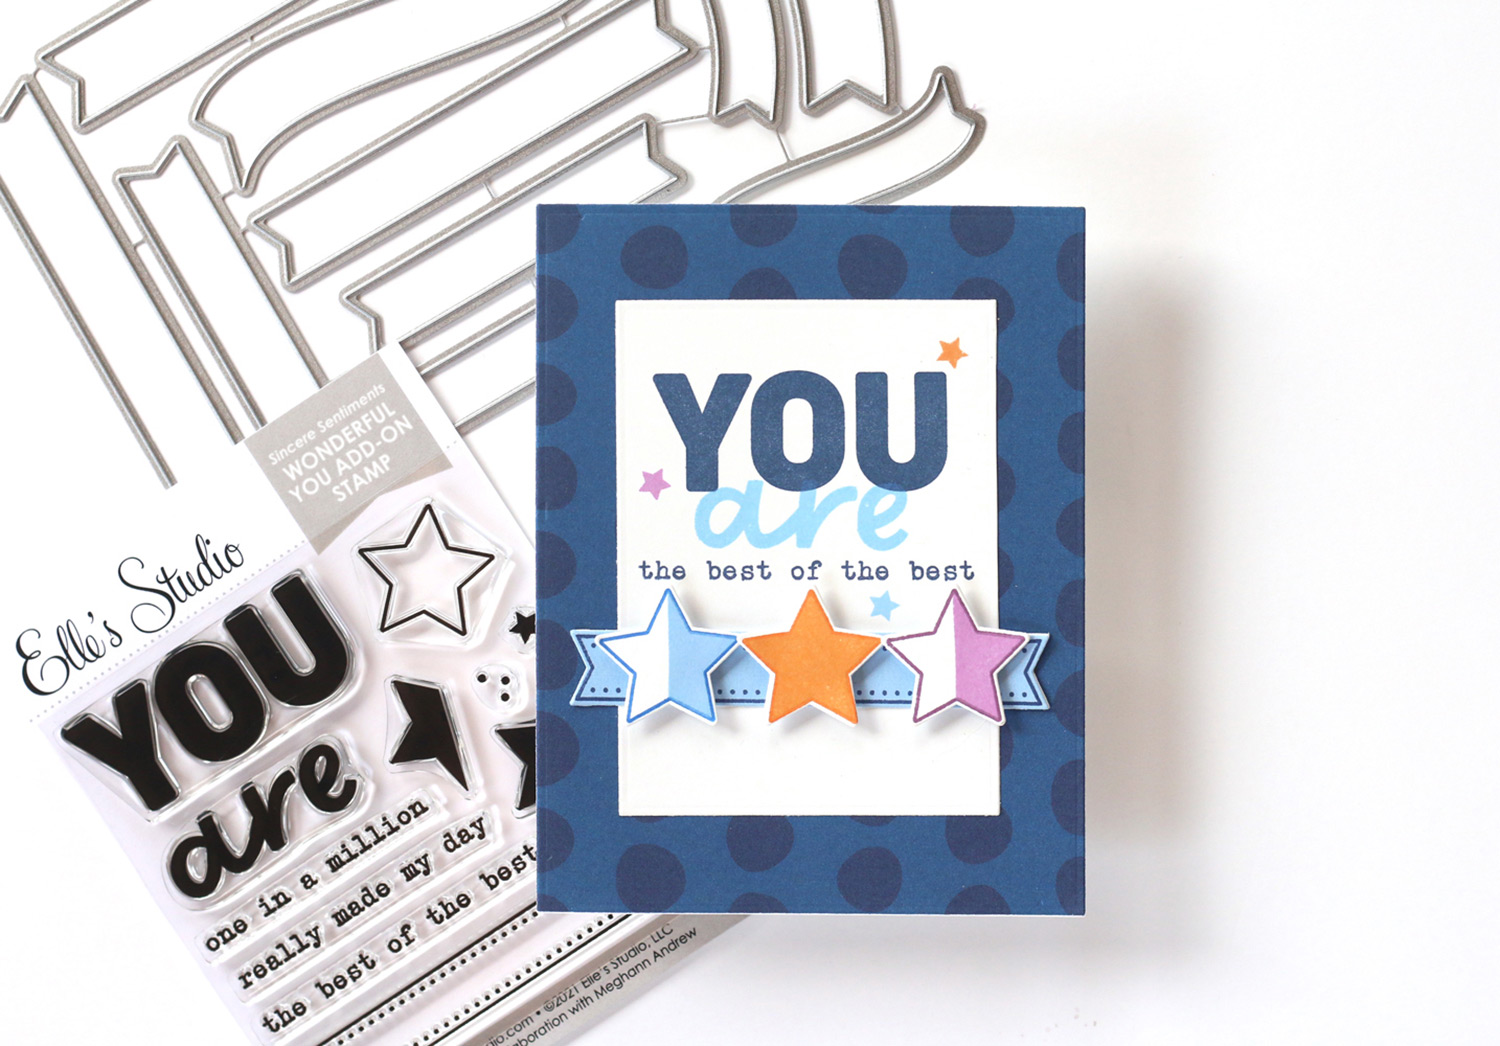
We are so excited about our newest release created with card makers in mind, Sincere Sentiments: Wonderful You! In case you missed the exciting news about these new products, head back to yesterday’s reveal blog post to take a look at the new products and wonderful card examples created by Meghann Andrew! Today, design team member Melissa Mann is with us to share two sweet and simple cards, created with lots of layers and the perfect sentiments! Let’s take a look!
Hello, friends! I am loving the new Sincere Sentiments: Wonderful You release! It was so quick and easy to whip together two cards using these new products and of course, the Layered Card Metal Die, a must-have for any card maker!
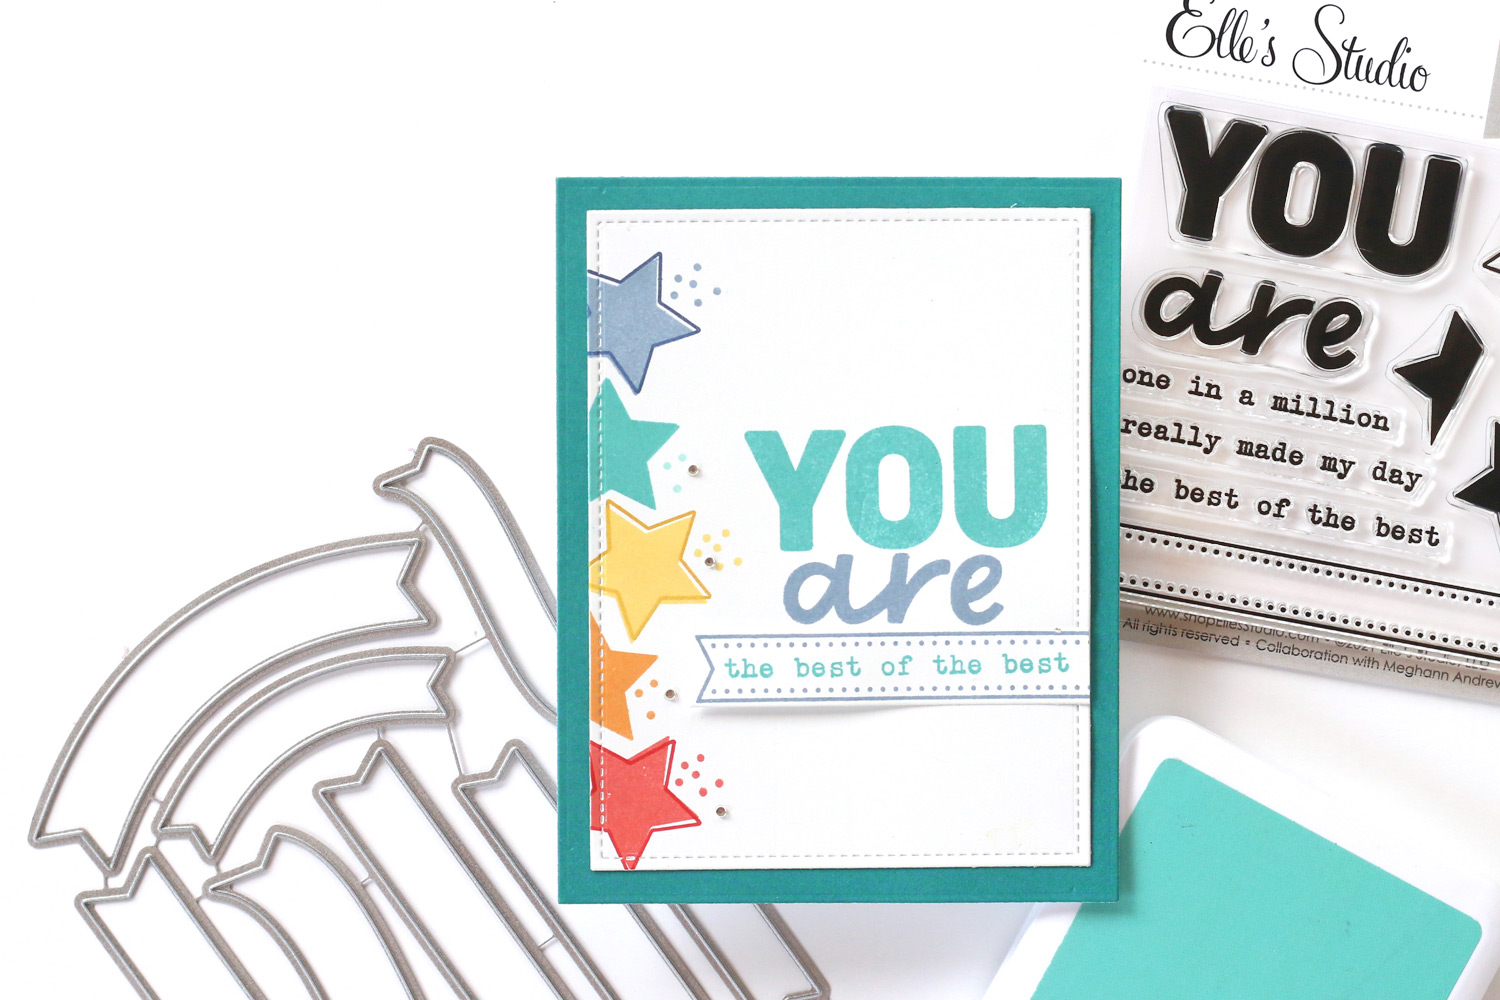
I layered the die cut papers onto a white cardstock base. I stamped my sentiments onto white cardstock and used the corresponding Sincere Sentiments Wonderful You Metal Die to cut them out. On the blue-toned card, I stamped a white panel repeatedly using the phrase “you are the best” in light blue ink and then placed my die cut word “YOU” on top and the smaller sentiment underneath.
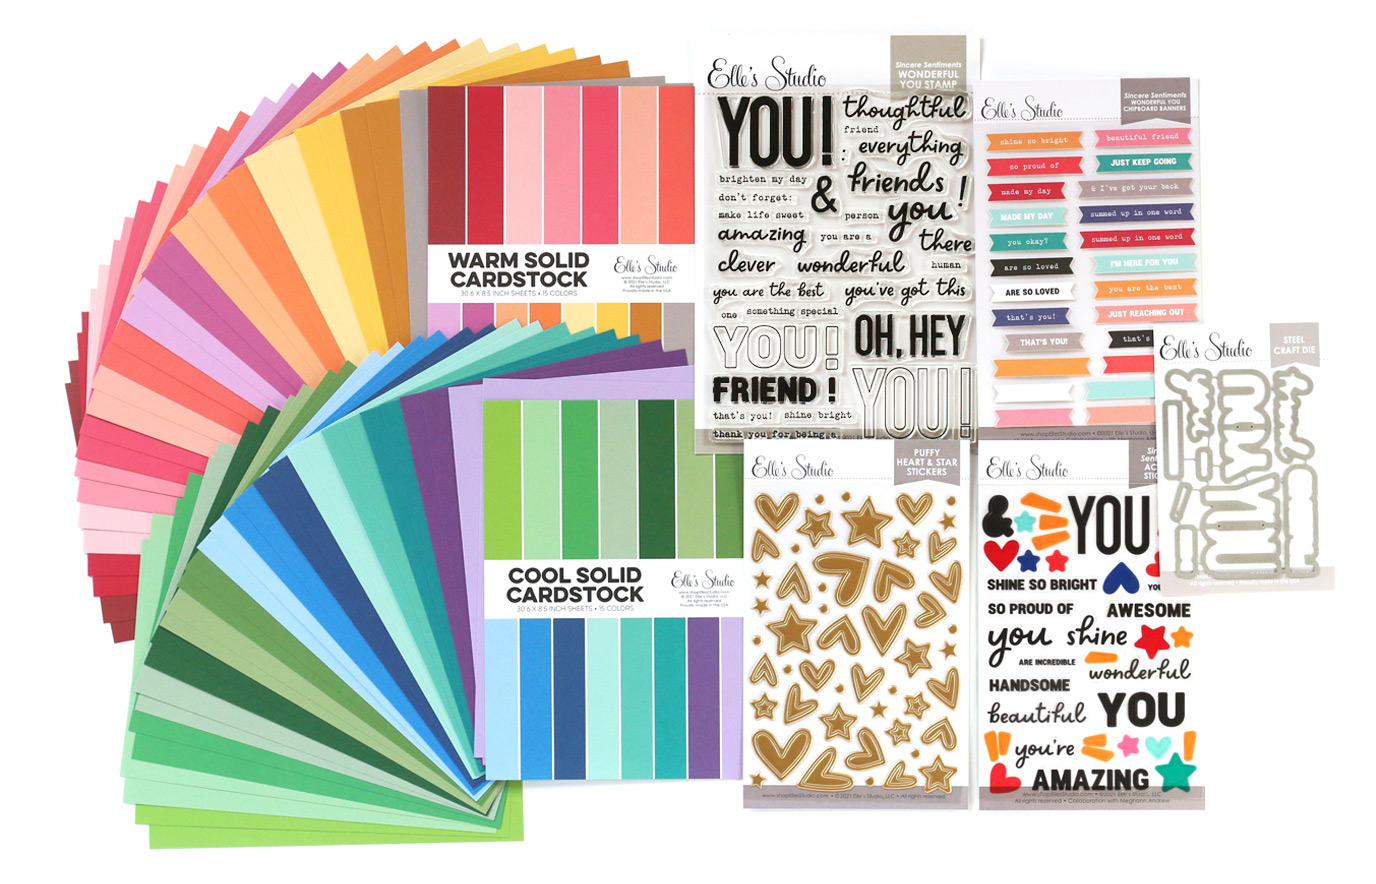
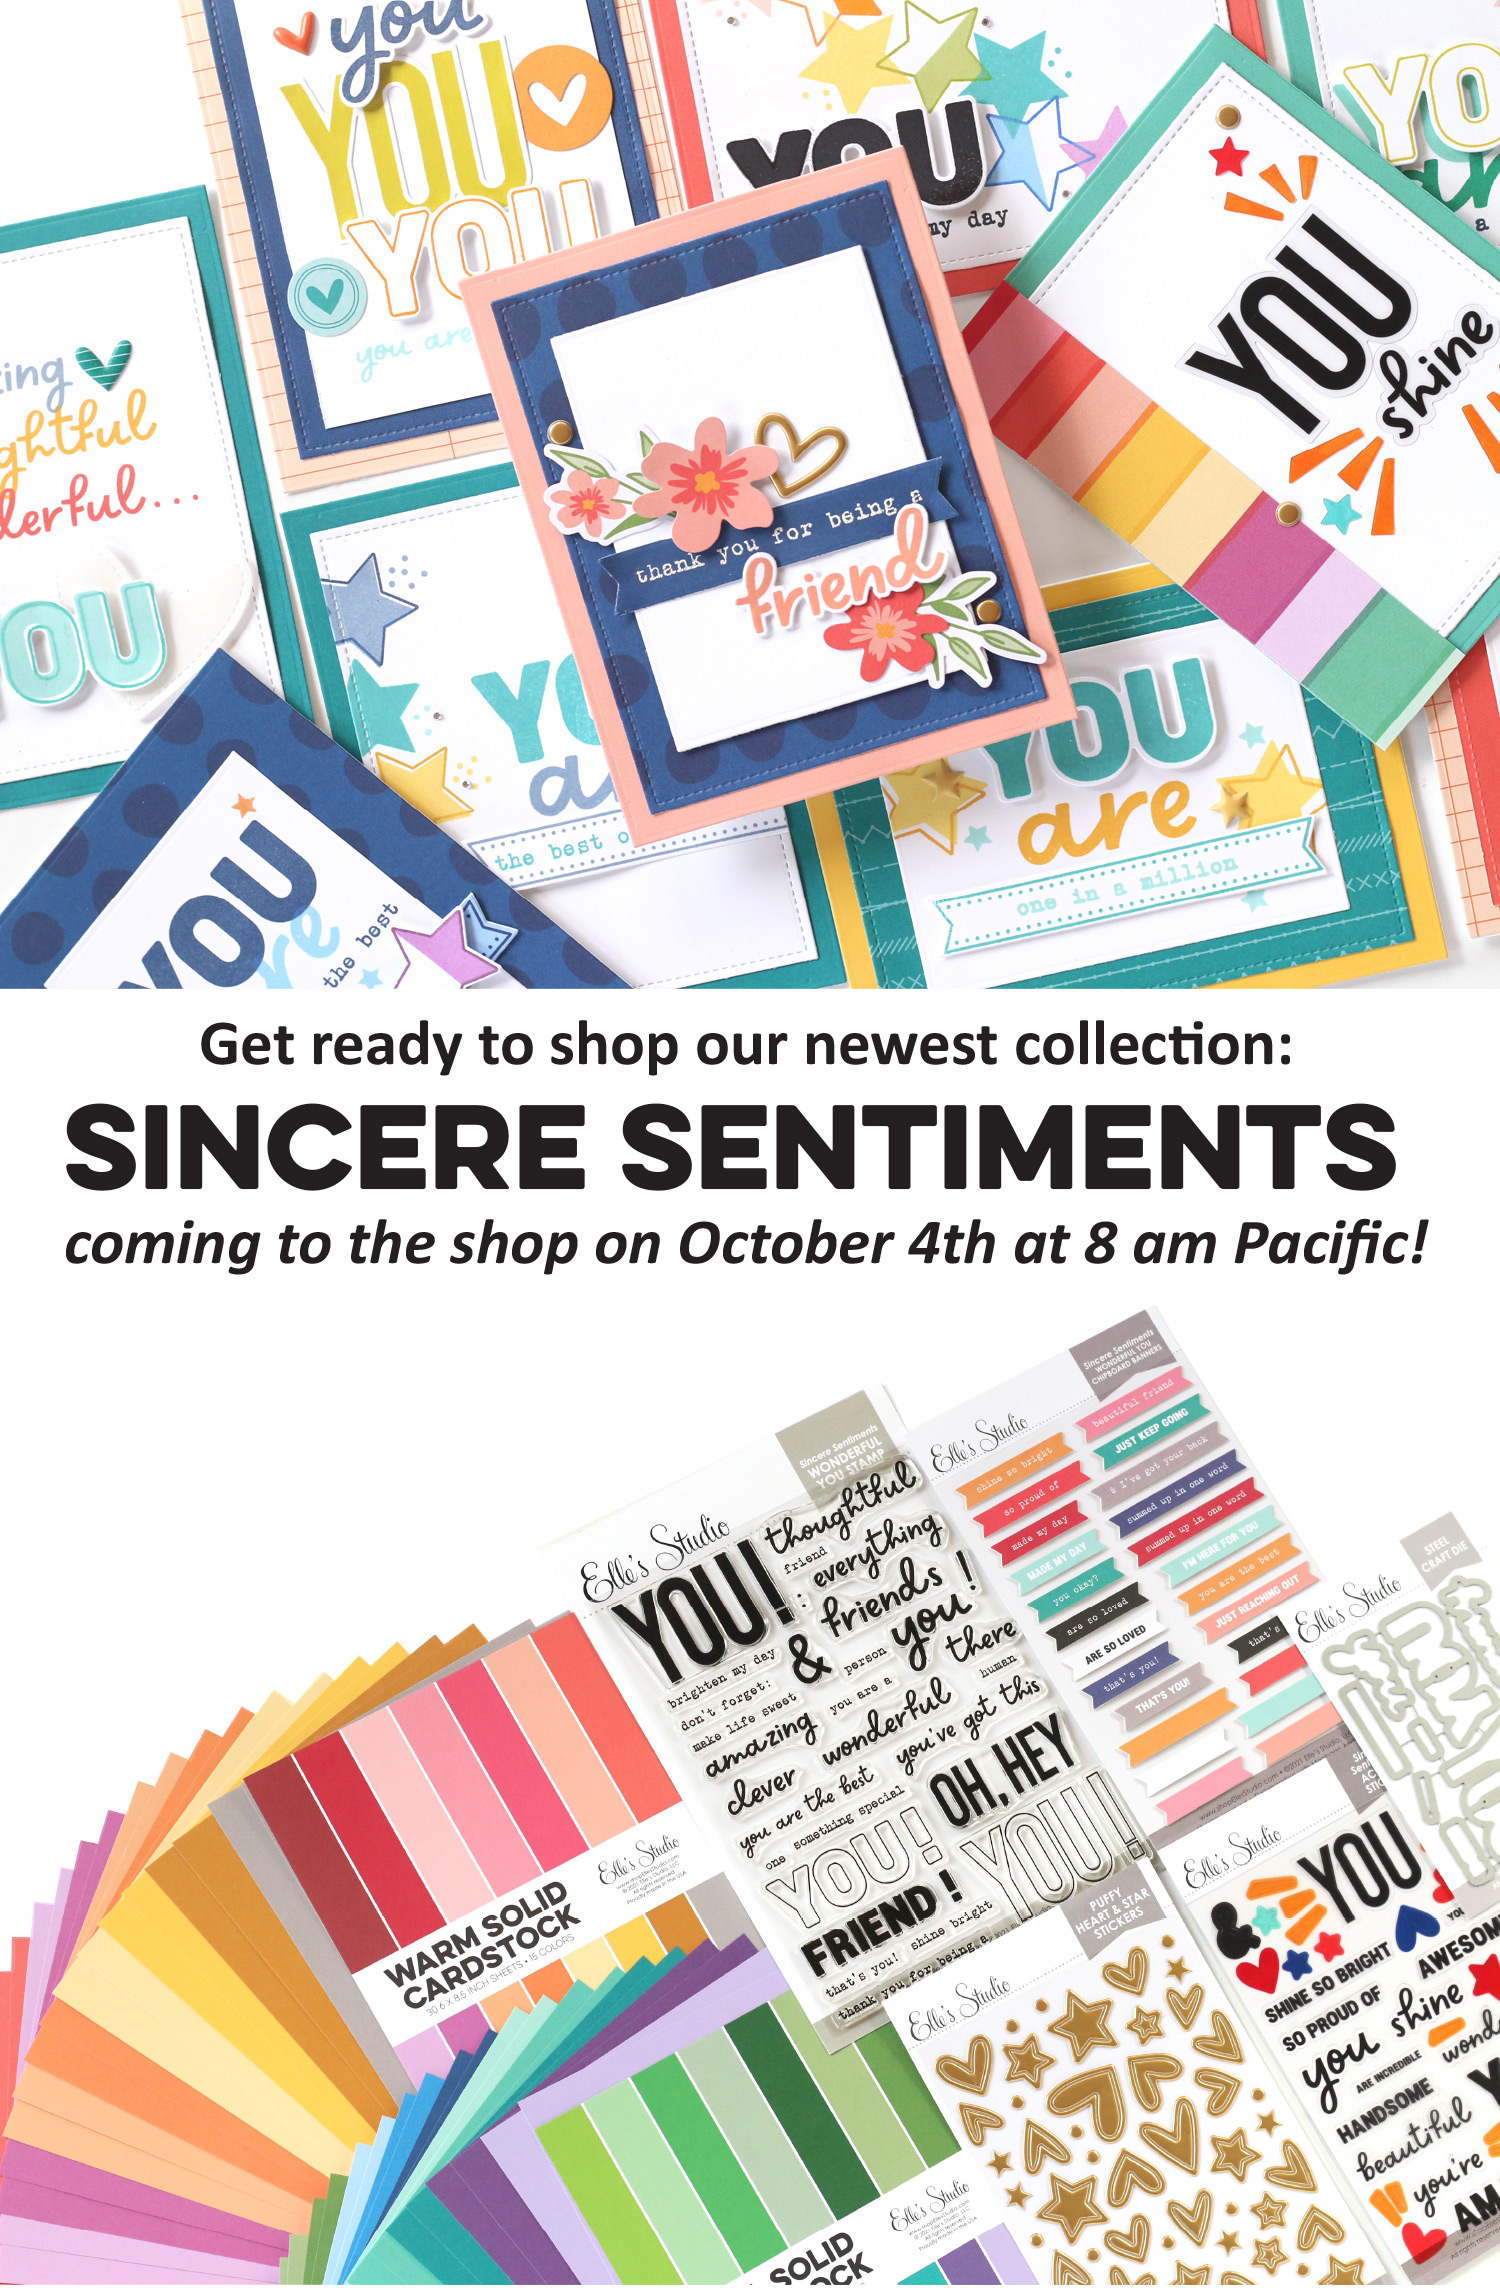
We are so excited to introduce our newest collection to the shop, Sincere Sentiments: Wonderful You! You’ll be able to create fun and beautiful cards in no time with these new products designed in collaboration with Meghann Andrew! Pair the stamps and stickers with your favorite patterned or solid paper and you’ll have a special card with a customized message for someone you want to celebrate, encourage or show how much you care!
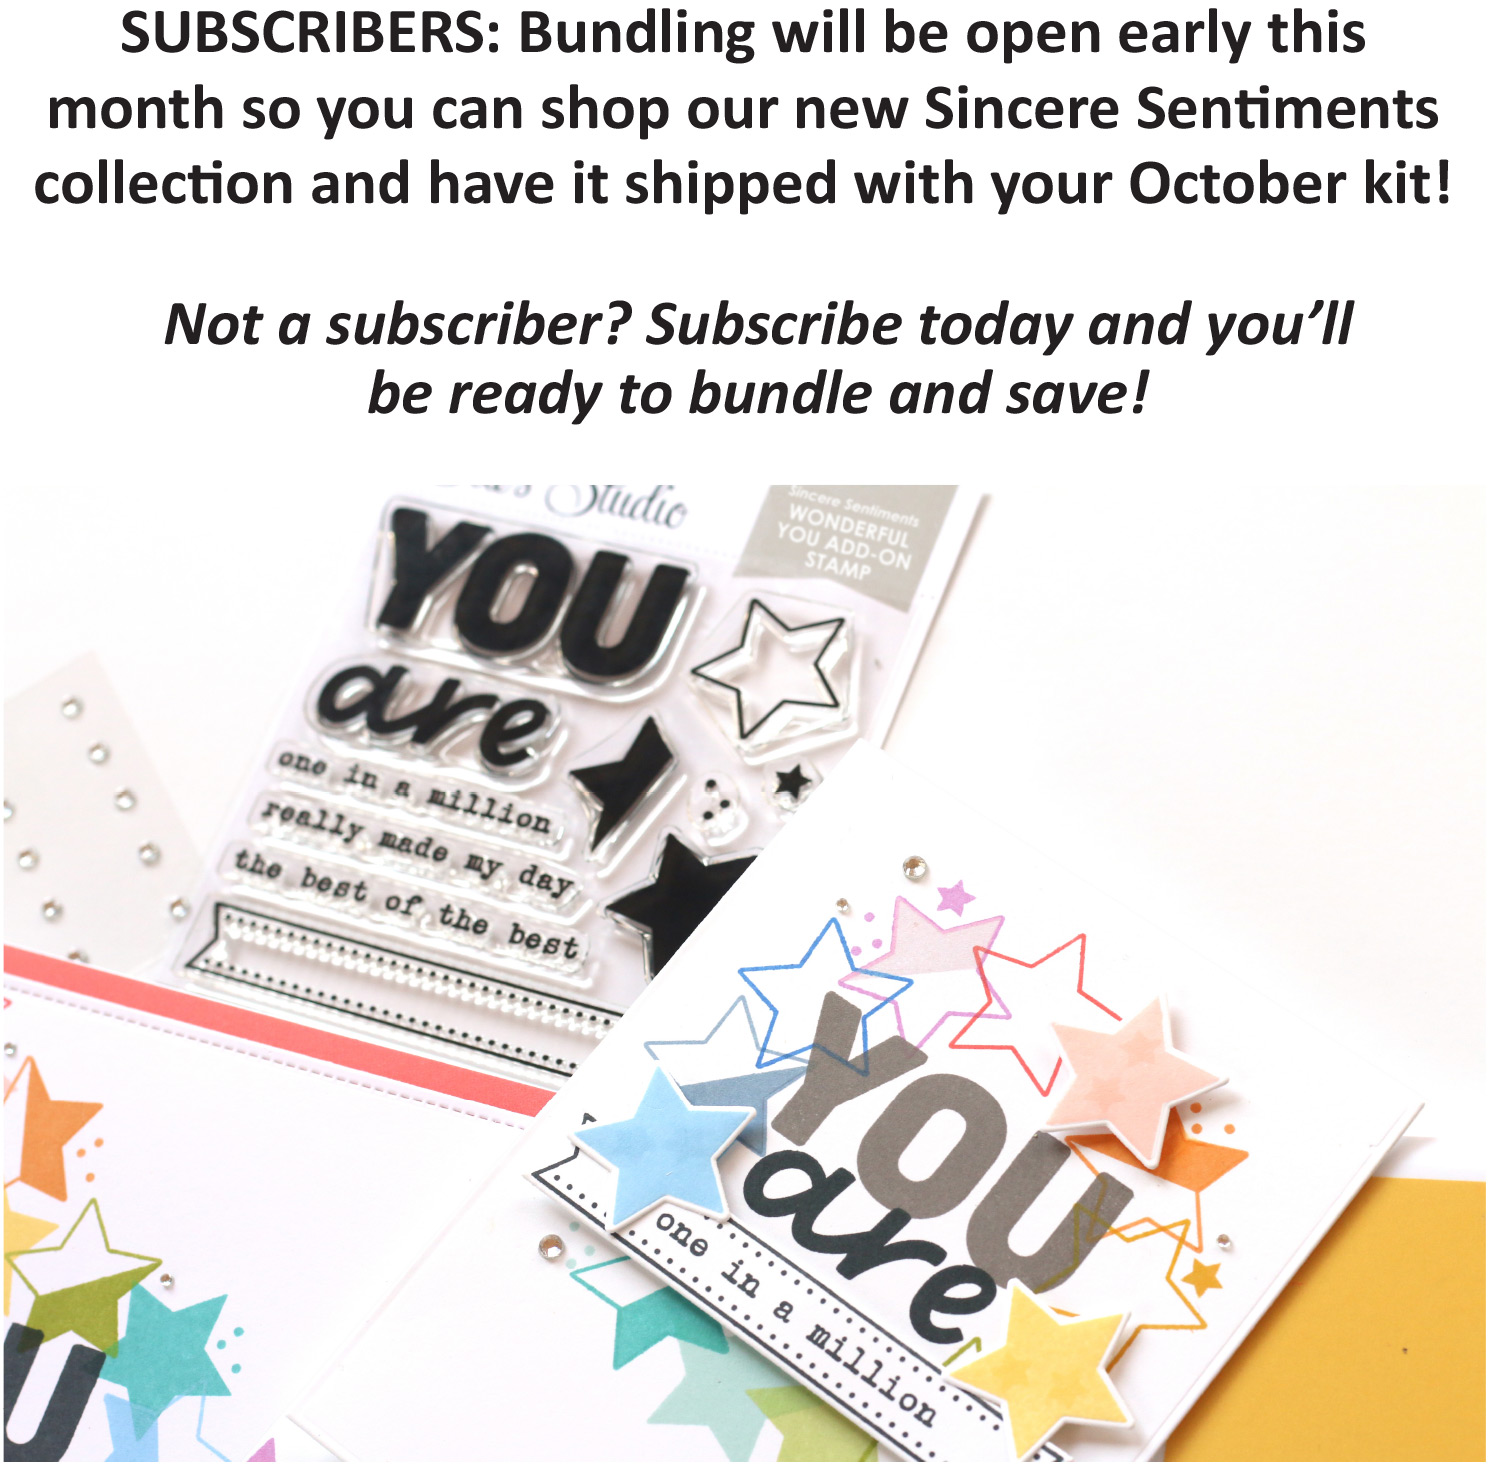
Kit Subscribers: We have opened bundling up early this month! Check your email for your October 1st or October 4th newsletter that contains your special coupon code so you can have your purchase shipped with your October kit and save on shipping!
Not a subscriber? Sign up now and you’ll be ready to bundle and save, too!
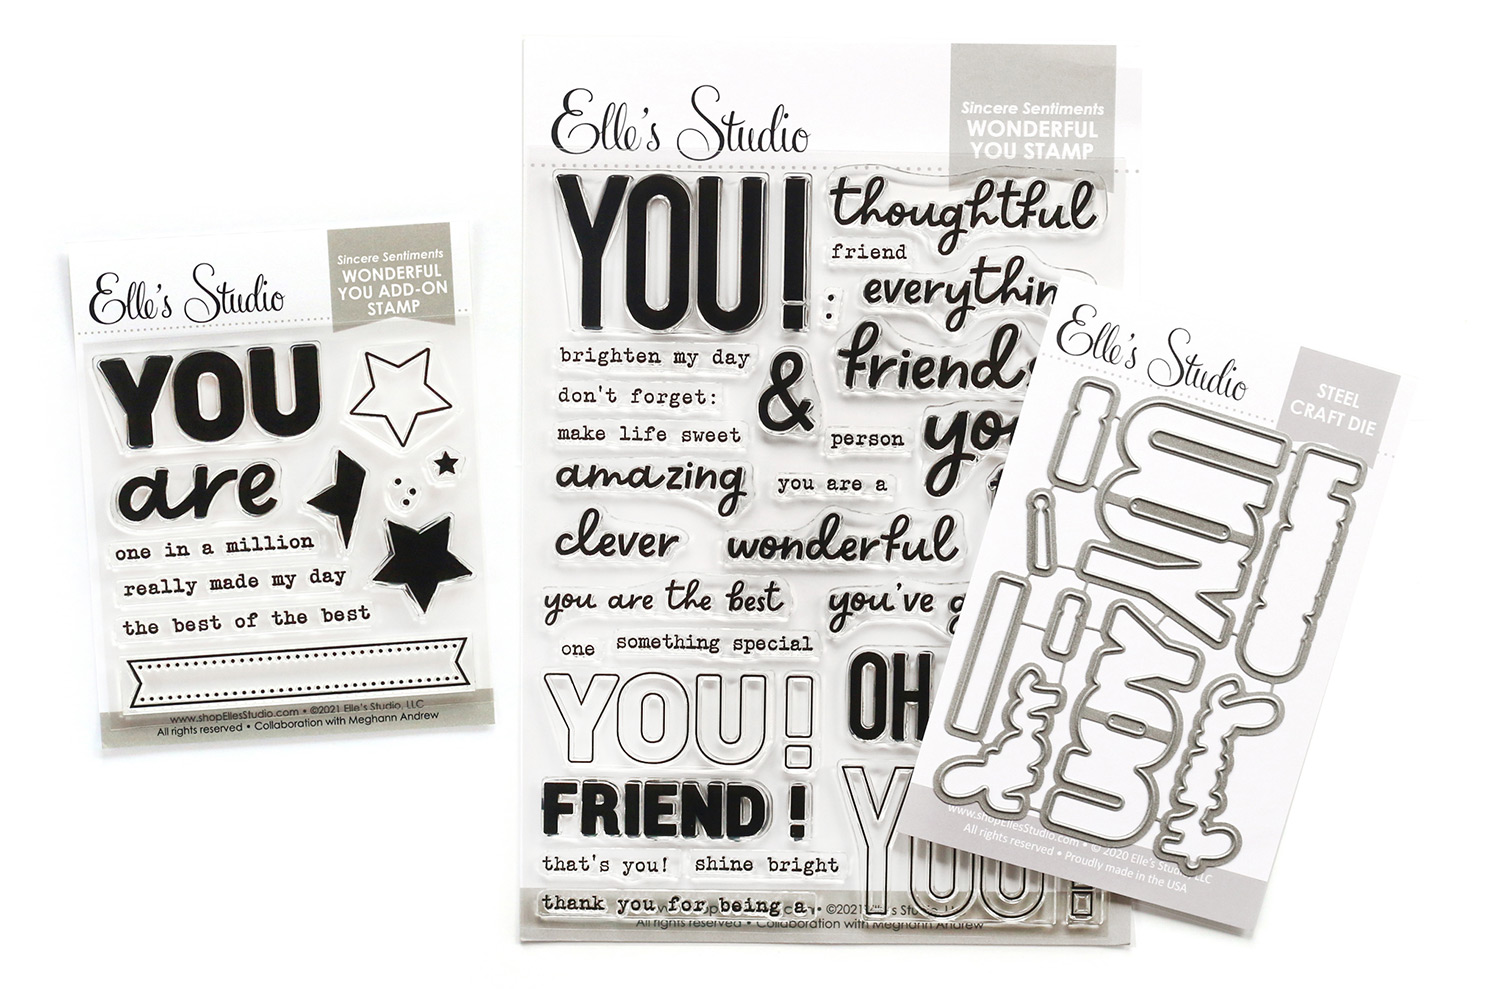
The collection starts out with a 4 x 4 inch and 6 x 8 inch stamp that coordinate with each other, and also work well on their own. Both of these stamps also work with the metal die we have to help you cut out the “you” and “friend” in different fonts!
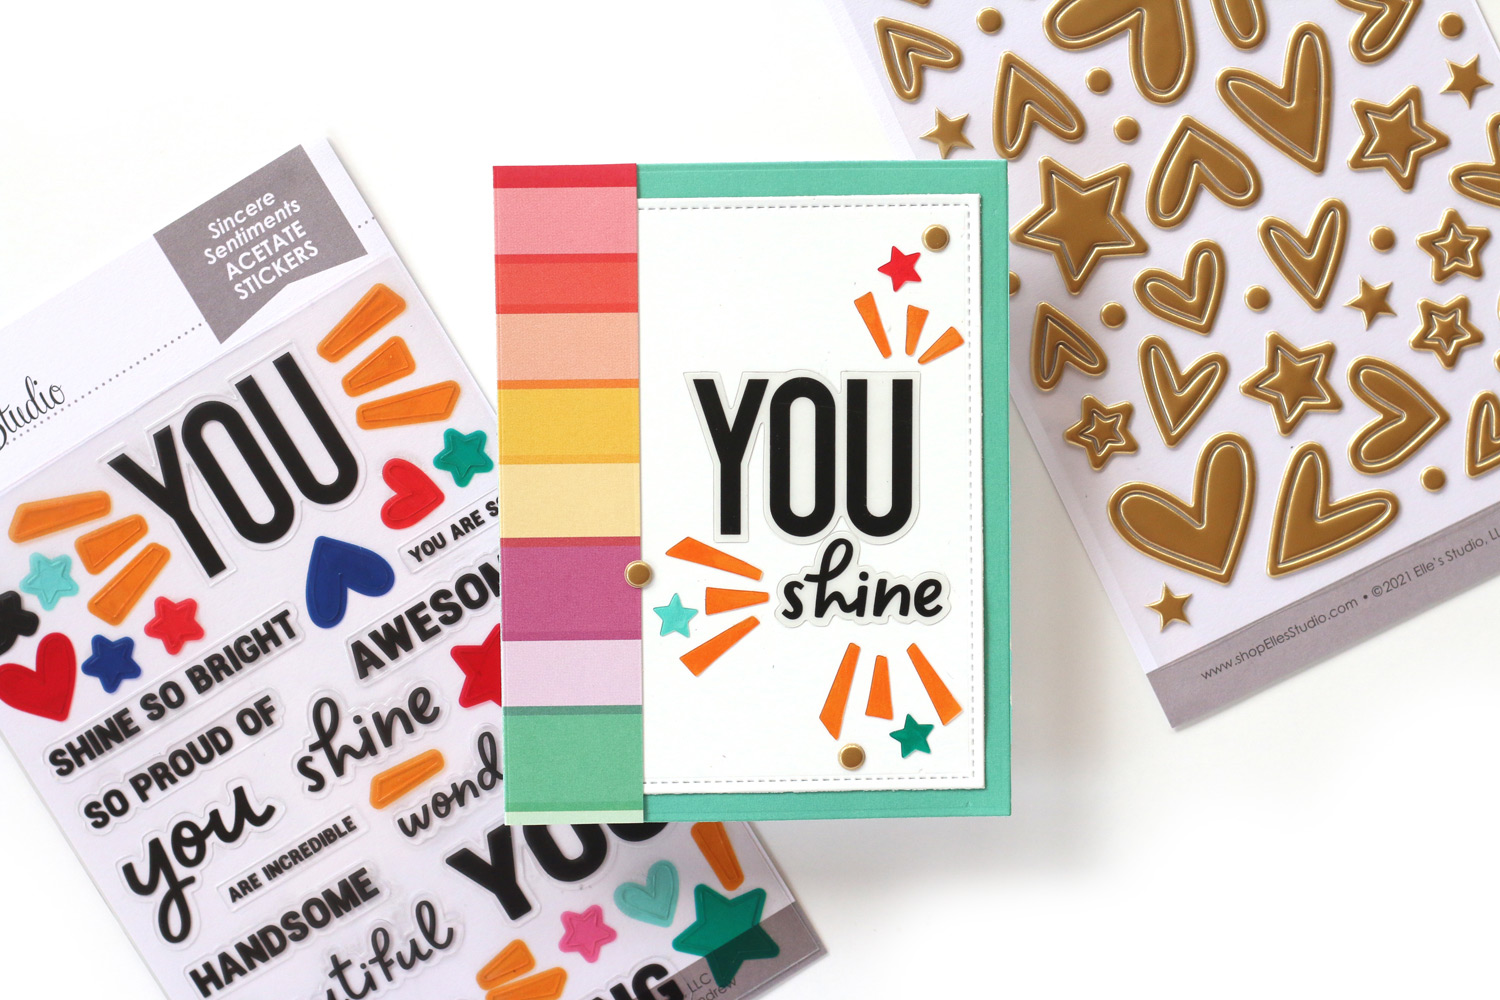
In addition to the Wonderful You stamps and dies, we have acetate sentiment stickers, chipboard stickers (that include blank banners you can stamp on!), and puffy gold hearts and stars to accent anything you stamp! Or, use them on their own to create the perfect sentiments with ease!
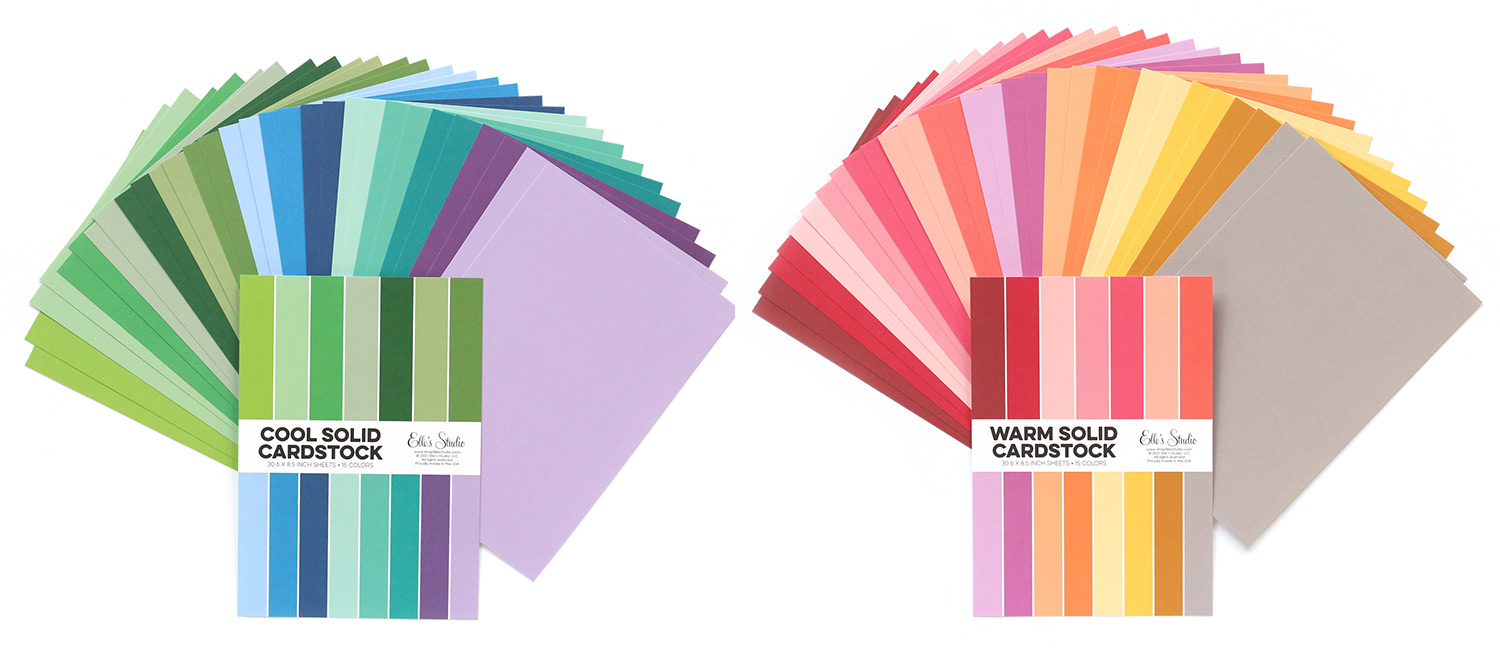
You love our signature colors, and now you can find them in solids! We have added cool and warm solid cardstock that coordinates with the colors we use year-round, along with the current patterned paper stacks that we already have in the shop!
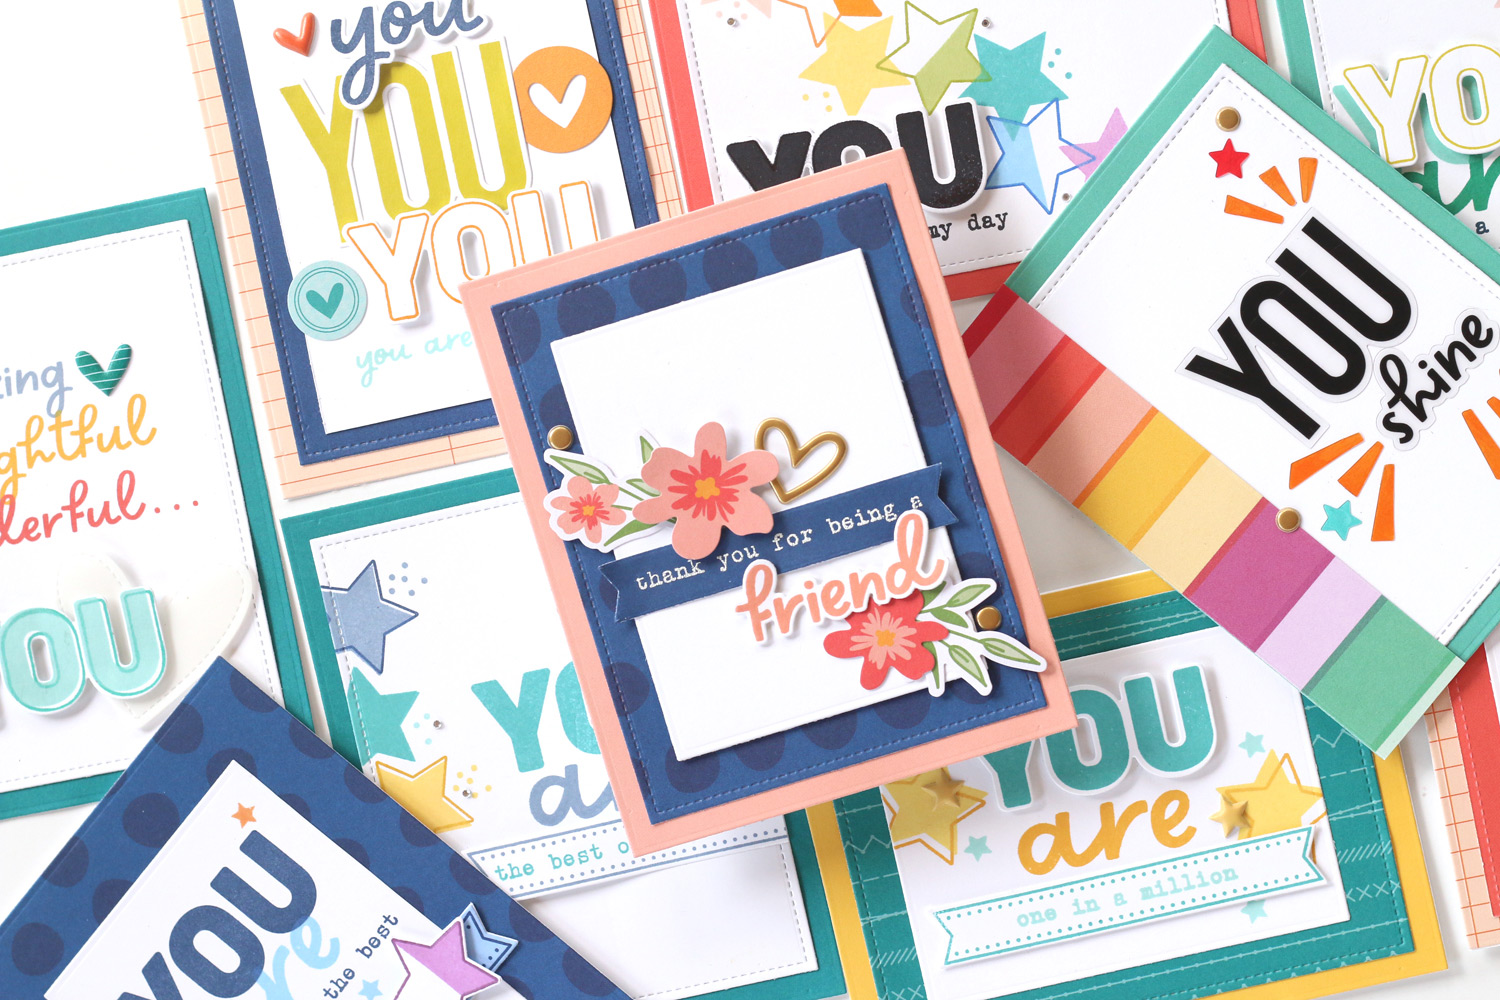
You’ll have endless card making possibilities by mixing and matching different sentiments and products in this new collection! Meghann Andrew created these cards for us to share today, using our new Sincere Sentiments products, combined with other current shop products, to get you inspired for when your box arrives! Here is a closer look at each one:
We can’t wait to see the cards that you create with these fun, new products! Make sure you share your projects with us in our Facebook group and use the #EllesStudio hashtag when posting on Instagram for a chance to be featured on our feed and win a gift certificate to our shop!
And, kit subscribers! Don’t forget – bundling is open early this month! Check your email for your October 1st or October 4th newsletter that contains your special coupon code so you can shop now and have your purchase shipped with your October kit to save on shipping! If you have any trouble or can’t find your emailed coupon code, please email us at info@shopellesstudio.com
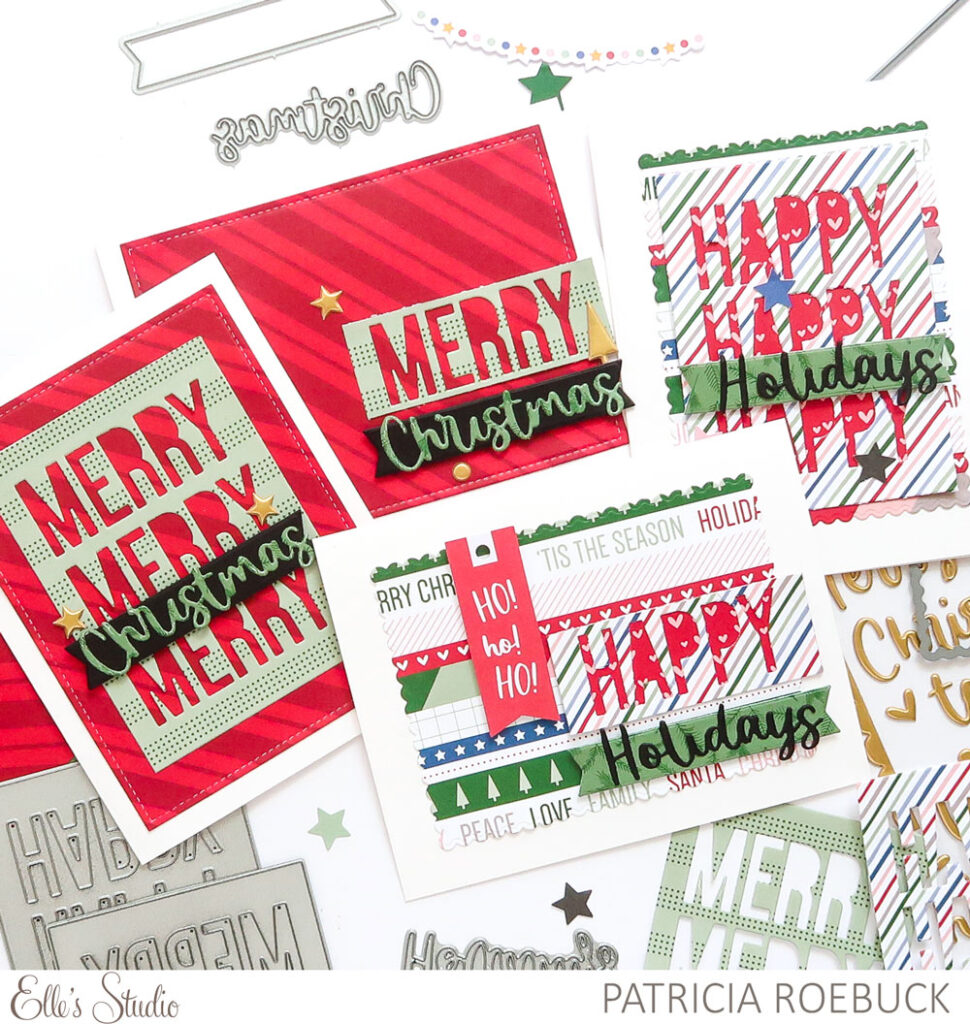
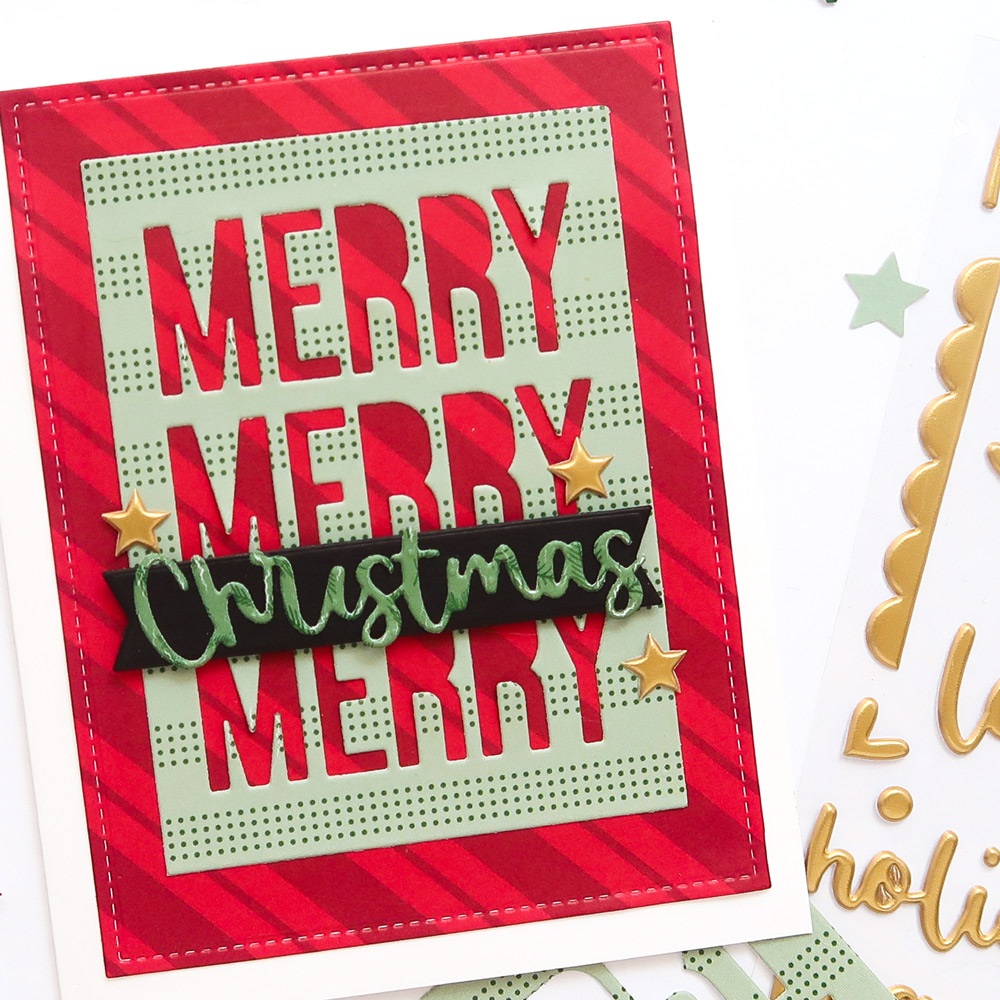
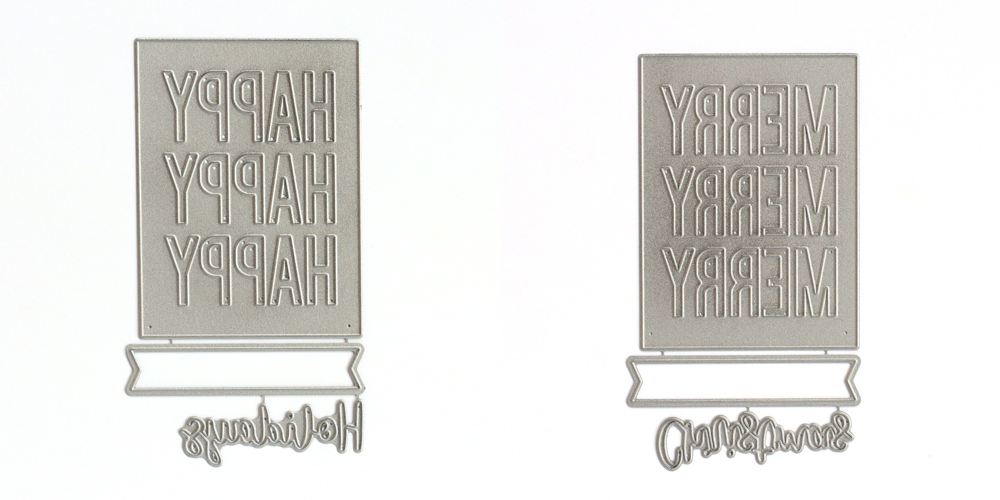
Hello, Elle’s Studio friends and happy World Cardmaking Day! It’s Patricia, and I am really excited to be on the blog today. Once I start making cards, I usually make a few, so today’s post is all about keeping the cards simple using the new Merry Christmas and Happy Holidays Metal Dies so we can make several at a time. The holidays are coming and for some of us that means sending Christmas cards. We need to get busy making them!
I started out by using the metal die plates to create the Merry Christmas and Happy Holidays sentiments as inMerry Christmas Metal Die. To add a simple, but beautiful detail to the card panel, I used a bold, red pattern from the Wonder Paper Stack with the Layered Card Metal Die to add a stitched look around the edge. The pale green upper with bold red under the die cut really pops. The dies and the paper do all the work. To make the ‘Christmas’ die cut stand out, I used a darker green pattern from the Wonder Paper Stack, and adhered it to the banner die cut from plain black cardstock.
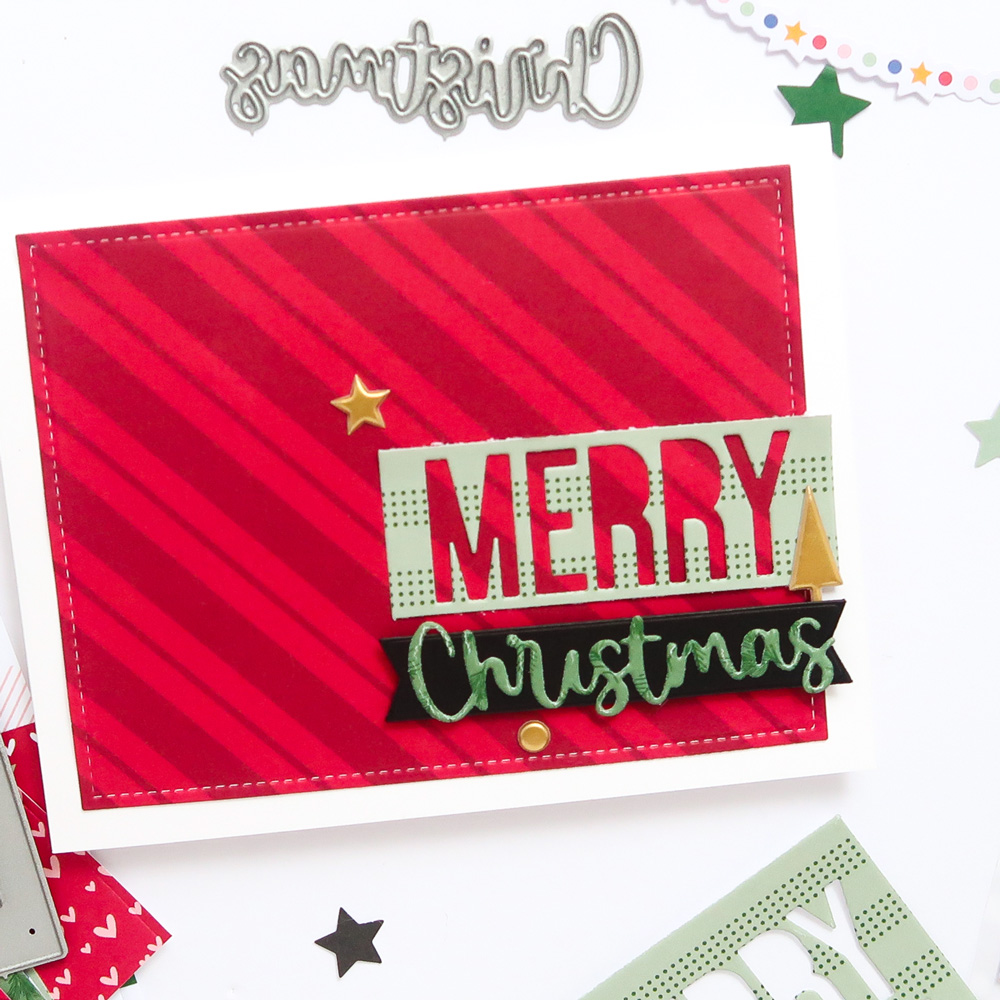
These dies do not have to be used as a full card panel. Staying with all the same colors, I used the exact same products, but instead created a landscape card. I trimmed one “merry” off of the three after die cutting using the green paper, then created a cluster with the same “Christmas” die cut and papers I did on the first. To add another layer of texture, I added the Holiday Magic Gold Puffy Stickers to both cards.
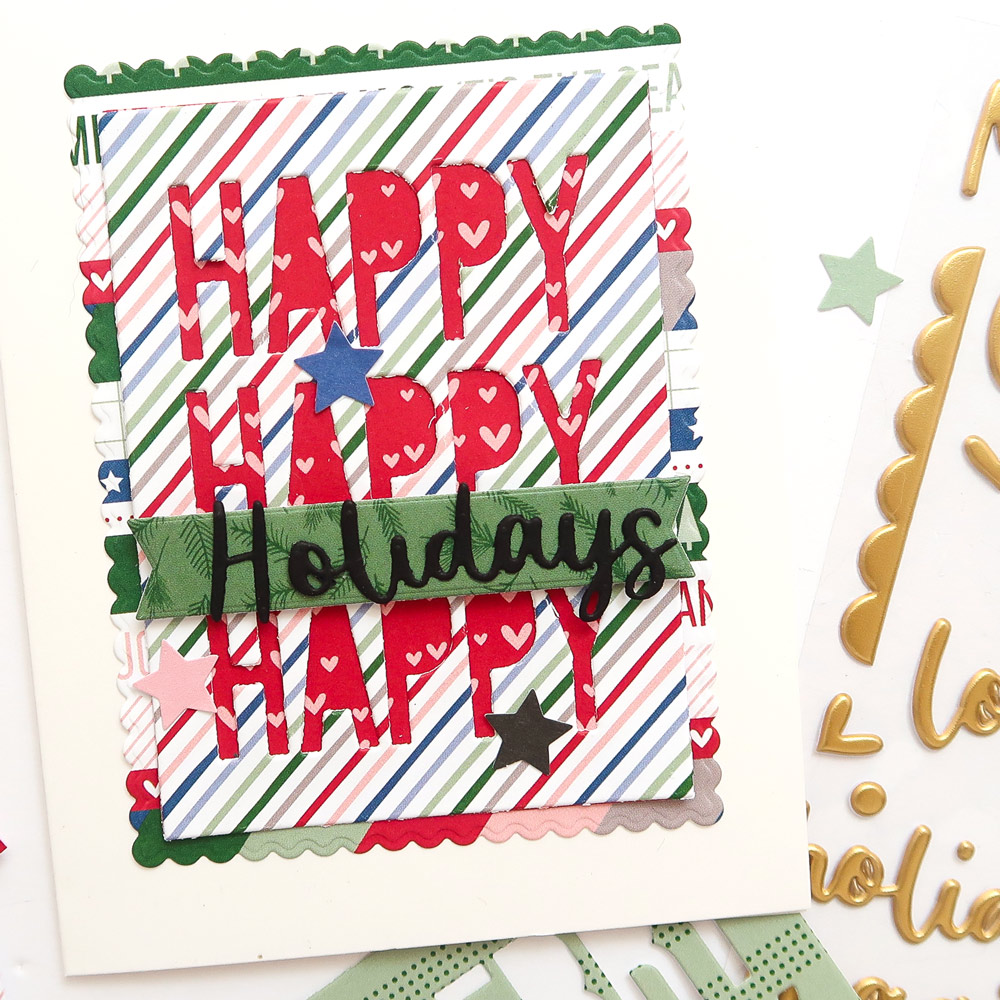
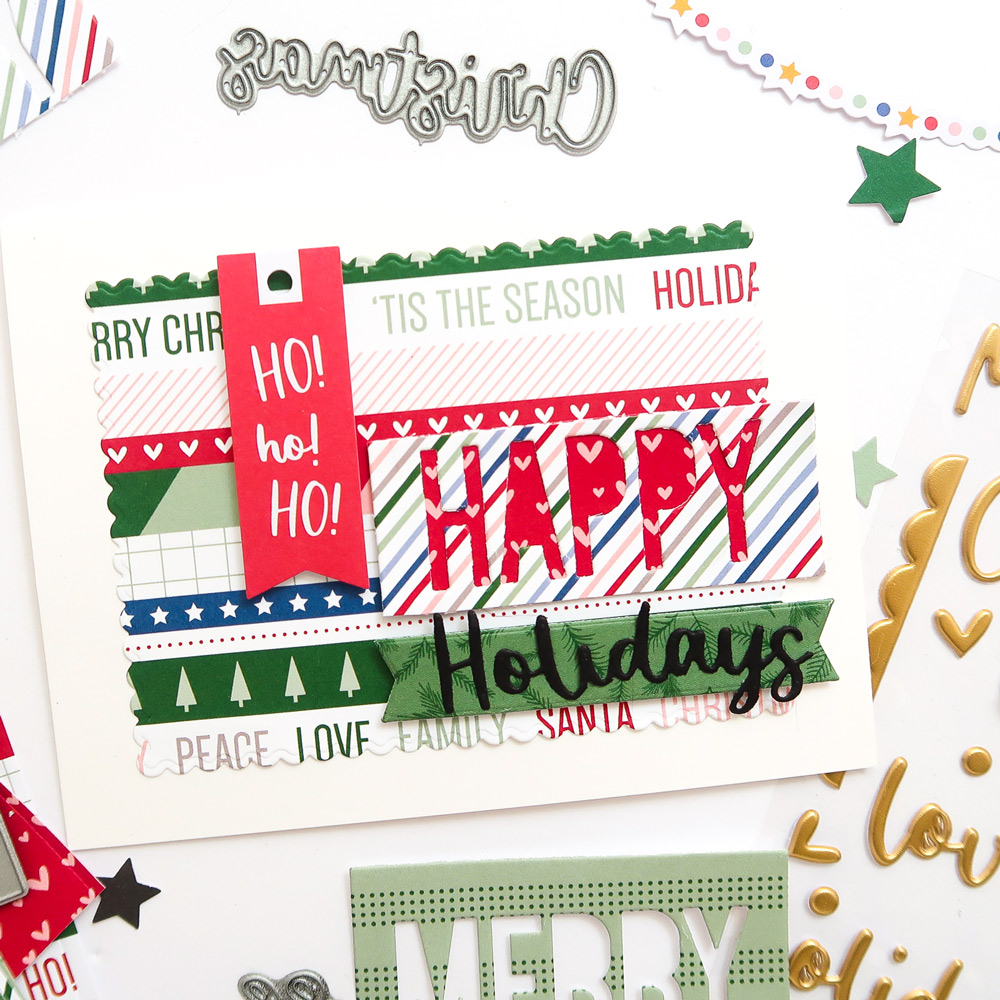
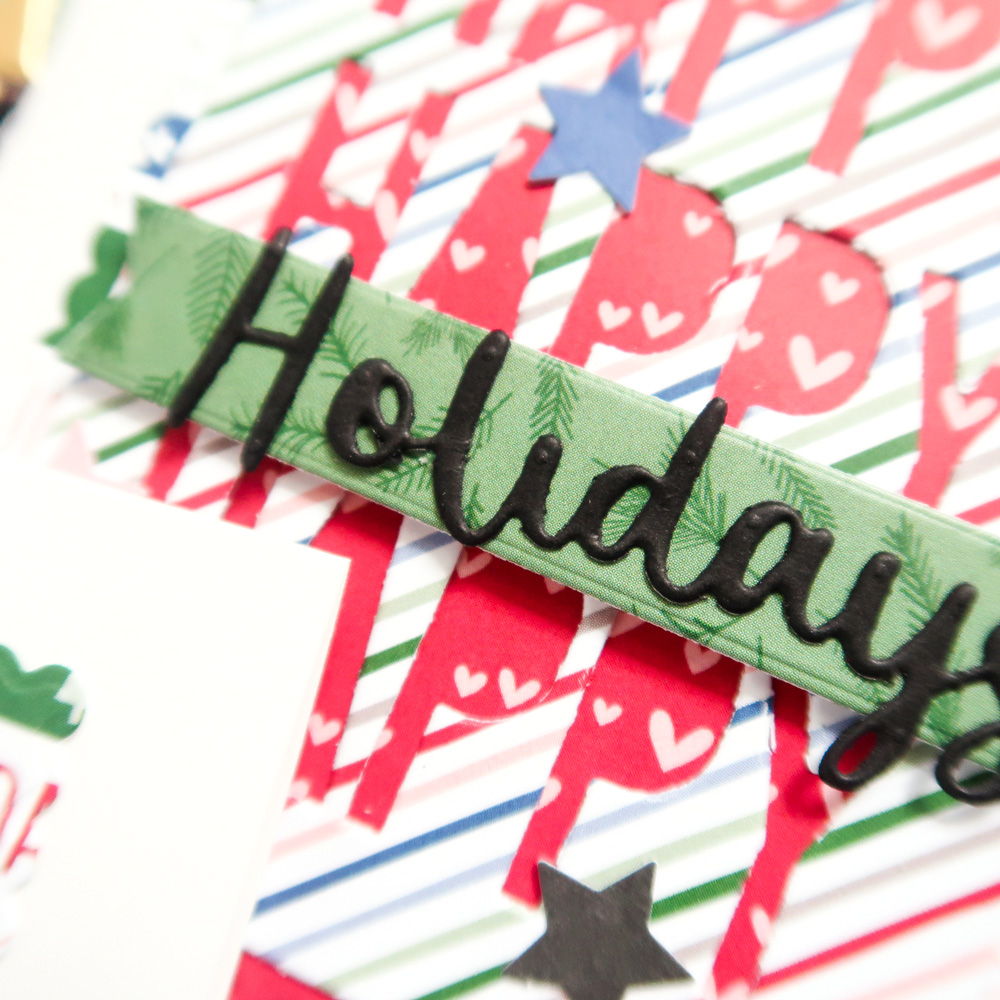
Like the first two cards, these next two cards use the same patterned papers from the Wonder Paper Stack, but this time with more pattern. I purposely chose the lined graphic paper as the card panel using a die from the Layered Card Metal Die, and then chose the diagonal pattern to use with the Happy Holidays Metal Die. The only thing I had to add was another layer of bold pattern under the die for it to stand out.
For each card, I used the same green patterned paper for the banner using the Happy Holidays Metal Die and the “holidays” word using plain black cardstock. I left the sentiments without using the dot for the ‘I’ which makes it easier when creating several cards at once. If you have the time, use a tiny bit of glue to attach each dot. To finish, I added die cuts from the Document December 2021 Kit to both cards.
Just a few products with the Merry Christmas, Happy Holidays, and Layered Card Metal Dies can make so many varied cards by just making simple changes! Take a look at how these came together in my process video:
I hope you are inspired and ready to start creating your holiday cards using these easy-to-use products! Happy creating!
Find our newest card dies that make creating holiday card fronts easy and beautiful in our shop’s Document December collection!
Comments Off on World Cardmaking Day 2021: Holiday Greetings Made Simple with Patricia Roebuck | Share This
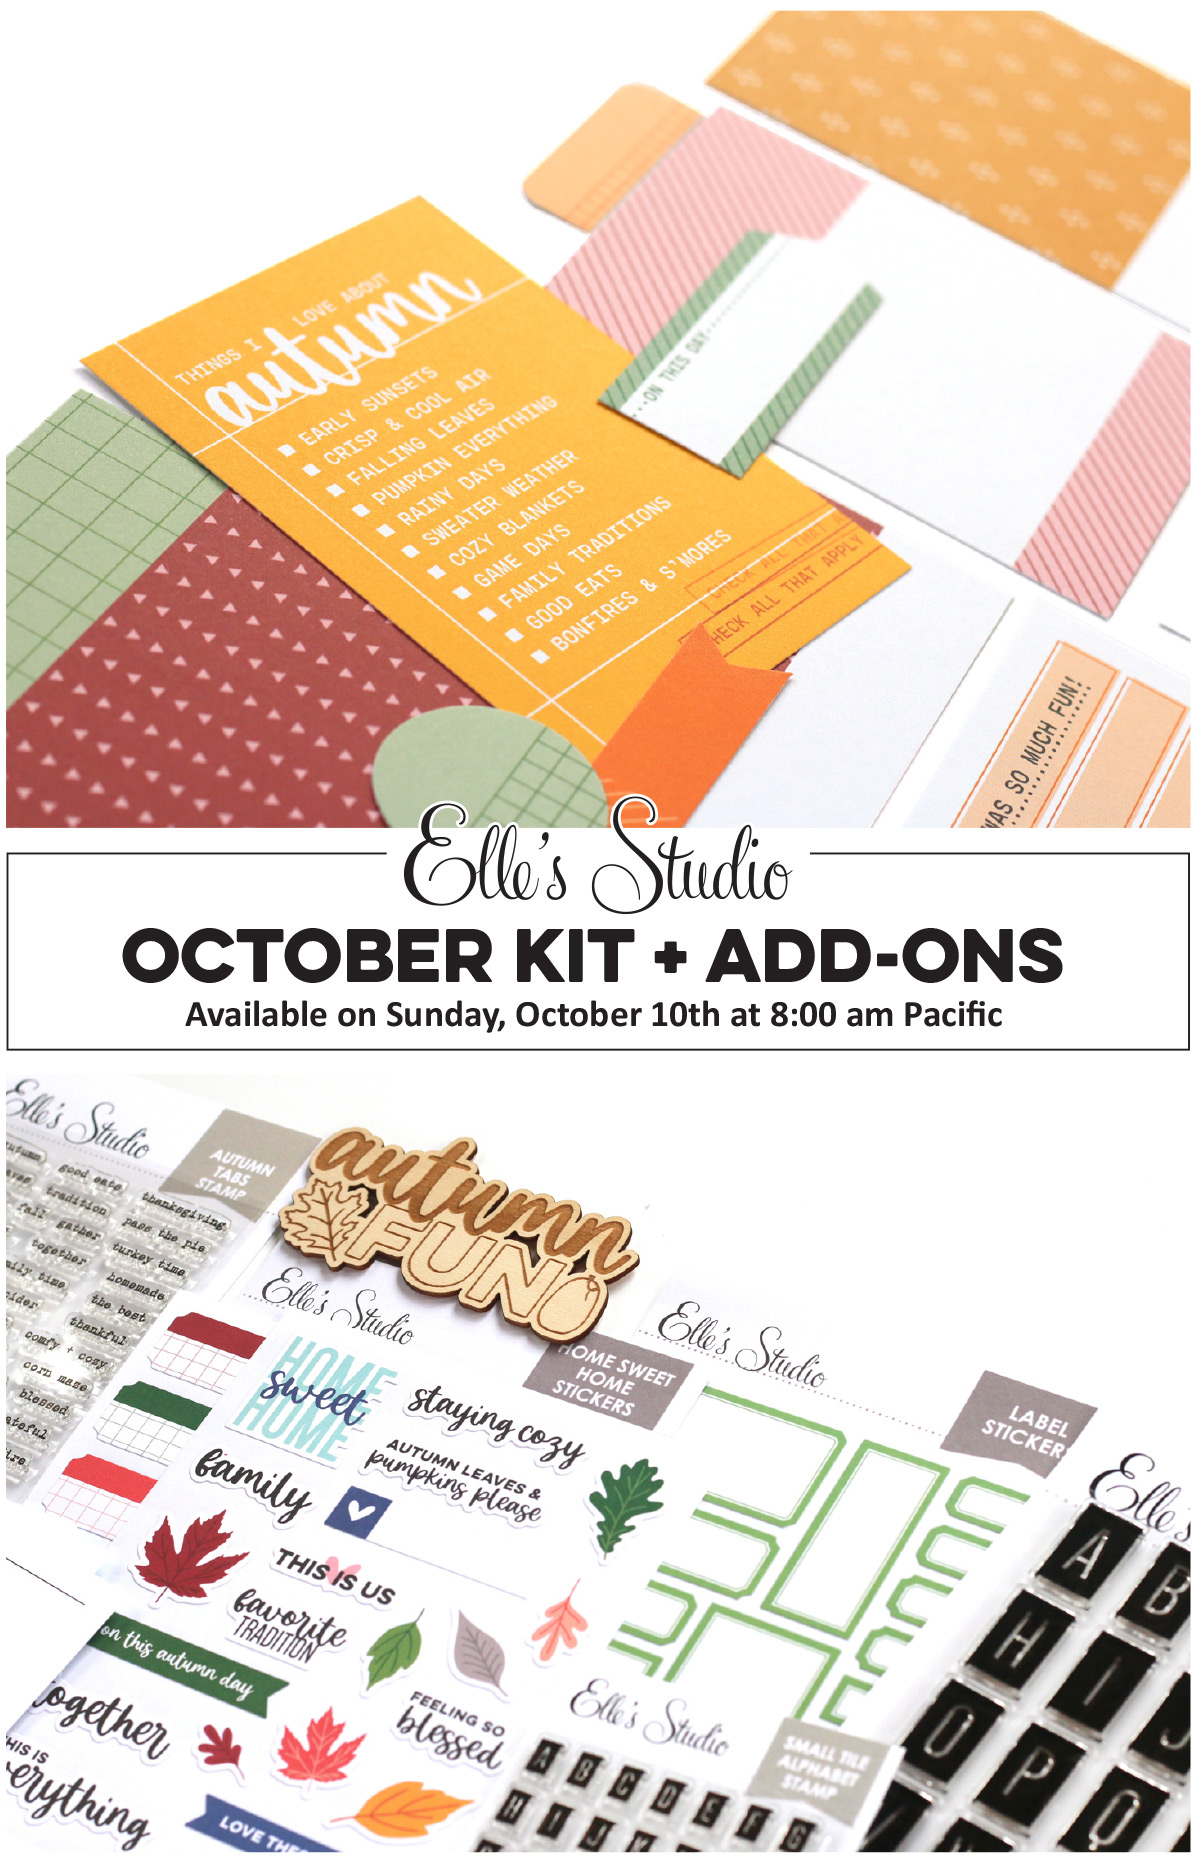
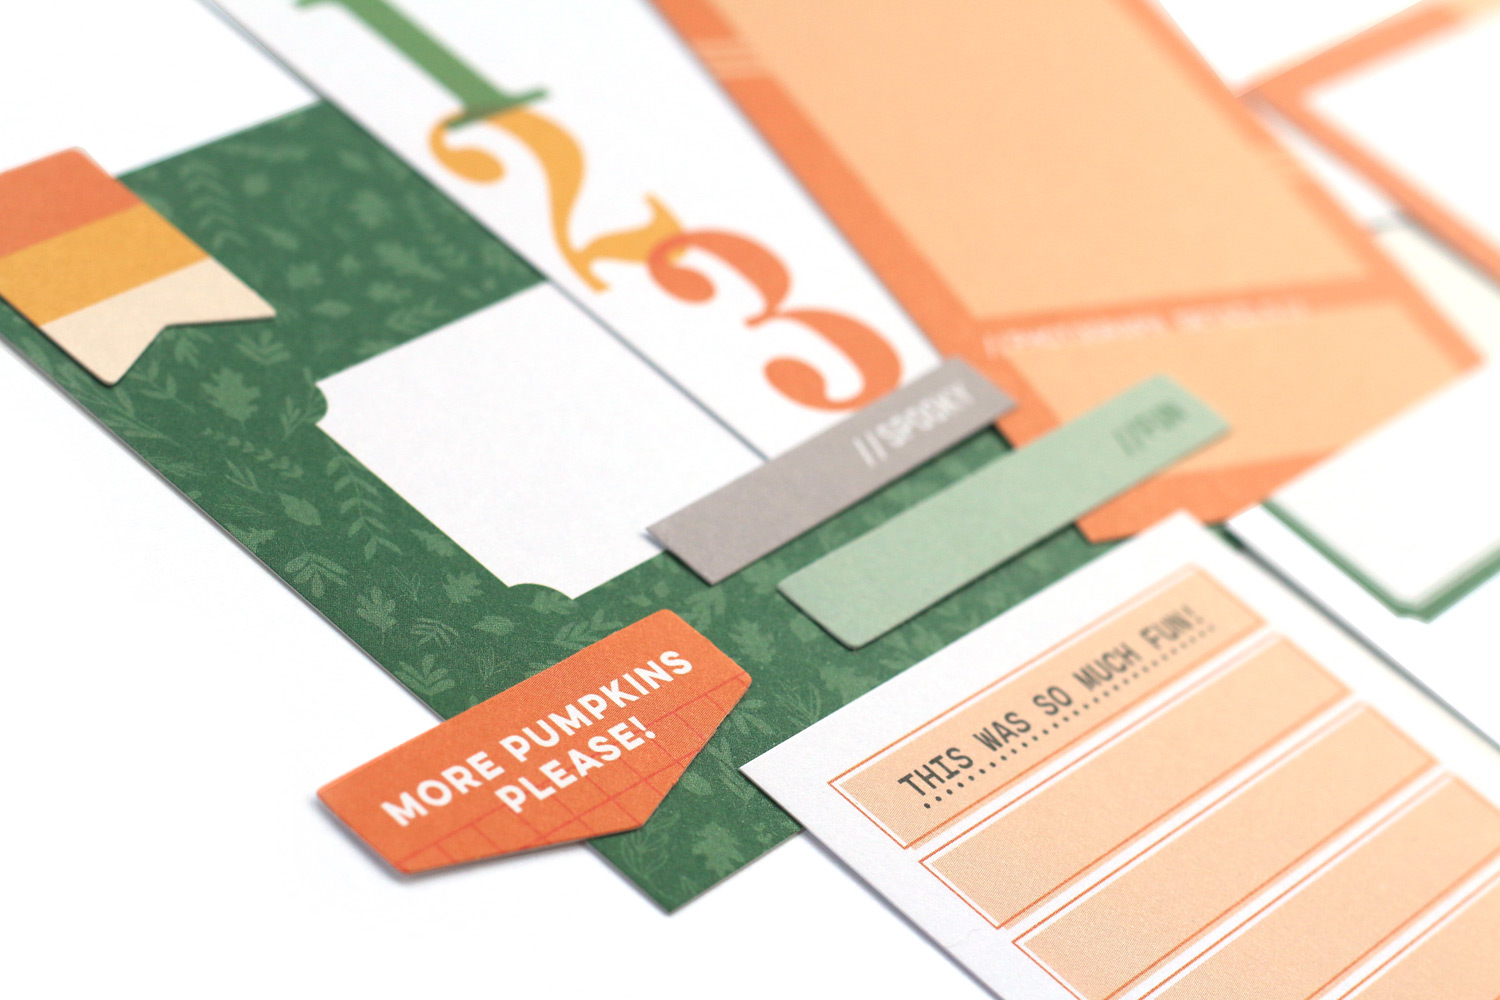
Our October kit + coordinating add-ons reveal is almost here and we can’t wait to share with you all the new and exclusive products that will be available soon! Our reveal will be full of the perfect products to document your October stories and take you right into the month of November! This month, our October kit will include 3 – 4 x 6 inch tags, 18 – 3 x 4 inch tags, and 26 die cuts!
This month we also have an early + extra SURPRISE and we are so excited to be bringing these new products to our shop, that were designed in collaboration with Meghann Andrew, to help you create fun and special cards, using our newest stamps and stickers!
Not a subscriber? You can pre-order our October kit now and lock in our $9.99 kit price by starting a subscription today! You’ll want to choose our SUBSCRIBE & SAVE option to get signed up and start your subscription with our October kit. We will then hold your kit and you’ll be ready to bundle and save at our October 10th reveal! Details on how to bundle with your subscription order will be emailed to you once you have purchased this product.
Kit subscribers, don’t forget! Along with being able to bundle any products from our shop that will ship for FREE with your kit during our 24-hour bundling period, starting on the 10th at 8:00 am Pacific each month, our subscribers will also have access to special discounts on select items! These discounted items can be found in our SALE section during our 24-hour bundling period, and you must be logged into your kit subscriber account to see them. Quick note: Our kits and add-ons are available without a subscription each month, too.
We are so excited to share all of these new products with you and see how you use them on your projects! Make sure you set your alarm and mark your calendar for Monday, October 4th at 8:00 am Pacific for our Sincere Sentiments reveal and then Sunday, October 10th at 8:00 am Pacific for our October kit and add-ons reveal! We hope to see you there!
Comments Off on A sneak peek of our October 10th reveal! | Share This
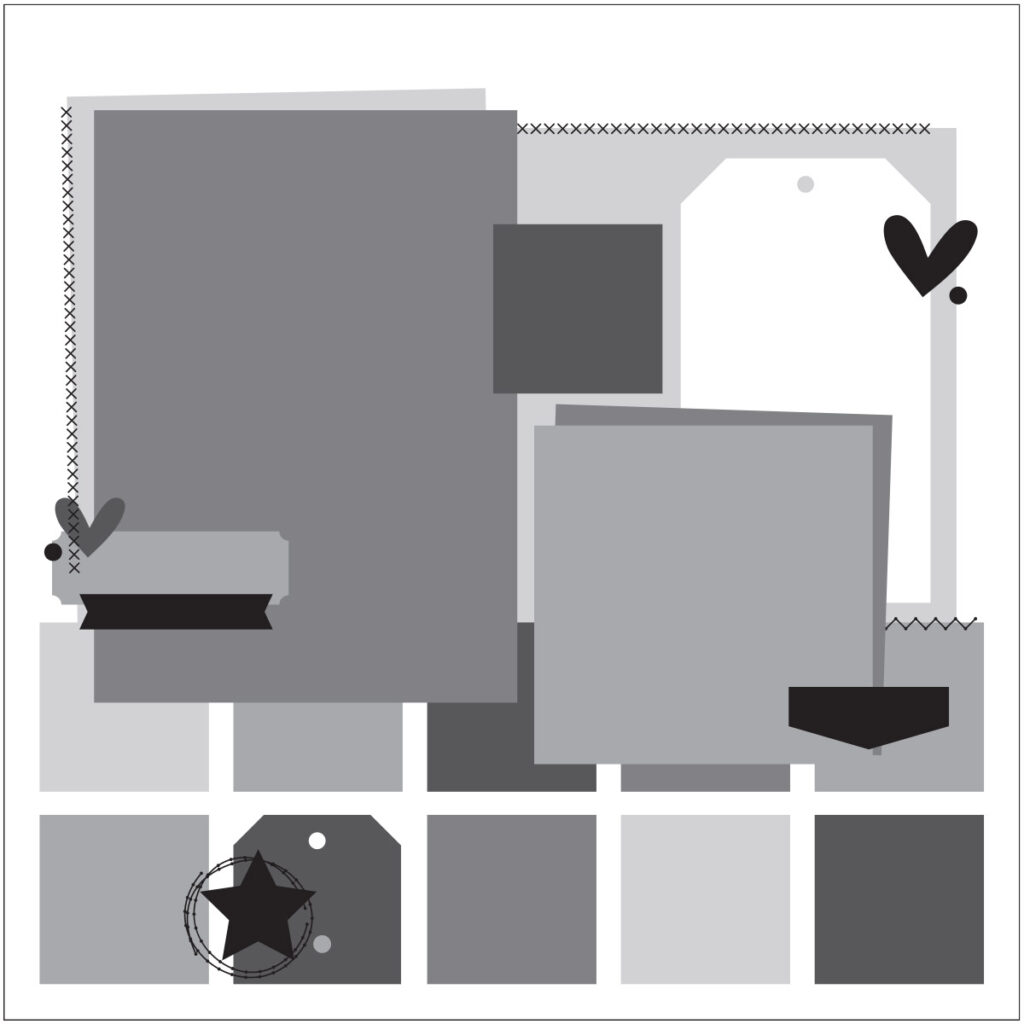
Hello crafty friends! It’s Nicole here and today I’m working with a gorgeous sketch for my inspiration using some of my favorite September kit and add-ons. Here’s a look at the sketch that I’ll be following today:
I love the repeating shape on the bottom of this sketch. For my project, I’ll be focusing a lot in that area. I’ll also be following this sketch pretty closely and only make a few adjustments.
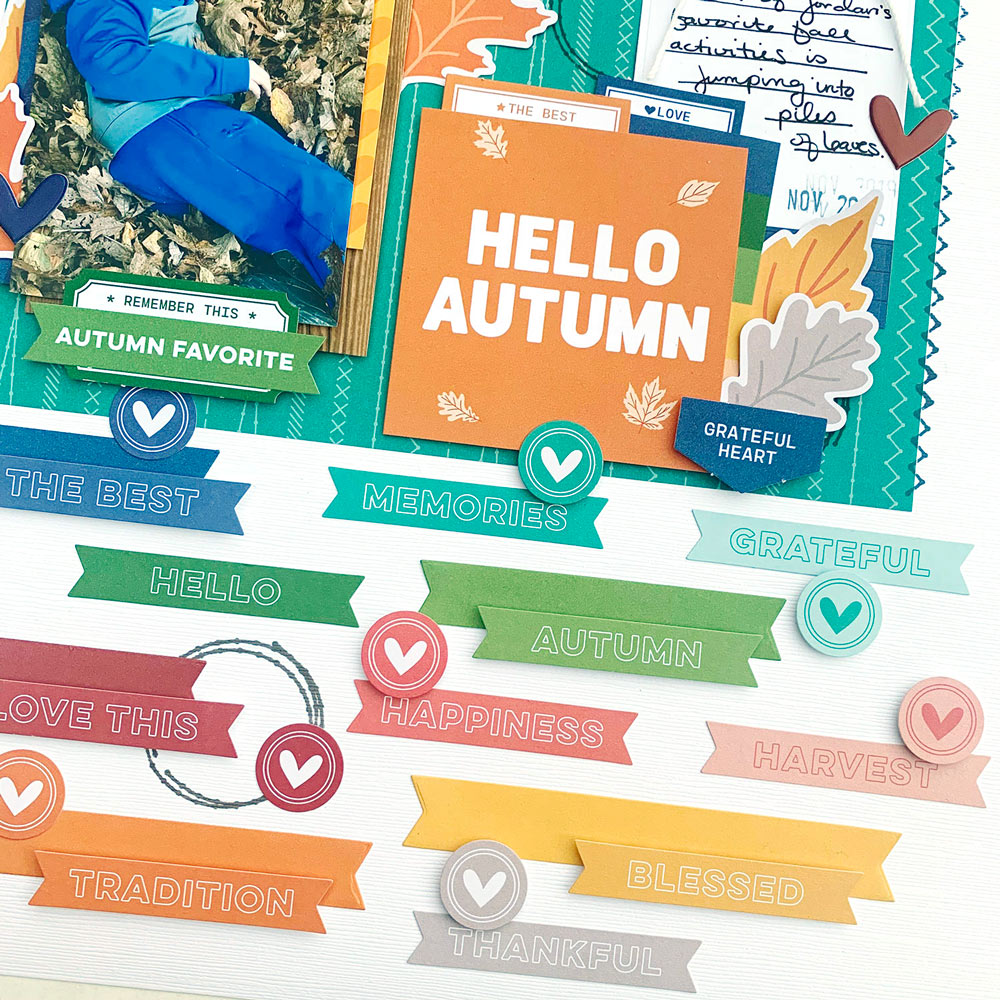
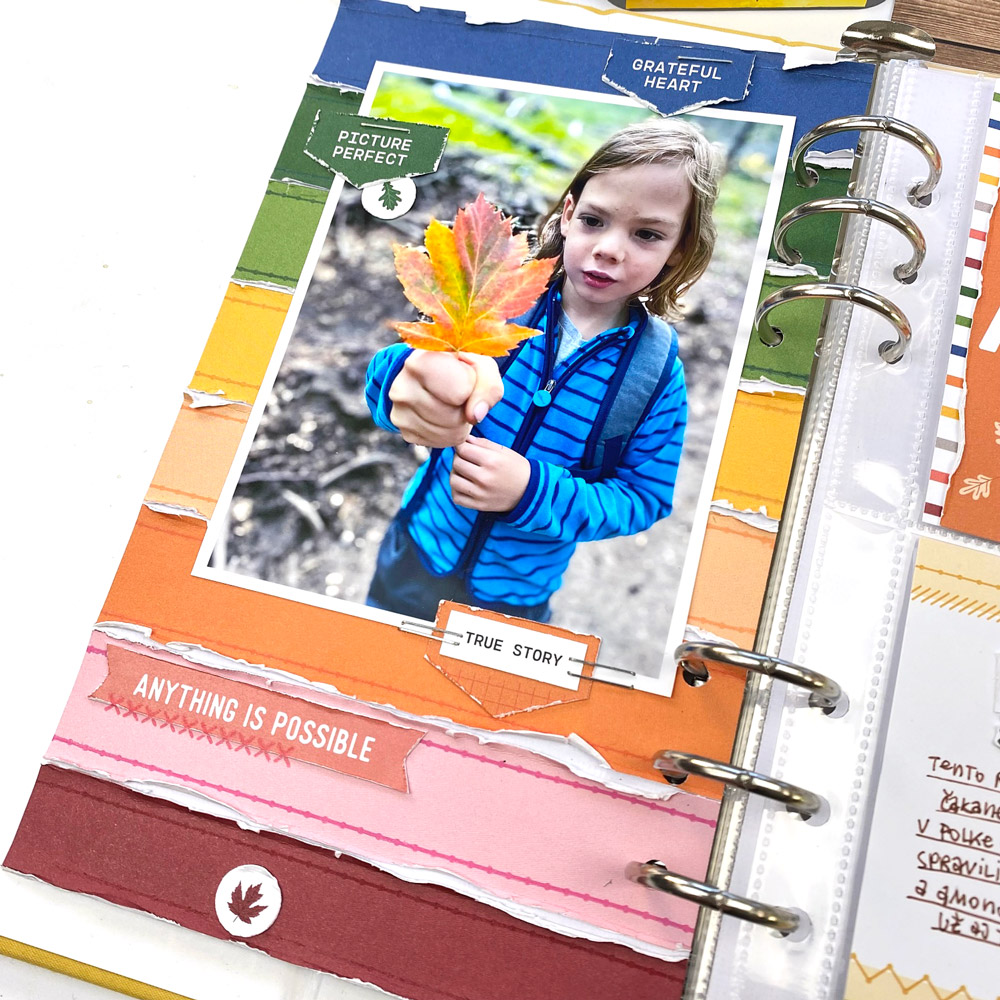
As I mentioned, I love the repeated pattern on the bottom of the sketch. This would be very easy to re-create using square pieces of patterned paper. For my project, I chose to use all of the banners in the Autumn Die Cuts along with creating some additional solid color banners, using the Banners Metal Dies and the Thankful Paper Stack. Using the solid color banners, I added those under the die cut pieces to create more tone-on-tone dimension and help fill the white space. In some places I even popped banners up on foam adhesive to give it even more lift. I also used the circle stitched stamp from the Home Sewn Stitches Stamp to add pops of grey behind those banners and also the top and side of my page.
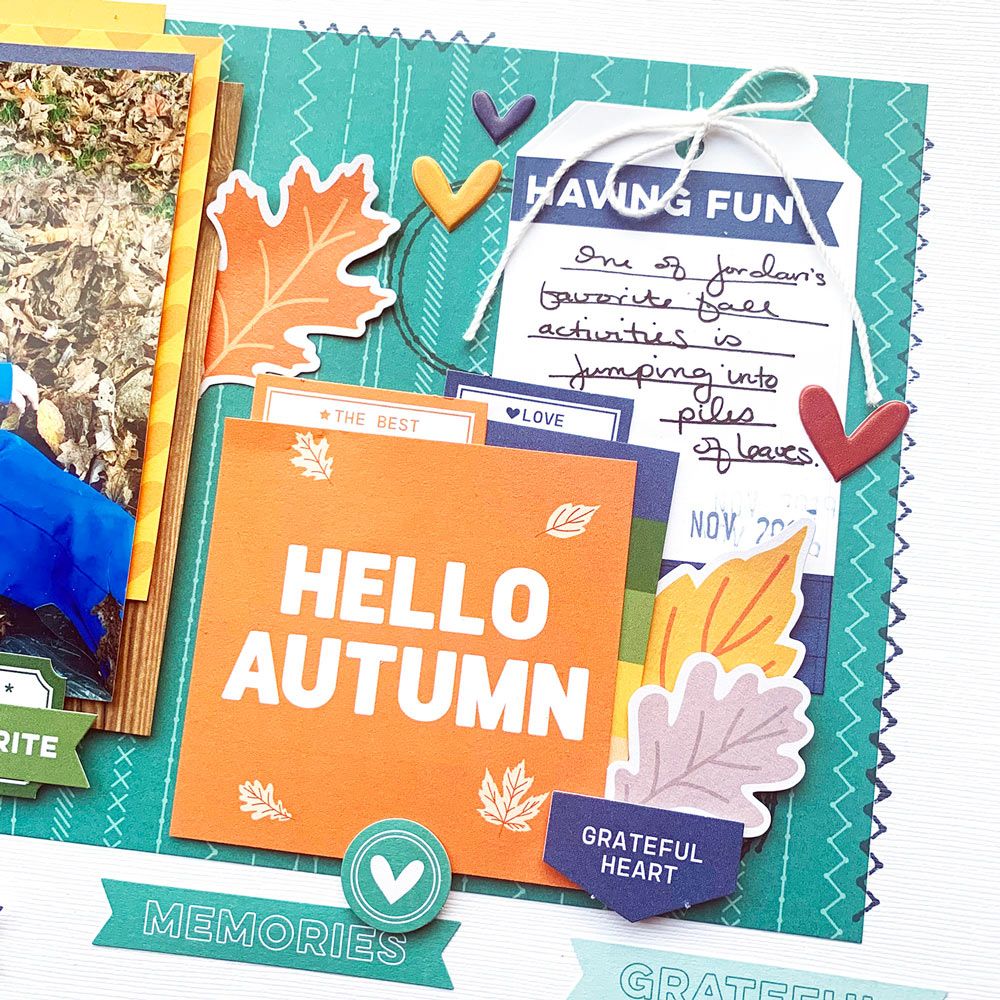
For the top of my page, I used the teal stitched paper from the Thankful Paper Stack as my background. I brought in different 3 x 4 inch tags from the September Kit for my title card and journaling card. The “Hello Autumn” orange tag is perfect for this title. I love cards like this where the words and phrases make a bold statement. It makes it easy to trim down and use it for a title for any layout or project. I also used a few of the die cut labels in the September Kit to add “the best” and “love,” which were the perfect additions to this part of my layout. I also used the “Having Fun” tag from the kit and the Nesting Tags Metal Die to make it into a tag to journal on.
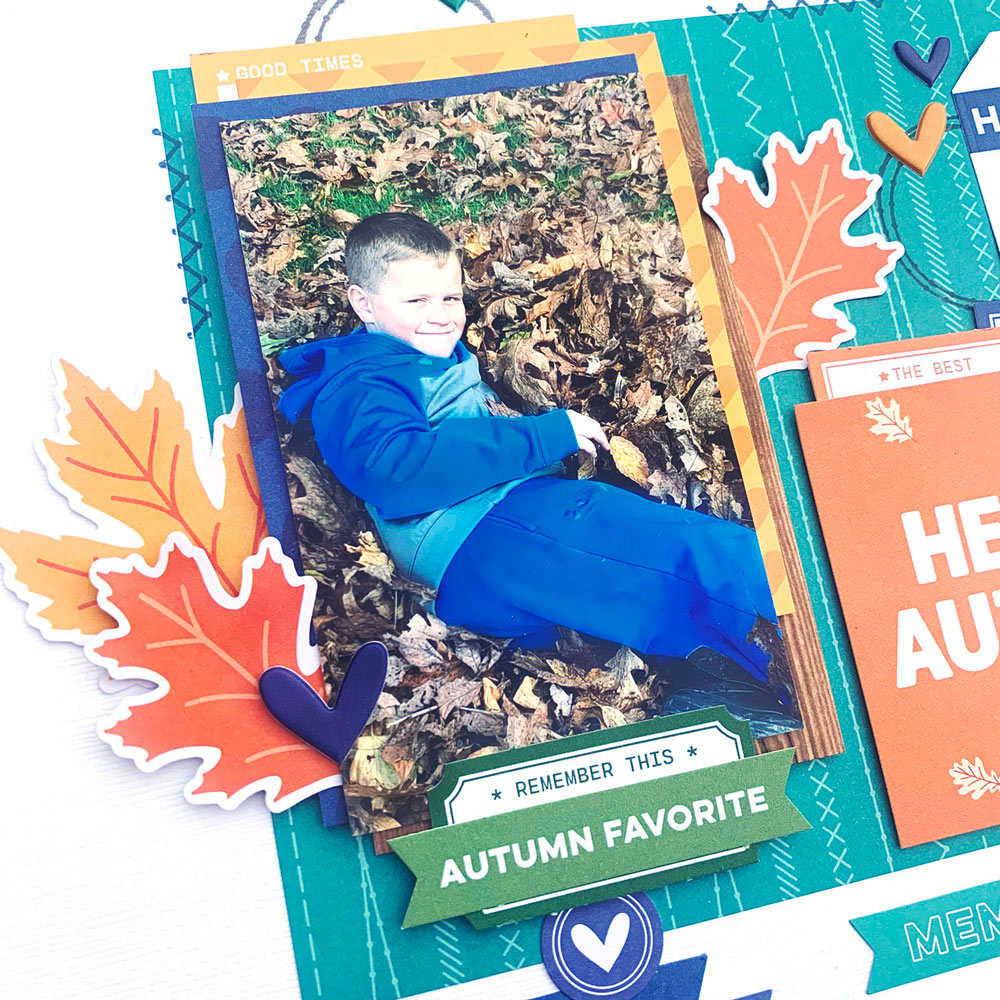
I used a photo of my son playing in the leaves on the upper left portion of my layout. To draw more attention to it and make it more of a focal point since there is so much going on in this layout, I added a few of the die cut leaves from the Autumn Die Cuts and layered them around his photo. I also added layers of patterned papers under the photo and layered a banner and September Label on top of the photo.
Lastly, I added stitched stamping around the top portion of my spread using the Home Sewn Stitches Stamp and several of the Autumn Puffy Hearts. I love these added pops of texture and color.
Thank you so much for stopping by today! I hope I’ve inspired you to take this sketch and make it your own! Be sure to share your creation in our Facebook Group or on Instagram using the hashtag #EllesStudio so we can see how you interpreted this sketch and made it your own!
Hi Elle’s Studio friends! It’s Katarina back with you, bringing more inspiration and tips on how you can use your September kit and add-ons in a traveler’s notebook.
Today I wanted to share a handful of tips with you on how to make a nice traveler’s notebook spread. These will not be new to some of you, however, I believe you will still find them useful!
1. Create texture without adding bulk
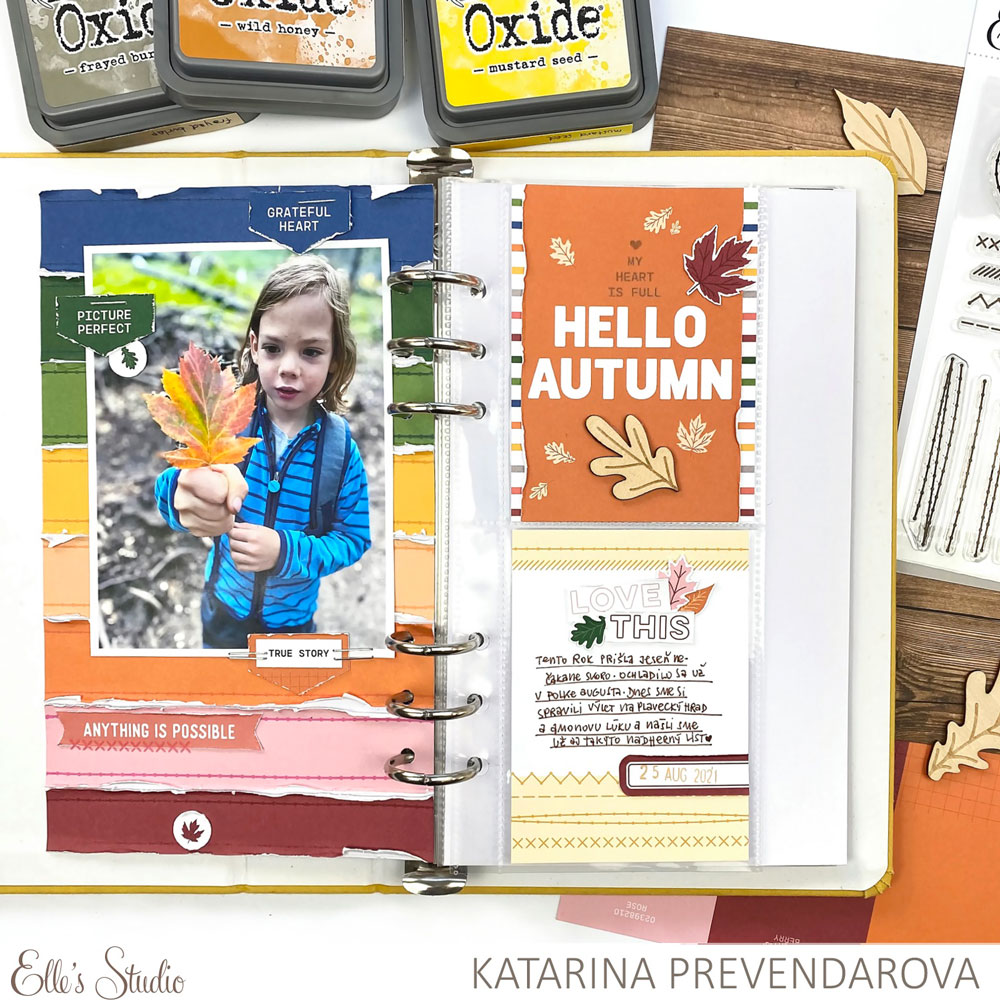
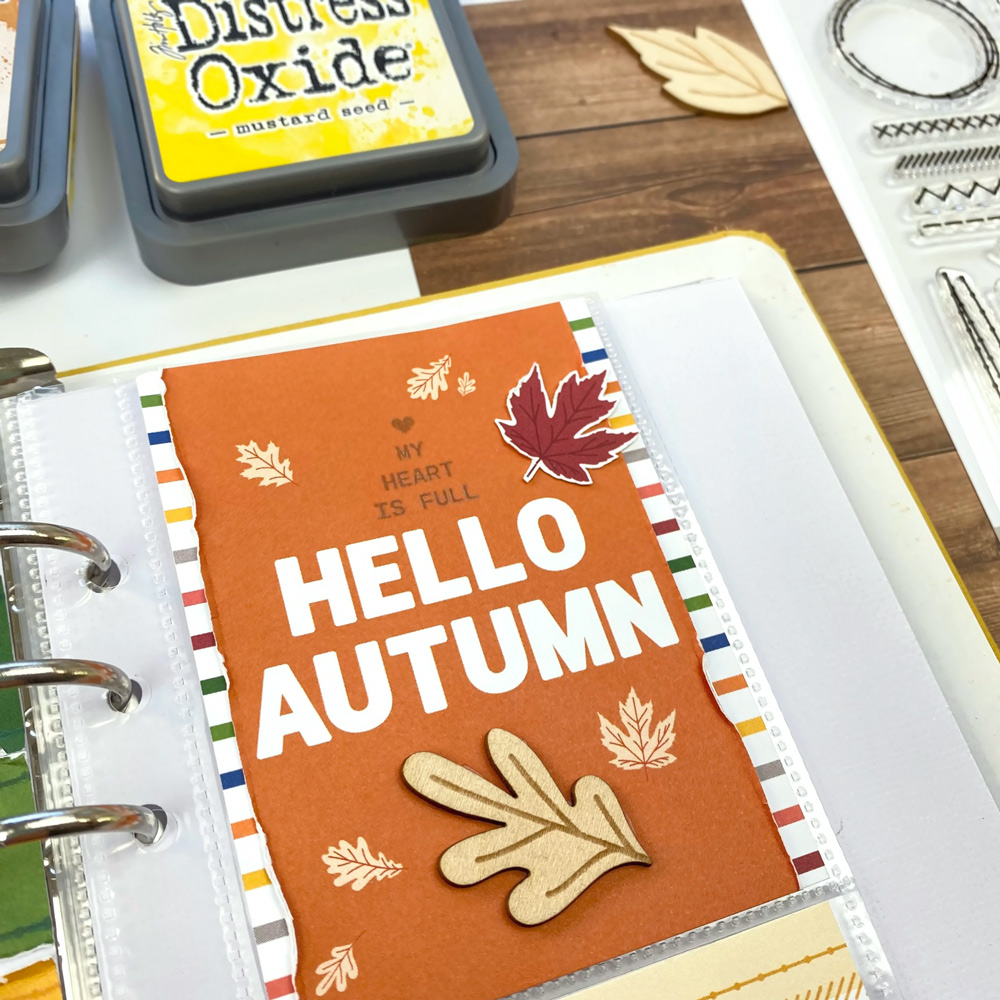
While a traveler’s notebook doesn’t go very well with a lot of layers or 3D elements, you can still create lots of texture without adding too much bulk. Here I cut the colorful striped paper from the Thankful Paper Stack into strips, adhered them onto a piece of white cardstock and distressed the edges of my stripes. You can also distress the edges of your die cuts or other embellishments.
Another technique to add texture is by stitching. You can hand stitch, use your sewing machine, or if you don’t feel like pulling out your sewing machine or just love stamping as much as I do, you can use the fantastic new Home Sewn Stitches Stamp, which includes so many gorgeous stitches—I just love it! Here I used it to stamp tone-on–tone to add a stitching detail on my paper strips.
Additionally, you can use your stapler to add even more texture.
2. Stamping
I already wrote about stamping above, but I needed to give it a separate paragraph, because stamping really is a big thing when it comes to traveler’s notebooks. You can add pops of color using different colored inks, or even create your own pattern by repeat stamping. You can stamp on your photos, too which really gives a beautiful effect. Two perfect things about stamps are that stamping adds zero bulk and you can use your stamps over and over.
3. Tone on tone
One fun technique to use in a TN is embellishing with tone-on-tone color. I always enjoy matching my die cuts, stickers and other products with patterned papers or mixed media backgrounds.
4. Create your own embellishments
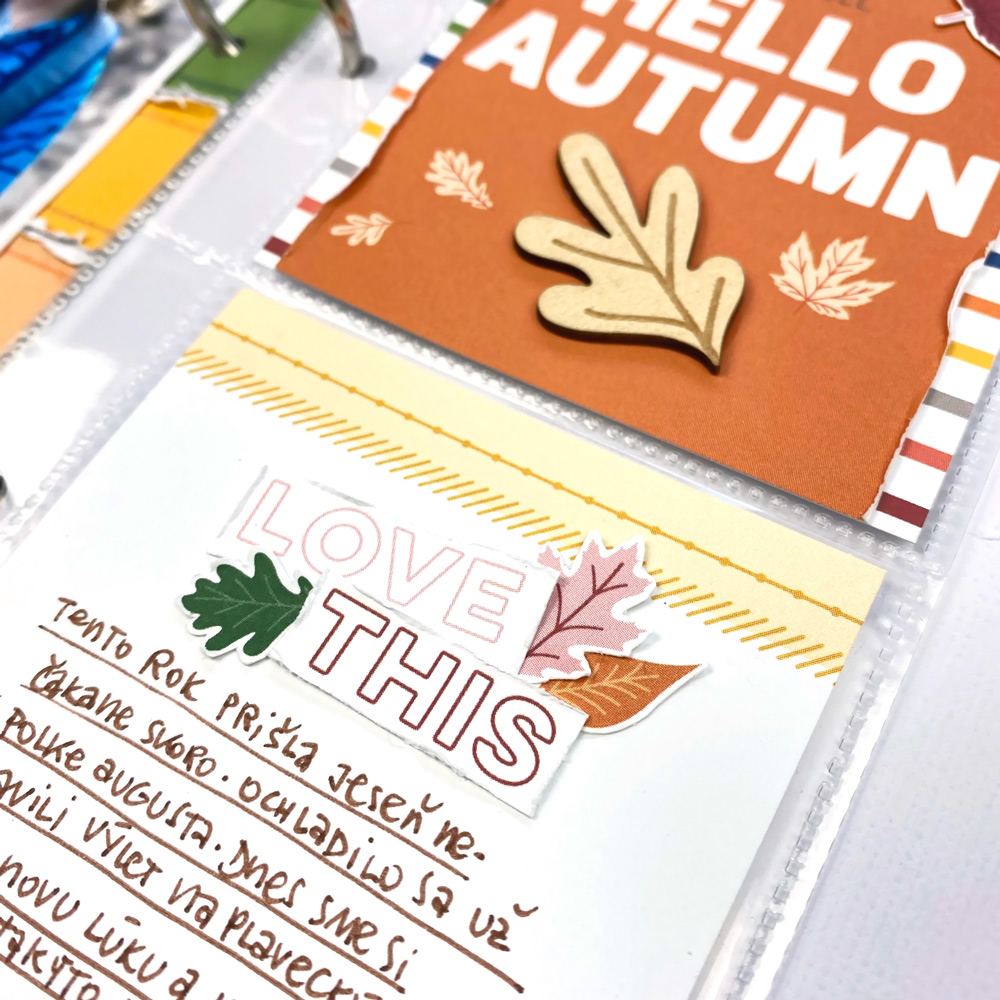
You can use your patterned papers or journaling tags to create your own flat embellishments. There are many techniques for that. Here, I fussy cut leaves from a journaling tag to add them to the two tags that I used for my spread—all from the September Kit. Also, I fussy cut the words “love this” from a patterned paper from the Thankful Paper Stack to add a nice detail to my journaling tag. You can also use your metal dies and die cutting machine.
5. Repetition and visual triangles
Repetition is one of my favorite techniques. Here I used three tab die cuts of the same shape from the September Kit and placed them around my photo, tone-on-tone, creating a visual triangle.
That is it from me today, friends. I really enjoyed putting this colorful autumnal traveler’s notebook spread together. I hope it inspires you to also put your hands on the beautiful September kit and add-ons and create something pretty in your traveler’s notebook. Don’t forget to share your creations with us on Instagram, using the hashtag #ellesstudio or in our Elle’s Studio Facebook Group. We love seeing what you create!
Have a wonderful day!
Comments Off on Traveler’s Notebook Tips with Katerina Prevendarova | Share This
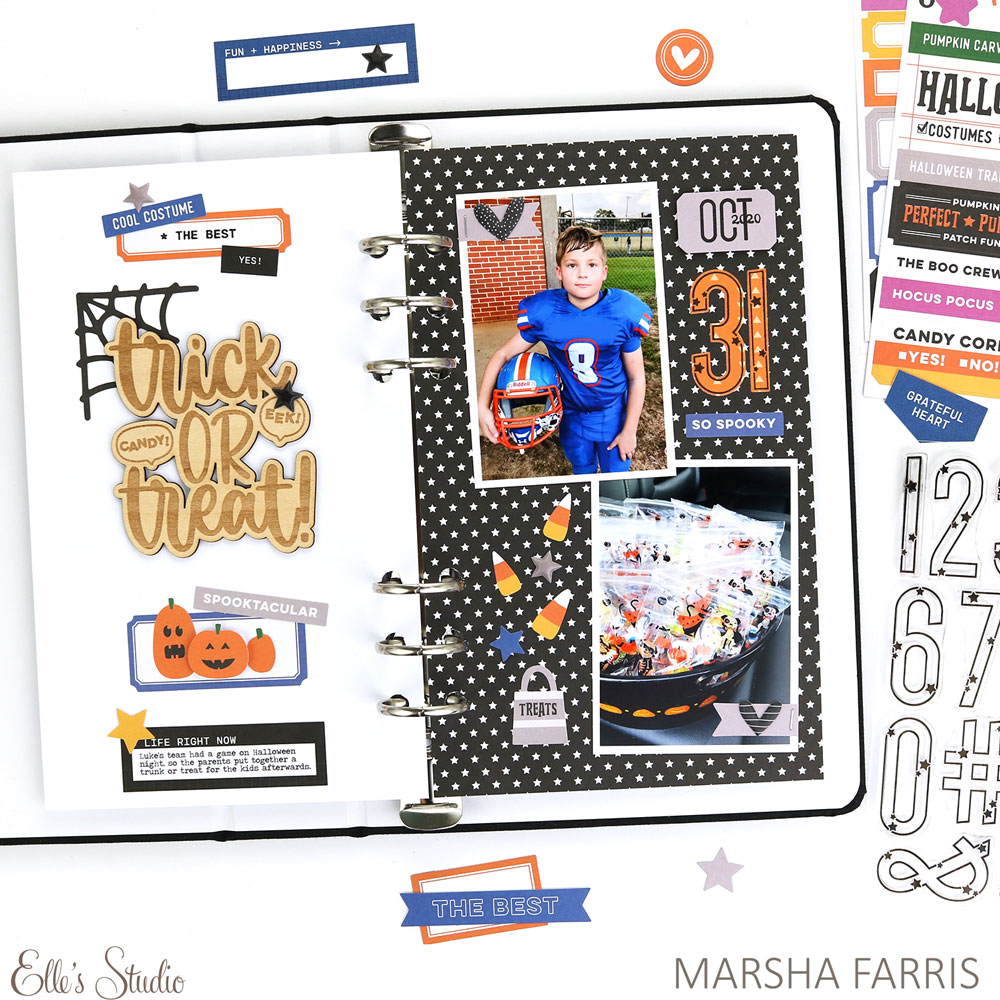
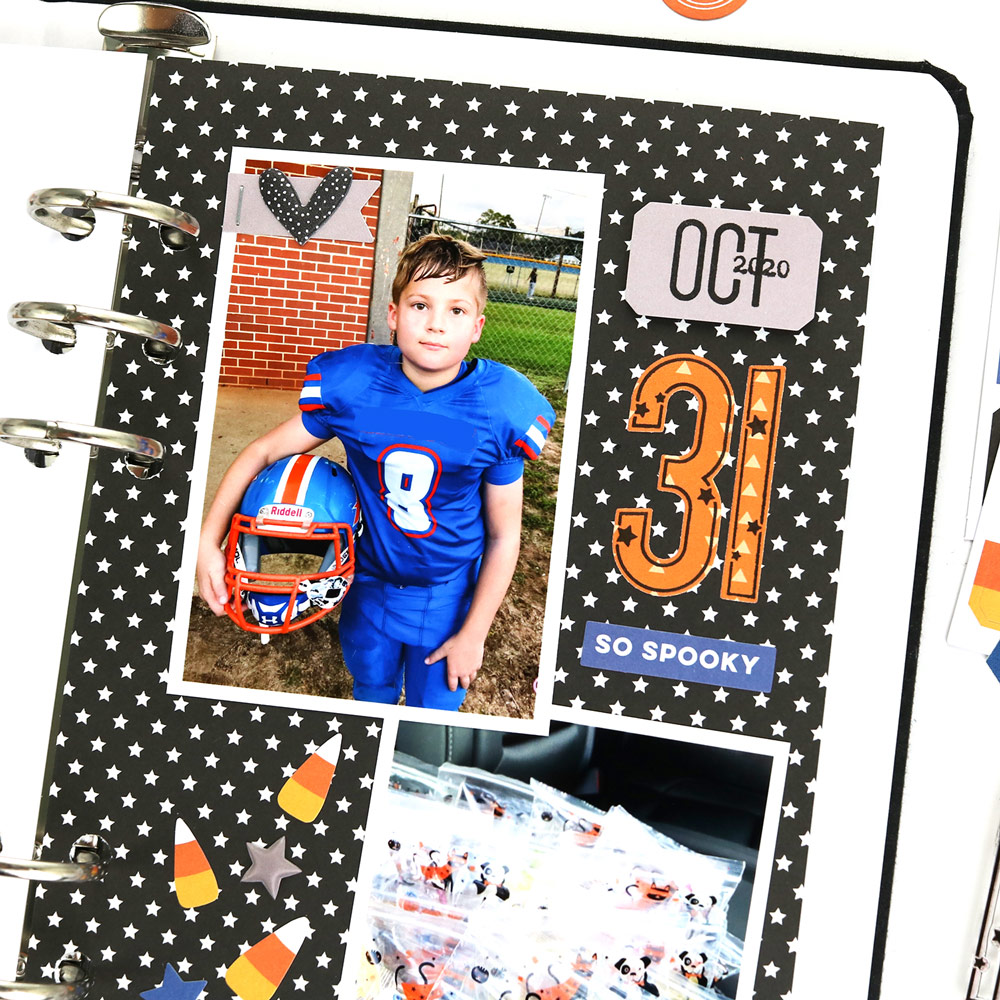
Hey, Elle’s Studio friends! It’s Marsha here today, and I’m excited to share a Halloween traveler’s notebook layout using the September kit and add-ons! I love documenting Halloween, and Elle’s Studio released some amazing new products this month that are perfect for this spooktacular holiday!
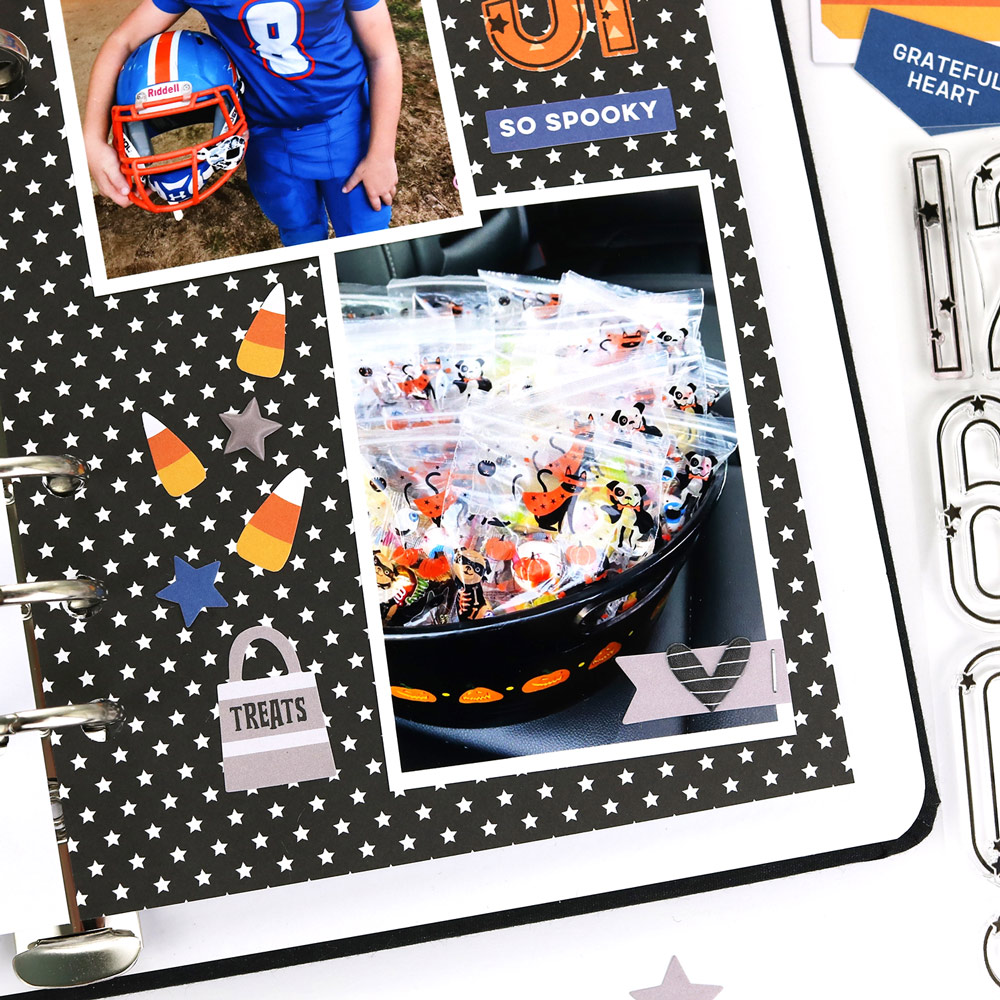
Next, I embellished the page with a variety of stickers from the Halloween Cardstock Stickers. These stickers include two sheets and are packed with icons, banners, phrases, and labels—perfect for Halloween projects! I finished off this page by adding Gray Cardstock Basic Shape Sticker banners and Autumn Puffy Hearts onto both photos.
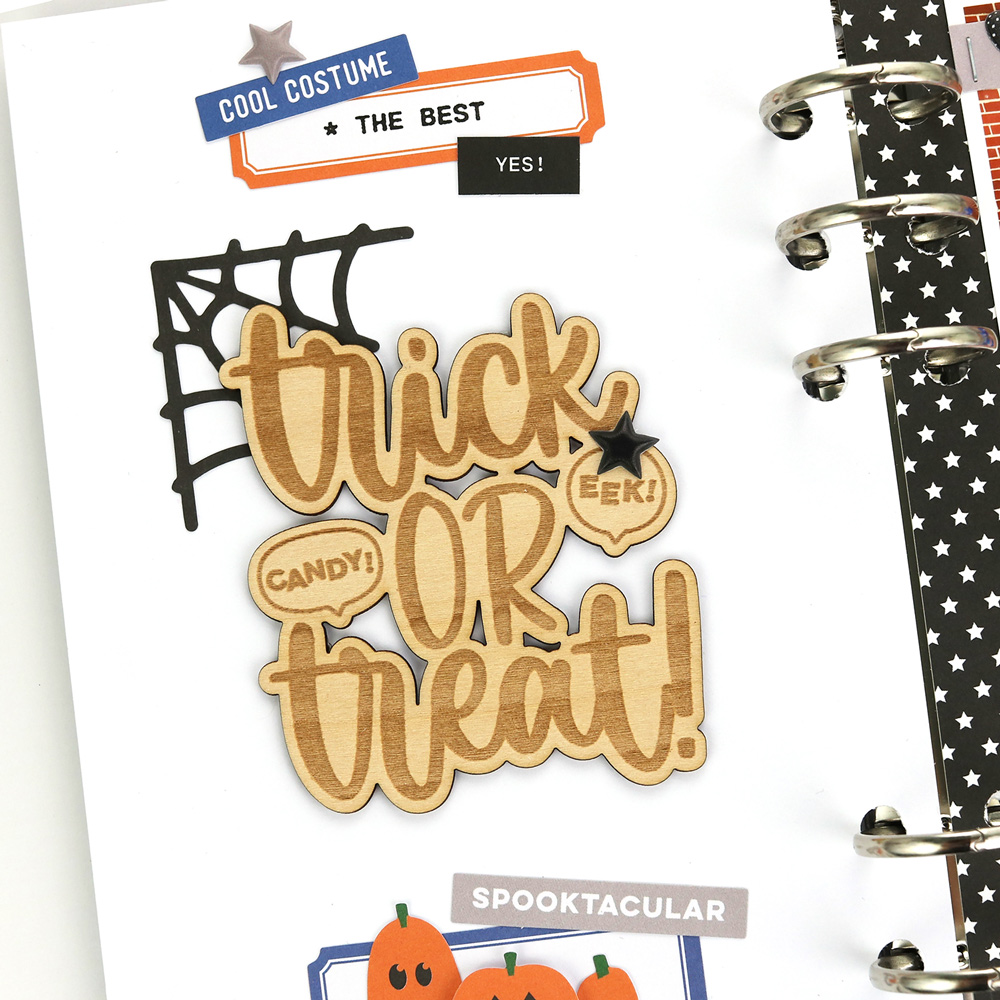
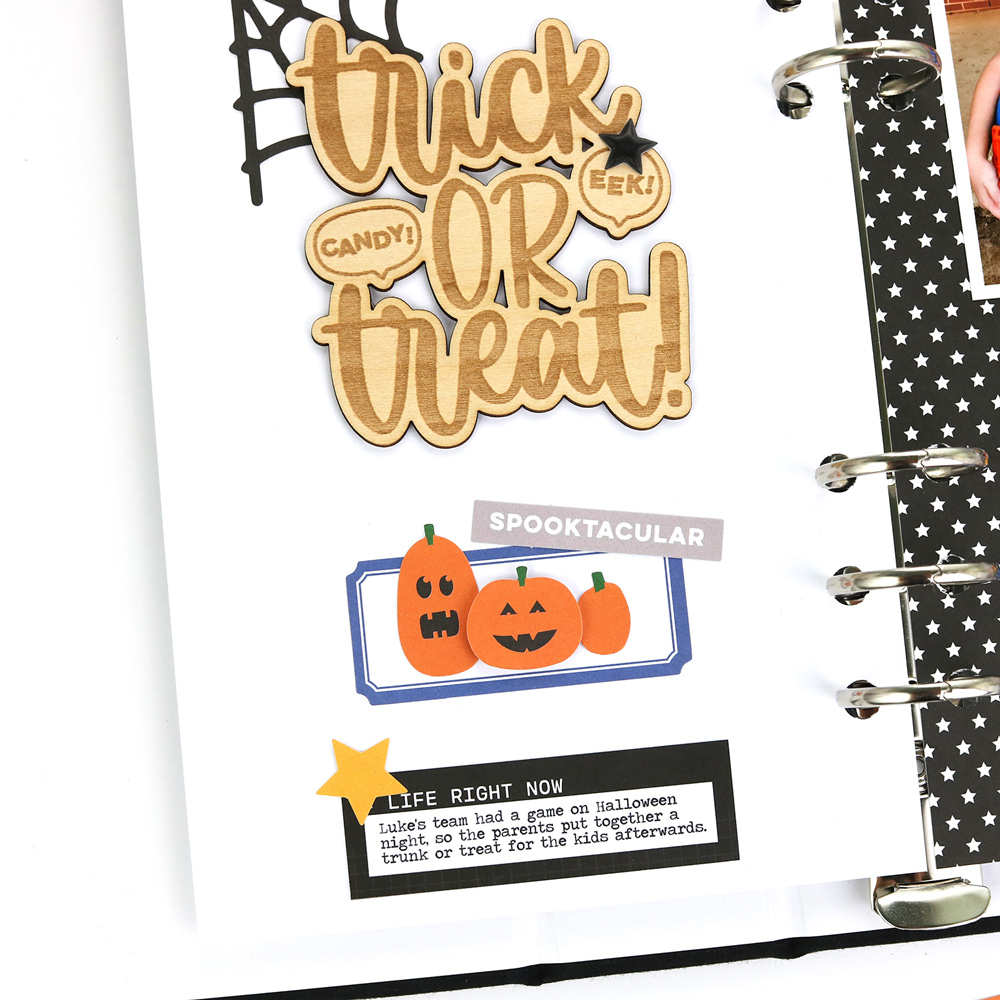
For the other page of the spread, I trimmed a piece of white cardstock to use as the background and added the Trick or Treat Wood Veneer to serve as the layout title. Then, I added labels from the September 2021 LabelsHalloween Cardstock Stickers in a column down the page. I stamped the phrase “the best” with the Thankful Stamp and black ink onto one of the label stickers.
I layered phrase stickers from the Halloween Cardstock Stickers onto the labels and added a spider web from the same sticker sheet behind the wood veneer title piece. I also added a word die cut from the September Kit onto another label. I typed my journaling on the computer and printed it out onto a September Label. To finish off the layout, I added star stickers from the neutral Tiny Shapes and Dots Puffy Stickers to a few areas around the spread.
I hope you are inspired to document your Halloween memories with the September kit and add-ons! Thanks so much for stopping by today! Happy creating!
Comments Off on Trick or Treat Traveler’s Notebook with Marsha Farris | Share This