Day 2 of our Bella Blvd team-up week is here with TWO tutorials + a giveaway! These two tutorials would also make a great Christmas gift for someone special!
 By Valerie:
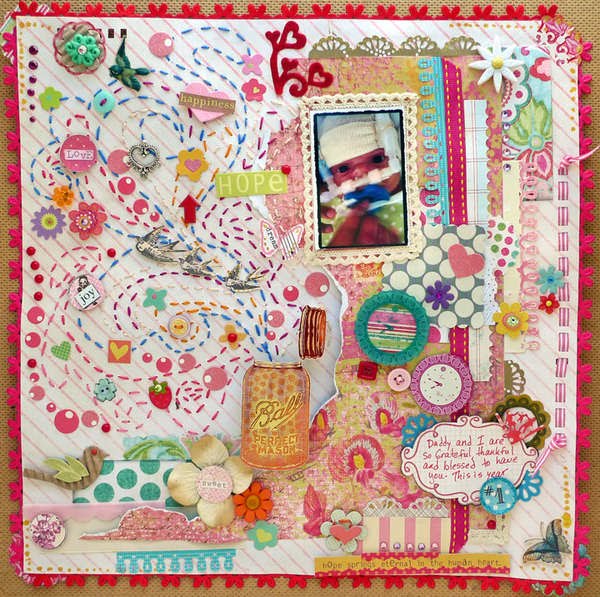
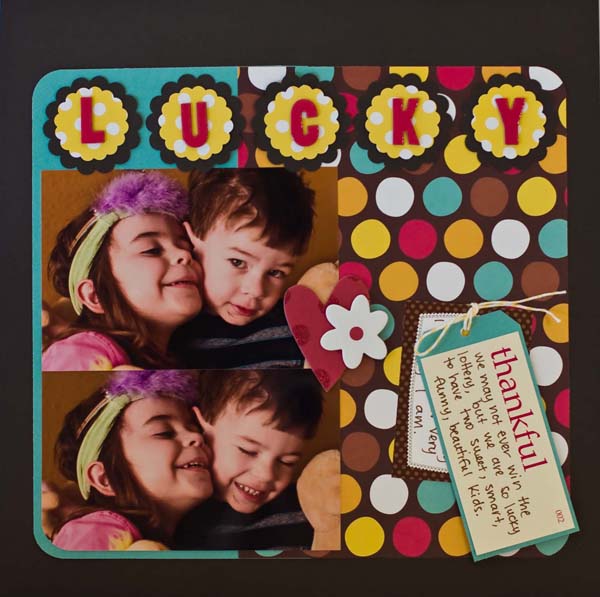
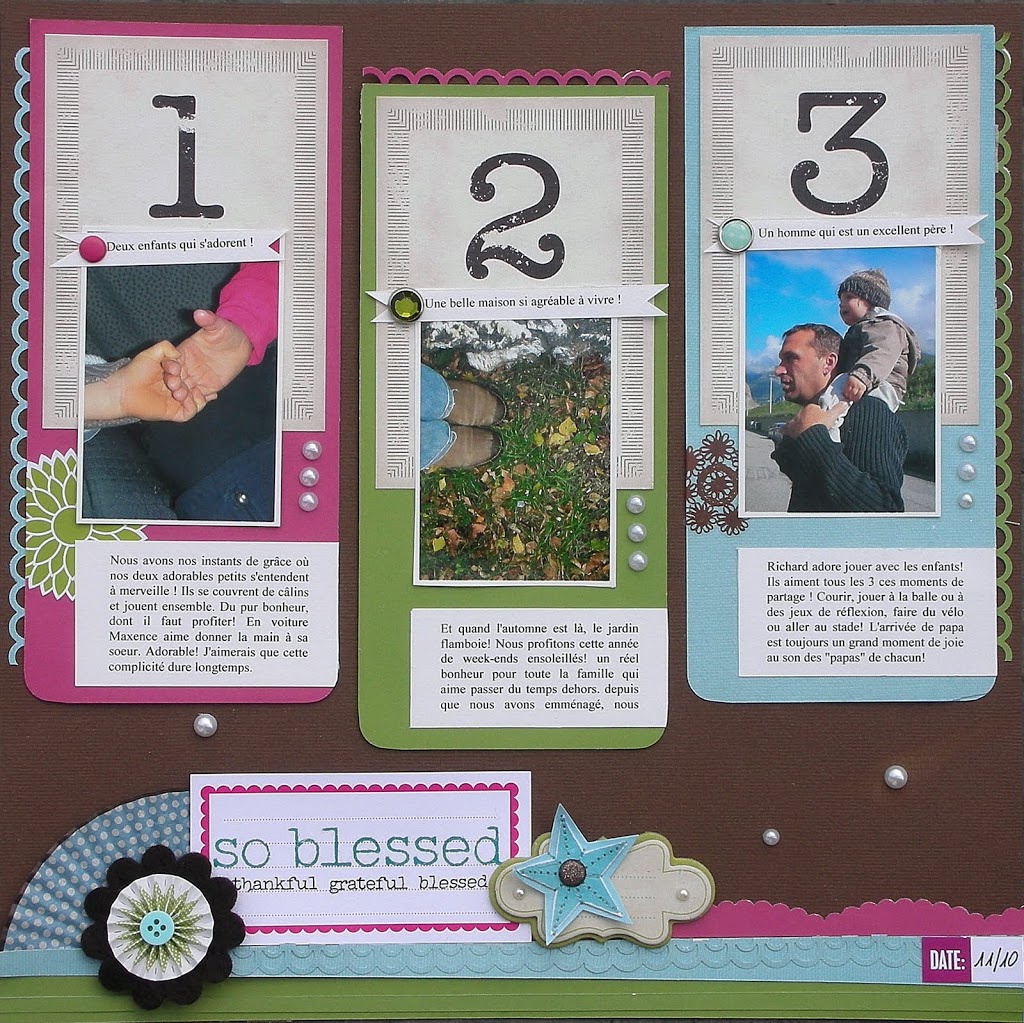
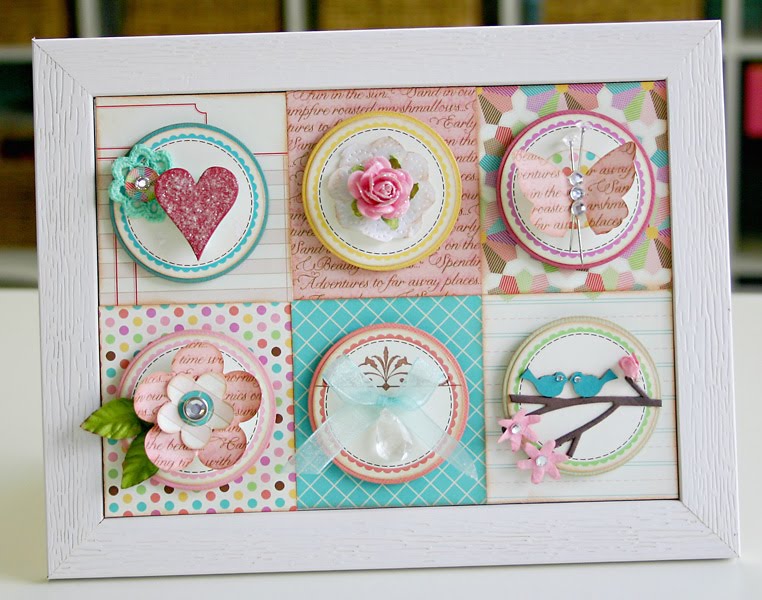
Hello! I am going to show you how to make a cute shadow box to keep for yourself, or give as a gift! The dimensions of the box that I bought was 5×7. First, cut a piece of 5×7 polka dot paper and adhere to the frame backing.
 Then, add a strip of the grid paper to the middle of the first layer.
 Adhere a couple of pieces of cardboard to the back of the elephant layer to give dimension.
 Flip over the elephant piece, and center to the polka dot paper. Add a small strip of the multi colored polka dots at the bottom.
 Now, replace the glass frame piece to the backing!
 Add one flower, a pink heart, and journal tag to the corner of the frame with adhesive.

 Thanks for joining me in this tutorial!
– Valerie
 By Anne Jo:
Hi there! I’m gonna share with you how you can create a very simple minialbum quickly and easily from scratch, using cardstock, patterned papers and some adhesive! Mine will end up being 5×5”-ish, so I’ll cut two strips of cardstock measuring 3,5”x12”.
 Now, I was lucky to get to borrow a Scor-it for the next step, which simplified it a *lot* – but still, you can do this the old fashioned way either using the scoring blade on your cutting board or a ruler and bone folding blade. I spaced the scorings 2cm apart – that’s like 0.8 inches (sorry, the measurement on my board was in centimeters ). Do this for both strips.
 Fold together like an accordion, cut away the ends that doesn’t fit into the measurement and adhere the two strips together into a long accordion.
Now, cut the patterned papers you’re going to use as your pages – as earlier mentioned, mine’s 5×5”. Now, for one of the pages, I wanted to create a pocket so the recipients could store smaller stuff into it. It’s easily done, especially with a scoring tool. Now, the pocket needed to be a little smaller than the 5×5” page it would be adhered to, so I cut an approx 10×10” square and then scored it like 3,4,3” both ways.
 Then I made cuts so only the middle flaps remained, like on the image above.
 Grab two largeish brads (or buttons and something to sew them with). Adhere the sideflaps.
 Then, making sure the top flap won’t overlap the bottom brad, add the brads and adhere the bottom flap.
 Tie a string to the bottom brad and you’ll have a cute little locking-mechanism for the envelope.
 Assemble the finished pages – remember to make sure to not have anything overlap from the “accordion” side.
 Turn the accordion so you can find the side which goes : /////
Skip the first fold – you want to adhere the next one: ///
Add adhesive to the whole fold (maybe not too visible on the image above) Add your first page…
 Then skip the next fold, and use the fold after that one: ///////
 Until you reach the end – leave the last fold like you left the first one. (just cut the excess if needed)
 Time to do the cover – make a 12×5,1” cut or something like that (slightly larger than the inner pages so it’ll cover it nicely)
 Fold the cover around the book, leaving (plenty of) room for the spine. You don’t want the spine to be too small, that will complicate the opening of the book. Crease the spines accordingly.
 Then adhere the last flaps of the accordion to the cover.
 Decorate your cover – I opted for simple, like the inner pages
Now let’s take a peek at the finished mini book!


Great work, ladies!! Thanks so much for inspiring us today with great tutorials and gift ideas! Love them!!
 Now it’s time for another GIVEAWAY from Bella Blvd! One person will win everything pictured above from their “Socialite” collection!
TWO ways to enter:
1. Just leave a comment below to be entered to win.
2. Also, gain an extra entry to this giveaway if you tweet: Elle’s Studio + Bella Blvd. team up week! Inspiration + giveaways at http://ellesstudio.blogspot.com #ElleBellaDay2 (hash tag must be included so we can find all the tweets and only one tweet per person, per day please.)
Winner will be drawn and posted on Saturday, December 4th – stay tuned for tomorrow! Don’t forget to head over the Bella Blvd. blog to see their inspiration and enter their giveaway, too!