Something new coming to Elle’s Studio!

We are very excited to let you in on a BIG secret we have been keeping for a while now – we’ve had so many people request extra inspiration with tips, techniques, and more that uses our exclusive kit, and that is also available in a pdf format for easy printing or storing on a digital device, so… We are so excited to introduce to you our “Exclusive Kit Mini Courses”:

ExclusiveKitMiniCourses-August2015
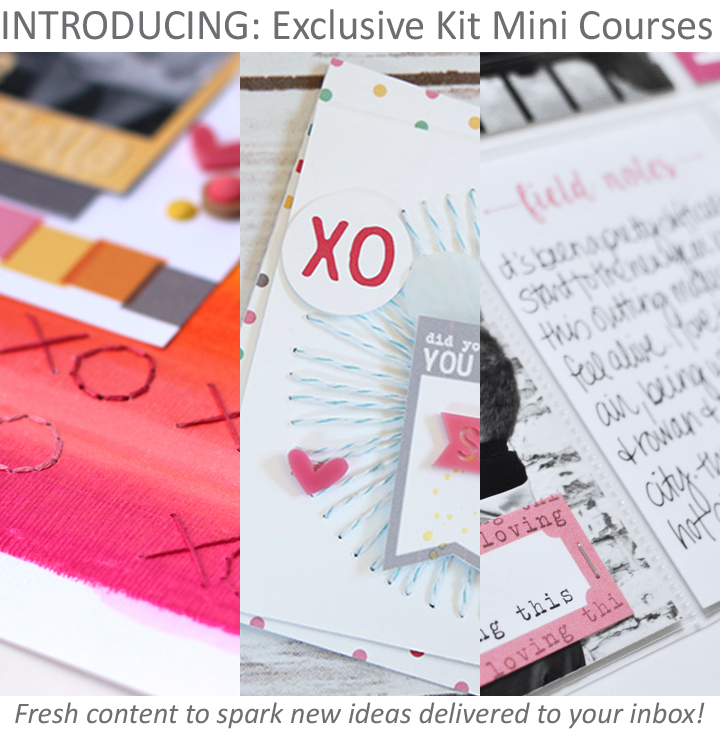
Every month we will now be offering a downloadable pdf class to go along with our monthly kit! The class will feature three different designers, along with a tip, technique, or fun idea, using our monthly kit and coordinating extras. This is something that people who want extra inspiration (besides our blog posts, and design team gallery projects) will be able to purchase separately. The class pdf will only be available during the month of the kit it coordinates with, so make sure you are signed up for our newsletter for a reminder of when it is live! If you are looking for new ways to use our kits, or a jump start of creativity, this will be the class for you!

In order to bring these classes to you each month, we have asked Meghann Andrew to be our Classroom Coordinator!MeghannAndrewMeghann has been a tremendous help putting our classes together and finding some incredible contributors to feature each month – you guys are going to be amazed at what our contributors have made to inspire and share with you!

Our first class will be available this Monday, on August 10th! Also, you won’t want to miss our August kit, coordinating extras, and sale that will also launch on August 10th – look for more sneak peeks and launch information later this week!

Thanks for stopping by and sharing all the excitement with us today!

PROJECT LIFE

Today I am sharing a few pages in my summer Project Life album!IMG_2538This summer I am documenting using a 6×8 album.  I am loving it!  I am able to create pages that are not necessarily focused on the week, instead, I am focusing on the story.  It’s nice to have a more relaxed method of documenting for the summer months.IMG_2530

We have had SO much rain this summer in the mid-west, so I decided to document a page highlighting our favorite thing to do when it rains— visit the library!  We visit the same library I visited as a child and it brings back so many memories every time we walk through the doors!  The “summer reading program” was a huge hit in our household, so I had to document it.

IMG_2534

What’s a summer without a garage sale and camps?  This was also a highlight for us in mid-june!   I used the star vellum from the July 2015 Kit in one pocket.  When I photograph the pages alone (outside of the album) the pages look a little plain.  However, when it is inside the album you can see a little peek of the pages to come- which I love!  Here is what this page looks like in my album.

IMG_2542Elle’s Studio products used: Elle’s Studio July 2015 Kit, Let’s Eat Journaling Tags, Good Times Printables , Letter and Number Stickers- Yellow, Let’s Eat Paper Collection Pack, Let’s Eat Stickers , Let’s Eat Word Labels, Hello 2015 Stickers, Numbers Stamp

How have you been documenting your summer?  We hope you show us your summer pages in our Member Gallery!


Pin-Inspired Project with Toni From

I love Pinterest. Like super, duper, I-would-marry-it-if-I-could-love. I also love pretty paper and crafting. Put all of that together, and you get today’s project.

It all started with this pin (show below) courtesy of the very talented people over at A Beautiful Mess.
EllesStudio-Toni-Pinterest01I also wanted to create something using something fun and happy using triangles and had an idea for a project my daughter could use. My youngest child is starting Middle School next month, and what better thing to receive than a handmade journal! So that is exactly what I created.

I started with gathering a bunch of Elle’s Studio supplies; some papers from the Shine collection, a few Let’s Eat stickers and Hello 2015 stickers, a bits and pieces pack, and some teal letter and number stickers. I also needed a spiral notebook, paper trimmer, scissors, a pencil, and some Mod Podge (any adhesive that is strong would work though.) The notebook I used is a standard spiral notebook sized approximately 8.5 inches x 11 inches.

I started by cutting out a bunch of squares of paper (sized 2.25 inches each.) I cut each square exactly in half to make triangles.

Next, I adhered Mod Podge liberally over the entire binder and arranged my triangles. Once all of the triangles were glued down, I brushed some Mod Podge on top and let it dry for about an hour. Finally, I embellished with the supplies mentioned above and this journal was complete!
EllesStudio-Toni-Pinterest02EllesStudio-Toni-Pinterest03I hope today’s post inspired you to create something you have pinned as well. Please feel free to use this piece as inspiration and post it in the Elle’s Studio gallery or on Instagram and tag #ellesstudio – We would love to see what you are creating! xo, Toni From

Products used: Shine papers, Shine bits and pieces, Let’s Eat Stickers, Hello 2015 stickers, and Teal letter and number stickers

Challenge: 3 x 4 inch tags on a layout by Jill Sprott

So-Not-Awesome-ES-Jill-blogFor me, “Elle’s Studio” is synonymous with tags. Each collection as well as the monthly kits feature so many different tags, all of which can be used in so many different ways. The 3 x 4 tags are among my favorites, as I often use that size for photos on layouts.

This page, which is about a recent visit to the Jaws set at Universal Studios, includes three 3 x 4 tags, layered over and under three similarly-sized photos. One of the photos included two darkened heads of strangers who were on the ride with us. No problem: I simply covered them up with a tag.

So-Not-Awesome-det-1-blogThat tag is a calendar card from the Hello 2015 collection. If you’ve been hoarding these like I’ve been, now’s the time to use them! I circled the date, and layered two smaller journaling strips over the remaining space. This part of the journaling looks back at how I once regarded the Jaws exhibit as a kid.

So-Not-Awesome-Det-2-blogThe journaling at the bottom of the page focuses on my most recent experience, which was a let-down. The 3 x 4 tag that I selected is, appropriately, a watercolor-background tag from the July Elle’s Studio kit. The sentiment on it does not really apply to an encounter with a man-eating shark (“Every moment with you matters” — well, maybe it does apply), so I covered it with another tag. The sentiment “oh my goodness” seemed relevant, and also pretty funny to me, since the lack of an exclamation point helps to convey just how underwhelmed I was.

So-Not-Awesome-det-3-blogThe star of the page (aside from the fakey shark) is a 3 x 4 tag (the backside of another Hello 2015 calendar card), to which I added the word “not” to the sentiment with the teal letter stickers.

All in all, visiting an attraction I once loved as a kid may not have lived up to my expectations, but working with these tags to scrapbook that experience actually made it pretty entertaining!

Introducing our new collection: Joyful

We have one more collection to reveal today and we are so excited to show you what is in store for the holidays with our next collection: Joyful! Joyful is full of papers, tags, die cuts in cardstock and vellum, wood veneers, stamps, and stickers! It will be perfect for capturing the entire holiday season on your scrapbooking layouts, cards, December Daily, Project Life, plus more! We are so excited to see how you use it in your projects!

Here is the first look at Joyful:

EllesStudio-Joyful01b

EllesStudio-Joyful02bEllesStudioThankful03This new collection will also start shipping to stores in late August and is available for pre-order now! We’d love it if you would request it at your favorite place to shop – either at your local scrapbooking store or online store, and big thank yous to those who have!! We appreciate that so much! This collection should also be available in our shop in September.

We LOVED reading your comments on our Thankful collection – thank you so much for all the sweet words, they mean so much to us and we are thrilled you love it so much! We’d love to hear what you think of this one, too! Make sure you leave a comment letting us know 🙂

Thanks for stopping by on this exciting day!

Introducing our new collection: Thankful!

It’s an exciting day here at Elle’s Studio – we get to reveal our next collection: Thankful! Along with being perfect for the autumn season, Thankful is all about being thankful and grateful for your family and friends! It’s perfect for scrapbooking layouts, mini albums, cards, Project Life, plus more, and we cannot wait to see what you guys create with it!

Here’s the very first look at Thankful:
EllesStudioThankful01

EllesStudioThankful02

EllesStudioThankful03This new collection will start shipping to stores late August and is available for pre-order now, so make sure you call your local scrapbook store or email your favorite online store and request this collection! We will also be stocking it in our store in September.

We’d love to know what your favorite part of the collection is – leave a comment letting us know. And, then make sure you check back tomorrow for the full reveal of our Christmas collection!

4TH OF JULY by Paige Evans

4th-of-July-by-Paige-EvansPaige is sharing another step-by-step layout tutorial with us today, along with a free cut file, and a video explaining the process of how to create these amazing stars with string! This is such a fun way to document your 4th of July activities, or any type of festive celebration!

Here’s how Paige said it came together: 11. Make 4 circles (these ones are about 5.5″ across) from white cardstock. I used a Silhouette Cameo to make these and have provided a free cut file! In the cut file I also added the snip marks so if you cut these using the cut file you can skip ahead to step 4.

22. Make 12 marks spaced evenly apart all around the circle. The spacing will depend on the size of the circle. For 5.5″ stars the mark should be made every 1 3/8″. Again, if you’re cutting with the cameo, no need to worry about this step, I’ve done it for you 🙂

33. Snip about an 1/8″ into each mark all the way around each circle.

44. Tie a knot in your choice of string, place the knot in the back of one circle, and start wrapping the string around. I’ve made a video so you can see how I wrapped each star. Note: I hadn’t made the cut file with the snips at this point so you’ll get to see how to mark and snip each circle.

55. Create four wrapped star circles.

66. Begin embellishing your layout using bits & pieces from the July kit. My background paper is made from a combination of papers from the Let’s Eat collection.

77. Flick watercolors over each circle in matching colors and write journaling on a tag. Create a title with letter and number stickers.

4th-of-July-Detail-by-Paige-Evans

Products used: July kit, Acrylic Stars, Weekend Printables, and Let’s Eat Paper Collection.

We hope this inspires you to get your celebrations documented! Have a wonderful day!

Scrapbooking with our Digital Products by Meghann Andrew

Hello there & thanks for stopping by the Elle’s Studio blog today! If you haven’t had a chance to check out the cut file or printable offerings in the Elle’s Studio shop, you should be sure to stop by today. I love having these versatile and useful cut files and printables in my digital library, especially since they’re reusable- a big perk for me! Today I’d like to share a layout I created using both the Weekend printables and the July digital cut files.

EllesStudio-MeghannAndrew-LayoutAs soon as I found the “AM” and “PM” tags in the July kit, I knew I wanted to document my daughter’s morning and evening routines at the moment. These everyday moments are the things we will forget as soon as they change. So, I took the photos especially for this layout. To create a divide between the two, I used the star border from the July digital cut file, which I cut three times- with white cardstock, gold glitter paper and dark grey glitter paper. I don’t know about you, but I can’t get enough of stars, so I know I will be using this cut quite often! Using dimensional adhesive, I layered the white cardstock on top of the grey glitter, then cut a few individual stars from the gold glitter cut. As well as dividing the layout in half, the cut file also hid the division between the two halves of my white background cardstock, which I cut to be able to print my journaling on my printer, which is not wide-format.
EllesStudio-MeghannAndrew-Layout2The Weekend printables included two circular labels, however neither matched the color scheme of my layout. I opened the individual label file in Photoshop, recolored it in yellow to match the “Five Stars” paper from the “Let’s Eat” collection and enlarged it to house a large ampersand in the center of my star border.

EllesStudio-MeghannAndrew-Layout3Adding the coordinating tags from the July kit, along with a small handful of extra embellishment like rub-ons, goil foil alphas and puffy stars finished my layout- one that I will cherish because it shows a glimpse into our daily life. Check out the Elle’s Studio cut files and printables to help you tell your stories and create those special layouts today!

Products used: July 2015 exclusive kit, July digital cut file, Weekend printables.

Documenting Summer

Hi, All! Alissa here today and I’ve got a summer layout I created with the Shine Collection.
EllesStudio-summer-fun-01First, pocket page scrapbooking is not just for Project Life. I love creating pocket pages for single events or stories, just like a regular 12×12 or 8.5×11 layout. For me, I think, it comes from my long time love of mini books. I’ve always loved creating mini books and pocket pages are really just a bunch of mini book pages tucked into a bunch of pockets on a single page.

EllesStudio-summer-fun-02bI layered patterned paper and a couple cards from the June printables with a few tags, letter stickers and a wood veneer sun to create the title card.

EllesStudio-summer-fun-03More layers to create the journaling. I think that text paper is my favorite in the Shine Collection.

EllesStudio-summer-fun-04Just like in my mini books, I love a full page/pocket photo with goodies layered on top.

EllesStudio-summer-fun-05This wraps up my summer pocket page with the awesome, summery Shine Collection. I hope you’ve enjoyed it and have found something to inspire you! :0

Have a great day!
Alissa

Products used: Shine Paper Collection, Wood Veneer, Extra Tidbits, Bits and Pieces, Lil’ Snippet – Highlights, Cutouts; Letter & Number Stickers – white; Good Times Printable 

Sketch Thursday

SketchToday’s sketch was inspired by Melissa Mann’s The Best layout – we love how she used a large photo for the main focal point, along with all those fun layers!

Kay played along with our sketch this week and she made this awesome 8.5 x 11 inch layout from it: RogersEllesJuly-7-copy

Kay took three photos and combined them to make one large photo – awesome idea! Then she added multiple layers and some fun embellishments to pull it all together!
RogersEllesJuly-8RogersEllesJuly-9
Products used: Let’s Eat Paper Collection, bits and pieces, and wood veneers.

We love it, Kay! Thanks for playing along this week!

For a chance to win a $10 gift certificate to our shop, create a project inspired by today’s sketch, upload it to the Member gallery and leave a comment here with the link by August 5th. A random winner will be selected and posted with the next sketch on August 6th.

Our randomly selected winner this week is: snazzyjj with her Robotastic layout:5018_3870_14375324225378_bigCongrats!! Please email us at info@shopellesstudio.com to claim your prize, with the following information:
Name & Address:
Contest: Sketch Thursday
Prize: $10 Elle’s Studio gift certificate