Process video with Jen Schow

EllesStudio-JenSchow-RightNow01
Hi everyone, Jen here! One of the things I love about the Elle’s Studio monthly kits are the cards that prompt you to record the “Right Now”. This month’s “Currently” card was just perfect for that and I decided to have my daughter fill in the blanks this time. I think it’s fun to incorporate her handwriting and her perspective in my scrapbooks.

EllesStudio-JenSchow-RightNow03EllesStudio-JenSchow-RightNow02
I used a bit of the new Little Moments collection in with all of my March goodies and I love the way they work seamlessly together. You can see how this layout was created in my process video:


Products used: Little Moments 12 x 12 paper, Little Moments Wood Veneer, Exclusive March 2016 Kit, Acrylic Stars – spring mix, Smile printables, and Letter & Number stickers – white.

Thanks for joining us today!

Favorite Friend card by Daniela Dobson

Welcome to the Elle’s Studio blog post today. It’s Daniela here sharing a card using our new Little Moments 6 x 6 paper stack.

Favorite-friend-by-Daniela-DobsonProducts used: Little Moments 6 x 6 Paper Stack, Jonah Alphabet Stamp, The Story Of Stamp, Little Moments – Word Labels, Little Moments – Journaling Tags, Little Moments – Bits and Pieces, Acrylic Stars – Spring Mix

I layered two different patterned papers from the 6 x 6 paper stack for the card base, one slightly smaller than the other.

Favorite-friend-close-by-Daniela-Dobson
I layered journaling tags and bits and pieces with word labels to create my card front. I found the perfect ink color for my stamped “friends” to go along with my “You’ll always be my favorite” sentiment. I added some ribbon with a button and twine to the tag and added some enamel dots and an acrylic star.

Favorite-friend-close-2-by-Daniela-Dobson
Thanks for stopping by! Be sure to share your projects using Little Moments 6 x 6 paper pad with us in our Member Gallery or on Instagram with the hashtag #ellesstudio!

Stamping with Meghann Andrew

Hello there, Elle’s Studio fans! Meghann here and stamps are a major tool in my scrapbooking arsenal. By using different inks and different techniques, I can use them to create almost anything I want on my pages, from embellishments to titles. Today, I’m here to share a bright, airy layout that is heavily stamp focused.

EllesStudio-MeghannAndrew-Stamping01Supplies: March exclusive kitNoteworthy stampLittle Moments 12” x 12” paper collectionLittle Moments bits and piecesLittle Moments stampJonah alphabet stampLabel It stampThe Story Of stampletter and number stickers- black.

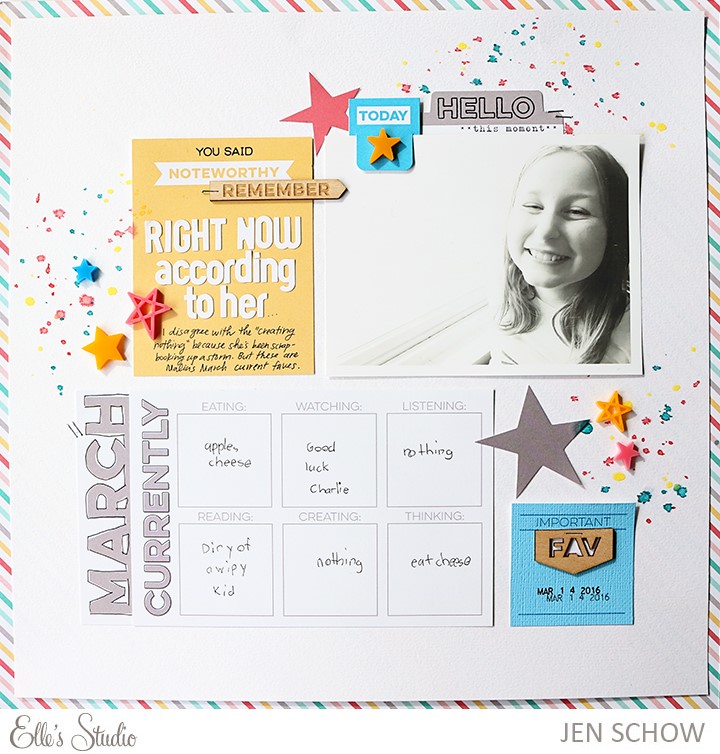
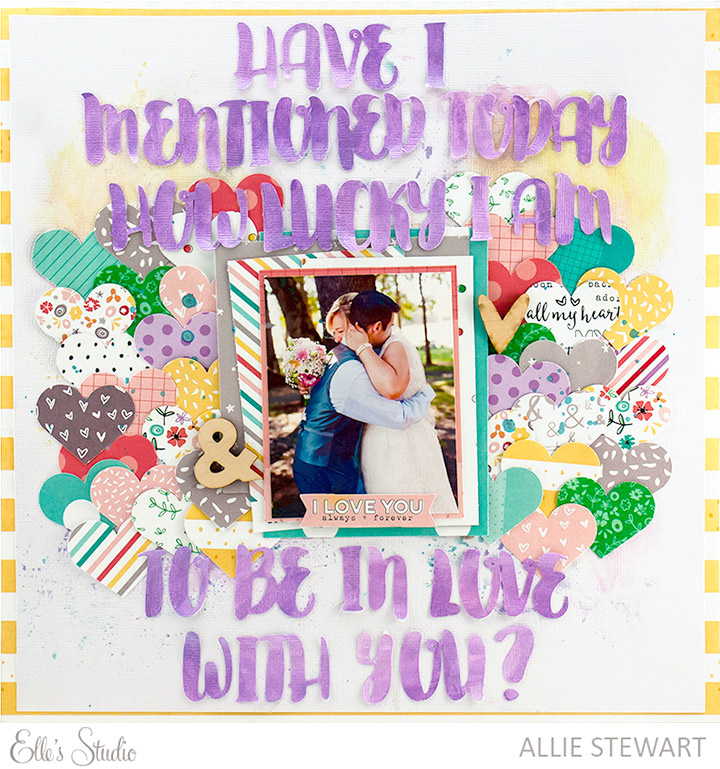
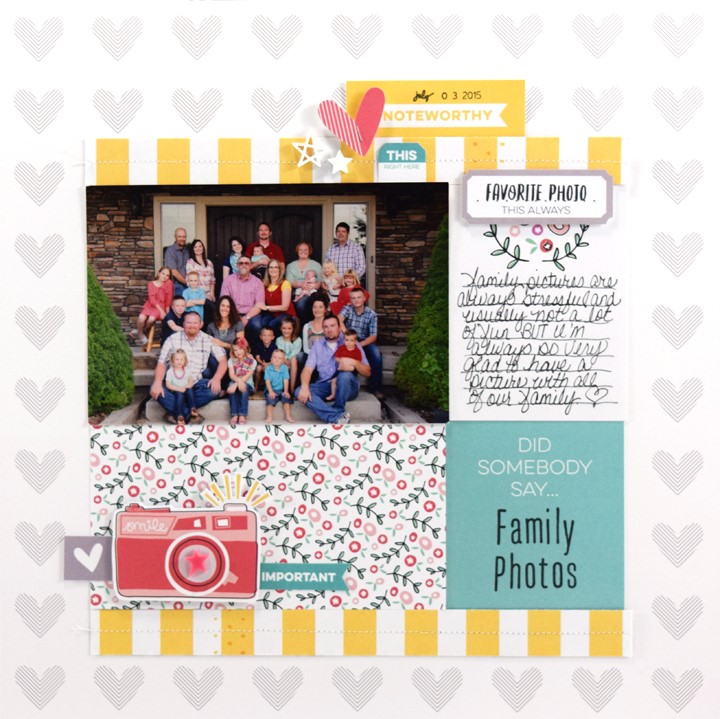
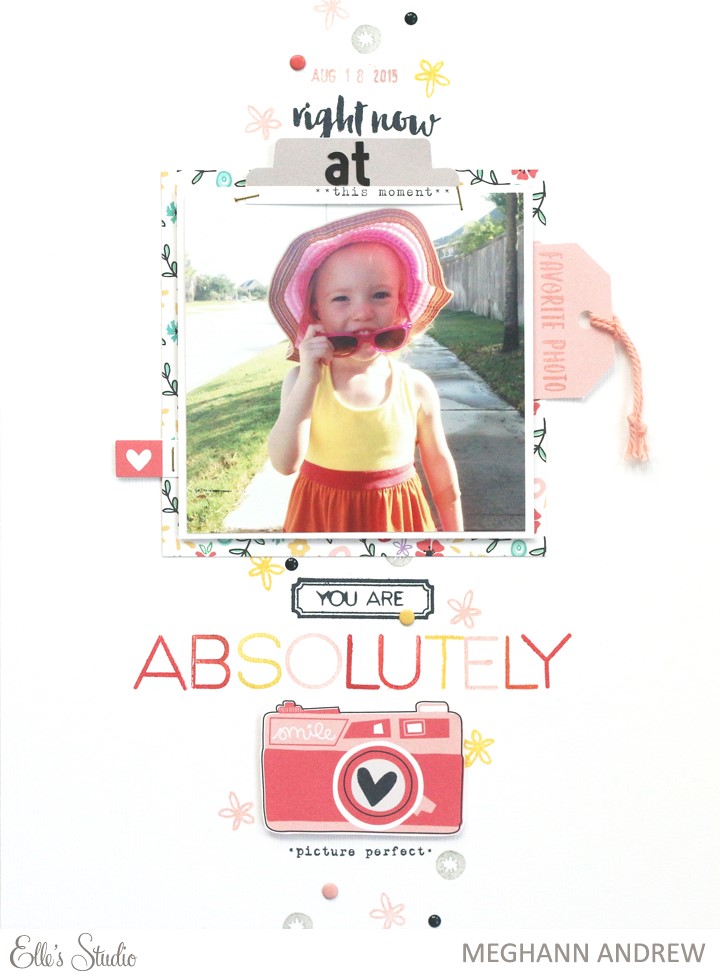
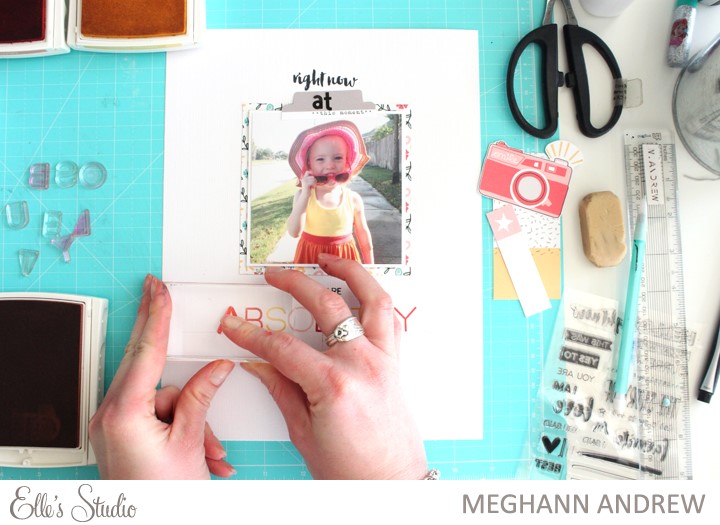
By focusing on a central column on my 8-1/2” x 11” layout, I used the NoteworthyLittle MomentsThe Story Of and Jonah stamps to create my title, as well as add embellishment to my graphic, one-photo design. By marking the center line on my paper, it was quite easy to add the “right now” and “you are” phrases at the center of the width of my paper, but getting the word “absolutely” centered, using the Jonah alphabet stamp, was a bit tricky. Let me show you how you can do it, too:

EllesStudio-MeghannAndrew-Stamping02
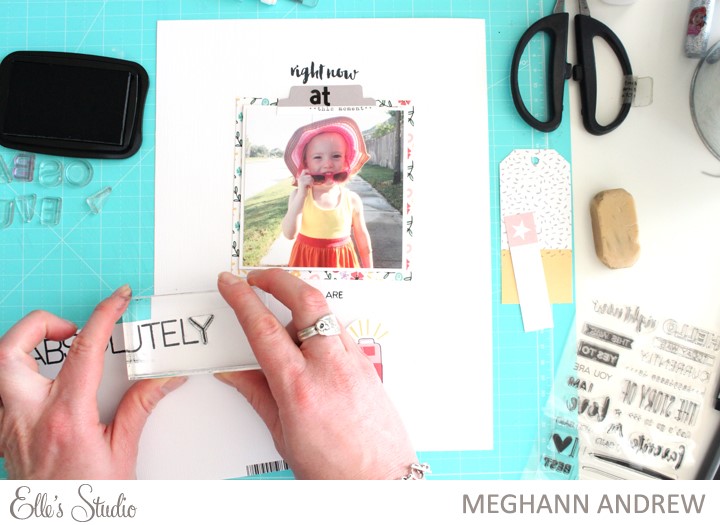
First, on a piece of scrap paper, I stamped the word “absolutely” in a straight line, using just one color for speed.

EllesStudio-MeghannAndrew-Stamping03
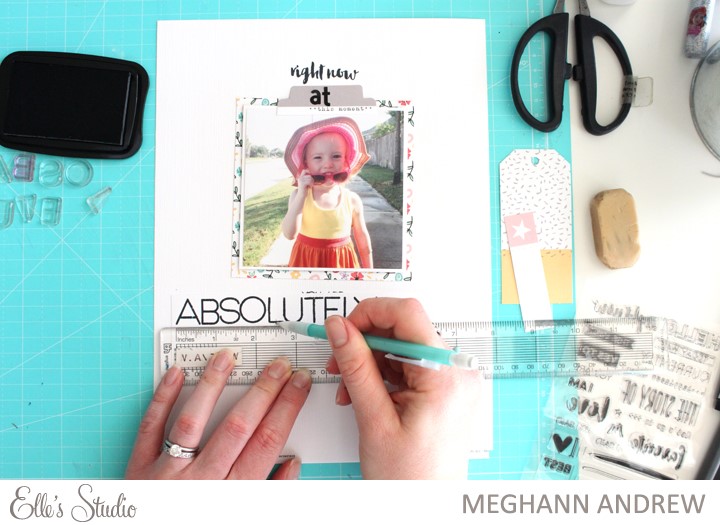
Next, I measured the length of the word and marked the center line. Going back to my layout cardstock, I marked the centerline of the paper under my photo, where I wanted to stamp the word. I also measured and drew a straight line with a pencil to use as a guide for the word.

EllesStudio-MeghannAndrew-Stamping04
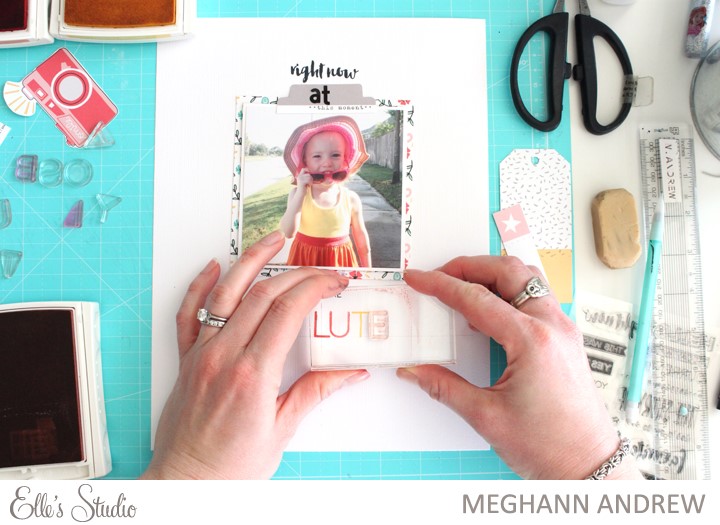
I began stamping with the L, since it was in the center point of my word. I lined the “L” up on the paper’s center point where the center point of the word was on my scrap piece of paper. From there, I stamped the remaining letters to the right of the “L” using different colors…

EllesStudio-MeghannAndrew-Stamping05
and continued with the letters to the left of the “L”, finishing with “A”.

EllesStudio-MeghannAndrew-Stamping06
Once the word was finished, I carefully erased my guiding lines with a gum eraser, and dusted the page off with a drafting brush. Using your hands to brush off the layout can result in smudges from wayward ink on your fingertips. Trust me, I speak from experience.

EllesStudio-MeghannAndrew-Stamping07
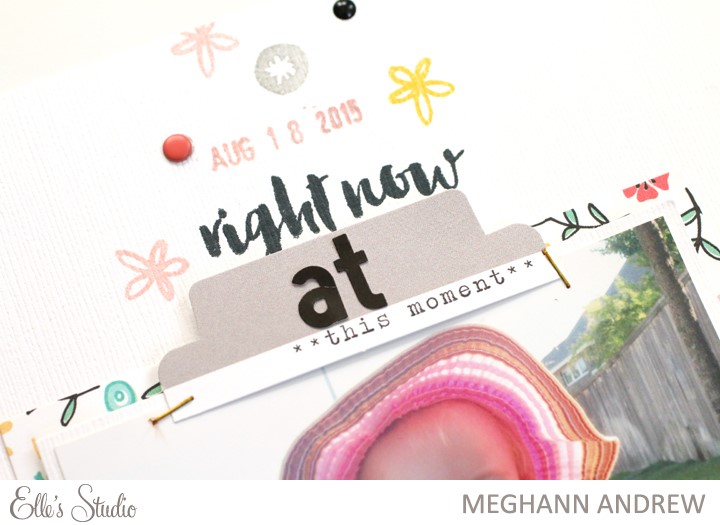
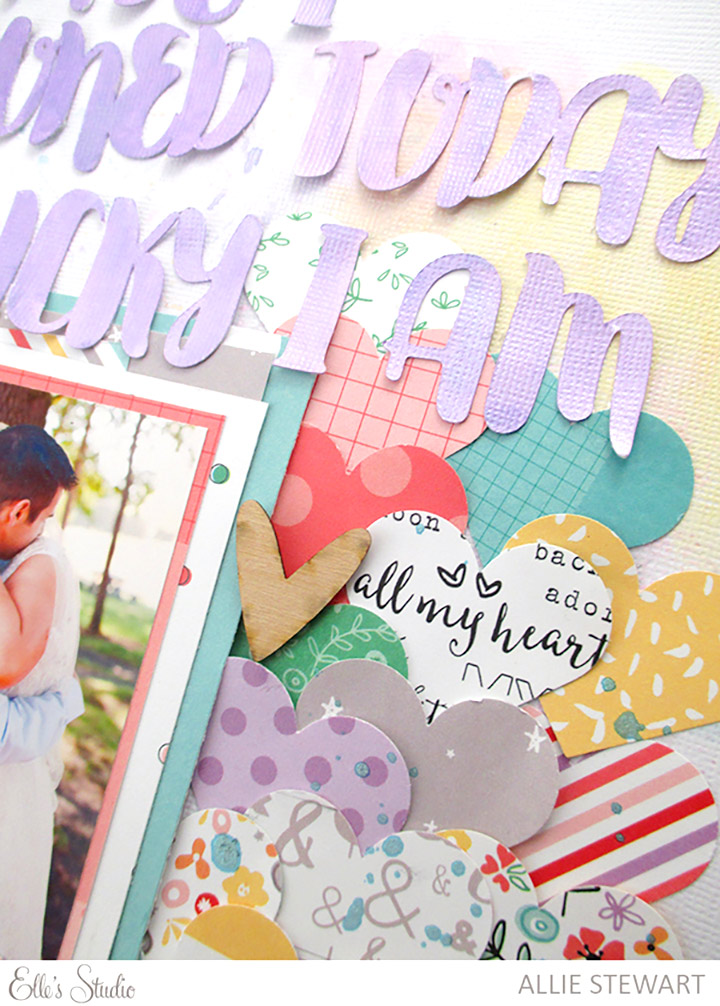
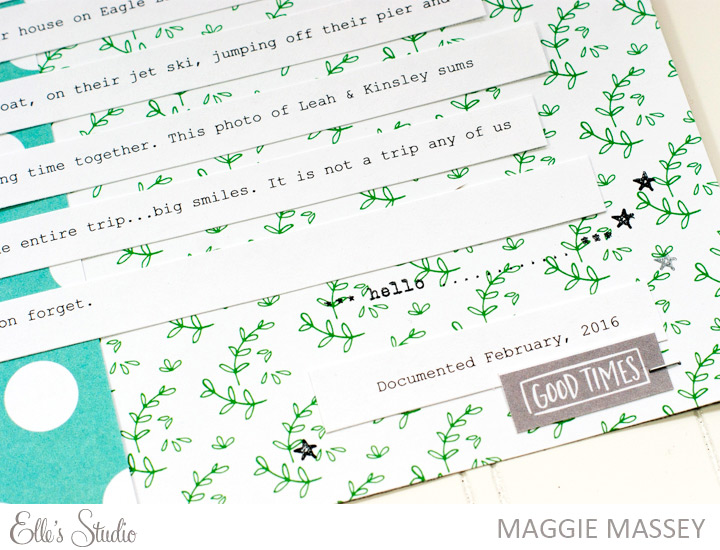
Once I had my title in place, I added the adorable small flowers from the Little Moments stamp to float from the top of my layout to the bottom.

EllesStudio-MeghannAndrew-Stamping08
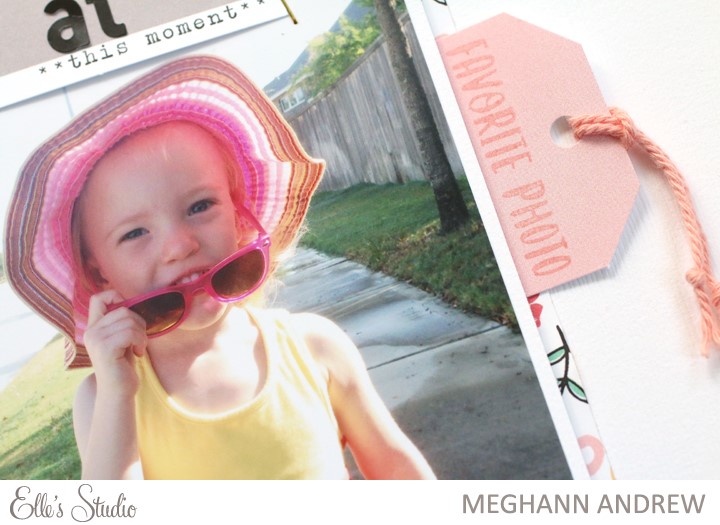
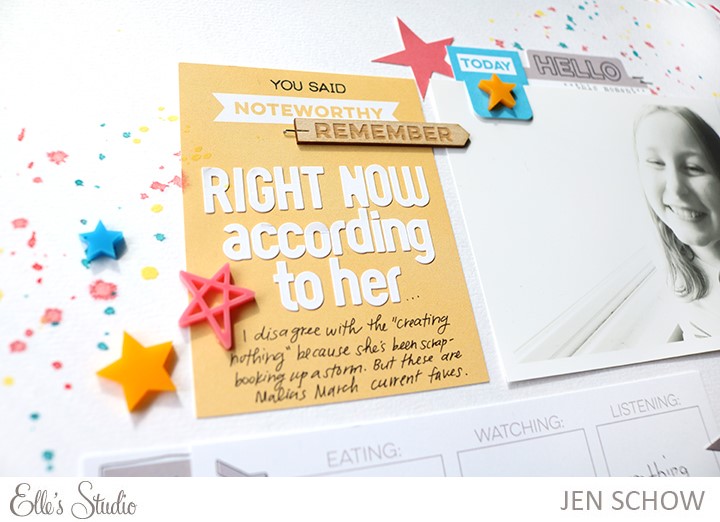
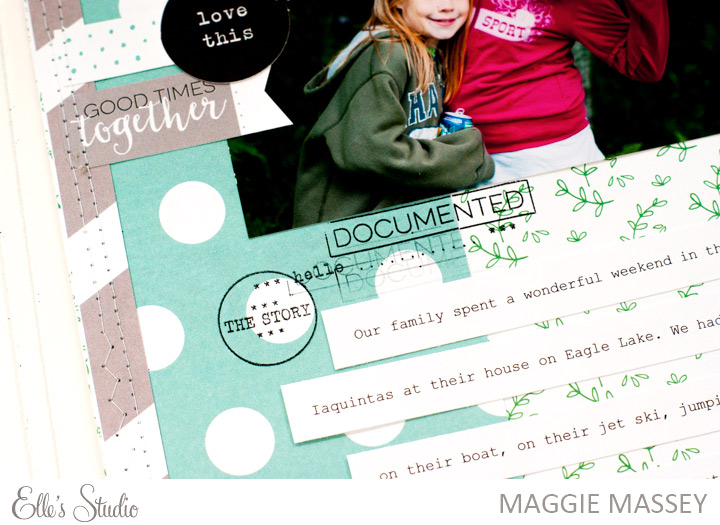
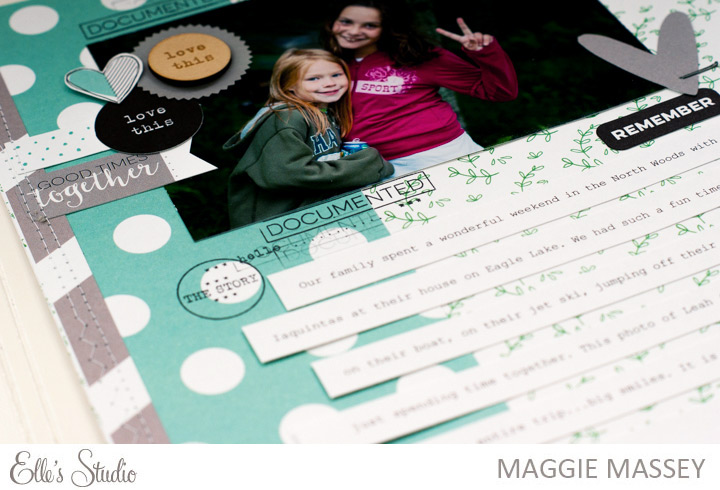
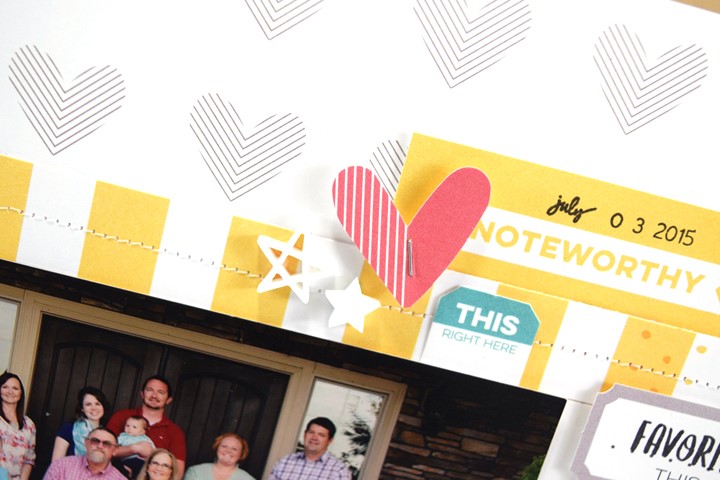
This photo is literally one of my favorite photos of my daugher, so I had to stamp that phrase from the  Noteworthy stamp onto a journaling tag from the Little Moments bits and pieces, which I tucked in a pocket behind my photo. By stamping the phrase with a similar colored ink to my tag, it kept the image less jarring, creating a tone-on-tone effect.

EllesStudio-MeghannAndrew-Stamping09
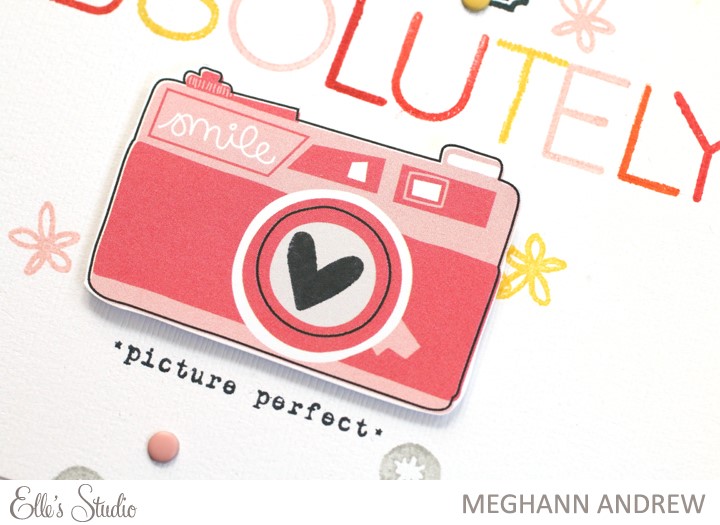
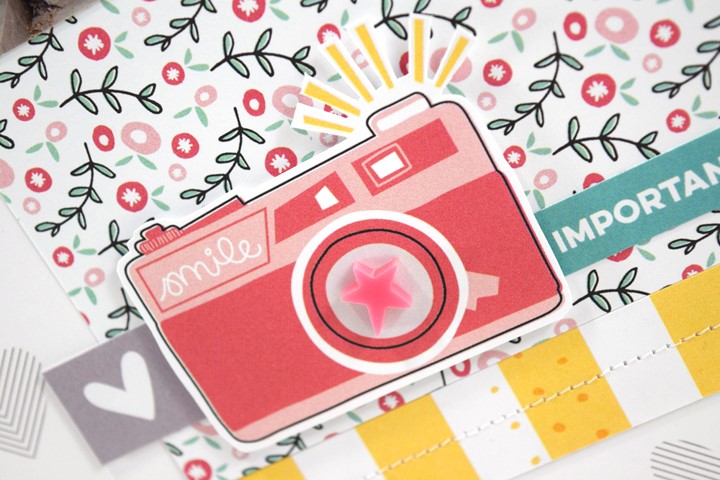
If you haven’t yet purchased the March exclusive kit, this sweet little camera is featured on one of the 3” x 4” journaling tags, and is perfect for cutting out to use as an embellishment. I added a black heart to the lens with the The Story Of stamp, and the final piece of the title, “picture perfect” was the perfect phrase to finish off this layout.

Thanks for joining me today! Before you go searching for the “perfect” alphabet sticker or pre-made embellishment on your next layout, consider stamping one for yourself!

Mixed Media Layout with Special Guest Ashli Oliver

Ashli Oliver is joining us as the second of our guest designers this month. We love her beautiful, mixed-media style, and we know you will love her project so much that you may even be grabbing for your paints and your March exclusive kit before you know it!

Hello there! It’s Ashli here with you today to share one of my favorite design techniques: REPETITION!

EllesStudio-AshliOliver-03
When I saw the gorgeous acrylic star embellishments, as well as the fun stars in the March digital cut file, I knew what I had to do!

EllesStudio-AshliOliver-01
After printing out my photo at 8-½”  x 11”, I used my Silhouette machine to cut the digital cut file stars straight from my image in the negative space along the left side. After cutting the stars, I removed my photo from the cutting mat and trimmed it before adhering it to the right side of my layout. Next, I adhered the photo stars back on my layout, matching them up to where they would have been on the original photo print- almost as though my photograph was bursting into a trail of stars!

EllesStudio-AshliOliver-trythis
Then, I layered the gorgeous acrylic stars on top and completed the starry goodness with some paint! I started by applying white acrylic paint to my cardstock, then once that was dry, I topped it with inexpensive watercolors to create a soft, dreamy background. You can learn more about this technique in my e-course, The Softer Side.

EllesStudio-AshliOliver-02
And, of course, I couldn’t leave the right side of my image out, so I used the lovely little tags from the March exclusive kit, bits and pieces from the Little Moments collection, and Little Moments wood veneer to layer up in repetition all along the side of my photo. A little stitching was the perfect finishing touch to pull this layout full of stars together.

Not only is repeating a design element fun, but it is a sure-fire way to guarantee a successful page!

EllesStudio-AshliOliver-04Ashli Oliver (aka soapHOUSEmama) lives with her husband and four girls, age 10 and under, in a suburb of Atlanta, Georgia. Ashli is a recovering graphic designer and when she is not busy homeschooling her kiddos, you can find her drinking copious amounts of coffee while playing with paint and pretty paper in her studio. Not only does Ashli love documenting her family’s memories, but she finds great joy in the creative process… which, in her case, usually involves lots of messy, painty fun!

You can find Ashli, and her work, at her WebsiteYouTube, Instagram, and Classes.

Sketch Thursday

EllesStudio-SketchThursday-3-17-16
Hi everyone, Allie here! There are lots of different ways to be inspired by sketches, and I tend to use sketches very loosely. They’re a great starting off point for a project! Today’s sketch was based off of Jen’s Smile layout  and I was inspired by the layers on either side of the photo.

EllesStudio-AllieStewart-SketchThursday01
I decided to use hearts instead of Project Life cards or other layers! I punched out hearts from patterns in the Little Moments collection, and added them on either side of my photo. I did a few small layers behind my photo, but kept the emphasis on the hearts. I did a long title of a quote that I’d been wanting to use for a long time.

EllesStudio-AllieStewart-SketchThursday02
I used my Silhouette Cameo to cut out the letters, and then painted them with watercolors. Finally, I added a few wood veneers and a die cut to break up all the patterned paper.

EllesStudio-AllieStewart-SketchThursday03Products used: Little Moments Bits and Pieces, Little Moments Journaling Tags, Little Moments Wood Veneers, Little Moments 6×6 Paper Stack, and Little Moments 12×12 Paper Collection

Now it’s your turn to create something inspired by this week’s sketch – it can be any type of project, too! For a chance to win a $10 gift certificate to our shop, create any type of project inspired by today’s sketch, upload it to the Member gallery, and leave a comment here with the link by March 30th. A random winner will be selected and posted with the next sketch on March 31st.

3771_4174_14580014856428_bigAnd, congrats to our randomly selected winner this week!  Vivian created this fun layout from our previous sketch! Please email us at info@shopellesstudio.com to claim your prize!

Little Moments with Kay Rogers

EllesStudio-KayRogers-LittleMoments01
Kay put together this fun layout using our new Little Moments collection. Using the 12 x 12 papers for the background, she layered one on top of the other, then added triangles cut from our 6 x 6 paper stack!

EllesStudio-KayRogers-LittleMoments02
Since this layout is so colorful, she printed the 3 x 4 inch photos in black and white to allow them to pop, then added them to the center along with a journaling tag, some bits and pieces, and wood veneers!

EllesStudio-KayRogers-LittleMoments03Products used: Little Moments 12 x 12 paper, 6 x 6 paper stack, bits and pieces, wood veneer, journaling tags, and stamp.

This entire collection is now available in our shop and we can’t wait to see how you use this new collection – make sure you share your projects with us in our Member Gallery or on Instagram with the hashtag #ellesstudio!

PROJECT LIFE | DOCUMENTING A BIRTHDAY

Hello everyone!  It’s Jenni here, sharing a new page in my Project Life album.

IMG_9110

My daughter’s birthday was in late February, and it turned out that her birthday was the same day as the “Fuller House” premiere!  We are already big “Full House” fans, so we knew a Full(er) House party for my little girl would be perfect!

IMG_9069

I used a 9×12 square pocket page to create this spread and it’s packed with items from Little Moments and the Elle’s Studio March 2016 Exclusive Kit.  I reserved a few squares for my journaling and used the Jonah Labels to highlight the topics I was journaling about.  I even dug in to a few of my Sycamore Lane products and pulled out the “Home Sweet Home” journaling card (a nod to a Kimmy Gibbler quote in Fuller House!) and the House cork piece.  And I of course had to use our Vellum Numbers to highlight her age!

IMG_9089

Whenever I document a birthday, I always try to include something small from the actual party in the spread.  Many times, I will save one of the candles from the birthday cake.  It’s always so special to look back and see a candle in my scrapbooking pages that helped us celebrate a new year.  I really enjoyed merging the two stories of my daughter’s birthday and our excitement for “Fuller House” in this spread.IMG_9092Thank you for stopping by today, I hope you gained some inspiration as you document birthday celebrations!

Elle’s Studio Products Used:  Elle’s Studio March 2016 Exclusive Kit, Little Moments- Bits and Pieces, Little Moments Journaling Tags,  Little Moments 12×12 Paper CollectionAcrylic Stars- Spring Mix, Jonah Labels, Jonah Alphabet StampSycamore Lane- Journaling Tags, Sycamore Lane- Cork Shapes, Vellum Numbers, Letter and Number Stickers- Grey

Little Moments with Michelle Wedertz

EllesStudio-MichelleWedertz1
Hi everyone, Michelle here sharing a layout made with the new Little Moments collection! When I first saw the new collection, my eyes went straight to two things – the black Letter and Number Stickers and the 6×6 Paper Pack – and I knew that I wanted to feature both in this fun layout about my morning coffee!

EllesStudio-MichelleWedertz2
The alphabet stickers are so perfect for creating long titles like I did here and the bold color really makes them stand out. With the 6 x 6 paper already cut down to size, I only had to simply layer them under my photo, finding an arrangement that I liked. I chose to embellish pretty minimally to keep the focus on the title, choosing two tags from the Bits and Pieces, and one sentiment from the stamp.

EllesStudio-MichelleWedertz3Supplies used: LIttle Moments: Bits and Pieces, 6×6 Paper Pack, and Stamp; and Letters and Numbers Stickers – black.

We are excited to see how you use this new collection – make sure you share your projects with us in our Member Gallery or on Instagram with the hashtag #ellesstudio!

Little Moments with Maggie Massey

Hey everyone! Maggie here! I’m so excited to share this 9×12 layout I’ve created with the brand new Little Moments Collection!

As soon as I laid my eyes on all of these wonderful new pieces I got so excited because I envisioned a million different projects…just the sheer variety of colors and patterns makes this collection so versatile!

EllesStudio-MaggieMassey-LittleMoments-aSupplies used: Little Moments Patterned Paper: My Favorite, Details; Little Moments Stamp Set, Little Moments Bit & Pieces, Little Moments Wood Veneer

For this page I chose to stick with mostly greens and greys – to coordinate with the colors in my photo and to make that pink just pop off the page.

EllesStudio-MaggieMassey-LittleMoments-b
I positioned my photo toward the top of the page and added a few embellishments to “ground” it to my layout.

EllesStudio-MaggieMassey-LittleMoments-c
A few more embellishments on the opposite side of the photo even out the look a bit.

EllesStudio-MaggieMassey-LittleMoments-d
I decided to add my journaling in long strips to help fill out the rest of my page…

EllesStudio-MaggieMassey-LittleMoments-e
…and a little grey embellishment at the very bottom ties in to the grey at the top.

EllesStudio-MaggieMassey-LittleMoments-f
A few stamps from the stamp set (probably one of the best sets ever) help finish off the page and make it more cohesive.

EllesStudio-MaggieMassey-LittleMoments-g
And that’s it! Man, I love this page…I think it’s probably my favorite right now…

Thanks so much for taking a look and don’t forget to share your projects with us in our Member Gallery or on Instagram with the hashtag #ellesstudio!

Grid Design Layout with Special Guest Becki Adams

Let’s welcome the first of two guest designers we have for March, Becki Adams! Becki’s clean, colorful designs are a perfect pairing with ES product, and we’re so excited to share her first project with you today!

Hey there, Elle’s Studio fans. I’m Becki Adams and I’m thrilled to be back here with Elle’s Studio. I’ve always been a huge fan of Elle’s Studio products. My favorite technique to use when working with Elle’s products is to create a layout with a grid design. The layout I created to share with you features two 3” x 4” tags and one 4” x 6” tag.

EllesStudio-GuestBeckyAdams-01Supplies: March exclusive kit, Little Moments collection paper pack, acrylic stars add-on and Noteworthy Stamp.

You may notice that the bottom section of my grid is slightly smaller than the top portion of the grid. There is a method behind my madness. I created a process video to show you how this layout came together:

I love the little details on this layout and the pink camera is my favorite part of this page! I love fussy cutting elements and adhering them to my projects with dimensional adhesive, and this camera tag was perfect for that technique.

EllesStudio-GuestBeckyAdams-02EllesStudio-GuestBeckyAdams-TryThis
Faux stapling is a technique I use when my stapler won’t reach the area on my layout – this technique is explained in the video above. I used this technique on the heart in this embellishment cluster.

EllesStudio-GuestBeckyAdams-03
The “this always” tag found in the March exclusive kit is perfect for adding a stamped sentiment. I chose the “Favorite Photo” stamp from the Noteworthy stamp set for this layout because this is one of my all-time favorite photos of my entire family. It’s rare for us all to be in the same place at the same time, and even more rare for us all to be in the same photo! Naturally, I love this photo- really love it.

EllesStudio-GuestBeckyAdams-03
I stamped the title for this layout onto the teal “Did somebody say…” tag with an older Elle’s Studio alphabet stamp set and black stamping ink.

EllesStudio-GuestBeckyAdams-05

Thank you for letting me share this layout and one of my favorite photos with you! Next time you sit down with an Elle’s Studio exclusive kit, try designing on a grid. It’s easy and a perfect design for Elle’s Studio tags!

EllesStudio-GuestBeckyAdamsI thought it would be fun to share a few random things about me: I love a clean house, a good book, and a really great cup of hot chocolate (in the winter) or a glass of raspberry lemonade (in the summer). Oh, and chocolate, don’t forget that I love chocolate. I also love a great find in a thrift store. My most favorite things to look for are books and dishes…a girl can never have too many dishes, or books.

My passion for scrapbooking started when I was given the assignment to create a scrapbook in my high school home economics class. I really started to be passionate about the hobby after my son was born in 2001. I have had the opportunity to work with many amazing companies and have made lifelong friends through this amazing hobby.

You can find more of Becki’s work at her blog, Facebook, Instagram, Pinterest, Twitter, and Periscope.