L.A. Adventure by Allie Stewart

EllesStudio-AllieStewart-Travel01
Hello there, Allie here today sharing a layout using the Travelogue items in the shop! I’ve been in the mood to scrapbook our Disney honeymoon photos lately, and the Travelogue items are perfect for it! The fun, bright colors match Disney pictures perfectly, and they are great for other travel pictures as well, like the day trip we took to Los Angeles in this layout.

EllesStudio-AllieStewart-Travel02
To create this page, I used a 12 x 12 paper from the Little Moments collection. Then, I took two large die cut letters and covered them with adhesive from a tape runner. I wrapped twine around each letter, and secured the ends on the back of the letter. I wanted the LA letters to be the focal point of my layout, along with the adventure wood veneer!

EllesStudio-AllieStewart-Travel03I knew I wanted to use three photos, so I started adding bits of layers using the Travelogue Journaling Tags and Labels, as well as a few items from the upcoming April Exclusive kit that will be in the shop on April 10th! For the title, I used the Go See Do acrylic pieces, and added a “period” between each word using the star stamp from the Travelogue Stamp set! I added a few more stamps on the page, and the layout was finished!

Thanks for joining me today! Don’t forget to stop by the shop to check out all the fun, new Travelogue items, and have a wonderful day!

Adventure layout by Melissa Man

Good Morning, everyone! This is Melissa here with you today and I’m sharing a layout made with various Elle’s Studio collections and the brand new Travelogue release from this month!

EllesStudio-MelissaMann-Travelogue01Products used: Cienna Paper Collection, Thankful Paper Collection, Shine Paper Collection, Love You More Paper Collection, Travelogue Stamp, Travelogue Journaling Tags, and Travelogue Labels.

I don’t know if you are like me, but I can never throw away the strips of paper on the bottom of 12×12 papers. I will save them up and try my best to use them somehow. Well, for this layout, I sketched out a large star on my white card stock and then used various strips to create the outline of the star. I stitched this all down with my sewing machine.

EllesStudio-MelissaMann-Travelogue02
After this was done, I splashed some Mr. Huey mists on my layout and then used the new Travelogue stamp set with gray ink and stamped around the outline of my star using the stamp “Notes from this day”. Once this was done, I layered my two pictures and 3×4 journaling tag that I typed my journaling on off to the middle right of the layout. My title was cut out using my Silhouette Cameo and I stitched it down on the top horizontal line of my star. Lastly, I tucked in some of the Travelogue labels around my layout and sprinkled a few of the gold chipboard stars on the white card stock where I had dropped the mist.

EllesStudio-MelissaMann-Travelogue03
Thanks for stopping by and taking a peek this morning!

Sketch Thursday

Hey hey everyone! Maggie here with my take on a sketch based off of a layout by Allie Stewart! Yay! Working from a sketch is one of my favorite ways to jump start my creativity…it’s like half the work is already done for  you!

EllesStudio-SketchThursday-3-31-16
Allie’s layout is so awesome, I stuck with the same basic design…the grid is really right up my alley.

EllesStudio-MaggieMassey-SketchThursday-01
For my page I chose a few everyday photos of my daughter studying and printed 2 of them in the Portrait orientation and 2 of them in Landscape. I arranged them on my page and added my title “Little Moments” right smack dab in the middle.

EllesStudio-MaggieMassey-SketchThursday-02
To mimic the lines on both the top and bottom of Allie’s page, I added strips of paper under my photos and some hand-drawn lines above the photos.

EllesStudio-MaggieMassey-SketchThursday-03 EllesStudio-MaggieMassey-SketchThursday-04
I used a regular old hole punch to create a few “bubbles” to add around my title, and a few stamps colored in with watercolors finish out this page. Thanks so much for taking a look!

EllesStudio-MaggieMassey-SketchThursday-05SUPPLIES: Little Moments Patterned Paper: All My Heart, Details; Little Moments 6″ paper pad, Little Moments Lil’ Snippets: Labels; Little Moments Bits and Pieces; Little Moments Stamp Set; Little Moments acrylic; Little Moments Wood Veneer; The Story Of Stamp.     

Now it’s your turn to create something inspired by this week’s sketch – it can be any type of project, too! For a chance to win a $10 gift certificate to our shop, create any type of project inspired by today’s sketch, upload it to the Member gallery, and leave a comment here with the link by April 13th. A random winner will be selected and posted with the next sketch on April 14th.

5018_4181_14588724934983_big
And, congrats to our randomly selected winner this week!  Snazzyjj created this awesome layout from our previous sketch! Please email us at info@shopellesstudio.com to claim your prize!

Reinforcing Your Story with Special Guest Ashli Oliver

Let’s welcome Ashli Oliver back for her second post of the month! Today, Ashli is challenging us to get “literal” on our projects. Let’s take a look at how she did just that:

Hello again! It’s Ashli back with you today to share how you can reinforce your story with design elements.

Notice all these tied up layers?

EllesStudio-AshliOliver-07

Not only does it just look fun and beautiful, but I chose to do it because this layout is all about my little one, cozied up in a blanket that I knitted for her.

EllesStudio-AshliOliver-06“Cozy” supplies: Little Moments 12” x 12” paper collection, Little Moments 6” x 6” paper stack, Little Moments bits and pieces, Little Moments wood veneers, Little Moments word labels, March 2016 exclusive kit, letter and number stickers- black

The layers of patterned paper from the Little Moments 6” x 6” paper stack reinforce the coziness of the blanket, while the thread tied around goes along with the knitting theme, mimicking the photos of my daughter and the blanket on the left side.

EllesStudio-AshliOliver-05
I added all of these lovely layers to a piece of the Little Moments 12” x 12” Happiness paper and topped them with some embellishment from the March 2016 exclusive kit, Little Moments bits and pieces, and Little Moments wood veneers. My title, “cozy” was added with the black letter and number stickers. To finish my layout and keep my signature style, I had to include a bit of mixed media paints to my patterned paper.

Next time you aren’t sure where to go with your page design, try pulling inspiration from your story!

EllesStudio-AshliOliver-04

Ashli Oliver (aka soapHOUSEmama) lives with her husband and four girls, age 10 and under, in a suburb of Atlanta, Georgia. Ashli is a recovering graphic designer and when she is not busy homeschooling her kiddos, you can find her drinking copious amounts of coffee while playing with paint and pretty paper in her studio. Not only does Ashli love documenting her family’s memories, but she finds great joy in the creative process… which, in her case, usually involves lots of messy, painty fun!

You can find Ashli, and her work, at her WebsiteYouTube, Instagram, and Classes.

Working with 6 x 6 paper with Alissa Fast

Good morning, all! Alissa here today and I’ve got the fabulous 6×6 paper stack from the Little Moments collection to show you. I love 6×6 pads and love that Elle created this as a stack, instead of a pad. And, my favorite thing is that the prints are completely different prints than in the 12×12 paper collection. So fun!

EllesStudio-AlissaFastProducts used: Little Moments 6×6 Paper Stack, Little Moments 12×12 Paper Collection, Little Moments Bits & Pieces, Little Moments Acrylic, Jonah Alphabet Stamps, March Exclusive Kit, Black Letters & Numbers, and Acrylic Stars – Spring Mix

I cropped several of the prints into 3×3 squares and then cut half of them into 2 triangles and adhered them to the full size squares.

EllesStudio-AlissaFast-02
I laid them out like a quilt pattern on the white cardstock and added 3 3×3 inch photos to the grid.

EllesStudio-AlissaFast-03
I thought a black title would stand out better than the white acrylic piece so I took a Sharpie to the Little Moments piece and one of the stars from the spring mix pack. I think the black stands out so well.

EllesStudio-AlissaFast-05
Then I went about adding bits and pieces to the grid to spruce it up.

EllesStudio-AlissaFast-04

Now, it’s your turn to create something awesome – Be sure to share your projects using Little Moments 6 x 6 paper pad with us in our Member Gallery or on Instagram with the hashtag #ellesstudio!

Journaling with Jill Sprott

March is a hinge month, ending so differently from the way it begins. There’s a good reason why it’s said that March is “in like a lion” and “out like a lamb.” It’s certainly been true for me this month! Luckily, I have furry friends who help me through months like these, providing me with psychic — and comic — relief.

EllesStudio-JillSprott-Journaling
This layout, inspired by the perfectly-designed “March” tag in the Elle’s Studio March kit, looks back at a rough month while also paying tribute to one of the furry friends who helped me through it.

Initially, I was going to add my journaling to the “March” tag, but I wanted to use the tag as a kind of anchor for the entire page. It’s the only aspect of the design that juts off of the painted background (which I created by adding a few dollops of slate gray acrylic paint to cardstock and using a brayer to spread around the color).

EllesStudio-JillSprott-Journaling2
To add some dimension and call even more attention to the “March” tag, I tucked in the “Little Moments” acrylic sentiment from the Little Moments collection, aligning it with the letters on the tag.

Building on the fact that March has been nearly-nonstop gray skies for me, literally and figuratively, and drawing color inspiration from my gray-toned kitty, I opted for a gray, black, and white palette. This month’s kit and the Little Moments collection contain lots of tags and patterns in these colors. I layered a bunch of them under the photo.

The journaling builds on the same color concept, mentioning how having a cat around helps one to deal with the “bleak grays” in life.

EllesStudio-JillSprott-Journaling1
The final addition to the page was stamping. When I looked at the Noteworthy stamp, I noticed a sentiment reading “picture perfect.” When I looked down at the photo on the page, I said the words aloud, and then giggled to myself — how “punny” would it be to have a sentiment that read “picture purrfect” instead?

It occurred to me that I had in front of me all of the needed letters. I snipped the phrase in half and stamped “picture” multiple times with white chalk ink. I then cut out the “ur” from picture and inserted it between the “p” and “rfect” in “perfect,” and stamped “purrfect” repeatedly in black ink.

EllesStudio-JillSprott-Journaling3
Just creating this page alleviated my March madness. I’m feeling so much better now. Could it be that this month might actually go out like a lamb?

Thanks for visiting today!

Smile layout with Jamie Leija

Hi everyone, Jamie here! I’m a sucker for yellow. It’s my favorite color! So this striped sheet was the perfect backdrop for the step by step story I was telling. My nephew was over a few weeks ago. He has a favorite chair in our apartment, which also happens to be my puppy’s favorite chair. So while he was visiting, they battled over it the whole time.

ES-Chair01Products used: Little Moments Paper Collection, Little Moments 6 x 6 Paper Stack, Acrylic Stars – Spring Mix, Smile Printables, March Cut Files, and Letter & Number Stickers – Light Gray.

There was a lot of conflicting colors in the photos, so I converted them to black and white and printed them at 3×4 inches.

ES-Chair03
Stars are one of my favorite icon, so I was excited to see them featured in this month’s cut file. To cut them out, I chose papers from the 6 x 6 Little Moments paper stack, since the patterns are shrunk down. It made for a better scale I think!

ES-Chair02
I thought I would have fun with how I adhered them. Instead of just gluing them down, I added a dollop of white paint to the page and stuck the stars down into them. I love the texture this adds! It’s a tad messy but definitely fun! To each of the star + paint dollops I added a few of the phrases from this month’s printable plus one of the acrylic stars available this month.

ES-Chair05
For the title, I thought I’d make it more dimensional, so it wouldn’t get lost. I cut out “smile” four times and then glued them all together.

ES-Chair04
Journaling strips were the only way I was going to get out everything I had to say about this series of photos. I printed and adhered them, then underlined each line with a pen. I think this helped to ground them. And it helped introduce more black to the page, to balance all of the contrast in the photos.

This was just a fun, silly, happy page to make! It was definitely a Little Moment but something fun to scrapbook!

Little Moments with Special Guest Becki Adams

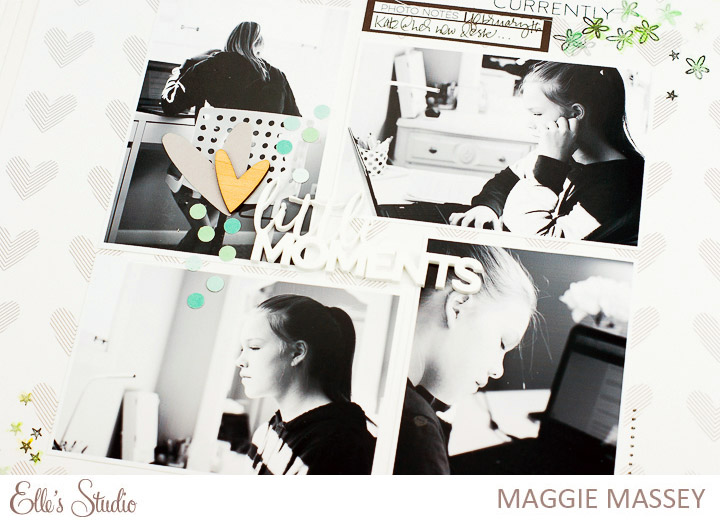
Let’s welcome Becki back for her second guest post with us! Becki is a pro at mixing patterns and layering on her layouts in such an effortless way. We love how she combined so many different patterned papers from the Little Moments collection. Let’s take a look at how she did it:

Hello Elle’s Studio friends, it’s Becki here and I am back with another layout using the beautiful Little Moments collection. The thing that I scrapbook the most is the little moments we have in our home, so this collection is perfect for me. I love all of it!

EllesStudio-GuestBeckyAdams-09
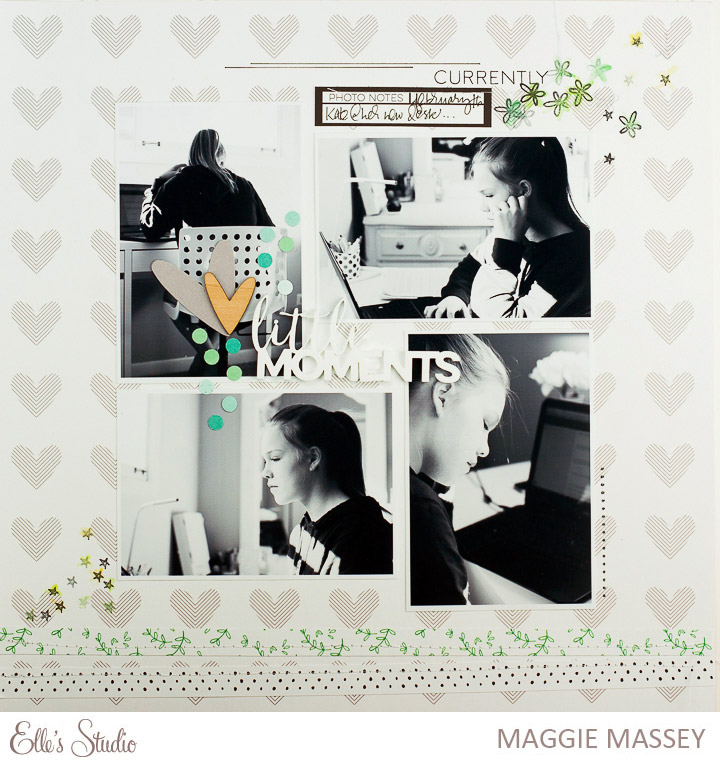
Products used: 12” x 12” paper collection, 6” x 6” paper stack, letter and number stickers- black, bits and pieces, journaling tags, wood veneers

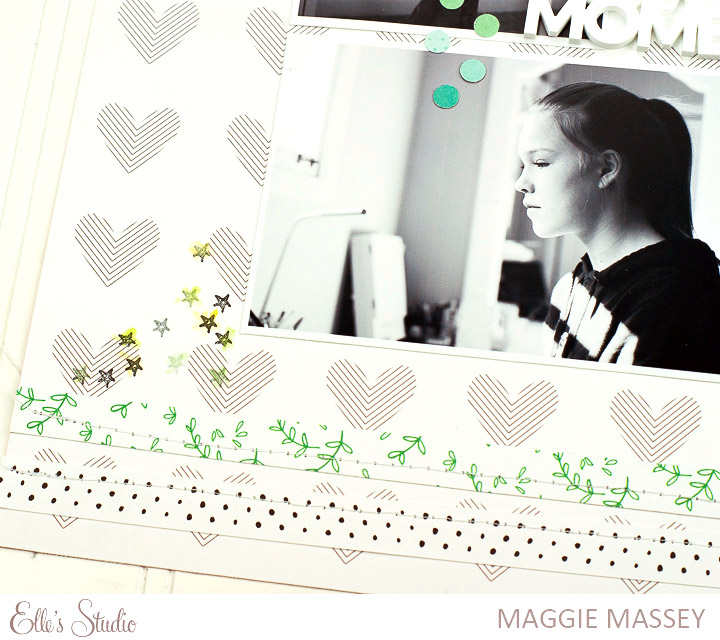
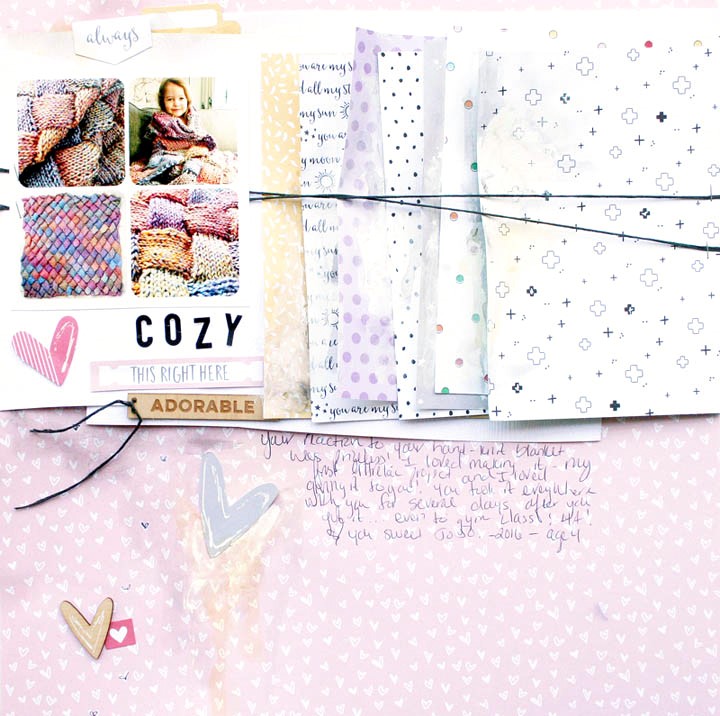
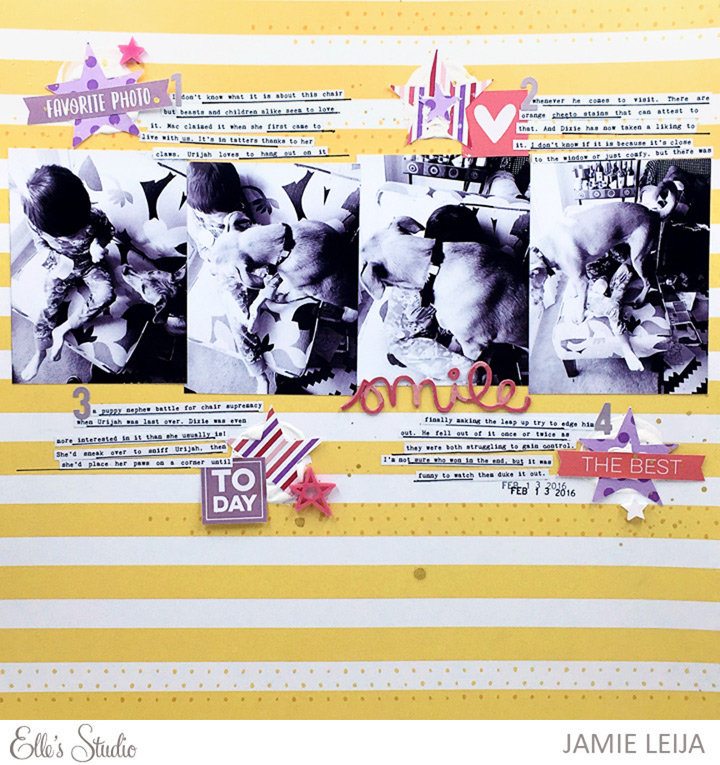
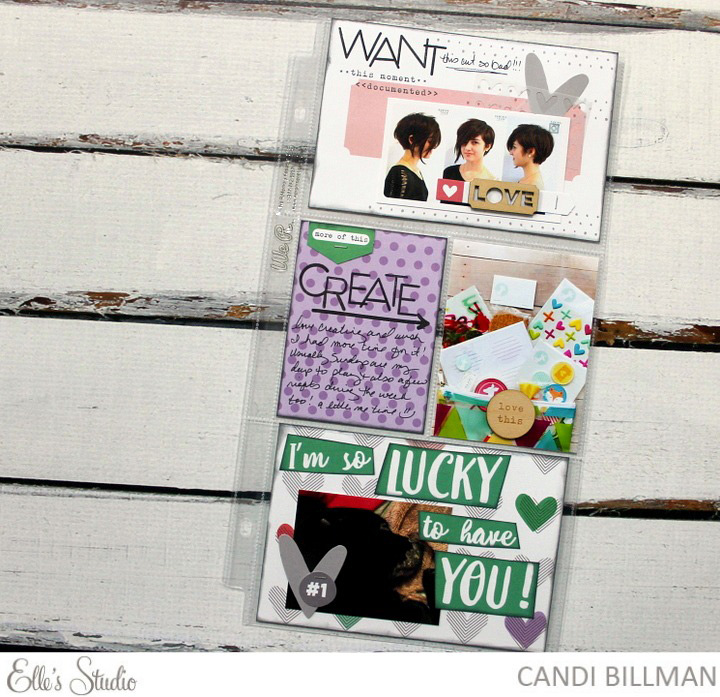
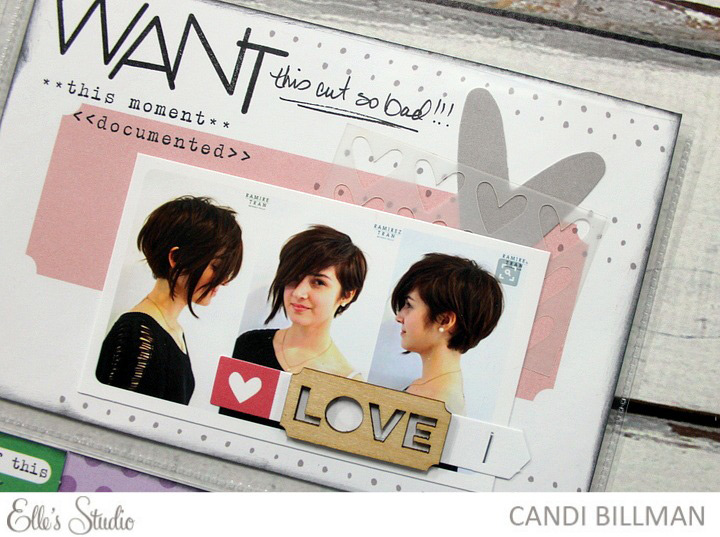
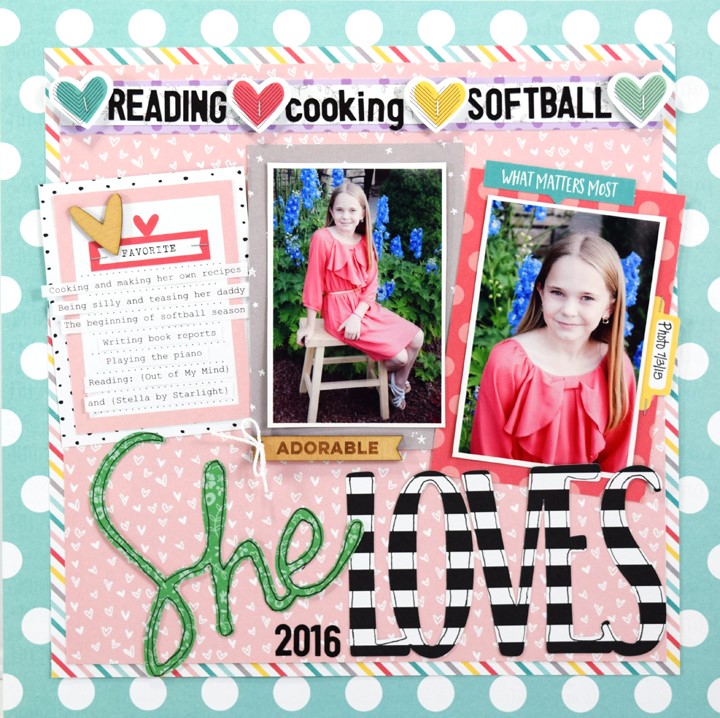
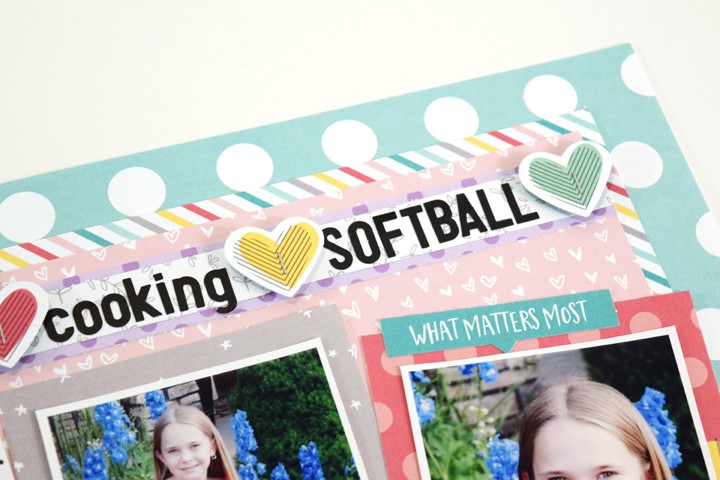
The project I created for you today is a layout titled, “She Loves,” which simply documents the things my daughter loves right now. I used a couple of photos that were taken of her when we had our family photos taken last summer and matted them on two patterned papers from the 6” x 6” paper stack.

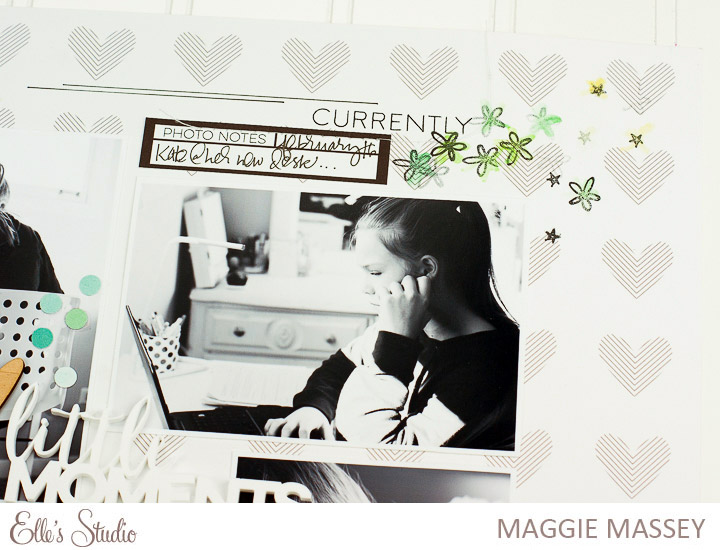
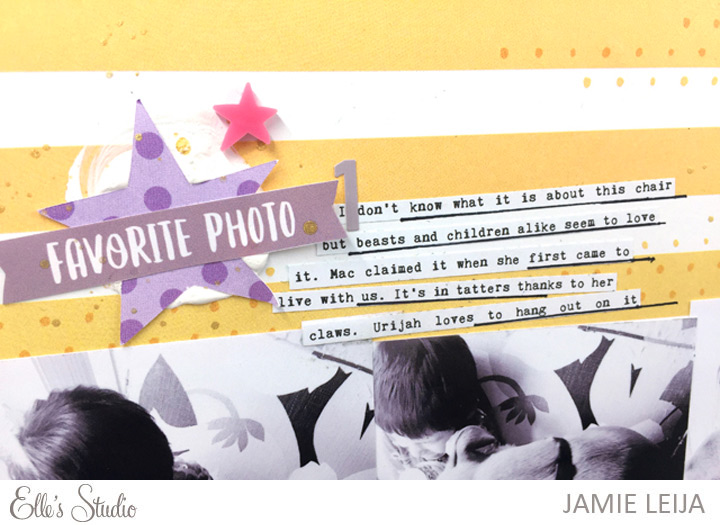
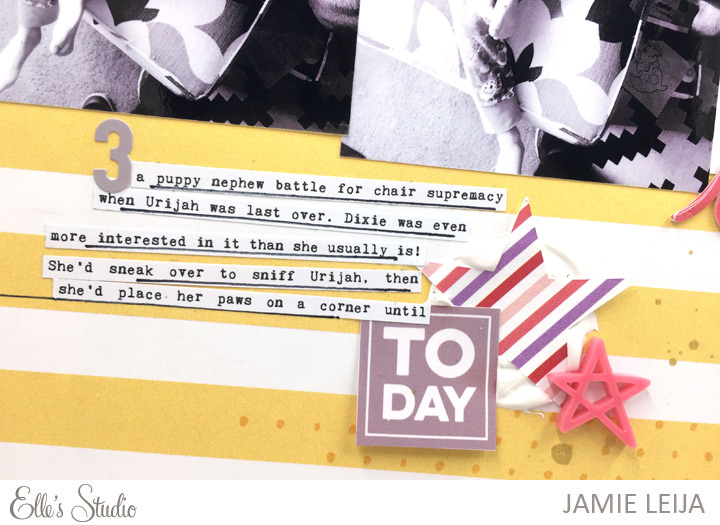
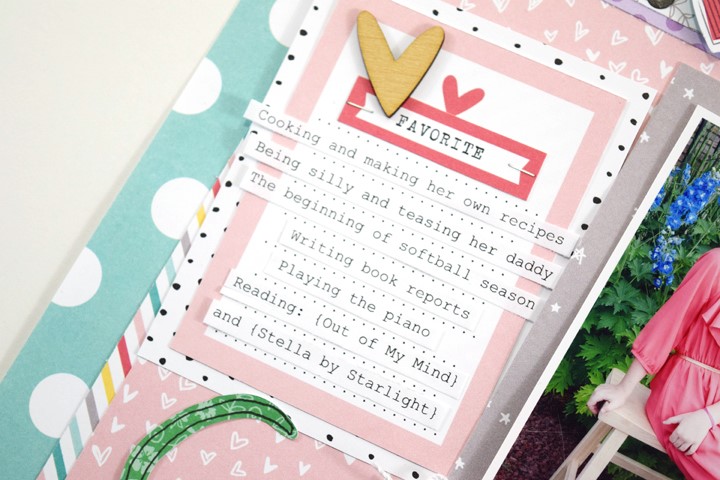
I added some typewritten strips to a 3” x 4” card from the Highlights cut-apart paper for my journaling, and placed the card to the left of my photos.

EllesStudio-GuestBeckyAdams-08
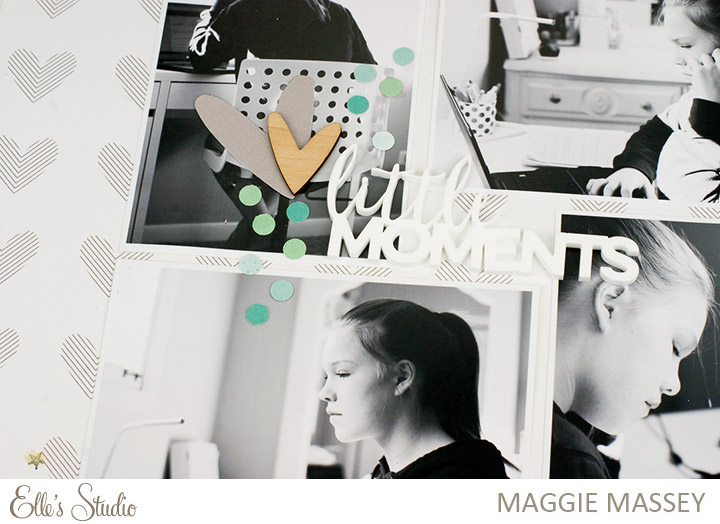
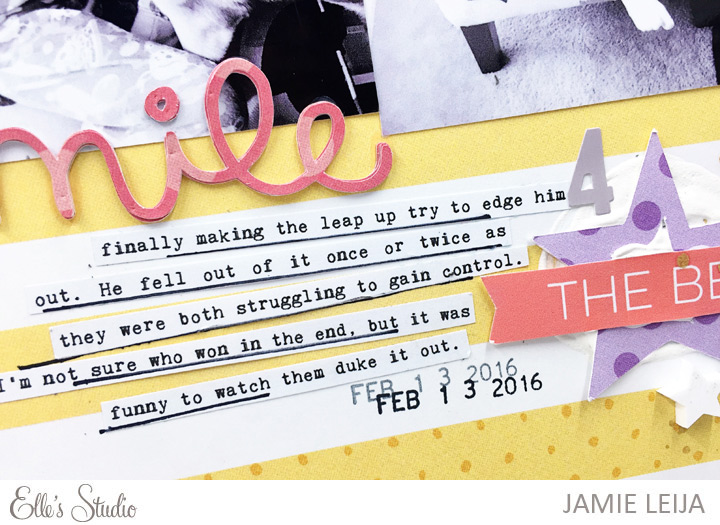
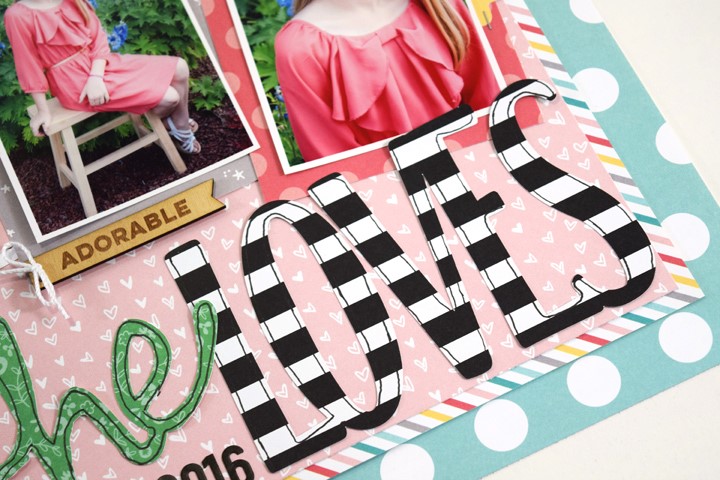
I used two papers from the Little Moments 6” x 6” paper stack to create my title, cutting the words, “She Loves” using my electronic die-cutting machine, using two contrasting fonts and patterned papers, so that the title stood out against my colorful background. After adhering my title, I outlined the edges of the die-cut words with a black pen to make it stand out a little bit more.

EllesStudio-GuestBeckyAdams-07
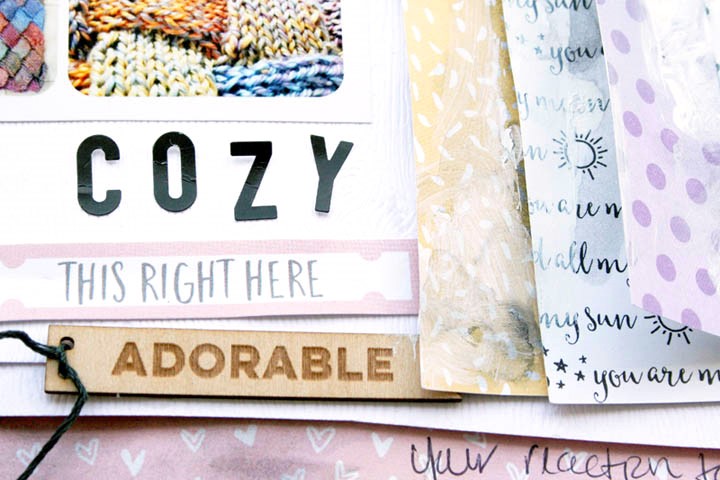
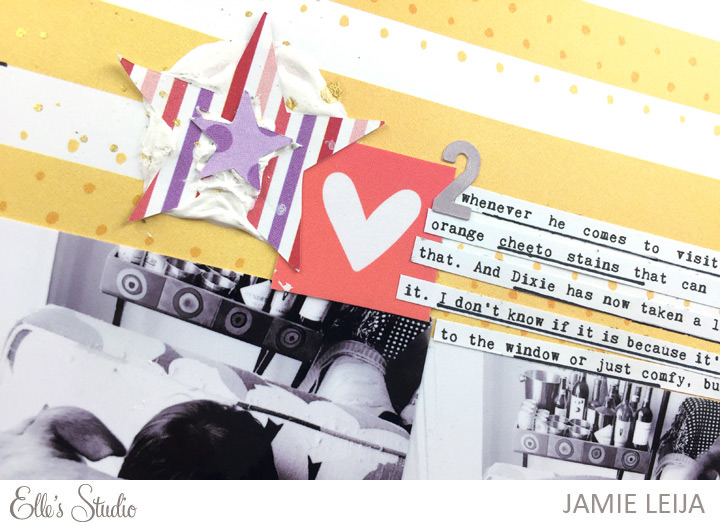
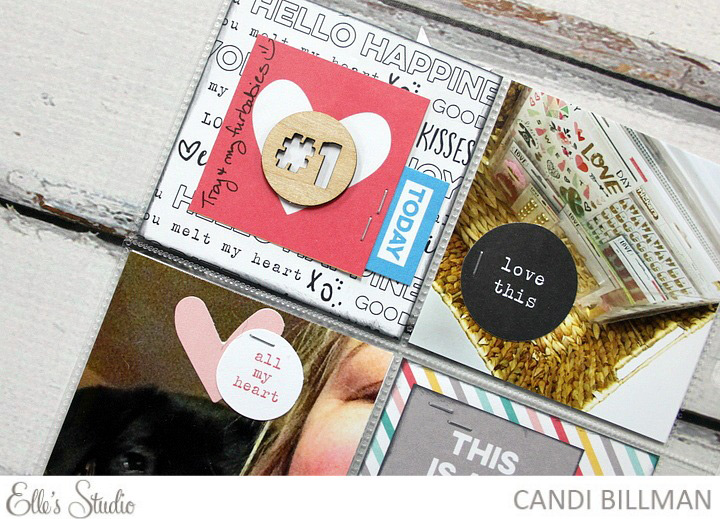
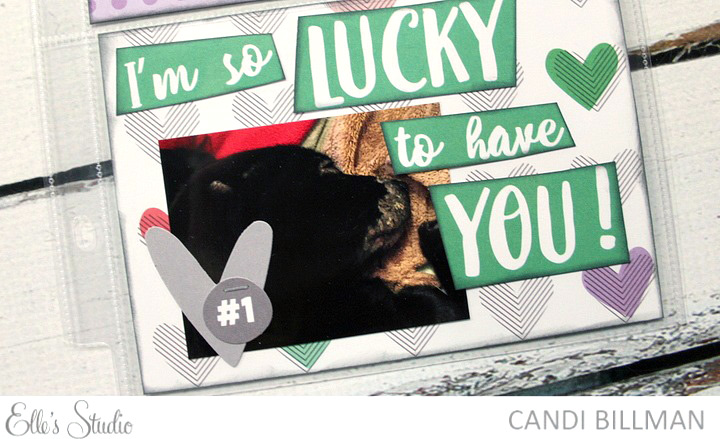
To balance the bold title at the base, I created a banner of at the top of the layout highlighting a few of my daughter’s favorite things, using black alphabet stickers and hearts that I fussy cut from a 3” x 4” tag in the Little Moments journaling tags.

EllesStudio-GuestBeckyAdams-061EllesStudio-GuestBeckyAdams-TryThis2
I love how this layout came together and have loved working with Elle’s Studio products this month! Thanks for stopping by the Elle’s Studio blog today, and I’ll see you soon!

EllesStudio-GuestBeckyAdamsI thought it would be fun to share a few random things about me: I love a clean house, a good book, and a really great cup of hot chocolate (in the winter) or a glass of raspberry lemonade (in the summer). Oh, and chocolate, don’t forget that I love chocolate. I also love a great find in a thrift store. My most favorite things to look for are books and dishes…a girl can never have too many dishes, or books.

My passion for scrapbooking started when I was given the assignment to create a scrapbook in my high school home economics class. I really started to be passionate about the hobby after my son was born in 2001. I have had the opportunity to work with many amazing companies and have made lifelong friends through this amazing hobby.

You can find more of Becki’s work at her blog, Facebook, Instagram, Pinterest, Twitter, and Periscope.
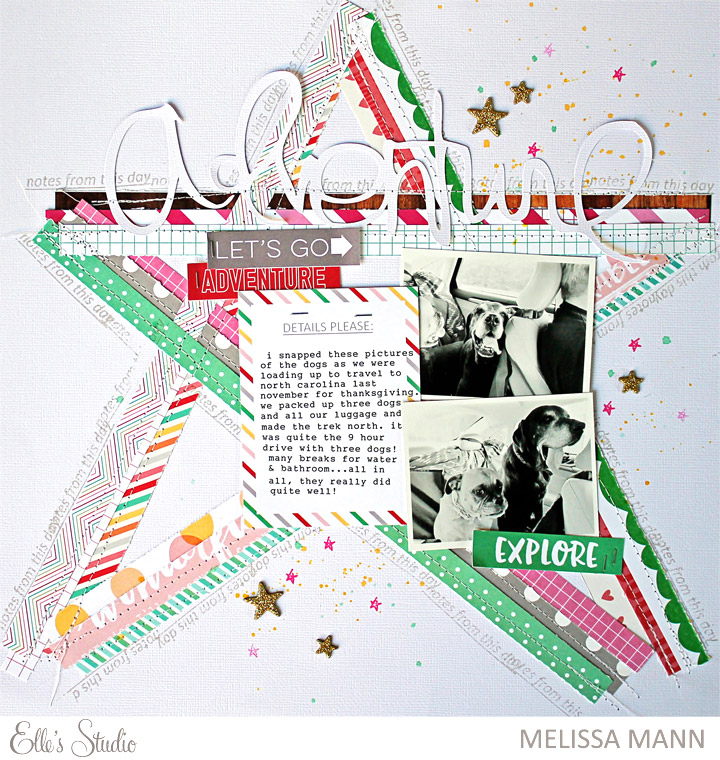
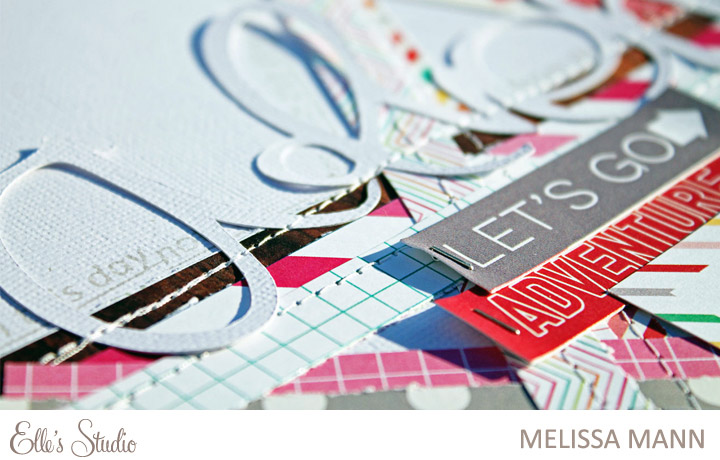
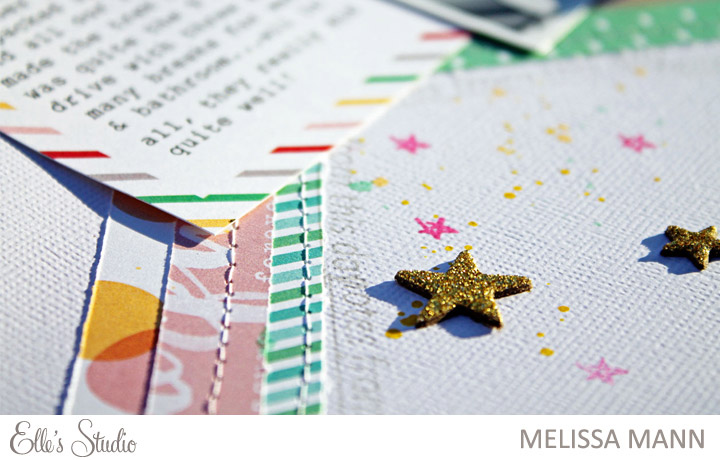
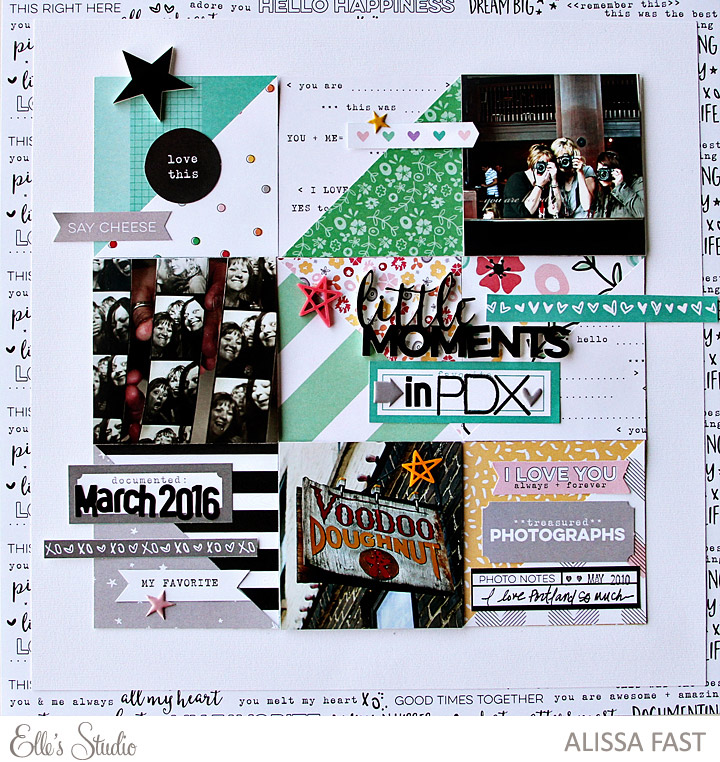
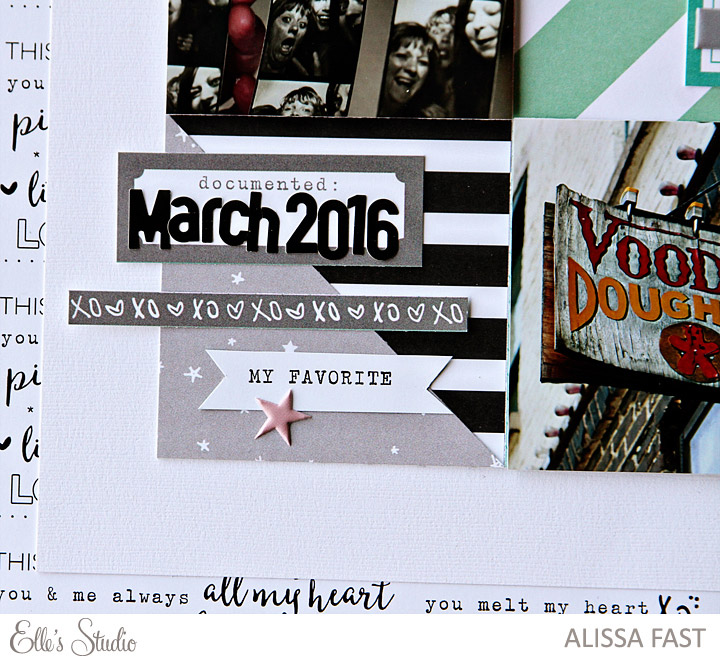
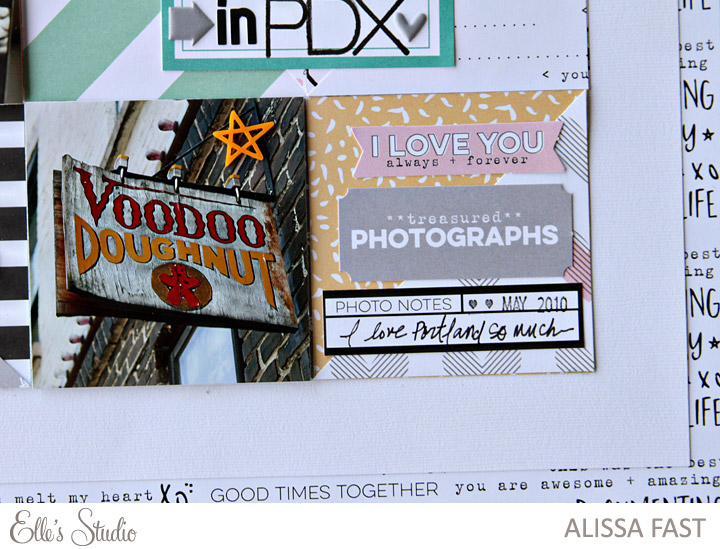
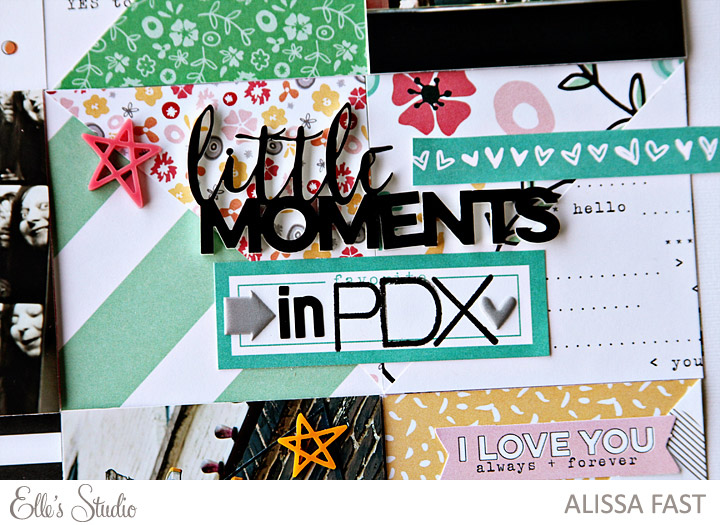
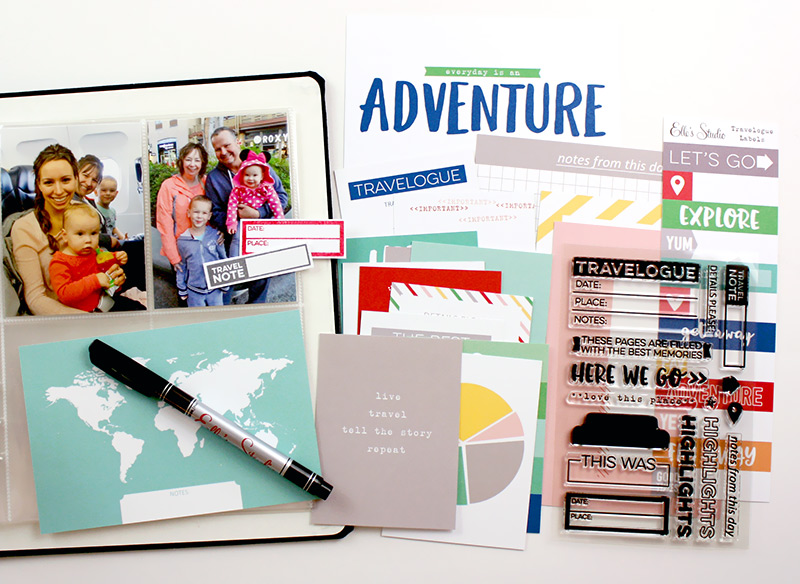
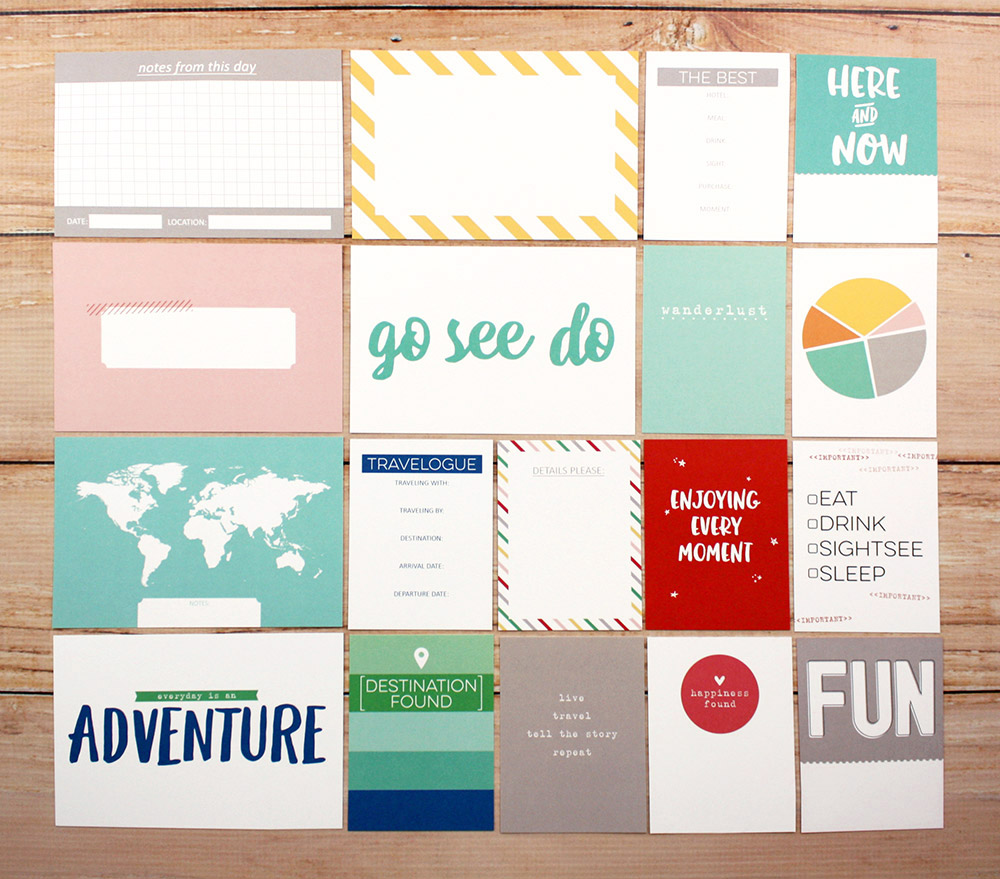
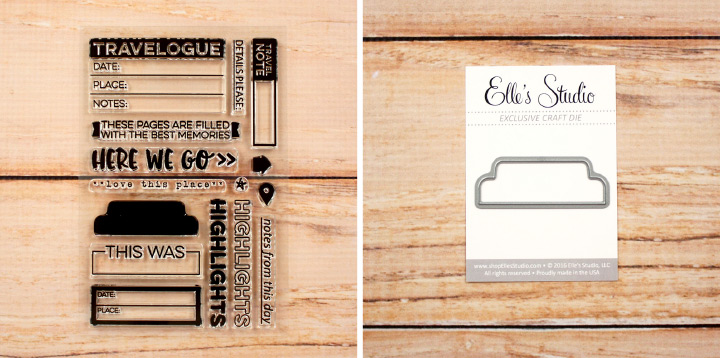
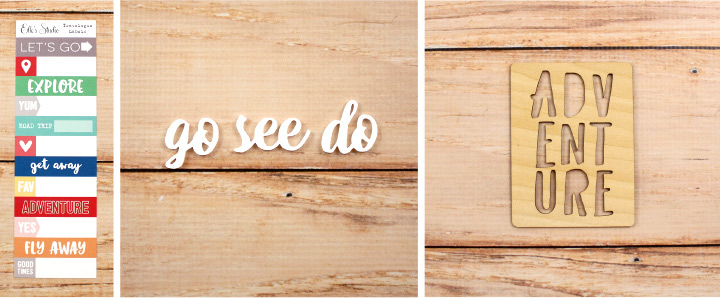
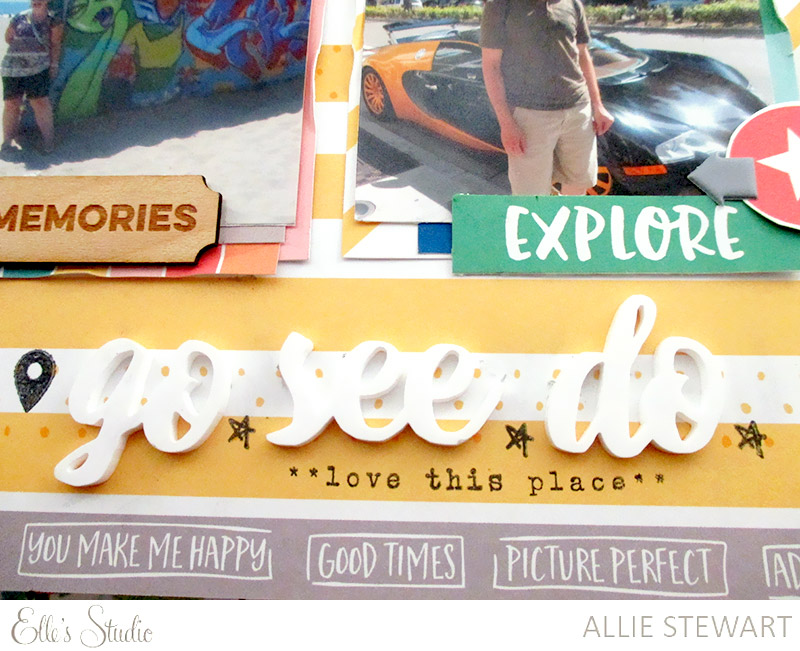
New travel items are here!

EllesStudio-TravelProducts
We are SO excited to announce that we have added some new travel items to our shop! These items are very versatile and will allow you to document any kind of trip or adventure!

EllesStudio-TravelogueJournalingTags
The journaling tags come double-sided, and you will receive six 4 x 6 inch tags and twelve 3 x 4 inch tags!

EllesStudio-TravelStamp-Die
Our Travelogue stamp measures 4 x 6 inches and has sentiments for creating your own journaling tags and embellishments, stamping on photos, creating your own labels, etc! There is also a coordinating die (sold separately) that will cut the tab out for you!

EllesStudio-TravelExtras
And, we also have some labels, go see do acrylic, and adventure wood veneer!

Thank you so much for joining us today and for your support! We are so excited to see how you document your travel with these new items!

Project Life with Candi Billman

Hi, ES Fans!!!  Candi here today to bring you a Project Life Spread using the March 2016 Kit + Little Moments Collection!  I created my own 3×4 and 4×6 cards from the Little Moments 12×12 Paper Collection + the 6×6 Paper Stack!  This spread was super fun to create!

For the left side of the spread, I picked out 4 different patterns from the Little Moments 12×12 Paper Collection and trimmed a 3×3 square from each one.  Next there is a 12×12 paper in the Collection that has several tags on it, I trimmed out the little 2×2 tags and adhered those to each 3×3 square that I created!

EllesStudio-CandiBillman12
I edged each 3×3 square with some black chalk ink!  Usually when I am trimming out tags from a 12×12 sheet and I don’t get the trim just perfect, there is some of the tag next to it, showing…so edging my tags with ink saves me from taking my scissors and trying to cut that extra off!  Works like a charm every time 🙂 On top of the heart I added a Wood Veneer!

EllesStudio-CandiBillman13
Here is another 2×2 tag adhered to a 3×3 square…I edged the sides with black ink and added some Black Letter Stickers!

EllesStudio-CandiBillman14
For the right side of my spread, the top 4×6 card is from the 12×12 paper I mentioned above that has several tags on it, that you can trim out.  The middle left 3×4 card is trimmed from a sheet out of the Little Moments 6×6 Paper Stack…same with the bottom 4×6 card!

EllesStudio-CandiBillman15
OK, so back in January I found a hair style that I WANT so bad!!!  I just had to add that to my spread 🙂 I used the Jonah Alphabet Stamp Set + Little Moments Bits and Pieces!  That vellum heart tag is so cute peeking out from underneath my photo!

EllesStudio-CandiBillman16
I took the 3×4 “I’m so lucky to have you!” tag (March 2016 Kit) and trimmed out the words, edged each piece with black chalk ink and added that directly this 4×6 card…

EllesStudio-CandiBillman17
There it is…Week 4 is in the books!  Creating my own cards for this weeks spread was a blast…I will definitely be doing that again in the future 🙂

EllesStudio-CandiBillman11
ES Monthly Kits are so perfect for Project Life spreads and we’d love to see how you use them, too! Make sure you share your projects with us in our Member Gallery or on Instagram with the hashtag #ellesstudio!