Documenting December in a Memorydex by Special Guest Tessa Buys

We are so excited to welcome Tessa Buys back for her second guest post! This week, she’s sharing an absolutely stunning Memorydex spinner created with the ‘Tis the Season collection. If you’re looking for an alternative way to document your December, you won’t want to miss this project!

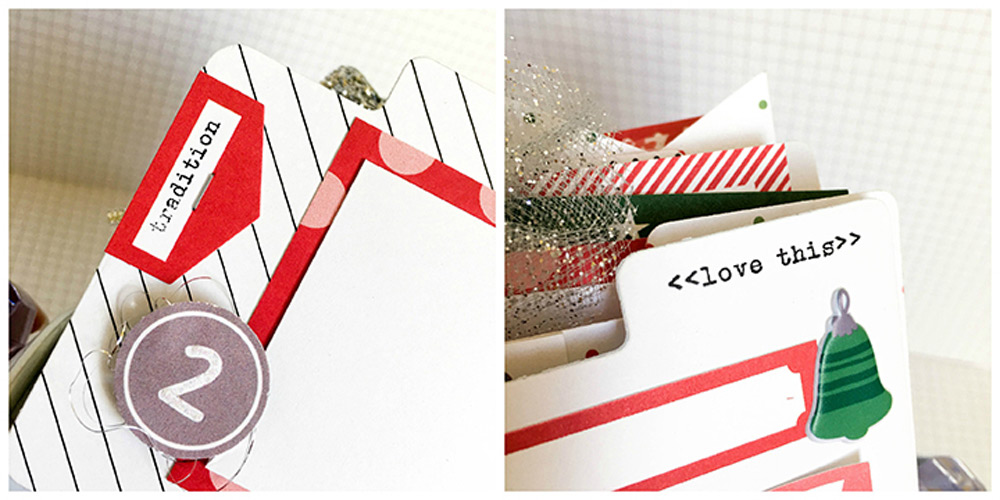
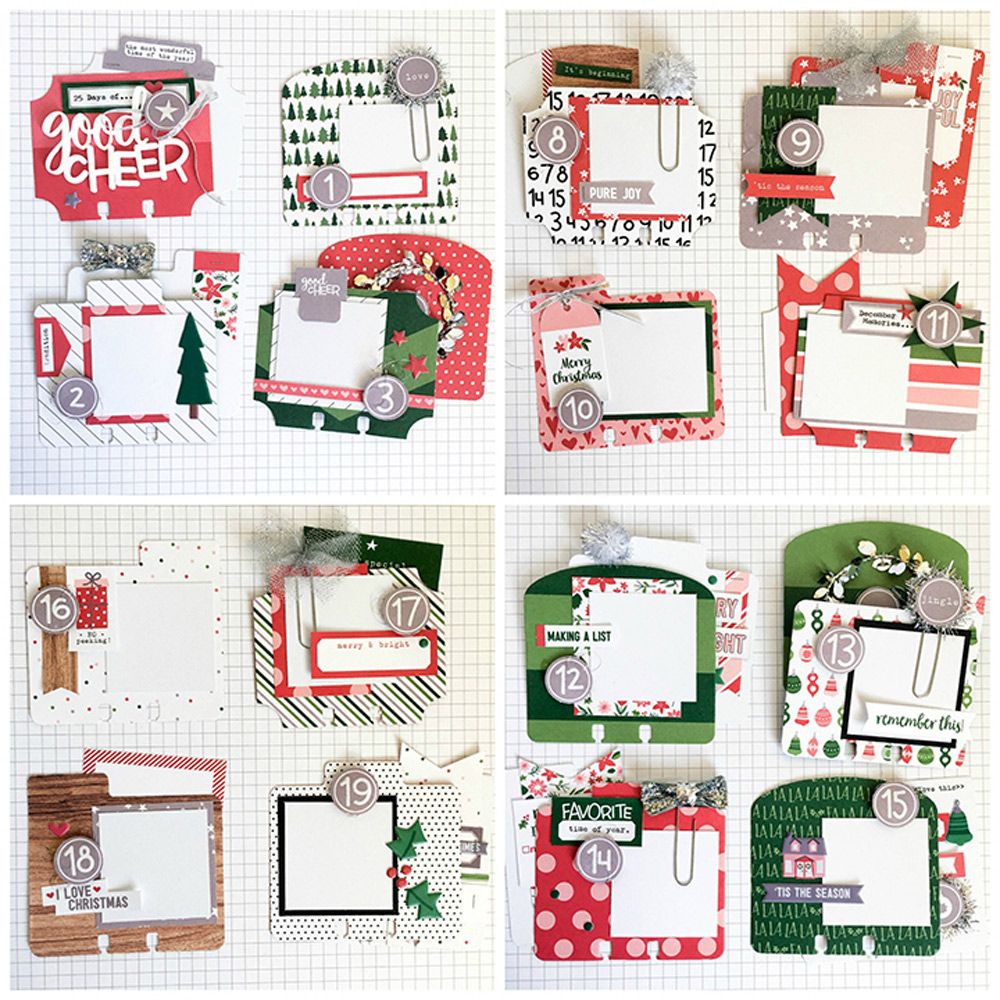
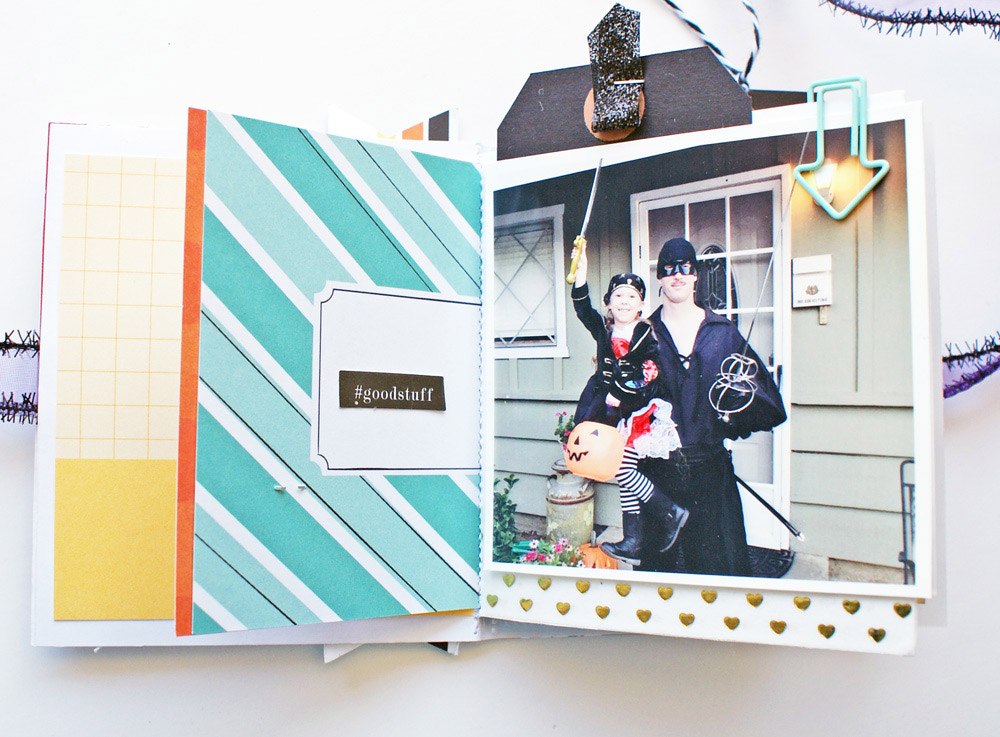
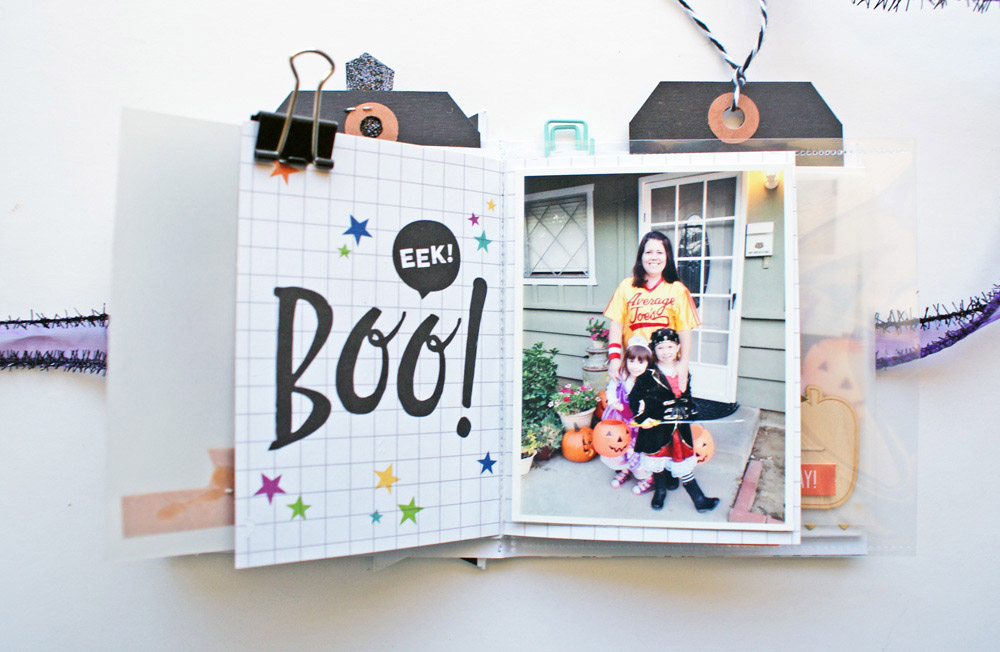
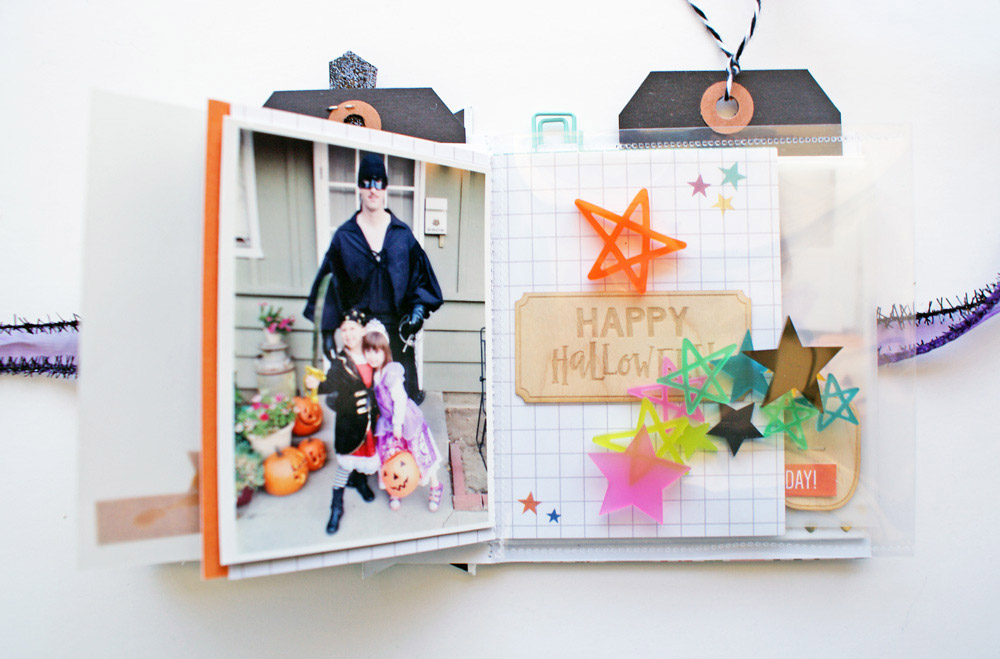
Hello, Elle’s Studio friends! I am really excited to be sharing this project with you today. To document our December this year, I decided to fill a Heidi Swapp Memorydex Spinner with the fabulous ‘Tis the Season collection. I started by making a title card using patterned paper from the 6” x 6” paper stack, the Good Cheer acrylic, and a label from the ‘Tis the Season small blank labels.

ellesstudio-tessabuys-spinner-01

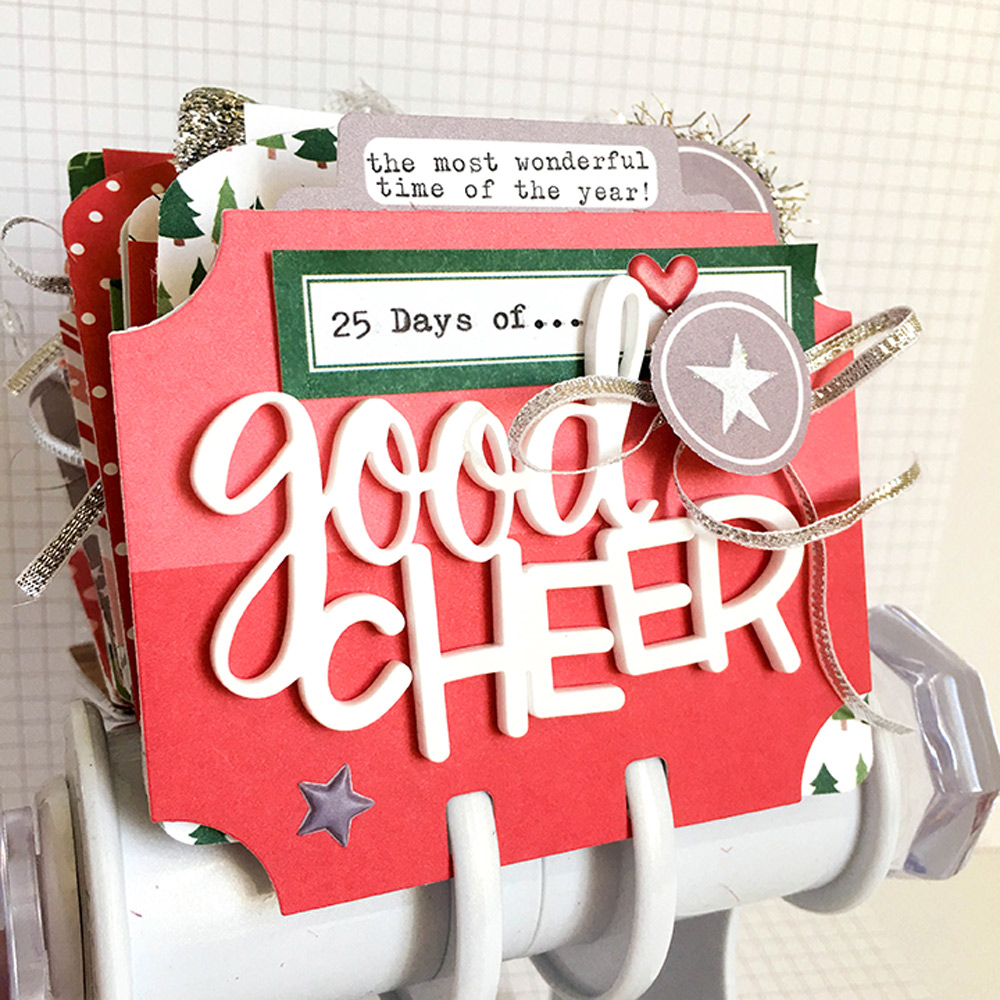
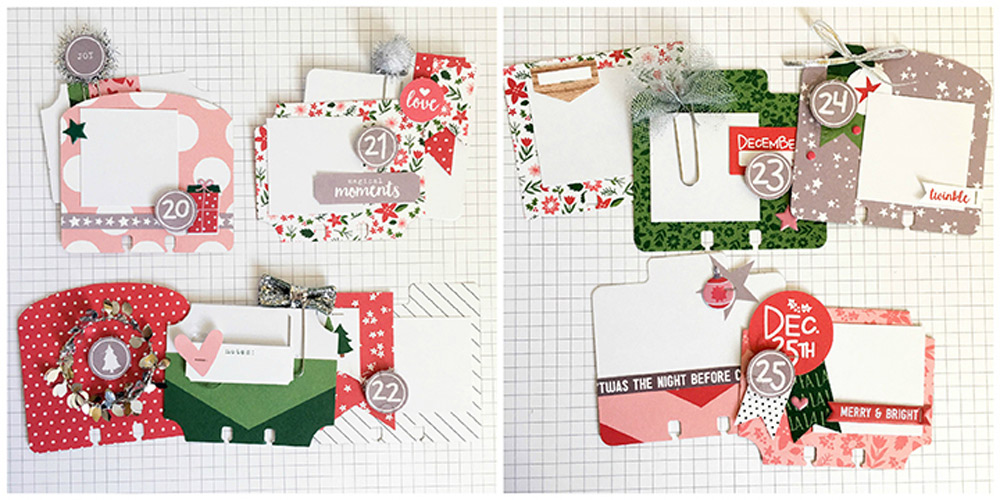
Inspired by the typewriter font on so many pieces in the collection, I used my own typewriter to fill out the label with “25 Days of….” Next, I made cards for each day of the month leading up to Christmas, as well as extra cards for more photos, journaling, and decoration.

ellesstudio-tessabuys-spinner-02

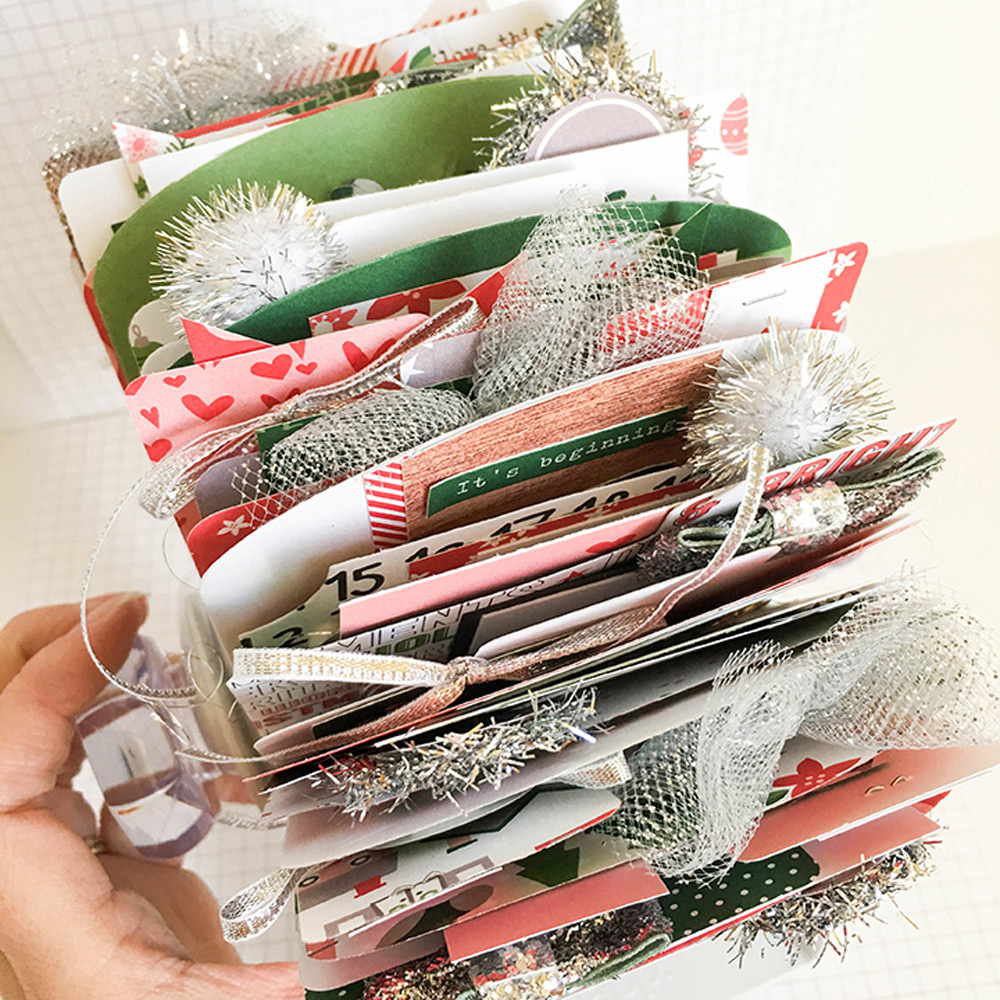
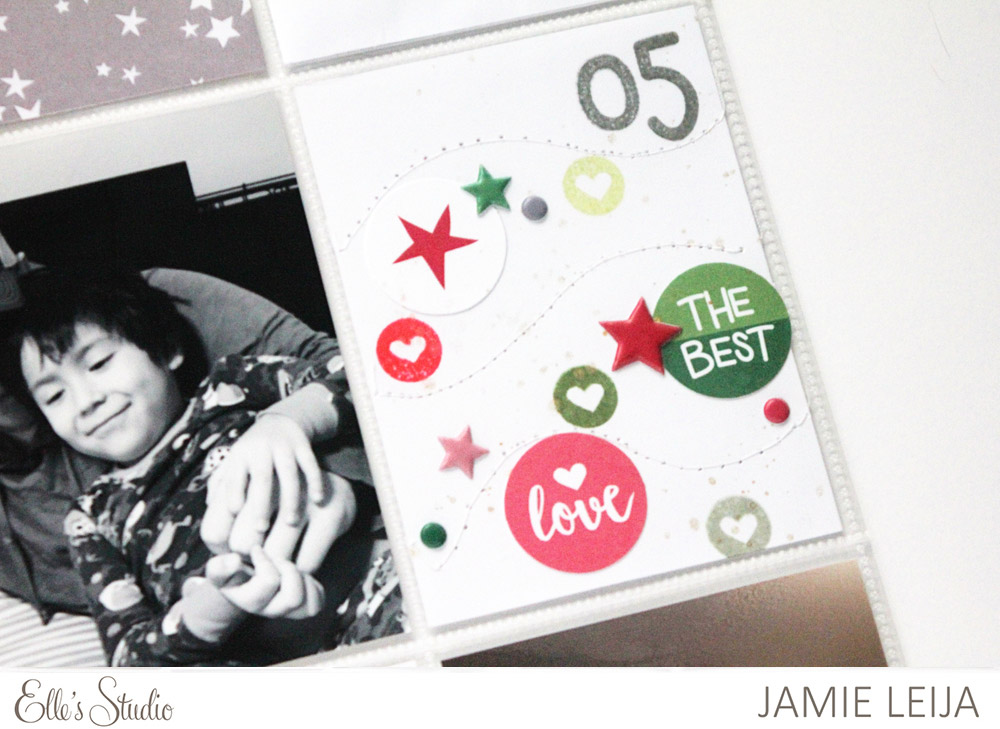
To make the daily cards, I used my one inch circle punch to punch the numbered circles from the “Countdown”  patterned paper in the 12” x 12” paper collection, adding iridescent glitter to the numbers for some extra sparkle. When adhering the numbers to the cards, I used foam adhesive and added a bit of silver metallic thread to the back.

ellesstudio-tessabuys-spinner-03

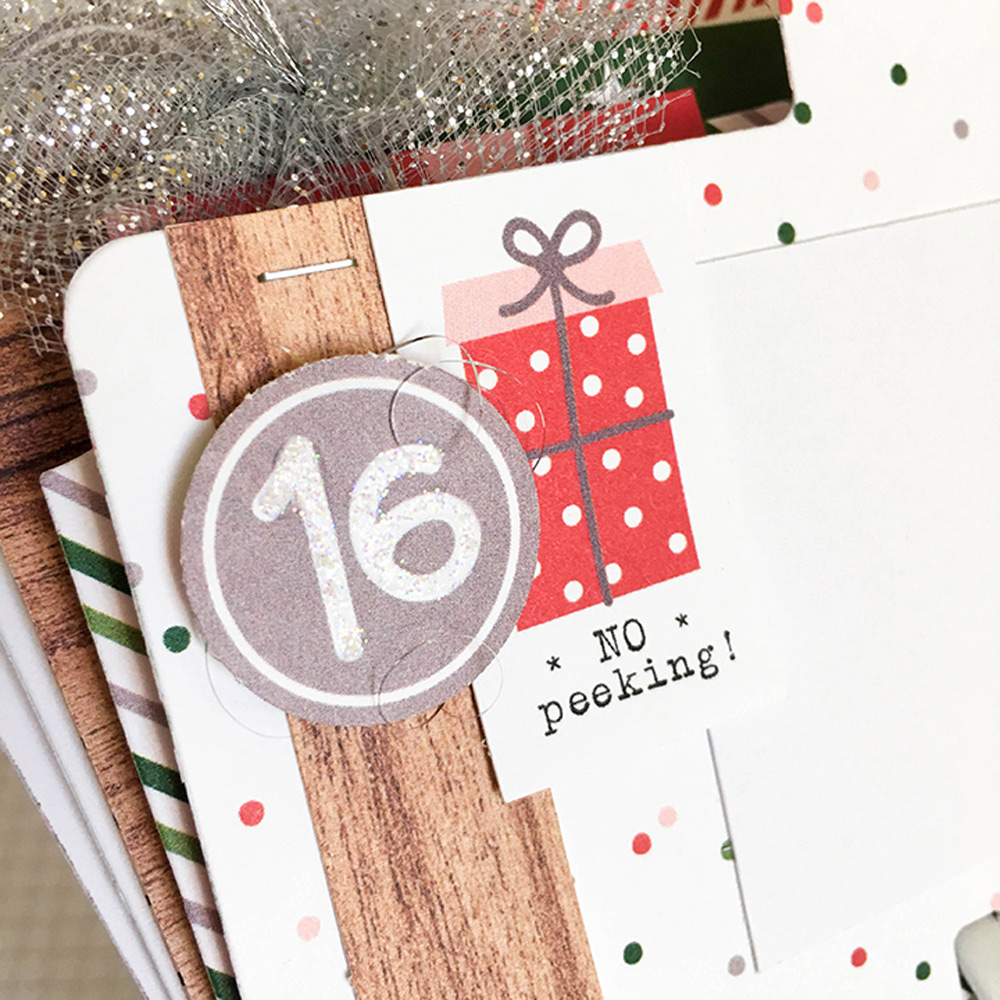
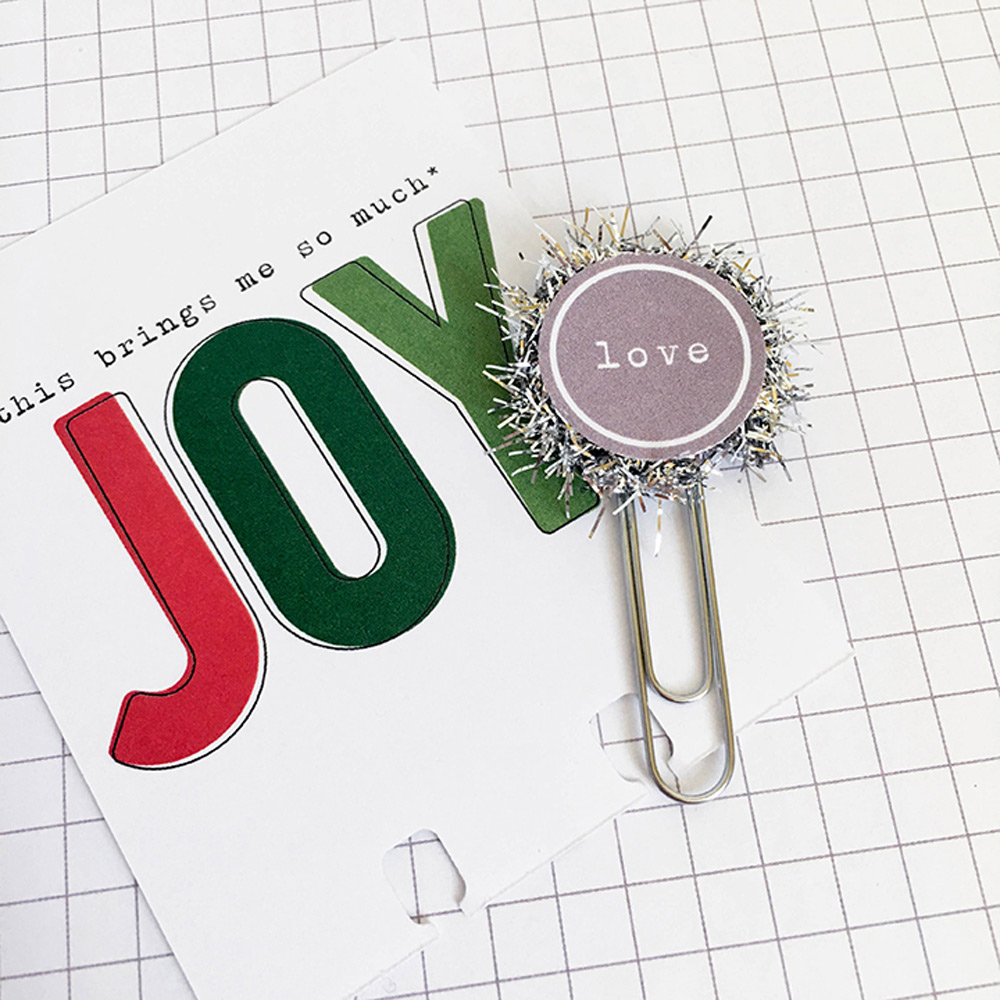
I used the other circles from the “Countdown” paper to make paper clips, adhering two circles back to back with foam adhesive, making sure the adhesive stuck to the top of the paper clip, too. I added silver tinsel trim to the edge of the circles for a festive, holiday touch.

ellesstudio-tessabuys-spinner-04

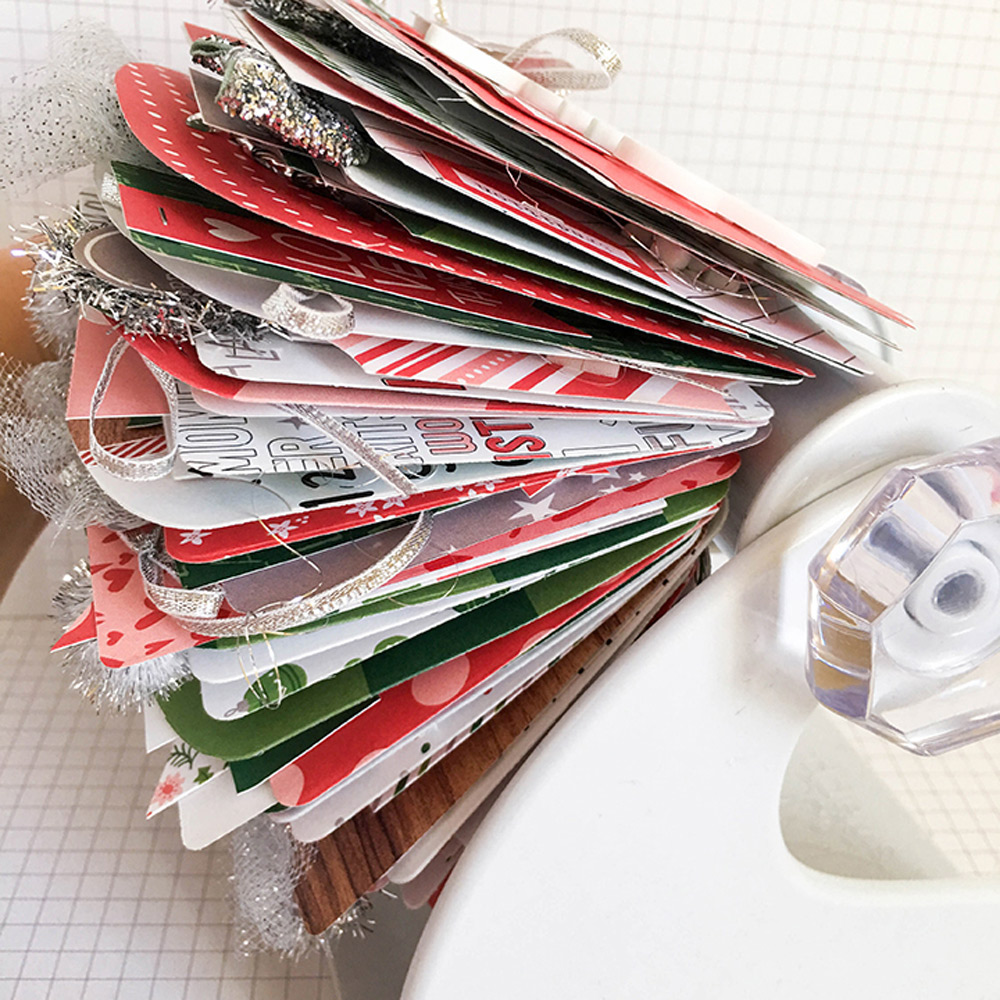
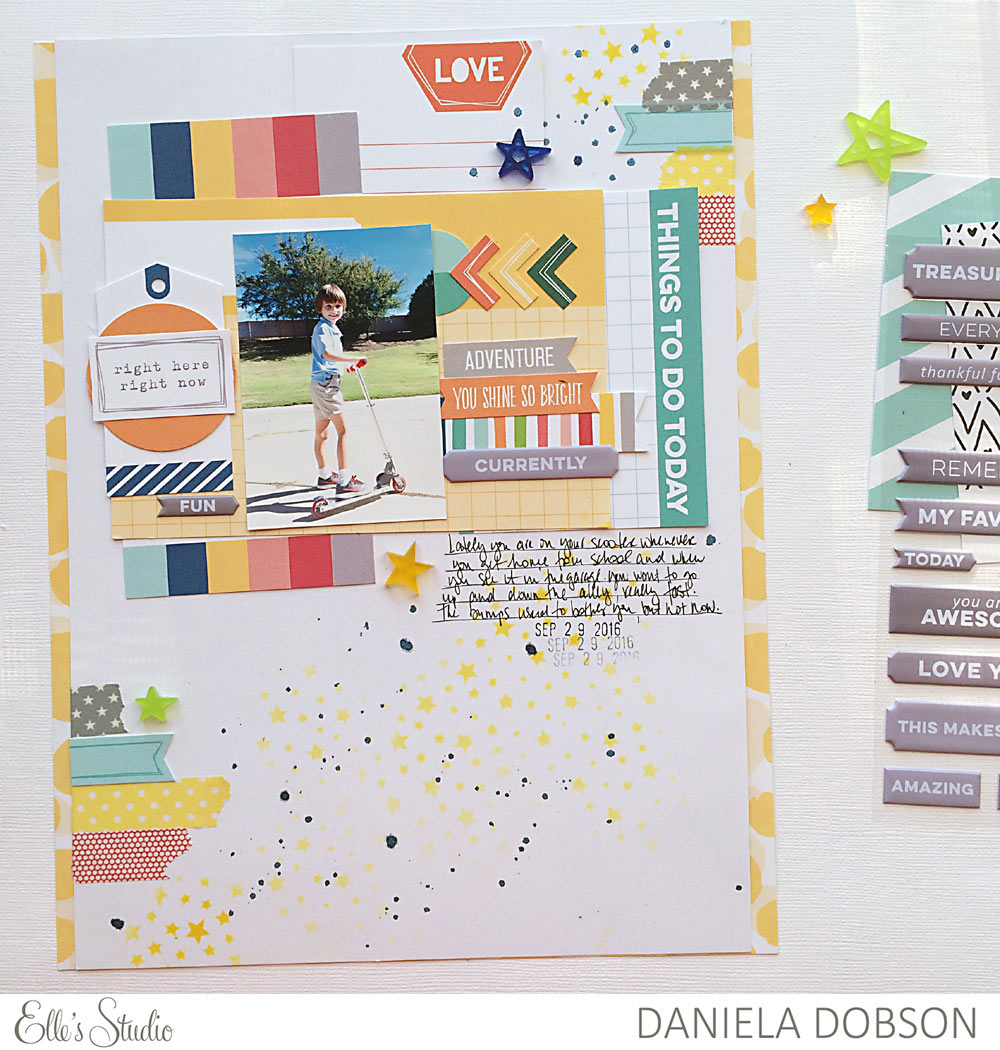
Rather than follow a recipe of any kind, every card is different. I mainly used the 6” x 6” paper stack, since the scale of the patterns was better suited to the size of my cards. I saved every little bit of paper after matting photo spaces and cutting out cards. Smaller scraps were easily trimmed into pennants or adhered to cards as borders. In fact, I still have a pile of pieces to attach to photos as December comes and I print pictures to add to the spinner. The paper is just too cute to throw any little bit away!

ellesstudio-tessabuys-spinner-05

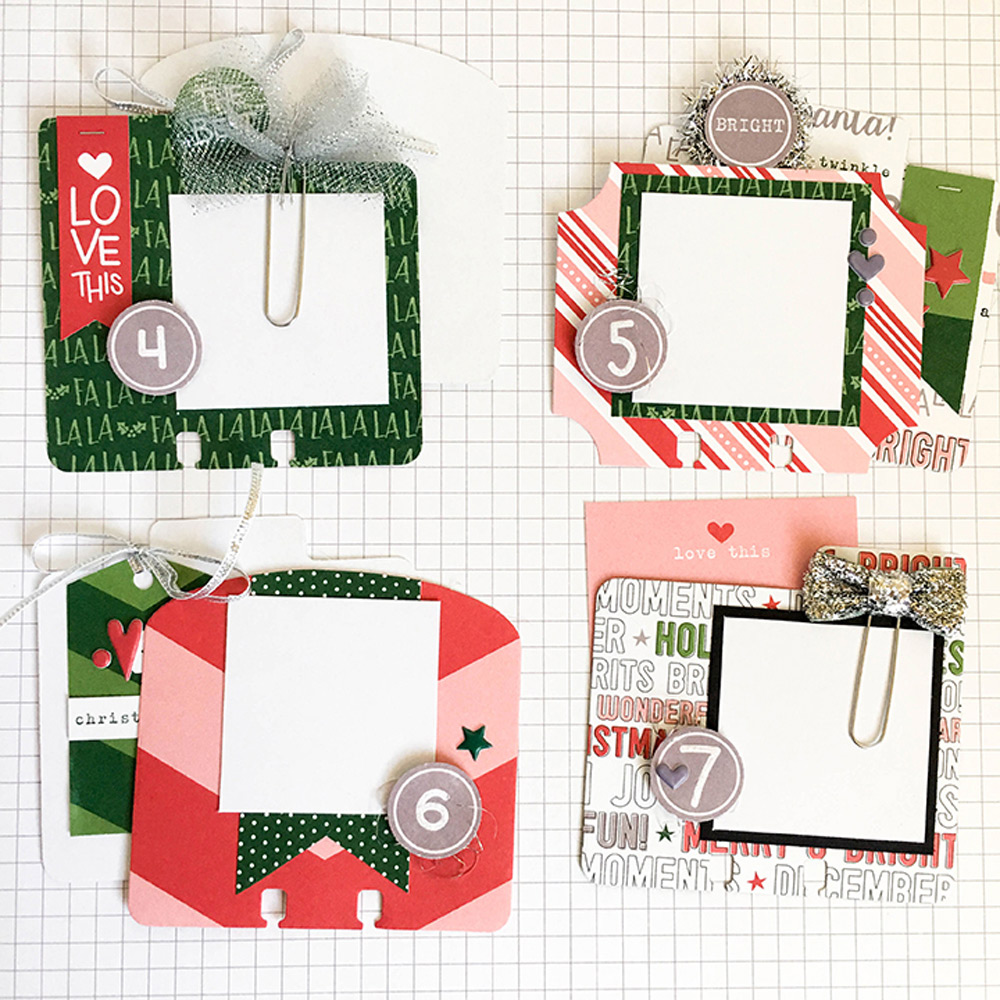
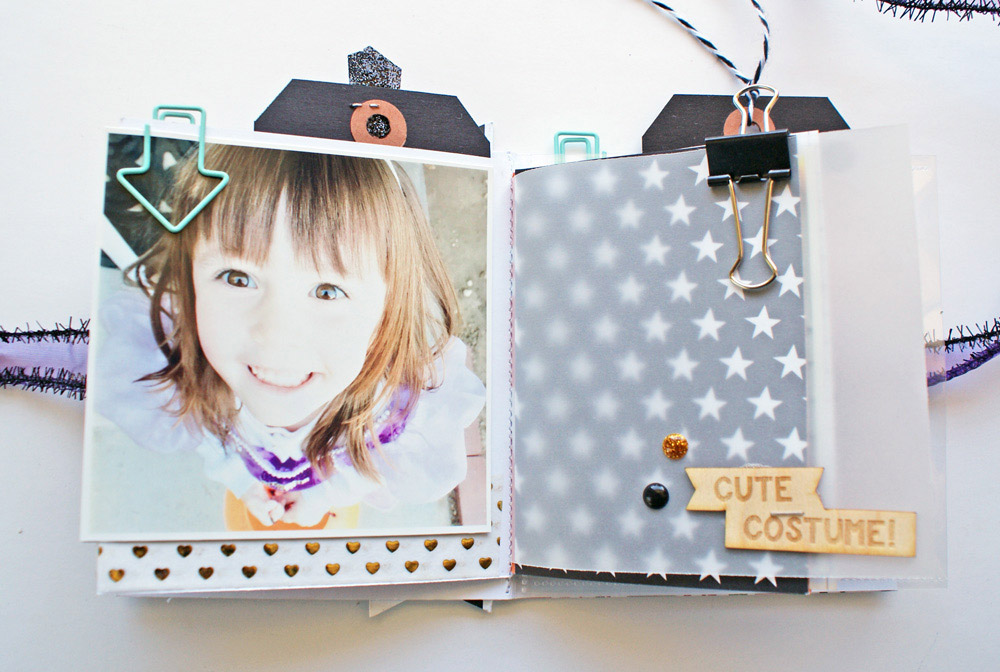
Every card has a little bit of embellishing, using elements from the ‘Tis the Season puffy stickers to the die cuts in the ‘Tis the Season bits and pieces. For more texture and holiday sparkle, I added silver metallic tulle, pom poms and ribbon to more paper clips. I also used silver wire trim to make little wreaths that encircle more “Countdown” circles.

ellesstudio-tessabuys-spinner-06

I enjoyed using the ‘Tis the Season stamp to stamp on the small blank labels and tabs. I plan to add more stamping when the cards are filled with journaling.

ellesstudio-tessabuys-spinner-07

If you’d like to see the spinner in action, I invite you to check out my YouTube video. Besides taking through the spinner card by card, I also show you how to make the “Countdown” circles paper clip:

ellesstudio-tessabuys-spinner-08

ellesstudio-tessabuys-spinner-09

Thank you to Elle for the opportunity to guest design this month! I cannot wait to fill my spinner with memories. I’m going to enjoy flipping through these ‘Tis the Season decorated cards for years to come.

ellesstudio-tessabuys-headshot

I live in Sacramento, California with my husband, three boys, and little girl. They’ve been the darlings of my scrapbook pages since I started a family, but I had been playing with paper and glue long before they came along. I currently design for Pink Paislee and We R Memory Keepers. I am also a creative team coordinator for Scrapbook Circle, where I host challenges and curate exclusive content for kit subscribers. When I’m not documenting life with pretty papers and embellishments, I’m getting creative in the studio teaching dance and setting choreography on competition students. I love the color combination of yellow, red and mint (a la my craft room), I survive on diet Dr. Pepper (I know, I should really quit), and I’m currently re-living high school by binge watching Buffy the Vampire Slayer. I have been an Elle’s Studio fan for many years and feel blessed to have the opportunity to be a guest designer this month!

Please visit Tessa’s blog, Precocious Paper, Facebook page, Instagram and YouTube accounts to see more of her beautiful projects! Thank you so much for working with ES products this month, Tessa. We’ve been truly inspired!

Treat-or-treat early & SAVE BIG – 31 items on sale, including our new class!

sketchtofinishvol2

We are excited to announce that “From Sketch to Finish Vol. 2” is now available! Simplify your scrapbooking process and start with a sketch! Our new class “From Sketch to Finish Vol. 2” will show you how working with sketches takes the guesswork out of the process and will allow to you create layouts, and more in no time! This class highlights beautiful autumn and holiday themed projects, along with everyday projects, too!

This 50 page PDF class starts with 10 different sketches with 10 contributors each sharing two papercrafting projects created from a sketch. You’ll get to read their tips and see their techniques in action as they share their process of working with the sketches. Then, we will end the class with an extra bonus of 20 full-page sketches and you’ll be on your way to creating projects in no time!

sketchtofinishvol2-contributors

Our amazing contributors – Kim Watson, Neela Nalam, Michelle Wedertz, Melissa Mann, Laura Wonsik, Vicki Boutin, Jamie Leija, Brandi Kincaid, Daniela Dobson, and Jill Sprott – will show you how you can follow the sketch exactly, or adapt it to work with your photos and supplies. Along the way, you’ll also learn tips on how to stretch your sketches and how you can customize them to fit your style!

This class comes as a downloadable self-paced PDF file. Once you have purchased the class, you will receive a link, via email, to download the class.

Also, for a limited time, you can purchase Vol. 1 and Vol. 2 together, for a discount! If you missed our first installment, here’s your chance to pick up both classes, together!

ellesstudio-trickortreatsale

Also, our annual Halloween Trick-or-Treat sale has started! We’ve picked out 31 favorite items and they are all on sale now! Click here to start shopping – some of these items are very limited and will most likely not be restocked once they sale out. No coupon codes needed. This sale ends on October 27th, 2016, at midnight, or while supplies last.

Thank you so much for joining us today – we are so excited to see how our new From Sketch to Finish Vol. 2 class inspires you!

Save

Save

Documenting Halloween in Project Life with Nancy Damiano

ellesstudio-nancydamiano-plhalloween1

SUPPLIES: Halloween Journaling Tags, Halloween Veneer, Autumn Leaves Acrylic Mix, October Kit, White Alphabet Letters, Teal Alphabet Letters, Halloween Acrylic Stars, Documented Stamp, and Everyday Label Puffy Stickers – Black

My favorite holiday is almost upon us! Decorating and celebrating is a huge part of the Halloween season around here, it puts me in the trick or treat mood. Part of that includes documenting memories using the Elle’s Studio Happy Halloween mini collection.

ellesstudio-nancydamiano-plhalloween-2

This left side of this layout features some of the homes in a nearby neighborhood. These folks do Halloween big! The bright oranges and teals in this kit compliment the purple tone in the photos. The Happy Halloween acrylic piece makes for the perfect title – it stands out, but not too much! Adding bits of tissue paper fringe and a bold, orange acrylic pumpkin from the kit dress up the plain card and add texture.

ellesstudio-nancydamiano-plhalloween3

I like to add subtle text to my kit cards. By using white Elle’s Studio Alphabet stickers on a white card, adds texture without overwhelming the layout with text. Notice that it’s the concept as the white-on-white used in the acrylic title at the top left.

The right side of the layout features some decorations, a silly moment and our costumes. I love the bright, happy colors and icons in this Halloween collection. They blend perfect with any costume – from a Ninja Mutant turtle to a very scary ghoul.

ellesstudio-nancydamiano-plhalloween5

I like to add pockets filled with something special to most of my project life spreads. Here I hand cut a large letter “H” to represent Halloween and filled it with wood veneer and Happy Halloween acrylic stars. It’s something fun and bright that breaks up all the text and photos on the layout.

ellesstudio-nancydamiano-plhalloween6

We can’t wait to see how you celebrate and document all of your spooky seasonal memories with our Happy Halloween collection! If you are posting on Instagram, make sure you use the #EllesStudio hashtag for a chance to be featured on our feed! And, if you blog, link us up in the comments below!

Save

Save

Save

Save

Stamping with Jen Schow

ellesstudio_jenschow_remember_01

I love stamping and the monthly stamp releases are always super cute and usable.  Today I wanted to focus on the Family Fun stamp set. I think repetition is a fun and easy way to incorporate lots of stamping and I love being able to use any ink colors that I have.

ellesstudio_jenschow_remember_02
Products used: October Kit, Family Fun Stamps, Autumn Leaves Acrylic Mix, and Small Label Die

ellesstudio_jenschow_remember_03

I chose colors based on the journaling cards I wanted to use from the October Kit, stamped them out, and then used the coordinating Small Label die to cut them all out. Super easy. I added a few die cuts and acrylic stars and called it done! If you want to see how the whole thing came together, you can watch the process video.

Halloween Mini Album with Michelle Wedertz

ellesstudio_michellewedertz_mini_01
Hello! I am super excited to share a new mini-album that I created using the fun Halloween Mini Collection! This is the second year in a row that I have made a Halloween themed album and let’s just say that I can imagine myself doing one every year because I have so much fun putting them together. I find that mini-albums are a great way to highlight a certain part or detail of a big event or holiday, but the best part about creating them is that they are great stash busters–meaning I can throw a whole lot of product into them and use up all of the exciting and neat things that I have without fear of over doing it. I can embellish until my heart is content!

ellesstudio_michellewedertz_mini_02
For this mini-album I wanted to use the Happy Halloween mini collection and coordinating embellishments to highlight my family’s Halloween costumes. Last year I made a 3×4 album that was bound together with a ring and even thought I think the Halloween collection would be a perfect choice for this, I wanted to try something new and decided to go with a slightly bigger album that I would bind together with my sewing machine.

ellesstudio_michellewedertz_mini_03
This base of the album is made entirely from the journaling tags, and a piece of graph patterned paper from the ‘Tis the Season collection and some white cardstock. To add in a little variety I also included a sheet of vellum and a 4×4 page protector. After sewing all of my layers together–which took some time and patience since I wanted to make sure my layers were all lined up correctly–I added my pictures and some embellishments. Here’s a look through the album:

ellesstudio_michellewedertz_mini_04

ellesstudio_michellewedertz_mini_05

ellesstudio_michellewedertz_mini_06

SONY DSC

ellesstudio_michellewedertz_mini_08

ellesstudio_michellewedertz_mini_09

ellesstudio_michellewedertz_mini_10

ellesstudio_michellewedertz_mini_11Products used: Happy Halloween Journaling Tags, Acrylic Stars, Wood Veneer, Happy Halloween Acrylic, ‘Tis the Season 12 x 12 paper, and the exclusive October kit.

Wishing you all Happy Halloween! – Michelle

Design Team Inspiration

facebook2
We are excited to share even more Design Team inspiration with you today! Below are some amazing and inspiring projects from each of our team members using our new items for October!

ellesstudio-meghannandrew-waitingforfall-01
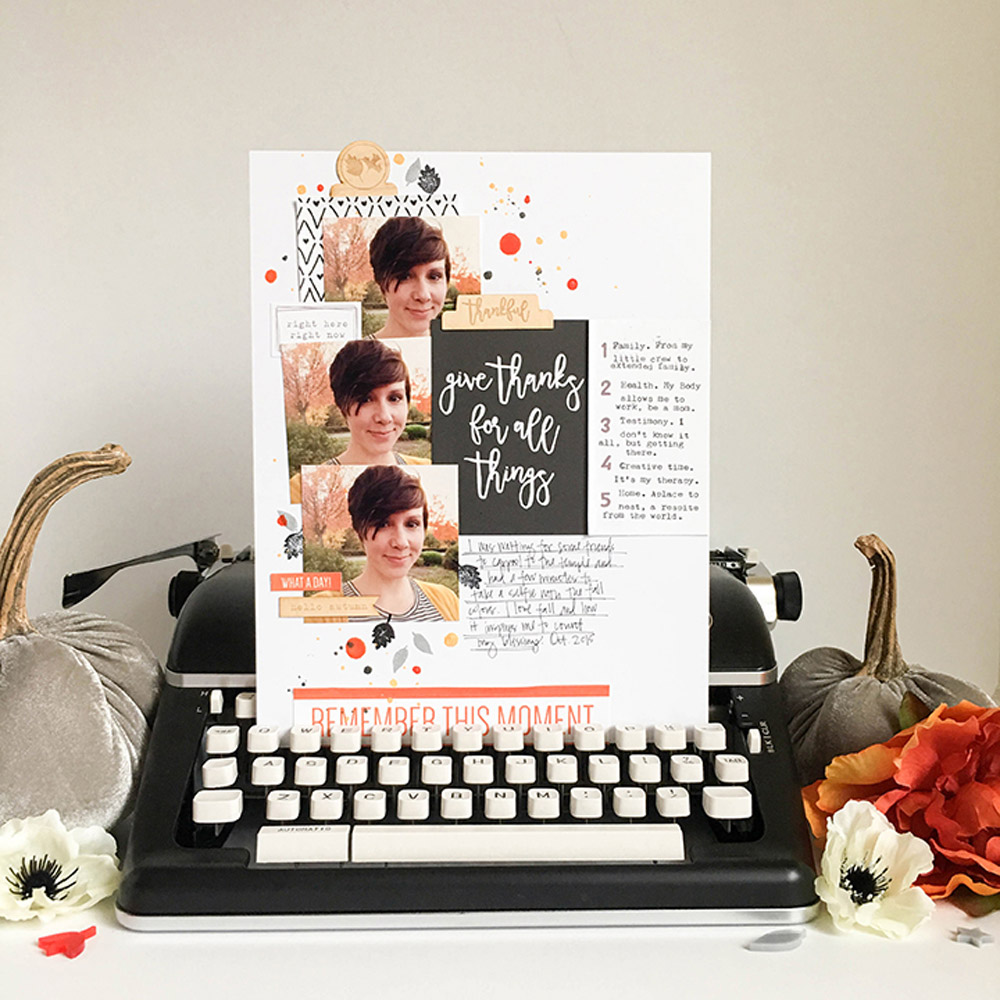
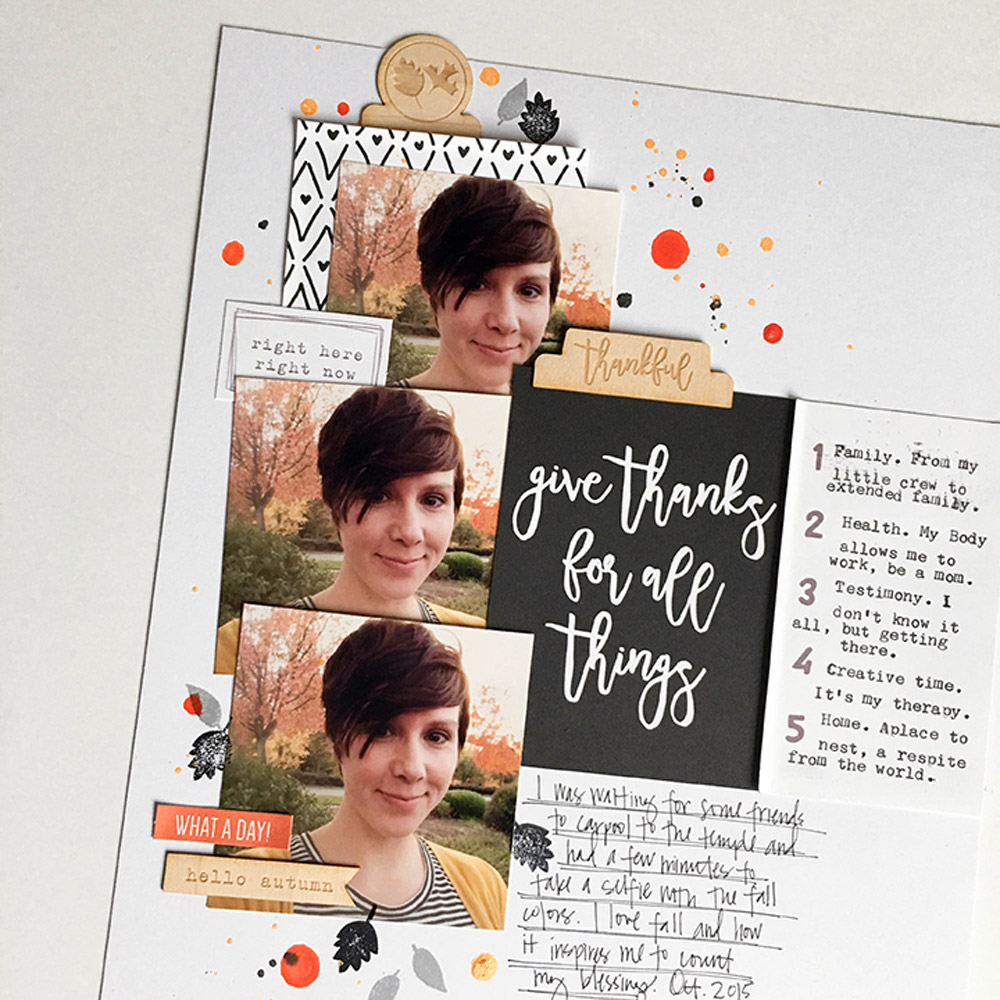
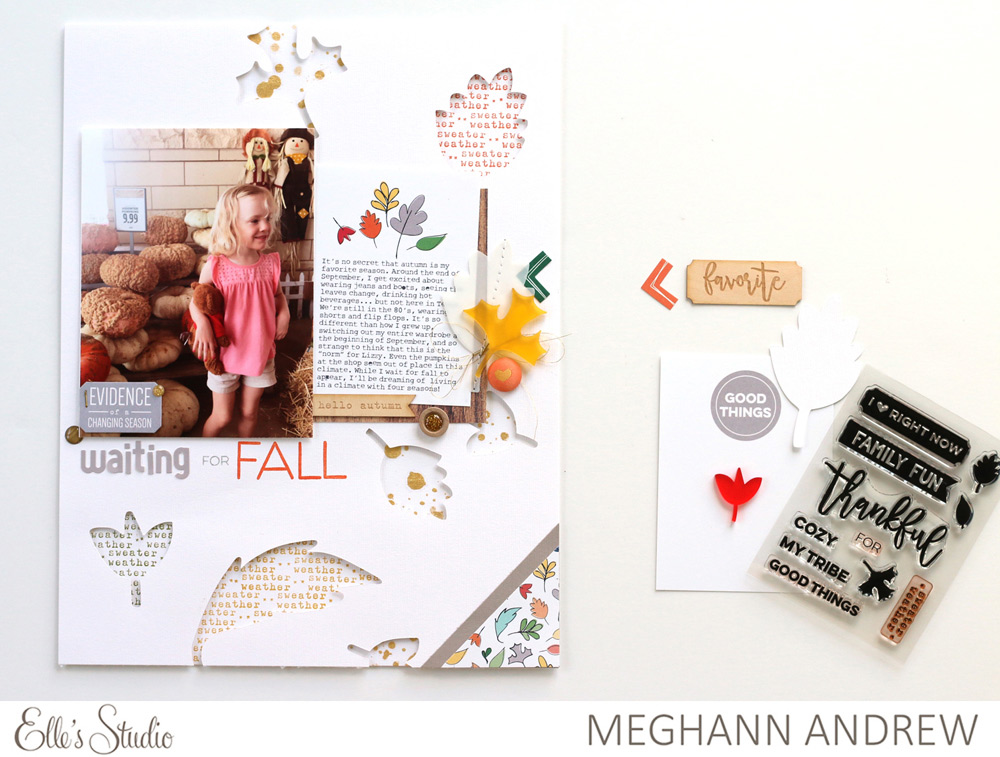
Waiting For Fall layout by Meghann Andrewsupplies used: Elle’s Studio October Kit, Autumn veneer, Autumn Leaves acrylic, October digital cut files, Family Fun stamp, and letter and number stickers- light gray

ellesstudio-nancydamiano-camping-02
Fall pocket pages by Nancy Damianosupplies used: Elle’s Studio October Kit, Autumn veneer, Autumn Leaves acrylic, Fall journaling tags, letter and number stickers- white, Family acrylic, and ’Tis the Season puffy stickers

ellestudiooctober2016_mlm4
Family layout by Melissa Mannsupplies used: Thankful Paper Collection, Elle’s Studio October kit, October and June Digital Cut Files, Family acrylic, and Family Fun stamp set.

ellesstudio-danieladobson-adventure-01
Adventure layout by Daniela Dobsonsupplies used: Elle’s Studio October kit, Halloween Acrylic stars, Sunny Days 12 x 12 Paper Collection, Sunny Days Bits and Pieces, and Everyday Labels Puffy Stickers – Gray

ellesstudio-jamieleija-partygoblins-01
Party Goblins layout by Jamie Leijasupplies used: Happy Halloween Journaling Tags, Happy Halloween Wood Veneers, Halloween Acrylic Stars, and Malia Alphabet Stamp

Stay tuned for even more inspiration coming from our special guest this month, and our team all month long! We would love to see how you use our products, too! If you are posting on Instagram, make sure you use the #EllesStudio hashtag for a chance to be featured on our feed! And, if you blog, link us up in the comments below!

Capturing fall with special guest Tessa Buys

We are delighted to welcome Tessa Buys as the Elle’s Studio guest designer this month. Tessa’s designs are intricately layered, with pops of bright colors and highly-contrasting neutrals, and we can always pick out her layouts in a lineup! Let’s take a look at how she used the October exclusive kit to create a gorgeous page!

Hello, Elle’s Studio friends! I’m excited to be sharing a layout with you that I created using the October 2016 exclusive kit and add-ons. Fall is absolutely my favorite season of the year, so I really enjoyed working with the colors and themes in this kit. It might just be the dancer in me, but I wanted to create some fall-like movement on this page:

ellesstudio-tessabuys-givethanks-01

Supplies | October 2016 exclusive kit, Family Fun stamp, Autumn wood veneers

To create a fall effect on a layout of your own, try these tips:

  1.  I started with a selfie that I took about this time last year. By printing my photo three times, I was able to overlap my selfies in a cascading pattern down the page, just like leaves falling from the trees. You could re-create the look with three similarly-posed photos, too.

ellesstudio-tessabuys-givethanks-07

  1.  Put heavier pieces at the bottom of the page, like a pile of leaves when you’re done raking the lawn. I trimmed the “Remember this Moment” element from a 4” x 6” tag. Attaching it to the bottom of the page anchored the layout with a big punch of orange.

ellesstudio-tessabuys-givethanks-04

  1.  Create a fall breeze by swirling leaves and droplets of ink across the layout. I started by stamping leaves from the Family Fun stamp in gray and black. Next, I added splatters of mustard yellow, orange and black ink. I can feel the wind stirring up some leaves just looking at it!

ellesstudio-tessabuys-givethanks-05

  1.  Fall leaves have some crunch to them; don’t be afraid to crumple some of your paper elements. I slightly bent the edges of the 3” x 4” tags I used for a photo mat, title, and journaling. I love the texture that simple technique adds, and fall is all about texture to me.

ellesstudio-tessabuys-givethanks-06

I love how the page turned out and I still have oodles of the October kit to go. If you picked up the kit, I’d love to see your take on some of these fall ideas. And if you don’t have the kit in hand, what are you waiting for? Happy creating!

ellesstudio-tessabuys-givethanks-03

ellesstudio-tessabuys-headshot

I live in Sacramento, California with my husband, three boys, and little girl. They’ve been the darlings of my scrapbook pages since I started a family, but I had been playing with paper and glue long before they came along. I currently design for Pink Paislee and We R Memory Keepers. I am also a creative team coordinator for Scrapbook Circle, where I host challenges and curate exclusive content for kit subscribers. When I’m not documenting life with pretty papers and embellishments, I’m getting creative in the studio teaching dance and setting choreography on competition students. I love the color combination of yellow, red and mint (a la my craft room), I survive on diet Dr. Pepper (I know, I should really quit), and I’m currently re-living high school by binge watching Buffy the Vampire Slayer. I have been an Elle’s Studio fan for many years and feel blessed to have the opportunity to be a guest designer this month!

Look for more of Tessa’s work on her blog, Precocious Paper, Facebook page, Instagram and YouTube accounts. Stay tuned for another project from Tessa here on the ES blog next week!


Documenting December with Jamie Leija

ellesstudio-jamieleija-decpocketmemories-01

Hiya, it’s Jamie and today I’m sharing my approach to documenting my December memories. I love the idea of a mini album that records memories from that oh-so-magical month! But I also know myself and the fact that follow through and daily upkeep isn’t my strong point. No matter how much I might want it to be!

ellesstudio-jamieleija-decpocketmemories-02Supplies Used: Malia Number Stamp; Tis the Season Word Labels, Journaling Tags, Puffy Stickers, Bits and Pieces, Wood Veneer, Stamp, Washi Tape Stickers, 12×12 Paper Collection

So this year, I’m going for a much similar solution. One that I think is very manageable. And that fits in my current album! I’m calling it my December Pocket Memories. I’m using a 9x12in pocket page with 3-3×4 pockets across and 3-3×4 pockets down. My formula for recording is very simple: decorated card + photo + story card. I’m making all of the cards before hand and then each day in December I will only need to remember to take photos and write a story. The reminder is already set up in my phone!

ellesstudio-jamieleija-decpocketmemories-03
For the decorative cards, there’s so many awesome Tis the Season products to use. On these six alone I used the journaling tags, patterned paper, stamp, wood veneer, word labels, puffy stickers, bits and pieces, and washi tape. I also am using the Malia Number Stamp to record the date. I like the continuity of including it on every card.

ellesstudio-jamieleija-decpocketmemories-04
I’m so excited about this project this year because I think its going to be manageable and one that I can easily get done with a little planning. And with all of these fun Tis the Season products, festive and cute!

Cheers,
Jamie

ellesstudio-jamieleija-decpocketmemories-05


Thankful Cards by Jamie Leija

ellesstudio-jamieleija-thankfulcards-03web
Hiya, it’s Jamie and I’m totally in love with the leaf pattern in this month’s kit and printable! I was so excited to see it in the printable because forever access!

I just had a birthday and I like to send thank you cards for all of my lovely presents. I don’t get many, but the people who do give them are truly people I am thankful for. Which is why all of the products this month were so appropriate for these cards.

ellesstudio-jamieleija-thankfulcards-01web
I started by enlarging the journaling card to 4 1/4 in wide and placing two of them on an 8 1/2 x 11 in canvas in Photoshop Elements, which I then printed out. Then I cut out “thankful” using this months cut file. I lightly adhered it to card base and then stitched it down with my sewing machine. I stamped “for” below and then added “you” with the light gray letter stickers.

ellesstudio-jamieleija-thankfulcards-02web
I also used the stamp to add some fun coordinating details to the envelope!

These were so simple and easy to make and I love how they turned out!

Scrapbooking with our October kit by Meghann Andrew

ellesstudio-meghannandrew-mywhingytribe-04web

October’s kit is typically one of my favorite of the entire year, and this month’s kit did not disappoint! There is such a wide range of colors and sayings on the tags this month, I’ve created three completely different layouts with the kit so far, and I’d love to share one with you today!

ellesstudio-meghannandrew-mywhingytribe-01webSupplies | October exclusive kitHappy Halloween journaling tagsHalloween acrylic starsAutumn Leaves acrylic mixFamily Fun stampMalia alphabet stamp’Tis the Season stampSunny Days 12” x 12” paper collectionSunny Days bits and pieces

One of my favorite tags in the kit was this 3” x 4” diamond patterned tag, and it was just asking to be painted with watercolor! After it dried, I added layered embellishment using small tags from the kit and a star from the Sunny Days bits and pieces. I repeated stars on a diagonal line across the layout using the Halloween acrylic stars and the Autumn Leaves acrylic mix.

ellesstudio-meghannandrew-mywhingytribe-02web

The 4” x 6” yellow tag was perfect for housing my title above the photo, and I created it with a mix of the Family Fun and Malia alphabet stamps.

ellesstudio-meghannandrew-mywhingytribe-03web

This kit is sure to inspire you to document your memories this autumn! Pick yours up today with a new kit subscription, so that you can lock in your introduction day kit price of $9.99 each month!

Save