A Feel Better Mini Collection Feature with Candace Perkins

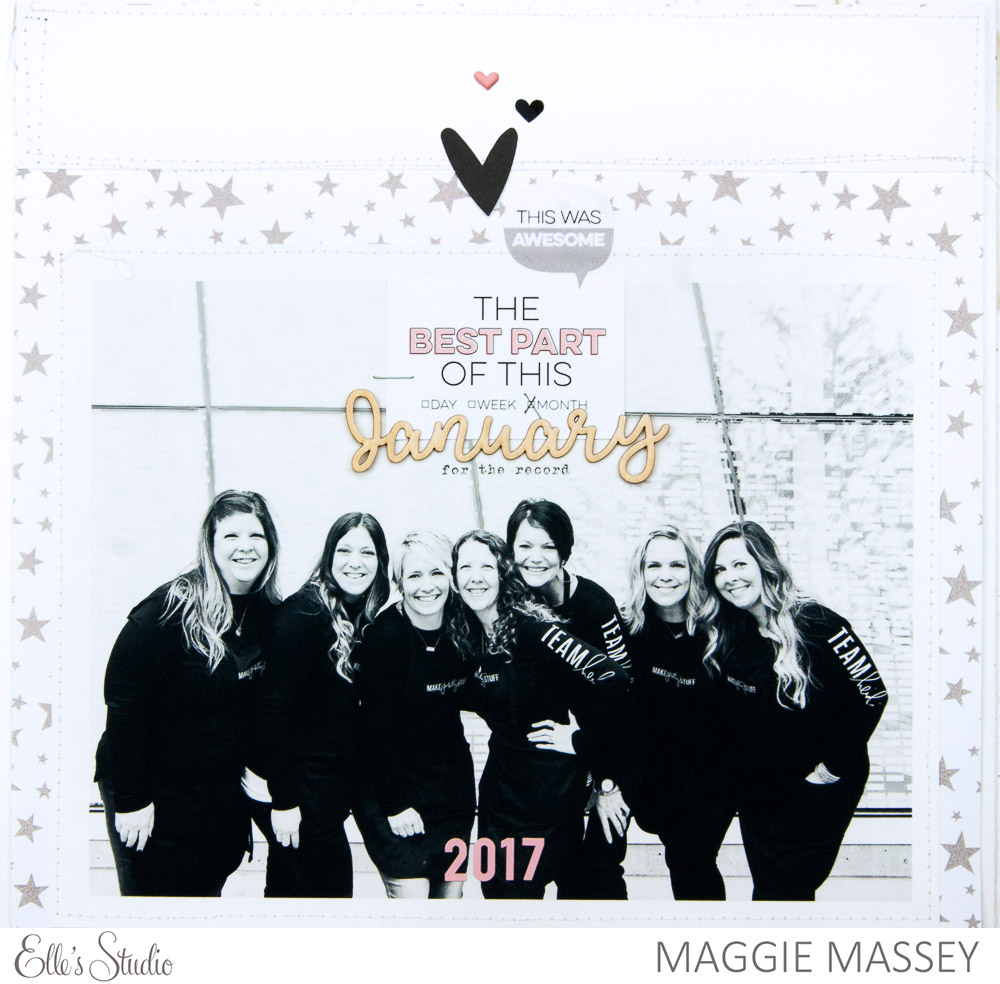
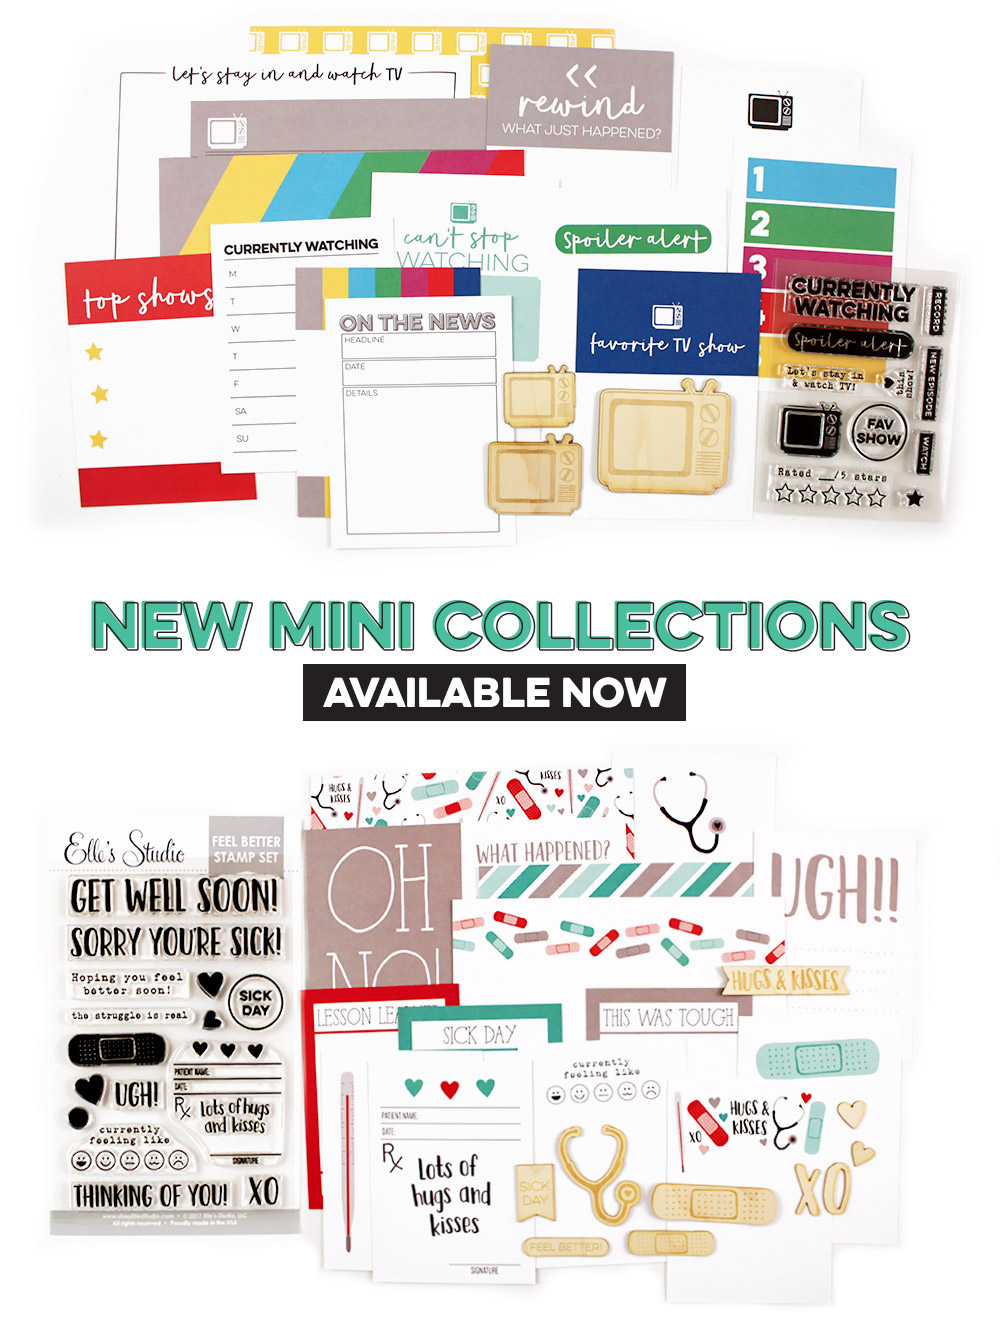
Being ill is never fun, but it’s a part of life, and sometimes those hard stories need to be documented. Candace Perkins is with us today to share how she documented a tough story with our new Feel Better mini collection.

Hello crafty friends! It’s Candace back with you today to share a layout using the newly released Feel Better mini collection. One of my New Year’s resolutions this year is to focus on storytelling when creating my layouts. I want to make sure I take the time to dig a little deeper and tell the stories I may have over looked in the past. When I saw the new Feel Better mini collection I knew the story I wanted to tell.

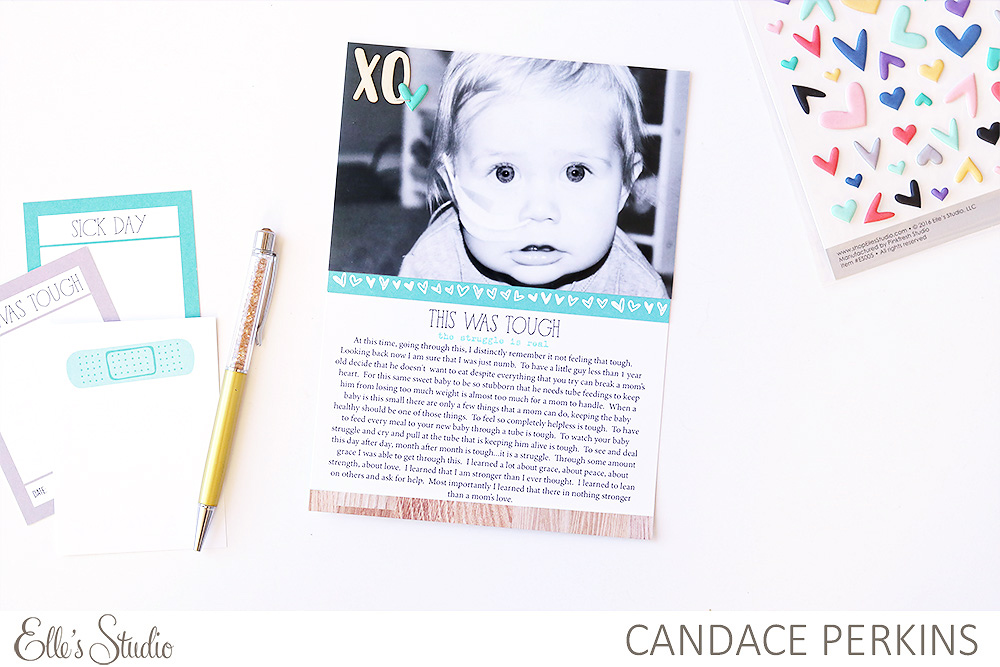
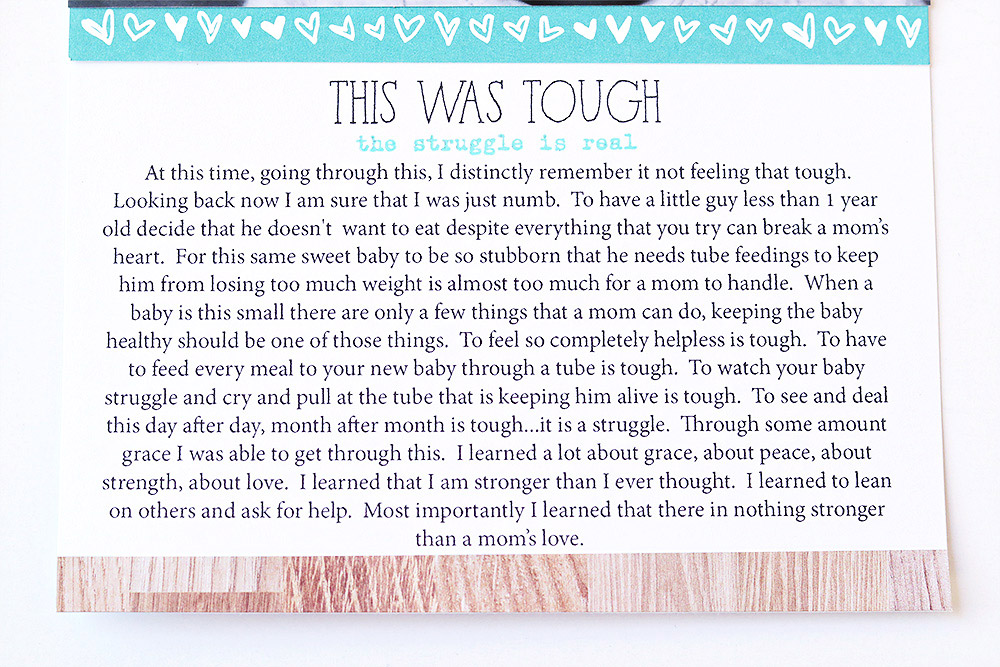
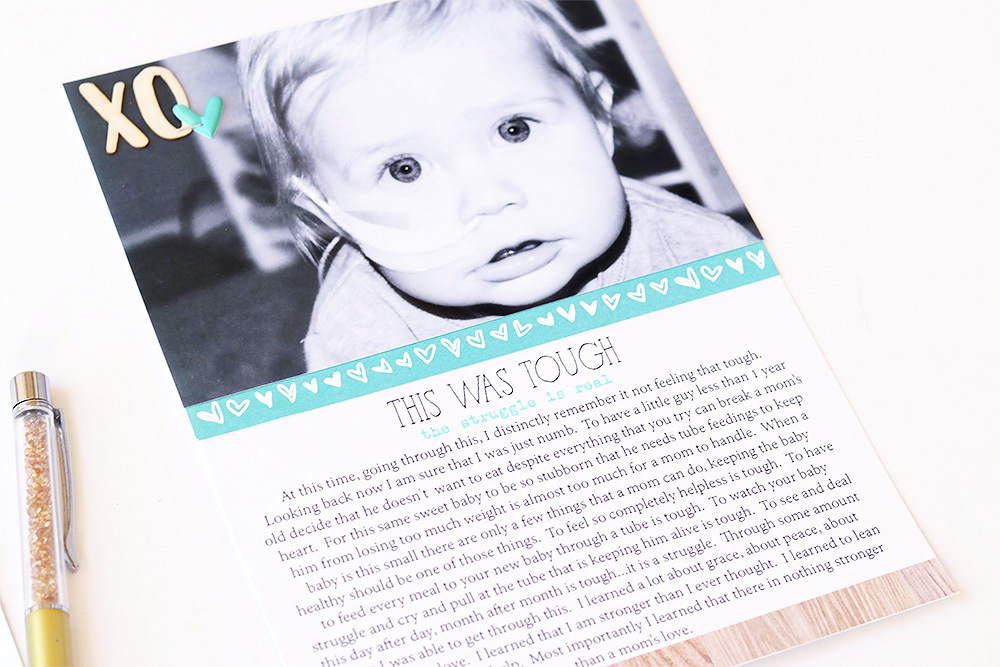
I decided to document a time a few years ago when my little guy was struggling to gain weight and grow. For about 6 months he needed a feeding tube to eat. I remember at the time thinking, “this isn’t so bad, I can handle this…” Looking back now I know that there was so much more to this story, and that is what I wanted to document.


Supplies | Feel Better Journaling Tags, Feel Better Stamp, Feel Better Wood Veneer, Puffy Heart Stickers, Sunny Days 12″ x 12″ Paper Collection

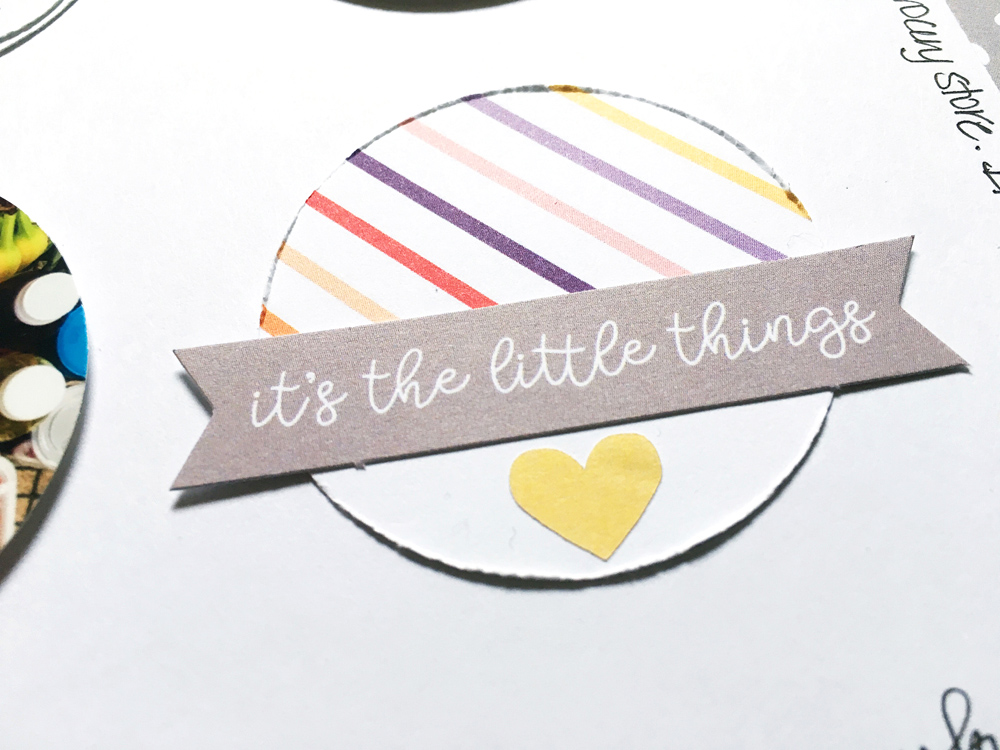
I loved the “This was Tough” card and wanted to use that sentiment as my title but I need more space to tell my story than the 3″ x 4″ card allowed, so I decided to go digital. Did you know that you can turn the physical 3″ x 4″ cards that come in the kit into digital files? With just a few extra steps you can manipulate the cards to tell any story you have in mind.

Step 1: Scan the card as an image file into your computer.

Step 2: Open the scanned image in Photoshop.

Step 3: Crop & manipulate the image to fit your project.

For my project I cropped out the title and placed it on a 6″ x 8″ canvas. I measured my spread to make sure that I could place my 4″ x 6″ photo on the top and use the Feel Better Stamp to create a sub title. Next, I created a text box and inserted all of my journaling right onto the 6″ x 8″ canvas. I then printed the canvas on 8-1/2″ x 11″ white card stock.


With my title and journaling in place all I needed to do was to assemble and embellish the layout. I adhered the photo to the top of the layout and used a cute branding strip to divide the photo from my journaling. I used the stamp Feel Better Stamp to add my sub title in mint ink to coordinate with the branding strip. Below my journaling, I added a strip of patterned paper from the Sunny Days 12″ x 12″ Paper Collection. I chose the woodgrain paper to keep a light, soft feel to the layout. When it came to adding embellishments, I wanted to tie in the patterned paper I used and bring the whole layout together. I used the adorable “XO” piece from the Feel Better Wood Veneer along with a mint puffy heart from the Puffy Heart Stickers.


I love how the whole layout came together. The Feel Better mini collection is perfect to tell so many stories and I love that I can manipulate the cards to tell any of these stories in the perfect way. Thanks for stopping by today! I hope this inspires you to use the wonderful goodies from Elle’s Studio tell more of your important stories.

Two new mini collections are now available!

We are excited to announce that we just added two new mini collections to our shop! The first collection is called TV and it includes journaling tags, wood veneers, and a stamp. Our second mini collection is called Feel Better and it includes journaling tags, wood veneers, and a stamp set, too! Both collections include fun illustrations by Rachel from Citrus and Mint!

Our new products would work great on all types of scrapbooking projects – layouts, mini albums, pocket pages, planners, and more! And, our design team will be sharing some fun projects with these new collections here on our blog this week!


Stop by our site to see the new products that were just added! And, we’d love to hear what mini collection theme you’d like to see next!

Save

Save

Journaling Tag Love + Process Video with Jen Schow

Although the 4″ x 6″ and 3″ x 4″ tags slide perfectly into pocket page spreads, our designers love using them on traditional layouts, too! Sometimes, that means altering them to make them work for our project, and Jen Schow is showing us how she did that today with a lovely layout!

Hey there! It’s Jen and I have an 8-1/2″ x 11″ layout to share with you today using the February Exclusive Kit + extras. I absolutely love the journaling tags that come in the monthly kits and it’s fun to incorporate them into my traditional layouts.


Supplies | February 2017 Exclusive KitHeart Circle Acrylics, Love with Arrow AcrylicOlivia Alphabet StampPuffy Heart StickersSunny Days 12″ x 12″ Paper Collection

In this layout about our new kitten, Crookshanks, I cut up some of the journaling tags to make them fit my layout. Let me show you what I mean.


I created a border at the top of my page using two strips of the adorable “Love” journaling tag from the February Kit. I added a bit of watercolor to match the other colors on my layout.


I also created a long tag by cutting down the “I’ve got joy” card and punching a hole in the top. I love how easy it was to create and I’ll definitely be using that trick again!


I included papers from the Sunny Days 12″ x 12″ Paper Collection and coordinating acrylic pieces from the Heart Circle Acrylics. I stitched the acrylic down and I think it kind of looks like whiskers, which lends to my story. If you want to see the whole thing come together, I’ve created a process video!

I hope you’ll give some of these ideas a try on your next project!

Do you love cutting your tags to make them work for your traditional layouts? Post your project and use the hashtag #EllesStudio on Instagram to show us your work, and have a chance to be featured on our blog, as well as win a gift certificate to the Elle’s Studio shop!

Weekend Vibes with Guest Designer Susan

Susan, a.k.a. “littlethingsbigdays” is back with us today to share her second project of the month. Last week, she created a layout very fitting for Valentine’s Day using the February Exclusive Kit, and today she’s showing us how versatile the kit can be with an “everyday” page that we know you will love!
 
Hi again! I’m back to share my second project using the February Exclusive Kit. I was very inspired by the “Saturday/Sunday” tag to make a page about my favorite kind of weekend – one with no set plans! I don’t know about you, but after the whirlwind of the holidays I really look forward to spending a “normal” weekend at home.


Supplies | February Exclusive KitWhat Happened StampOlivia Alphabet Stamp, Speech Bubble Stickers 
 
I scrolled through my camera roll and found photos that captured the activities of my favorite weekends – cooking, going for walks, reading, eating out, etc. I printed them and then punched out the centers with a 2″ circle punch. I used the same punch on some of the 3″ x 4″ tags from the February Exclusive Kit to give myself a nice variety of colors and patterns to go along with the photos.
 
After arranging all the circles into a grid, I cut one slightly larger circle to hold my stamped title. I stamped “favorite” from the What Happened Stamp and “weekend” using the Olivia Alphabet Stamp. I adhered the photos in place using thin dimensional adhesive squares and slightly distressed the edges of the patterned circles before attaching them to the page, to add some texture and definition.


I embellished some of the patterned circles with the Speech Bubble Stickers and die-cuts from the February Exclusive Kit. I punched the “joy, joy, joy” from one of the 3″ x 4″ tags and trimmed the “Saturday” and “Sunday” that inspired the page into banners and added them to the circles.


After cutting about 1/4″ from all four edges of my page, I attached it to the gray “Details” patterned paper from the Little Moments 12″ x 12″ Paper Collection. How great is it that Elle’s collections mix and match so well?! I wrote my journaling all around the edges to complete the page. Now if only I could have another of those relaxing weekends…


I’ll be back one more time this month with a layout using a fun new release! Stay tuned!
 
I love recording stories to capture our memories because I believe that all the little details add up to a big life. You can find me on Instagram as @littlethingsbigdays or on my blog “Little Things, Big Days.” 

Design Team Inspiration


Are you ready to see more inspiration from our team this month? Our Design Team has put together a ton of fun projects using our new items for February and we can’t wait to share them with you! Let’s take a look:

1st day layout by Michelle Wedertzsupplies used: February 2107 kit, What Happened stamp set, Speech Bubble stickers, Date stickers, and Heart circle acrylics.

Sweetheart layout by Melissa Mannsupplies used: February 2107 kit, Love You journaling tags, What Happened stamp set, Sweetheart acrylic, and Puffy Heart Stickers.

London Lion layout by Meghann Andrewsupplies used: February 2107 kit, February labels, wood veneer stars, Malia Uppercase and Lowercase stamp, What Happened printables, and February cut files.

Best Ever layout by Maggie Masseysupplies used: February 2107 kit, What Happened stamp set, Speech Bubble stickers, Sunny Days 12 x 12 paper, Puffy Heart Stickers, and wood veneer months.


Ooh La La pocket pages by Jennifer Chapinsupplies used: February 2107 kit, Speech Bubble stickers, Puffy Heart Stickers, wood veneer stars, XO acrylic, Date stickers, and heart circle acrylics.

January pocket pages by Jamie Leijasupplies used: February 2107 kit, Monthly journaling tags, and heart circle acrylics.

Week 3 pocket pages by Candace Perkinssupplies used: February 2107 kit, Love You journaling tags, Love Ya wood veneer circles, Dated stamp, Jonah stamp set, What Happened stamp set, and wood veneer stars.

XO layout by Allie Stewartsupplies used: February 2107 kitSweetheart acrylic, Speech Bubble stickers, Puffy Heart Stickers, XO acrylic, and February labels.

Happy Pocket Pages by Alissa Fastsupplies used: February 2107 kit, wood veneer stars, Puffy Heart Stickers, and What Happened printables.

We hope you found our teams projects as inspiring as we did – it’s always so fun to see how each one of our team members uses our kits! Stay tuned for even more inspiration coming from our team next week, and from our guest designer!

We would love to see how you use our products, too! If you are posting on Instagram, make sure you use the #EllesStudio hashtag for a chance to be featured on our feed! And, if you blog, link us up in the comments below!

Sketch Thursday with Neela Nalam

We are back with our next installment of Sketch Thursday! This month, we have the talented Neela Nalam working with our sketch, and we think you’ll love how she’s resized it to create the sweetest inspiration piece ever!

Working from sketches is one of my favorite ways of getting out of my creative rut. It helps me think differently than what I normally do and I love that. This week we have a brand new sketch to inspire you, too!


When I saw this month’s sketch, I knew that I wanted to adapt it to a spread in my traveler’s notebook- I’ve been loving creating in it lately. I used the sketch for the right side of my spread and kept the left side very simple for documenting the facts.


Supplies | February Exclusive KitFebruary Labels, Wood Veneer Stars, What Happened Stamp, Puffy Heart Stickers, Sequins- Love MixDated Stamp, Little Moments 12″ x 12″ Paper Collection

I am documenting the birth of my niece with this spread. I haven’t met her yet, and I so desperately want to hold her in my hands.


On the right side I used strips of paper from the Little Moments collection behind the her photo. I cut down the “joy, joy, joy”  3″ x 4″ tag from February Kit and placed it on the left side of the photo.
The  Wood Veneer Stars from the February add-ons are my absolute favorite. I used these, along with the Puffy Heart Stickers and Love Mix Sequins as embellishment. I stamped the word ‘favorite’ from the What Happened Stamp on a pink February Label, and added it on top of the photo. I also added the ‘love you so much’ die cut from the February Exclusive Kit. As you see, I pretty much stayed true to the sketch, except I adapted it to a much smaller scale.


On the left side, I cut the purple 3″ x 4″ tag from the February Kit and added another February Label and Puffy Heart Stickers. I then stamped the date on which she was born with my favorite Dated Stamp. I journaled on the “best part” tag from the February Kit, and placed it below my date. I then added some of the same embellishments that I used on the right side to tie both the pages together.


Now it is your turn to be inspired by this month’s sketch! Link up a project in a comment on this blog post, using the February sketch as inspiration by March 10th, 2017 to be entered to win a $10 gift certificate to the Elle’s Studio shop! We will announce the winner next month on our next Sketch Thursday. We can’t wait to see what you create! Congratulations to last month’s Sketch Thursday winner, “Super Stick Chick” with her winning layout:

Please email us at info@shopellesstudio.com to claim your prize!

If you love to use sketches as a jumping-off point for your projects, check out our specially priced bundle of From Sketch to Finish Volumes 1 and 2 in the Elle’s Studio shop today!

A Pocket Page Traveler’s Notebook with Jamie Leija

Our design team is always “wowing” us with their creations, but Jamie’s project today has us running for our scissors! She’s taken a simple pocket page to the next level, using the February 2017 Exclusive Kit. Let’s see what she created. 

Hiya! It’s Jamie and I’m so excited to share a hybrid project I created using the February 2017 Exclusive Kit and extras!


Supplies | February 2017 Exclusive Kit, What Happened Stamp, Heart Circle Acrylics, Puffy Heart Stickers
 
My new (to me) favorite things in the paper crafting world are traveler’s notebooks. I’m kind of obsessed. It’s all traveler’s notebooks all the time! I’m making often and using them for everything.


I knew that I wanted to make one to help me keep track of the stories I want to tell: whether in pocket pages for my monthly memories spreads, tiny weekly stories in my traveler’s notebook, or in layouts or mini albums. I created this super special traveler’s notebook to jot all of them down.


I’m calling this a hybrid project because the cover I created is actually a 6″ x 8″ page protector that has twelve 2″ x 2″ pockets: essentially a mini pocket page! It was so much fun to create tiny inserts for each of the pockets. At that size they don’t need much embellishing.


To create the cover, I cut down five 3″ x 4″ journaling tags from the February 2017 Exclusive Kit into 2″ x 2″ squares. I embellished them with die-cuts from the kit and phrases from the What Happened Stamp. Then, I added my title, “2017 Storytelling,” a few other die-cuts and two Puffy Heart Stickers to the top of the page protector. I left one square empty and filled it with a few of the Heart Circle Acrylics.


I embellished the back inside cover the same way, using a few of the scraps from the cover, then embellished with labels, die-cuts, stamped words and puffy hearts.


I added my pages and stitiched them together using a saddle stitch, just like I have for the other paper notebooks I’ve created. To keep the top of the page protector closed I found the most simple of all solutions…clear scotch tape! Can you see it? You’d have to try really hard!

Thanks for stopping by the blog today! If you’ve been inspired to create your own traveler’s notebook using Elle’s Studio supplies, share via Instagram with the hashtag #EllesStudio! We’d love to see your project, and you will be entered to win a $10 gift certificate to the shop!

Floral Inspiration with Daniela Dobson

Happy Valentine’s Day, friends! Daniela Dobson is an expert card maker, and today she’s sharing just how easy it is to create a beautiful card using the February Exclusive Kit and add-ons in the shop. Wouldn’t receiving a handmade card like the one below just make your day? We think so!

Welcome to the Elle’s Studio blog today. It’s Daniela here highlighting the exclusive February 2017 Exclusive Kit and extras. I was inspired by the 3″ x 4″ floral background tag from the kit and wanted to use it as a focal element on my card.


Supplies | February 2017 Exclusive KitSpeech Bubble StickersLove You Journaling TagsSunny Days 12 x 12 Paper Collection

I used my watercolor crayons to color in the flowers and leaves on the journaling card background- just a little touch of color with the crayon and a little water with the paint brush to move the color around. I added a little bit of color to the diamond patterned paper of the card base as well.


I cut a strip of yellow from one of the patterned papers in the Sunny Days 12 x 12 Paper Collection and used my fringe scissors to add a fringe to the paper strip. I cut the striped border journaling tag from Love You Journaling Tags in half and adhered it behind my watercolored flower journaling card. The fringe was added to the bottom and a little twine tied in a bow to the front. I added the yellow heart sticker from the Speech Bubble Stickers and layered the colorful banner tag from the February 2017 Exclusive Kit. It was the perfect way to pull all of the colors together.

I used a gray marker to draw the flowers onto white cardstock, then I colored them with the same watercolor crayons. They are a larger version of the ones on the journaling card. I fussy cut them and adhered them to the front with dimensional adhesive. Above the flowers, the “hello” sticker from the Speech Bubble Stickers created the perfect sentiment!


Thanks for stopping by and don’t forget to share your projects inspired by this post using Elle’s Studio products using the hashtag #EllesStudio on social media for a chance to win a $10 gift certificate to the Elle’s Studio shop!

One Product, Three Ways: What Happened Stamp

This month, we’re introducing a new post here on the Elle’s Studio blog called “One Product, Three Ways.” Today, we want to highlight the new What Happened Stamp with three different projects from three different designers to show you the versatility of this fun stamp! Let’s take a look at what our designers have created.

Maggie Massey: 

I was sorting through my February Exclusive Kit when I came across a 4″ x 6″ tag that was covered with the word “LOVE” in all different sizes and typefaces, and I fell in love. I’ve always been drawn to that design, and so I decided I would create my card in the same style.


Supplies | What Happened Stamp

I started by taking a plain old blank card and tracing one of my 4″ x 6″ cards onto it, to give me some idea of where my stamps would go. Then I used washi tape to mask off the outside of my “box.”

Next I pulled out some of my favorite embossing powders and set to work.


There was really no rhyme or reason as to where I stamped. I just kind of tried to make words fit into spaces, and I LOVE the result! I love, too, that I could recreate this exact same card using different ink and embossing powders and I would get a whole new look!

Jen Chapin:


Supplies | February Exclusive Kit, What Happened Stamp, Fav Acrylic, Heart Circle Acrylics, Speech Bubble StickersPuffy Heart Stickers

For this layout, I stamped “love this moment” from the What Happened Stamp repeatedly on white cardstock with multiple colors of ink. I then used a 1″ punch to punch the circles out and adhered them to my layout with foam adhesive.


The result is a unique, rainbow-colored mat for my photo. I finished it off with some Heart Circle Acrylics and Puffy Heart Stickers, as well as the Fav Acrylic piece. Punching out stamped images is a great way to create custom elements for your projects!

Laura Hager: 

One of my favorite scrapbooking techniques is stamping! I love that you can use one product with so many different color inks and create so many different styles and projects. This month, I used the “What Happened” stamp to create a fun pocket page layout.


Starting with a story to tell is the easiet way for me to create ideas to scrapbook. I built a garden in my backyard for my January goal and used this stamp set to document it. The script “favorite” stamp was the perfect thing to capture my feeling for plants. I love plant shopping and checking in on my garden.


Supplies | February Exclusive KitWhat Happened Stamp, February Labels
 
I think the “true story” stamp is so fun! I knew I wanted to create a tag with this stamp. Again, I used alphabet stickers to add text and stamped on a label. Stamping on labels helps add the perfect pop of color to the layout!

The “date and subject” stamp is a perfect way at add the important information to my scrapbook. I made a tag with the date and added some journaling about why this garden is so special to me.

I love stamps that can be used in multiple ways. I know the stamp set will be one of my new go to favorites. Test out your creative and see how many ways you can use the cute stamp set!
 
We love how differently each of the designers used this stamp! Be sure to check out the What Happened Stamp in the shop, and check back next month for the next “One Product, Three Ways” post.

Filling Pockets with Andrea Gray

Hi again, friends! It’s Andrea here with another pocket page! The February Exclusive Kit and add-ons are full of colorful journaling tags, cute stamp sentiments and clean labels to document your everyday and today I’m going to share some fun ways you can use them to accomplish that!


Supplies | February 2017 Exclusive Kit, What Happened Stamp, February Labels,  Love You Journaling Tags, Puffy Heart Stickers
 
One of my favorite ways to capture in words what I have captured in photos is to make a list. Here I used a 4″ x 6″ journaling tag from the February Kit to list all the “things” that happened during the week. All of these items are documented in photos but maybe there is no room on the photos to document in detail. I like adding the list in one spot to allow the reader to match the item to the photo. I then added the date range and week number sideways and a heart and die cut saying to the bottom to make it feel complete.


Memes are a great way to say what needs to be said when you’re just fresh out of your own words. The patterned journaling tags are perfect for adding a meme while still showing off the colors or design of the tag.


Another way to add stories to your small pocket inserts is to use a label. The February Labels are perfect for quick little jots of text. Below I’ve used them for a quick story as well as a time stamp. I turned the yellow label vertically so that I didn’t cover up the design on the card and it still allowed me to write out all the words for my story.


The stamp sentiments are the perfect size to add little pieces to tell your story. One of my favorite things to do is to stamp directly over the design on the card like I did over the yellow stars. It makes it feel like it belongs there – like it’s part of the design. On the orange card, I used the white label space to stamp the word “favorite” from the February What Happened Stamp.


Elle’s Studio makes it so easy to document your days with fun and colorful supplies!

Thank you for joining me today! Be sure to share your pocket page layouts using the new Elle’s Studio products on social media with the hashtag #EllesStudio!