A sneak peek of what is coming on April 10th!

Are you getting excited for our April kit + add-ons reveal? We cannot wait for you to see everything we have in store! This month our kit + add-ons will have you ready to document April and take you right into the month of May! Look for our kit + add-ons available in our shop this Monday, April 10th at 8:00 am PST.

April’s kit includes 3 – 4 x 6 inch tags, 18 – 3 x 4 inch tags, and 25 die cuts! Get ready to pick up our April kit for our launch day special pricing of only $9.99 on Monday, April 10th, at 8:00 am PST. After the 10th, our kits go back to their regular price of $11.99. Or, you can lock in the $9.99 price anytime by starting a subscription!

We will also have our brand new collection in stock on the 10th! Live Laugh Love includes 12 x 12 and 6 x 6 papers, labels, journaling tags, die cuts, wood veneers, acrylic, stamps, stickers, puffy stickers, and enamel dots!! You can view the entire collection here. And, if you subscribe to our monthly kit, you’ll be able to add this to your kit order and have it shipped together for free (USA) or reduced shipping (International)!

Don’t miss another kit! On April 10th you will have another chance to subscribe to our kit. With a subscription, you will be guaranteed a kit each month, lock in our launch day special price of $9.99, and receive FREE (USA) or reduced (International) shipping on anything added to your box each month on the 10th. Quick note: Our kits and add-ons are available without a subscription each month, too.

Make sure you set your alarm and mark your calendar for Monday, April 10th at 8:00 am PST! If you haven’t signed up for our newsletter, make sure you do to receive a reminder of when everything is available for sale!  We hope to see you there!

Chevron Inspiration with Allie Stewart

Inspiration is everywhere, and today Allie Stewart is showing us how she created an amazing background design on a scrapbook layout based on a 3″ x 4″ tag from our upcoming April 2017 kit. Look closely and you may see a few sneaks for what is to come on April 10th, including our new Live Laugh Love collection!

Hello there! Today I have a fun new layout to share using the BRAND NEW Live Laugh Love collection! I love all the colors and patterns, and couldn’t wait to dig in.


Supplies | Live Laugh Love 12″ x 12″ Collection Pack, Live Laugh Love 6″ x 6″ Paper Stack, Live Laugh Love Cutouts, Live Laugh Love Bits & Pieces, Live Laugh Love Acrylic

The background for this page was inspired by a journaling tag in the upcoming April Exclusive kit! I loved the rainbow chevron, and recreated it on my layout using a diamond shaped punch and patterns from both the 12″ x 12″ and 6″ x 6″ papers. The arrangement of colors was based exactly on the journaling card.


Next, I used modeling paste and heart stencil to add a bit of mixed media to the page. One thing I love about the Elle’s Studio acrylics is how easy they make page titles! It takes all the work out of coming up with a title, and having to align individual letters. I embellished around the photo with Live Laugh Love Cutouts and the Bits & Pieces, and finished off with some puffy stickers!


I loved creating with Live Laugh Love, and I can’t wait to make many more projects using this beautiful collection! Be sure to pick up your own stash of these lovely products when they hit the shop on April 10th at 8am PST!

Using Smaller Patterns with Melissa Mann

Are you a 12″ x 12″ scrapbooker and have no clue what to do with the 6″ x 6″ paper stacks that are available with our collections? Today, Melissa Mann is sharing a perfect project to put those smaller patterns to work, and we know you will be inspired! Let’s take a look.

Good Morning, you guys! It’s spring time here on the Gulf Coast of Florida and the new paper collection, “Live Laugh Love,” by Elle’s Studio is a fabulous choice for capturing all those spring time memories. I plan on capturing some photos of the new garden my husband is installing in our front yard this spring, but in the meantime, I created this layout using a picture of my hubby from a lunch date we had at Texas Roadhouse last November.


Supplles (all available on April 10th) | Live Laugh Love 6″ x 6″ Paper Stack, Live Laugh Love Journaling Tags, Live Laugh Love Bits and Pieces, Live Laugh Love Word Labels, Live Laugh Love Washi Stickers, Live Laugh Love Enamel Dots, Live Laugh Love Stamp
 
I ALWAYS forget about the cute 6″ x 6″ paper stacks that are available with each collection. This time, I was determined to put it to good use and used it exclusively for this layout! The smaller designs on the 6″ x 6″ sheets of paper are a good fit when punching out small designs such as the circles that travel the length of my layout.


I punched out a variety of 1″ and 1-1/2″ circles from the 6″ x 6″ paper stack and placed them down the length of my layout in a slight diagonal line- some were cut in half and placed on the edges, and some were placed on top of other circles using foam dots. I wanted the appearance that the circles were breaking through the white card stock.


I used one of the Live Laugh Love 3″ x 4″ journaling tags for my typed journaling. I typed on the bottom half, and then cut the top part of the card and placed it on the opposite side underneath my picture.

I can’t wait to see what you create with the new “Live Laugh Love” collection, which will be available in the ES shop on April 10th, along with our April kit reveal! Thanks for stopping by the blog today!

An Easter Treat with Maggie Massey

It’s April, which means Easter is almost here! We wanted to make sure that you didn’t miss the new Easter products that hit the shop last month, so a few of our DT members will be highlighting them this week! First up, we have Maggie Massey, who created the perfect Easter treat to grace anyone’s Easter basket!

Hello, hello everyone! Happy April!

Easter falls later in the spring again this year and I am sooo happy about that! Not only does that mean the weather here in the midwest may be a little less cold & rainy, but it also means I’ll have more time to get some fun projects done for friends & family.

I’ve already got a jump on this year’s treats and I have Elle’s Easter items to thank for it! I found some adorable egg cartons at Target (for just $1!) and I thought they’d be perfect for holding some paper eggs & candy!


I got to work cutting some “eggs” out of a few of my favorite patterned papers in the new Live, Laugh, Love Collection.

Then I filled the eggs with some candy, popped them into the cartons, and done! So easy… and so adorable!


Next, I wrapped up the cartons with some baker’s twine and added a tag created with the 3″ x 4″ bunny tag in the March 2017 Kit. It was so simple to create, and I love it!


This “tag” was created with the Happy Easter Acrylic and it is my favorite!


We will be dropping off our little care packages with some friends and neighbors during the kids’ Spring Break next week…and I’m so excited for their recipients to open them!


Supplies | Easter Stickers, Happy Easter Acrylic, Spring & Flowers Acrylic, March 2017 Kit, Live Laugh Love 12″ x 12″ Paper Collection (coming soon to the Elle’s Studio shop!)

Maybe we’ll even leave a few little candy-filled paper eggs around here- you know…for safe-keeping.

Thank you so much for taking a look! And Happy Easter!

Little Words Required with Neela Nalam

We are so excited to be highlighting projects using our new Live Laugh Love collection this month, and to start things off, we have a beautiful layout by Neela Nalam. Sometimes, there are very few words we can use to describe incredible moments in our lives, and Neela shows us below how we can let the product do the talking for us. Let’s take a look.

Hi everyone! This is Neela here and I am so excited to be kicking off a new month of projects using the new Live Laugh Love collection. Let me just tell you that every piece in this collection is so well thought out and every element coordinates so well together.


Supplies | Live Laugh Love 12″ x 12″ Paper Collection, Live Laugh Love 6″ x 6″ Paper Stack, Live Laugh Love Cutouts, Live Laugh Love Word Labels, Live Laugh Love Journaling Tags, Live Laugh Love Puffy Stickers, Live Laugh Love Bits and Pieces, Live Laugh Love Wood Veneers, Live Laugh Love Stamp

I wanted to keep this layout simple and let the collection do all the talking. In fact, this may be one of the very few projects where I haven’t done any journaling. The bits and pieces in the collection say it all. I love when it all becomes so easy.

I backed the photo with journaling tags and three patterned papers from the 6″ x 6″ paper stack. The designs and colors are simply amazing. When I turned this around to glue it onto the 12″ x 12″ wood grain paper, I hated to hide the other side as the patterns and colors are simply awesome on that side too. I then cut out corners from a 12″ x 12″ patterned paper to add to my woodgrain paper and I stitched them down. The handwritten pattern and the red/pink pattern are from the same paper.


I added the bits and pieces, tags and word labels all around my photo. I love this photo of the kids and myself hanging out at a cafe in Prague. Whenever I see photos of me with the boys, I need to remind myself to make sure I have more of these. I also stamped the phrase “live laugh love” onto a label. I used wood veneer pieces and puffy stickers to add dimension to the layout. Last but not least, I added enamel dots in a visual triangle.


To say I adore this collection is an understatement and can’t wait to make a whole bunch of awesome projects with it.

Make sure you get your own Live Laugh Love supplies as soon as they are available in the Elle’s Studio shop on April 10th at 8am PST!

Live Laugh Love Highlight with Meghann Andrew


We at Elle’s Studio are so excited about our new everyday collection, Live Laugh Love, which debuts in the Elle’s Studio shop on April 10th at 8am PST, along with our April exclusive kit and add-ons. I’m Meghann Andrew, and I’m also excited to share with you the first project created with this lovely collection here on the ES blog!


Supplies | Live Laugh Love 12″ x 12″ Paper Collection, Live Laugh Love 6″ x 6″ Paper Stack, Live Laugh Love Stamp, Live Laugh Love Wood Veneers, Live Laugh Love Bits and Pieces, Live Laugh Love Cutouts, Enamel Dots, Malia Lowercase Alphabet Stamp, Letter and Number Stickers- Black

This new collection will be perfect for documenting your memories, no matter the season. With fresh vibrant colors, and everyday sentiments, your projects and photos will truly shine!


Whether you love patterned paper, stamping the perfect sentiment, or adding the final touch of a wood veneer heart, this collection has a variety of elements to finish off your page perfectly.


This collection will also pair perfectly with a variety of supplies already found in the ES shop, like the Malia Lowercase Alphabet Stamp and Letter and Number Stickers.


We hope you are as excited as we are about this new collection, Live Laugh Love! Be sure to set your alarms for April 10th at 8am PST so that you can grab all of the new goodies in the shop, and thanks so much for stopping by the ES blog today!

Documenting the During and After with Andrea Gray

Do you have a larger story to tell that would take up a lot of space in your weekly pocket page spreads? Why not give it its own place and dig a bit deeper into the story!? Today, Andrea Gray is doing just that with two fun spreads documenting the during and after of a fun trip to Ikea!

Hey friends, it’s Andrea here again and it’s no surprise that I’m sharing a pocket page with you, but this time I want to inspire you to scrapbook a larger event that is separate from your weekly or monthly documenting.

On my layout I created below, I documented a trip my kiddo and I took a trip to IKEA for some shelves. I started with three photos that all had a similar color scheme and I just knew I had to keep them together and tell this story without including them in my normal weekly spread. Using the blue and yellow colors in the March 2017 Kit and extras, I pulled out labels, tags, puffy alphas and die cuts that coordinated and made sense in the layout.


Supplies: March 2017 KitSky Blue Puffy Alpha Stickers, March Labels, Vellum Sentiments, Puffy Star StickersDate Stickers – Blue & Green, Puffy Heart Stickers, Everyday Labels Puffy Stickers – Black

The fun and challenging part about this whole ‘documenting’ thing is knowing what to document. It can be difficult to think to the future and wonder what should a person know about this photo or person or layout. Thinking about that, I decided to use the Sky Blue Puffy Alpha Stickers to make a title of the name of the shelves. The Kallax shelves are very popular among crafters because they fit our gigantic 12″ x 12″ albums perfectly and I have so many of them in my home already. Having the name down will be a fun little nugget in years to come!


One thing we like to do when we go to IKEA is take pictures against the bright yellow wall. Since I had several that were useable, I decided to make a collage of four photos against a white background, instead of keeping them separate. This is helpful in keeping your layout from feeling cluttered, and it creates a striking visual! I added three of the March Labels, leaving them sticking out of the side of my photos and layered the “this is where the story beings” die cut and banner from the Blue and Green Date Stickers to add color.


The yellow circle from the Vellum Sentiments is so perfect for this selfie I took in the mirror section.


Now that I acquired the shelves, I had to document how they came to life in my family room. The turquoise and yellow colors in the March kit work perfect with my colors in that room so it was a no-brainer!


Supplies: March 2017 Kit, Right Now Journaling Tags, TV Journaling Tags, Grow and Bloom Wood Veneer, Fav Acrylic, Dated Stamp, Love Ya Wood Veneer Circles, Wood Veneer Stars, Acrylic Frosted HeartsSunny Days 6″ x 6″ Paper Stack

This card from the Right Now Journaling Tags makes a perfect place to list some fun facts about the experience.


Since this room is where we watch all of our TV (and by TV I mean YouTube and Netflix) I thought it would be perfect to use this 4″ x 6″ journaling tag from the TV Journaling Tags. I just added a Grow and Bloom wood veneer word and an acrylic heart from the Acrylic Frosted Hearts for color.


This room really is my favorite, so I added a piece of washi and glued down the fun and clean Fav Acrylic word to this leftover piece of patterned paper from the Sunny Days 6″ x 6″ Paper Stack.


I couldn’t leave the layout without adding two of my favorite tags from the March kit, the “joy down in my heart” and “good times” were perfect for this layout. I love when supplies help tell the story!


So there it is, friends- permission to scrapbook larger events in pockets and not cram it into your weekly layout. I hope you take tons of photos so you can make a special layout (or two) too!


Until next month, happy scrapping!

A Big Move Documented with Jamie Leija

Who knew that the stressful task of moving house could look so good in a pocket page layout? Today Jamie Leija is showing us that even the mundane, everyday life events can be documented in a beautiful way using the March 2017 Kit

Hiya, it’s Jamie here, and today I’m sharing my latest pocket page! The March 2017 Kit makes it so easy to put bright and colorful pages together. Color is my number one design consideration. It’s also one of the reasons I love Elle’s Studio products so much. Elle is a master with bold and beautiful colors!


Supplies | March 2017 Kit, Acrylic Stars – Spring Mix, Puffy Star Stickers, Sequins – Blue Green Mix, Letter & Number Stickers – White, Today Sticker Labels

I used three of the tags and several of the die-cuts from the March 2017 Kit on this spread. The story was actually prompted by the “this is where the story begins…” label, and it was perfect for this page about starting life in a new house. The embellishing was kept simple, thanks to the Puffy Star Stickers and Blue Green Mix Sequins! They are the perfect size for decorating 3″ x 4″ tags.

My favorite photo on the spread is actually a screen grab from a video I shot. Out of nowhere my very excited cat decided to do a drive by attack (a playful, no biting or scratching one) on my nervous dog. It makes me giggle still! I simply added a die cut and some journaling right to the photo.


The standout tag on this page is definitely the bold and lovely chevron. I added white Letter & Number Stickers to it to reinforce the story of the layout. I also love that teal makes its way into just about every monthly kit. It’s my second favorite color and my most used color in scrapbooking. It will show up a plenty in projects about my home, since our kitchen cabinets are teal.


I printed directly onto the last card, after I added a few die cuts to embellish it. It took a bit of playing in Word and a few pre-pints to make sure it would line up correctly, but it actually wasn’t difficult to make this happen. I just had to remember to remove the puffy star before sending it through my printer!


There’s one special element going on on this page. It’s not immediately obvious and I like that. On the main journaling tag, I wrote about the animals and how they’re settling into our new house. I also wanted to include some journaling on how the humans are feeling about the move. I printed this on a 3″ x 4″ journaling tag from the kit, and then hid it behind the top 4″ x 6″ photo with the help of a brad. It’s easily accessible but not immediately obvious- just as it was meant to be.

A Floral Digital Background with Neela Nalam

The monthly printables that release with every new kit are perfect for coordinating with your physical product as they are on the printable page, but they can also be modified to create exceptional elements on your pages, just like Neela Nalam did today with her custom page background. She’s broken the process down in a few easy steps below! 

For this project, I decided to use a journaling tag from the March 2017 Treasure Printables. I selected the spring flowers tag because I loved the flowers on this one. This inspired me to tell a story about our trip to a botanical garden in Hawaii. I always struggle to make layouts without photos of people, but this tag inspired me to print out a bunch of the photos of the flowers that I ended taking during our trip.


Supplies | March 2017 Kit, File Under Stamp, Sequins- Blue Green Mix, Spring and Flowers Acrylic, Grow and Bloom Wood Veneer, Easter Stickers, Today Sticker Labels, Treasure Printables, Little Moments 12″ x 12″ Paper Collection

To create this layout, I converted the 3″ x 4″ tag to a 8- 1/2″ x 11″ page and added my journaling. The process was simple:

First, I opened the tag in Photoshop Elements.


Next, I erased the background of the image using the magic eraser tool, being sure to erase the border of the tag too, leaving the background transparent.


I converted this tag to a size of 8-1/2″ x 11″ by creating a new blank file, sized at 8-1/2″ x 11″, with a transparent background. Then I dragged the tag with the transparent background into this file. I then resized to make the flowers at the top of the page as big or small as I wanted, drew my text box and typed my journaling. At this point I was ready to print the file.


Then, I printed my photos in a grid and glued them below the journaling. I loved the flowers on the tag but couldn’t stop myself from using the acrylic flowers and leaves from the Spring and Flowers Acrylic. I also decided to stamp the flowers using the File Under Stamp in various colors, fussy cutting them and adding them to the printed flowers on the tag.


I then wanted to add a title for this layout. What better one than the wood veneer word that says “bloom” from the Grow and Bloom Wood Veneer. I dressed this up with the stamped flowers and leaves too from the File Under Stamp. It was so much fun to do all this stamping!


I then finished the layout with some tags from the March 2017 Kit, stickers from the Today Sticker Labels, Easter Stickers and sequins from the Blue Green Mix. I also converted the 8.5″ x 11″ page to a 9″ x 12″ layout by backing it with a patterned paper from Little Moments 12″ x 12″ Paper Collection.

I hope this project inspires you to modify the Elle’s Studio monthly digital tags to suit your needs. The process is easy and I love that the same tag can be used to create so many different outcomes!

Documenting TV Favs with Guest Designer Melanie Blackburn

Our TV Mini Collection has been so popular, and we’ve loved seeing how our Elle’s Studio fans have used it to document their favorite movies and television shows! Today, our March guest designer, Melanie Blackburn is sharing her favorites using this collection, in her signature clean, yet colorful style. Let’s take a look. 

Hello again friends! I’m happy to be back today with my last spread for Elle’s Studio as this month’s guest designer. I’ve had so much fun over the last month creating projects to share on the blog, and want to thank you so much for taking the time out of your busy day to read my blog posts. I’m thrilled and honored to have been able to share my creative process with you this month.


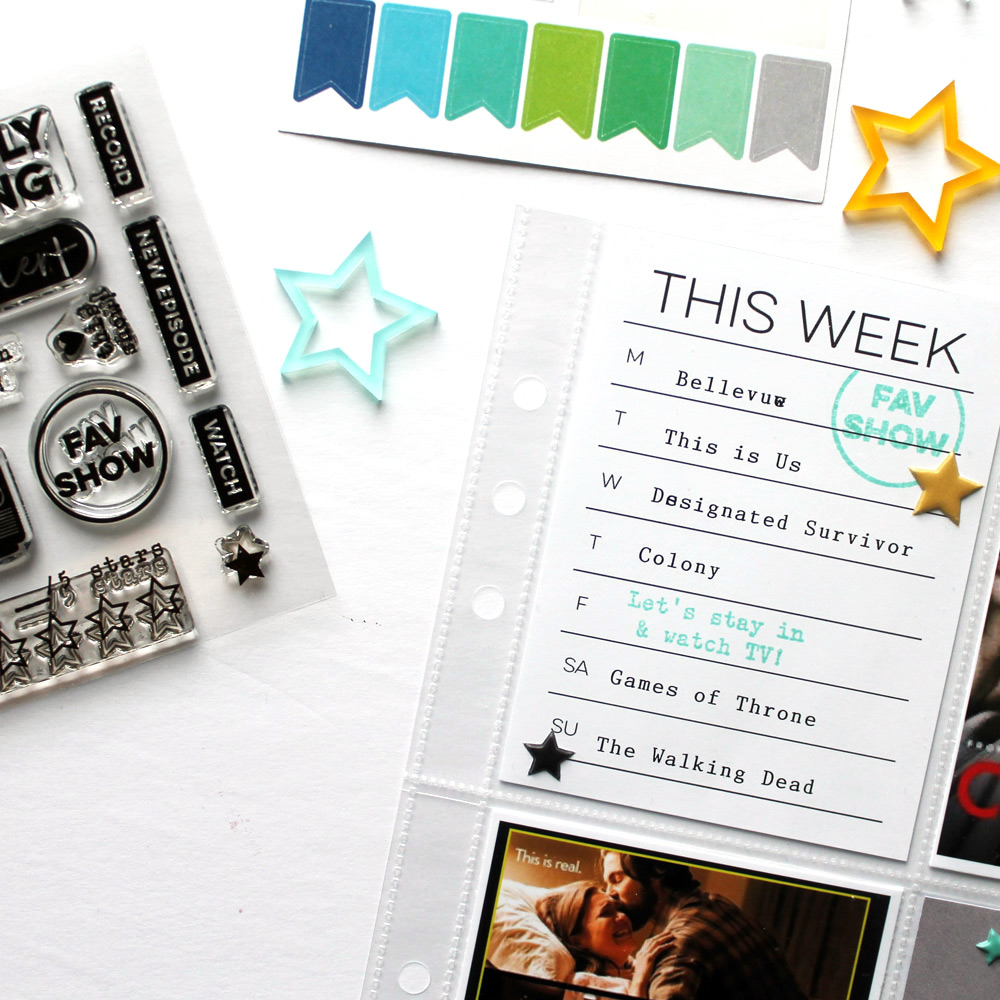
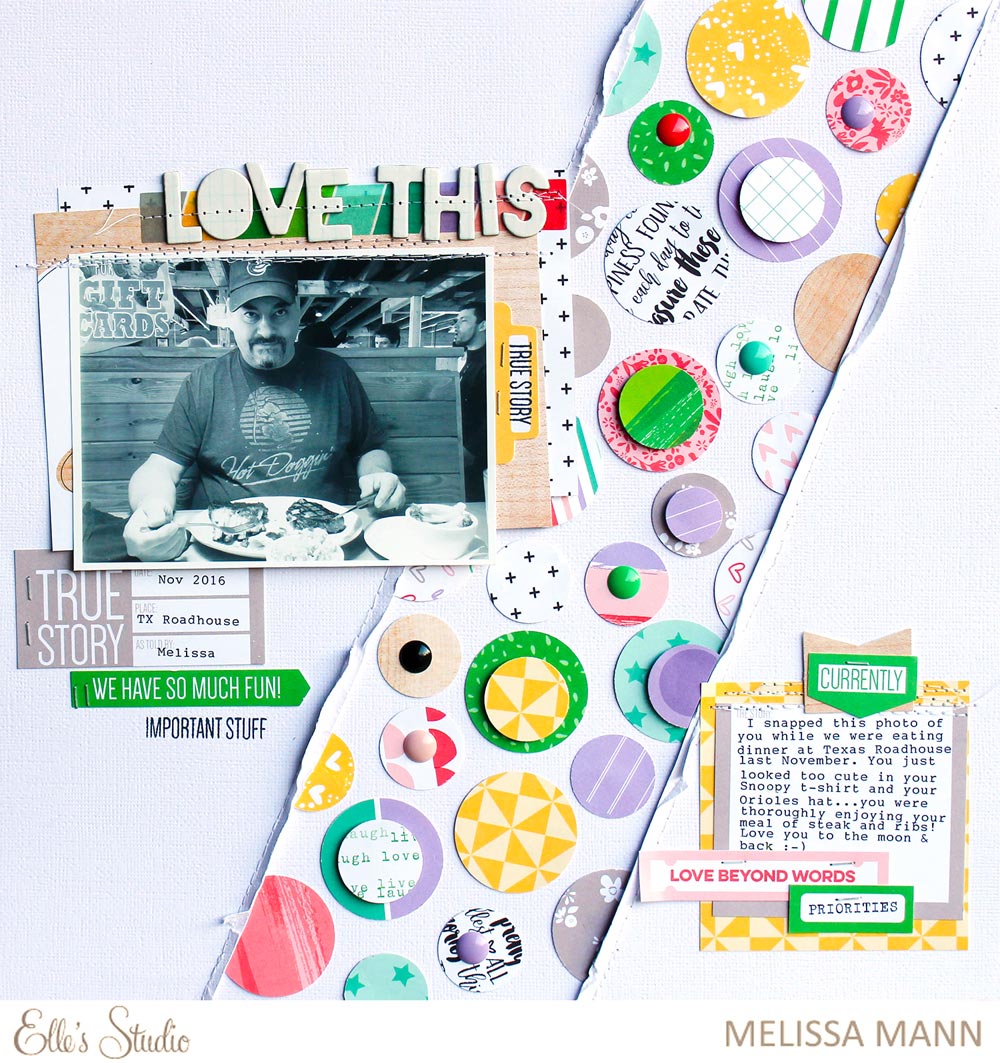
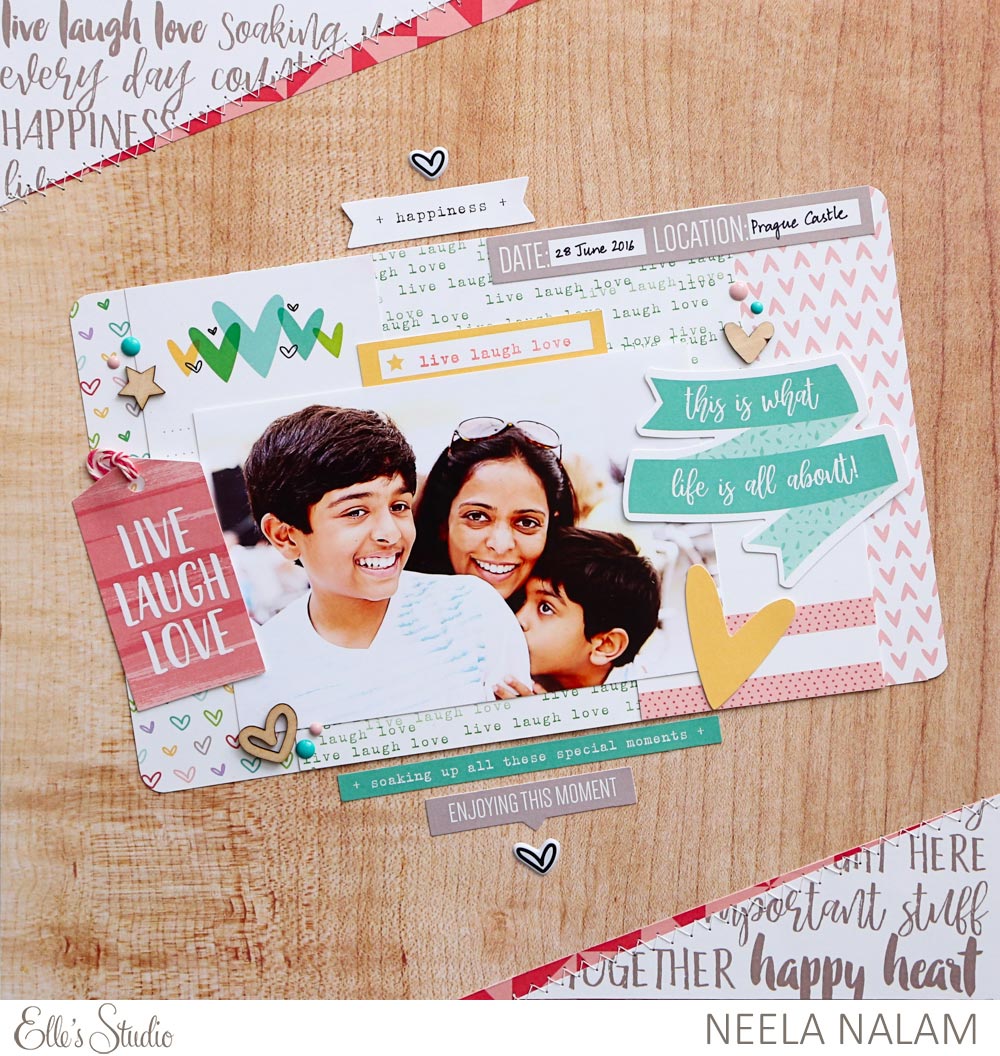
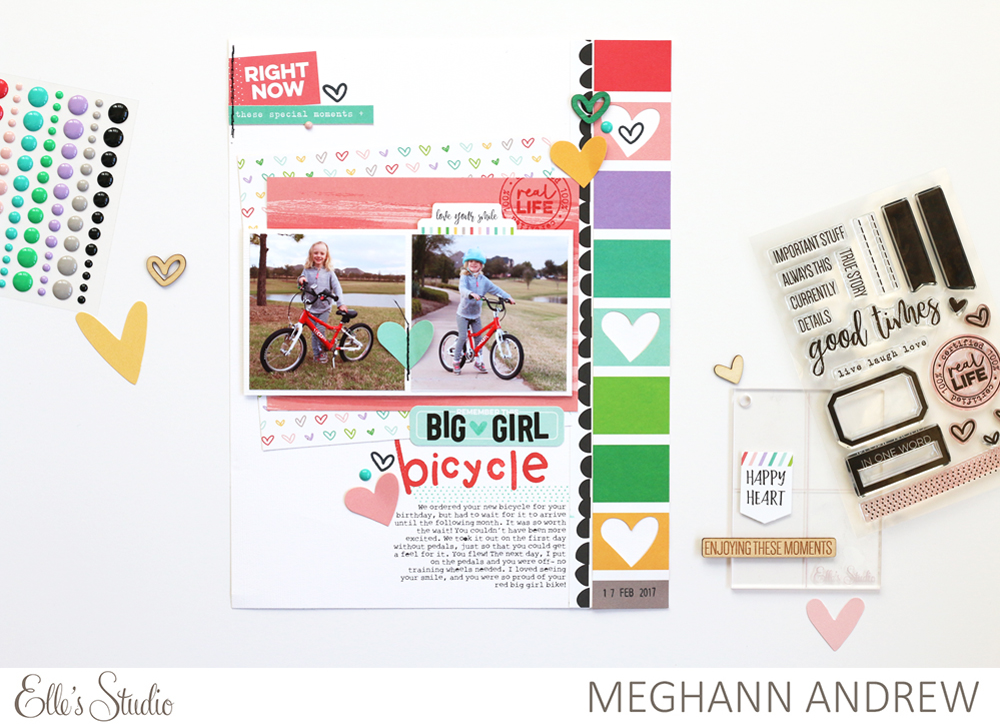
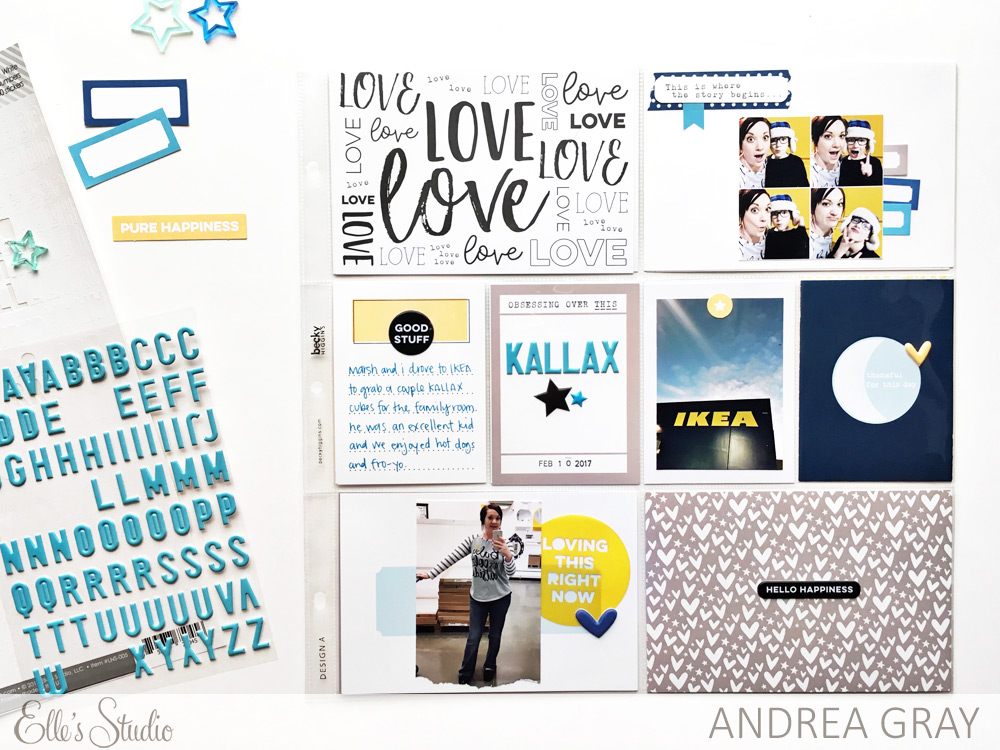
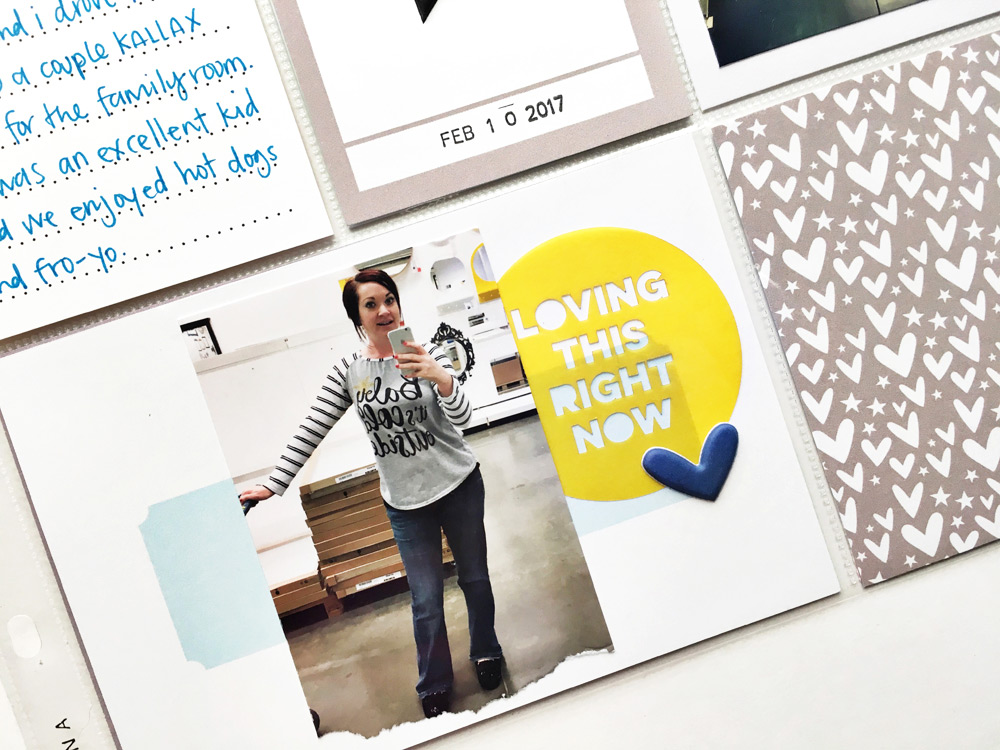
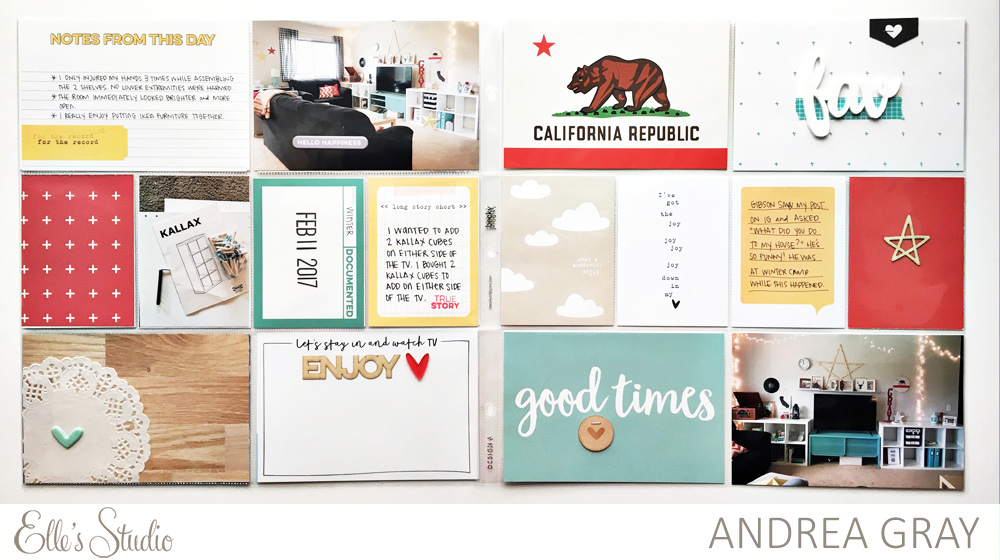
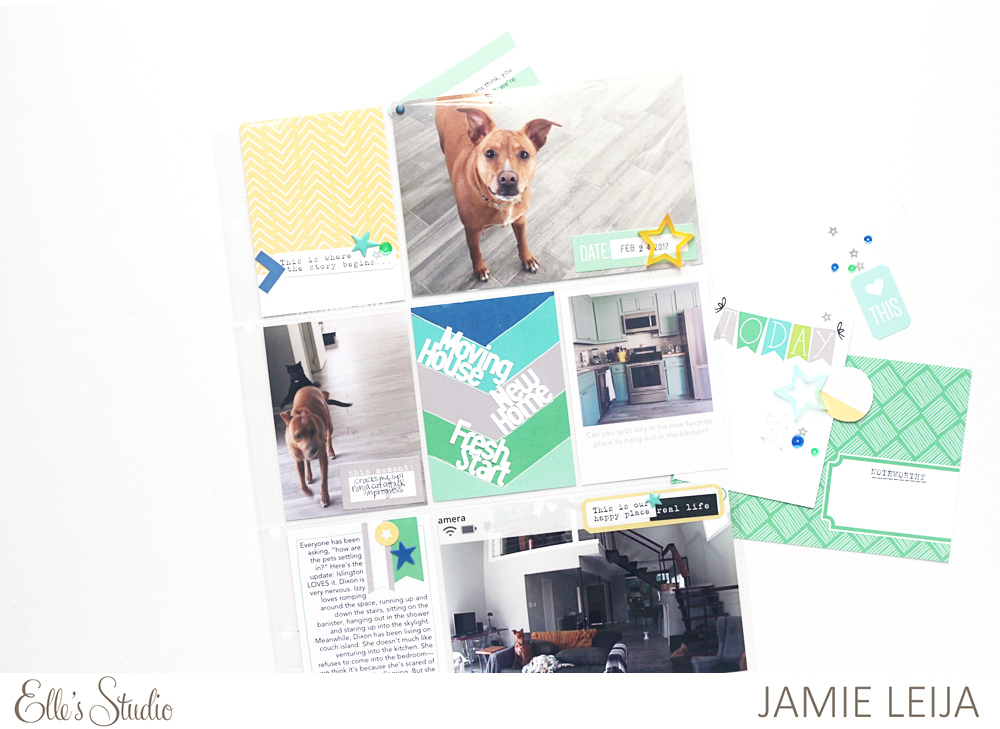
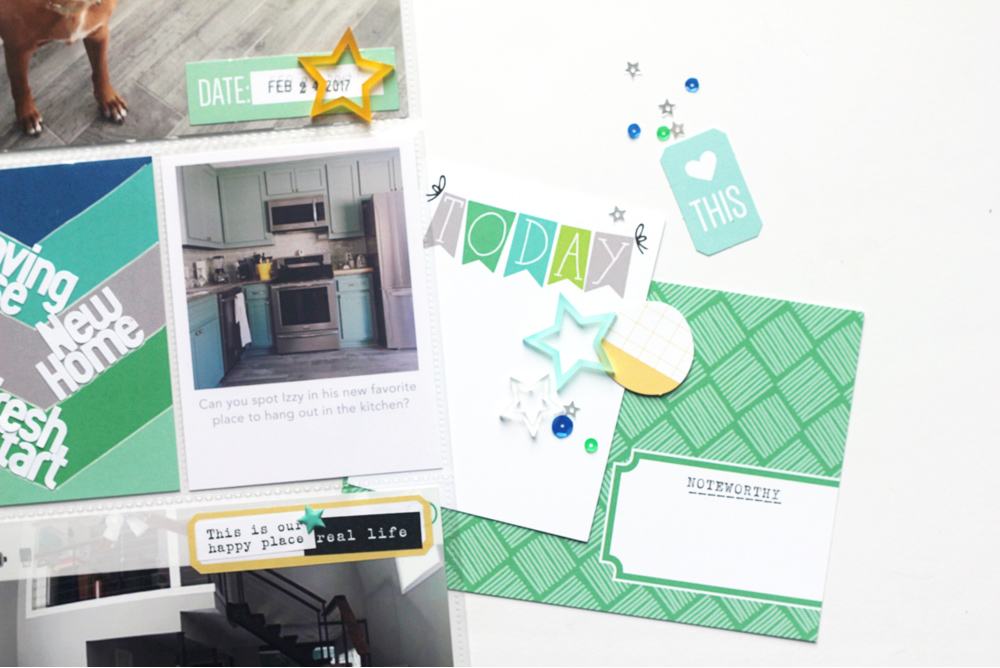
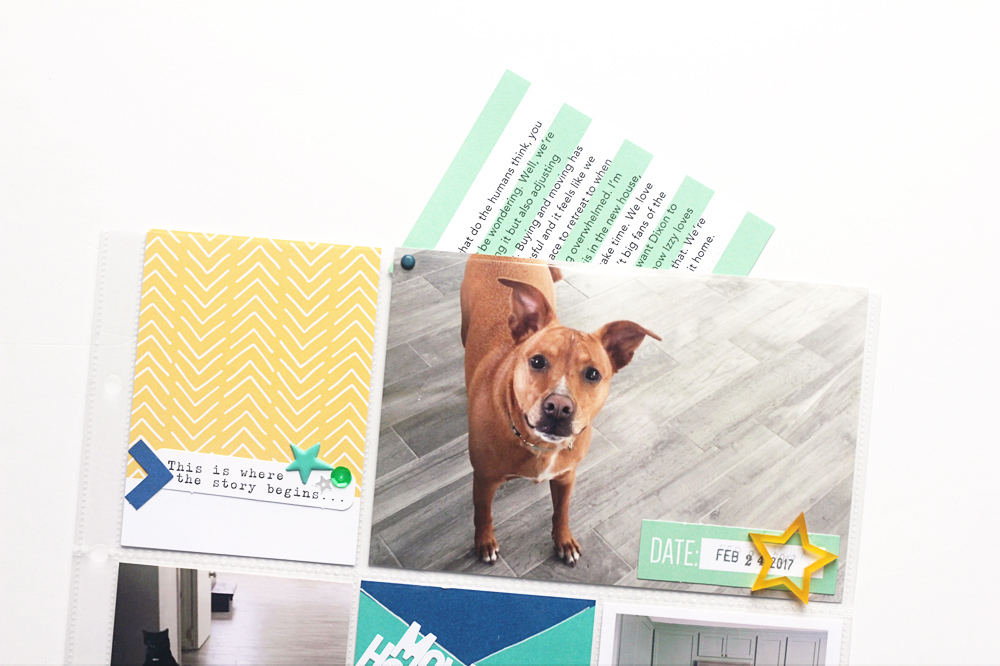
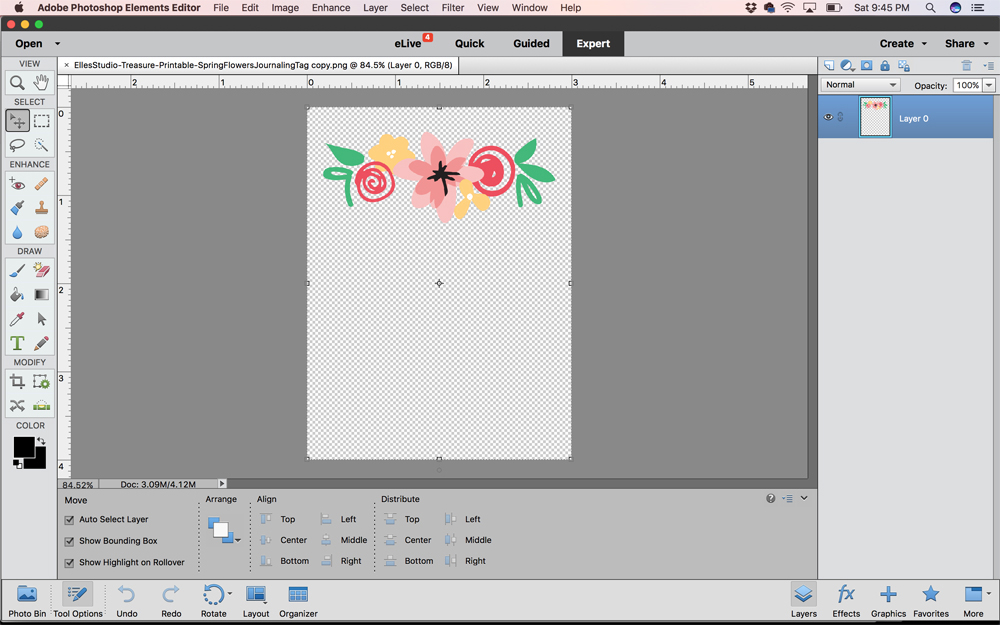
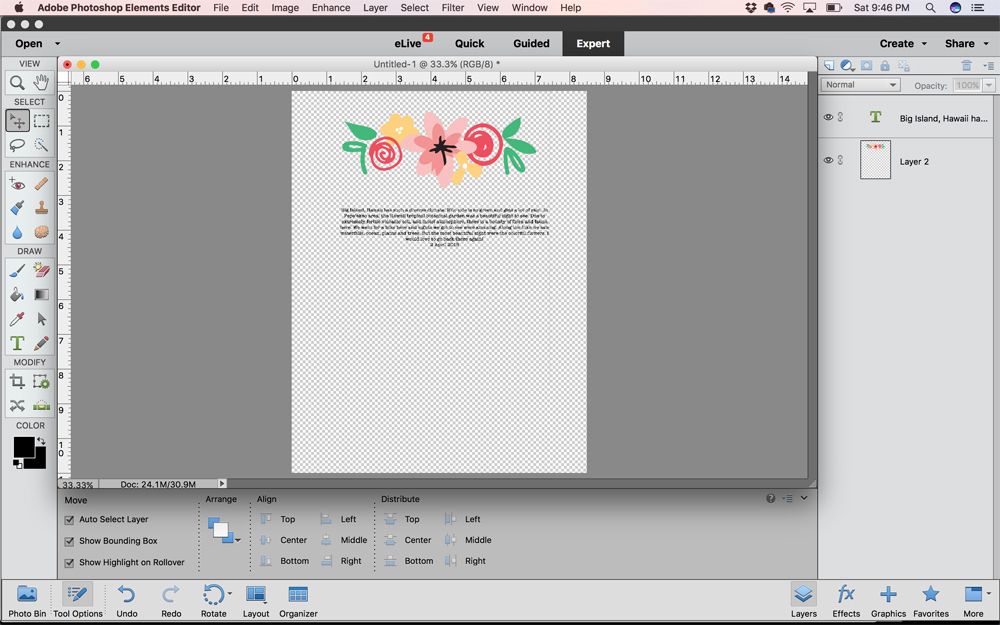
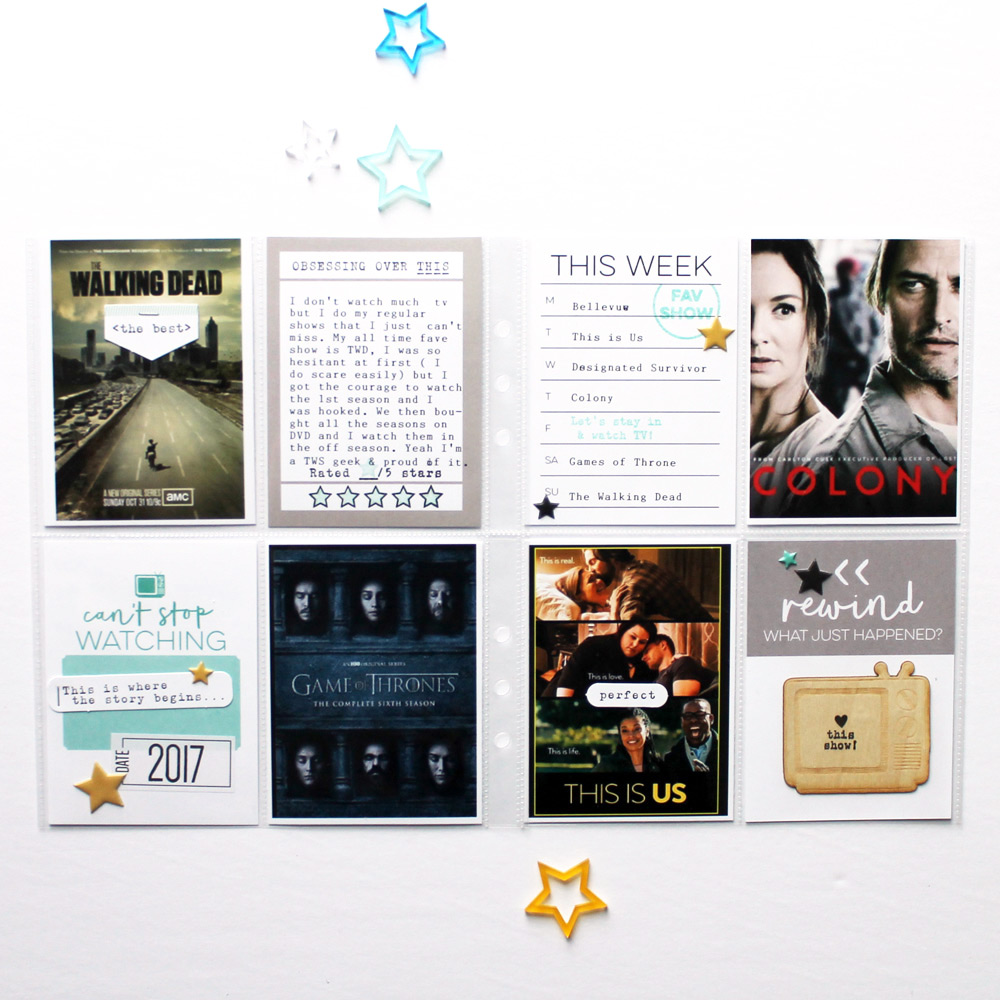
My last project is a spread for my personal 2017 album, which is a 6″ x 8″ format. I received the wonderful TV Journaling Tags set along with the TV Stamp and TV Wood Veneers. I knew I had to create a spread about my favorite current television shows! I don’t watch much television, but I do have some regular shows that I just can’t miss. To create this spread, I used images from the web, opting to select my top four favorite shows and balance my spread with four journaling/accent tags. I love the mix of stamps paired with the tags and wood veneer. I wanted to create a fun spread and I think I’ve achieved this! Side note – I’m fully aware of the journaling error for Game of Thrones but it’s a joke between my husband and I, I always get the name wrong, so I thought it would be fun to include that in my spread as well!
 
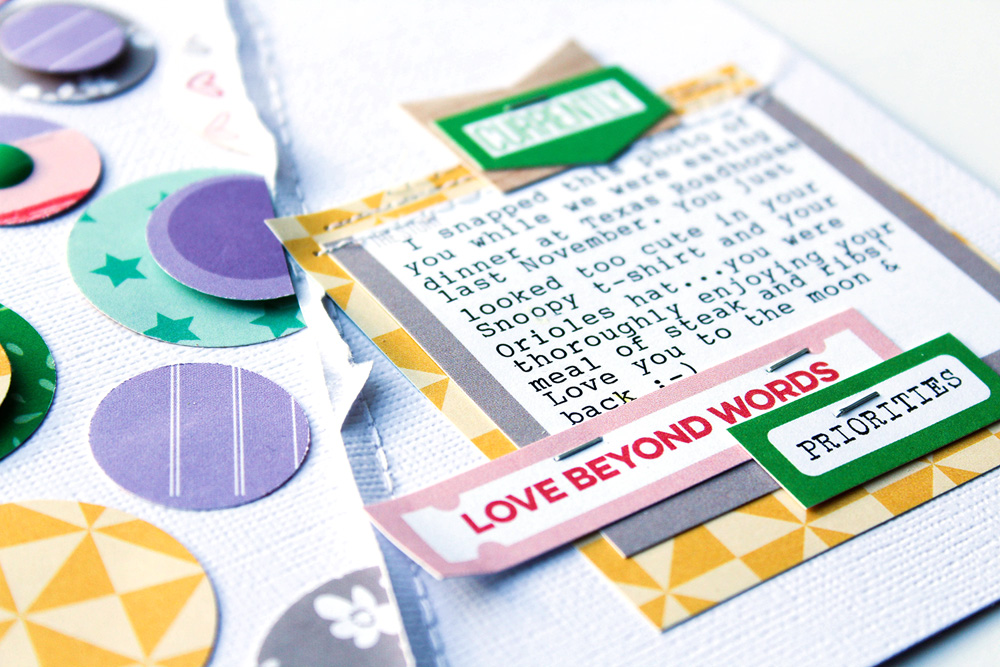
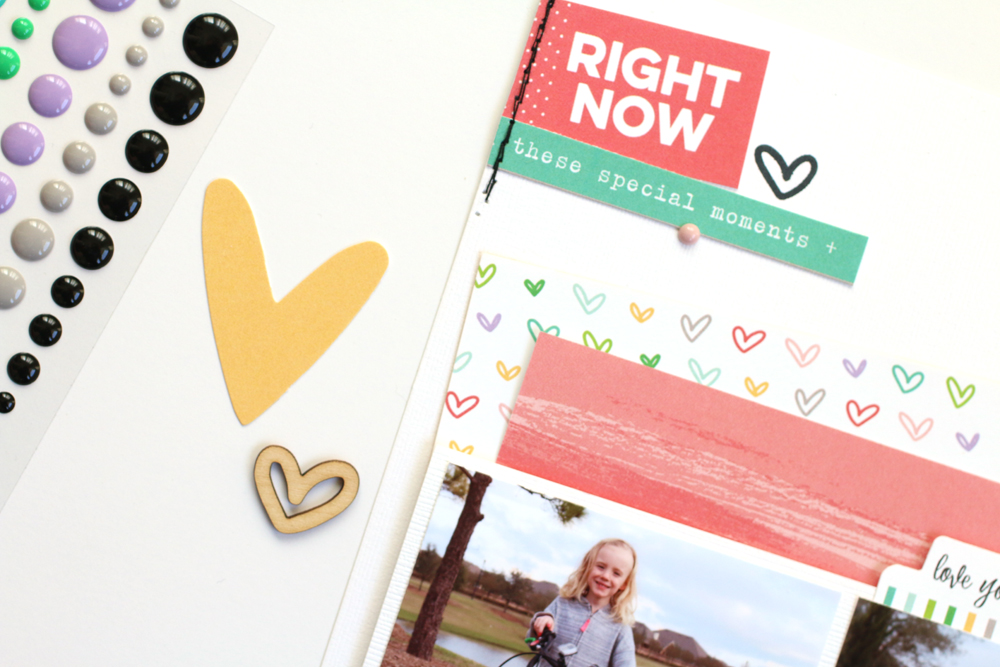
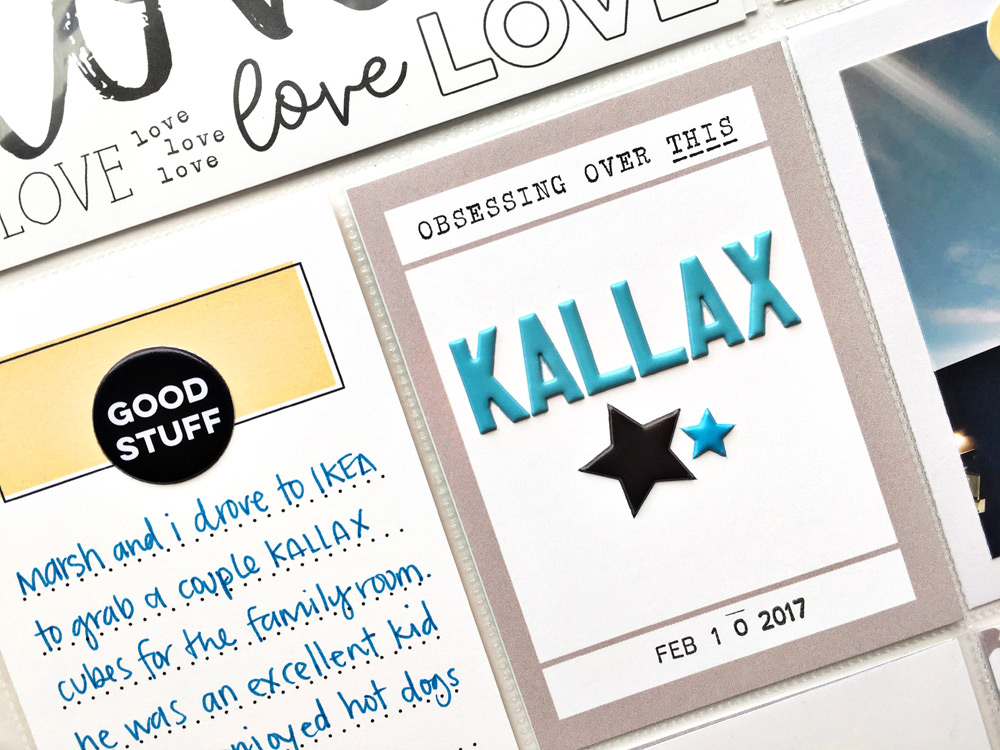
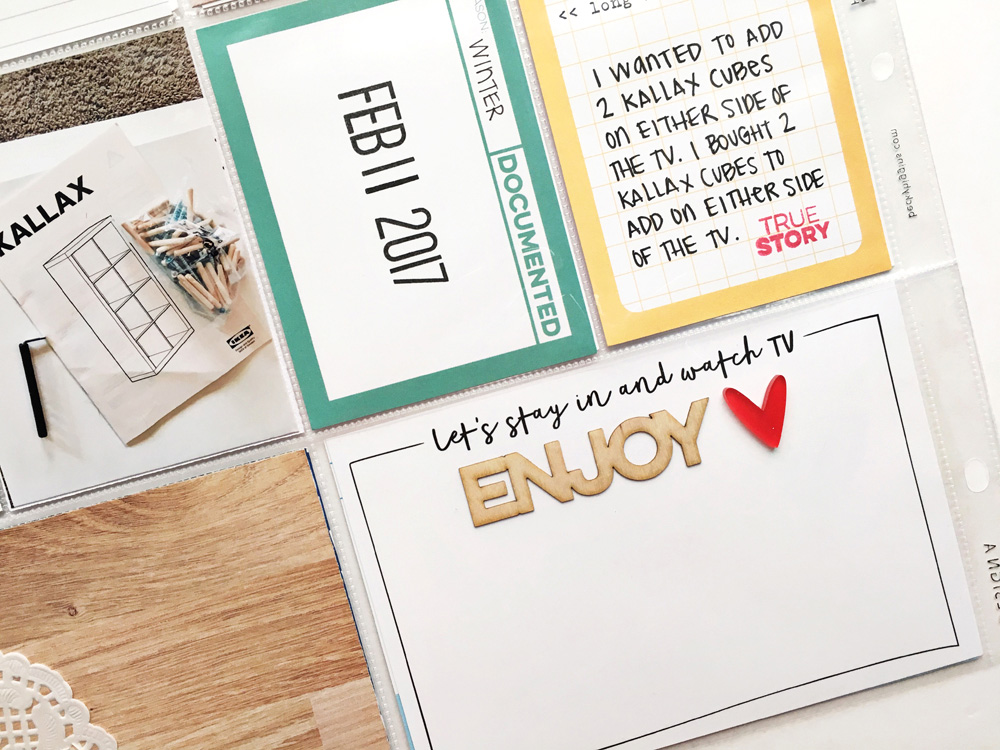
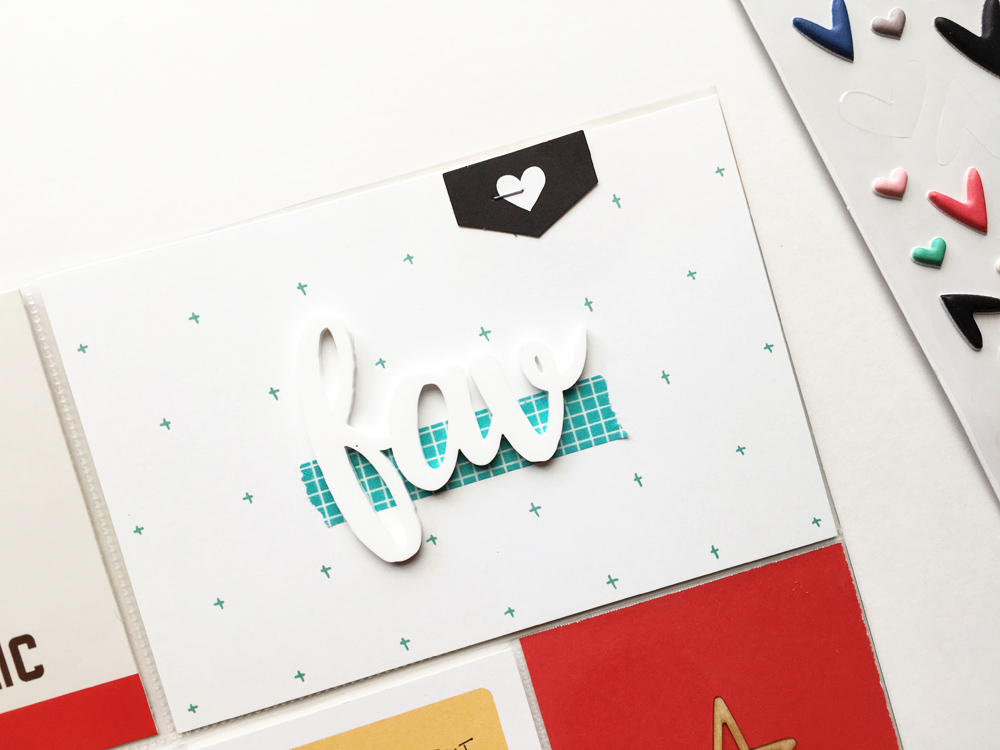
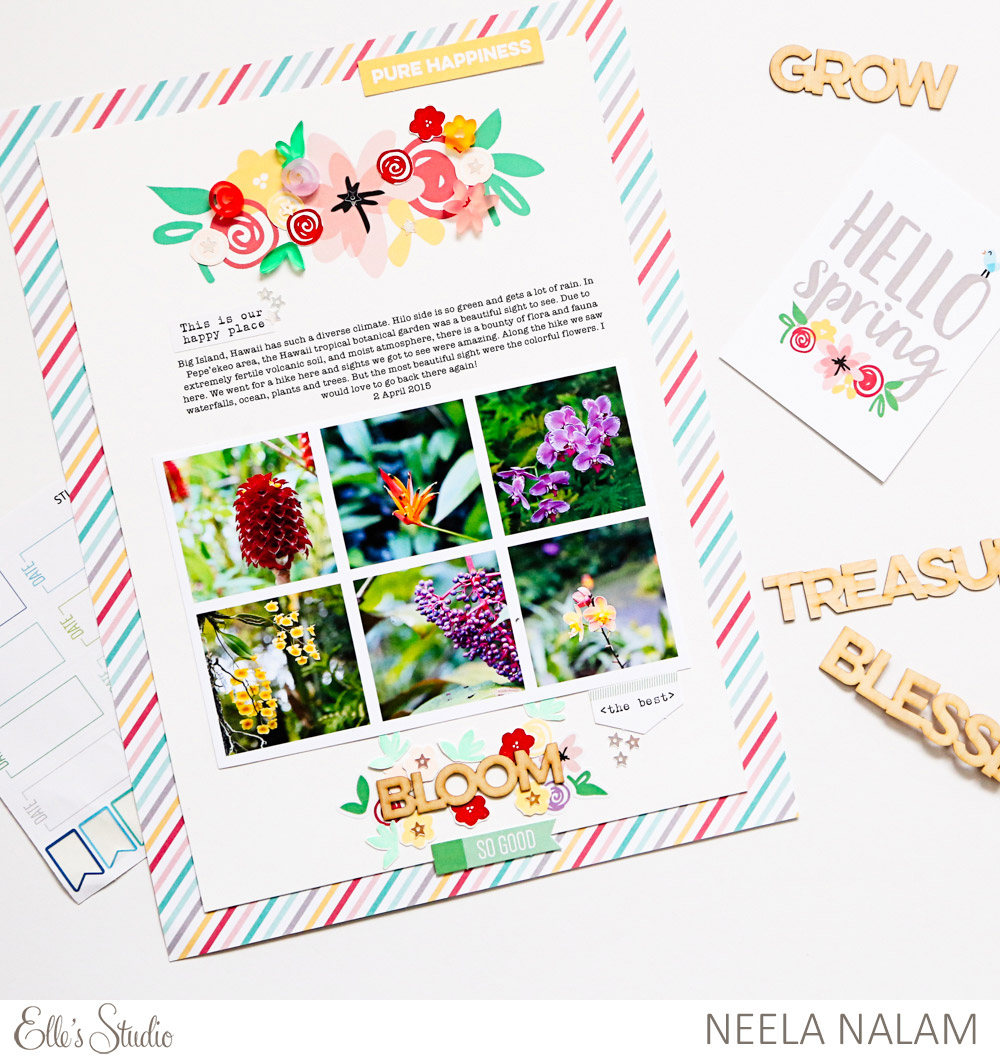
As I mentioned in my previous post, I’m a huge fan of wood veneer, and I especially love Elle’s Studio brand because they aren’t too bulky and so easy to work with. I was thrilled to see the cute TV Wood Veneers, and I opted to pair one with a journaling tag, adding a small stamp to the center of the TV- just a little extra accent to add more details to my card.


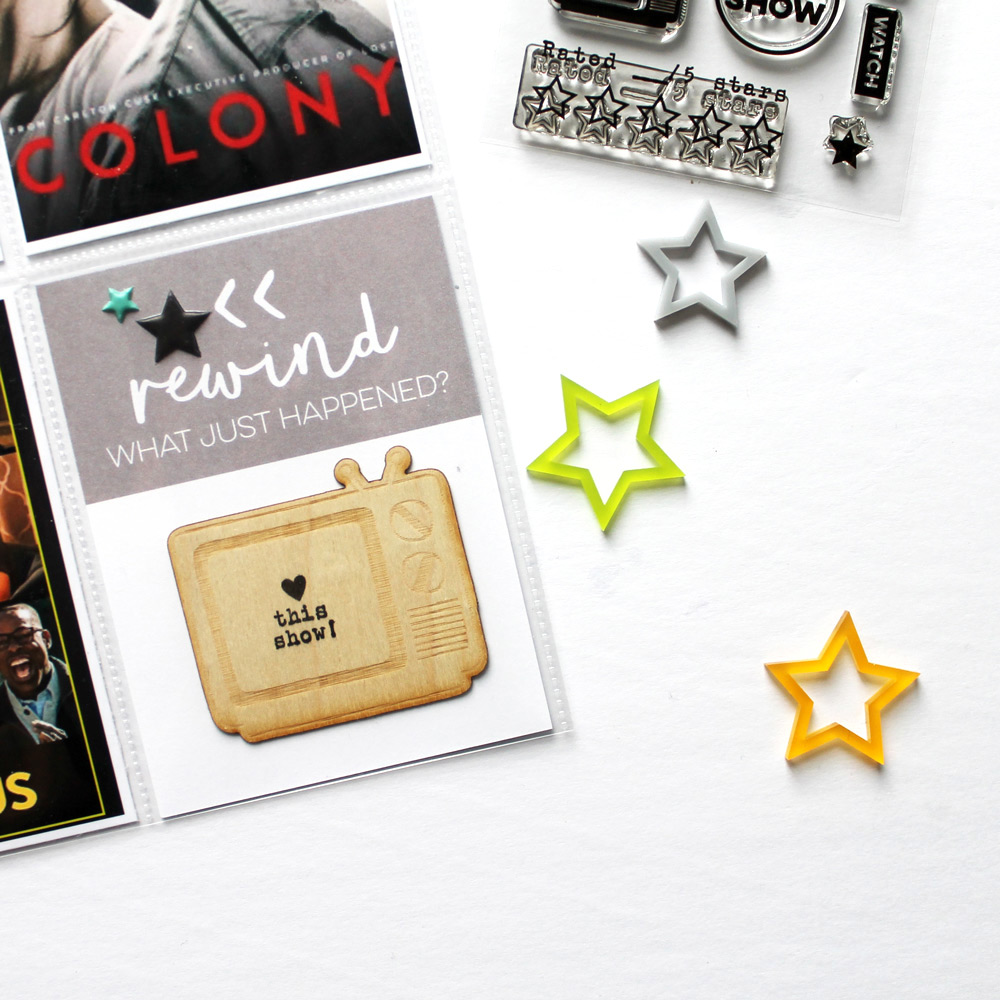
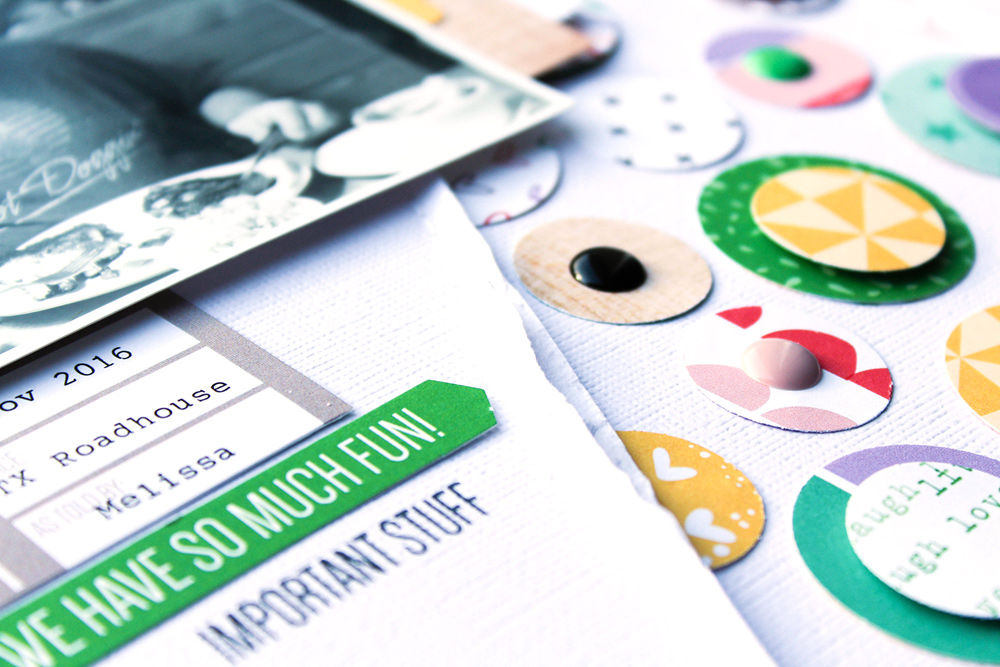
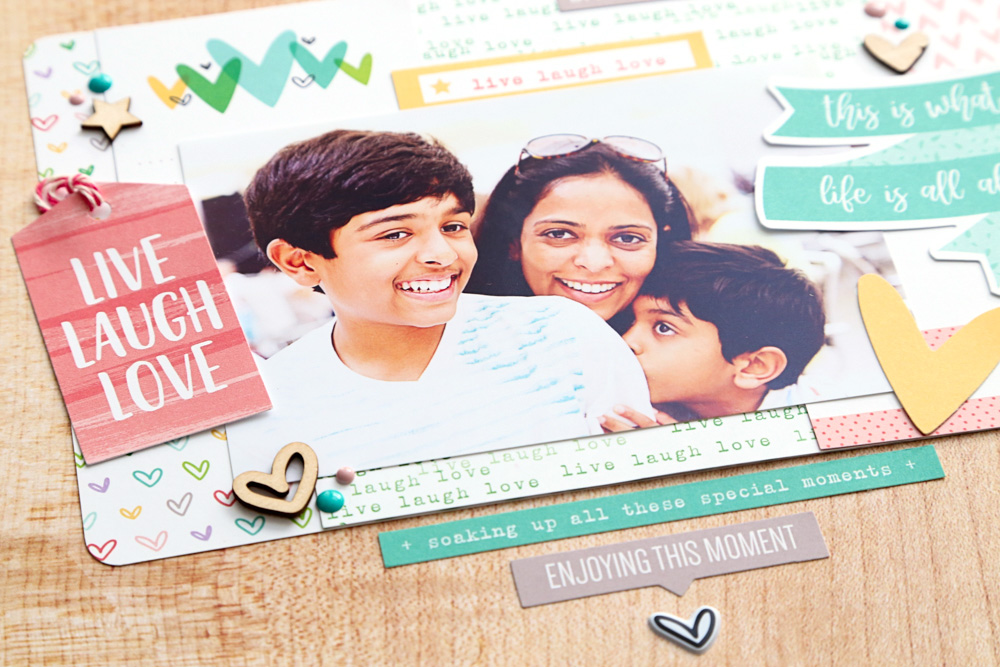
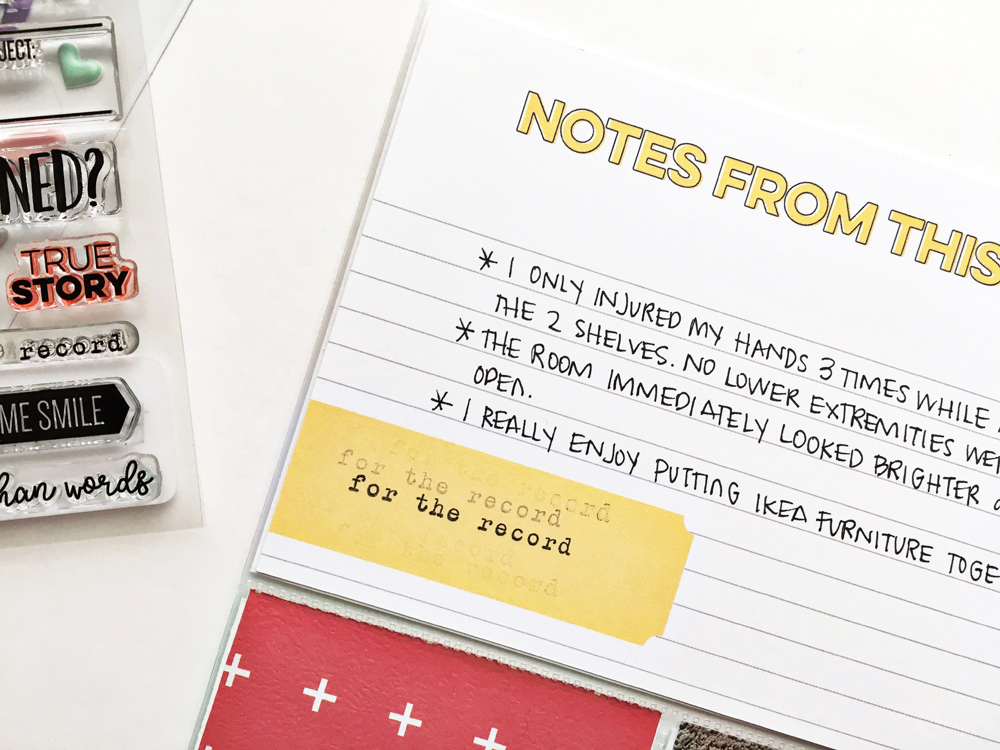
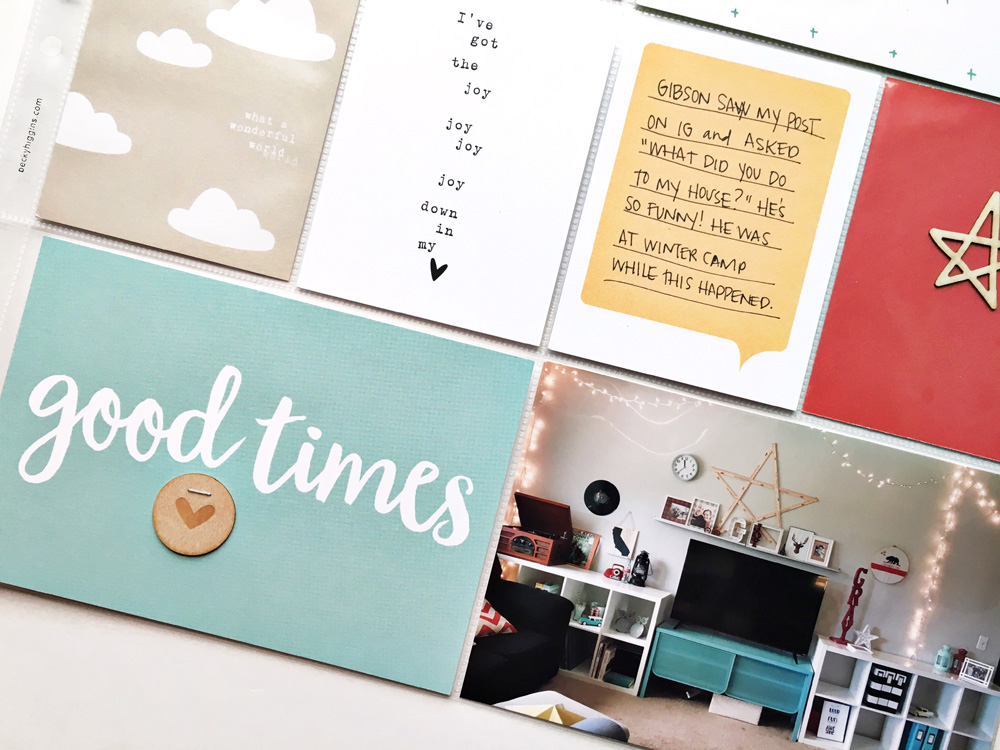
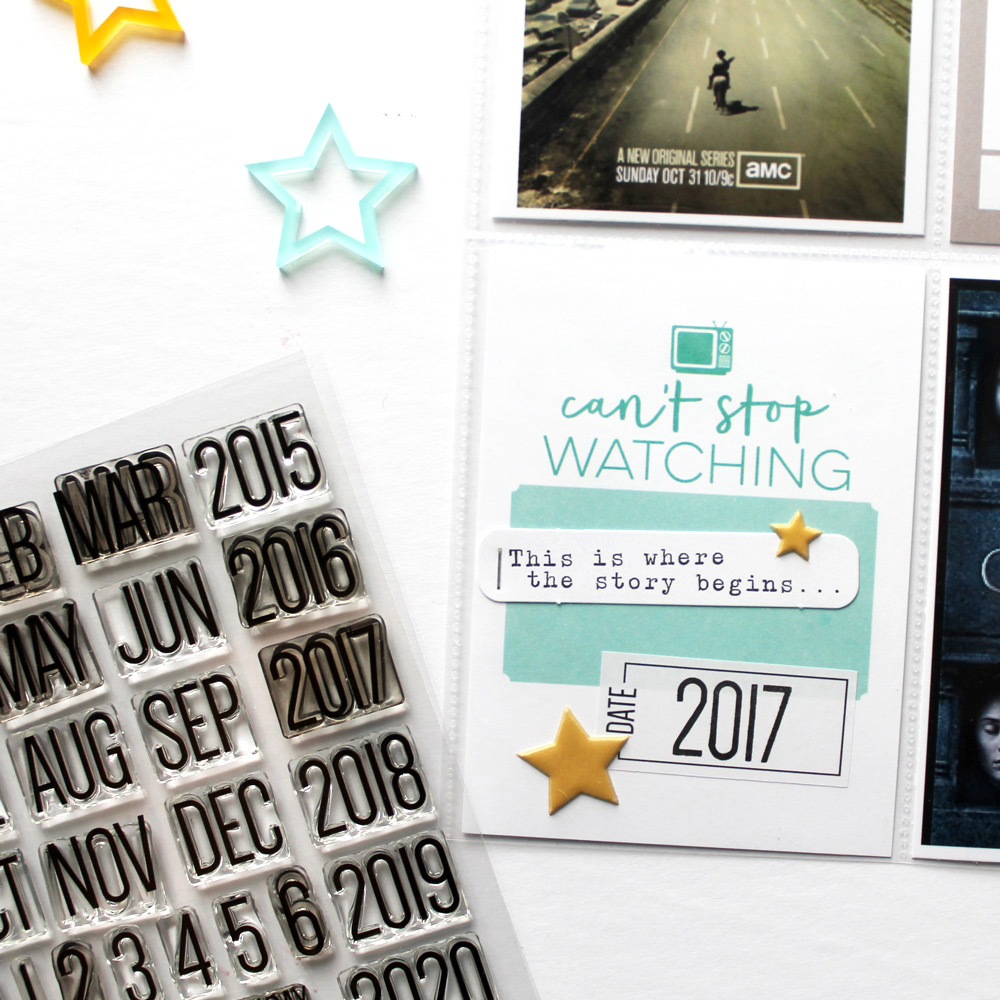
The TV Stamp is beautifully designed- the images aren’t too bulky and are the perfect accent for the journaling tags. I’ve opted to use the stamp set in different ways. First, I complimented my journaling on the TV schedule for the week. I also used the star rating stamp, stamping with a teal color to coordinate with the teal card in the spread, which helps to balance the design. Of course I used the Dated Stamp on a label as an accent to an already adorable journaling tag.


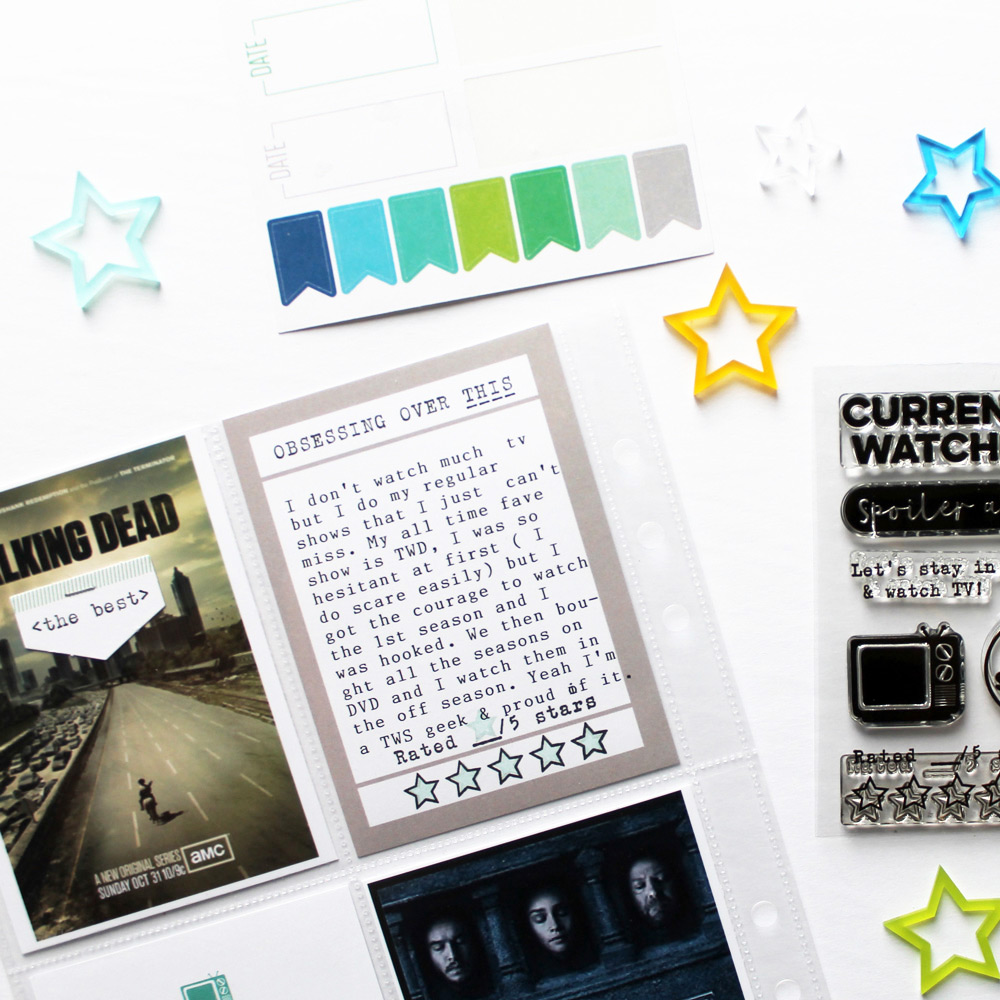
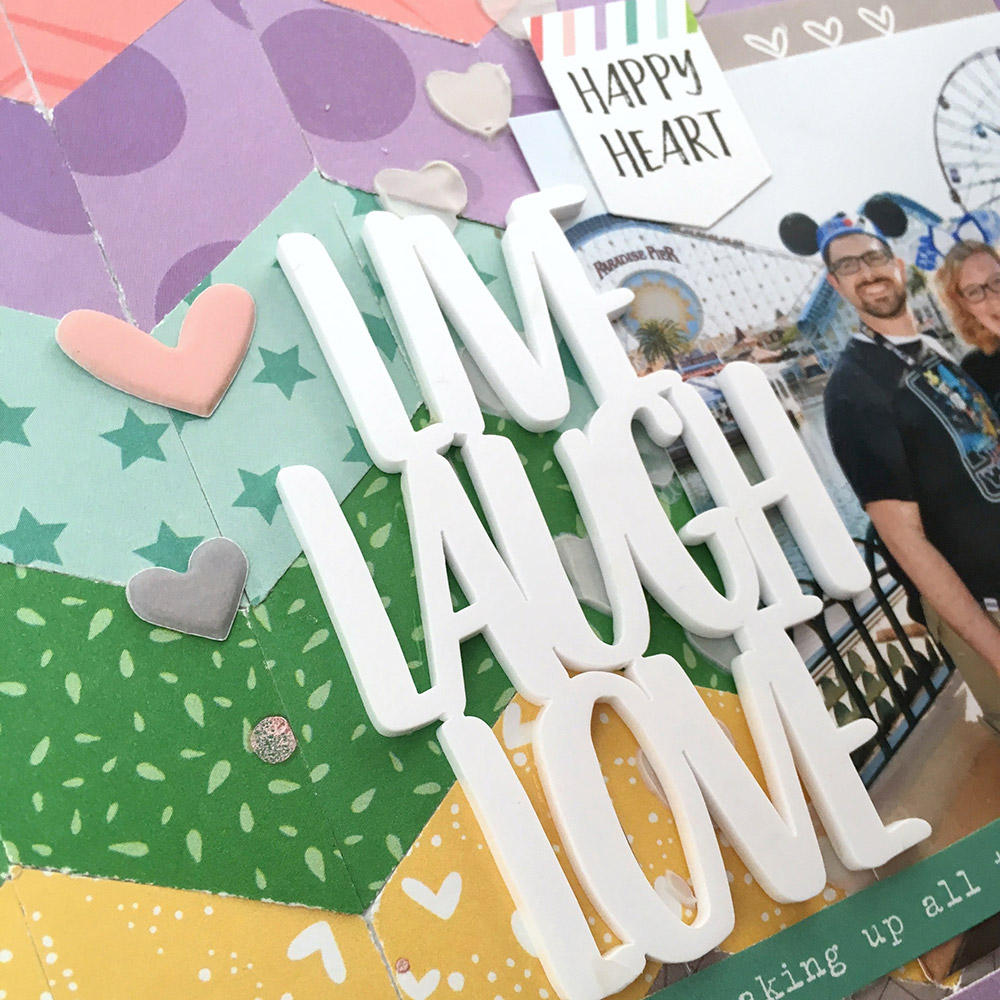
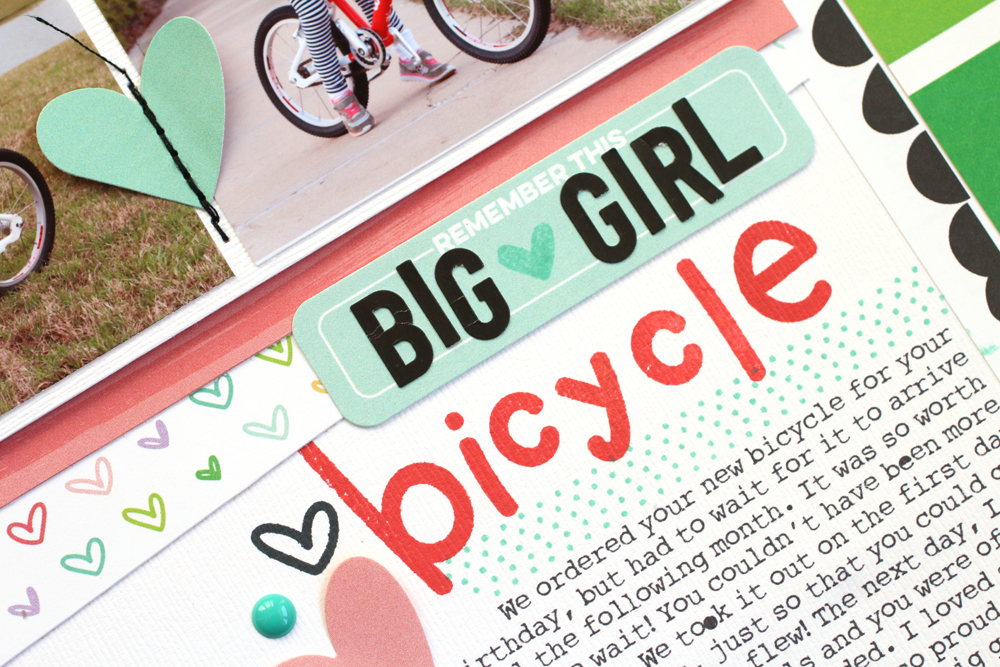
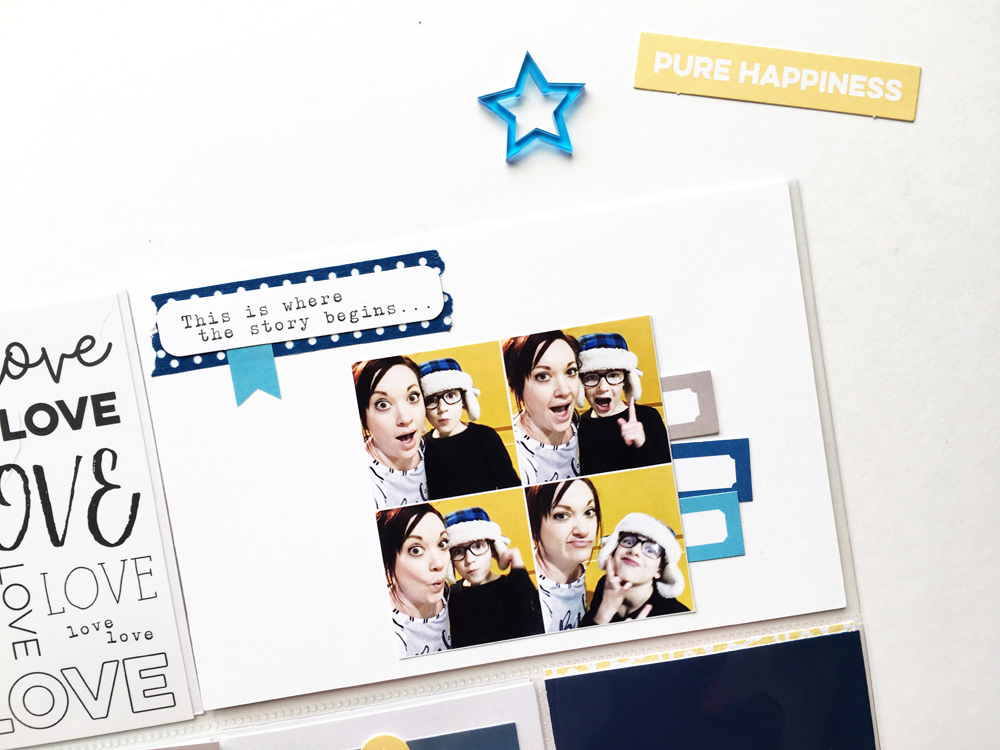
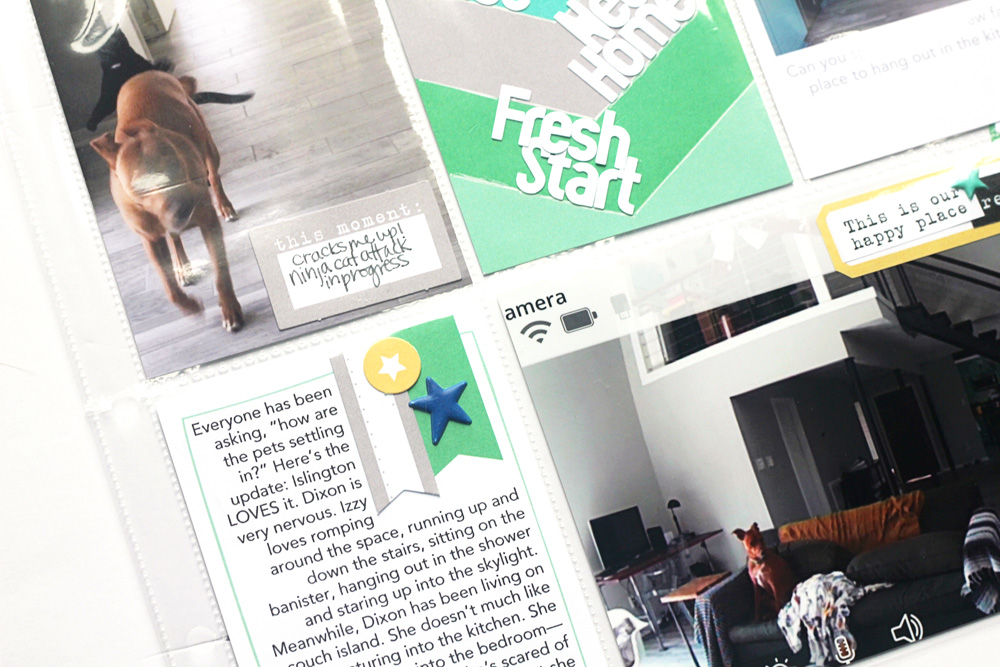
In order to create a cohesive design I added the Acrylic Stars- Spring Mix throughout my spread. This creates a visual triangle which directs the eye to the feature parts of the spread. Since the pictures were rather dark, I opted for lighter journaling tags, which helps to reduce the bulkiness of the spread and make it more pleasing to the eye.


Thank you again for stopping by to see my projects this month. It has been an honor to be guest designer for Elle’s Studio. Thank you, Elle and Meghann for having me!


Supplies | TV Journaling Tags, TV Stamp, TV Wood Veneers, Acrylic Stars- Spring Mix, Dated Stamp, March 2017 Kit, Puffy Star Stickers


Melanie Blackburn has been part of the scrapbook industry for over 10 years. Her love of paper started at a very young age when she started hoarding a collection of notepads and fruit scented pens. Her love of scrapbooking and memory keeping evolved when she became a mother.

Over the course of her creative career, Melanie has designed for various manufactures; she currently designs for Ali Edwards and Gossamer Blue. Melanie’s style is eclectic with a flair for mixing embellishments, creating layers and a love for white space. As of two years ago, Melanie has shifted her creative focus to documenting her family’s daily activities with Project Life. She is currently working on a 6″ x 8″ pocket page personal album and 9″ x 12″ pocket page family album.

When Melanie is not busy preserving her family’s memories, she enjoys decorating her home with antique market finds, going to gym, reading and spending time with her family. She lives in a quiet suburb in eastern Canada with her three daughters and her husband.

You can follow Melanie’s work on her Instagram account and her blog. We have loved all of her projects featured here on the ES blog this month. Thank you so much for your beautiful work, Melanie!