National Scrapbooking Day 2018!

Welcome to National (or International for our overseas friends) Scrapbooking Day at Elle’s Studio! We are so excited to have you here! We love that this hobby not only allows us to express ourselves in a creative way, but also document our memories and get our photos printed, while connecting with like-minded people!

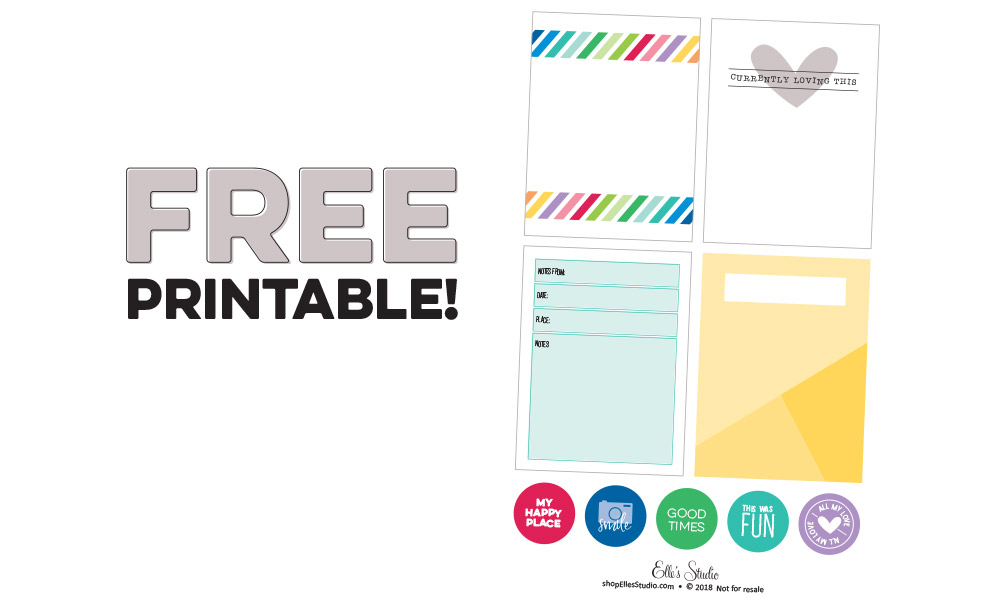
First, To help you document your important memories, and celebrate this fun day, we have a free printable for you, our valued customers! Simply stop by our website, put the free printable in your cart and check out! We can’t wait to see the projects you create with it!

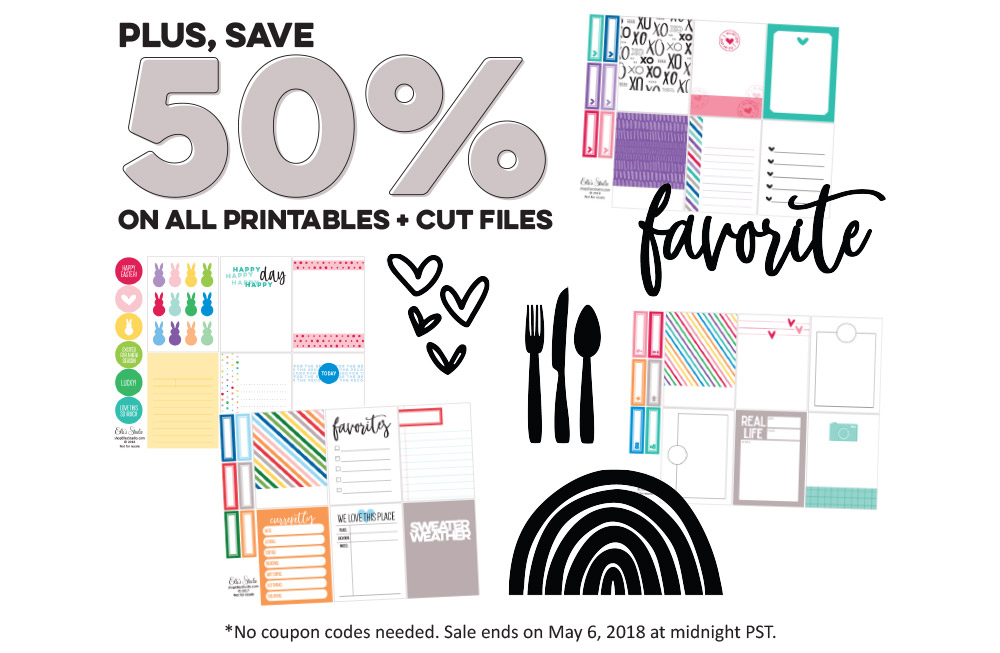
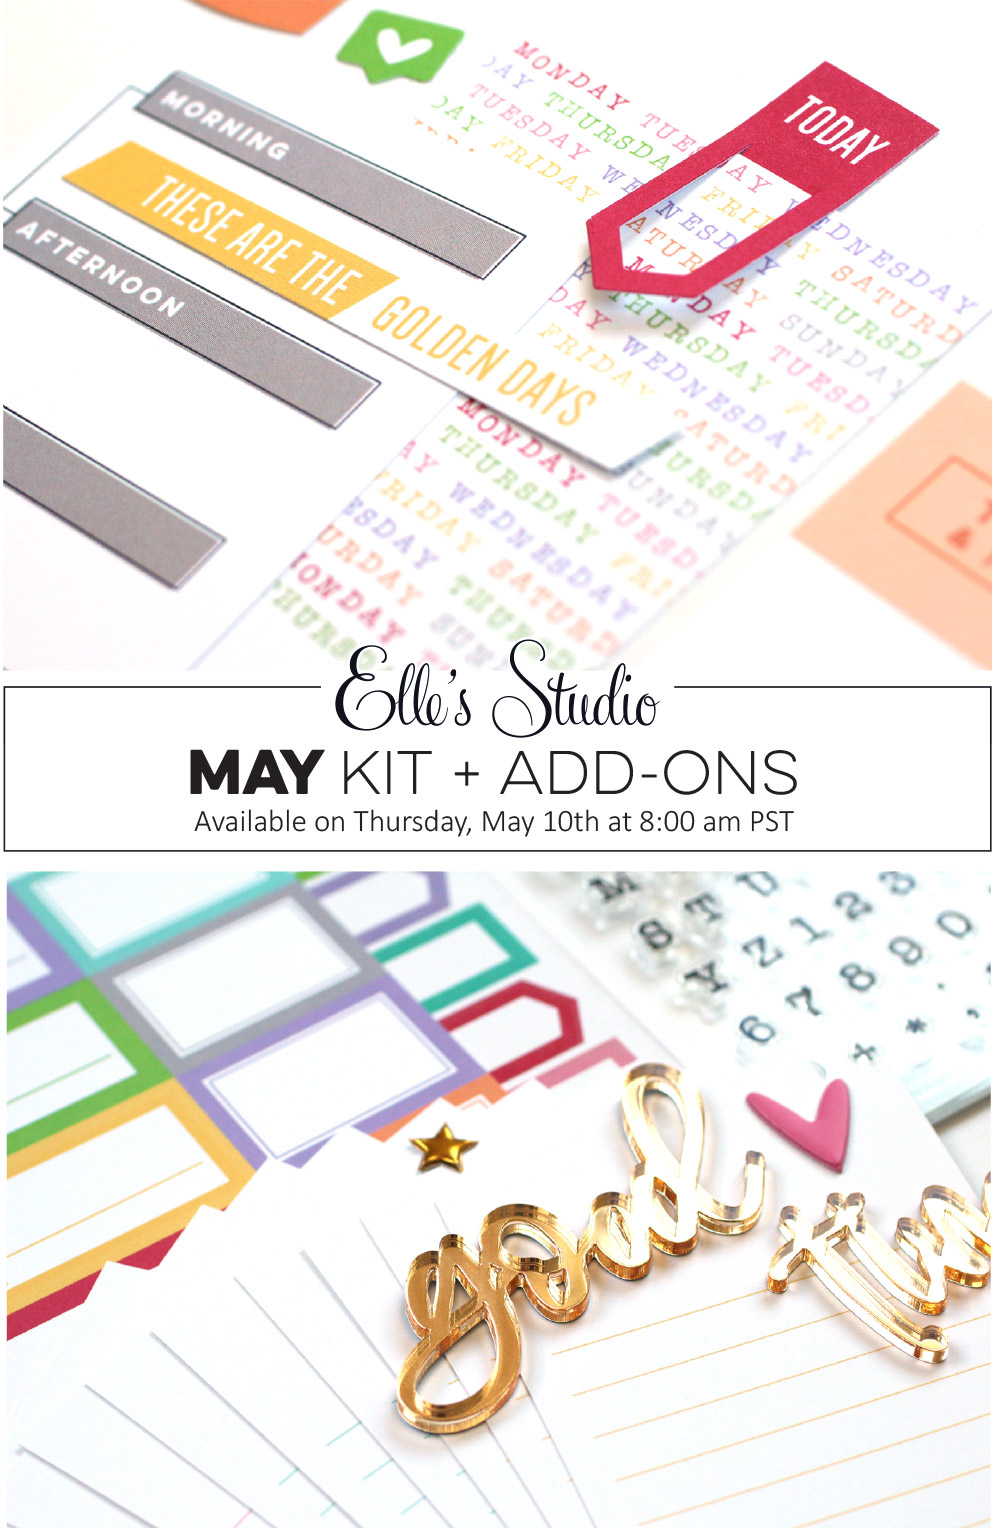
We love digital printable and cut files here at Elle’s Studio, so for this special weekend we’ve made all of the digitals in our shop 50% off! You can add these staples to your digital library to create with over and over again on your scrapbook layouts and pocket pages!

Along with sharing our free printable, and giving you a huge discount on our digital printable and cut files, we’ve created five challenges based on design team projects to inspire your creativity this weekend! Use them to document in a scrapbook layout, pocket page or traveler’s notebook using at least one Elle’s Studio product, and you could win one of the three prizes outlined below!

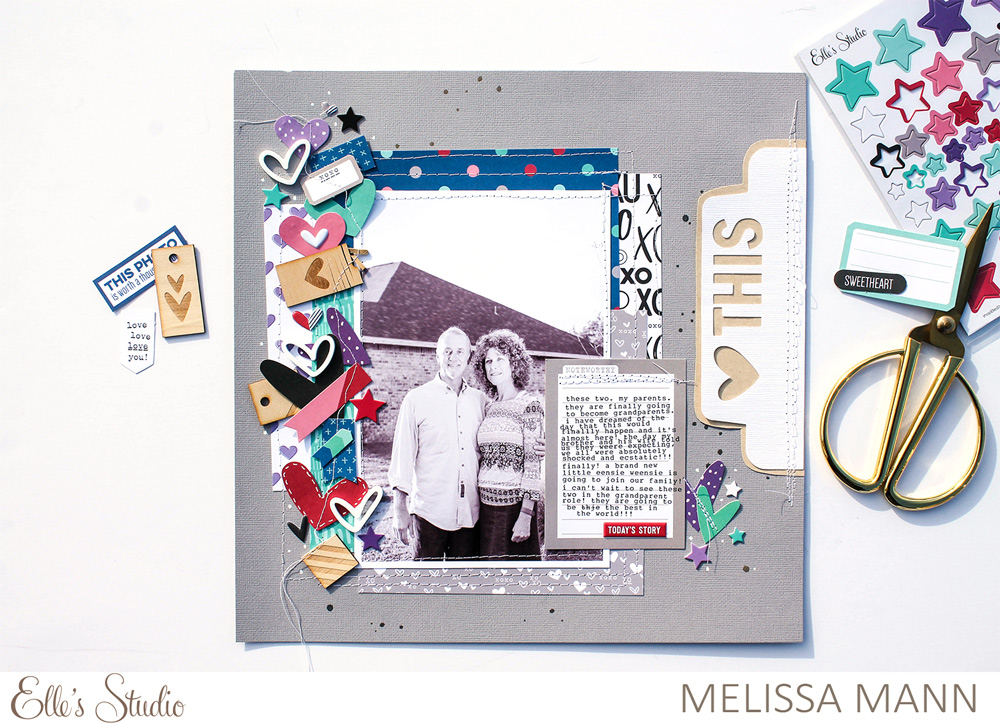
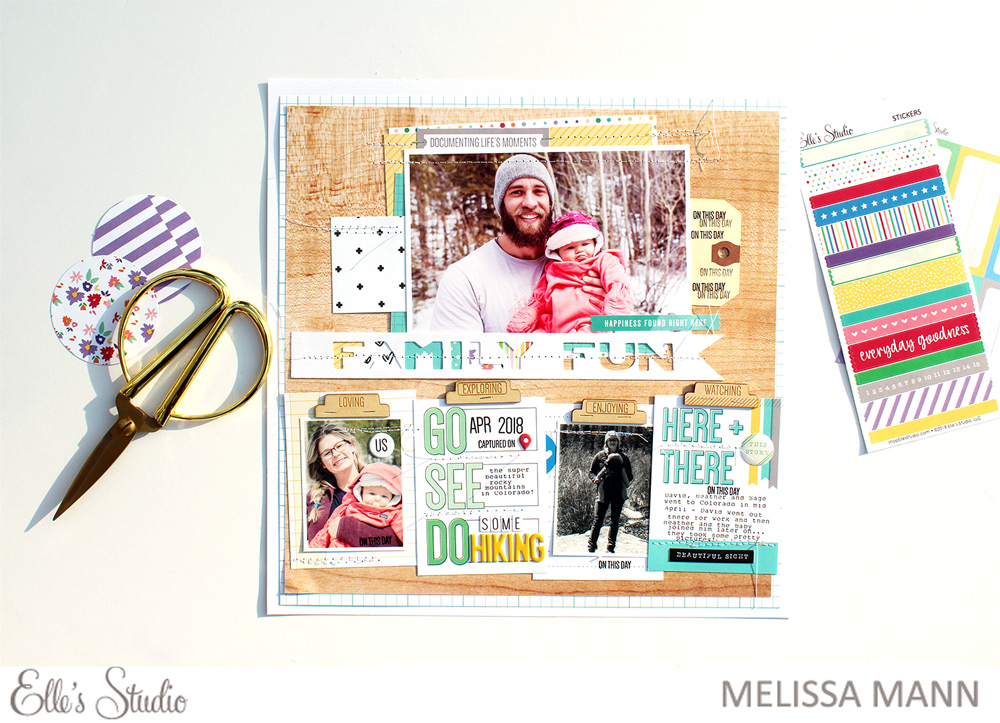
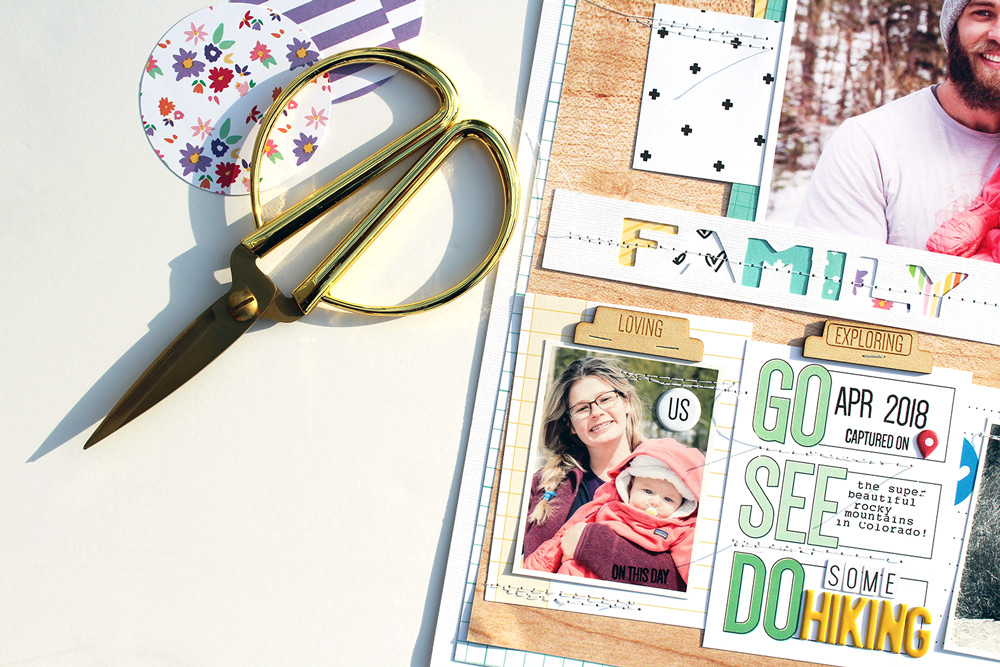
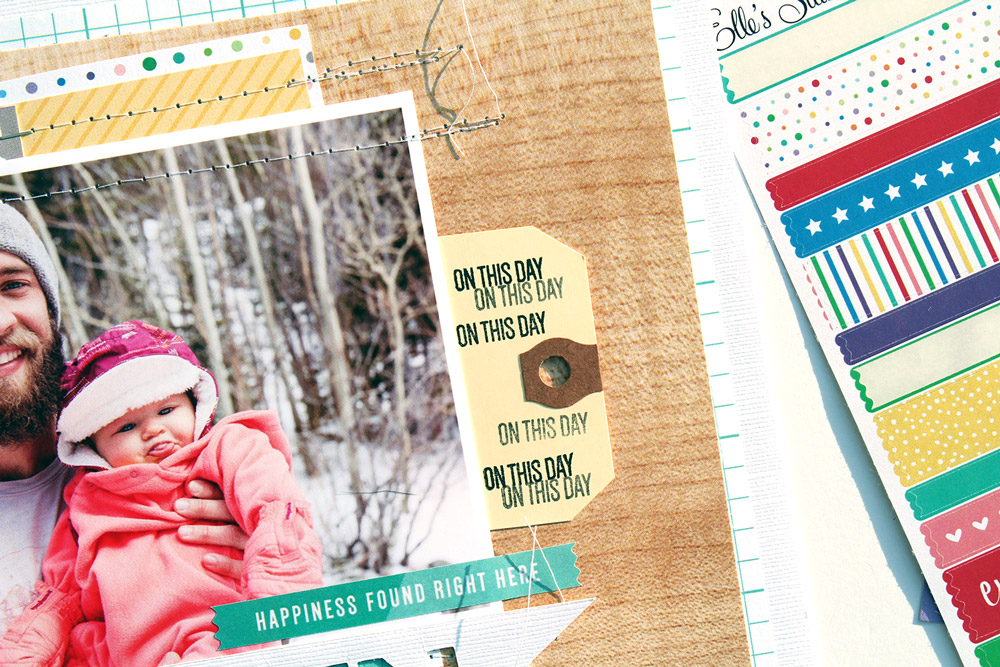
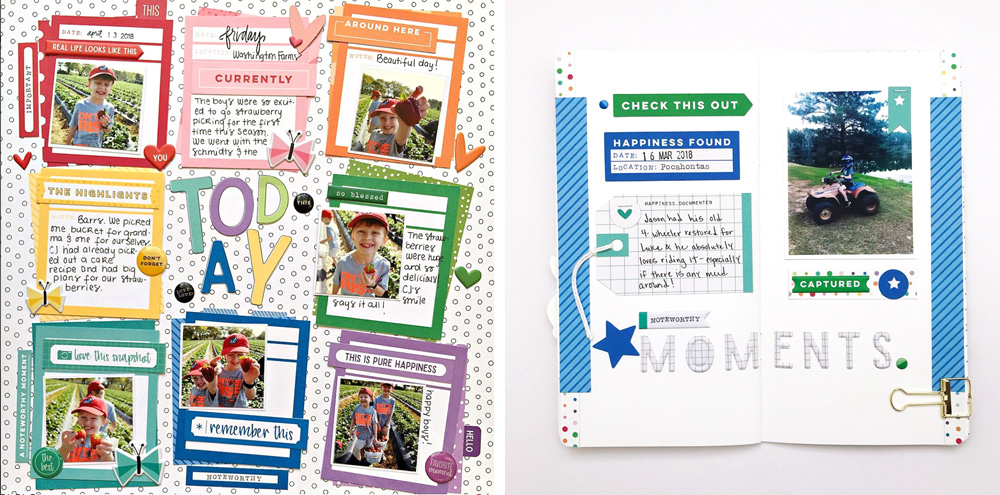
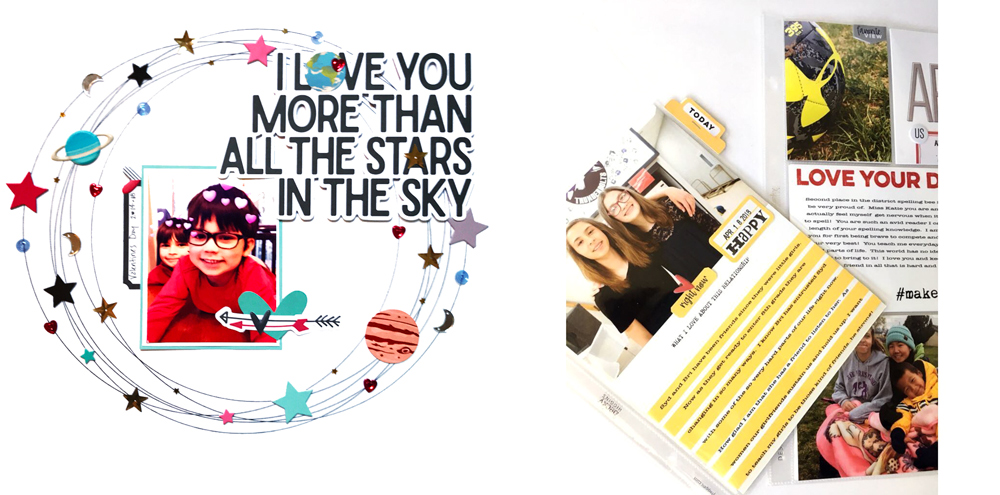
Challenge #1 | Create a column of embellishment, like Melissa Mann did here using our monthly kit and add-ons on the side of her photo. This fun three-dimensional grouping adds so much texture and interest to her page and can easily be re-created with a variety of embellishments!

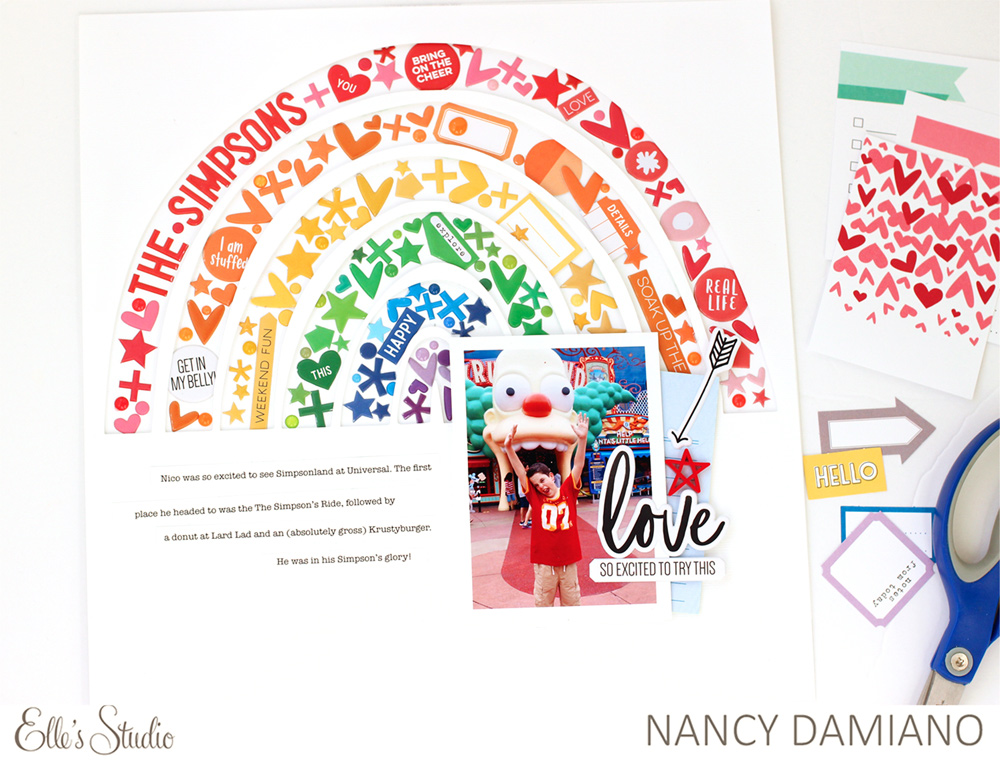
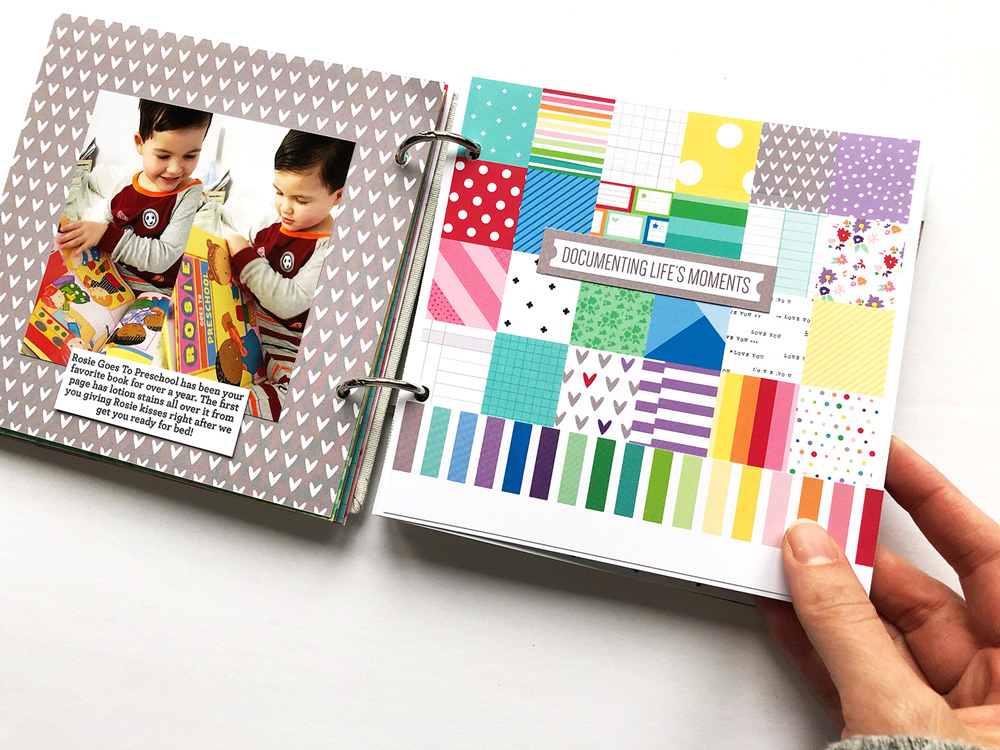
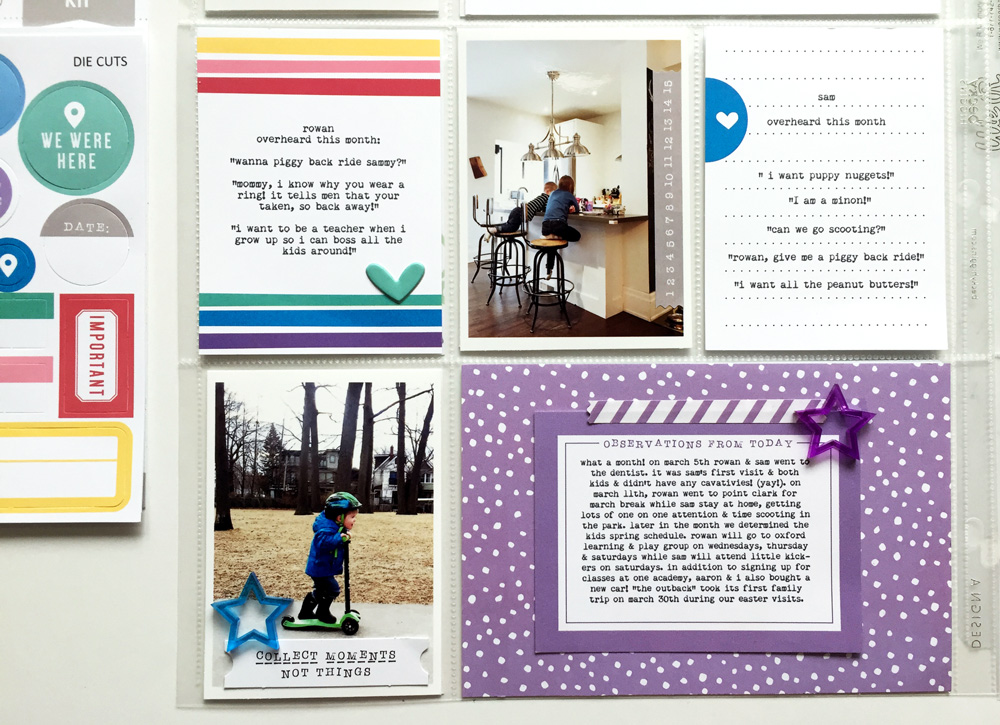
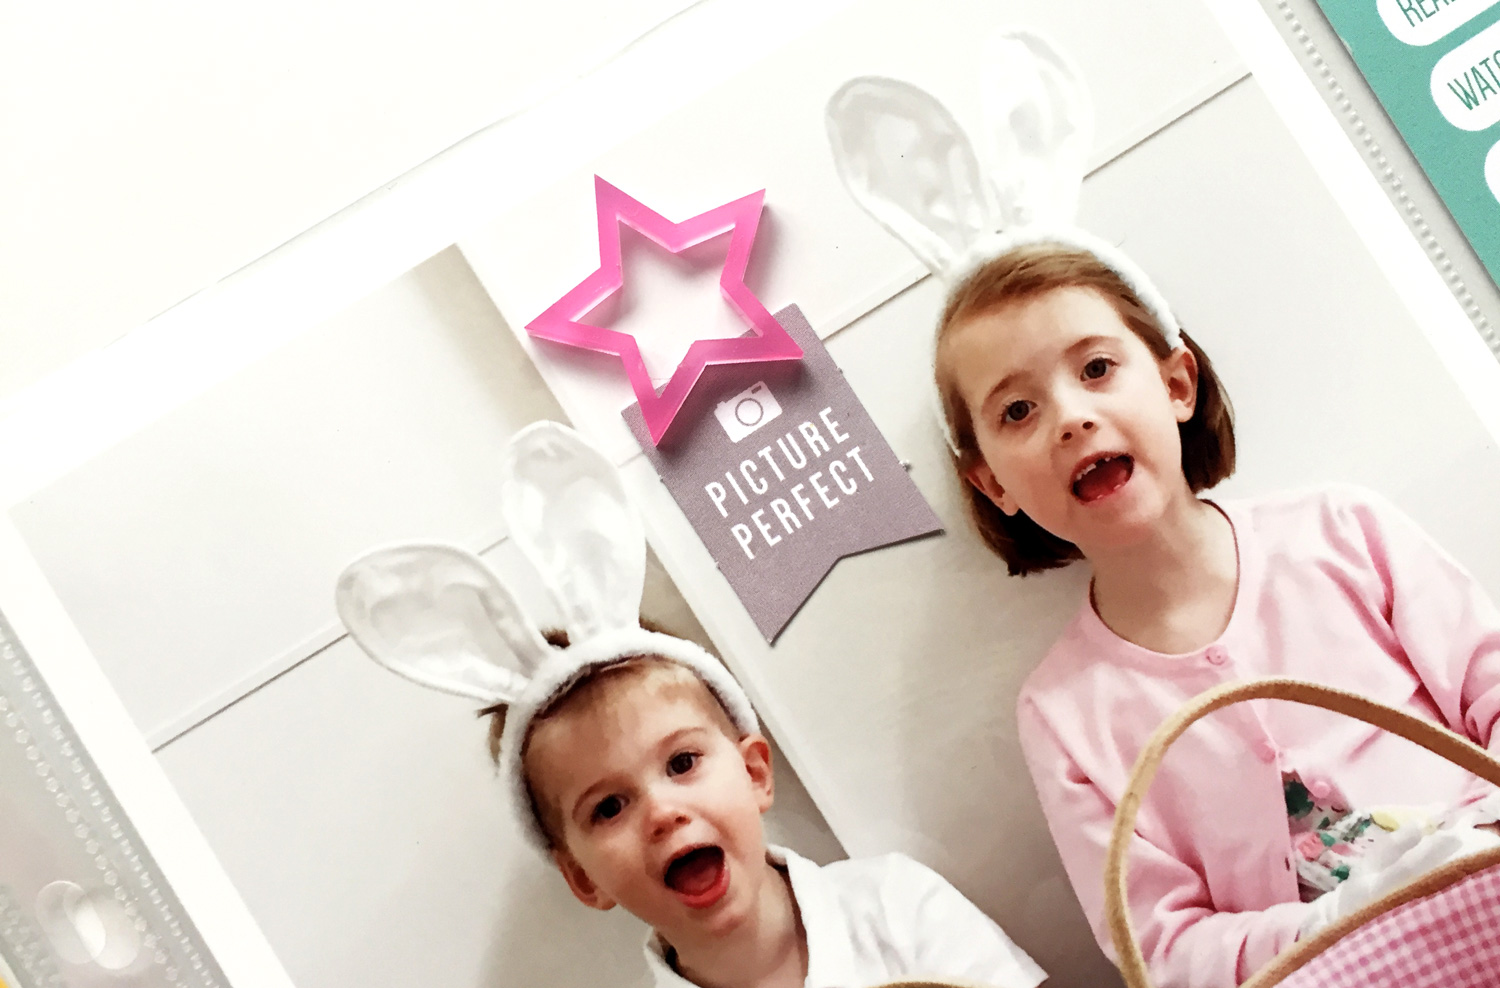
Challenge #2 | Fill a die-cut negative space! Use your favorite cut file, then cut it out and fill with paper, tags or embellishments, like Nancy Damiano did here! She used our March 2018 Digital Cut File and puffy stickers.

Challenge # 3 | Add mixed-media to your project! Get inspired by the colors from our products and add paint, mist, paste—whatever medium you’d like to your page to give it texture and added color and interest, like Meghann Andrew did on this page created with the January Digital Cut File.

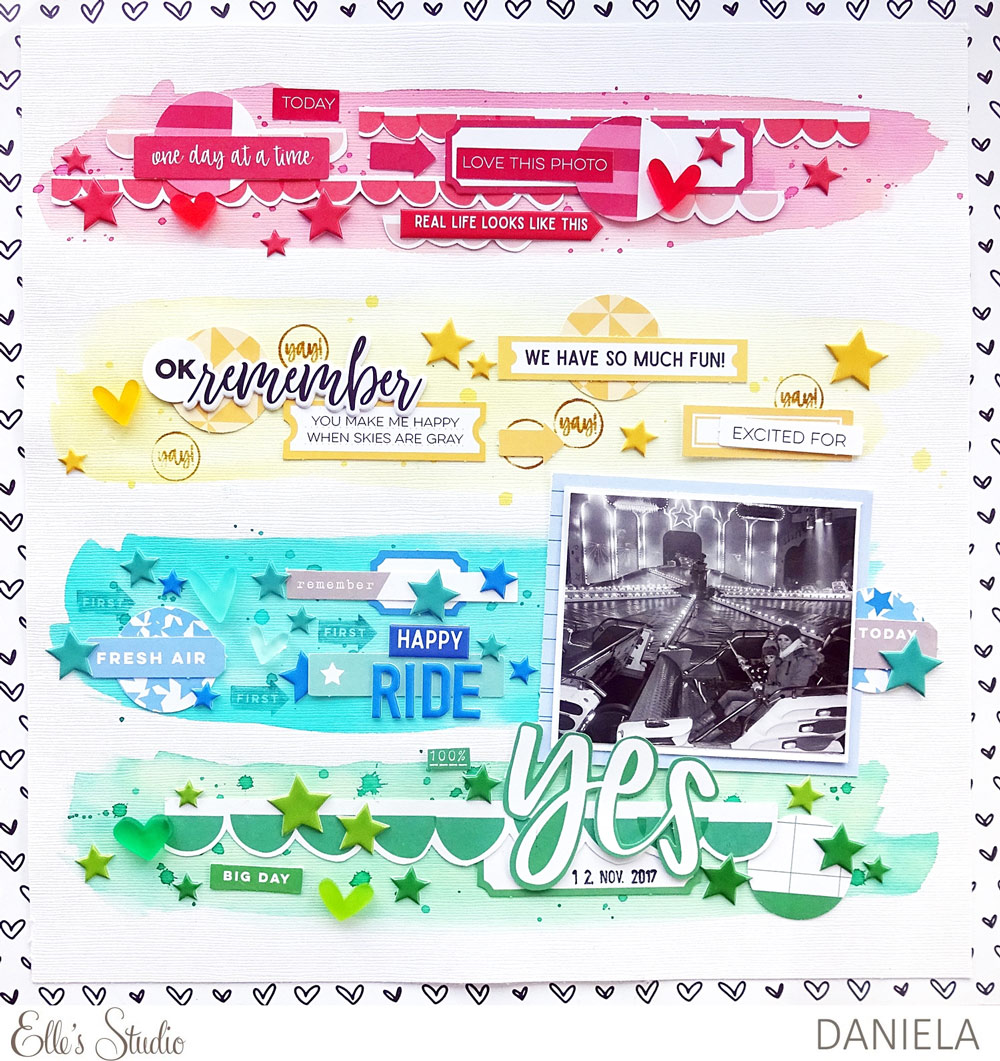
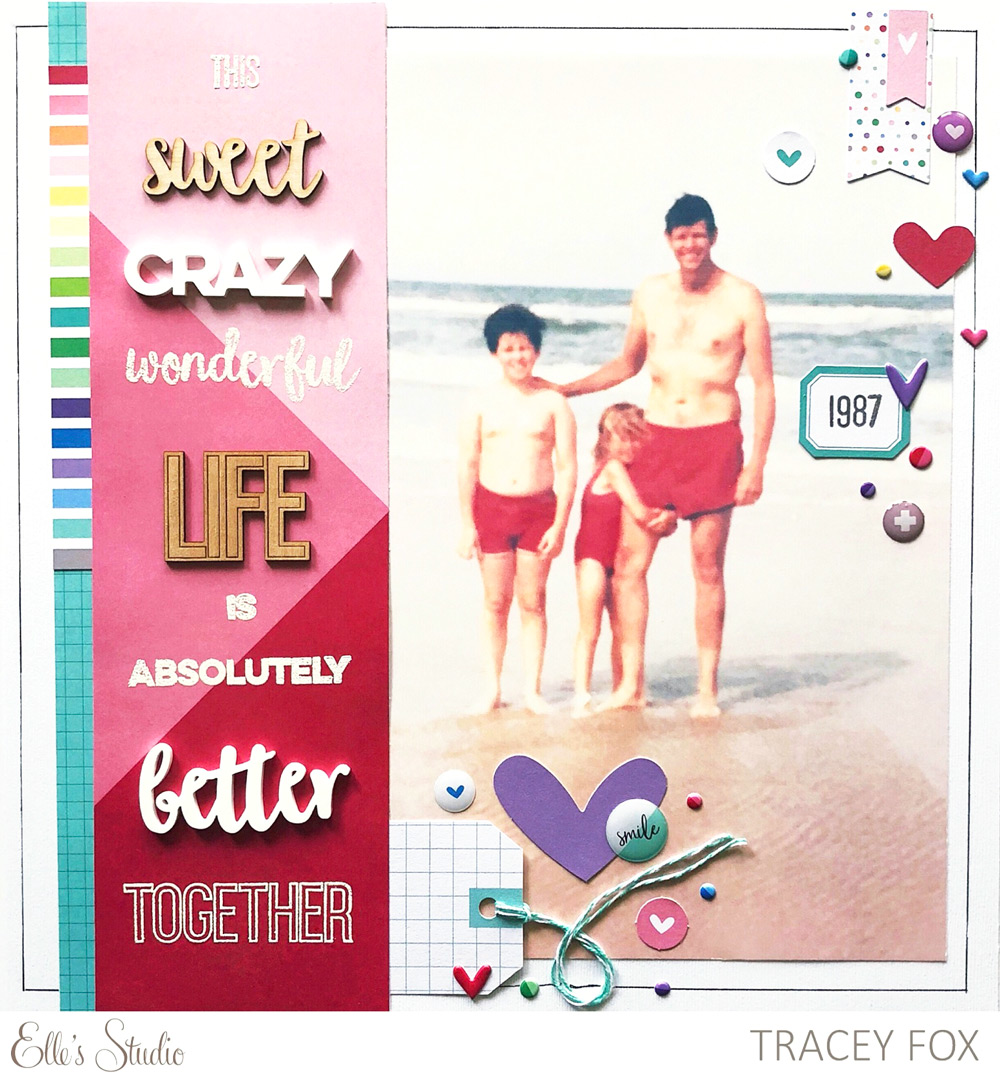
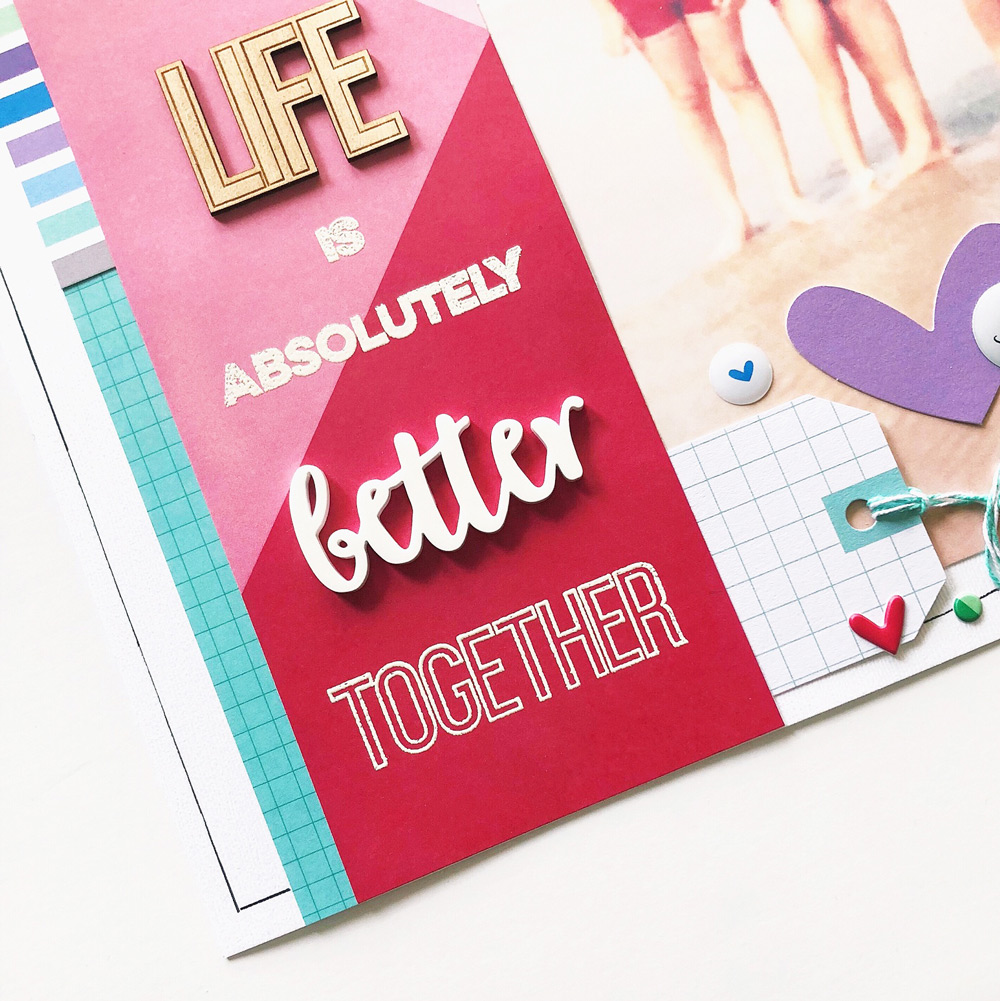
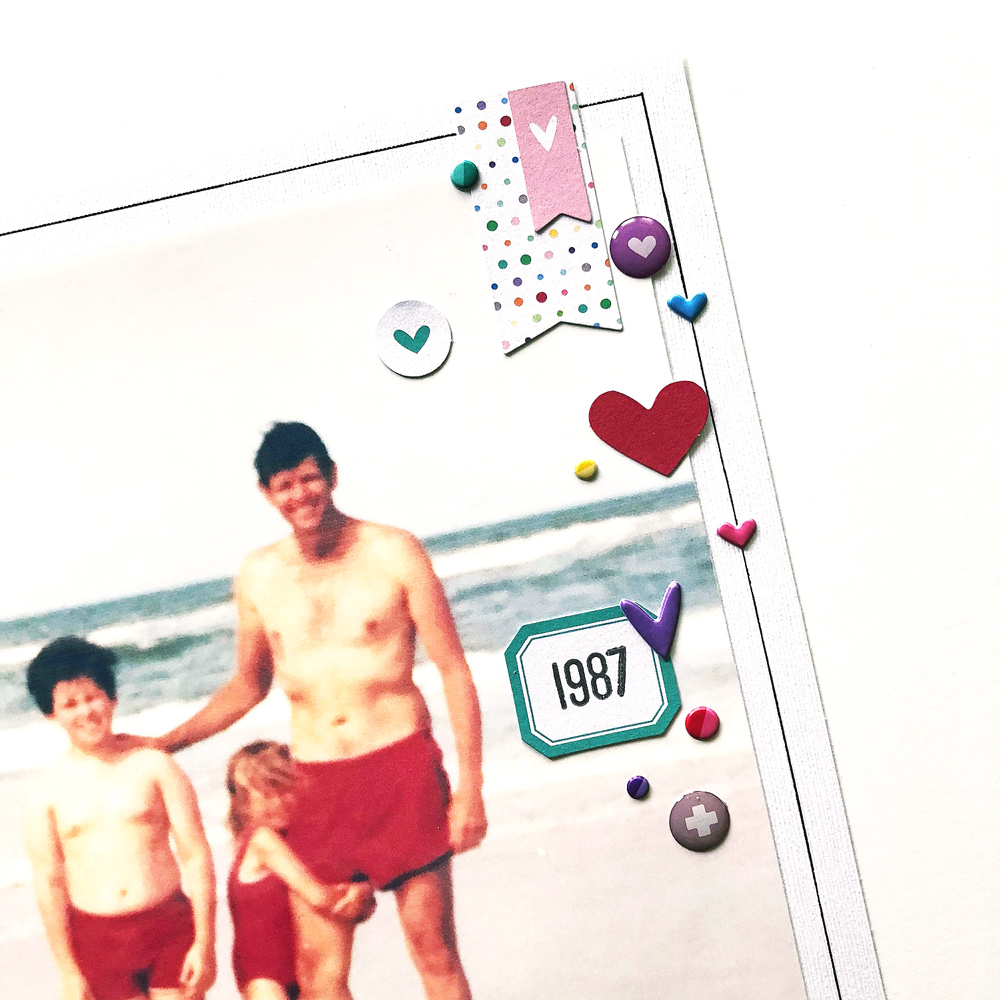
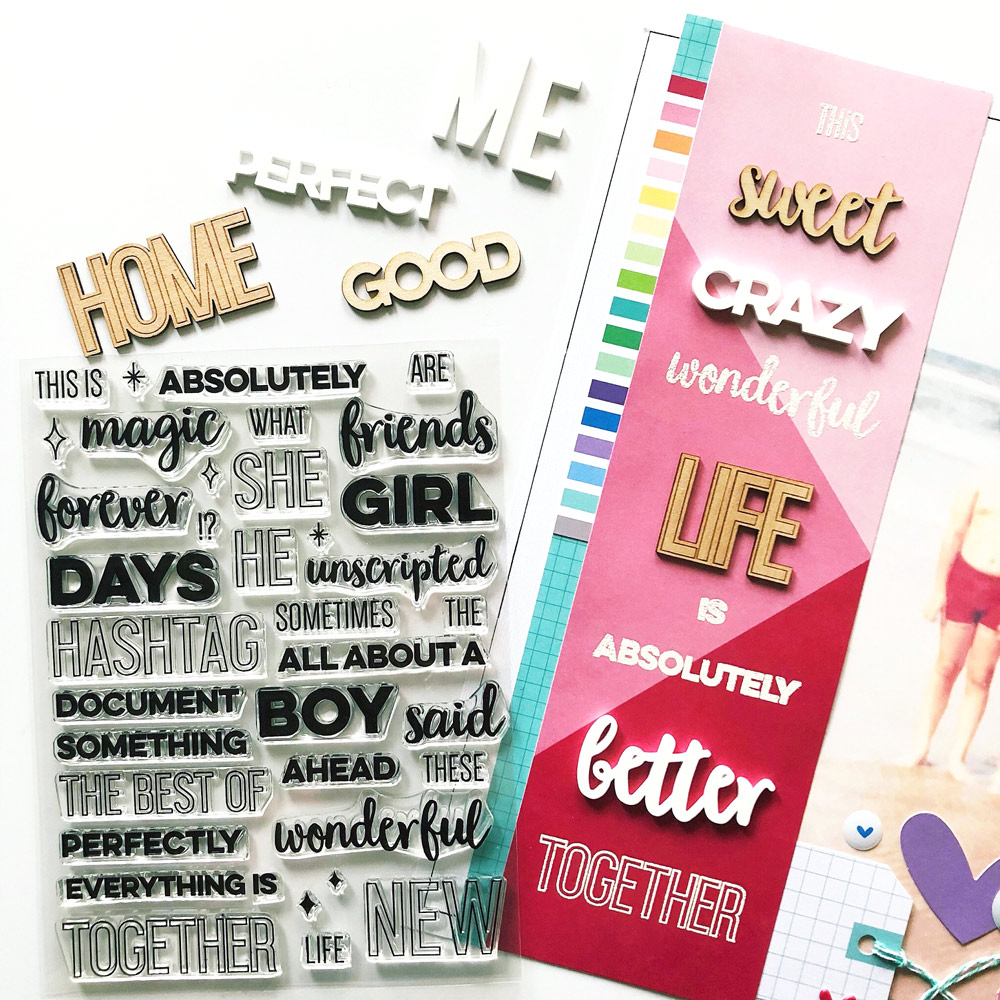
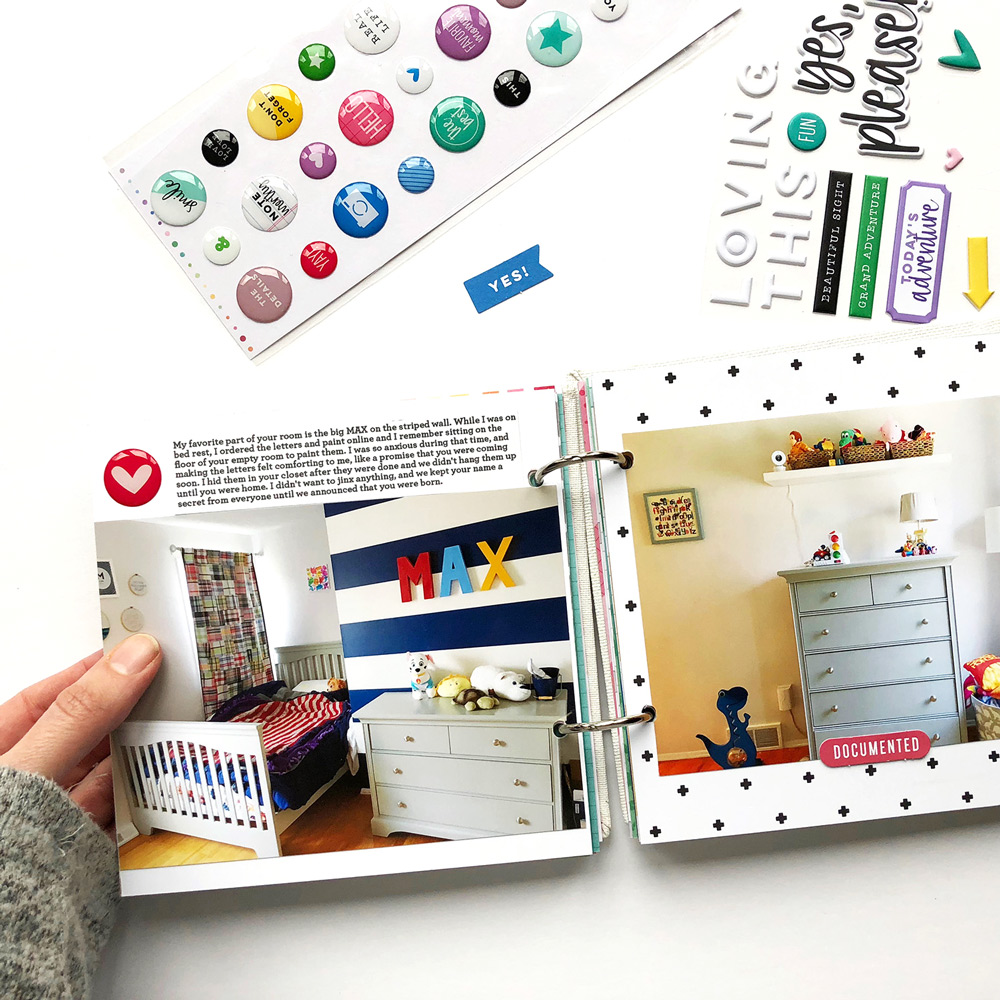
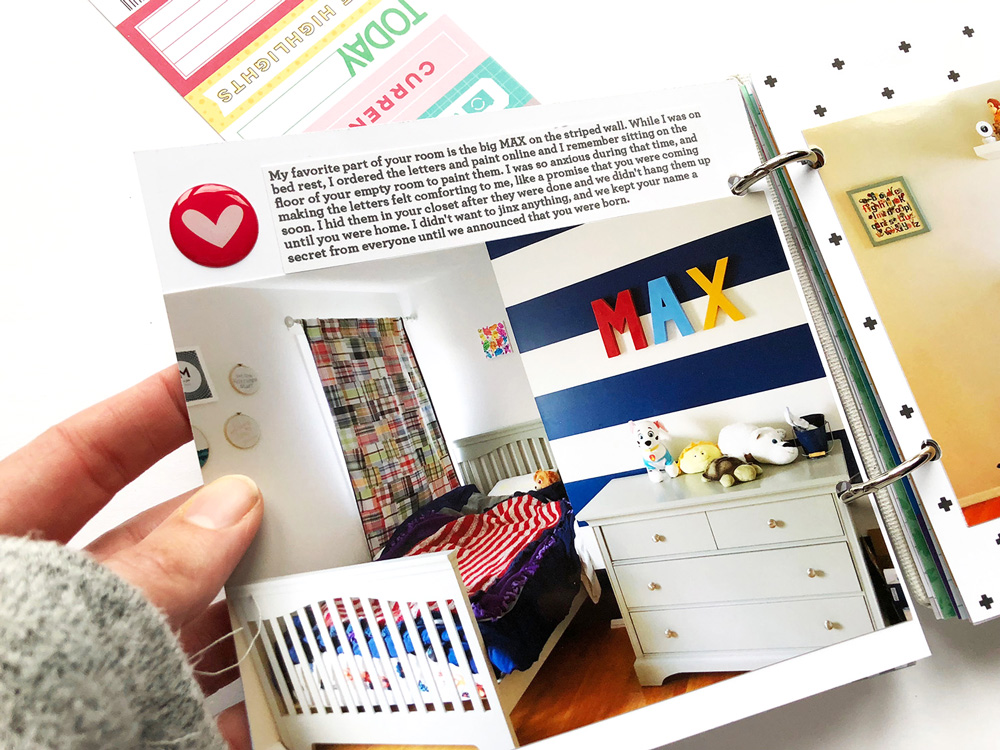
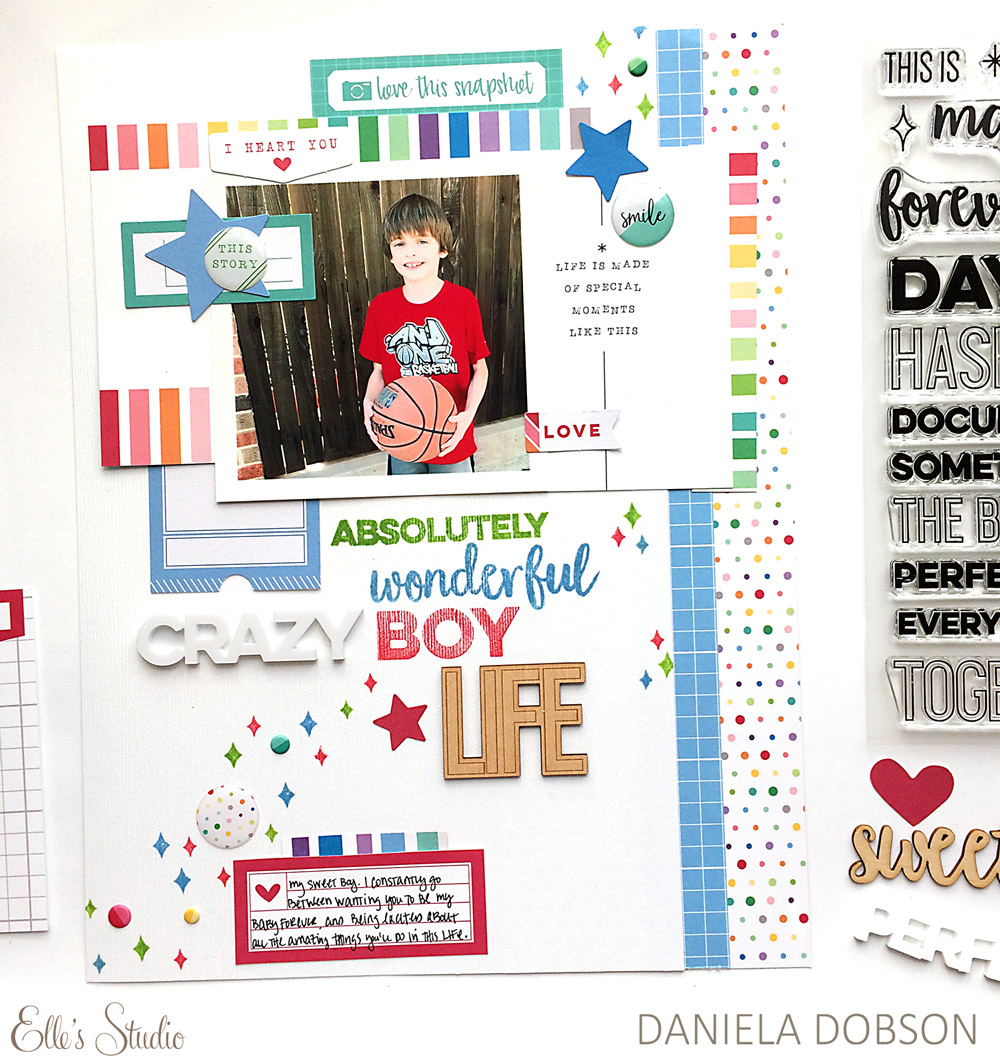
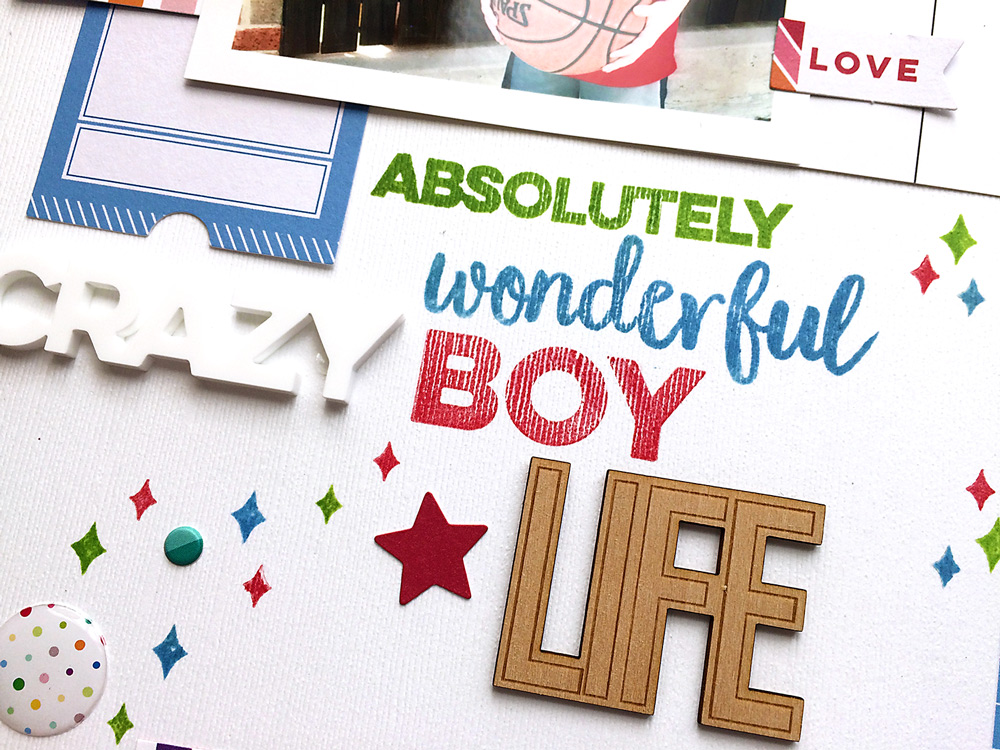
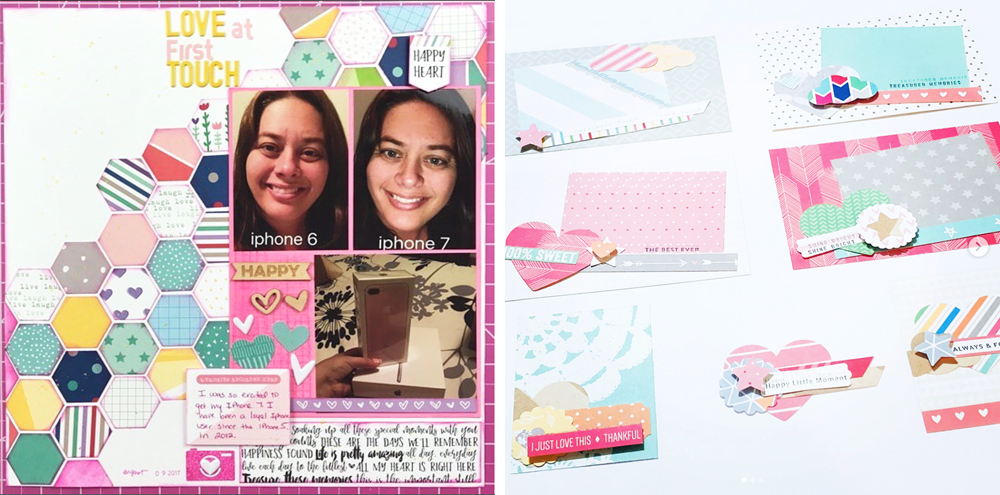
Challenge #4 | Color block you page elements, like design team member Daniela did on this colorful page using the March 2018 Kit and add-ons. This is a great way to add loads of color to your project without making it too overwhelming!

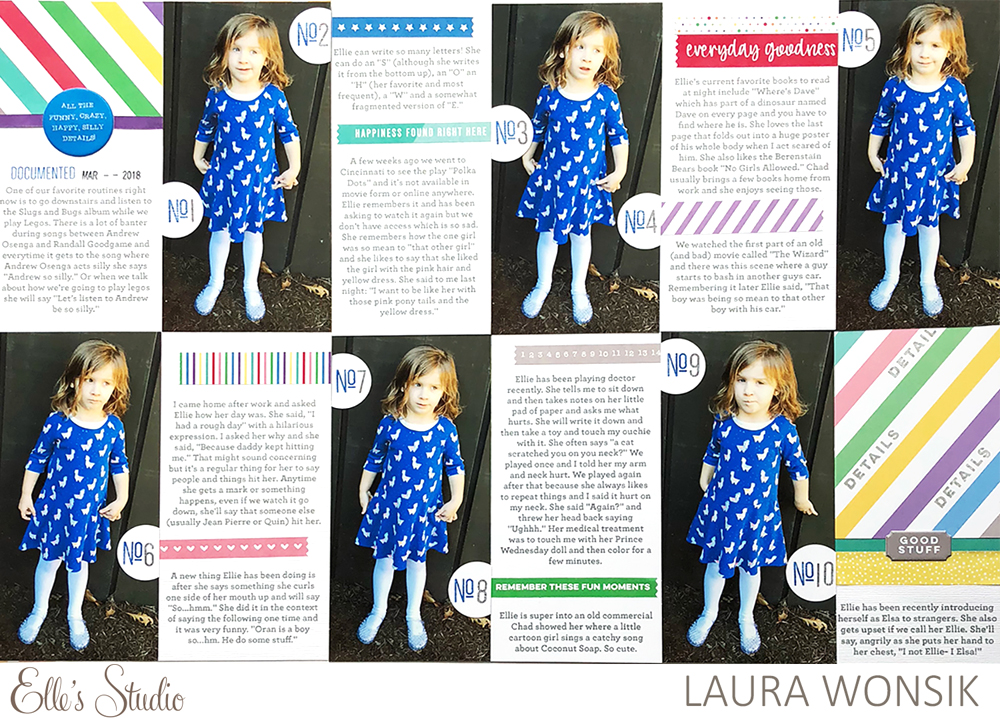
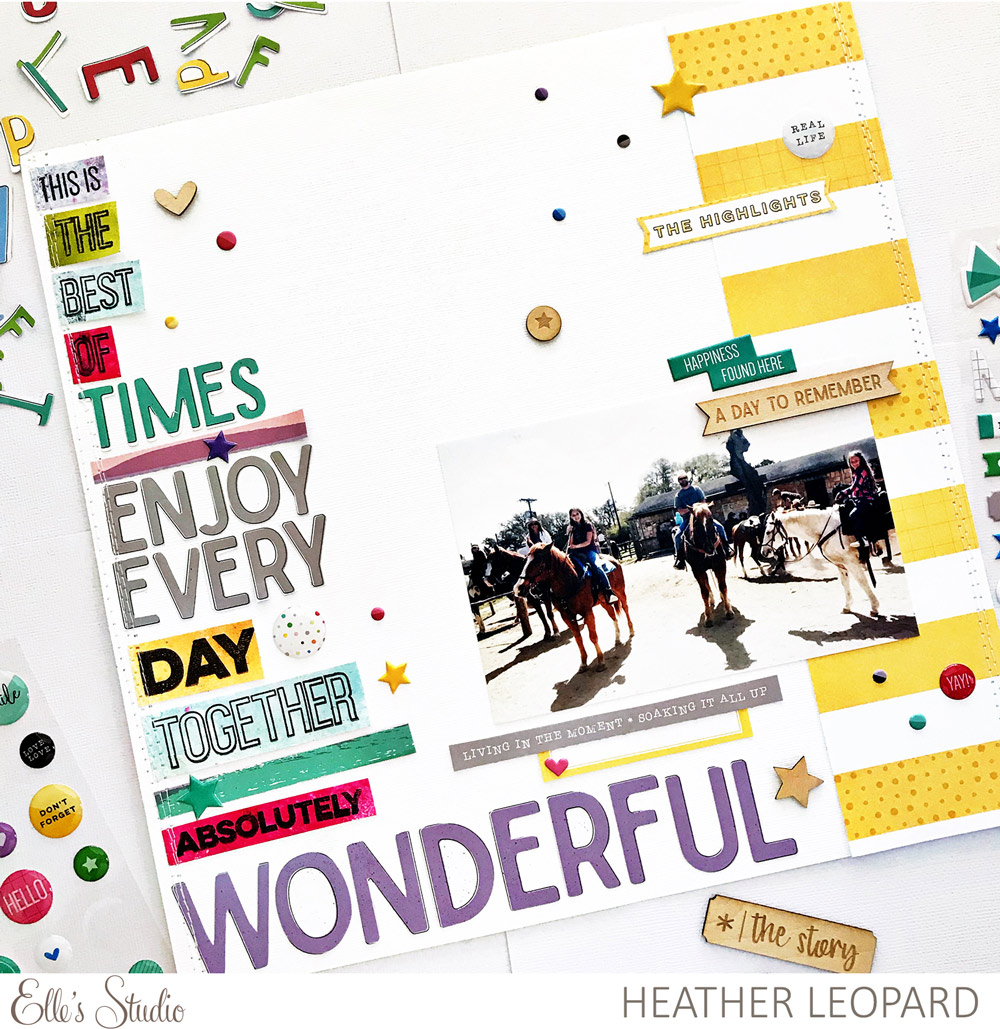
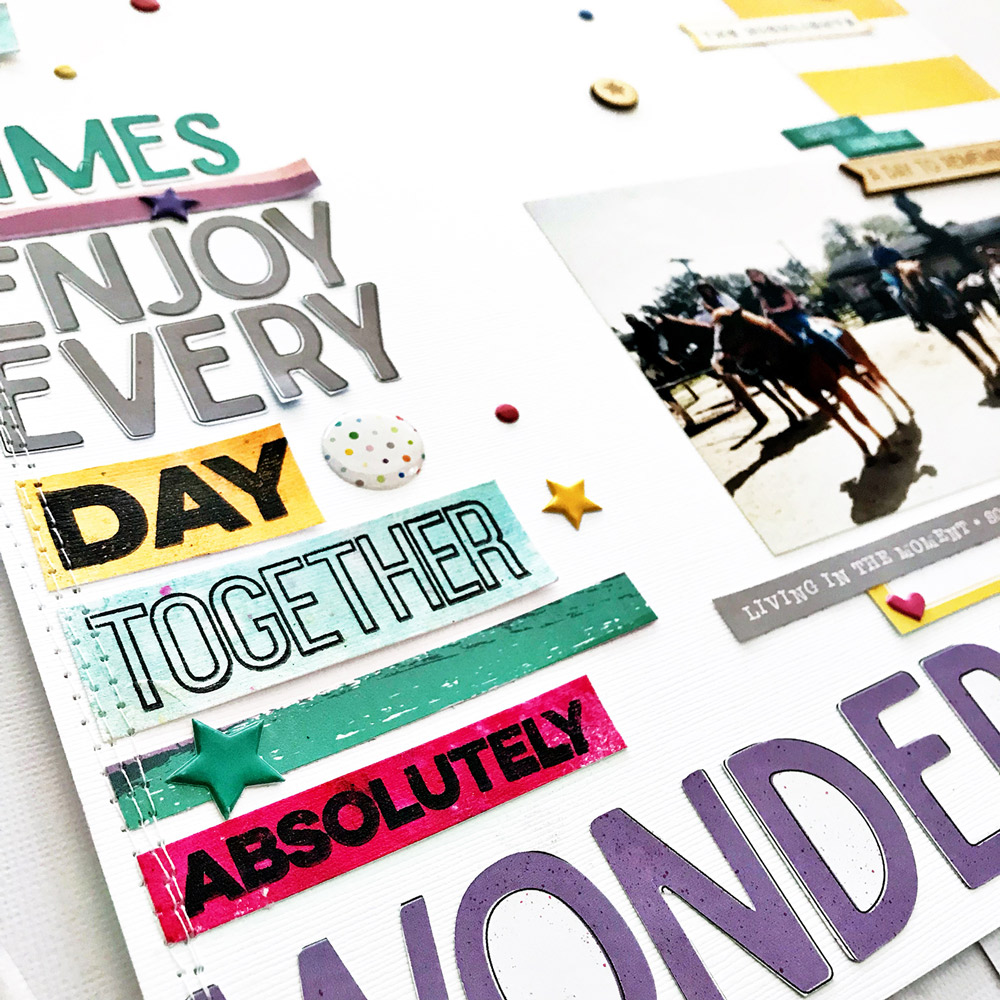
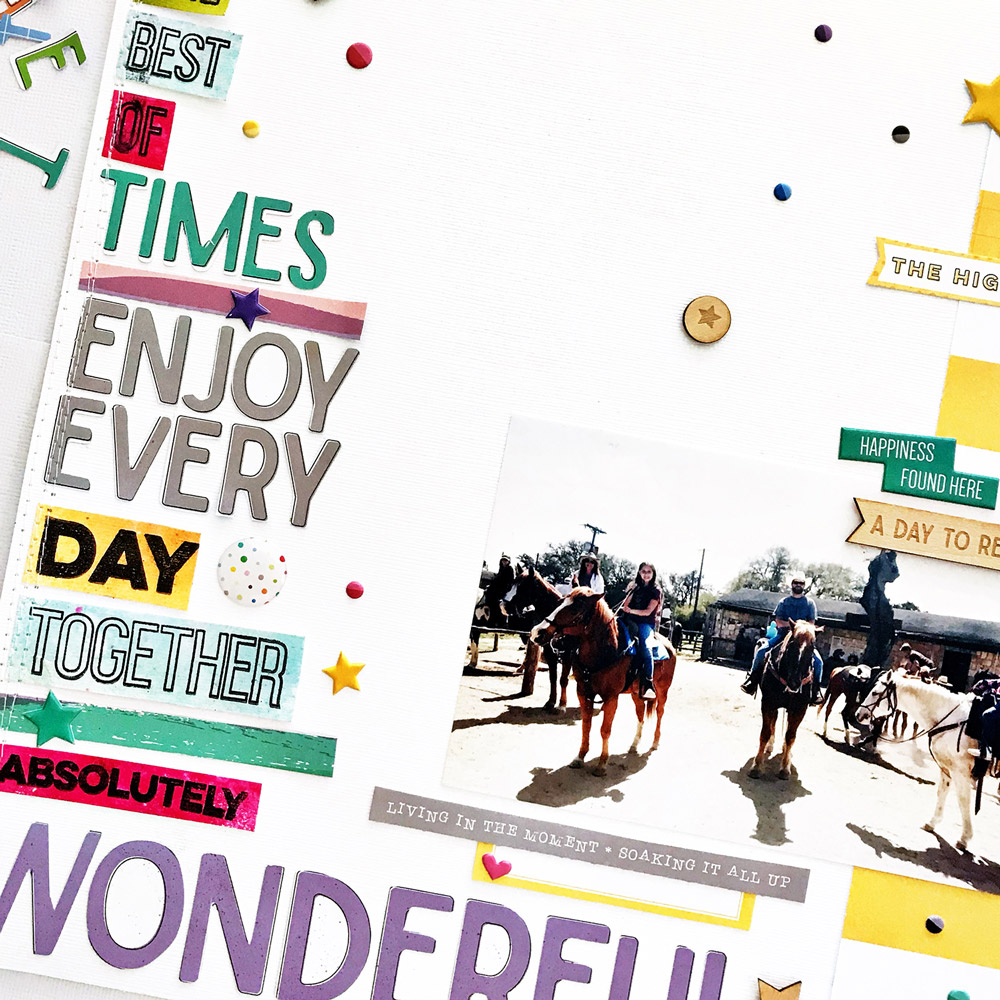
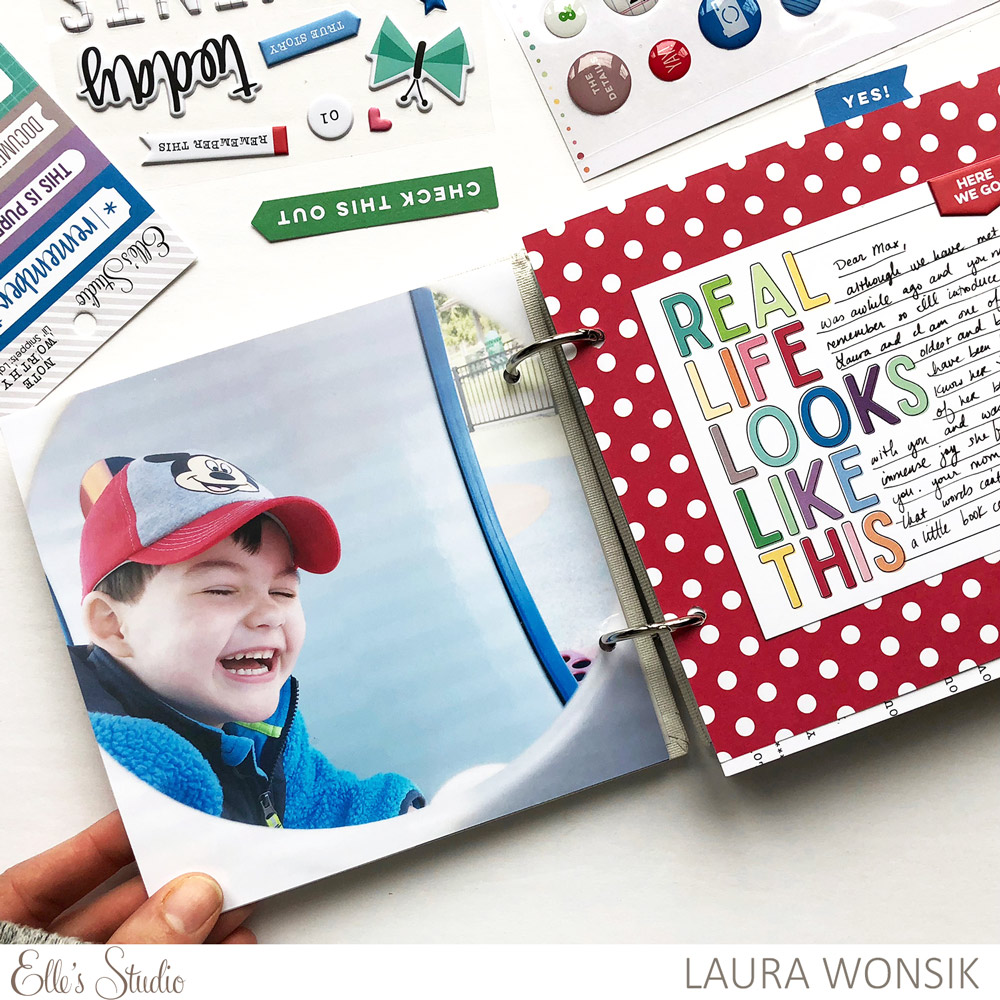
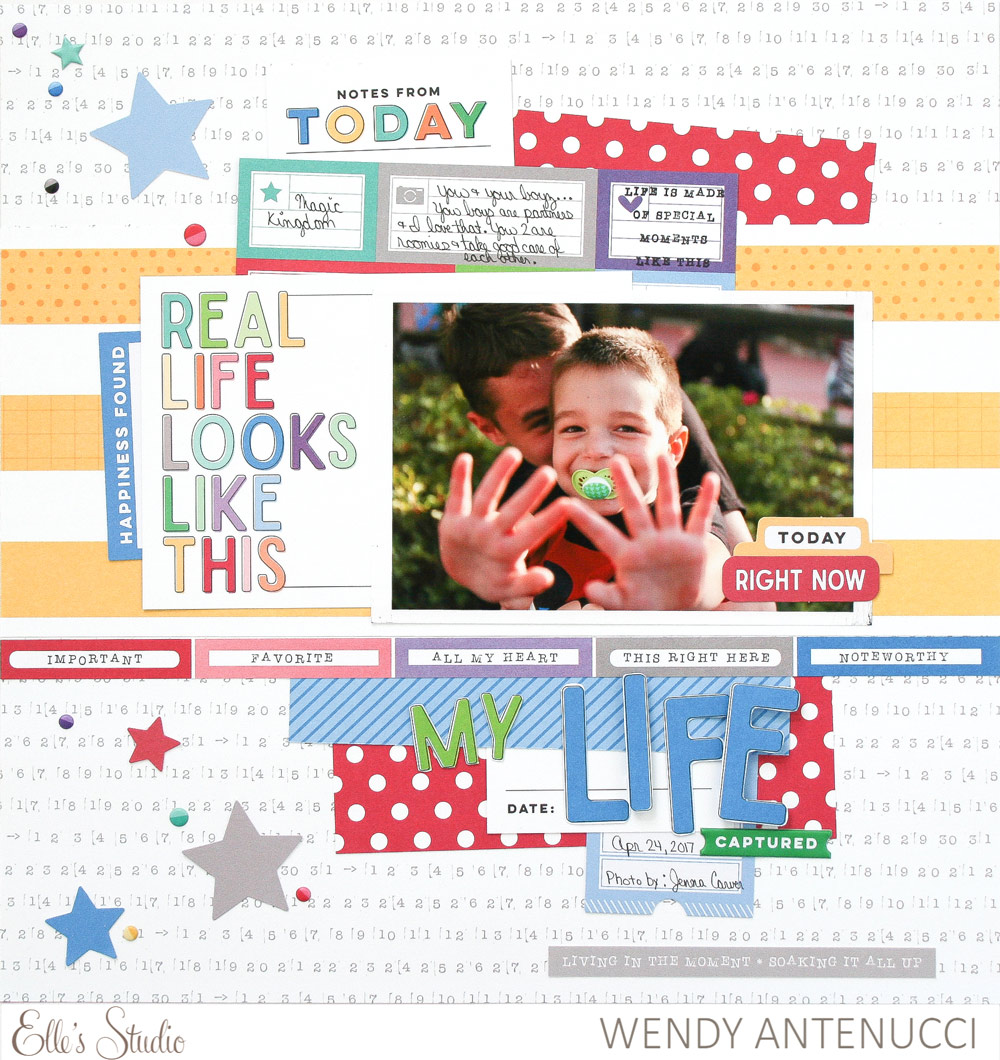
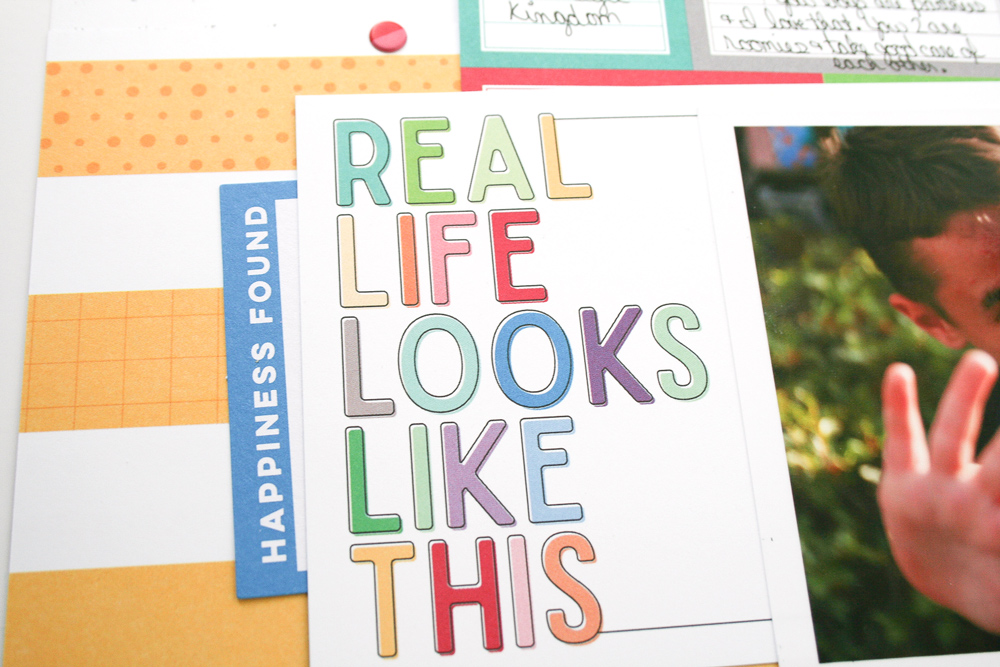
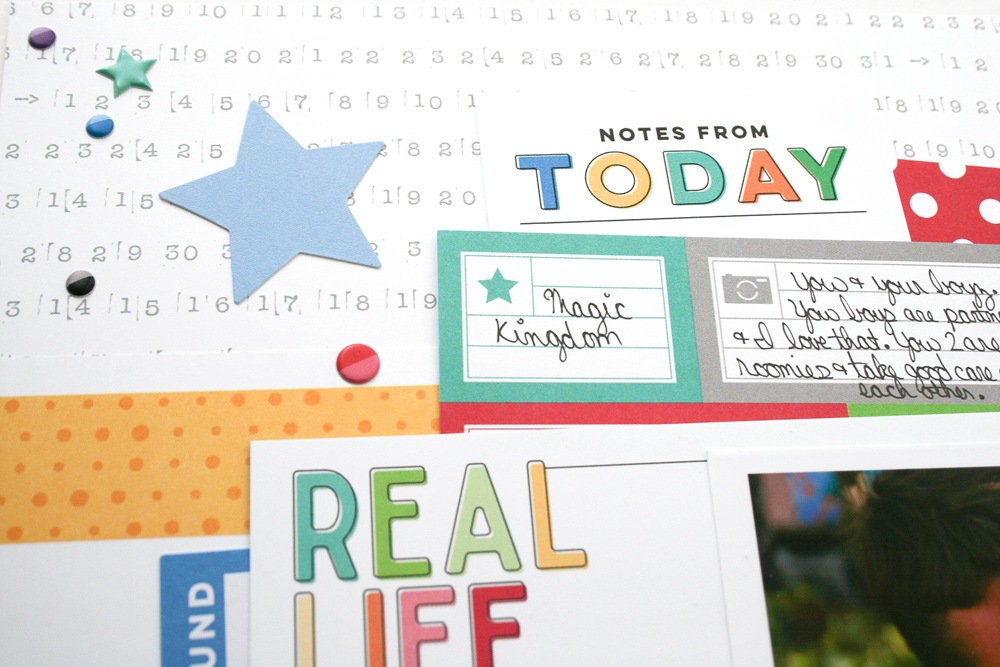
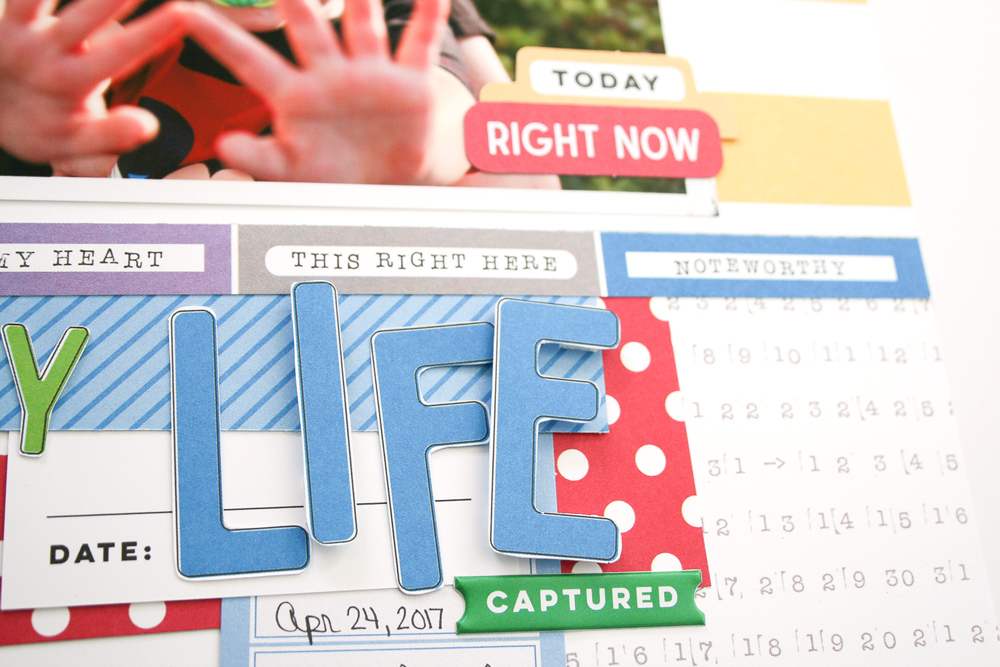
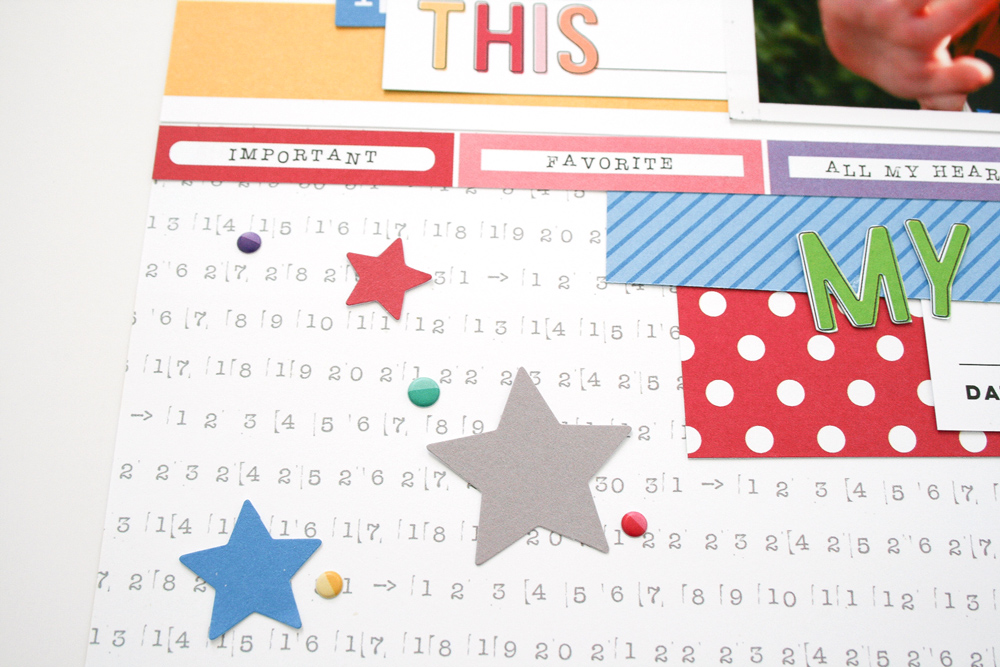
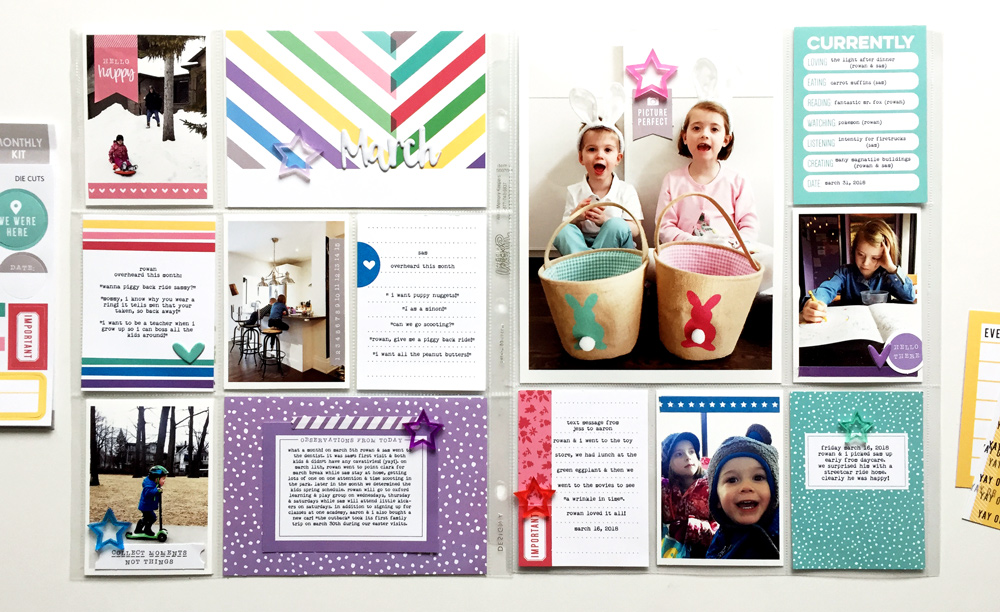
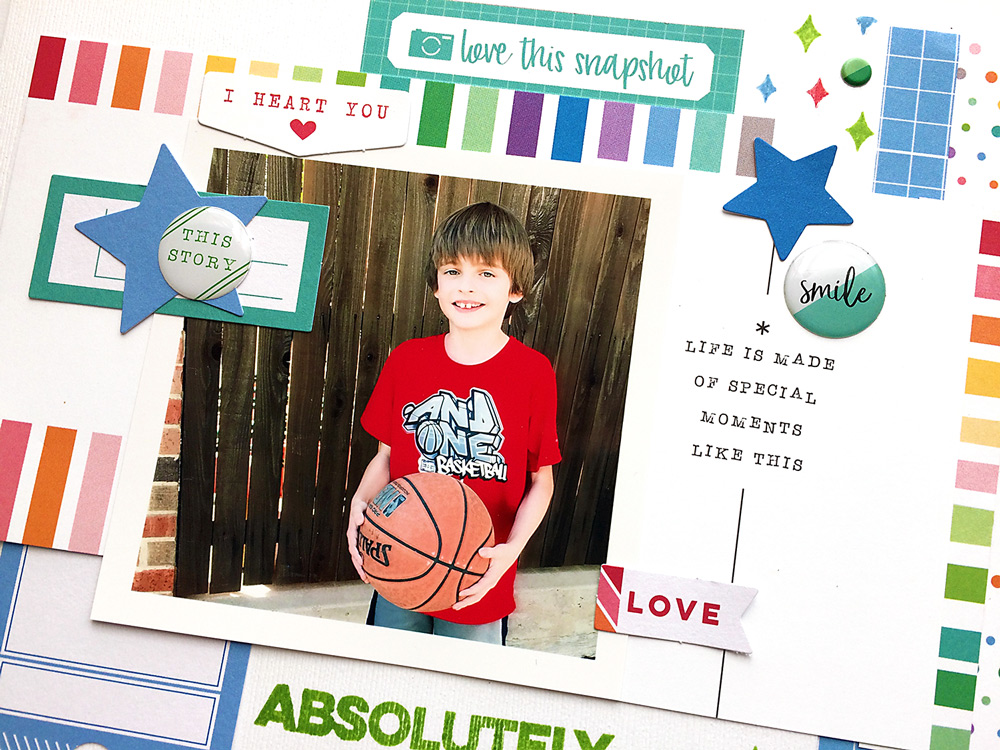
Challenge #5 | Use repetition on your design. We love how Laura Wonsik created movement and interest on this page by using similar photos, repeating horizontal lines using our Everyday Goodness Stickers and small circles stamped with our Noteworthy Stamp. Use repeating elements on your next project to create unity and movement.

Just for creating a project based on one of the challenges above, using at least one Elle’s Studio product (this could even be our free printable!), you could win one of three gift cards: $50 for the grand prize, $25 for second place and $10 for third place. Winners will be selected randomly from the entry posts, so the more projects you create based on the challenges above, the better your chance of winning!

Each project will count as one entry, even if you have included multiple challenges in that project. Please post a comment on this blog post for each project you create including the challenge number and Instagram post or blog post link to your project image. (If you want to use Instagram to post your entry, please post your photo on Instagram, using the hashtag #EllesStudio, then tap on the three dots ( … ) above the photo. Select “Share” and then select “Copy Link”. This is the URL you will use when posting your entry comment here.

Entries will close at 11:59pm PST on Saturday May 12th, and winners will be announced on May 14th! Good luck, and we can’t wait to see what you create!

April #EllesStudio Spottings on Instagram

We love checking out the projects posted to Instagram using the hashtag #EllesStudio! With so much inspiration to be found on this platform, we are always thrilled to find our customers posting their creations that use our product, and this month, these six projects that used the hashtag caught our eye:


We loved how @scrapwithrachel, on the left and @heymarshamakes used our newest collection, Noteworthy on their projects! Their projects are the perfect example of how perfect this collection is for creating colorful layouts or traveler’s notebook spreads.


How gorgeous is the layout that @prettypapers22 created on the left using our Love You Die Cuts? It just shows that you don’t have to use a lot of product to create a stunning page. On the right, we are loving how @mylifemylensphotography used our April 2018 Kit to create a word-heavy pocket page spread.


How fun is the background that @lifeinlayouts created on the left using tags from our monthly kits, as well as our XOXO 6″ x 6″ Paper Stack? We also spy our Live Laugh Love Wood Veneers and new Yellow Puffy Alphabet Stickers on her fun layout! On the right, @carolinas_creations used scraps from our earlier collections and tags to create ready-made, dimensional filler tags for her pocket pages. We think they are just beautiful! 
 
Just for posting their projects on Instagram using the hashtag #EllesStudio, these six ladies will win a $10 gift certificate to the shop! Thank you so much to all of you for sharing your projects with us this month! Please email us at info@shopellesstudio.com to claim your prize!
 
Have you created something with Elle’s Studio products lately? Upload your projects to Instagram using the hashtag #EllesStudio for a chance to be featured here on the ES blog next month! Until then, have fun creating!

A sneak peek of what is coming on May 10th!

Happy May, everyone! Our May kit + coordinating add-ons reveal is almost here and we are so excited for you to see all the new products we’ll have in the shop! This month our kit + add-ons will have you ready to document all your everyday real life moments, good times, and more! Plus, it will take you right into the month of June! May’s kit includes 3 – 4 x 6 inch tags, 18 – 3 x 4 inch tags, and 27 die cuts!

Get ready to pick up our May kit for our launch day special pricing of only $9.99 on Thursday, May 10th, at 8:00 am PST. After the 10th, our kits go back to their regular price of $11.99. Or, you can lock in the $9.99 price anytime by starting a subscription! And subscribers, don’t forget! You’ll be able to bundle anything from our shop (including the new add-ons) with your monthly kit for FREE (USA subscribers) or reduced (International) shipping!

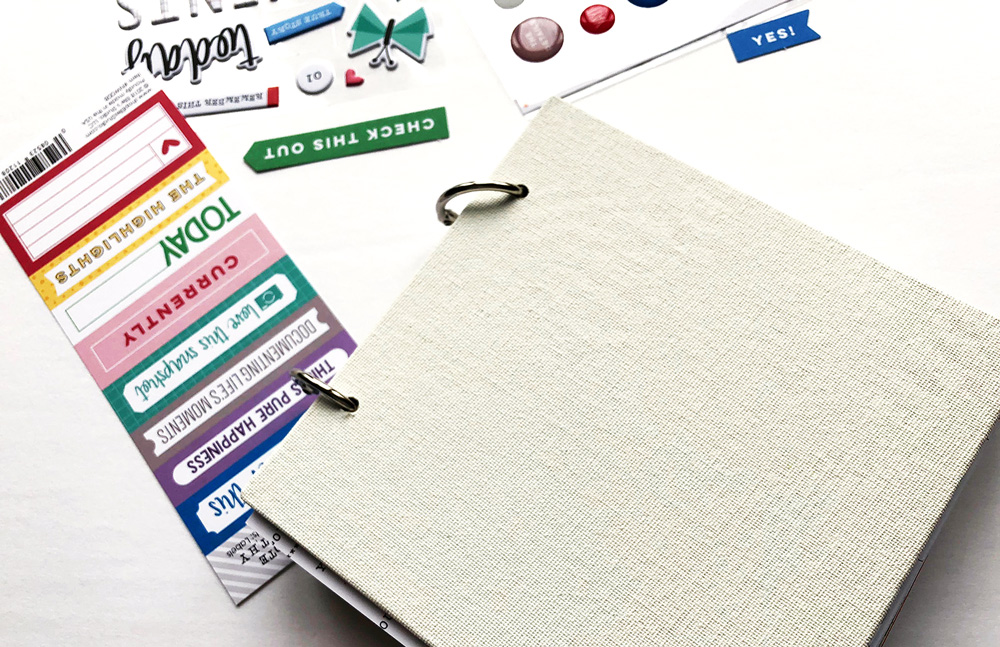
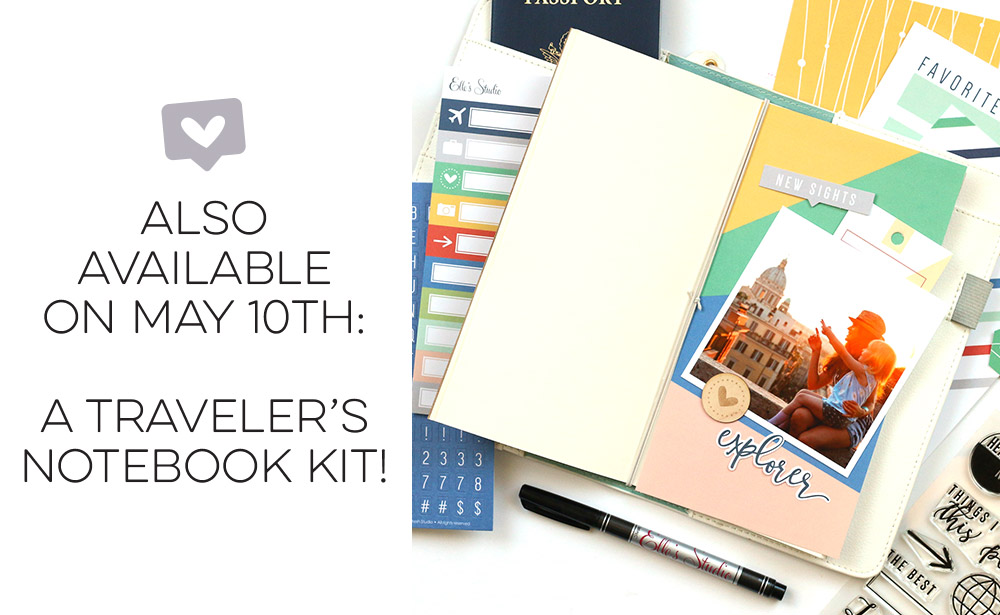
We have an add-on surprise this month! Along with our May kit and add-ons, we will also have a Traveler’s Notebook kit that you don’t want to miss! It will include papers, die cuts, a stamp, labels, stickers, thin wood veneers, and more! We are so excited about this new addition for May and we can’t wait to see how you use it to document your stories!

Not a subscriber? We have just a few spots left were you can start with our April kit now! Or, wait until May 10th to sign up and start with our May kit! With a monthly subscription, you will be guaranteed a kit each month, lock in our launch day special price of $9.99 + shipping, and receive FREE (USA) or reduced (International) shipping on anything added to your box each month during our 24 hour bundling period (starting on the 10th at 8:00 am PST and ending on the 11th at 8:00 am PST). Along with more time to shop, our subscribers will also have access to special discounts on select items during the 24 hour bundling period! These discounted items can be found in our SALE section during bundling, and you must be logged into your kit subscriber account to see them. Quick note: Our kits and add-ons are available without a subscription each month, too.

Make sure you set your alarm and mark your calendar for Thursday, May 10th at 8:00 am PST! If you haven’t signed up for our newsletter, make sure you do to receive a reminder of when everything is available for sale!  We hope to see you there!

Inspired by the Currently Wood Veneer Tabs with Melissa Mann

One of the fun products released along with our April 2018 Kit was the Currently Wood Veneer Tabs, which are perfect for layouts or pocket pages! Today Melissa Mann is sharing how they inspired her to get more photos and words on her newest 12″ x 12″ layout. Let’s see what she created:
 
Hello! Good morning to you all and thanks for stopping by the Elle’s Studio blog! I’m excited to share another layout I created using the new Noteworthy Collection and the April 2018 Kit!


Supplies | April 2018 Kit, October Digital Cut File, Everyday Goodness Stickers, White Cardstock Alphabet StickersCurrently Wood Veneer TabsAdventure Puffy Stickers, Yellow Puffy Alphabet StickersMini Dated Stamp, Noteworthy Word LabelsNoteworthy Epoxy Stickers, Noteworthy 6″ x 6″ Paper Stack, Noteworthy 12″ x 12″ Paper Collection, Live Laugh Love 12″ x 12″ Paper Collection
 
My goal for this project was to highlight the awesome Currently Wood Veneer Tabs. I used the veneers to top each 3″ x 4″ journaling tag and photo that I used on the bottom half of my project.


I loved that each wood veneer tab had a different word and I used them as a guide for each of my journaling cards. Each verb represents what is being portrayed on the tag or photo and made it an easy way to guide my choice of pictures and journaling.


One of my favorite parts of this layout is the smaller pictures supporting the main picture; at first, I was going to use journaling on all four cards but the Currently Wood Veneer Tabs actually inspired me to use some smaller pictures to represent that specific word!


I hope you have been enjoying your April Kit and add-ons, and getting those memories recorded! Thanks for stopping by!
 

Going Big with Tracey Fox

We love how easy that our newest Title Builder release is making title creation on any papercrafting product, and today, Tracey Fox is with us to highlight just how perfect your next title can be when paired with a treasured photo. Let’s take a look!
 
Hey there! It’s Tracey Fox here. Have you picked up the Title Builder Vol. 2 Bundle from the Elle’s Studio shop yet? The Title Builder Vol. 2 Stamp, Wood Veneer, and Acrylic sets are indispensible tools in your scrapbook stash for combining words to make endless combinations for titles for your scrapbook pages! I had fun going BIG with the new Title Builder Vol. 2 products on this layout featuring an old family photo of a little five year old me with my brother and dad on a family vacation.


Supplies | Title Builder Vol. 2 Stamp, Title Builder Vol. 2 Acrylic, Title Builder Vol. 2 Wood Veneer, Mini Dated Stamp, Noteworthy Double-sided Journaling TagsNoteworthy Bits and Pieces, Noteworthy Epoxy Stickers, Noteworthy Puffy StickersNoteworthy 12″ x 12″ Paper Collection
 
I already knew I was going to create a BIG title, so I decided to make my photo big as well. I printed it at 8.5″ x 11″ and paired it with a 3.5″ piece of the bold, color-blocked pink paper from the Noteworthy 12″ x 12″ Paper Collection. This paper went great with the faded red swimsuits in my vintage photo, and I also love how the angles in its design come to a point to lead the eye from the title toward the picture.


I chose words from the Title Builder Vol. 2 Stamp, Title Builder Vol. 2 Acrylic, and the Title Builder Vol. 2 Wood Veneer sets to create the long title “this sweet crazy life is absolutely better together,” which seemed like the perfect sentiment for a treasured family photo. I heat embossed my stamped words with white embossing powder and adhered the wood and acrylic words in place down the page.


Since the title and enlarged photo are the stars of the page, I kept the rest simple and just added a scattering of embellishments from the Noteworthy Epoxy Stickers, Noteworthy Puffy Stickers, and Noteworthy Bits and Pieces. Since the versatile Mini Dated Stamp has separate numbers in addition to current year stamps, I was able to use it to stamp the year “1987” on the label from the Bits and Pieces pack.


I loved getting to use the new Title Builder Vol. 2 products and am so excited to add them into regular rotation in my scrapbooking, right along with the original Title Builder set! I’m so excited to see what title combinations you come up with on your pages. Thanks for stopping by today!
 

Starting with a Title with Heather Leopard

Our newest product, the Title Builder Vol. 2 Stamp, designed to help you build titles on your scrapbook layouts, pocket pages and traveler’s notebooks is not only wonderful used on its own, or in the Title Builder Vol. 2 Bundle, it is also fabulous when paired with your favorite scrapbook collection, like Heather Leopard is showing us today with Noteworthy!
 
Hi everyone! It’s Heather Leopard here with a scrapbooking layout using the new Title Builder Vol. 2 Stamp and the Noteworthy collection. This project can be easily recreated by stamping on patterned paper or cardstock but I chose to dabble in a bit of mixed media to create something different.


Supplies | Title Builder Vol. 2 Stamp, Noteworthy Blank Labels, Noteworthy Word LabelsNoteworthy Cutouts, Noteworthy Wood Veneer, Noteworthy Puffy Stickers, Noteworthy Epoxy Stickers, Live Laugh Love 6″ x 6″ Paper StackNoteworthy 12″ x 12″ Paper Collection
 
I knew I wanted to mix stamped words from the awesome new Title Builder Vol. 2 Stamp with some of the words from pattern #3 in the Noteworthy 12″ x 12″ Paper Collection. I also knew that I wanted to create a super long title about spending family time together. What I didn’t know was what photo I wanted to use. That said, I have tons to choose from so I knew it wouldn’t be too hard, so I created this layout completely based on the structure for the title. That’s kind of scary but also kind of fun to start with a title!


There’s a lot of awesome words included on the Noteworthy patterned paper #3 and I wasn’t sure which ones I wanted to use but I knew I wanted to cut them out. I also knew I didn’t want to cut them all out by hand so I used my Silhouette and the PixScan to cut practically all the words out. I think that was a bit of pro-scrap-tination, if you you know what I mean. While the words were cutting, I decided to play with gesso and mists to create some colorful backgrounds to stamp on. I wanted a watercolor effect so I played around with 5 colors. Once dried, I had to figure out what I wanted to say in the title. I ended up choosing three phrases and I stamped the same words from the Title Builder Vol. 2 Stamp over each color, to have a variety of colors to choose from for each word. Once I had all the words cut out from both the patterned paper and the stamped words, I lined them up against the left side of the paper, adding a patterned paper strip from the Live Laugh Love 6″ x 6″ Paper Stack between the phrases. I also stitched over the words to secure them down.


I decided to scrap a photo we took together on a recent trip to the dude ranch. We went on long horse rides in the Texas hill country several times a day and had a great time together doing all the activities the ranch offered. I decided to keep the layering behind the photo light and instead anchored it with a long patterned paper to even the page out. I also chose to add a couple of embellishments, like the Noteworthy Wood VeneerNoteworthy Puffy Stickers and Noteworthy Epoxy Stickers over and around it to draw the eye around.


I still need to add journaling under the “highlights” Noteworthy Word Label. There’s so much to say about this experience and I still need to put my thoughts together.
 
Thanks so much for stopping by today. If you’d like to see how this came together, check out my YouTube channel!
 

Mini Magic with Laura Wonsik

Mini albums are a wonderful gift to create for someone we care about, and today Laura Wonsik is sharing a beautiful mini album gift inspired by our new Noteworthy collection. Let’s take a look:
 
Hello! This is Laura here and I’m so excited to share a mini-album I made using some of the great new products from the April release. The idea for this album actually came from the name of the newest Elle’s Studio collection: Noteworthy. Here’s the story:


Supplies | Banner StickersAdventure Puffy Stickers, Currently Wood Veneer TabsCerulean Blue Puffy Alphabet StickersNoteworthy Double-Sided Journaling TagsNoteworthy Bits and PiecesNoteworthy Wood VeneersNoteworthy Epoxy StickersNoteworthy 6″ x 6″ Paper Stack
 
My best friend is not a scrapbooker. She admires what we do as memory keepers but doesn’t feel drawn to do it herself. Her birthday is in May, so I told her that I wanted to make her a scrapbook of her son as her present. Given that she doesn’t do this, I felt completely overwhelmed with how to approach it. I wasn’t sure what format to do; whether there should be a theme, whose voice should do the journaling… there were a lot of options.
 
That’s when I thought about the Noteworthy collection. I thought, “I’ll just approach the album from the angle of what is most noteworthy about Max’s life right now at 3 years old.” So, I told her to send me some noteworthy snippets compiled them in this little album.


The Noteworthy 6″ x 6″ Paper Stack is perfect for making a little mini album, but since I wanted to make the papers the pages rather than pocket pages I wasn’t sure what I should do for the exterior. I was walking through Walmart when I saw a 3-pack of 6″ x 6″ flat canvas in the craft aisle. Using my crop-a-dile punch I was able to make this my exterior. I told my friend that Max can paint them and that way some of his artwork will also be included in the album.
 
I included over 25 photos in this album of varying orientations so I decided to pick two standard editing sizes to make the design easier.


As I was looking through the products to find matching papers, I noticed the 6″ x 6″ Paper Stack insert showing a little snippet of all of the papers included in the pack. I decided to add the border of one of the Noteworthy Double-Sided Journaling Tags to the bottom and include it in the album. My friend told me that it’s one of her favorite pages!


As with so many of the products from Elle’s Studio, I love how the colorful products will match so many types of photos. This is especially helpful in a mini-album that includes photos from various times and places.


Whenever I work with a large collection for a project, I lay all of the embellishments out so that I can easily see what might work with a page.


Here are all of the pages included in the album. I hope you enjoyed today’s post and feel inspired to try something new or use your crafting to share your creations with others!


Sketch Day with Wendy Antenucci

Welcome to the Elle’s Studio blog! It’s Wendy here today sharing a page created from the sketch taken from Tracey Fox’s fun Easter page. I love sketches now, but I haven’t always. When I tried to follow a sketch exactly it became a burden, so today, I was inspired to create using the sketch as a guideline.
 
Here is the sketch created from Tracey’s layout:


And here is my interpretation of the sketch:


Supplies | Noteworthy Double-Sided Journaling Tags, Noteworthy Cutouts, Noteworthy Bits and PiecesNoteworthy 6″ x 6″ Paper Stack, Noteworthy Puffy StickersNoteworthy 12″ x 12″ Paper Collection
 
I started this page with the lovely yellow and white striped paper (totally my favorite piece) from the Noteworthy 12″ x 12″ Paper Collection and worked with a horizontal design as the sketch suggested. I couldn’t resist the fun “real life looks like this 4″ x 6” tag from the Noteworthy Double-Sided Journaling Tags, which was such a perfect sentiment for my page and the fun colors and design took my page to a new level.


After establishing the horizontal feel of the page I began to layer elements to bring in colors to my layout and to continue the horizontal layered feel of the sketch. The manufacturer’s strip from a piece of patterned paper in the 12″ x 12″ Paper Collection with all the words fit the sketch exactly and the words were perfect to tell more of the story. I then chose fun colors from the Noteworthy 6″ x 6″ Paper Stack that I wanted to add in and let those peep above my main photo block.


Did anyone else fall in love with the 12″ x 12″ paper with all the words and phrases? I sure did, and I love to fussy cut, so I began trimming out words that I thought might fit my layout, going for a bold title that wouldn’t be lost.


I finished the layout by embellishing with stars from the Noteworthy Bits and PiecesI love that the pieces help tell the story and further add the color I love so much from Elle’s Studio, but they don’t get too fussy or overwhelming!


I am so glad that I have learned to use sketches to my advantage now; instead of being a rule, they are a fun suggestion to help steer your creativity to new levels!


Do you have a layout inspired by this sketch to share? Post it on Instagram and use the hashtag #EllesStudio for a chance to be featured here on our blog next month, AND win a gift certificate to the shop! We can’t wait to see how you interpret this sketch!

A Monthly Pocket Page + Process Video with Jess Forster

Whether you create pocket pages for a weekly, monthly or just an event format, our monthly kits can help you get those stories told—no matter what they look like! Design team member Jess Forster has recently switched up her pocket page process, and we love how she uses our kits to get her beautiful photos and poignant journaling into her pockets. Let’s take a look at her latest creation: 


Supplies | April 2018 Kit, Everyday Goodness Stickers, Banner Stickers, Adventure Puffy Stickers, Monthly Puffy Stickers, Acrylic Stars
 
This year, I am excited to use Elle’s monthly kits to record our monthly family stories. Simply put, instead of taking a weekly approach, making 52 layouts per year; I am creating 12 pages, or one spread per month! Here is a video overview of how I created my March 2018 pocket page layout using the April 2018 Kit. Have a look at how the page came together in this video:


For me, the first thing to do is to review my previous monthly layout. Pocket page scrapbooking is like a puzzle. You have look at the previous layout to see how the pieces (photos and journaling tags) will fit together moving forward. The first step in my creative process is to create a sketch.


This year, I am using two, 9″ x 12″ pocket pages per month. Using my stash of divided page protectors and my photo trimmer, I just cut them down to the size I want, making sure that I don’t cut the seams. Since I know I want to include a cute enlarged photo of my kids from Easter, I decide to create my own custom pocket page, using the Fuse Tool, a silicone mat and regular 12″ x 12″ page protector. Since I will be using the backside of the custom page protector, I should note that I don’t completely close it up. That will finish seaming it together next month, when I fill the flip side, for my April layout.


Once my page protectors have the spaces I want, I print out my photos and choose my journaling tags from the April Kit. This month, I included both individual and group pictures of my kids. No surprise: my kids are the focus of each monthly page. In terms of the journaling tags, I always sort Elle’s monthly kit by colour. Not only do I use most of the tags from the kit each month, I love the consistency of colour she uses in her tags…so awesome!


Once I have decided on the placement of photos and journaling tags, I type my journaling on the computer. I take a photo of the tag I want to add journaling to and then open the photo up in Photoshop Elements. I type my journaling onto the photo to make sure it’s within the lines. When it’s time to print, I turn off the background layer in Photoshop Elements and print the journaling onto a test piece of white cardstock. I then take my actual journaling tag and hold it on top of the white cardstock against a well-lit window, to make sure it lines up. I then adhere my journaling card to my test cardstock and print the journaling again. Fun fact: I learned the “window trick” from Elle’s awesome blog coordinator, Meghann Andrew, and you can see that process in her quick adhesive tips video. Thanks Meghann!


Once the journaling is finalized, I finish off the page with embellishments. This month, I used Elle’s awesome Acrylic Stars, as well as the Everyday Goodness, Banner Stickers and Adventure Puffy Stickers, as well as a few of the die-cuts from the April Kit.


I hope I have inspired you to document your life right now using a monthly approach, or to use the Fuse Tool or to type your journaling on the computer!
 
Thanks for looking!


What format do you use in your pocket pages? We’d love to see how you’re using our monthly kits, no matter if they’re weekly or monthly pages! Share your creations on Instagram using the hashtag #EllesStudio, for a chance to be featured here on the blog and win a gift certificate to the shop! 

Documenting Boy Life with Title Builder Vol. 2 and Daniela Dobson

We are so excited about your new title possibilities with the release of our Title Builder Vol. 2 Bundle! Today, Daniela Dobson is with us to share a fun layout with a title that incorporates all three pieces of this terrific bundle to highlight her story. Let’s take a look:
 
Welcome to the Elle’s Studio blog today! It’s Daniela here highlighting the Title Builder Vol. 2 Stamp, and I created a layout where my title is front and center!


Supplies | Title Builder Vol. 2 Bundle, Title Builder Vol. 2 Wood Veneer, Title Builder Vol. 2 Acrylic, Title Builder Vol. 2 Stamp, April 2018 KitNoteworthy Double-Sided Journaling Tags, Noteworthy Word Labels, Noteworthy Bits and Pieces, Noteworthy Puffy Stickers, Noteworthy Epoxy Stickers, Noteworthy 6″ x 6″ Paper StackNoteworthy 12″ x 12″ Paper Collection
 
I placed my photo in the top left of this 8-1/2″ x 11″ layout and layered it with a journaling tags from the Noteworthy Double-Sided Journaling Tags and April Kit.


I stamped the title with different ink colors to match the stripes in the journaling tag under the photo. To get the title lined up, I arranged the words the way I wanted them and stamped each separately, with different ink colors on the page. I added an the “crazy” acrylic and “life” wood veneer to the title.


I added my journaling to the bottom of the page on a cut-apart journaling tag in the Noteworthy 6″ x 6″ Paper Stack and stamped the sparkle elements in the same colors as my title from the Title Builder Vol. 2 Stamp in a diagonal line going right through my title!
 
Thanks for stopping by today!


We can’t wait to see what you create with Title Builder Vol. 2! Be sure to share your title creations with us on Instagram using the hashtag #EllesStudio!