Jane + Chloe = LOVEly Cards with Meghann Andrew

With Valentine’s Day quickly approaching, it’s time to think about creating handmade cards and tags to add a special touch to your holiday gifting for those that you love. You may think our Large Jane Alphabet Stamp is made for scrapbook layouts, but Meghann Andrew is here to show you how you can also use these large alphas to create cards, too, and when paired with the Chloe Alphabet Stamp, it’s a match made in heaven! Let’s take a look:

Hello! It’s Meghann Andrew, and I LOVE Valentine’s Day! I love giving and receiving gifts, letting someone know how much I care, and especially, crafting for the sweetest of holidays! I’m a stamper at heart, and when I saw the tall and thin sans-serif Large Jane font alongside the handwritten Chloe, I knew that they would be perfect on Valentines!

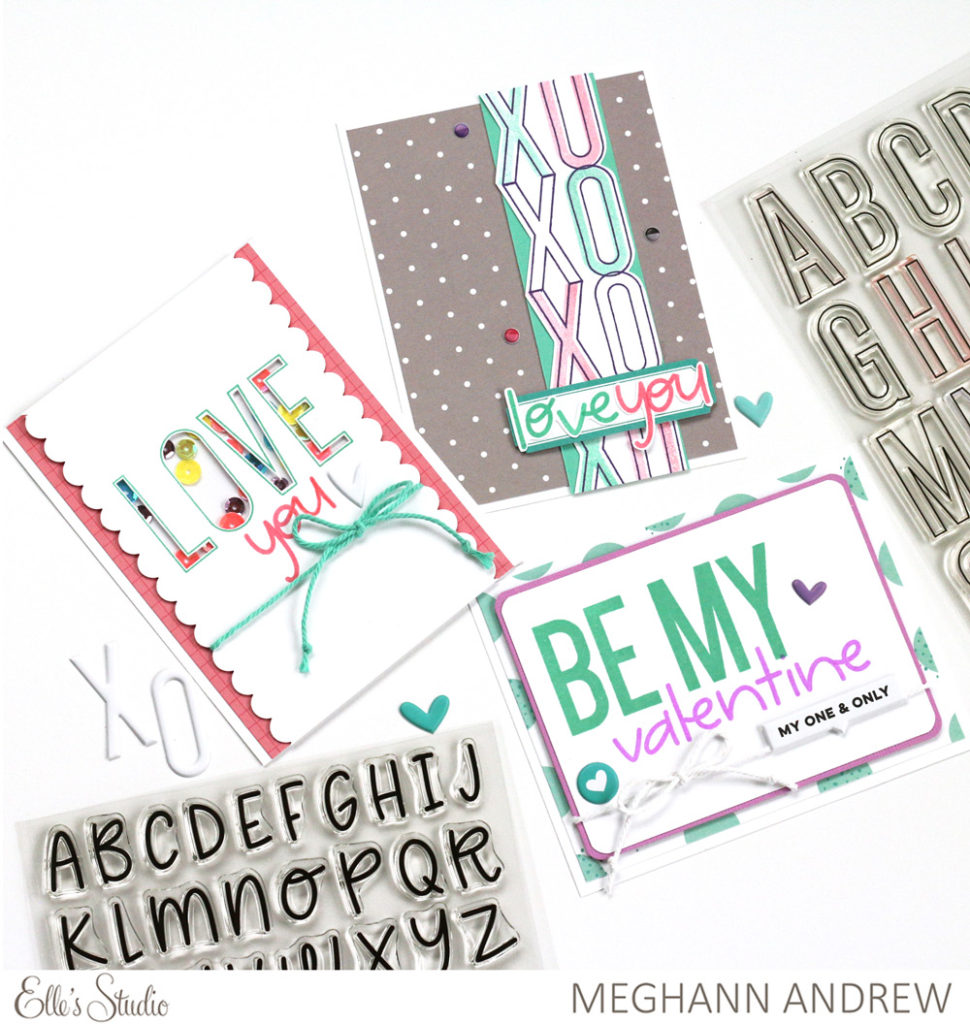
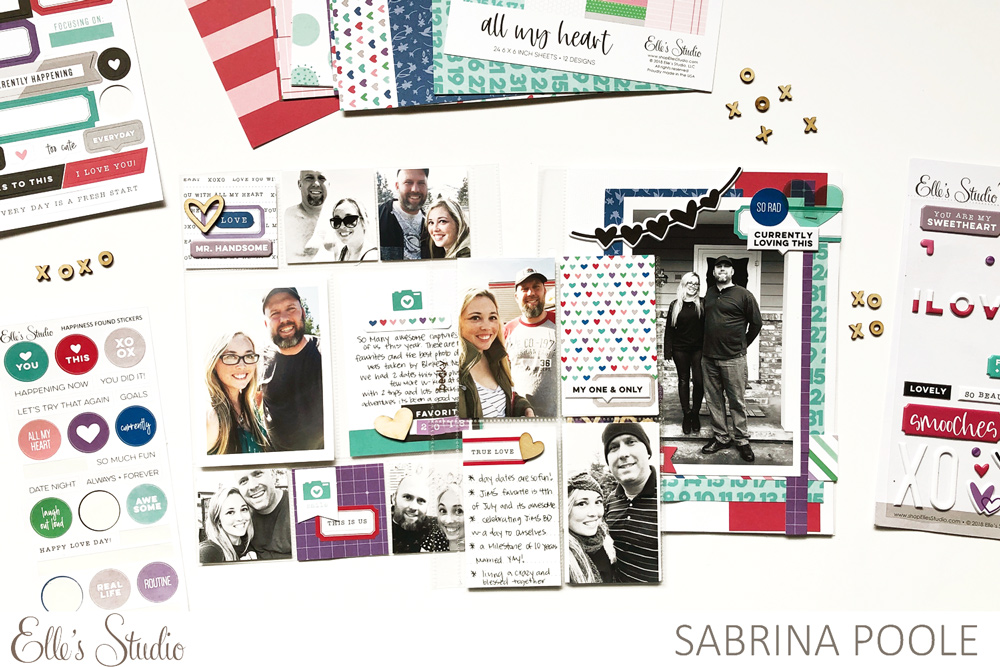
Supplies | January 2019 Kit, Sweetheart Puffy Stickers, All My Heart 6 x 6 Paper Stack, Large Jane Alphabet Stamp – Outline, Large Jane Alphabet Stamp  Solid, Chloe Alphabet Stamp

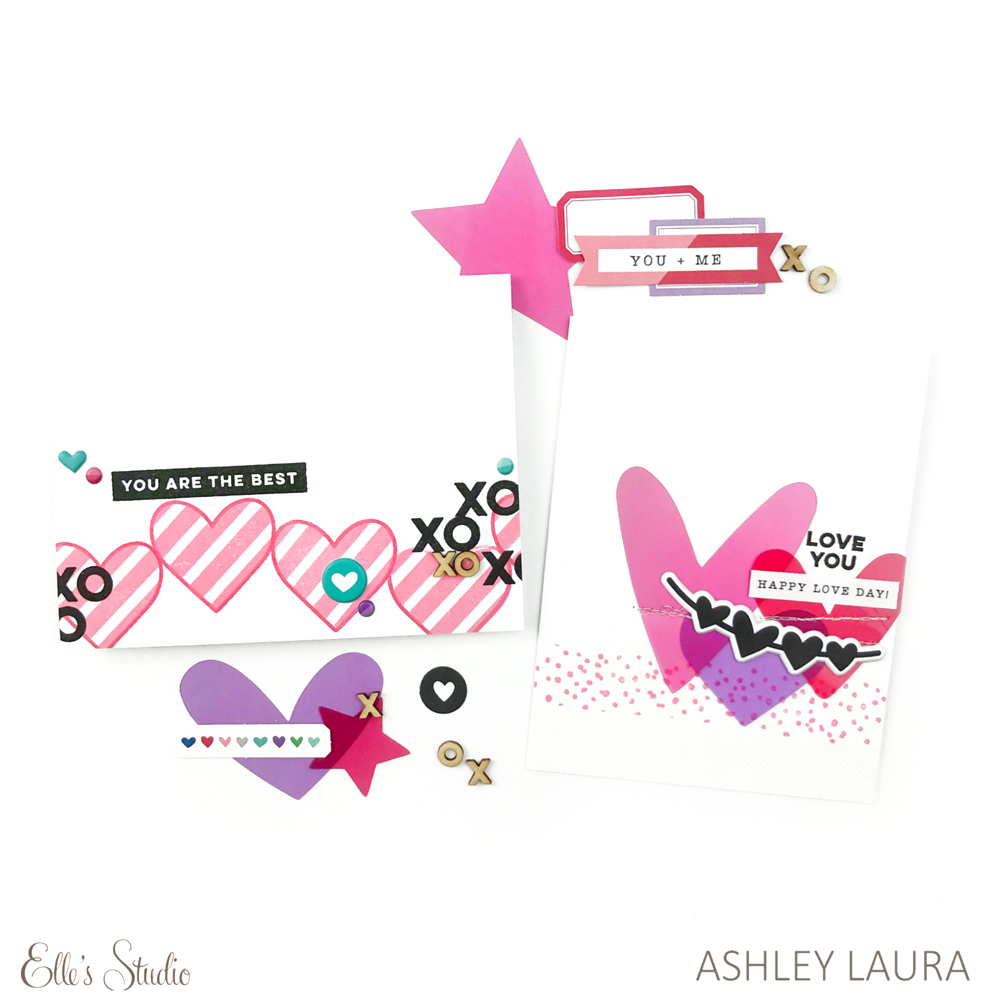
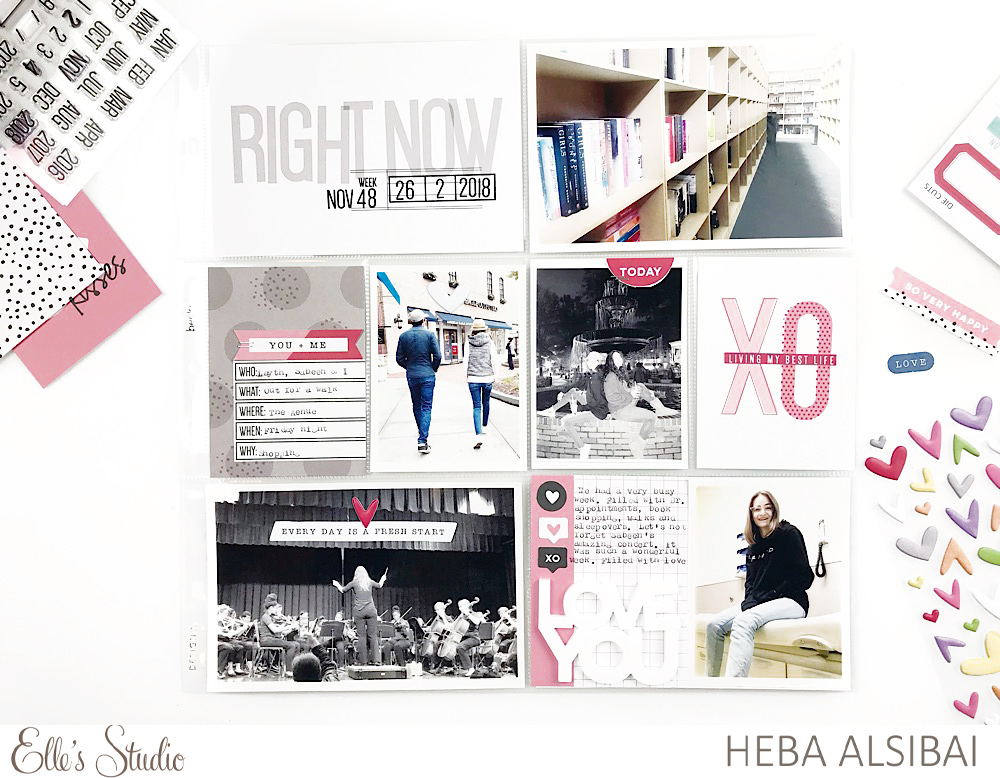
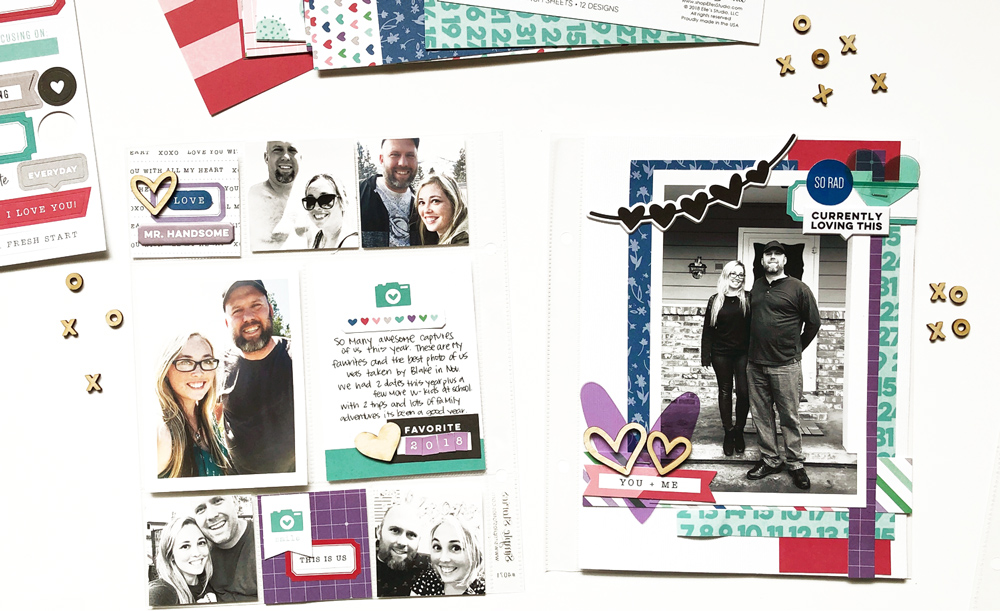
These sweet and simple cards came together in just minutes, with a few products from the January kit and extras!

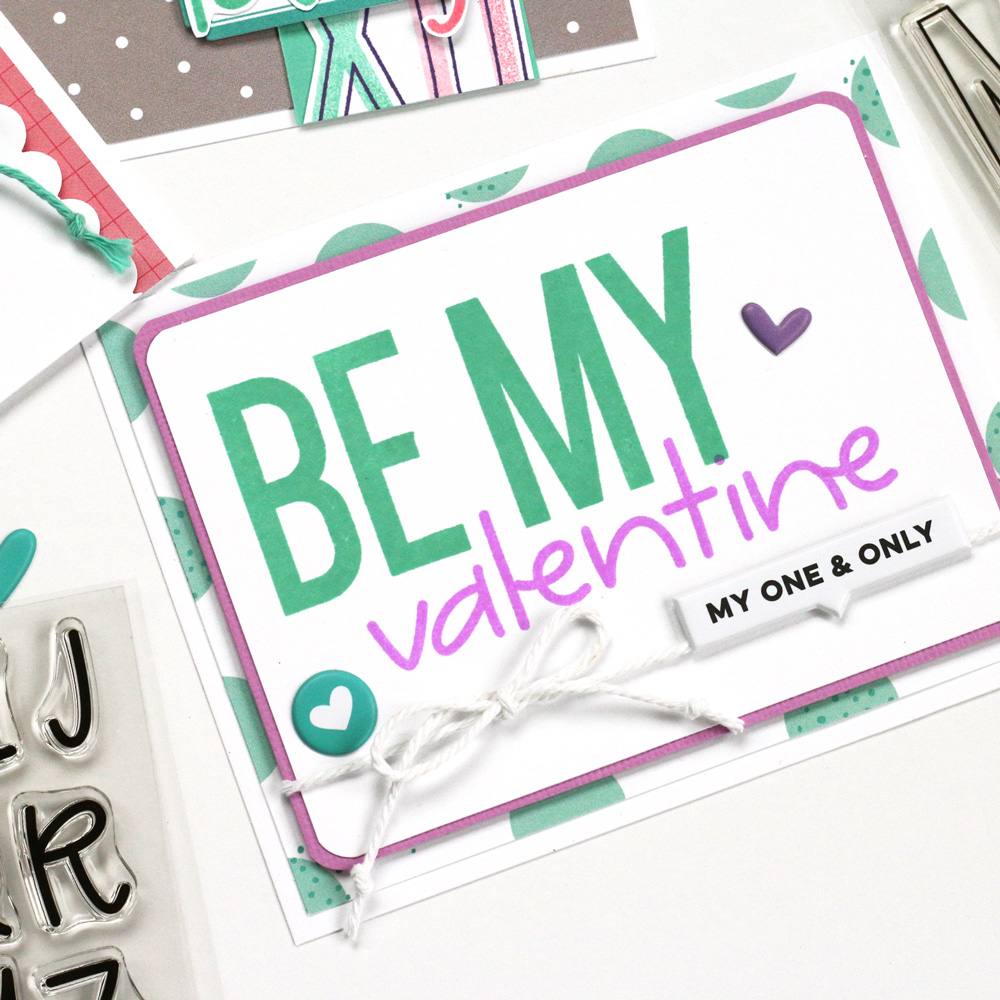
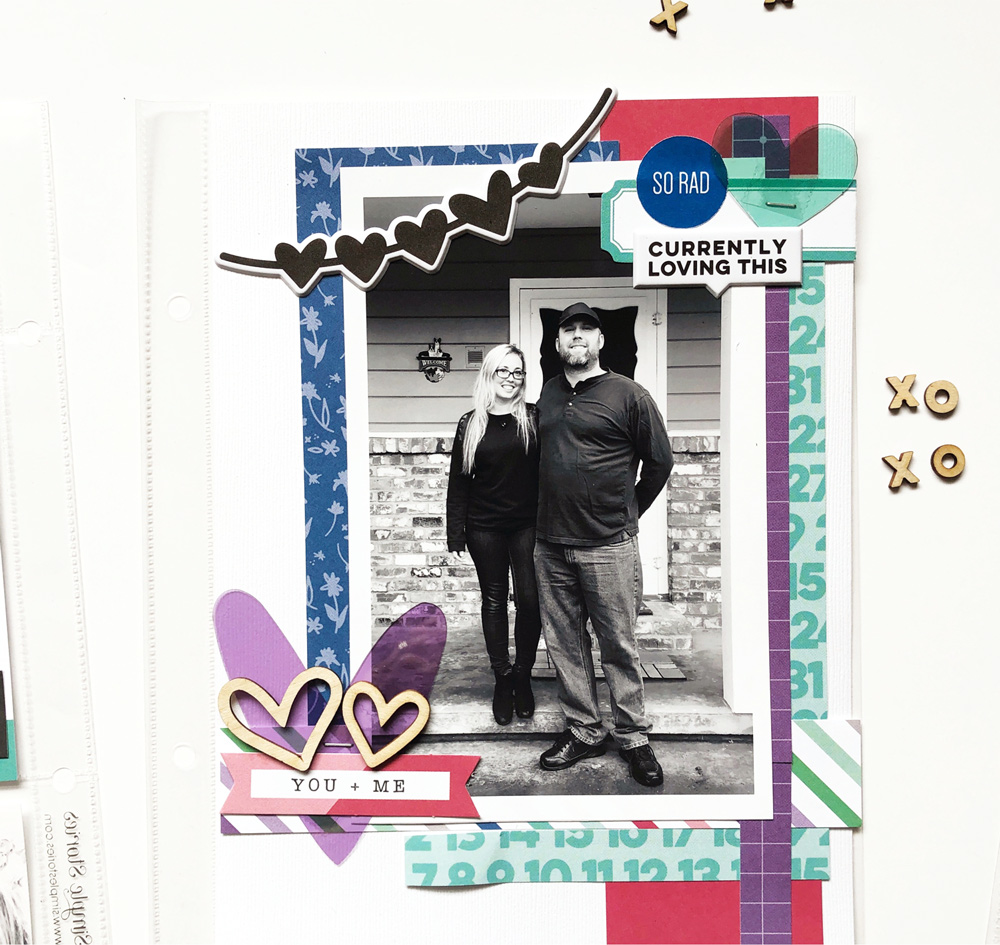
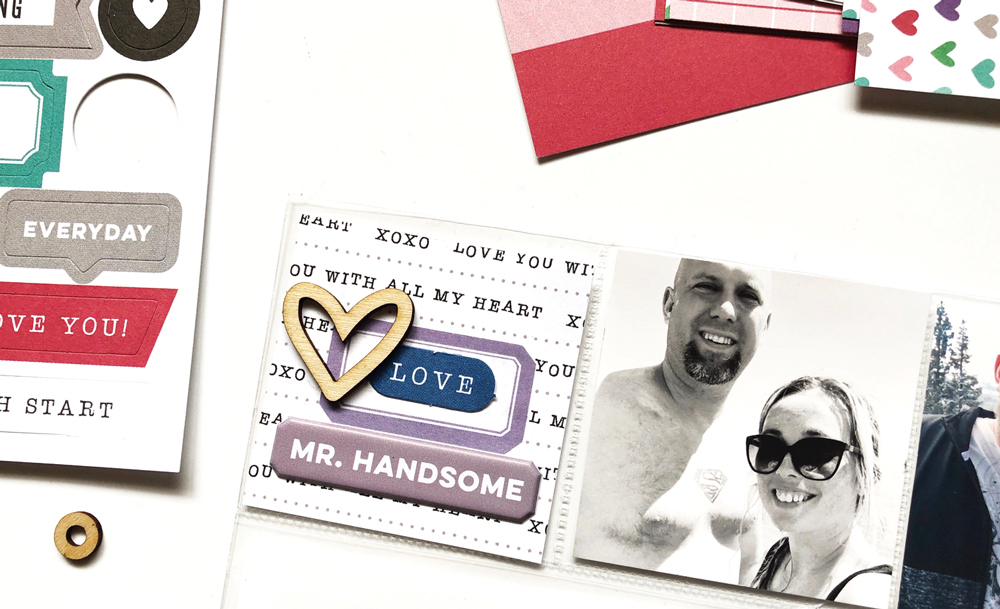
Let’s start out with the simplest card. If you can stamp, you can create this layered and lovely greeting! The teal polka dot pattern from the All My Heart 6 x 6 Paper Stack provided just the color I needed on the background. I stamped “be” and “my” in teal ink using the solid Large Jane Alphabet Stamp, then added “valentine” below in an orchid purple using the Chloe Alphabet Stamp. To frame my sentiment, I backed the white cardstock with a thin, orchid cardstock frame, tied it with baker’s twine and adhered to my card front using dimensional adhesive. The only thing left was to add a few puffy stickers from the Sweetheart Puffy Stickers sheet.

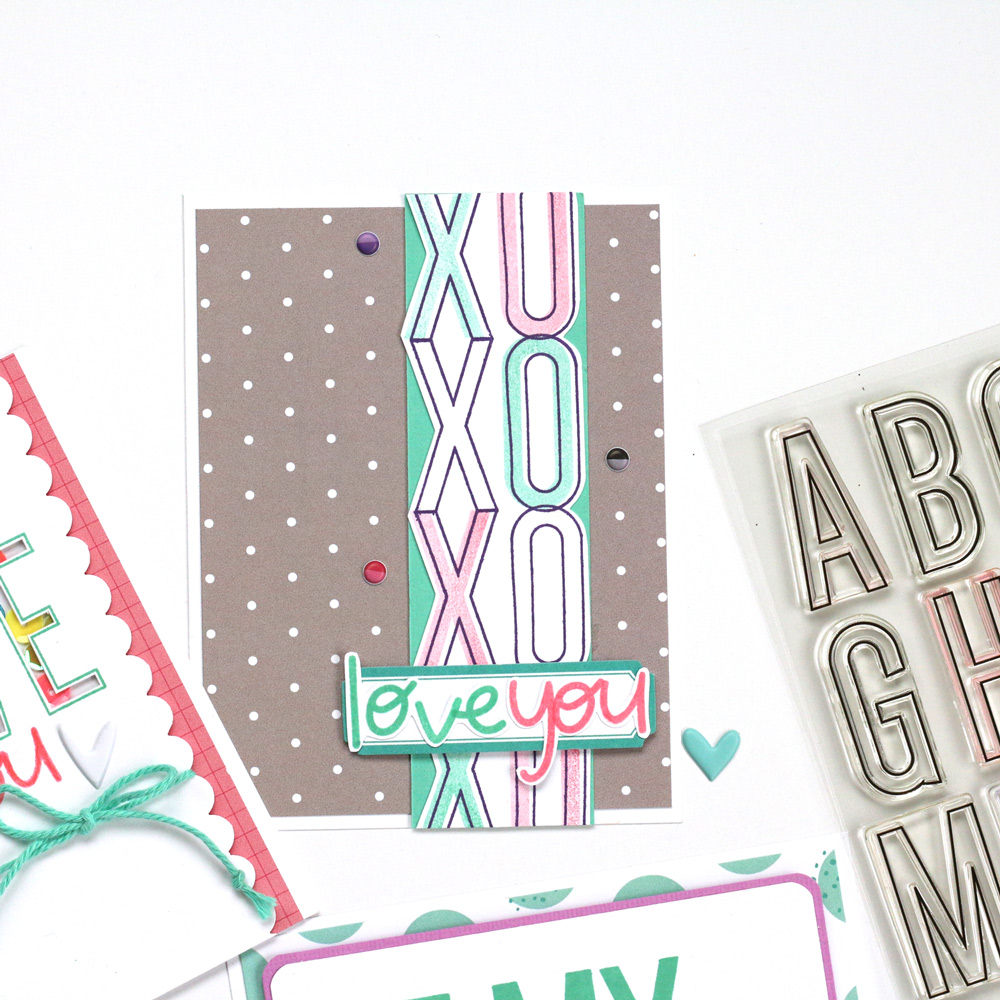
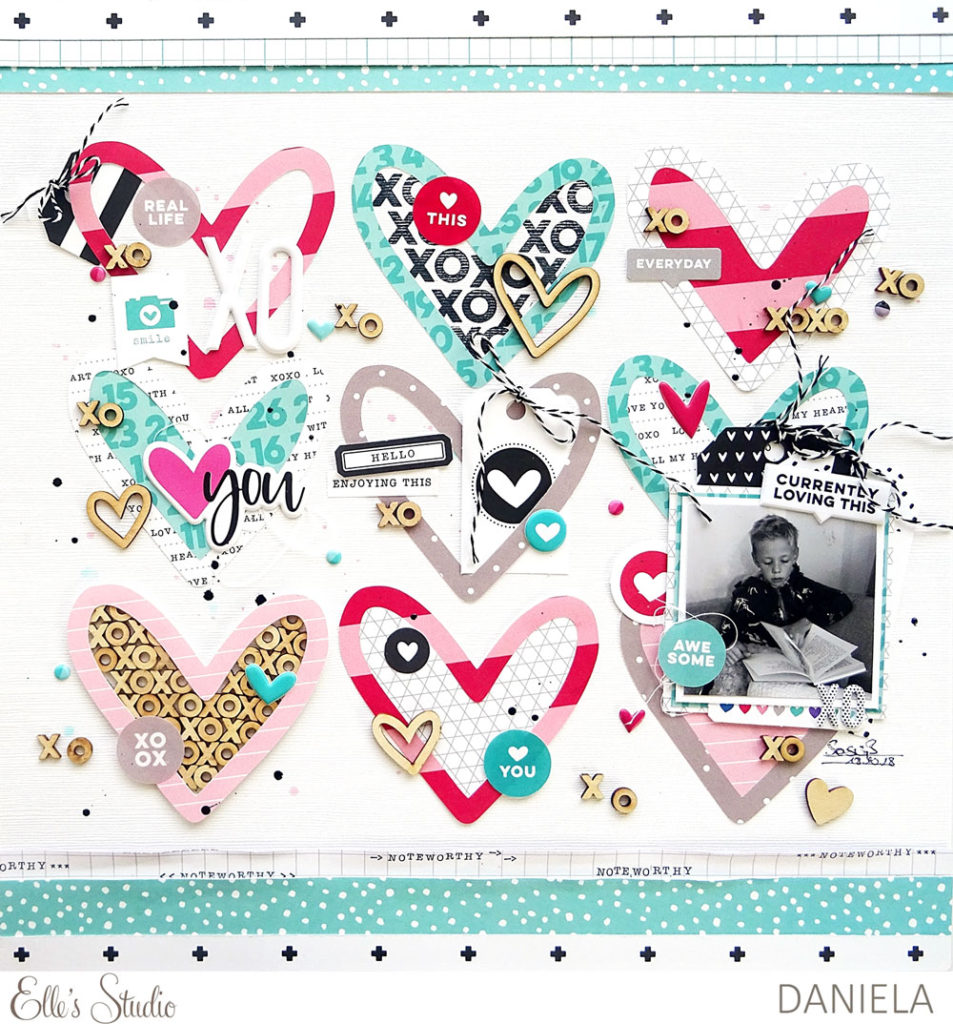
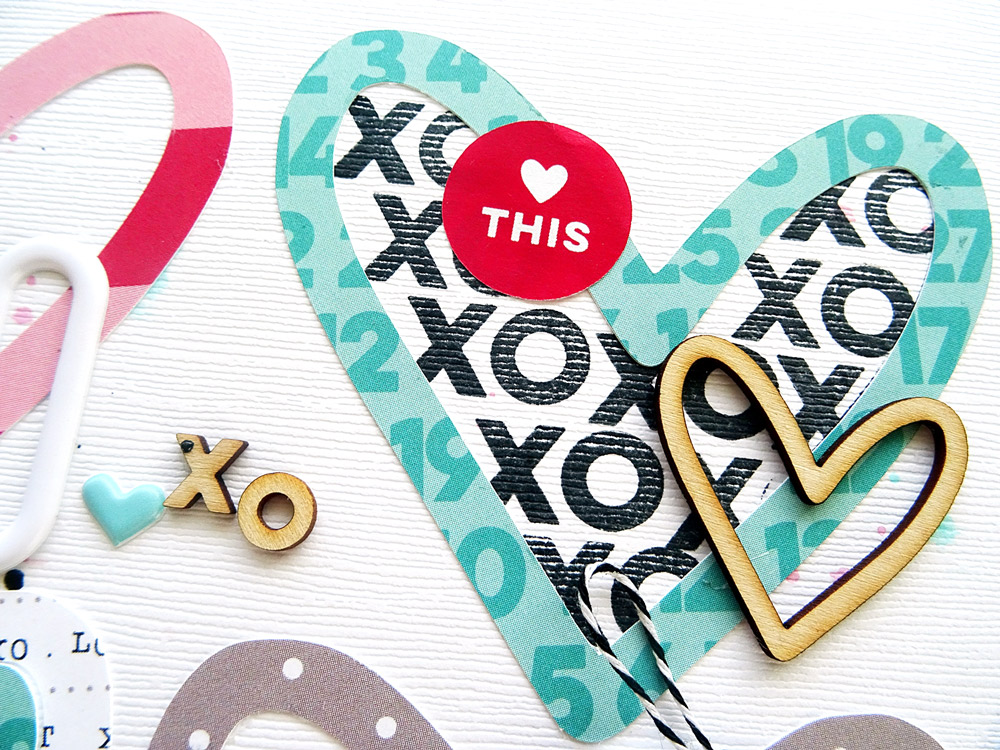
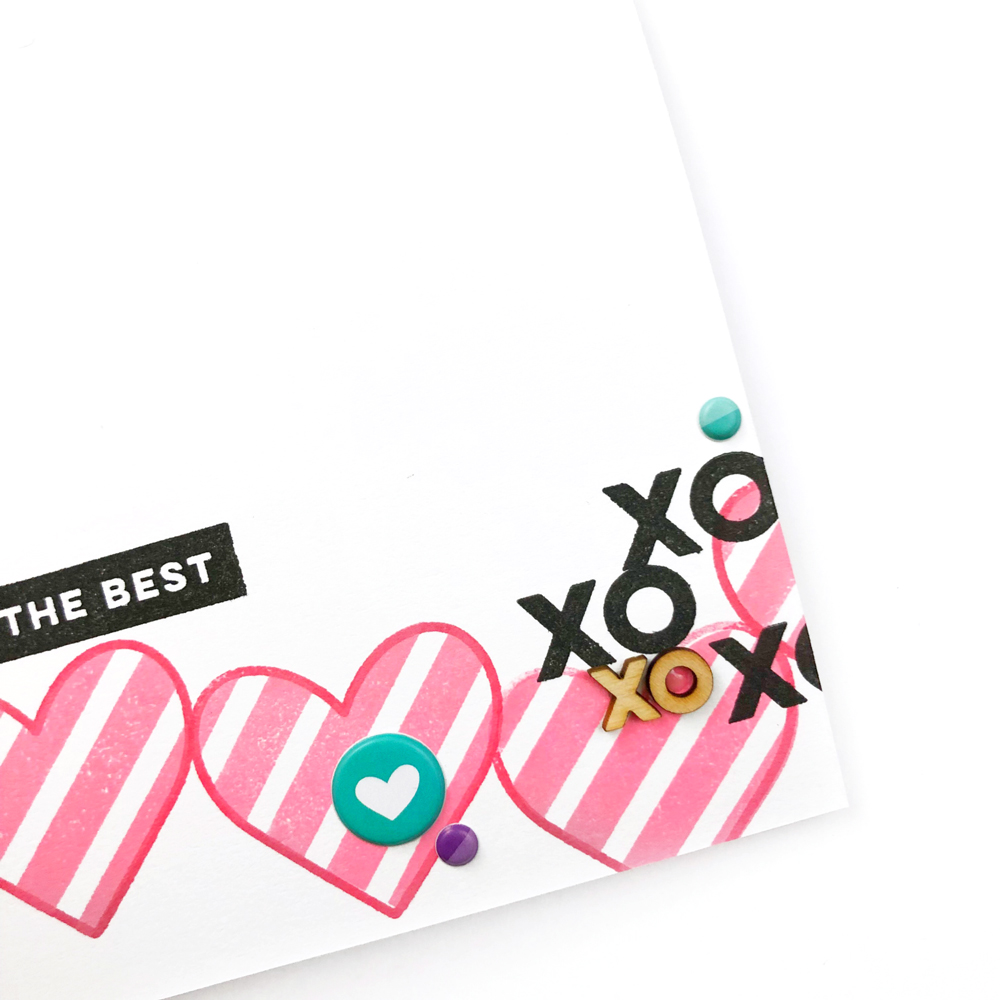
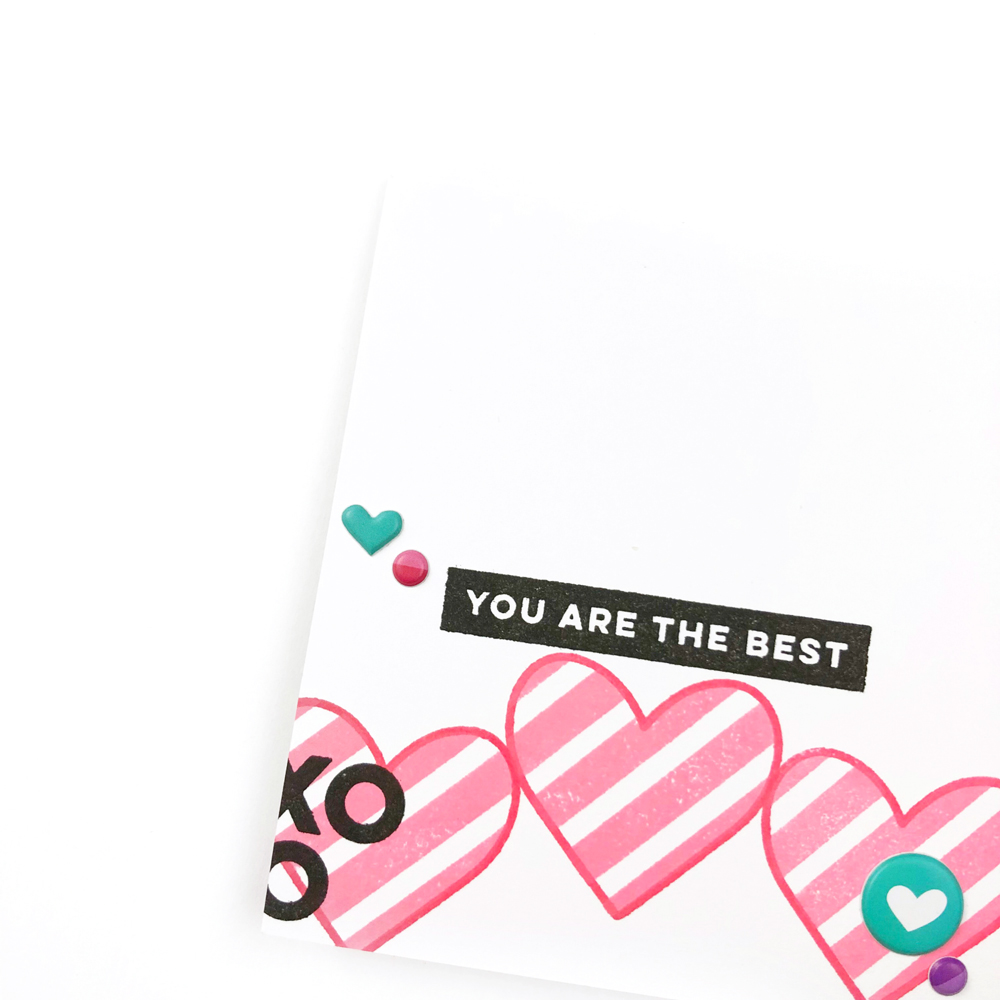
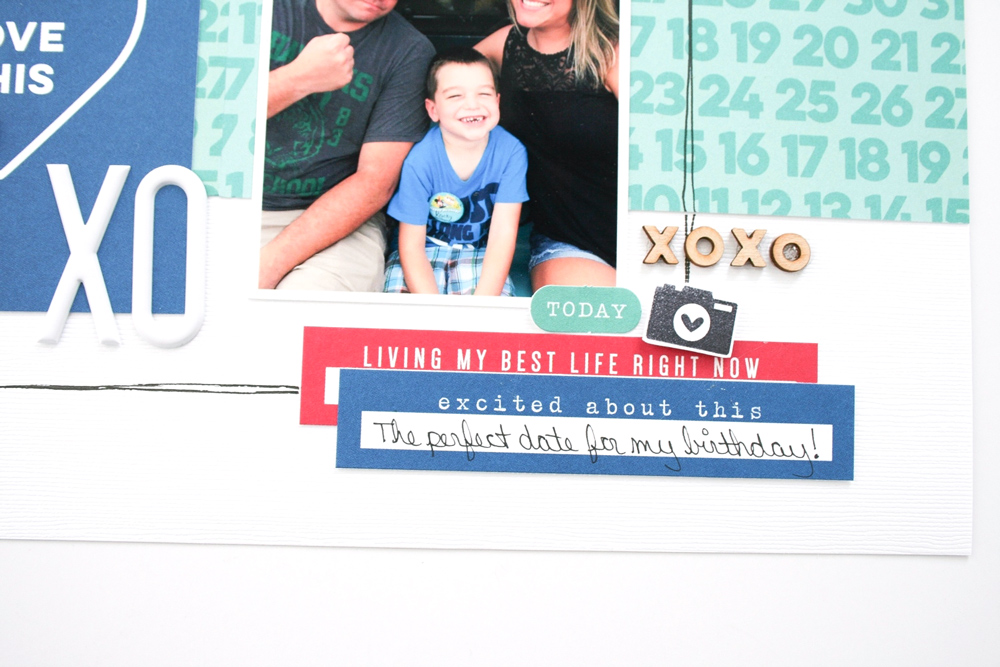
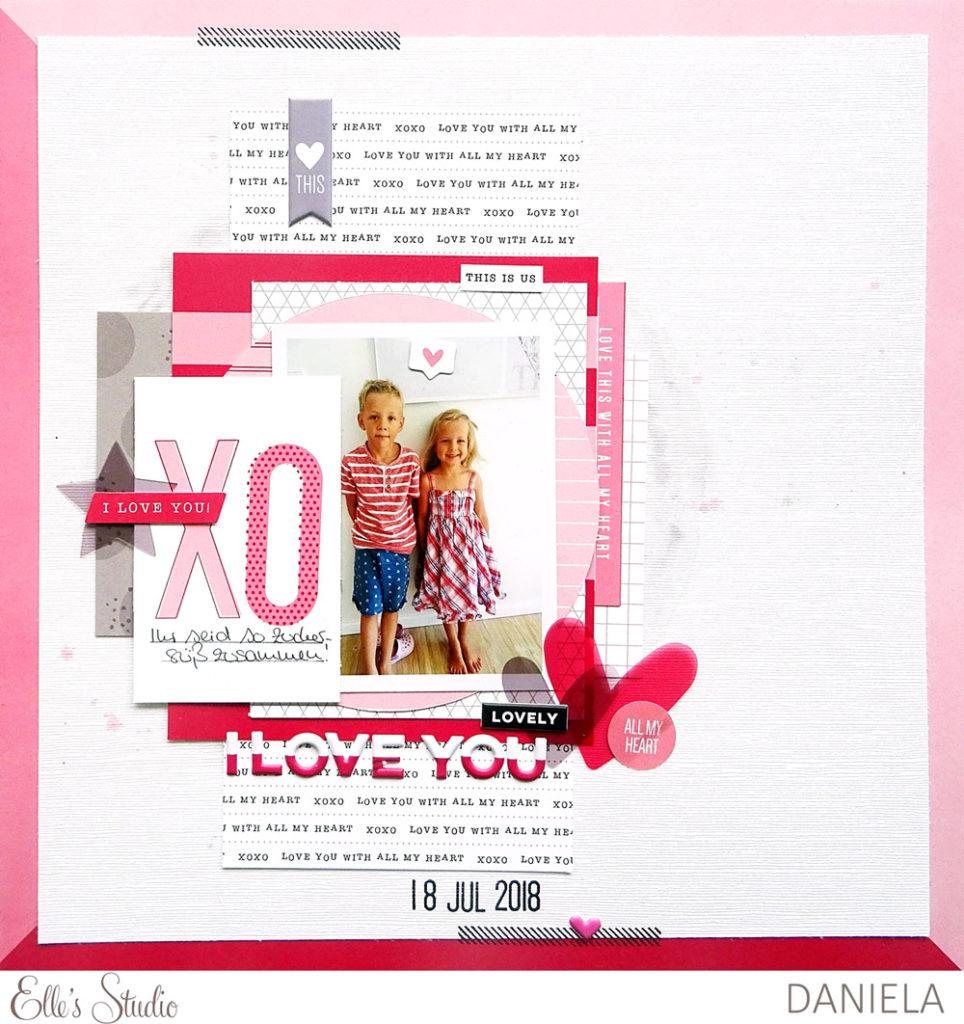
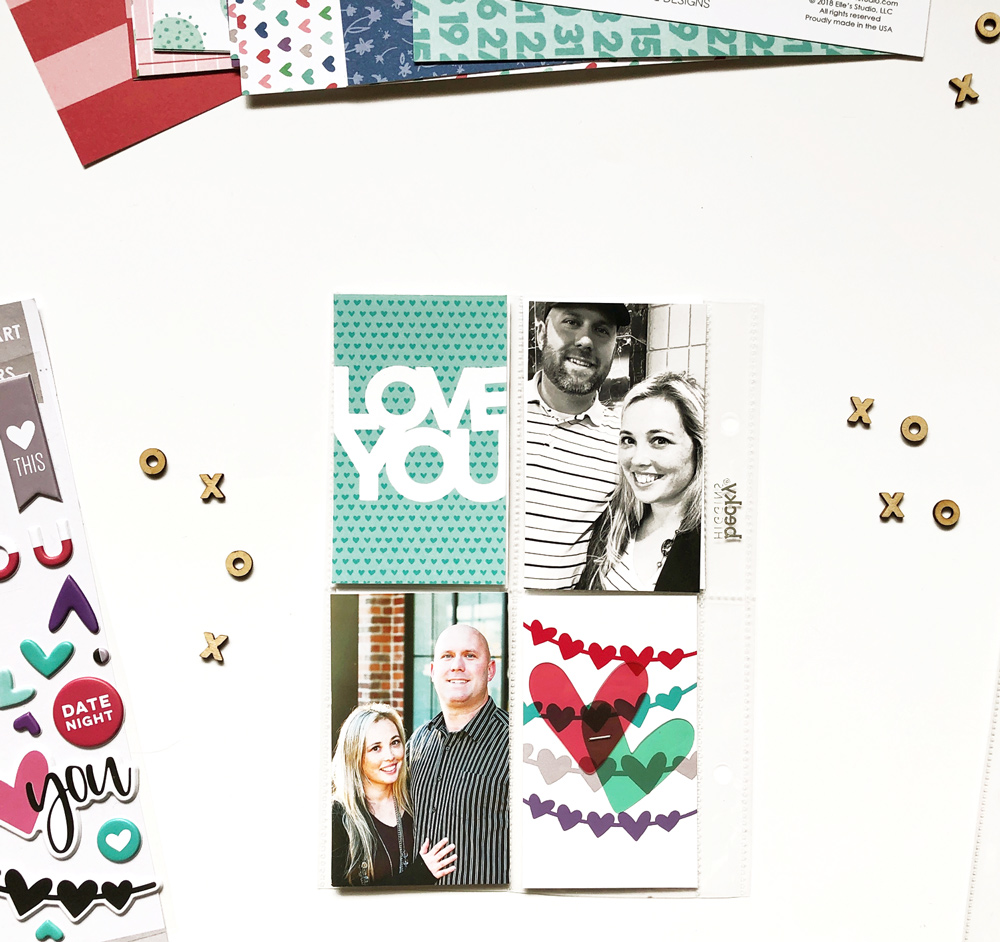
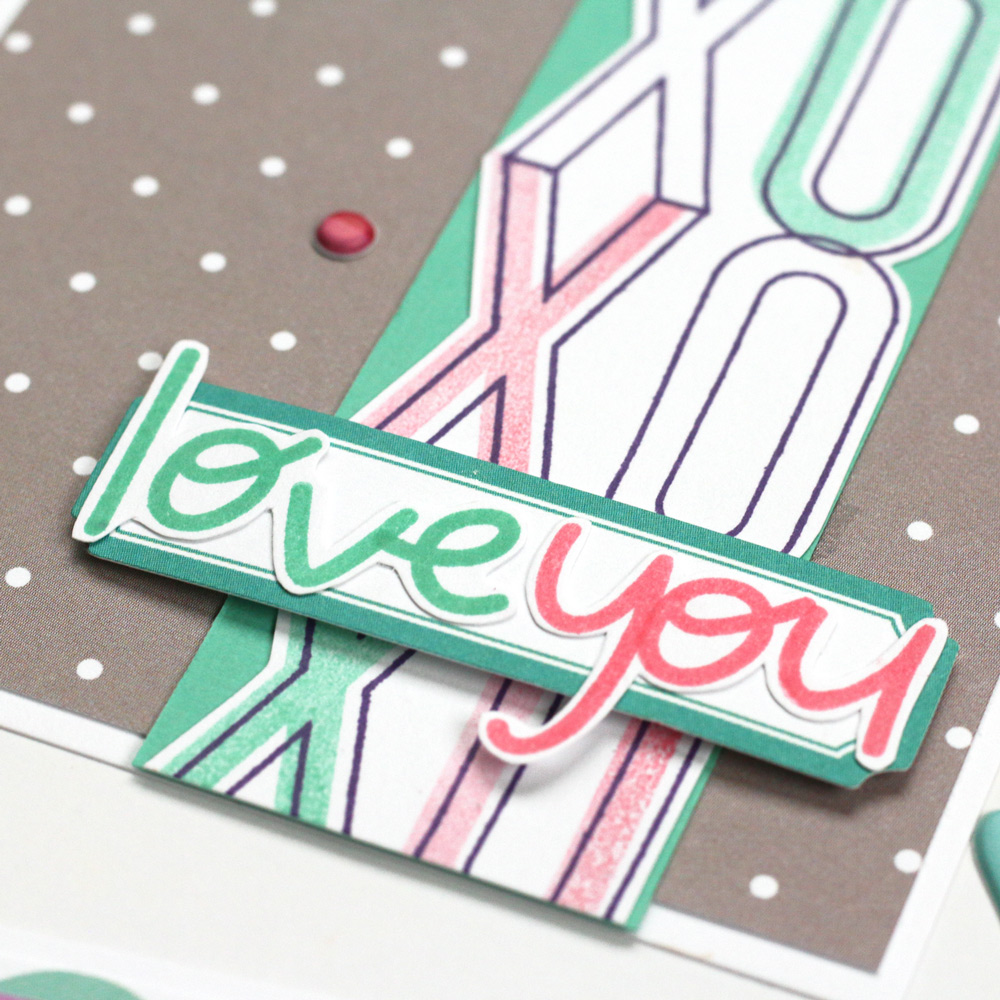
This card was so much fun to put together! I started off by stamping a column of “XO’s” using the Large Jane Alphabet Outline Stamp onto smooth, white cardstock, then I offset stamped the Solid Jane Alphabet X’s and O’s using teal and pink ink. I fussy cut my column and backed it with some teal cardstock, before adhering to my gray polka dot background from the All My Heart 6 x 6 Paper Stack. I topped the column with a label from the January 2019 Kit and added the Chloe stamped and fussy-cut “love you” sentiment to the top. Three small dots from the Sweetheart Puffy Stickers finished off the card.

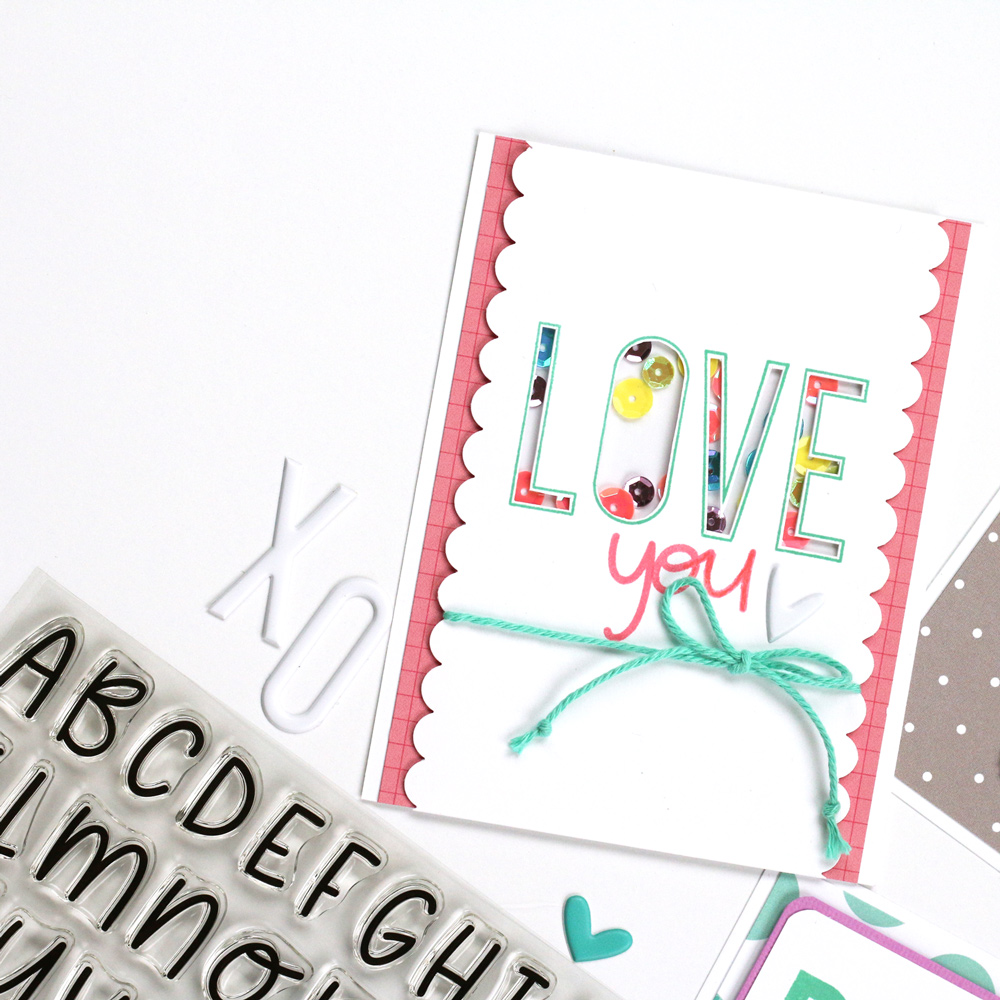
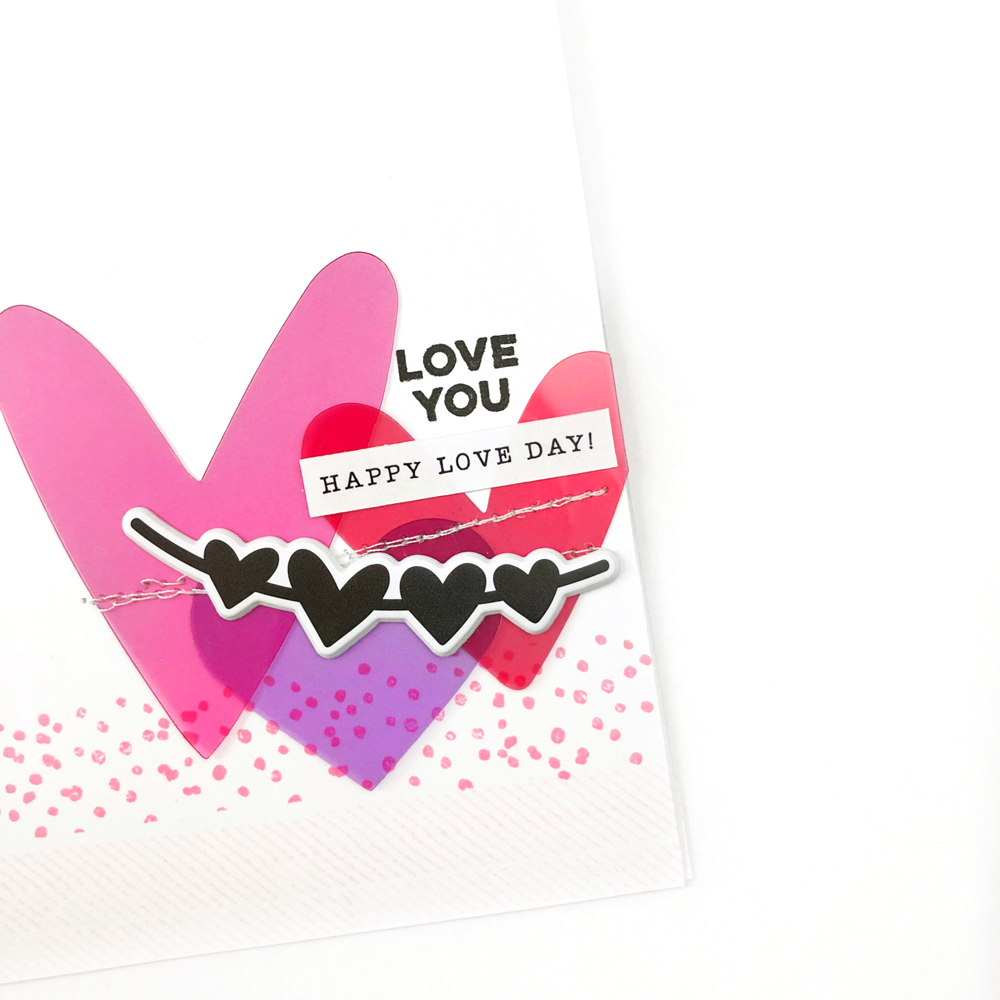
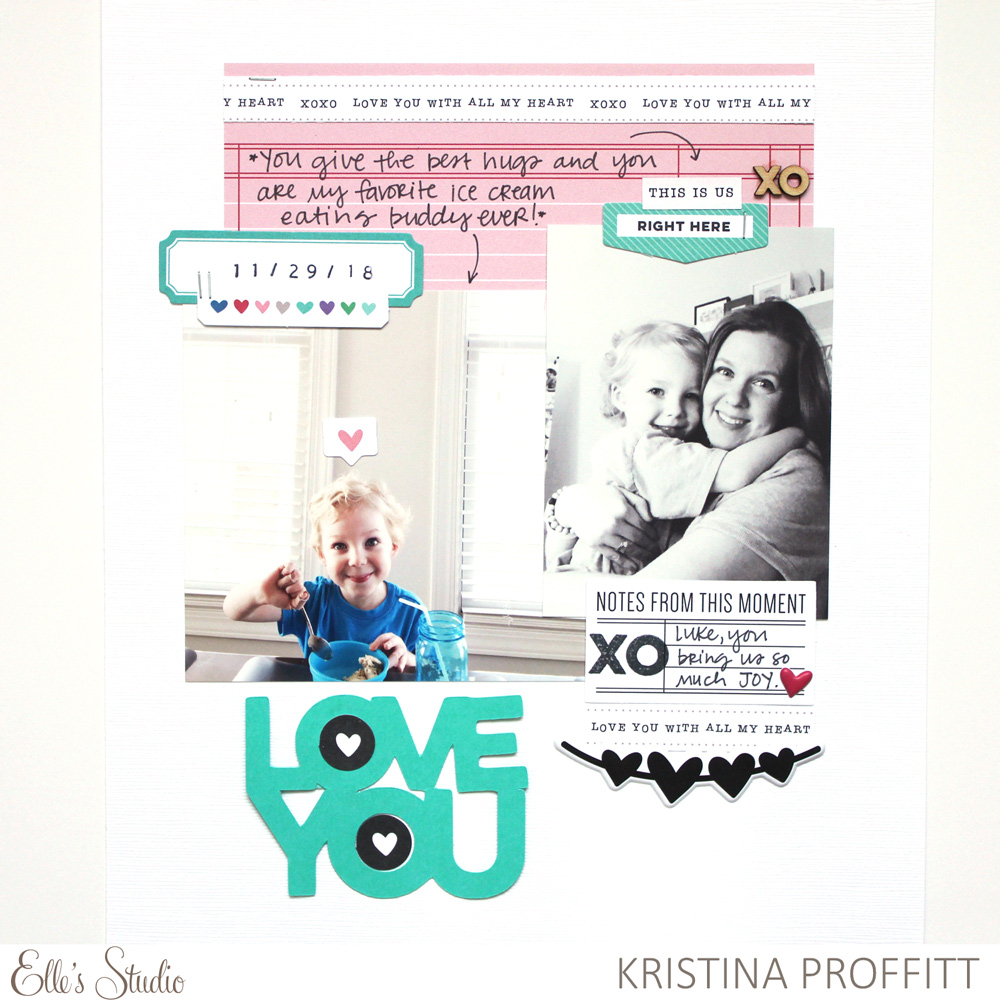
This card may be the most time-consuming in the trio that I’m sharing today, but it only takes minutes to create. After stamping “love” onto my white cardstock background using the Large Jane Alphabet Outline Stamp, I cut out the center of the letters using a craft knife. I then used a border punch to add a scalloped border to the edges, being sure that my “love” word was centered. Next, I added acetate to the back of the word before stamping “you” in pink ink using the Chloe Alphabet Stamp. I then tied teal twine around this cardstock piece. On my white card front, I added small strips of the pink grid paper from the All My Heart 6 x 6 Paper Stack to the sides. After adding dimensional adhesive to the back of my cardstock around the word “love” and in each corner. I placed a few sequins on my card front and laid the “love you” piece on top, being sure that the dimensional adhesive made a good seal around the sequins. The only thing left to add was the white puffy heart!

I hope I’ve inspired you to play with the Jane and Chloe Alphabet Stamps to create some lovely Valentines for the ones that you love this month! Thanks for stopping by!

The Highlights of 2018 Mini Album with Jennifer McMurtrey

Hello Elle’s Studio friends! To say I’m excited to share my first blog post as a member of the 2019 Elle’s Studio Design Team would be an understatement! Just know that I’m super excited and we’ll leave it at that. 

Let’s talk about social media and using it for memory keeping—I love that having these apps allows me to keep a running history of my life. Whenever I need to remember a date or find a specific photo, I scroll through my timeline or feed to get the information. Since it would be impossible for me to scrapbook every one of these photos, I decided to create a mini album highlighting my favorite memories from each month of 2018.

List of products: Pink Acrylic Album, January 2019 Kit, January 2019 Digital Cut File, January Labels, So Loved Shipping Tags, January Blank Label Stickers, Heart and Star Acetate Die Cuts, XO Wood Confetti, Linked Wood Veneer Hearts, Wood Veneer Hearts, Round Months of the Year Wood Veneer, All My Heart 6 x 6 Paper Stack, Happy Heart Stamp, Title Builder Stamp, Here and Now Stamp, Large Jane Number Stamp, Large Jane Alphabet Stamp – Outline, Noteworthy Puffy Stickers

Creating the cover took a little bit of time because I was gluing so many small pieces with the XO Wood Confetti to the Pink Acrylic Album. To make this a bit easier, I placed all of the x’s and o’s within the Linked Wood Veneer Hearts and covered the entire area with washi tape. Next, I slowly peeled the tape back with all of the confetti attached. Doing this allowed me to put glue on all of the pieces at once and then stick them back down in one fell swoop. To ensure everything stayed where I wanted it, I left the tape on until the glue was dry.

With each of my 12 photos printed, I went about creating the pages of the album. Each month is identified using the Round Months of the Year Wood Veneer pieces. These provided me with a simple and consistent way to label each page.

I kept the journaling to a minimum and let the pictures speak for themselves. Each page is single-sided to keep the album simple and is embellished with bits from the January Kit and add-ons. You’ll also find the hearts and heart banner die cuts from the January 2019 Digital Cut File on various pages. I love adding cut files to my projects to give them that extra bit of oomph. 

When I am scrapbooking, I try not to sugar coat anything because I want the stories to be a true reflection of the event. The picture of my kids not wanting their picture taken is a prime example. While the photo isn’t the best, it records the day perfectly.

When using the kits, I love trying to find new or different uses for the 3″ x 4″ and 4″ x 6″ journaling tags. Don’t be afraid to cut them up to fit your needs, just as I’ve done on several pages in the album. 

Another fun trick is to attach one of the 3″ x 4″ journaling tags to a smaller piece of patterned paper to create a uniquely sized page in the album. With the November page, I did just that and used “Hello” from Title Builder Stamp on the bottom half of the card. I love the peek-a-boo effect it creates with the next, and final, page of the album.

I hope my album will provide the inspiration you need to get those photos printed and your memories recorded!

It has been so inspiring to see all the projects created with the January 2019 Kit. Please be sure to share your projects with us in the Elle’s Studio Facebook Group or on Instagram using the hashtag #EllesStudio!

Thank you for stopping by today and I hope you are inspired to create!!

Travel Treats Documented with Nathalie Leonelli

The greatest thing about our monthly kits is that they are versatile for year-round use, with a range of colors and themes that can match up to your memories month to month. Today, design team member Nathalie Leonelli is with us to share how she documented a summer memory using our January kit and add-ons. Let’s take a look at how it turned out!

I work on recording my summer travels pretty much year round but I especially enjoy doing so during those winter months! I love that the January kit and extras inspired me to create this new spread in my traveler’s notebook:

Supplies | January 2019 Kit, Sweetheart Puffy Stickers, Hazel Alphabet Stickers – Light Purple, Navy Puffy Alphabet Stickers, Heart and Star Acetate Die Cuts, All My Heart 6 x 6 Paper Stack, Mini Dated Stamp

When working in pockets, I feel somewhat limited with the layering, so I had a blast adding layers here, using a mix of patterned papers, die-cuts, journaling tags and acetate embellishments.

The Heart and Star Acetate Die Cuts have been rocking my world this month. They are awesome for layering and I wanted to show you how to play with the see-through aspect by adding elements both behind and on top of them. Don’t you love the result?

I had two photos for my left page and I placed them on the inner edge leaving room for a vertical title. I used two contrasting alphabet stickers: the light purple Hazel Alphabet Stickers and Navy Puffy Alphabet Stickers, and decided to not center them perfectly, reflecting a bit of the layered look of the opposite page.

The final touches were made to balance out the colors between the two sides; with a strip of color here, an extra die-cut there and a few puffy dots. Take a look at the pages once I put them in my (deconstructed) traveler’s notebook:

Whether you are working with summer photos or more recent ones, I hope to have inspired you to use your January Kit and extras in your traveler’s notebook or other type of mini albums. When you do, let loose and have fun with layers!

Happy Hearts with Daniela

Design team member Daniela always creates layouts full of color and texture, and the project she is sharing today is no exception, created with our January Kit and add-ons! Let’s take a look!

Hi there, it’s Daniela again and I’m so excited to share another layout today. I’m still totally crazy about the All My Heart 6 x 6 Paper Stack, so I created a layout using the January 2019 Kit and extras. There are so many embellishments this month and I used lots of them on my page!

First, I worked with the January 2019 Digital Cut File to cut hearts from the 6 x 6 papers which I placed on white cardstock. In a second step, I added lots of details on top of the hearts.

Supplies: January 2019 Kit, January 2019 Digital Cut File, So Loved Shipping Tags, Happiness Found Stickers, Sweetheart Puffy Stickers, Black and White Polka Dot Puffy Alphabet Stickers, XO Wood Confetti, Wood Veneer Hearts, Happy Heart Stamp, All My Heart 6 x 6 Paper Stack, Noteworthy – 12 x 12 paper collection

I embellished the hearts in different ways. Some of them are filled with paper or wood veneers, for others I used stickers. I filled the heart below with “X’s” and “O’s” from the Happy Heart Stamp and placed a Wood Veneer Heart and a Happiness Found circle sticker on top of it to combine different textures.

The wood veneers and Sweetheart Puffy Stickers add lots of dimension to the page. I also included twine here and there and black color splashes for even more texture.

I like the combination of black and white photos with fresh, bold colors. The color scheme for this page is pink, turquoise and grey, with black and white. These colors occur all over the page. This way, the layout doesn’t become too wild, although there are so many different items on the page.

All of the elements on my page are overlapping here and there to create lots of dimension and texture! I hope you like my page. If you have left overs from your January kit and add-ons, go and grab them and start scrapping!

Thanks for stopping by and have a great day!

Simple and Sweet Valentines with Ashley Laura

Valentine’s cards, or even an everyday card to show someone how much you care do not have to be difficult, and Ashley Laura is here to show us how just a bit of stamping and embellishments from our January release can make someone we love feel special!

Hi y’all! I’m Ashley, a Texas girl, with a love for family and an obsession with paper. I am so excited to be sharing my first blog post for Elle’s Studio with y’all! Today I have two greeting cards that can be given as Valentine’s cards or just simple as a way to say, “I love you!”

Supplies | January 2019 KitHappiness Found StickersHeart and Star Acetate Die Cuts, XO Wood ConfettiSweetheart Puffy Stickers, Happy Heart Stamp

I began with two pieces of white cardstock cut and folded down to 4.25″ x 5.5″. I love using white cardstock as my base so that it gives me plenty of options as I began to stamp and embellish. 

I used the Happy Heart Stamp to add some hearts and texture to the background of the cards. I embellished with the XO Wood Confetti, Heart Acetate Die Cuts, and Sweetheart Puffy Stickers

I love adding pops of black to colorful pieces. I stuck to the same type of color-scheme for both cards, so it was super easy to pull my black ink and add a little extra touch!

If you’re not much of a card-maker, this project is for you! These were incredibly simple to make! Grab the Happy Heart Stamp and a few little embellishments and get going. 

Have you created a card using our January Kit and add-ons? Share it with us on Instagram using the hashtag #EllesStudio!

“Inspired By” with Wendy Antenucci

Our Design Team Inspiration posts are always full of fresh inspiration, and even if you do not use the exact same products as the original, you can still be inspired by the design, color scheme or product usage to create something truly your own! Let’s take a look at how Wendy Antenucci did that using the December Inspiration Gallery.

Hello everyone, it’s Wendy here today with a layout inspired by Laura Wonsik’s fun grid:

I was so captured by Laura’s title built into her grid style layout that I just had to document my story using this same approach.

Supplies | January 2019 Kit, January Labels, Happy Heart Stamp, Sweetheart Puffy Stickers, All My Heart 6 x 6 Paper Stack, Black Puffy Alphabet Stickers, Wood Veneer Confetti, Wood Veneer Hearts

To begin my grid style layout I chose two pictures (from the many) that told this part of the story and two tags that brought in colors and sentiments that furthered my story.  Love was an important part of the story that I wanted to tell, but it was also my son’s birthday, so I chose the number paper from the All My Heart 6 x 6 Paper Stack to add to the theme of the page.

I chose the “who, what, where, when, why” 3″ x 4″ tag from the January 2019 Kit that allowed me to write the details of his day down and also provided me the space for the title, which I added using the Black Puffy Alphabet Stickers. Even though the title didn’t fit into my grid, I chose to use Laura’s inspiration and go for the black, bold letters. My little boy told everyone his birthday was “August two second,” which became my title for the page.  

To add in more “boy” colors, I chose the blue and red January Labels to add a few masculine touches and to tell more about my story.  I couldn’t resist the Wood Veneer Confetti—such a cute little touch don’t you think?

I love the hand drawn lines that Laura used on her layout, so I also did the same to contain my story to one part of the page. It gives a bold statement, much like my little boy!  I brought in some black touches to further the masculinity of the page in a visual triangle to cause your eyes to stay focused on the main part of the story. A few fun Sweetheart Puffy Stickers added the final touch.

What memories do you need to tell, both good and bad?  Take the time today, be inspired and write your story, it can never be lost that way!

Documenting the Now with Guest Heba Alsibai

Today is Heba Alsibai’s last post as our guest designer, and we have loved seeing what she created with our January Kit and add-ons. From her everyday layout to her fun and energetic traveler’s notebook spread, she has made the most of the beautiful and versatile January products. Let’s take a look at what she created this week!

Hello everyone! It’s Heba Alsibai here, sharing my third and last project here on the Elle’s Studio blog. It is definitely bitter sweet, but I enjoyed creating these projects and sharing them with you.

Supplies | January 2019 Kit, January Labels, Love You Acrylic, Puffy Heart Stickers – Spring Mix, Mini Dated Stamp

I’m playing catch up on some of my pocket pages today, using bits and pieces from the Elle Studio January release, working on documenting week 48 in my Project Life album from 2018. I always start my pocket page by adding my photos from the week. Then I chose which journaling tags work well with my photos. Once my tags were chosen, I decided to take two of my 3″ x 4″ tags to my typewriter and type my text directly onto the card. I usually journal about a few important things that happened throughout the week, or I’ll focus on telling one story that needs to be told. 

I always use my title card to add the week and date, so I used the Mini Dated Stamp to do just that. I love this stamp set—it’s the perfect size to add the date in small spaces. Once I finished with my title card and my journaling, I started embellishing, which is definitely my favorite thing to do when working in my pocket pages! 

I purposely kept the bottom part of my 3″ x 4″ journaling tag empty because I knew I wanted to add the beautiful white Love You Acrylic under my journaling. My daughter wasn’t feeling well that week and I thought the acrylic piece was fitting. Because I used such a bold and large embellishment, I decided to keep the rest of my embellishments simple. 

To finish up my layout I used some of the January Kit die cuts to add a little color to my spread. Matching January Labels and Puffy Heart Stickers brought the spread together and made it cohesive. I cut the bottom of the “today” half circle from one of the January Kit journaling tags then slipped my photo underneath it, to look like I added an embellishment. This is a great way to use your tags and make them work for your layout. 

I love how this spread came together so quickly by using the Elle’s Studio January 2019 Kit and add-ons, which made it easy. I hope I was able to inspire you to use your monthly kits in your pocket pages. Thank you for welcoming me here on the blog as the Elle’s Studio January guest designer!

Hello everyone! My name is Heba Alsibai, I’m a mother of two teenagers and a wife to a wonderful husband. My husband and I own a small medical supply company that keeps my husband traveling and me working from home. I love that I’m able to work from home, I get to see my kids go off to school and welcome them home when they get back. I live in the beautiful state of Georgia far from the hustle and bustle of Atlanta. I am a total homebody that loves to read and loves to watch reruns of Friends. But by far my favorite thing to do is crafting. I also love sharing my crafty projects on my YouTube channel and Instagram. 

Back in 2001 When I gave birth to my first born, I started keeping a little scrapbook album for him. It wasn’t your traditional scrapbook album. It was more of journaling milestones and documenting pictures with dates. I also did the same with my daughter once she was born. But in 2007 I moved to Dubai and became friends with my next-door neighbor who was an avid scrapbooker. Once she shared her beautiful scrapbooking layouts with me, I was hooked. 

My crafting journey started with creating traditional scrapbooking layout. But in 2011 I discovered pocket pages and completely switch to pocket page memory keeping. Documenting our daily stories in pockets became something that I enjoyed because of the ease and simplicity of it. 

But in 2016 I found traveler’s notebooks and I was so excited to be able to be creative outside the pocket again. I didn’t know how much I missed creating layouts until I found traveler’s notebooks. What I love the most about these notebooks is the size. They are small, so you never feel overwhelmed or intimidated by the size. Not like a traditional scrapbooking layouts. You can create a spread in no time at all. Some of my favorite memories were done in a traveler’s notebook. 

With that said, no matter what format I use, as long as I’m crafting I’m happy :). I’m excited to share some of my layouts with you, using the Elle Studio January kit and embellishments!

We are so grateful to Heba for sharing her beautiful projects with us this month. Be sure to follow her work on her YouTube feed and on Instagram. Thank you so much for inspiring us, Heba!

January Design Team Inspiration: Volume Three

We hope that you have loved creating with your January kit and add-ons, but just in case you needed more inspiration to pull out your kit contents and a few treasured photos, we know that these ten projects will leave you feeling ready to create!

Love You by Kristina Proffitt – supplies used | January 2019 Kit, January 2019 Digital Cut FileHappiness Found StickersSweetheart Puffy Stickers, XO Wood Confetti, All My Heart 6 x 6 Paper StackHappy Heart Stamp

XO by Sabrina Poole – supplies used | January 2019 KitXO Wood ConfettiHappiness Found StickersHeart and Star Acetate Die Cuts, Sweetheart Puffy Stickers, All My Heart 6 x 6 Paper Stack

Happiness Found traveler’s notebook spread by Patricia Roebuck – supplies used | January 2019 KitJanuary Labels, So Loved Shipping TagsHappiness Found StickersHeart and Star Acetate Die CutsSweetheart Puffy StickersAll My Heart 6 x 6 Paper Stack, Happy Heart Stamp, Noted Stamp, Jane Alphabet StampMini Dated Stamp, Noteworthy Epoxy StickersNoteworthy 12 x 12 Paper Collection

A Year of Loving You by Melissa Mann – supplies used | January 2019 KitXOXO Pages Digital Cut FileJanuary LabelsHazel Alphabet Stickers – White, Black and White Polka Dot Puffy Alphabet Stickers, All My Heart 6 x 6 Paper StackHappy Heart Stamp

First Tooth by Candace Perkins – supplies used | January 2019 KitSo Loved Shipping TagsSweetheart Puffy StickersAll My Heart 6 x 6 Paper Stack, Large Jane Alphabet Stamp – Outline, Large Jane Alphabet Stamp  Solid, Here and Now Stamp

Love You by Daniela – supplies used | January 2019 Kit, January LabelsHappiness Found Stickers, Heart and Star Acetate Die CutsSweetheart Puffy StickersMini Dated StampHappy Heart StampAll My Heart 6 x 6 Paper Stack, Noteworthy 6 x 6 Paper StackNoteworthy 12 x 12 Paper Collection

November pocket page spread by Nathalie Leonelli – supplies used | January 2019 KitJanuary Blank Label StickersHappiness Found Stickers, Heart and Star Acetate Die CutsSweetheart Puffy StickersBlack and White Polka Dot Puffy Alphabet Stickers, Black and White Polka Dot Puffy Alphabet StickersAll My Heart 6 x 6 Paper Stack

Aunt Goals by Tracey Fox – supplies used | January 2019 KitJanuary LabelsHappiness Found StickersSweetheart Puffy StickersBlack and White Polka Dot Puffy Alphabet Stickers, Sweetheart Puffy Stickers, XO Wood Confetti, Wood Veneer Hearts, All My Heart 6 x 6 Paper Stack, Happy Heart Stamp

Zoo Crew pocket page by Meghann Andrew – supplies used | January 2019 KitJanuary Blank Label Stickers, Happiness Found StickersSweetheart Puffy StickersBlack and White Polka Dot Puffy Alphabet StickersHeart and Star Acetate Die CutsWood Veneer Hearts, Happy Heart Stamp

Making Waves by Suzanna Lee – supplies used | January 2019 KitJanuary Print and Cut Labels, January 2019 Digital Cut File, Love You Printables, January Labels, January Labels, Happiness Found StickersJane Alphabet Stickers – RedHeart and Star Acetate Die CutsSweetheart Puffy Stickers, Navy Puffy Alphabet StickersAll My Heart 6 x 6 Paper Stack, Happy Heart Stamp, Large Jane Alphabet Stamp – Outline, Noteworthy 12 x 12 Paper Collection

Keep watching here on our blog for even more inspiration from our team using our January 2019 kit and extras! We also want to see what YOU are creating! Share your projects with us in our Elle’s Studio Facebook Group, or on Instagram, using the hashtag #EllesStudio!

Going with a Grid with Kristina Proffitt

Hi friends! It’s Kristina here, and today I’m going to be sharing a layout with you that I created using a sketch from the From Sketch to Finish Vol. 4 Digital Class. It was so hard choosing just one layout to be inspired by, but in the end I chose to use one of the bonus sketches, Sketch #22. What really drew my eye to this sketch was the grid-like pattern that it had. I always love a good grid because it’s great for multiple photographs and for scattering embellishments on the page. I love the visual interest of the sketch and was excited to put my own spin on it.

Supplies | January Labels, So Loved Shipping Tags, Happiness Found Stickers, Sweetheart Puffy Stickers, Heart and Star Acetate Die Cuts, Wood Veneer Hearts, Round Months of the Year Wood Veneers, Large Jane Alphabet Stamp – Solid, Large Jane Number Stamp, All My Heart 6 x 6 Paper Stack

I thought this sketch would be the perfect one to use to create a fun layout of my “Top 9” Instagram photographs of 2018. I created the foundation of my 8.5″ x 11″ layout using white cardstock, and since I scrapbook in the 8.5″ x 11″ size, I changed up the grid pattern a bit from the sketch and made it tighter to condense it all to fit on my page. Whether you’re scrapbooking in the 12″ x 12″ format or another size—I love how you can take a sketch and use it to create with your own style and adaptations.

I used a tag from the So Loved Shipping Tags and adhered it to the back of one of my photographs. Then I took a piece of patterned paper from the All My Heart 6 x 6 Paper Stack, cut it to size and adhered it behind another photograph. I trimmed the ends of the patterned paper so that it also looked like a tag, too. I wanted to mimic that look both on the top left and bottom right of the layout. 

I placed all of my photographs on the cardstock base in a 3″ x 3″ grid pattern. I cut strips of patterned paper from the All My Heart 6 x 6 Paper Stack and adhered it to the top and bottom of the layout, once again for repetition. I

I loved pulling out the Large Jane Alphabet Stamps for the title. I wanted something bold at the top and that did the trick! Those stamps are SO versatile! Then I stamped the “9” from the Large Jane Number Stamp onto patterned paper (once again from the All My Heart 6 x 6 Paper Stack), cut it out and adhered it next to the stamped title. I

A simple star from the Heart and Star Acetate Die Cuts stapled next to the “9” finished the title. 

Along the bottom of the layout I cut a strip of the January Labels and added a bit of hand-journaling.I

I placed some random embellishments throughout my grid, just like the sketch. I loved adding the Round Months of the Year Wood Veneers onto some of the photographs (which were the months they were taken in) and decided to sprinkle in some Sweetheart Puffy Stickers, Happiness Found Stickers and a Wood Veneer Heart. I pulled inspiration for the different shapes from the sketch. I

Being inspired by this sketch reminded me just how fun it is to use sketches to not only stretch us creativity, but to give us a fresh and new starting point when scrapbooking. Using sketches are so much fun and if you ever feel like you’re in a creative slump, just pull out these sketches and you’ll be creating in no time.

Be sure to purchase From Sketch to Finish Vol. 4 Digital Class on sale this week! It’s full of amazing sketches and inspiration, friends! 

Have a great day!

We’d love to see how you are inspired by our sketches—fifty alone in the From Sketch to Finish Vol. 4 Digital Class, not to mention the rest of our amazing class lineup on your projects! Take advantage of our class sale today!

A Year of Love with Sabrina Poole

Documenting the ones we love is such an important thing to do, but when it is someone truly special to us, why stop at one page to document that relationship? Design team member Sabrina Poole is sharing how she’s documenting a whole year in her relationship today using the January Kit and extras. Let’s take a look:

Hi scrappy friends! This is Sabrina, and I’m excited to share my first project as a design team member. I used the January kit and the extras to create this year-in-a-review of my husband and I for 2018. The January Kit and extras are full of love and perfect for documenting all things related to love. 

Supplies | January 2019 Kit, Love You Printables, January 2019 Digital Cut Files, January Blank Label Stickers, Happiness Found Stickers, Wood Veneer Hearts, Heart and Star Acetate Die Cuts, Sweetheart Puffy Stickers, All My Heart 6 x 6 Paper Stack

I started with a photo my son actually took of us on Thanksgiving and wound up being my absolute favorite photo of the year. I decided that would be my focal photo for the right side of the spread and added in some papers from the new All My Heart 6 x 6 Paper Stack. I love how the different sized papers and positions of the paper strips add dimension and fun to my 6″ x 8″ spread. I then added several different types of hearts for a variety of textures. This kit and the extras had plently of hearts to choose from! For this layout I choose a puffy sticker heart banner from the Sweetheart Puffy Stickers, Heart Acetate Die Cuts and two Wood Veneer Hearts.  Here is a close up of the 6″ x 8″ spread:


I changed several of my photos to black and white so they didn’t clash with the colors of the kit. It also makes the season or when the photo was takenn hard to tell. My focus remained on the documenation of my husband and I in 2018. Here is a close up of my husband and I at the beach alongside a 2″ x 2″ pocket filled with paper from the All My Heart 6 x 6 Paper Stack and topped with a gray January Blank Label Sticker, the “love” die cut from the January Kit, “Mr. Handsome” Sweetheart Puffy Sticker and Wood Veneer Heart

This year I wound up with so many great photos, that I decided to include an insert in an Instax size which is 2.25″ x 3.5″. And since the journaling tags don’t come in this size, I used digital files to make my cards. At the top, I opened the “love you” 3″ x 4″ printable tag from the Love You Printables in Photoshop Elements, and simply cropped it to 2.25″ x 3.5″. For the tag at the bottom, I made a custom tag by using the heart banner in the January 2019 Digital Cut Files. I duplicated the banner four times, then added a fill layer so I could change the color of the banners to colors from the kit. Once I had that custom tag printed, I added two Heart Acetate Die Cuts. I love how the digital files allowed me to add my creative touch. 

My year-in-review spread wound up being two 6″ x 8″ pages plus an insert. I love how this spread came together and it inspires me to document my husband and I more. Having lots of different pieces from the January Kit and extras allowed me to have so many options in putting together this spread. I had lots of fun stickers, veneer, labels, papers and digital printables to choose from. Here is a look at the full spread:

Thank you so much for looking and I hope this inspires you to use your kit and extras in a different way, and also try out the digital files!