Pocket Page Fun with the New Magical Memories Collection By Jess Forster

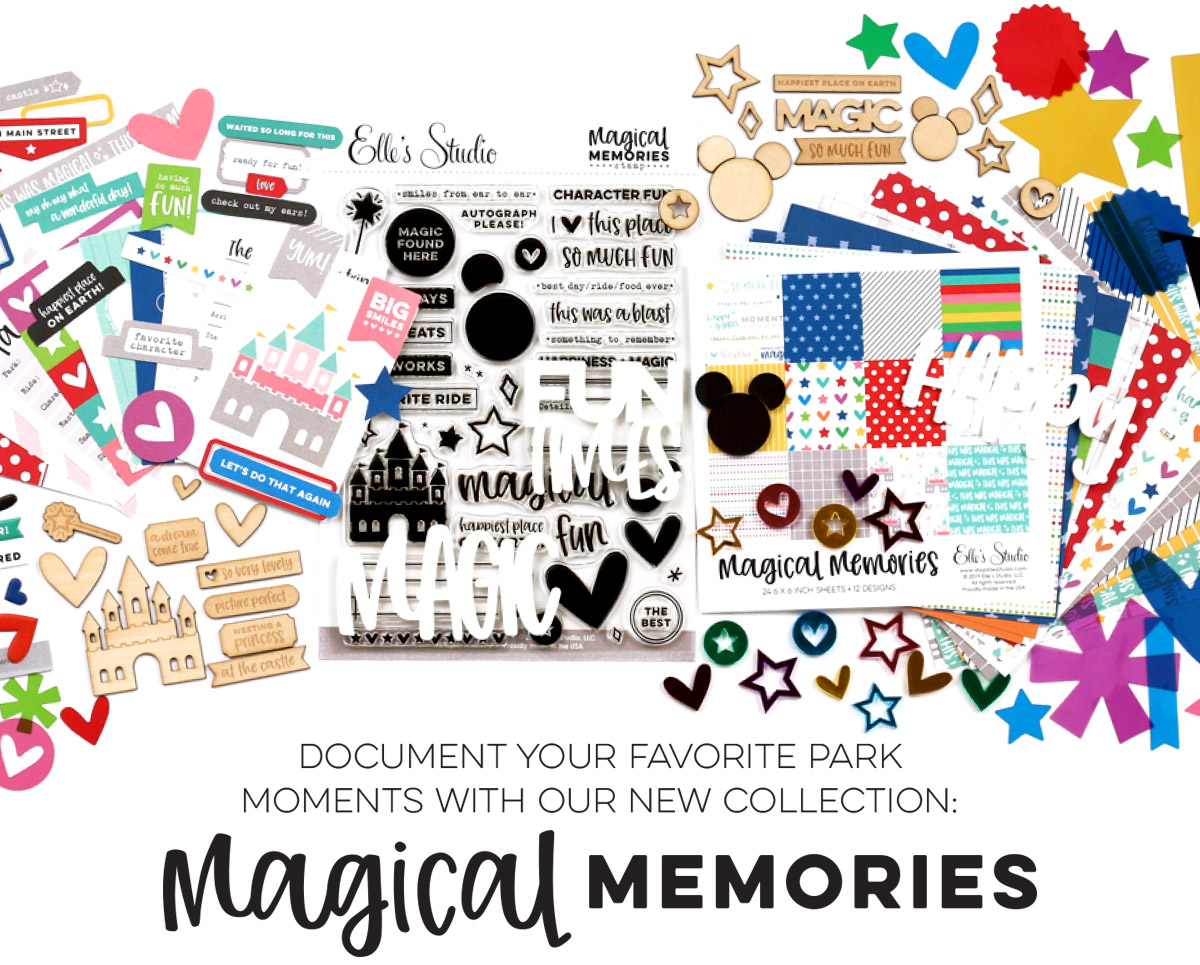
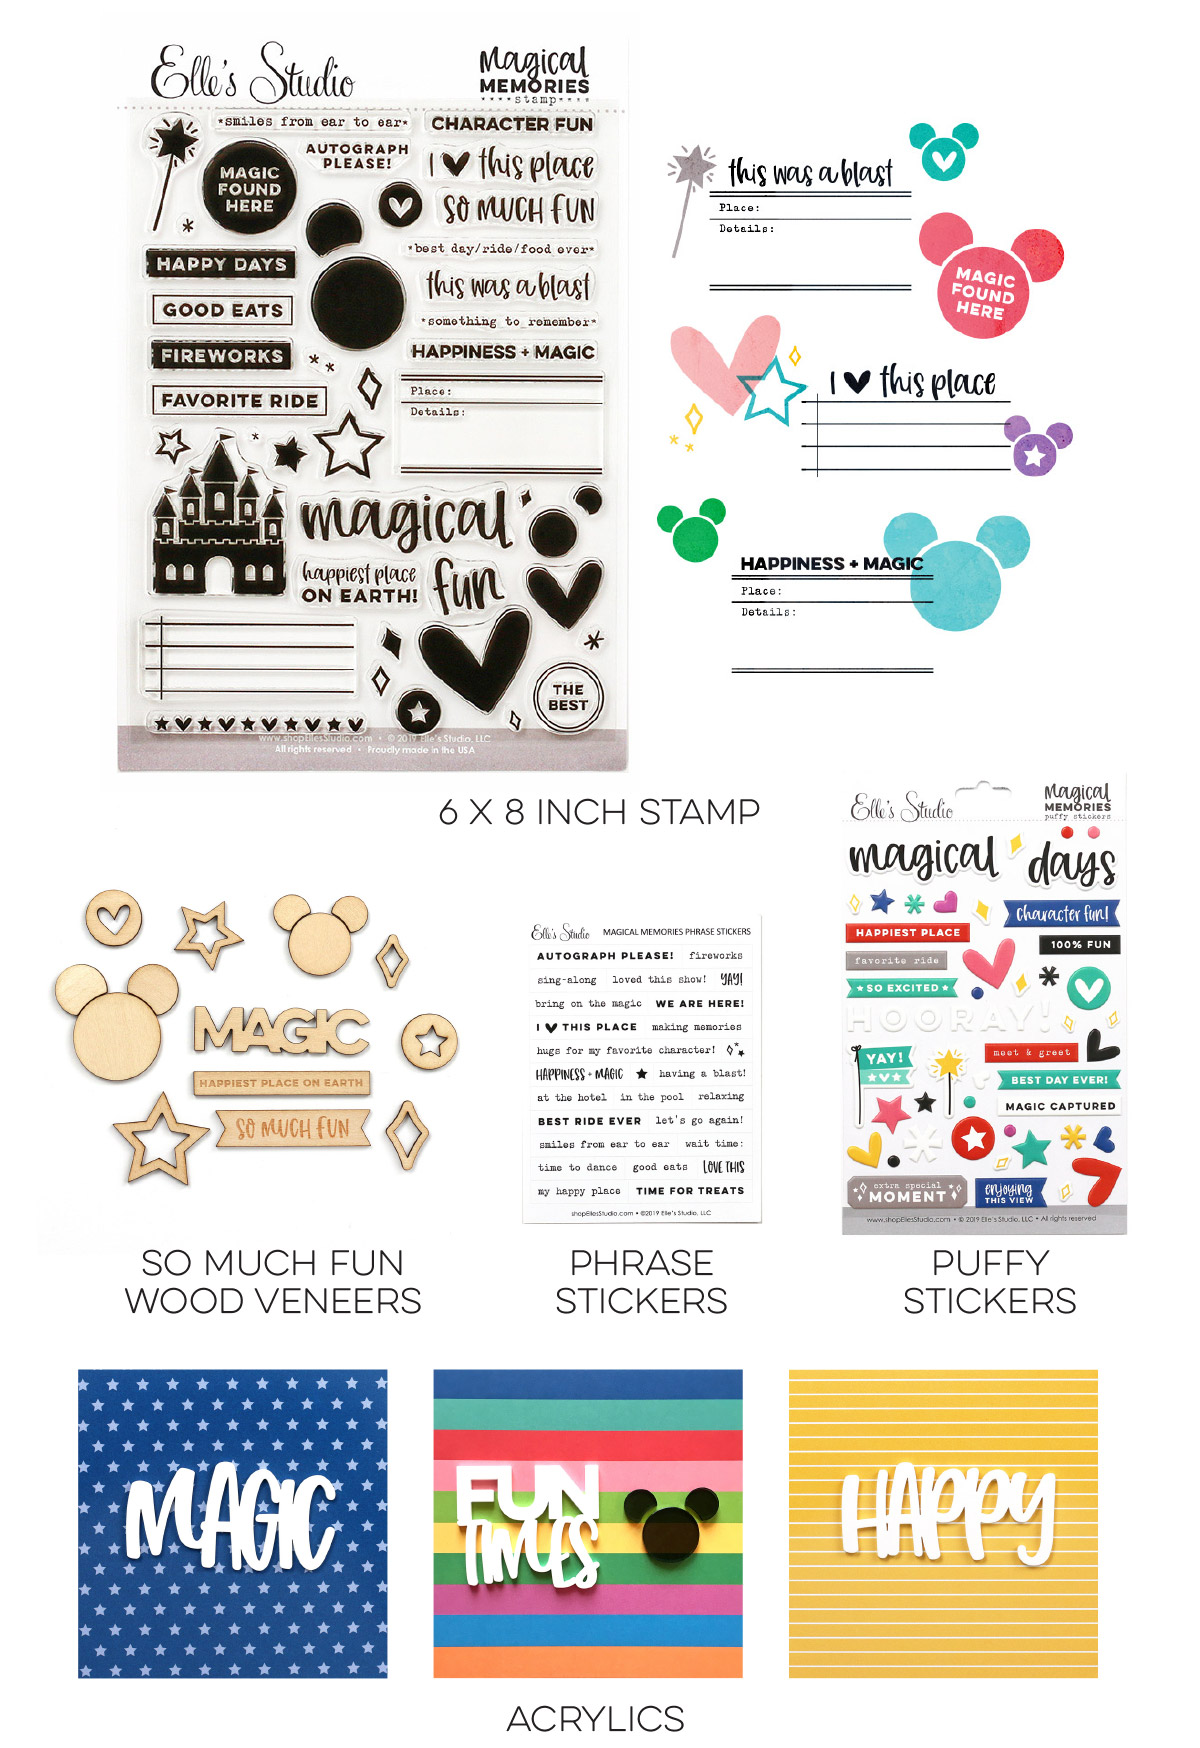
Do you have thousands of photos from your Disney adventure, but you’re not sure how to start documenting them? Grab our new Magical Memories collection and read the tips that Jess Forster is sharing with us below, along with a beautiful new pocket page spread!

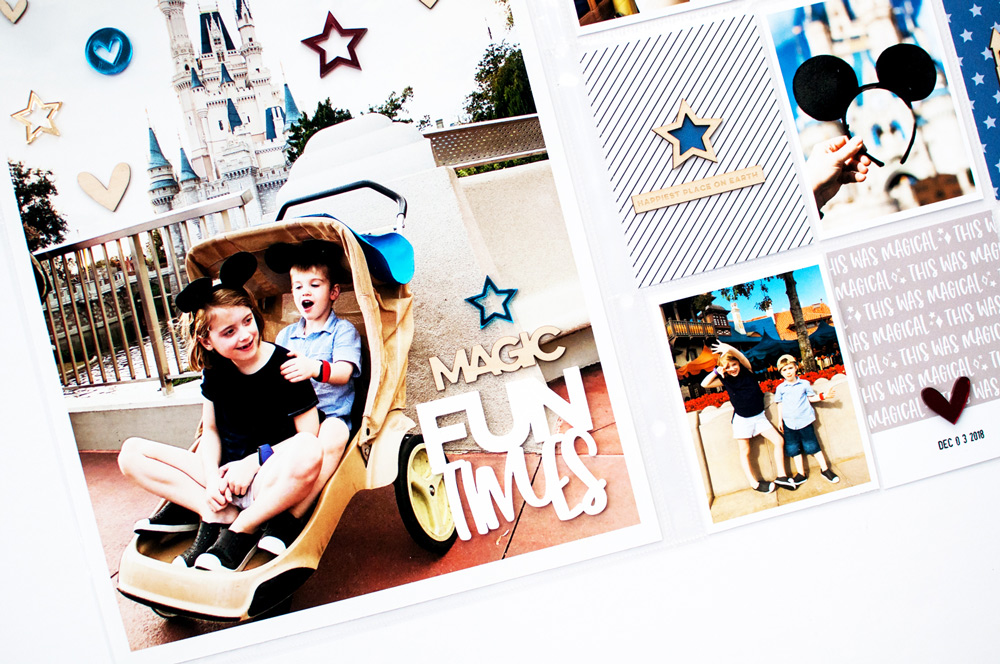
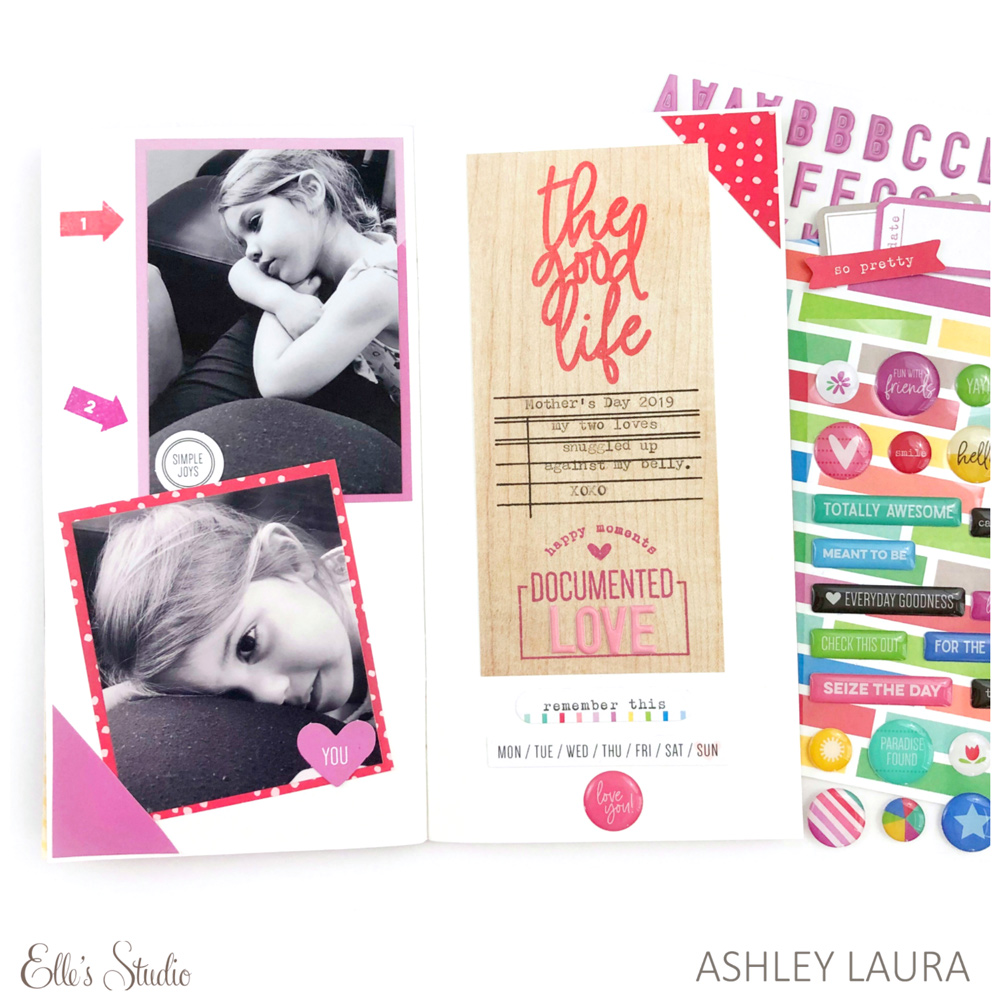
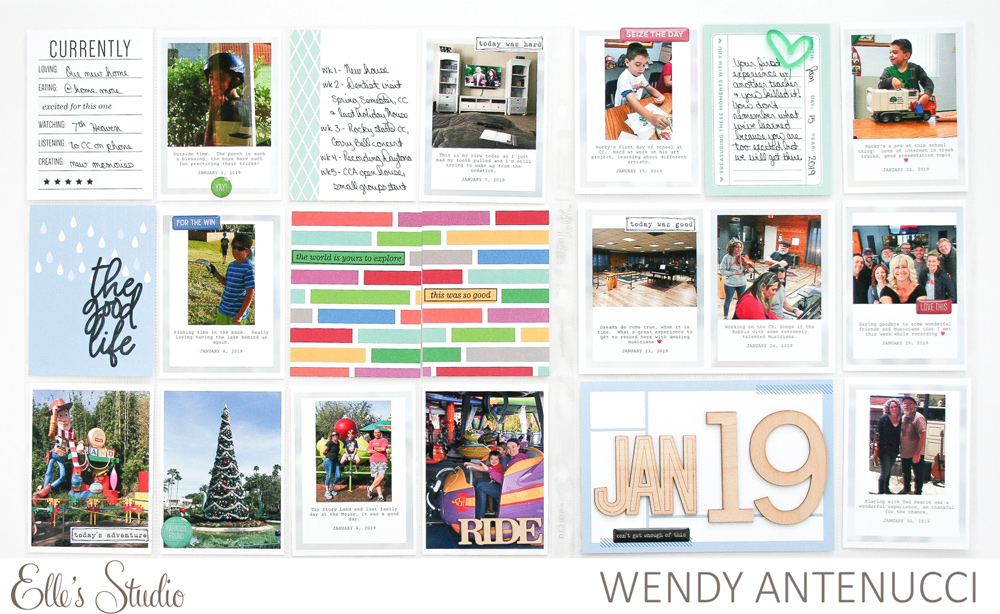
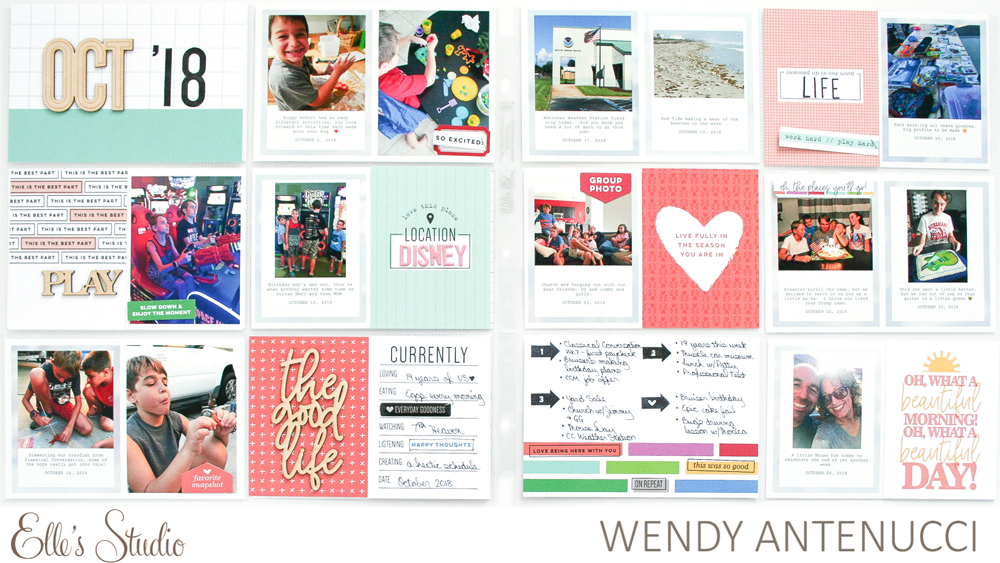
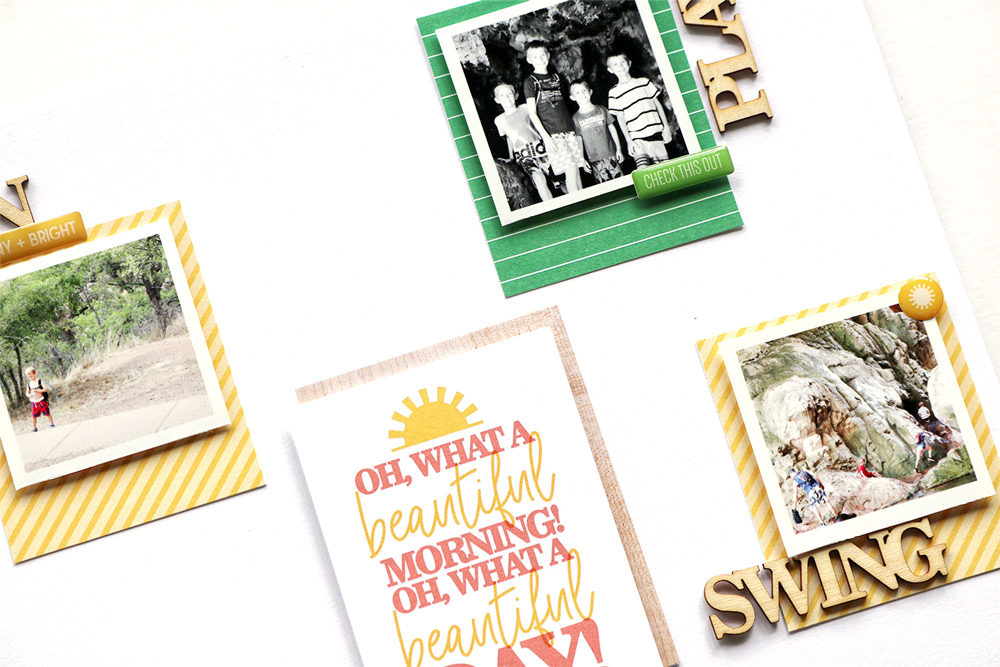
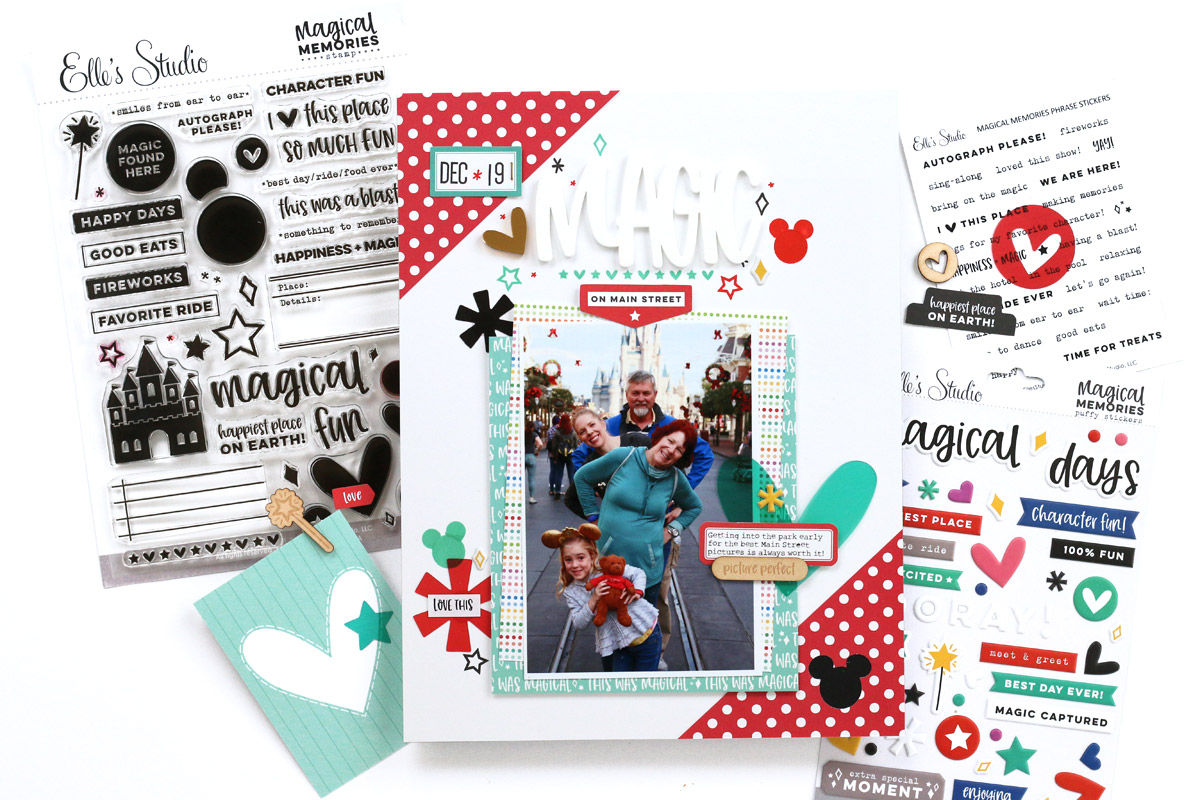
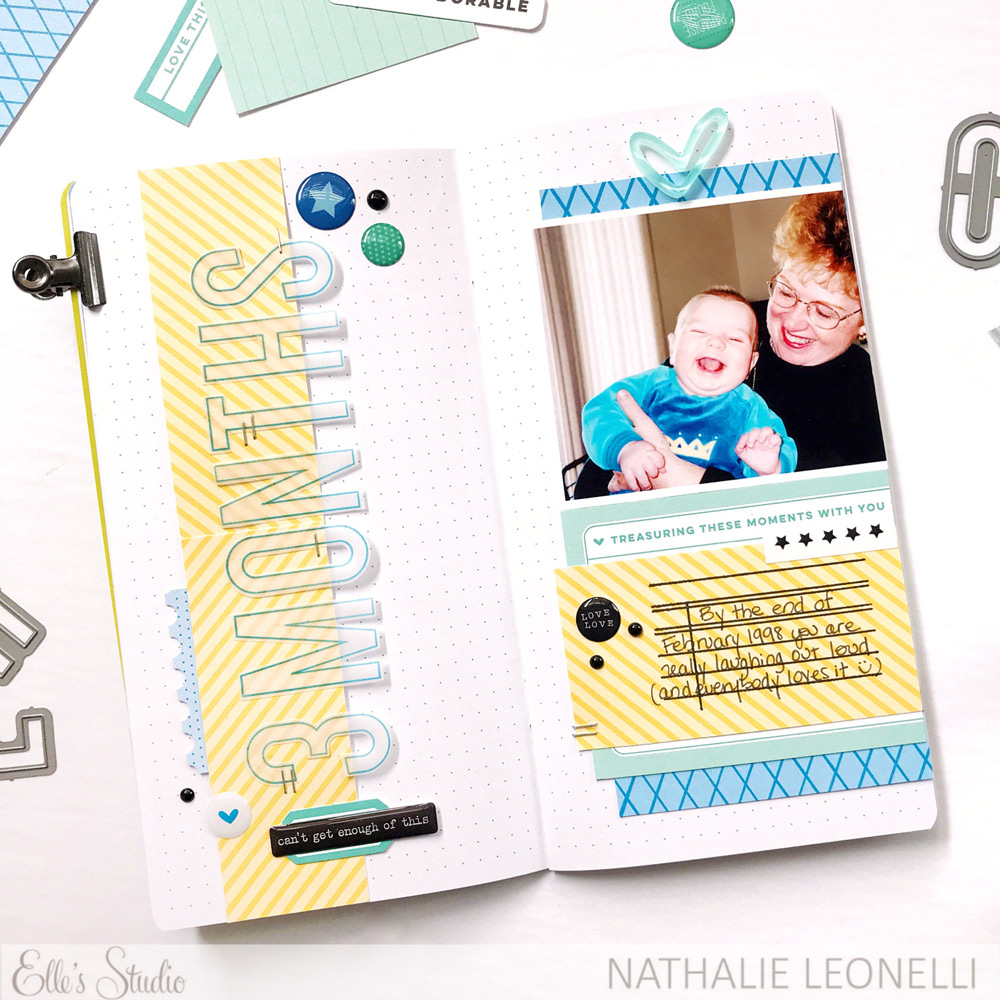
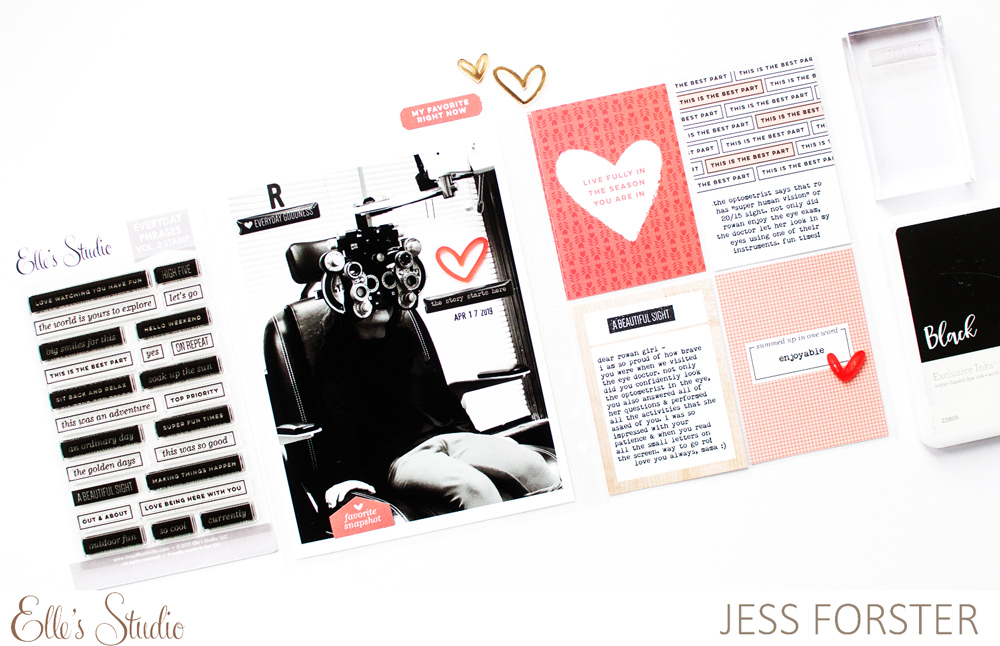
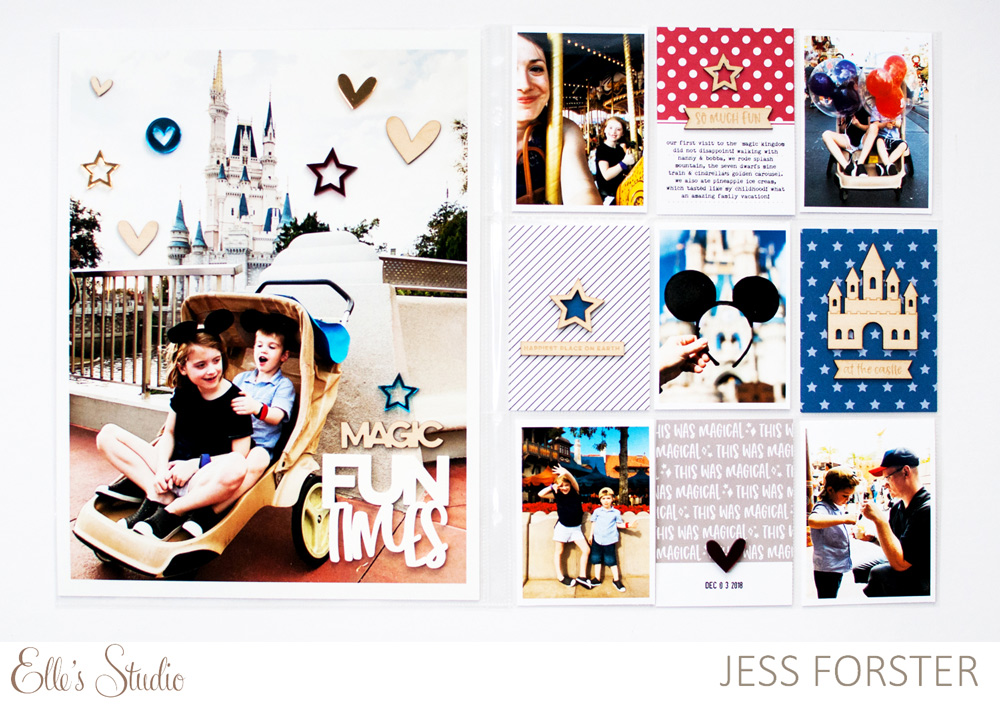
Hands up if you’re excited for the new Magical Memories release? Insert me, jumping and doing a happy dance… HA! Having just taken my kiddos to Disney World for the first time in December 2018, I was so excited to play with Elle’s new Disney-themed goodies and reliving our fun family vacation again. Here is a look at the pocket page that I created: 

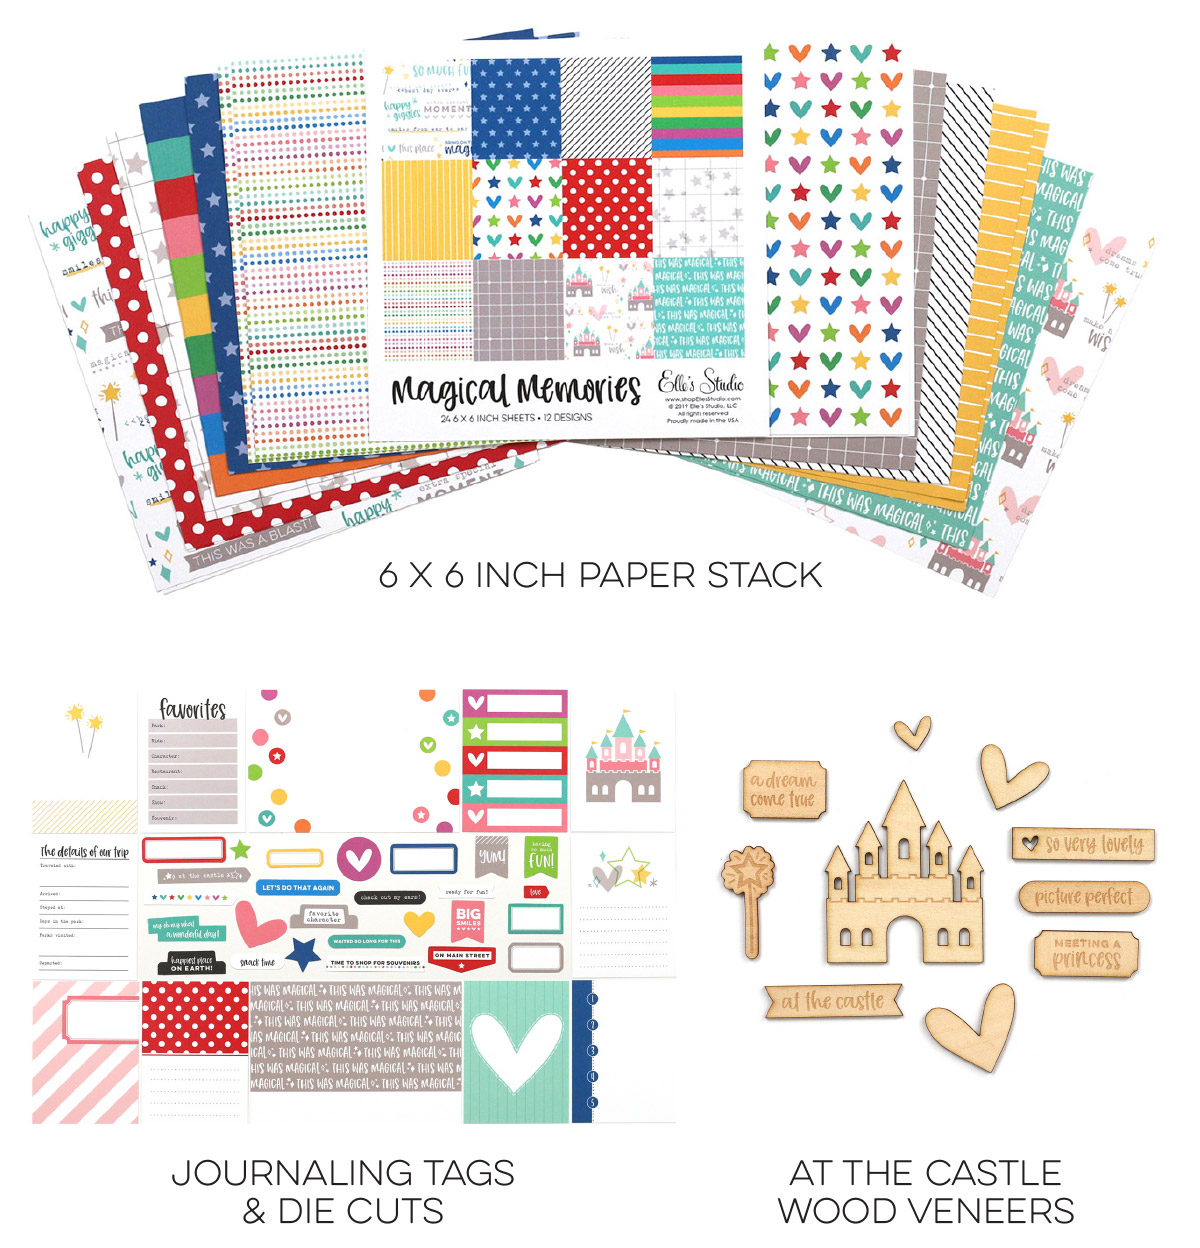
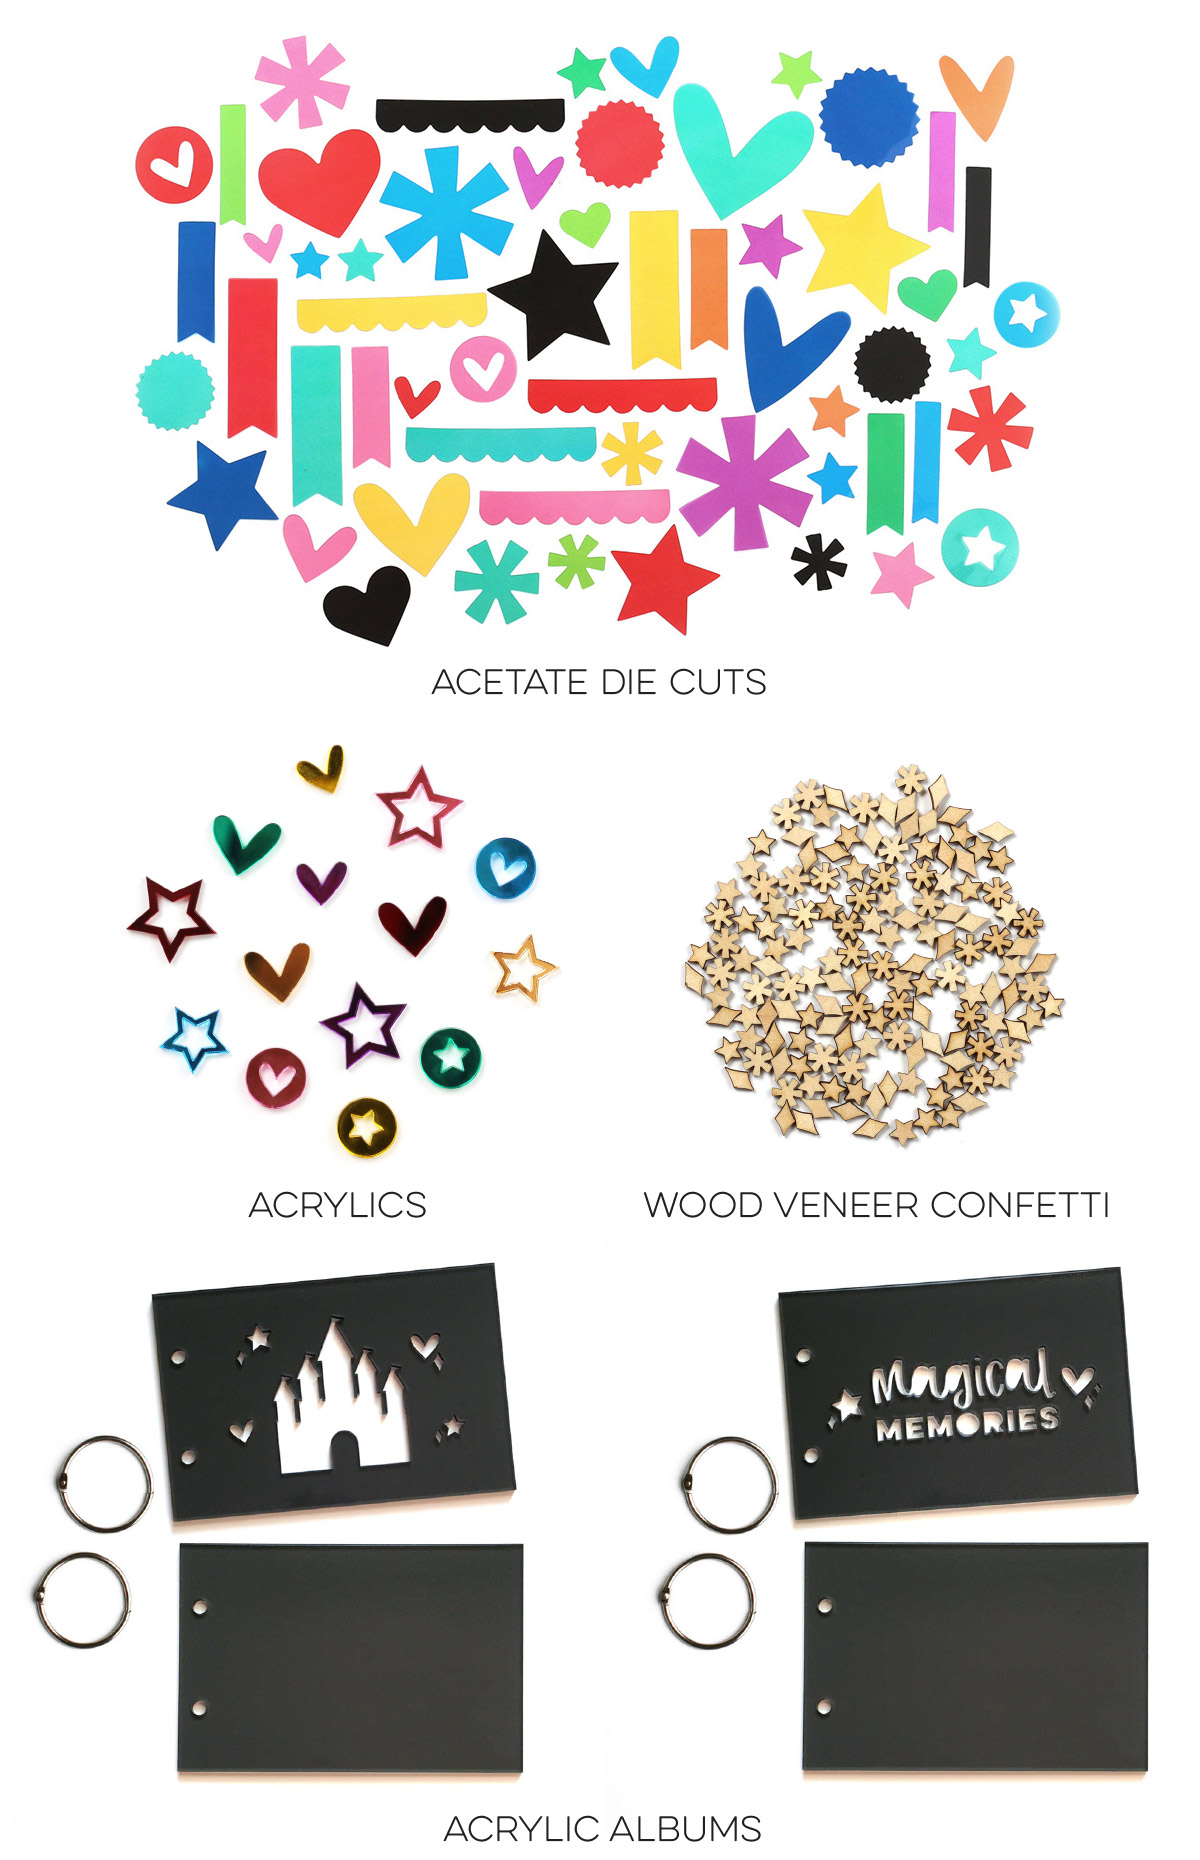
Supplies | Magical Memories Journaling Tags, Magical Memories At the Castle Wood Veneers, Magical Memories So Much Fun Wood Veneers, Magical Memories Acrylic Hearts and Stars, Magical Memories Fun Times Acrylic, Magical Memories 6 x 6 Paper Stack

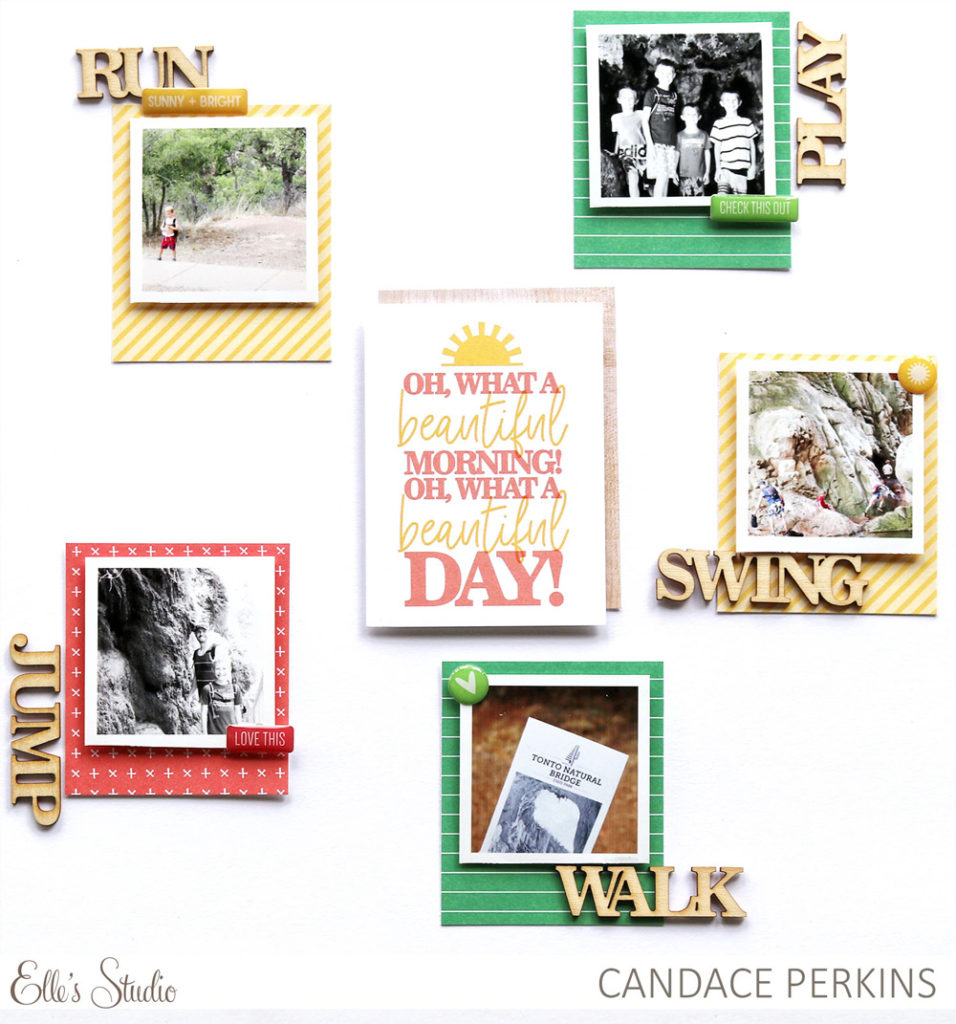
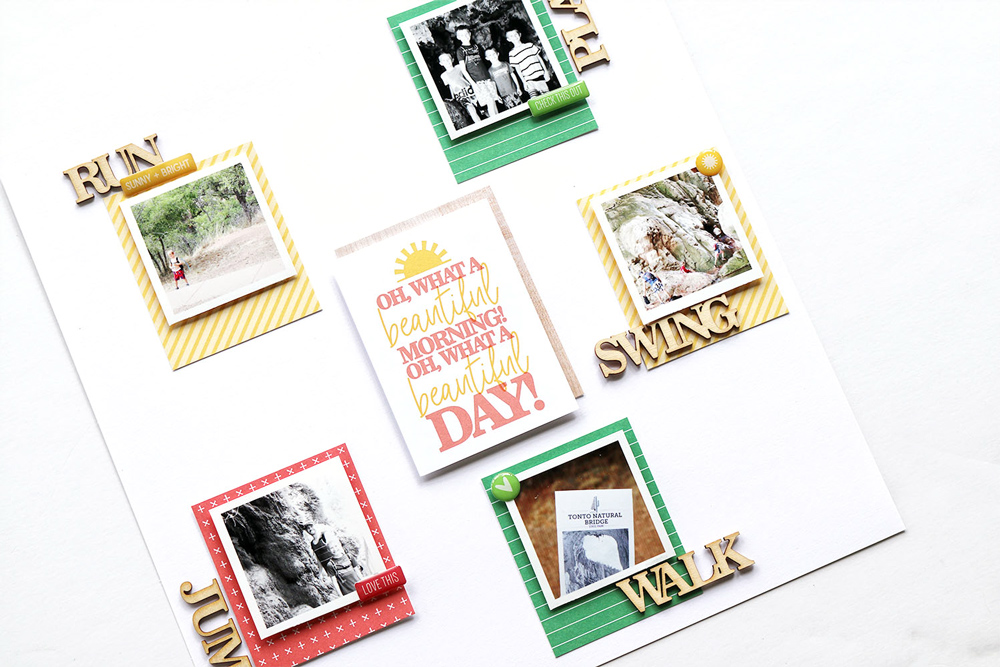
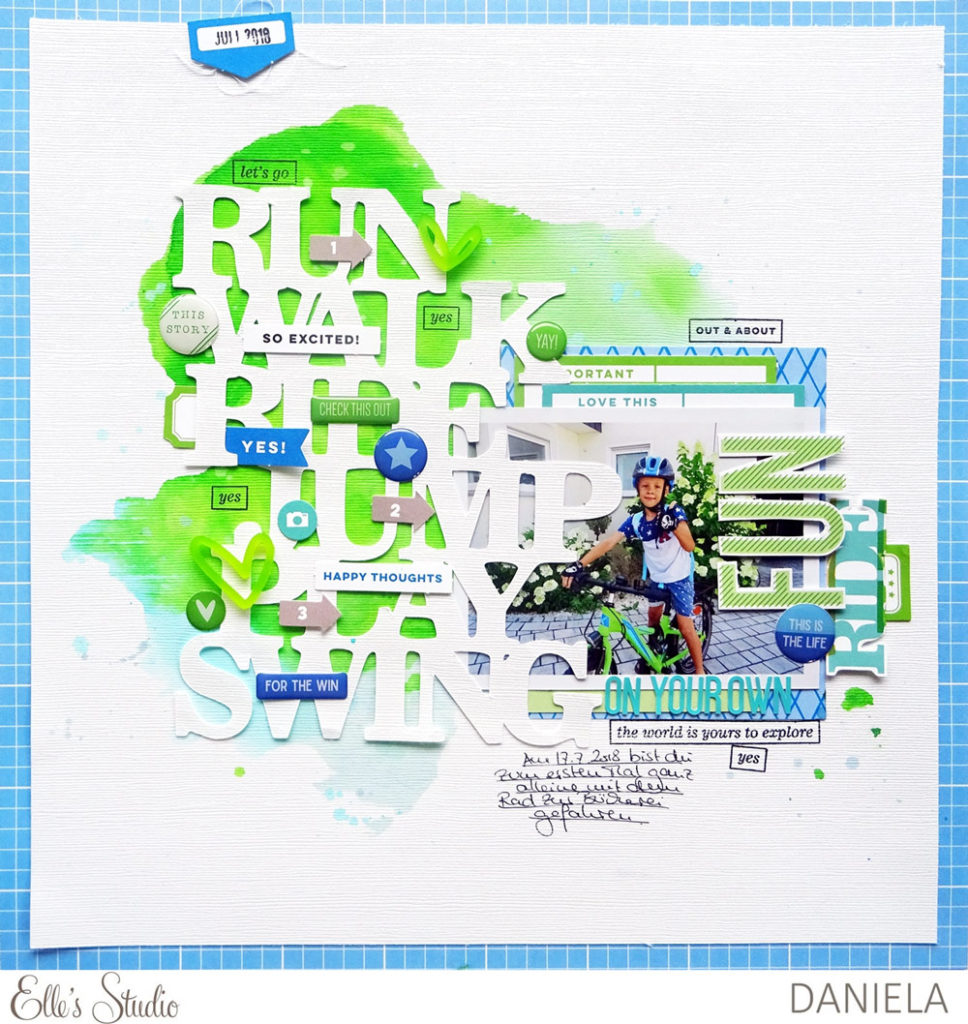
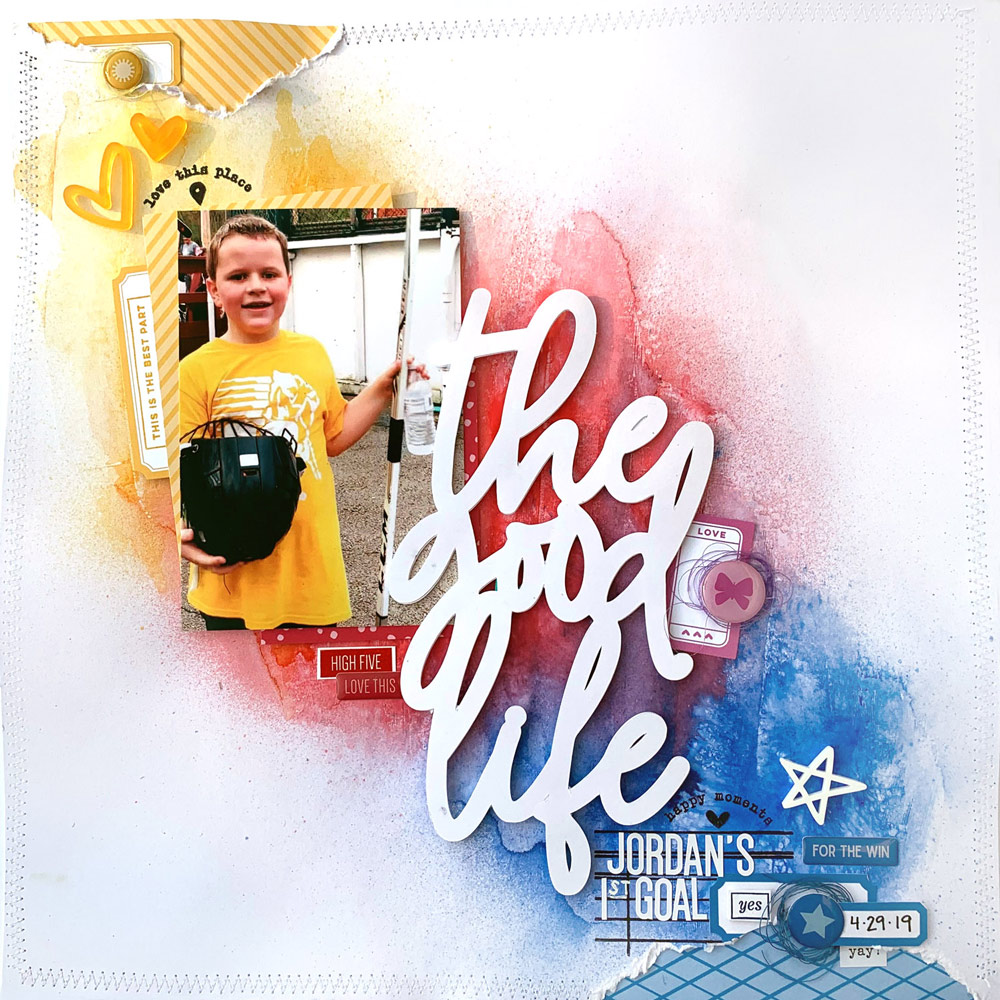
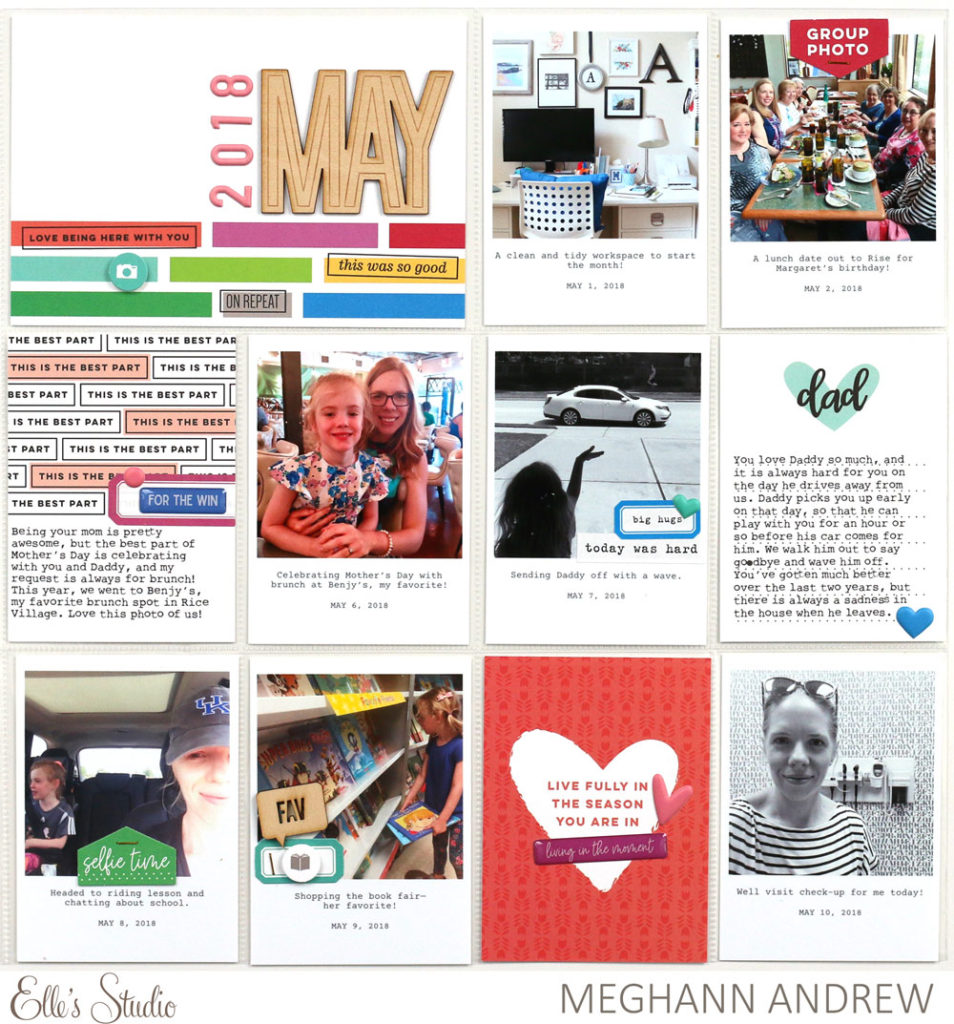
In this 9 x 12 layout double page layout, I told the story of going to the Magic Kingdom for the first time with my kids. Although I took over one thousand photos during our trip, I printed out five of my favourites; these included four 3″ x 4″ pictures and one 9″ x 12″ enlarged photo. Specifically, I choose photos from our time in front of or around Cinderella’s castle. My kids still talk about the castle, so it was important to me to visually highlight this specific feature of our Disney adventure. I plan on documenting more of this Disney trip, but this was a good start by focusing on one activity.

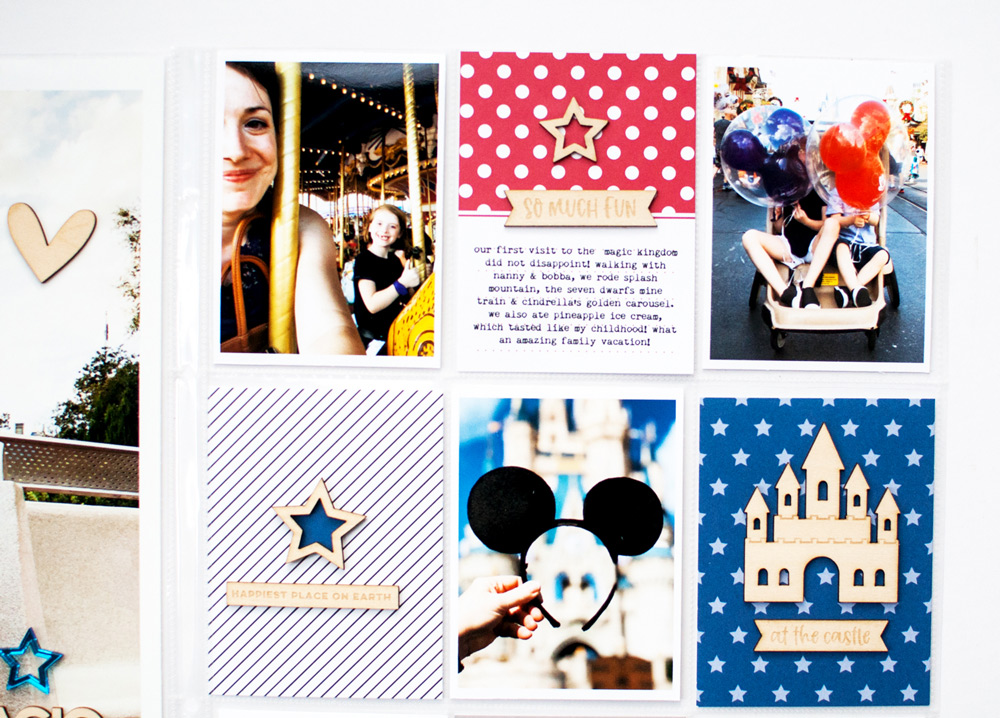
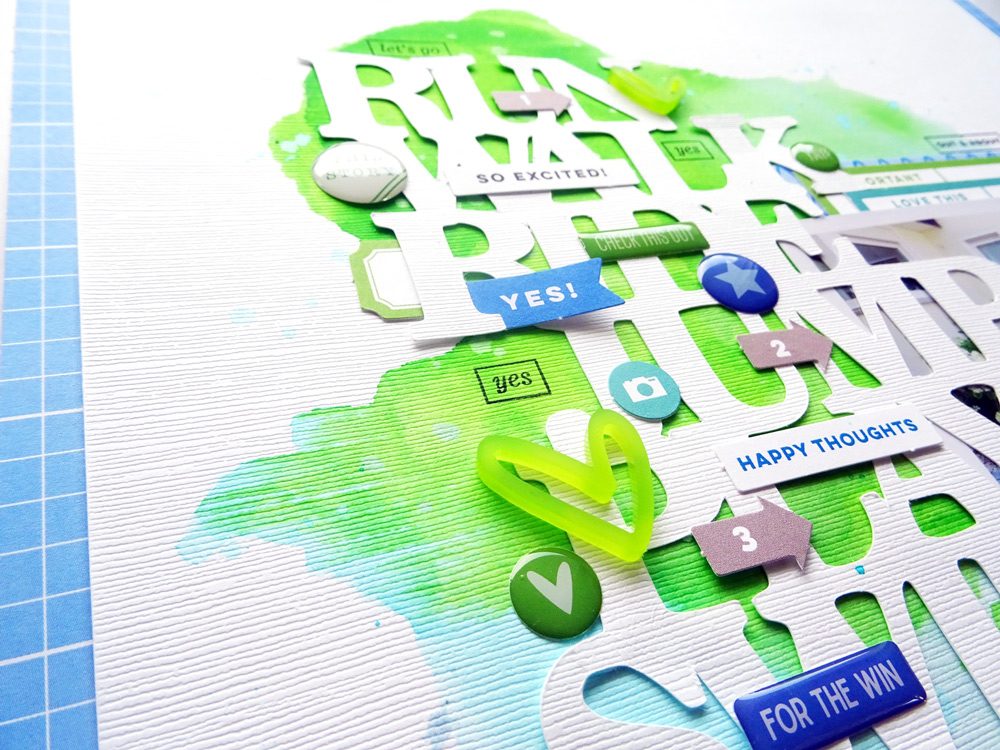
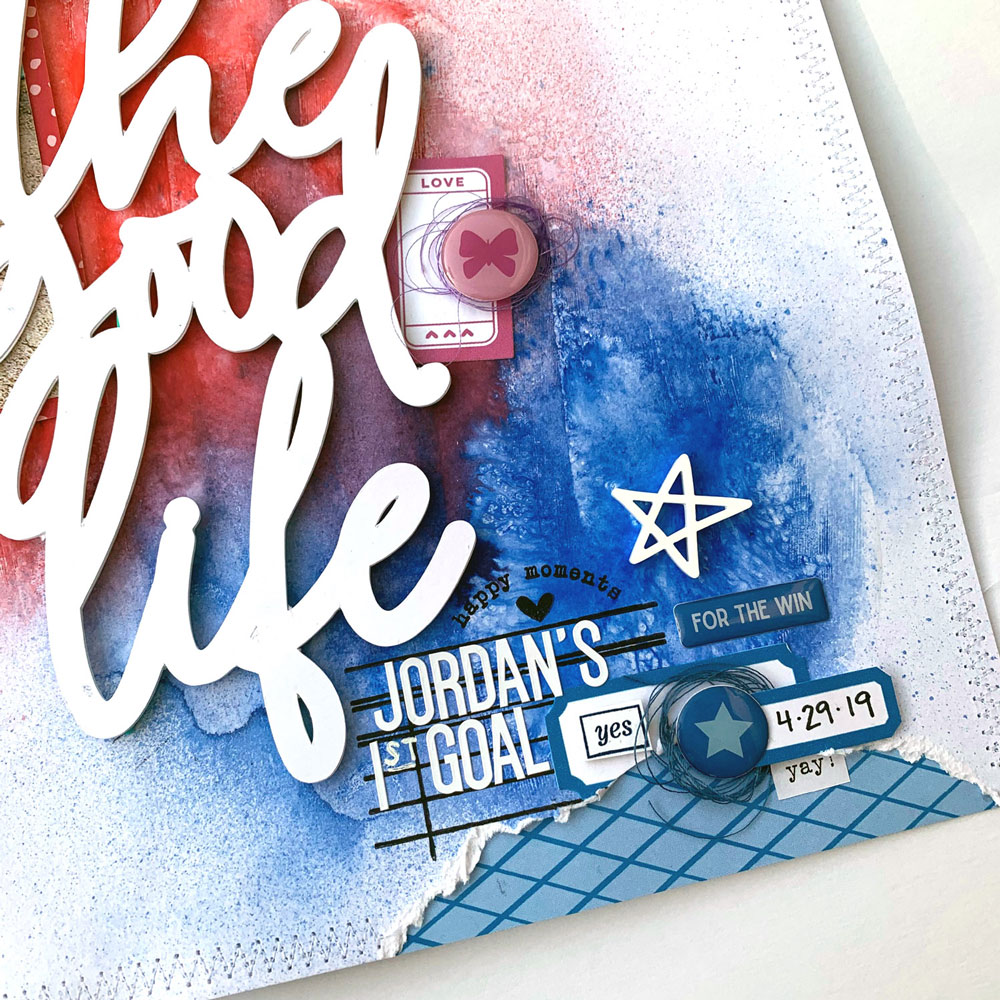
After printing my photos and placing them in a checkerboard AB pattern within the pockets, I decided on a color scheme. I looked to my photos for color inspiration and decided to go with a combination navy blue, red, grey and black. I love that Elle has a variety of colors to choose from in her Magical Memories 6 x 6 Paper Stack and Journaling Tags, both of which I used in my pockets. You could easily scrapbook a princess layout or a character meeting using a pink, purple and teal color scheme! Making a mental note for my next layout! 

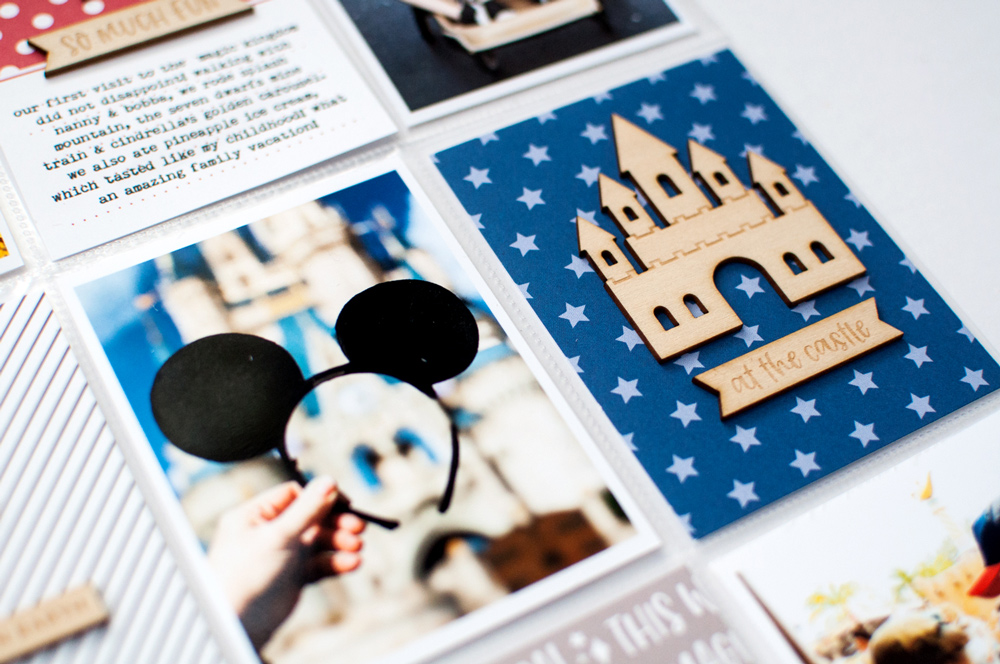
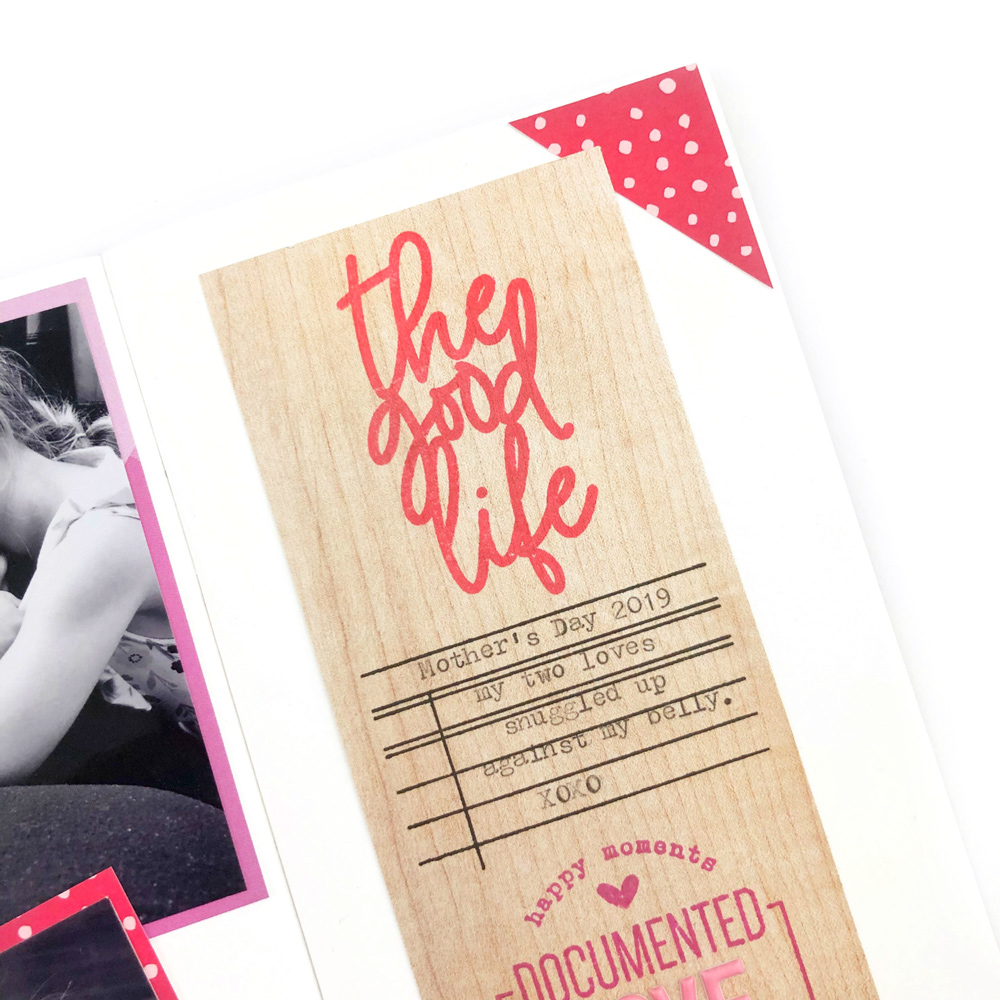
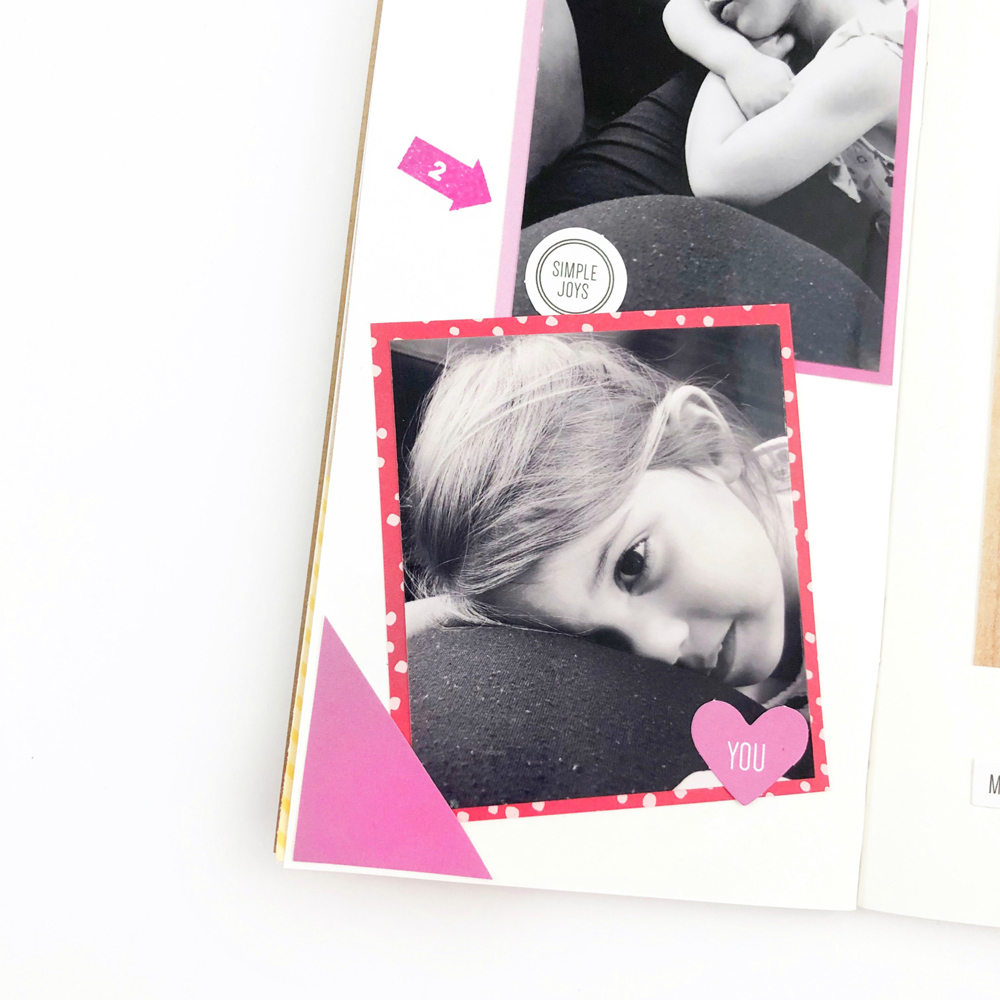
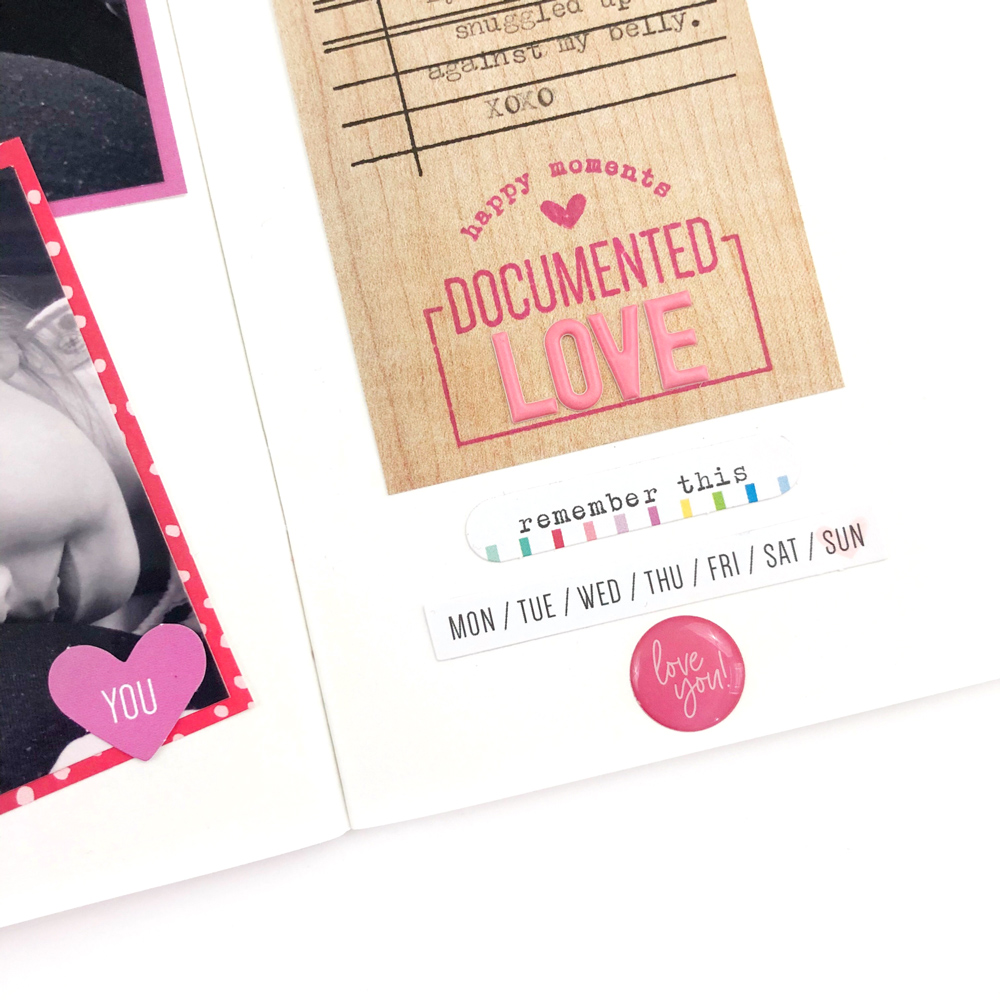
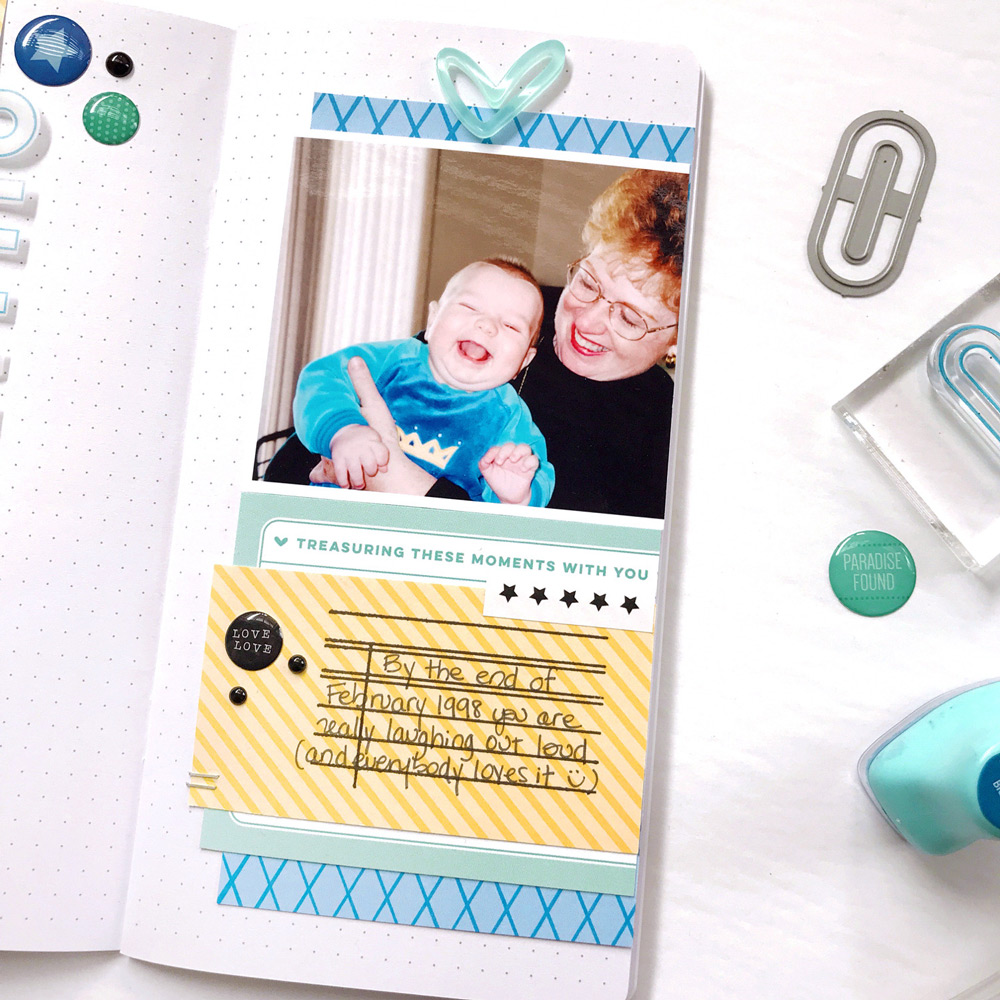
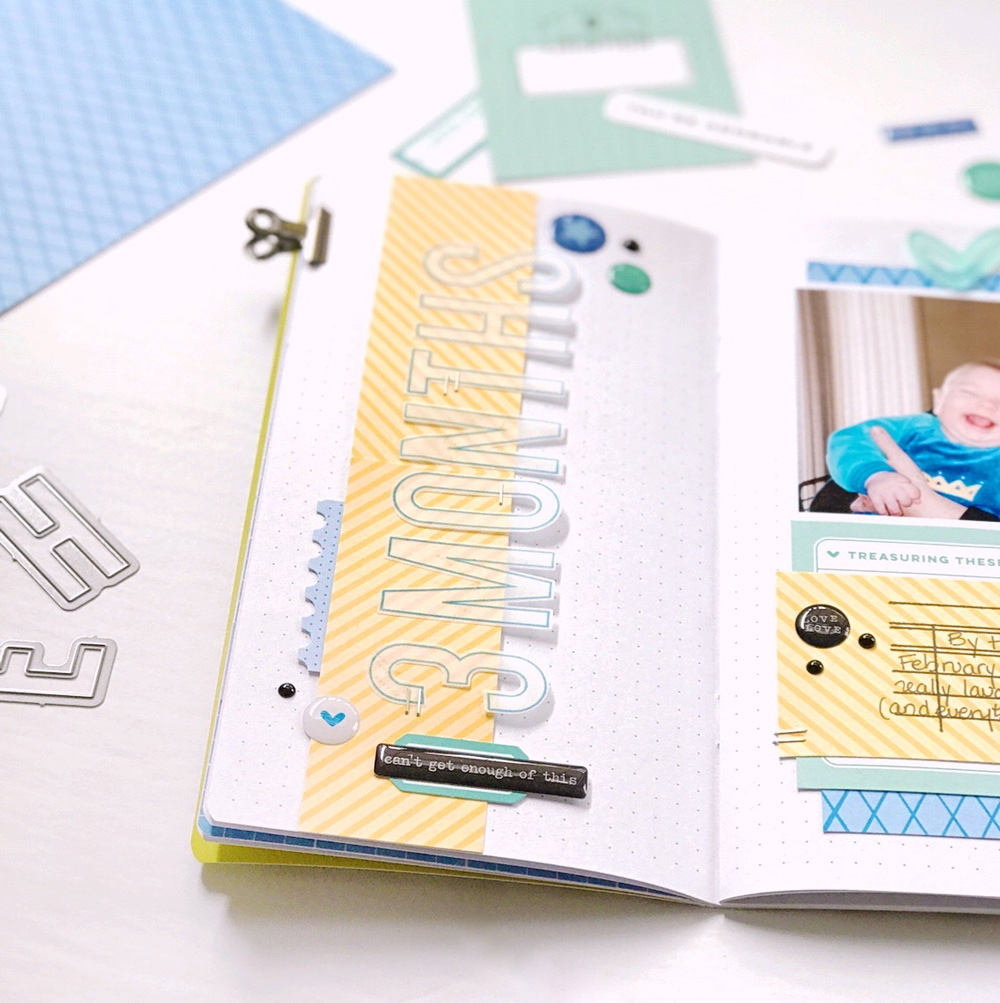
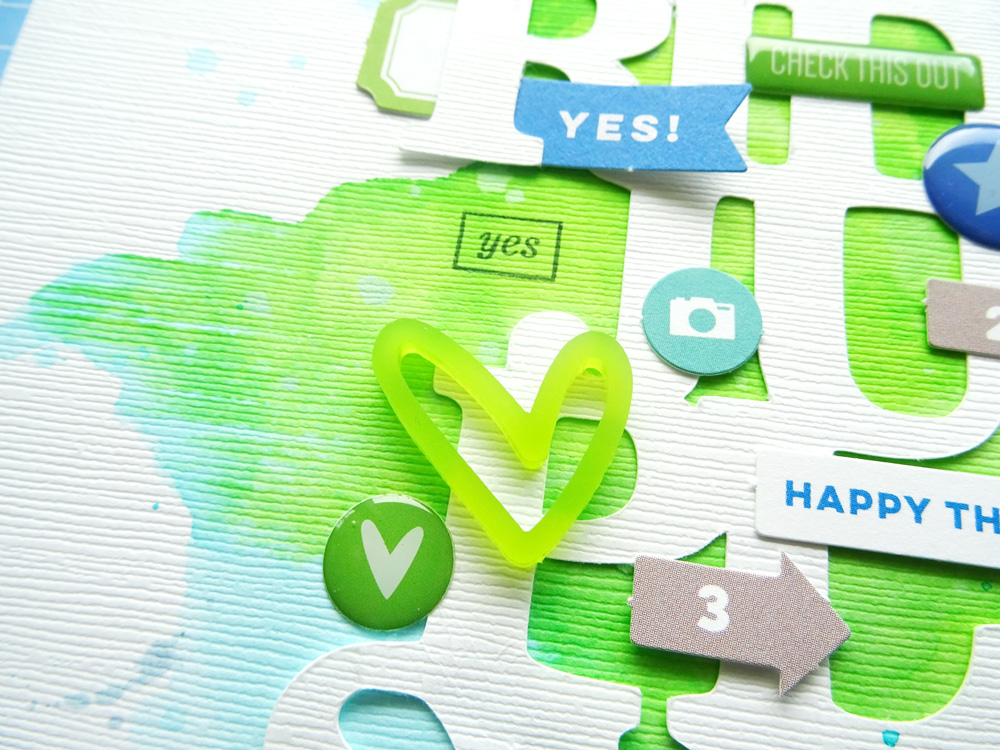
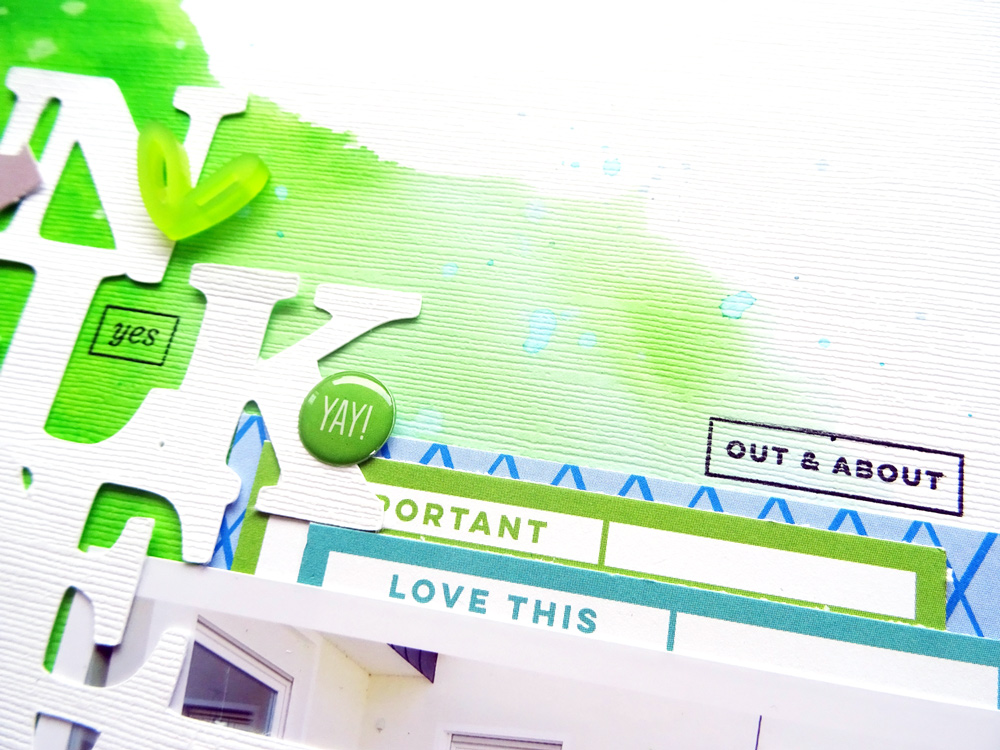
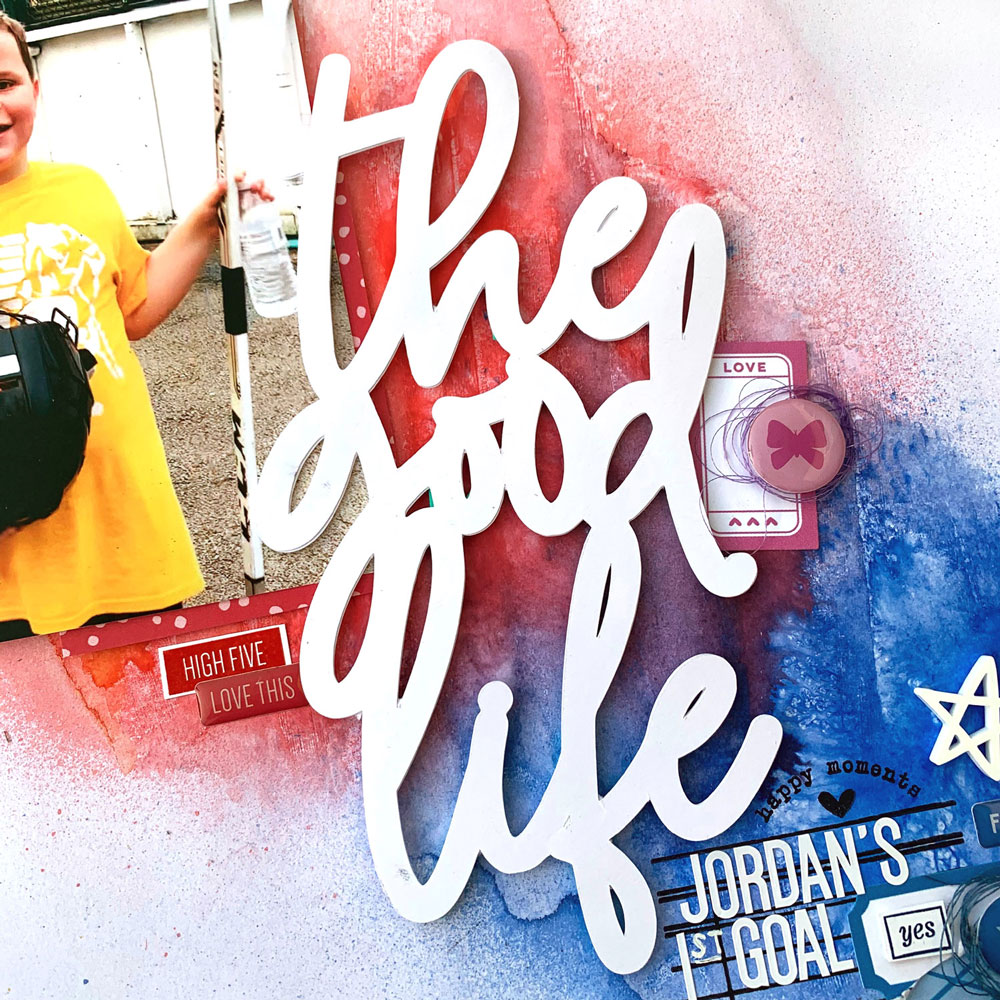
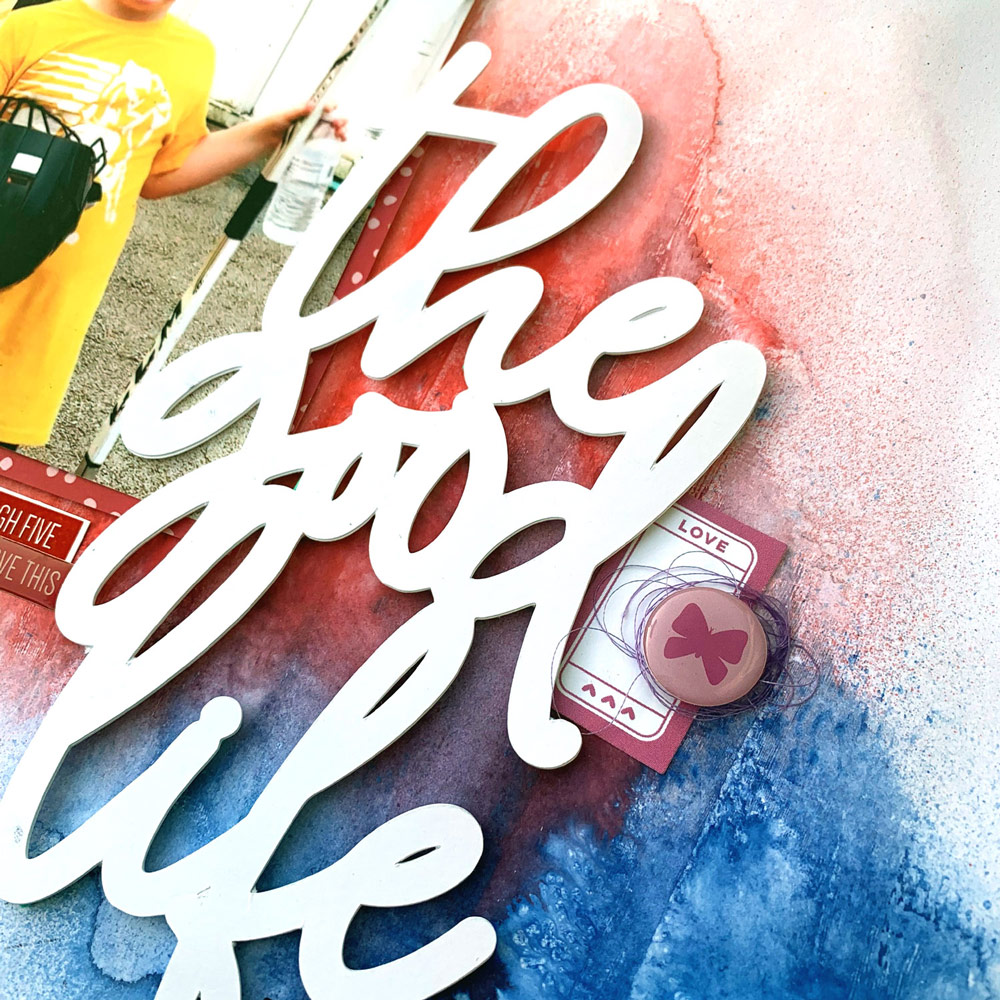
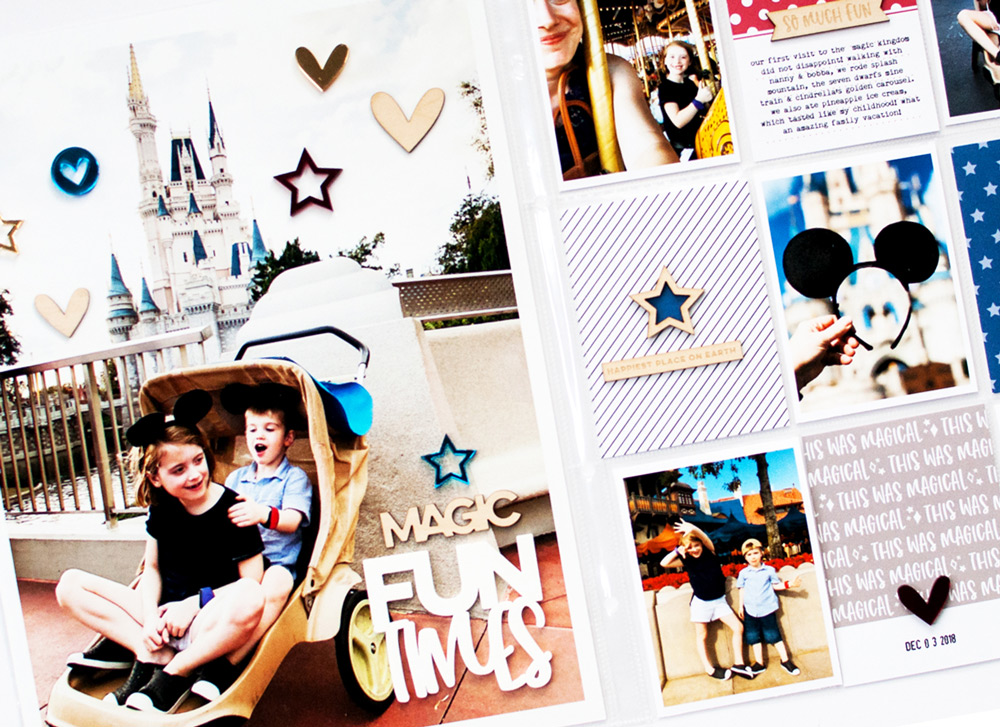
After typing up a few details of my story, I then embellished my photos and journaling cards. Specifically I combined the “magic” wood veneer from the So Much Fun Wood Veneers and Fun Times Acrylic to create a large, bold title that would stand out on my enlarged photo. I then embellished the rest of the photo using the Acrylic Hearts and Stars and wood veneer hearts from the At the Castle Wood Veneers to draw attention to Cinderella’s castle. Finally, I placed the At the Castle Wood Veneers on my journaling cards. As I said, our time around the castle, riding the Cinderella’s golden carousal was a really memorable experience that my kids still talk about today. 

Not only are there lots new fun Elle’s Studio products to document your magical memories, I hope I have inspired you to start documenting your Disney adventures by grouping your photos by theme park or activity. If you are feeling stuck or overwhelmed as to where to start documenting, just ask your family what part of the trip they liked the most!

Thanks for looking! 

Stamping The Good Life with Ashley Laura

Stamping is such a great technique that anyone can try—you just need a great stamp set, acrylic block and ink to open up so many creative possibilities! Today, design team member Ashley Laura is with us to share how she used our newest exclusive set, The Good Life Stamp, in her traveler’s notebook. Let’s take a look!

Hey everyone! It’s Ashley here, with a new project focusing on The Good Life Stamp. I absolutely love stamping and I personally believe stamps are underused. Something that you can use over and over in different ways will always be worth the purchase! This stamp set is no exception! I created a traveler’s notebook layout, focusing on a simple color scheme using the beautiful stamps from the stamp set.

Supplies | May 2019 KitEveryday Goodness Epoxy Stickers, Pink Puffy Alphabet Stickers, Beautiful Day 6 x 6 Paper Stack, The Good Life Stamp

I wanted to showcase the different ways you could use these stamps, so I started by stamping the journaling lines onto the woodgrain pattern found in the Beautiful Day 6 x 6 Paper Stack and quickly typed a message. Then, I found patterned papers to match the ink in my stash. Here’s a quick tip: Look at the ink in your stash first. It’s much easier to find paper to match then to go out and buy more inks. Plus, Elle’s Studio’s color schemes are so versatile so you can always find colors to match.

This picture of my daughter hugging my very pregnant belly was perfect for the #1 and #2 arrow die cuts from the May 2019 Kit. Here’s another quick tip: I looked at the stamp set first and then chose the photos that I thought would compliment well.

I stamped a few other sentiments, including the “happy moments documented” box, which I added the word “love” to using the Pink Puffy Alphabet Stickers. I adhered the woodgrain paper, with the stamped images to my TN insert page.

Lately I’ve been loving clean lines, so naturally, I added some quick embellishment—die cuts from the May 2019 Kit and an Everyday Goodness Epoxy Sticker, aligned in the center on my layout. I kept this layout super simple! Get out one of your favorite stamp sets, choose your paper and photos, and get to stamping!

Pocket Formulas with Wendy Antenucci

Hello everyone, it’s Wendy here today with a new spread for my pocket page album. I have completed six years and now am working on my seventh, but I needed a way to keep things simple so I could keep up!  Thanks to the beautiful Elle’s Studio monthly kits I am able to quickly catch up on past months with a formula that I use each month. I’m here to share it with you today!

Supplies | May 2019 Kit, Currently Journaling Tags, Days of the Week Phrase Stickers, Everyday Goodness Epoxy Stickers, Hand Drawn Acrylic Hearts, Large Wood Veneer Numbers, Large Months of the Year Wood Veneers, Beautiful Day 6 x 6 Paper Stack, Everyday Phrases Vol. 2 Stamp, The Good Life Stamp

Step 1 – Color:  I begin by printing out my pictures, which I do at home on my Canon TS8120. Thanks to the Collect App, I have already chosen the pictures and typed up a bit about each photo when it was fresh in my mind. Once I have my pictures for the month I then choose the tags and paper that best supports the theme of my pages. To make my two-page spreads unified, I am very careful to bring the colors I have chosen onto both pages. In my January pages I have a strong presence of blue/aqua, wood, and then multi-color which allows some additional freedom.

Step 2 – Title:  I love using the Large Months of the Year Wood Veneers as my title for each spread.  I used the 4″ x 6″ tag from the May 2019 Kit to house my wood veneer, and I added a pop of black with the Everyday Goodness Epoxy Sticker. With this being the first page of 2019, I also used the Large Wood Veneer Numbers to mark the new year.

Step 3 – Currently:  I love using the Currently Journaling Tags to add details about each month.  The Days of the Week Phrase Stickers allowed me to cover up entries that I didn’t need to record.  

Step 4 – Weekly:  I choose one of the journaling tags each month to write the highlights of each week of the month.  

To fill in some blank spaces in my pocket page spread and to add to the theme of this month, I used the Everyday Phrases Vol. 2 Stamp to fill in the little boxes on the colorful 4″ x 6″ piece of paper from the Beautiful Day 6 x 6 Paper Stack. I love that they fit in so well allowing perfect customization!

To continue the flow of blue from the title card I used the 3″ x 4″ blue rain tag, but to make it fit my theme better, I stamped “the good life” sentiment from the The Good Life Stamp on it, continuing the flow of colors between the pages.

Some fun pops of wood veneers, phrase stickers, and epoxy stickers add both color and texture to my pages giving my story all it needed for future generations.

Thanks so much for joining me today, I hope that you found some helpful insights into making your memory keeping a bit easier!

May Design Team Inspiration: Volume Three

Today we are sharing our final DT inspiration projects for the month of May, and we may have saved the best for last! Let’s take a look at these beautiful, layered creations using the May 2019 Kit and add-ons.

Read by Melissa Mann – supplies used | May 2019 KitMay 2019 Cut FilesBook Review Journaling Tags, Read Phase Stickers, May Blank Label Stickers, Everyday Goodness Epoxy Stickers, Everyday Phrases Vol. 2 Stamp, Beautiful Day 6 x 6 Paper Stack

May 2018 pocket page (Part 2) by Meghann Andrew – supplies used | May 2019 KitMay Blank Label Stickers, Days of the Week Phrase Stickers, Tiny Everyday Label StickersEveryday Goodness Epoxy StickersPink Puffy Alphabet Stickers, The Good Life Wood Veneer, Everyday Phrases Vol. 2 Stamp

Read by Daniela – supplies used | May 2019 KitMay 2019 Cut Files, Book Review Journaling TagsMay Blank Label Stickers, Read Phase Stickers, Jane Alphabet Stickers – TealEveryday Goodness Epoxy StickersHand Drawn Acrylic HeartsBeautiful Day 6 x 6 Paper StackEveryday Phrases Vol. 2 Stamp, The Good Life StampNoteworthy 12″ x 12″ Paper Collection

March 2019 pocket page spread by Nathalie Leonelli – supplies used | May 2019 Kit, Book Review Journaling Tags, May Blank Label StickersEveryday Goodness Epoxy StickersHand Drawn Acrylic HeartsYellow Puffy Alphabet Stickers, The Good Life Wood Veneer, Play Wood Veneer Words, Small Months of the Year Wood VeneersBeautiful Day 6 x 6 Paper Stack

The Good Life by Tracey Fox – supplies used | May 2019 KitEveryday Goodness Epoxy StickersHand Drawn Acrylic Hearts, The Good Life Wood VeneerBeautiful Day 6 x 6 Paper StackEveryday Phrases Vol. 2 Stamp, The Good Life Stamp, Noteworthy 12″ x 12″ Paper Collection

October 2018 pocket page spread by Wendy Antenucci – supplies used | May 2019 KitEveryday Goodness Epoxy Stickers, Pink Puffy Alphabet StickersLarge Months of the Year Wood VeneersPlay Wood Veneer Words, The Good Life Wood Veneer, Beautiful Day 6 x 6 Paper Stack, The Good Life Stamp, Large Jane Alphabet Stamp – SolidJane Alphabet Stamp

The Good Life by Jennifer McMurtrey – supplies used | May 2019 KitHand Drawn Acrylic Hearts, The Good Life Wood Veneer, Wood Veneer ConfettiBeautiful Day 6 x 6 Paper StackEveryday Phrases Vol. 2 Stamp,

Fun double page layout by Steph Grimes – supplies used | May 2019 KitMay Blank Label StickersEveryday Goodness Epoxy StickersBeautiful Day 6 x 6 Paper StackEveryday Phrases Vol. 2 Stamp

The Good Life by Kristina Proffitt – supplies used | May 2019 KitEveryday Goodness Epoxy Stickers, Hand Drawn Acrylic Hearts, The Good Life Wood Veneer, Play Wood Veneer Words,  Everyday Phrases Vol. 2 Stamp, Mini Dated Stamp

There are still many more May 2019 Kit and extras projects to come here on the blog! Check in each day for more inspiration and ideas on how to use our kit to document your cherished memories in a beautiful way!

Adventure Documented with Candace Perkins

Our May kit and extras. are the perfect products to document outdoor memories at the beginning of your summer adventures, and Candace Perkins is here with us to share how she was inspired by these products! Let’s take a look.

Hello Elle’s Studio friends! It’s Candace here to share a quick summer page I created using goodies released with the May kit and extras. I love that they contain so many themes and ideas for documenting your special moments and memories! I was inspired to tell many different stories prompted by the words and ideas in the goodies. For my gallery projects I was prompted to tell two stories of everyday happy moments and the books I am reading.  For today I decided to tell a story of adventure! 

Supplies | May 2019 Kit, Everyday Goodness Epoxy Stickers, Play Wood Veneer Words, Beautiful Day 6 x 6 Paper Stack

To start my layout I used a white cardstock 12″ x 12″ base. Next, I cut various 2″ x 3″ pieces from the Beautiful Day 6 x 6 Paper Stack. I placed little family photos from our adventure at Tonto Natural Bridge on the cut patterned paper.  

For the title, I used a tag from the May 2019 Kit and placed it in the center of the layout on dimensional adhesive. I placed the photos around the layout in various places to balance color and weight across the spread.  

I loved the fun Play Wood Veneer Words and thought they would be the perfect match to our adventure photos.  I arranged the word next to the photos at different angles to add a bit more interest to the spread. 

To finish off the page, I added a few of the Everyday Goodness Epoxy Stickers to the photo clusters.  I love the touch of dimension and whimsy they bring to the spread!  

Such a fun spread and memory captured! What will you be inspired to create with the goodies this month?!  Don’t forget to share and use the hashtag #EllesStudio on social media so we can see!  Have a beautiful day!

Our Magical Memories collection is now available in our shop!

We are so excited to reveal our newest collection: Magical Memories! Our new collection features the perfect colors and sentiments to capture all your special memories at the park! It has 6 x 6 papers, a 6 x 8 inch stamp, journaling tags and die cuts, wood veneers, stamps, puffy stickers, and MORE! Here’s a peek at all of the products in this collection:

All of these new products are available, and shipping now, in our shop! To celebrate this BIG reveal, we will be including a little bit of extra magic with your package! Orders placed today (Wednesday, May 22nd, 2019) through Friday, May 24th 2019, will receive this special three-piece acrylic surprise pictured above! No coupon code required – we’ll add it to your package when your order ships!

We are so excited to celebrate this reveal with you and we can’t wait to see how you use this new collection to scrapbook all of your special memories! Make sure you share your projects with us in our Facebook group and use the #EllesStudio hashtag when posting on Instagram for a chance to be featured on our feed and win a gift certificate to our shop!

Documenting Baby with Nathalie Leonelli

At first glance, our May Kit and add-ons look like the perfect supplies to document your summer memories with their bright colors and play themes, but look closer, and you’ll see that this kit isn’t what it seems! It can be used to document any array of memories, as design team member Nathalie Leonelli is showing us today with a spread in her baby traveler’s notebook. Let’s take a look!

Hello, it’s Nathalie and I’m back to share a new layout created with the May 2019 Kit and add-on release. As you might have seen last month, I have started “the baby album I never made” in a traveler’s notebook insert (more details on my blog). I was so happy when I found in the May 2019 Kit and BBeautiful Day 6 x 6 Paper Stack included the perfect colors for an old photo of my now 21 year old laughing his heart out at 3 months:

Supplies: May 2019 KitEveryday Goodness Epoxy Stickers, Read Phrase Stickers, Hand Drawn Acrylic Hearts, Beautiful Day 6 x 6 Paper Stack, The Good Life Stamp, Large Jane Alphabet Stamp – Outline, Large Jane Number Stamp – Solid and Outline, Large Jane Alphabet Metal Die, Large Jane Number Metal Die

On the right, I lined up several elements: patterned paper from the Beautiful Day 6 x 6 Paper Stack, a tag from the May 2019 Kit and the star Read Phrase Stickeron the edge of the page. This was a nice way to anchor my design.

My favorite part is the title on the left page. I chose to stamp my letters and number onto vellum using the outline Large Jane Alphabet Stamp and Large Jane Number Stamp and die cut them with the matching metal dies. I just love the airy and ethereal effect. It makes a statement without taking away from my photo.

I then used one of the stamps from the new The Good Life Stamp to add a journaling spot directly on the yellow piece of patterned paper from the Beautiful Day 6 x 6 Paper Stack. I finished my layout with a few epoxy stickers and enamel dots from my stash, bringing some black touches into the mix for contrast.

I have a tendency to go for bright colors first, but I like that this kit and extras also gave me the option to create a more pastel look, perfect for a baby layout.

One more thing: I said it before and I’ll say it again, the Jane alphabet & numbers stamps and metal dies are absolutely my favorite! They are must haves. I guarantee you will be using them again and again!

Documenting Childhood Fun with Daniela

Our May 2019 Kit and add-ons have a fun, and playful feel, with outdoor themes perfect for this time of year when the weather is perfect! Design team member Daniela documented a memorable childhood moment in a perfect way with these new supplies, and we know it will inspire you to document your fun outdoor activities, too. Let’s take a look.

Hi friends, it’s Daniela again and today I want to share another layout created with the May Kit and extras with you. There are so many favorite pieces this month, so this layout came together quite easily!

I’m a huge fan of this month’s May 2019 Digital Cut Files. Since I had these pictures in my stash showing my son going on his first ride to the library all alone, I decided to use the die cuts that focus on playful free-time activities, and this is the result:

Supplies | May 2019 KitMay 2019 Digital Cut File, May LabelsMay Blank Label Stickers, Jane Alphabet Stickers – TealEveryday Goodness Epoxy StickersHand Drawn Acrylic HeartsBeautiful Day 6 x 6 Paper StackEveryday Phrases Vol. 2 StampNoteworthy 12″ x 12″ Paper Collection

Taking cues from the colors in my picture, I chose a green, blue and teal color scheme. I started the page by creating a background in these colors using liquid colors and placed the white cardstock die cut on top of it. Of course, I also added lots of bit and pieces to embellish the big title, like Everyday Goodness Epoxy Stickers.

To highlight the picture, I created several layers by using the Beautiful Day 6 x 6 Paper Stack and the May Labels. Everything is connected somehow and overlapping here and there so that there aren’t any lose elements on the page. This adds to a playful and happy style.

I also added more details and explanations of the documented situation by using the Everyday Phrases Vol. 2 Stamp in combination with Jane Alphabet Stickers and phrases cut from the tags found in the May 2019 Kit. Of course, there is also some journaling in black ink to tell the whole story.

All in all, I wanted to create a page with much to discover. The mixed media background, different layers, the big cut file and lots of bits and pieces help to create a cheerful and playful page that conveys the happy mood I wanted to preserve.

Have you already started using you May 2019 Kit and add-ons? If not, do so now! There is plenty of use in all these beautiful goodies and they are so much fun to work with. Thanks so much for stopping by and have a great day!

Mixed Media Magic with Guest Nicole Kerr

We are excited to welcome back our May guest designer, Nicole Kerr, today, and her project is nothing short of magical. She’s combined our May 2019 Kit and extras in such an amazing way with her own mixed-media style! Let’s see what she created.

Hello crafty friends! It’s Nicole here and today I’m back with another project using lots of the fabulous, new May release products! Today, I’m creating another 12″ x 12″ layout for you, but this time, I’m focusing on primary colors, a little mixed media and the awesome May Cut Files! Let’s get started!

Supplies | May 2019 Kit, May Print and Cut Labels, May 2019 Cut Files, May Blank Label Stickers, Jane Alphabet Stickers – WhiteHand Drawn Acrylic Hearts, Everyday Goodness Epoxy Stickers, Play Wood Veneer Words, Beautiful Day 6 x 6 Paper Stack, The Good Life StampEveryday Phrases Vol. 2 Stamp

I first began by adding a thin layer of clear gesso on my background.  I applied this to the center top left to bottom right of the page.  I added the gesso because when I apply my mists and water, the gesso allows the colors to move around the page and mix together.  Sometimes if they mix too much together, I have to dab a bit of the color up with a paper towel so the colors don’t get “muddy.”  Some of the mist did overspray on to areas where there was no gesso, but I didn’t mind! I actually like the little splatters of color that it gave around the edges!

I let that completely dry over night before I moved on to the rest of my page.  Next, I tore pieces of the top left and bottom right of my white background paper and layered pieces of patterned paper from the Beautiful Day 6 x 6 Paper Stack behind it, as another layer. I chose a coordinating yellow and blue to match the mists I used in those areas.

Next, I cut “the good life” phrase three times using the May 2019 Cut Files with my cutting machine and glued all three layers together to create a thicker title, which I placed in the center of my layout.  Gluing three layers together helps give it more stability and dimension on the page. With all of the other color going on in the background, I chose to keep this white and not introduce a new color. Once in place, I added my photo with layers and also the journaling lines from The Good Life Stamp and the white Jane Alphabet Stickers on the bottom right for a subtitle. I finished my layout by adding color-coordinating embellishments, labels from the May 2019 Kit, tangled thread, a bit more stamping and a stitched zigzag border. Here are a few other close ups of my finished project:

Thanks so much for stopping by today! I hope you’ve had fun and been inspired! Until next week, happy scrapping! I can’t wait to see what you create!

Hello friends! My name is Nicole and I’m so very excited to be here!  I’m a 30-something mama of two boys and married to my hero and best friend of 14 years. I work in the Accounting and Marketing field by day and scrapbook and paint by night. After being introduced to the card making community about 9 years ago, my love for scrapbooking was found and has continued to grow over the years. I am truly blessed to have the opportunity to inspire others thru my visions, creations and love of color. Never be afraid to show the world what it is that you create. There is no right or wrong…just be you! 

Come back next week to see Nicole’s final post using the May kit and extras! Until then, check out her latest projects by visiting her blog and Instagram feed!

May Design Team Inspiration: Volume Two

Our design team is ready to inspire you with more projects created with the May 2019 Kit and add-ons, just in time for your creative weekend! Let’s take a look at the bright and beautiful layouts and pocket pages!

May 2018 pocket page (Part 1) by Meghann Andrew – supplies used | May 2019 KitMay Blank Label Stickers, Tiny Everyday Label StickersEveryday Goodness Epoxy StickersPink Puffy Alphabet StickersShapes and Dots Puffy StickersLarge Months of the Year Wood Veneers, Wood Veneer Speech Bubbles, Everyday Phrases Vol. 2 Stamp

Read 2019  by Candace Perkins – supplies used | May 2019 KitRead Acrylic,Beautiful Day 6 x 6 Paper Stack

A Beautiful Sight pocket page spread by Jess Forster – supplies used | May 2019 KitHand Drawn Acrylic Hearts, Everyday Goodness Epoxy StickersEveryday Phrases Vol. 2 Stamp

Read Julius Caesar by Wendy Antenucci – supplies used | May 2019 Kit, May LabelsEveryday Goodness Epoxy Stickers, Read AcrylicBeautiful Day 6 x 6 Paper Stack

Last Day pocket page spread by Patricia Roebuck – supplies used | May 2019 KitMay Blank Label StickersEveryday Goodness Epoxy Stickers, Pink Puffy Alphabet StickersRead Acrylic, Play Wood Veneer Words, Everyday Phrases Vol. 2 Stamp

Read by Mary-Ann Maldonado – supplies used | May 2019 KitMay Labels, May Blank Label Stickers, Fuchsia Puffy Alphabet StickersEveryday Goodness Epoxy Stickers, Read AcrylicBeautiful Day 6 x 6 Paper Stack, Large Jane Alphabet Stamp – StripesLarge Jane Alphabet Metal Die,Noteworthy 12″ x 12″ Paper Collection

Spring Beach Day pocket page spread by Sabrina Poole – supplies used | May 2019 KitEveryday Goodness Epoxy StickersPink Puffy Alphabet StickersTeal Puffy Alphabet Stickers, Yellow Puffy Alphabet StickersShapes and Dots Puffy Stickers, The Good Life Wood Veneer, Beautiful Day 6 x 6 Paper Stack, Everyday Phrases Vol. 2 Stamp

Strawberry Picking Fun by Suzanna Lee – supplies used | May 2019 KitMay 2018 Cut Files, May Blank Label Stickers, Jane Alphabet Stickers – RedPink Puffy Alphabet Stickers, Everyday Goodness Epoxy Stickers, Hand Drawn Acrylic HeartsBeautiful Day 6 x 6 Paper StackThe Good Life StampEveryday Phrases Vol. 2 StampLarge Jane Alphabet Stamp – Stripes, Large Jane Alphabet Stamp – Solid

Yes, Girl by Ashley Laura – supplies used | May 2019 KitMay Blank Label Stickers, Pink Puffy Alphabet Stickers, Everyday Goodness Epoxy Stickers, Hand Drawn Acrylic Hearts, Beautiful Day 6 x 6 Paper Stack, Large Jane Alphabet Stamp – Solid

Share what you are creating with your newest supplies, using our hashtag #EllesStudio on Instagram, or in our Elle’s Studio Facebook Group, and stop by the blog all this week for more project inspiration!