Crisp autumn nights call for a fire, a cup of something warm and a good book! Today, design team member Sabrina Poole is here to show us how she gets cozy in the evenings with a book in her lap, documented in a new pocket page with traditional page spread! Let’s take a look!
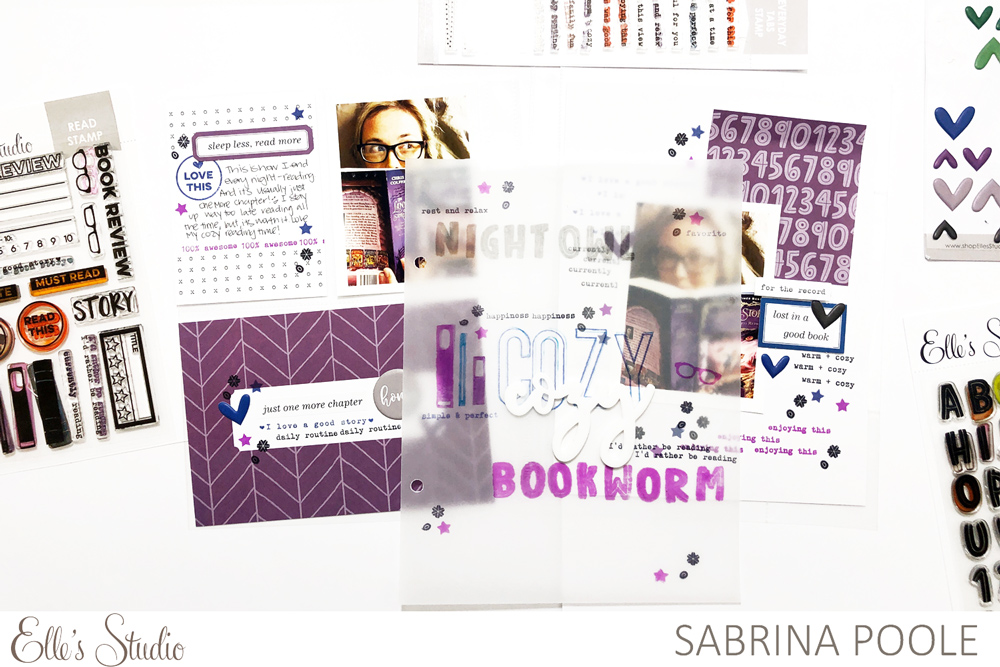
Hi this is Sabrina from the creative team! Today I want to share how I used vellum, stamps and the Cozy Acrylic to create a 6″ x 8′ spread all about late night reading.
For the first time, I tried stamping on vellum and I think it turned out great! I used the Winifred Alphabet Stamp to add the words “bookworm” and “night owl.” I also used the outline Large Jane Alphabet Stamp, which helps the Cozy Acrylic, layered on the top, to stand out more. My last addition added some stamped icons: glasses, circles, star and books using the Read Stamp.
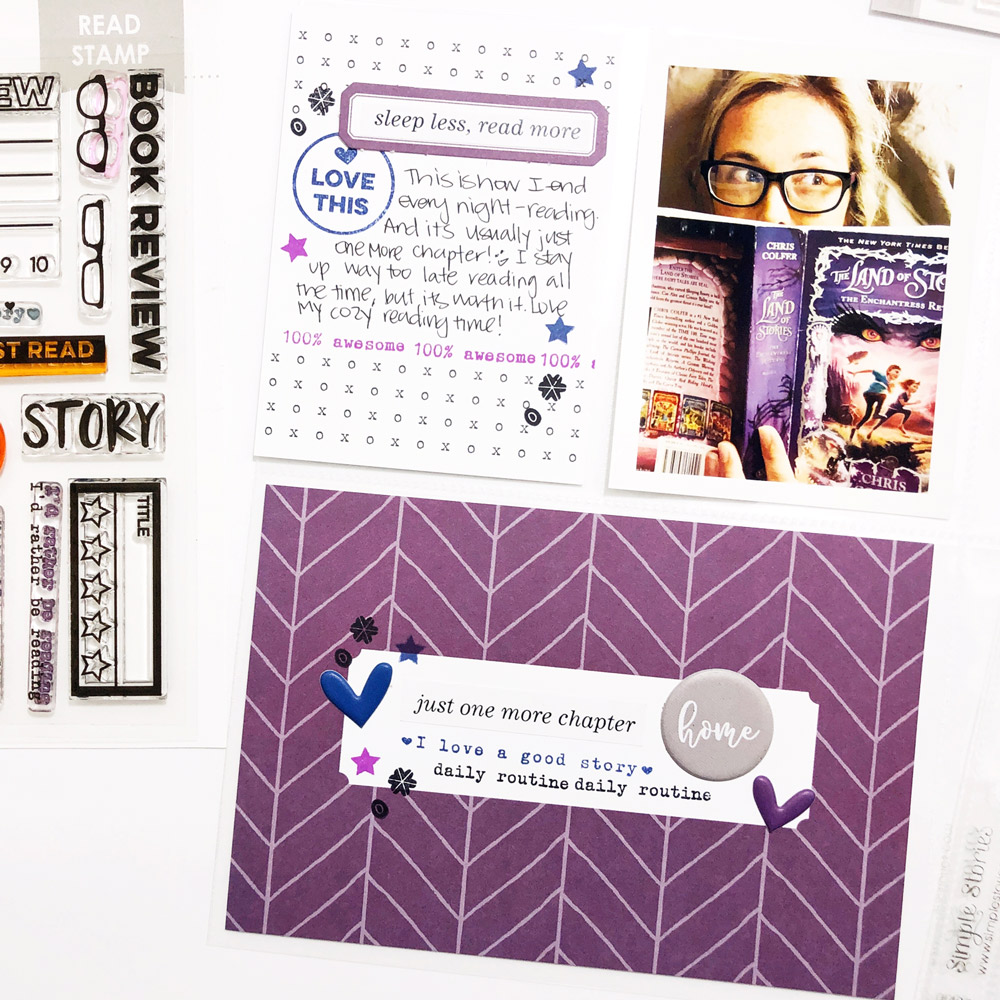
The purple hue in the October 2019 Kit helped me to choose this color scheme and I loved working with it since it is not a color I work with often! I also wanted to bring in dark blue, so I used various stamps to do this. I added the neutral “XO” journaling tag on the left page to add my journaling, but added color using stamps and labels.
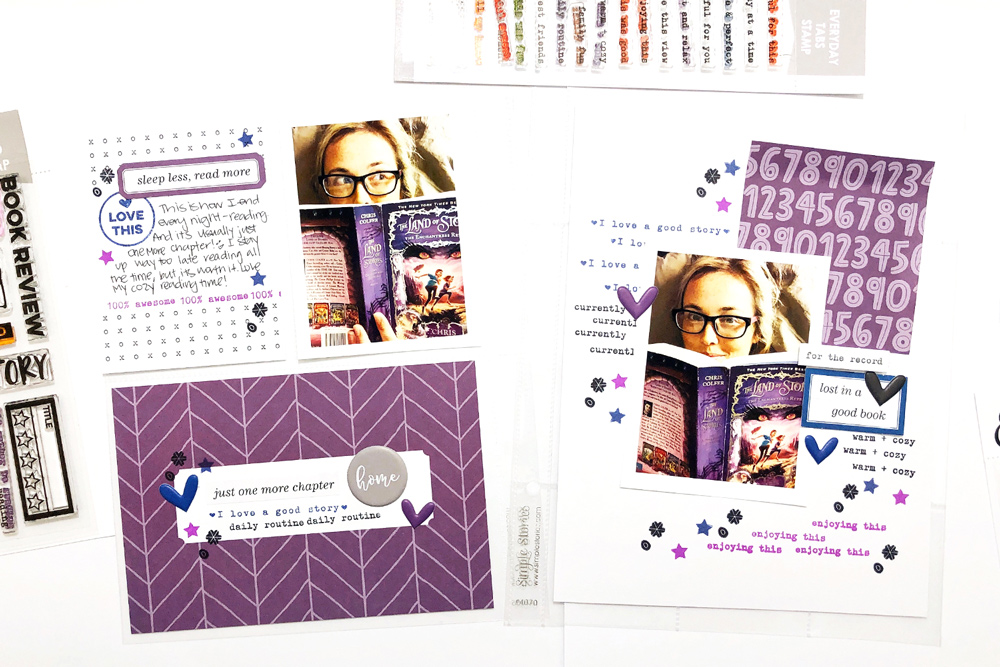
The right side of the spread was created with a 6″ x 8″ page which I stamped using various sentiments from the Everyday Tabs Stamp. I love how the words and small elements add movement to overall page.
To finish off the spread, I added the Read Phrase Stickers, Puffy Autumn Heart Stickers and Autumn Puffy Stickers. I love finishing my nights with lots of reading and now I’ve documented that part of my life in my album. There’s nothing better than a good book and being cozy in bed! Thanks so much for stopping by today!
Show us how you are documenting you love of reading, your 2019 read list, or how you get cozy using our October 2019 Kit and add-ons by posting your project on Instagram using the hashtag #EllesStudio or in our Elle’s Studio Facebook Group!
Comments Off on Getting Cozy with a Good Book and Sabrina Poole | Share This
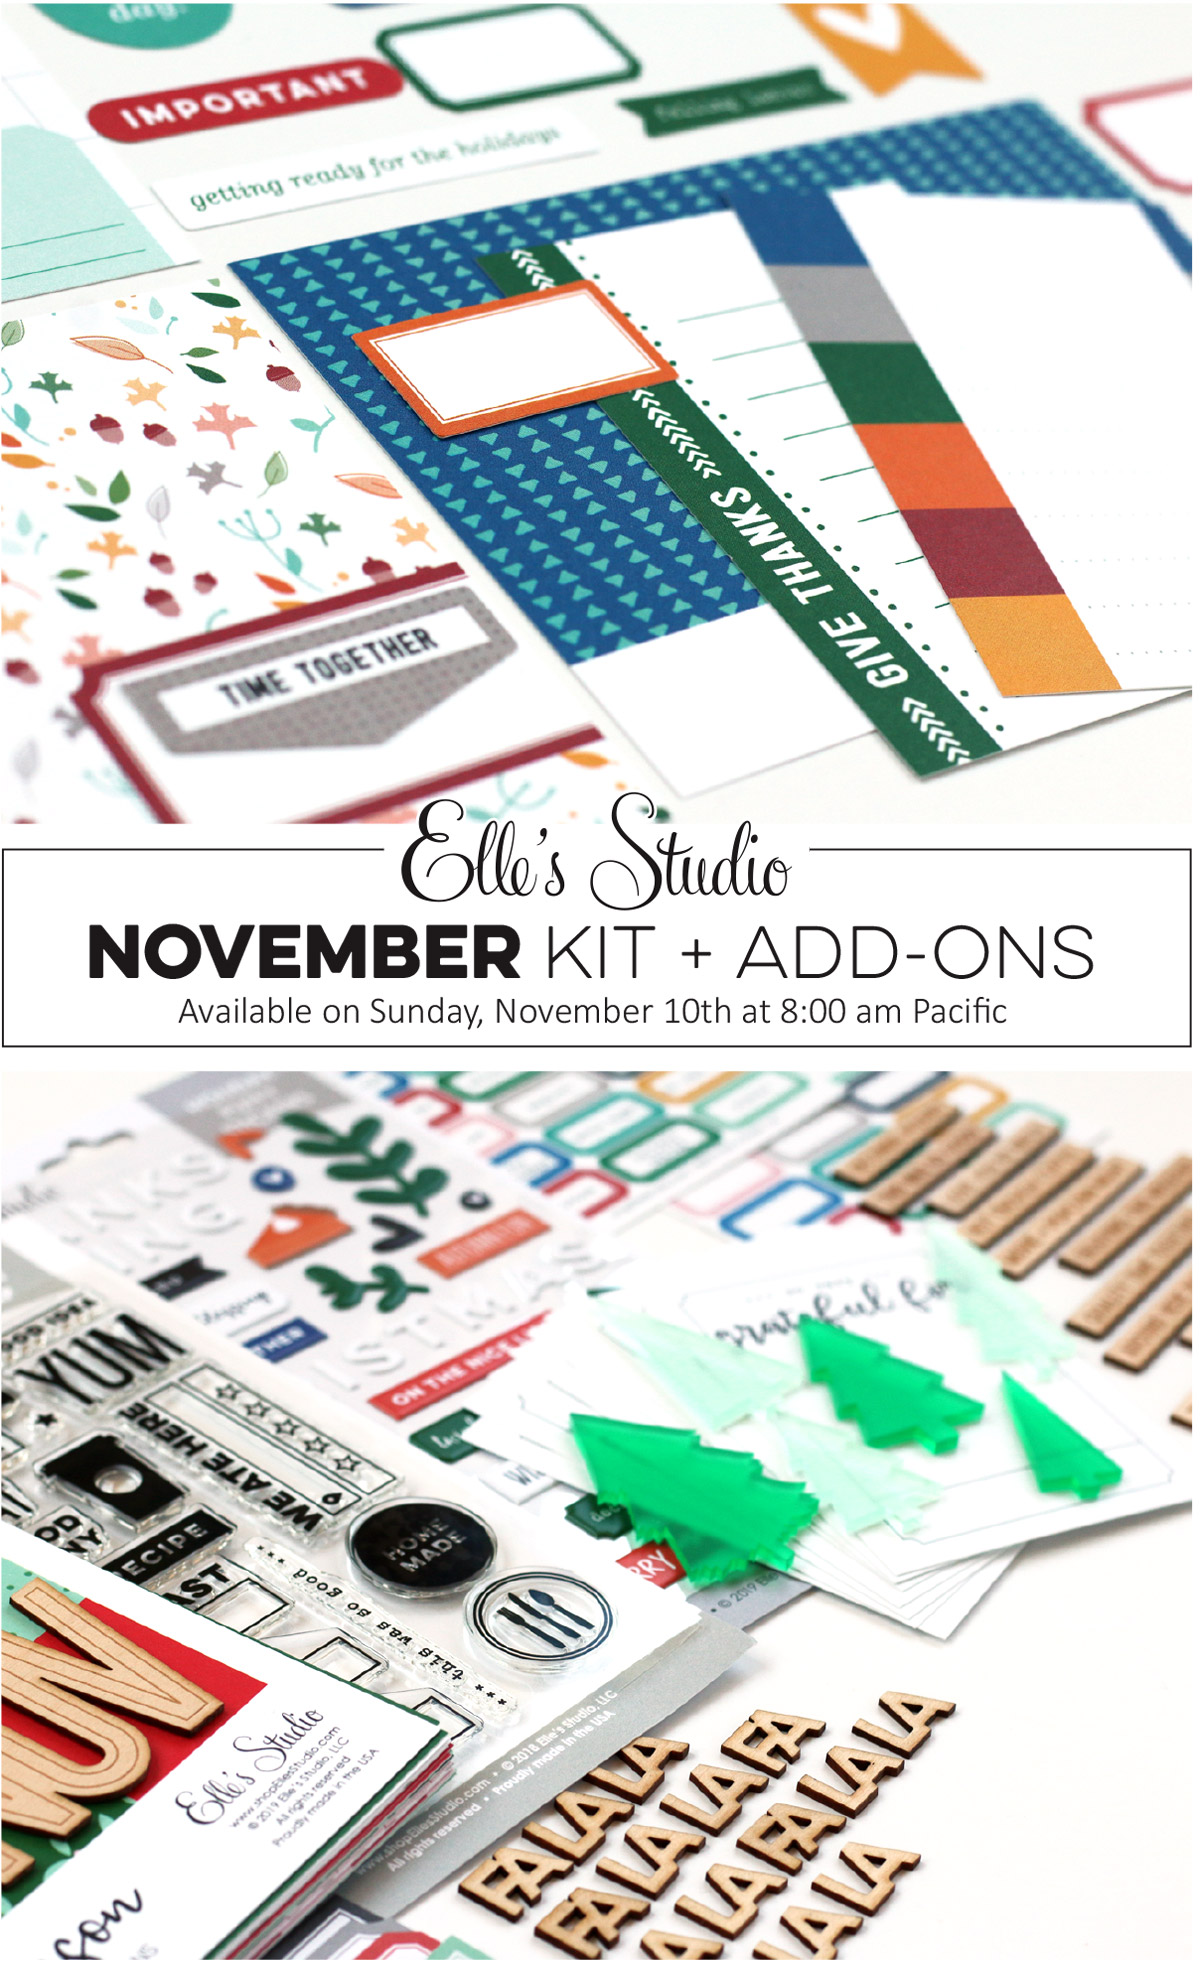
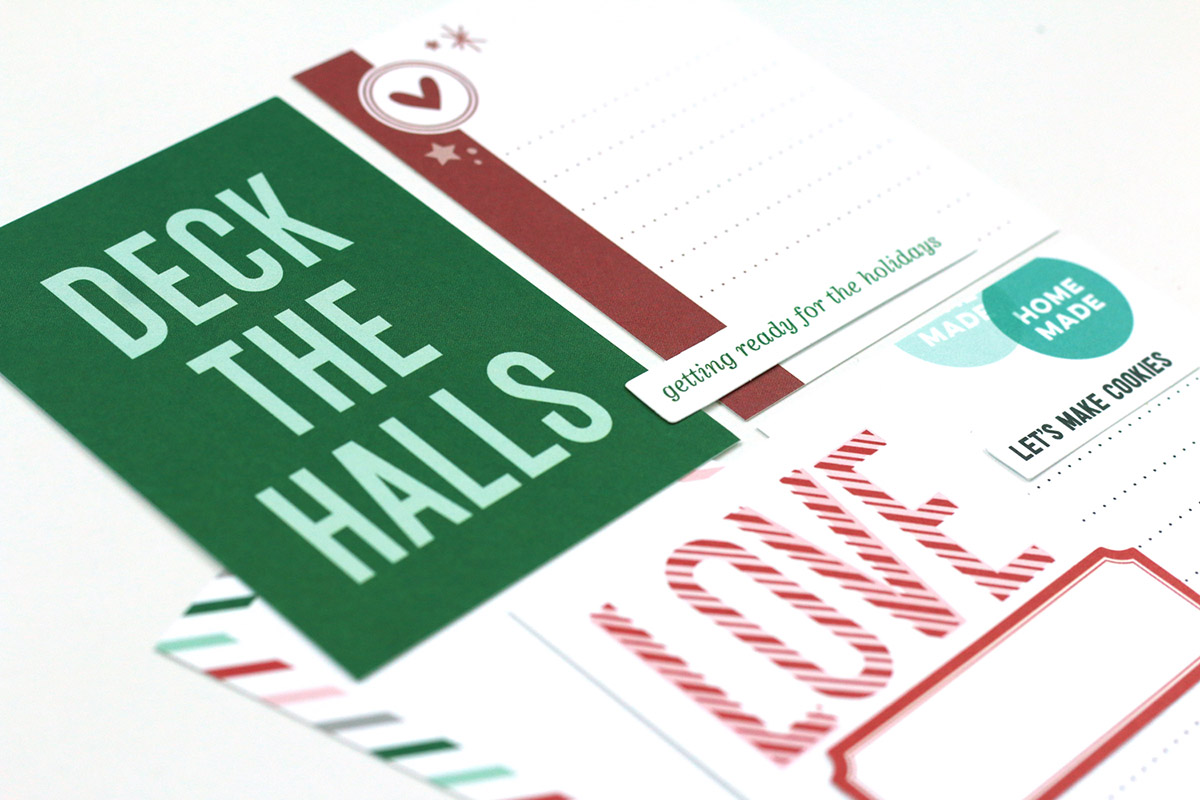
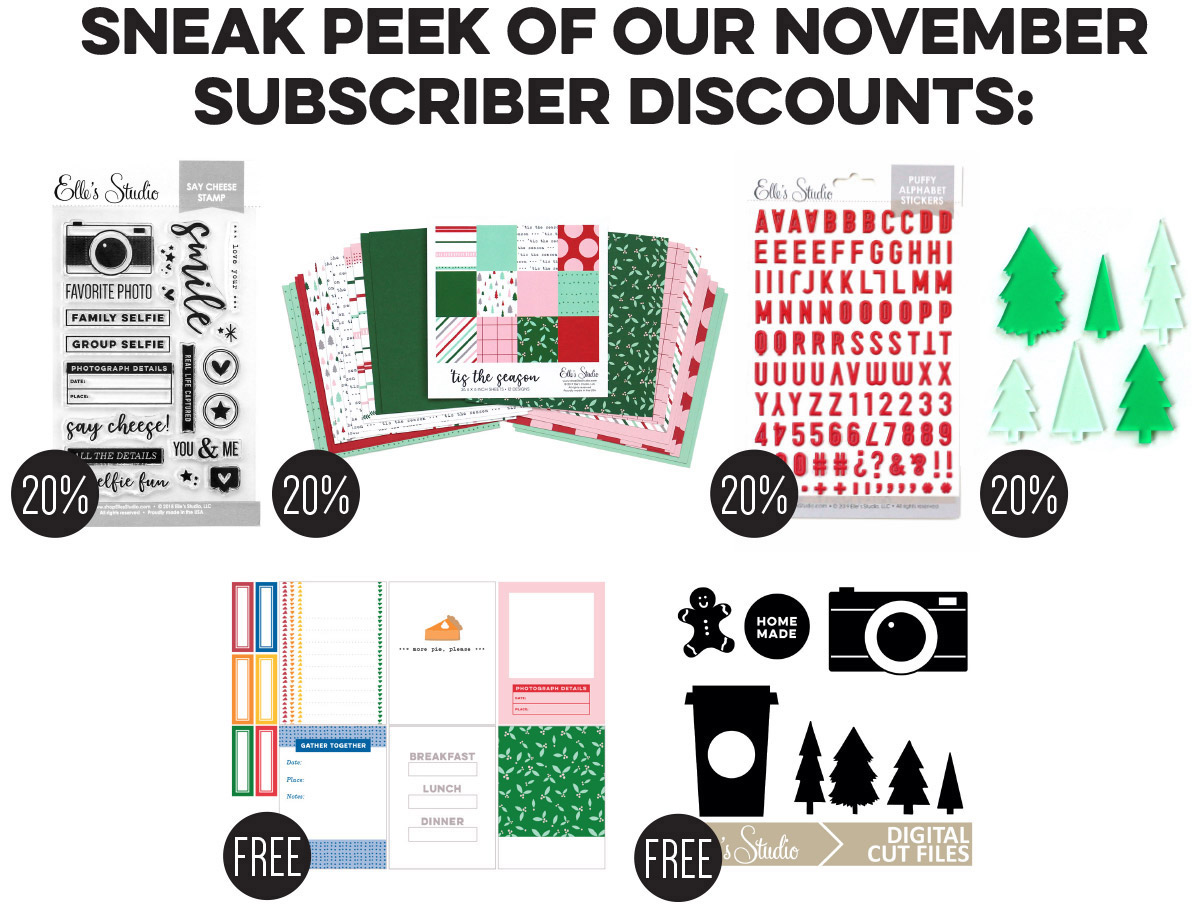
Our November kit + coordinating add-ons reveal is almost here and we can’t wait to share with you all the new and exclusive products that will be available soon! Our reveal will be full of the perfect products to capture your November stories! This month, our November kit will include 3 – 4 x 6 inch tags, 18 – 3 x 4 inch tags, and 28 die cuts! We will also have a lot of really fun holiday themed add-ons this month!
Not a subscriber? You can pre-order our November kit now and lock in our $9.99 kit price by starting a subscription today! You’ll want to choose our SUBSCRIBE & SAVE option to get signed up and start your subscription with our November kit. We will then hold your kit and you’ll be ready to bundle and save at our November 10th reveal! Details on how to bundle with your subscription order will be emailed to you once you have purchased this product.
Kit subscribers, don’t forget! Along with being able to bundle any products from our shop that will ship for FREE with your kit during our 24-hour bundling period, starting on the 10th at 8:00 am Pacific each month, our subscribers will also have access to special discounts on select items! These discounted items can be found in our SALE section during our 24-hour bundling period, and you must be logged into your kit subscriber account to see them. Quick note: Our kits and add-ons are available without a subscription each month, too.
We can’t wait to share all of these new products with you and see how you use them on your projects! Make sure you set your alarm and mark your calendar for Sunday, November 10th at 8:00 am Pacific! We hope to see you there!
Comments Off on A sneak peek of our November 10th reveal! | Share This
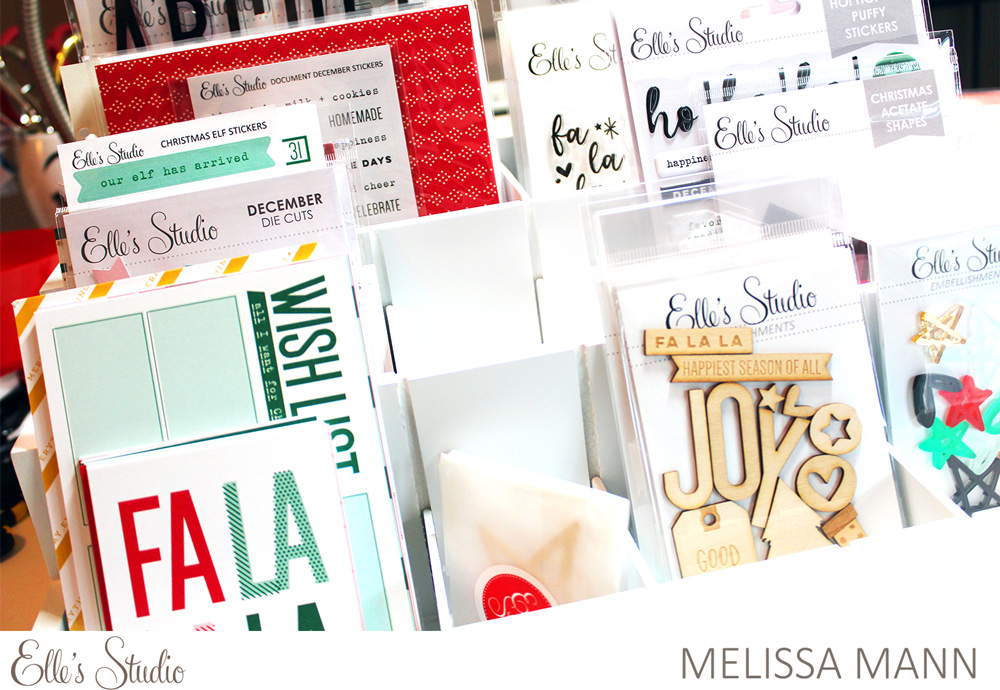
Hello there, friends! November is here and we’re less than 30 days away from the first day of our Document December project! If you haven’t even taken your DD contents out of their box yet, we are here today to inspire you to do just that, and get your project ready for the busy month of December. Whether you prefer to set up your album or notebook in advance, or create something fresh and new each day, our team will be here over the next three Saturdays to bring a new post of inspiration on how you can make the most of your kit, organize your supplies and build a successful Document December project that records your best December memories. Today, we’re kicking it all off with tips and ideas from Steph Grimes, Amanda-jayne Baldwin, Jen McMurtrey, Sabrina Poole and Melissa Mann!
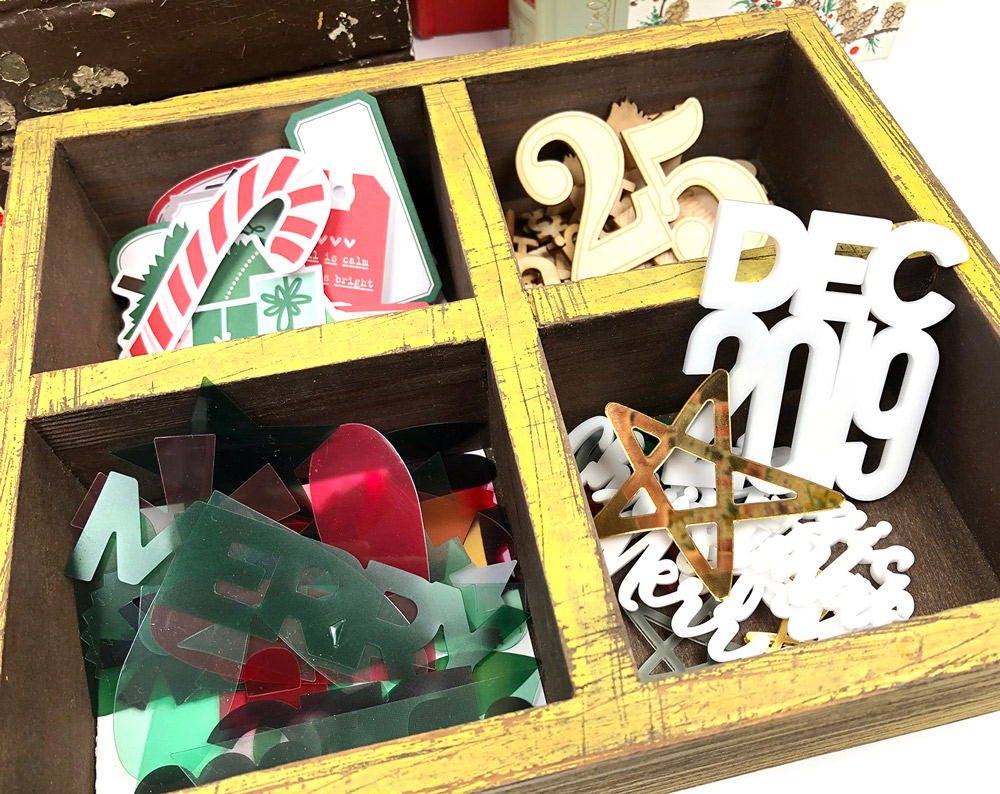
Steph | I love documenting our holiday season! There are always so many activities, celebrations and traditions and they end up being some of my favorite stories each year. Last year, 2018, was the first year I completed a daily album and that’s my plan again this year. I also plan to work on my album every day because I had so much fun doing it that way last year. To help keep me organized, I have all my kit supplies stored in a 13” x 13” plastic container from IRIS. A few years ago, I bought some of these great tray inserts with reconfigurable dividers that work great for storing project kits. (I don’t know if they still make the trays, but they are so awesome!)
In the storage container itself, I am storing all my 6” x 8” papers, some extra papers I’ve added, stickers, and stamps. Then, in the divided tray, I am storing all the little bits and bobs, like wood veneer, acrylics and die cuts, as well as the 3” x 4” and 4” x 6” journaling tags. When I’m not working on this project, the tray will just slide in on top of the things I’m storing in the bottom and has a dedicated spot on my shelf. When I am working with this kit, the tray easily comes out so I can access and find everything I have to work with. I am using a 6” x 8” album for this year’s project and I like to make foundation pages ahead of time. This really helped keep me on track last year, ensured I had time to get as crafty as I wanted because I could do a large part of it ahead of time, and helped me get my album done shortly after December ended.
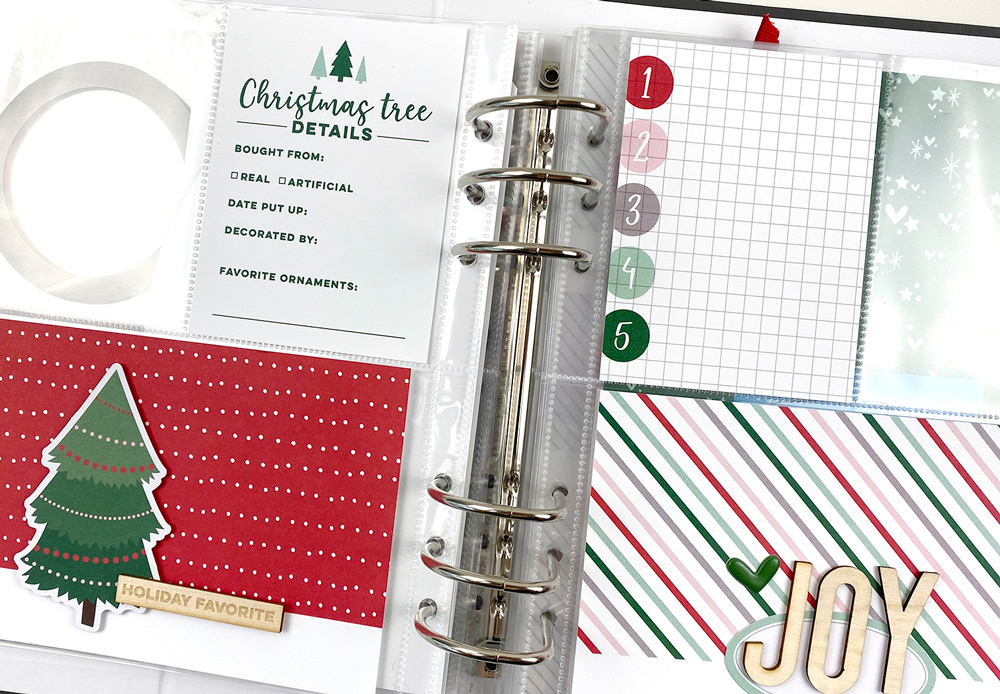
Here, I’ve embellished two of the 4” x 6” journaling tags with die cuts and wood veneer and paired them each with a 3” x 4” journaling tag to kickstart my story for these two days. One of the stories will be about our Christmas tree and will likely include details about the tree itself (we may need to buy a new one this year!) and decorating. For the other page, I’d like to focus on joy by identifying five things that are bringing us joy on that particular day. Doing some of this thought work and preparation ahead of time helps me remember what stories I want to tell and what supplies I want to use.
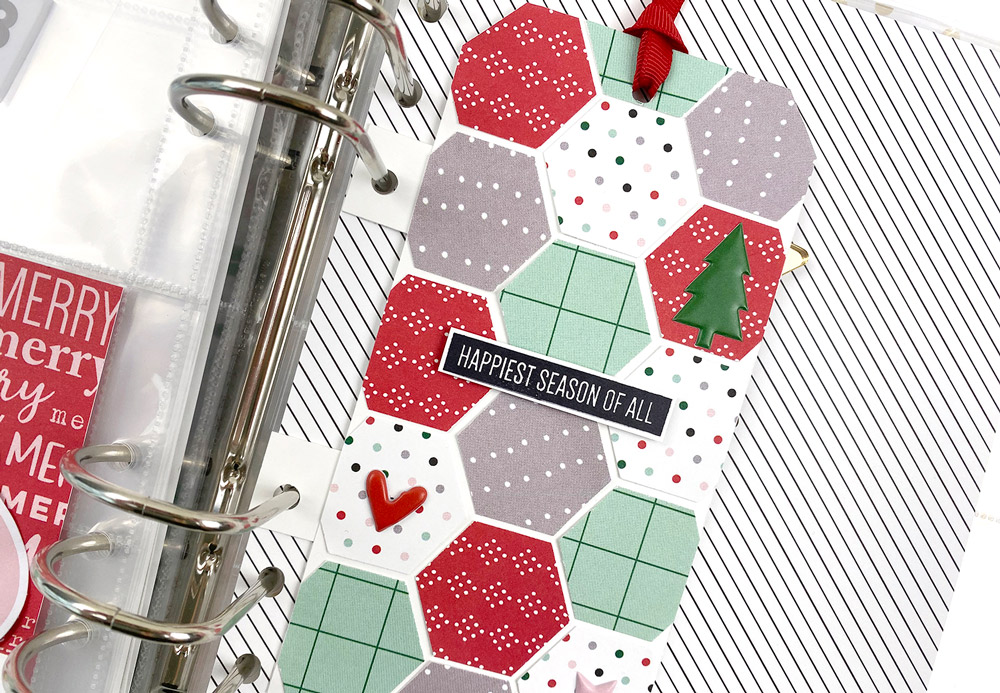
Like I mentioned, I like to get crafty in this album and sometimes I just want to go all out! But when I’m working day to day, I don’t always have time, so doing some of this work ahead of time helps. One of the special pieces I made already is this quilted tag. I used a hexagon punch to punch shapes from a few of the 6” x 8” papers in the kit. Then, I arranged them on a tag I had in my stash to create a sort of paper-pieced quilt. I embellished with a stamped sentiment from the Christmas Phrases Stamp and a few puffy stickers, added ribbon and some tabs punched right into my album.
I can’t wait for this project and to see what you create! Happy HOLIDAY scrapping!
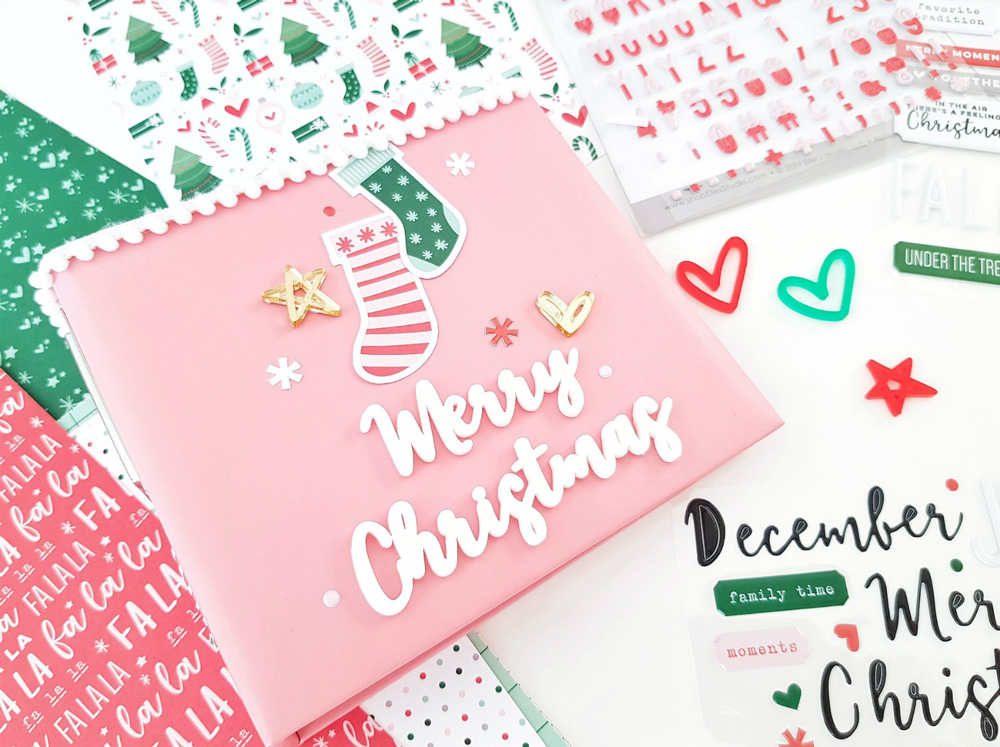
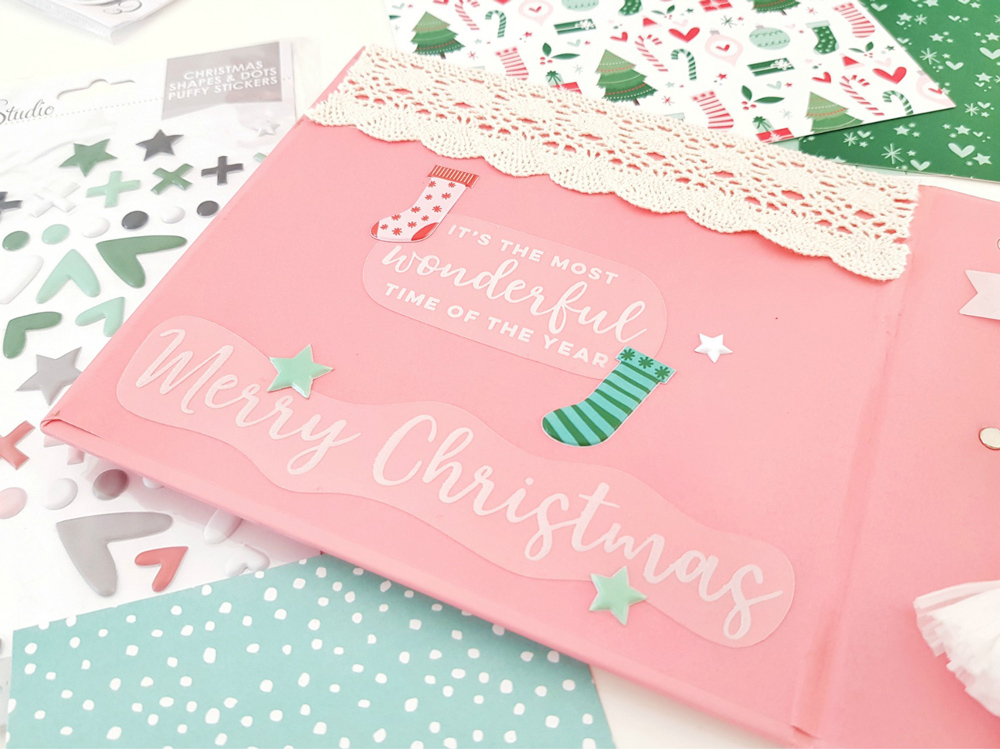
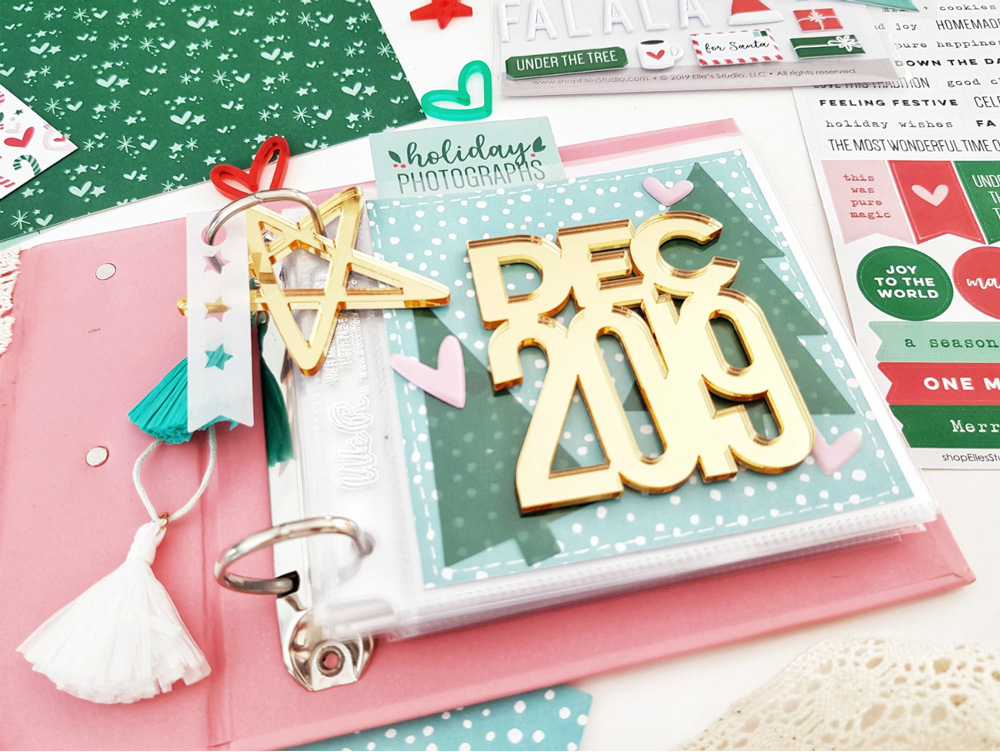
Amanda-jayne | Hi, friends! It’s Amanda here, and I am so excited to share how I’ve prepared my Document December album, as well as give you a few top tips & early glimpses too! I just LOVE this season, and Buddy the Elf maybe one of my idols, ha! #nogrinchhere. This year, I’m a little time poor so I’ve opted for a smaller, easier album to record this year’s festivities. My album is a 4″ x 4″ pocket page album, but it was a tad boring for my liking! No surprises then that my album preparation involved quite a bit of embellishment and decoration. I started with the book plate and spine of the album, and added the year with our Red Dipped Puffy Alphabet Stickers. I also glued pom pom trim (from my sewing box stash) across the top of my album cover. The tiny pom poms reminded me of snow and really added a fun & playful element to the cover.
Top Tip #1: Selecting a smaller pocket size album will ensure that we don’t get overwhelmed by the enormity of documenting the season.
Speaking of fun, I just loved decorating the cover! The Merry Christmas Acrylic was a perfect title and adornment for this year’s album—take a peek!
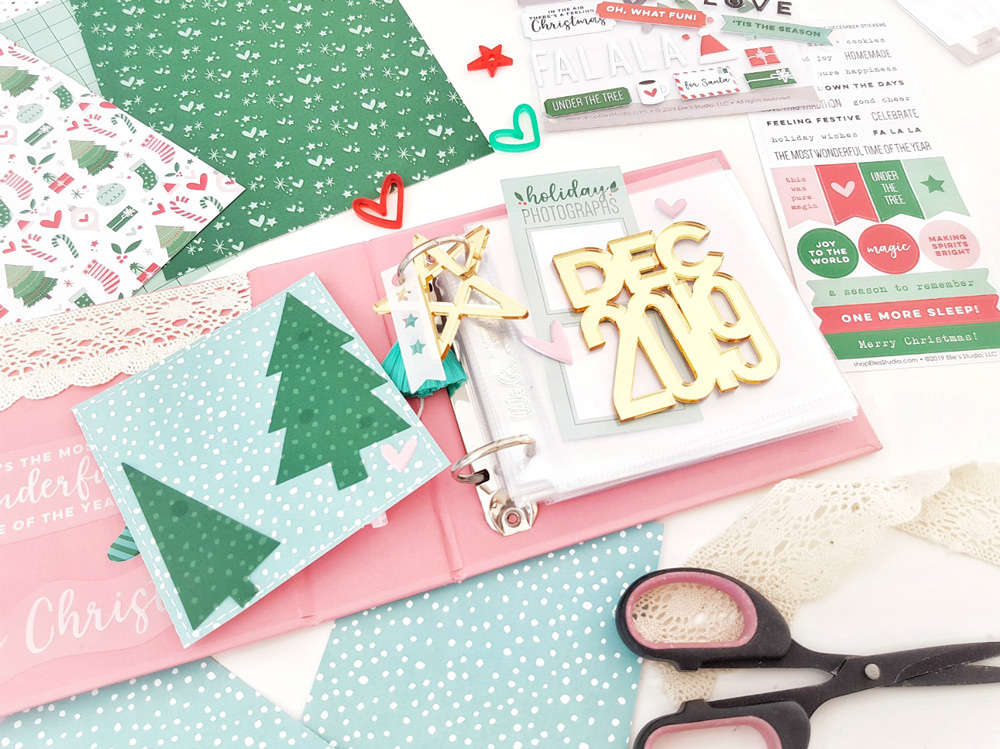
I’m so happy with how this turned out! Simple, sweet and really pretty! Those stocking die cuts from the Document December 2019 Kit are everything! And of course, I couldn’t just do the front cover, so here’s a peek at the inner cover too.
You’ll notice that on my desk I have cut a whole lot of patterned papers to the 4″ x 4″ size to aid my album preparation. I have used both the Document December 2019 Kit papers, as well as one of the Noteworthy 12 x 12 Paper Collection papers too!
Top Tip #2: When it comes to unusual sized albums, it helps to pre-cut a bunch of background papers so that all you need to do is print your photo and add a sentiment and sticker or two!
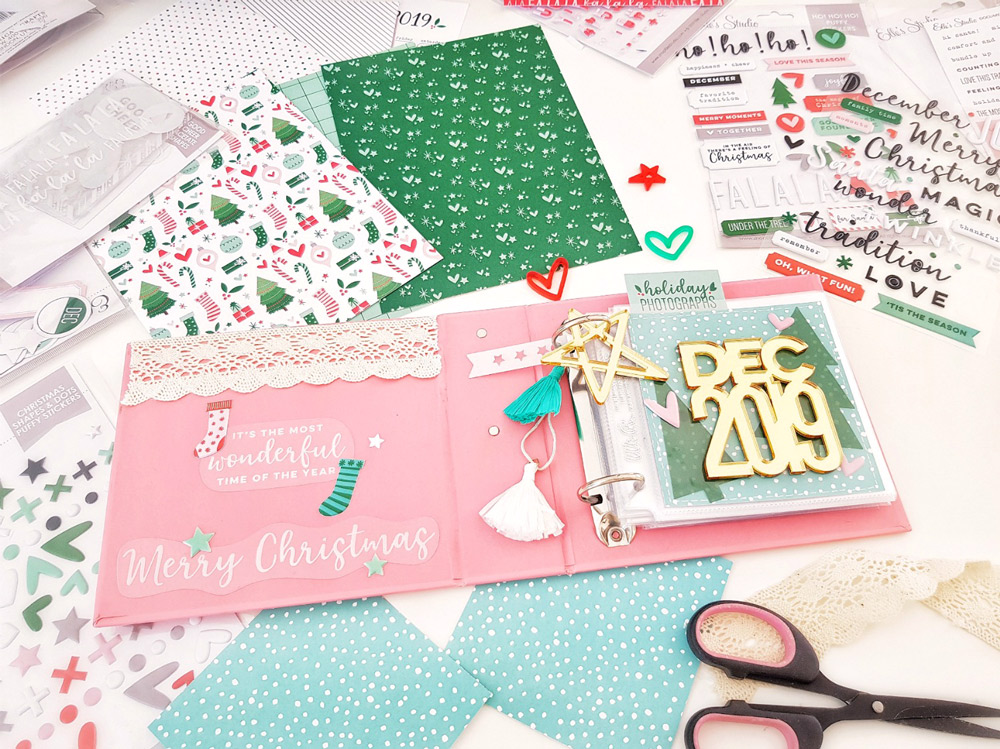
For the inside cover of my album, I combined the new Good Cheer Acetate Die Cuts with more of the puffy stickers from the Document December 2019 Kit. In keeping with my love for fabric trims and textural elements, I also added some vintage burlap lace & a couple of tassels from my stash.
Top Tip #3: To avoid the appearance of glue behind the clear acetate, I used the puffy stickers to hide the spots and help hold the acetate in place.
I attached two tassels to one of the album rings, and while I was there I decided to hole punch the Good Cheer Acetate Die Cut star banner and thread it onto the ring as well. For maximum impact, I also threaded the large gold acrylic star from the onto this ring as it’s embellishments galore for this mini album!
Top Tip #4: Hole punch die cuts and maximize embellishments with openings to use as ‘dangling charms’ on album rings. Great for adding interest & texture to your pages, as well as softening the appearance of the album rings.
Last, but by no means least, to avoid over-filling my pockets I adhered the Dec 2019 Gold Acrylic to the front of my clear pocket, not to the pattern paper base card! Such a great opening page to my super sweet DD album!
Top Tip #5: Adhere larger embellishments to the exterior of your pockets to keep them from getting too bulky!
It’s beginning to look a lot like Christmas for me! I hope my DD album preparation has inspired you to get started on your Christmas documenting too!
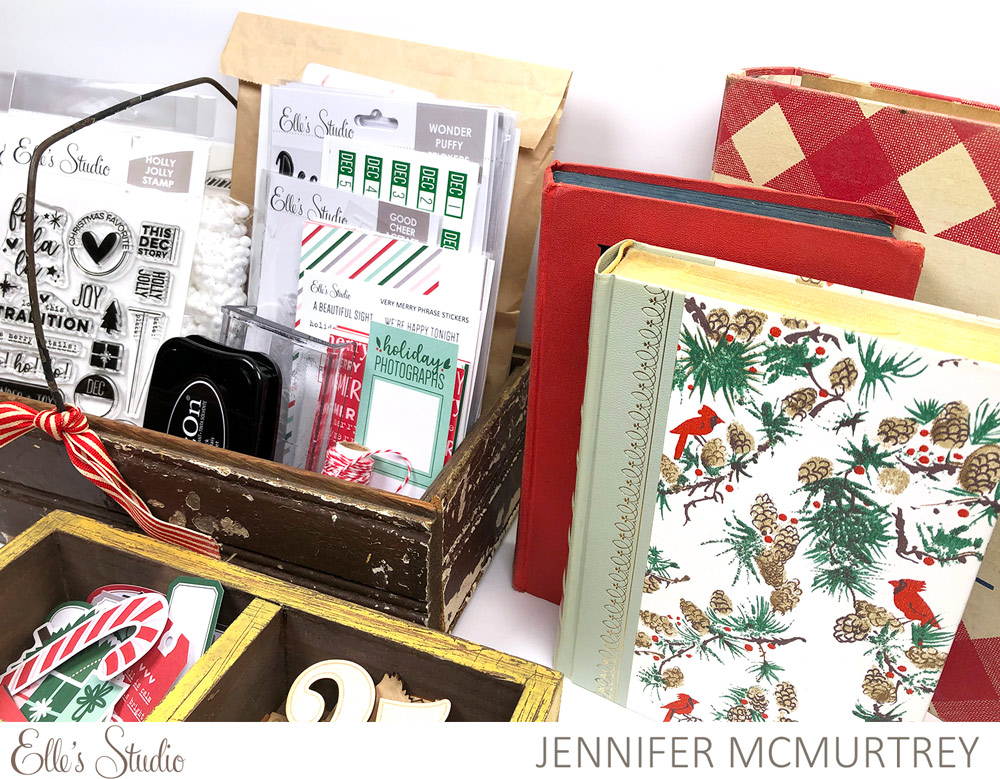
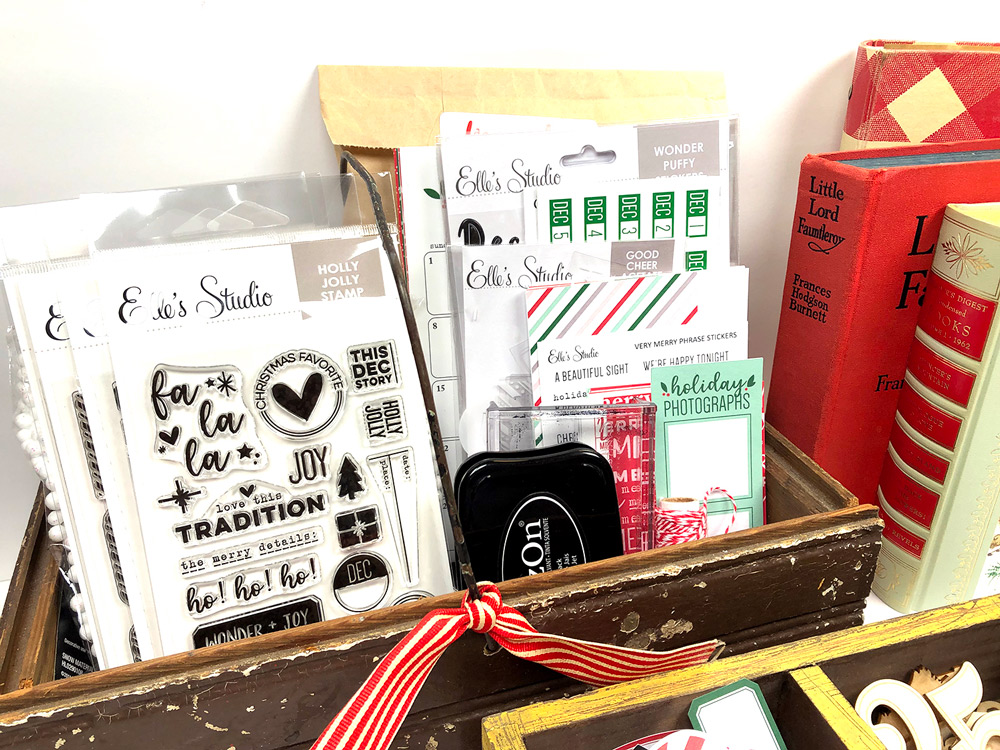
Jen | I am so excited about this year’s Document December project and have already begun to get all of my Elle’s Studio goodies organized. Because we don’t have littles anymore and aren’t as busy with activities, I’ve decided to begin curating stories of my childhood Christmas memories in order to pass them on to my own children.
While I do have a 6″ x 8″ album on standby in case any issues arise, I plan to use a vintage Betty Crocker cookbook that I purchased over the summer. It will be perfect because it is in binder form and already has tabbed dividers that I can alter. Pairing my Elle’s Studio products with a box of old Christmas ephemera should be the perfect mix to create a really fun junk journal. The majority of the prep work will take place in early November when I head to a four-day crop where I can work on it uninterrupted. I’m really excited about this project and cannot wait to share my progress with you all.
For now, I have organized all of the product into two trays that I can take with me to the crop as well as use when I am home. The trays will be placed on a shelf in my craft room where they can be easily accessed as well as put away as I work on the book.
I hope you all enjoy the season and the delight of creating such a special project that can be enjoyed for years to come.
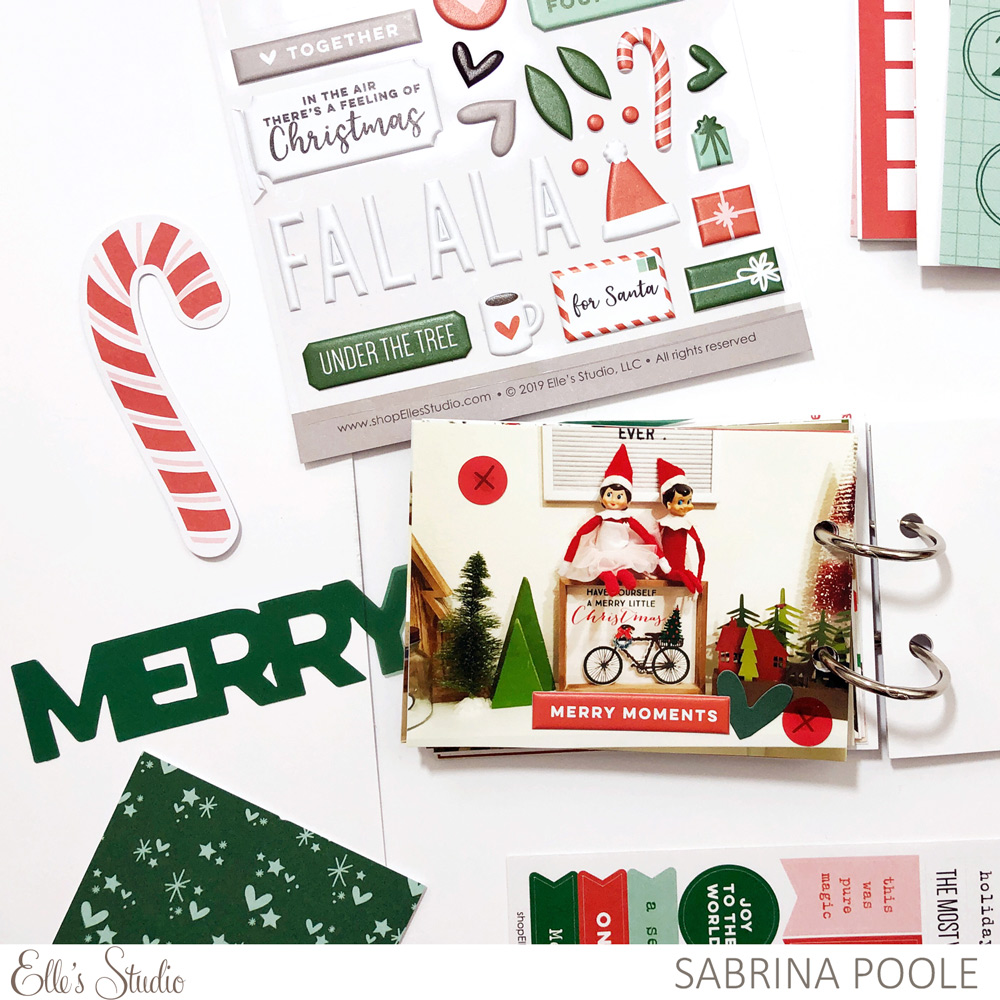
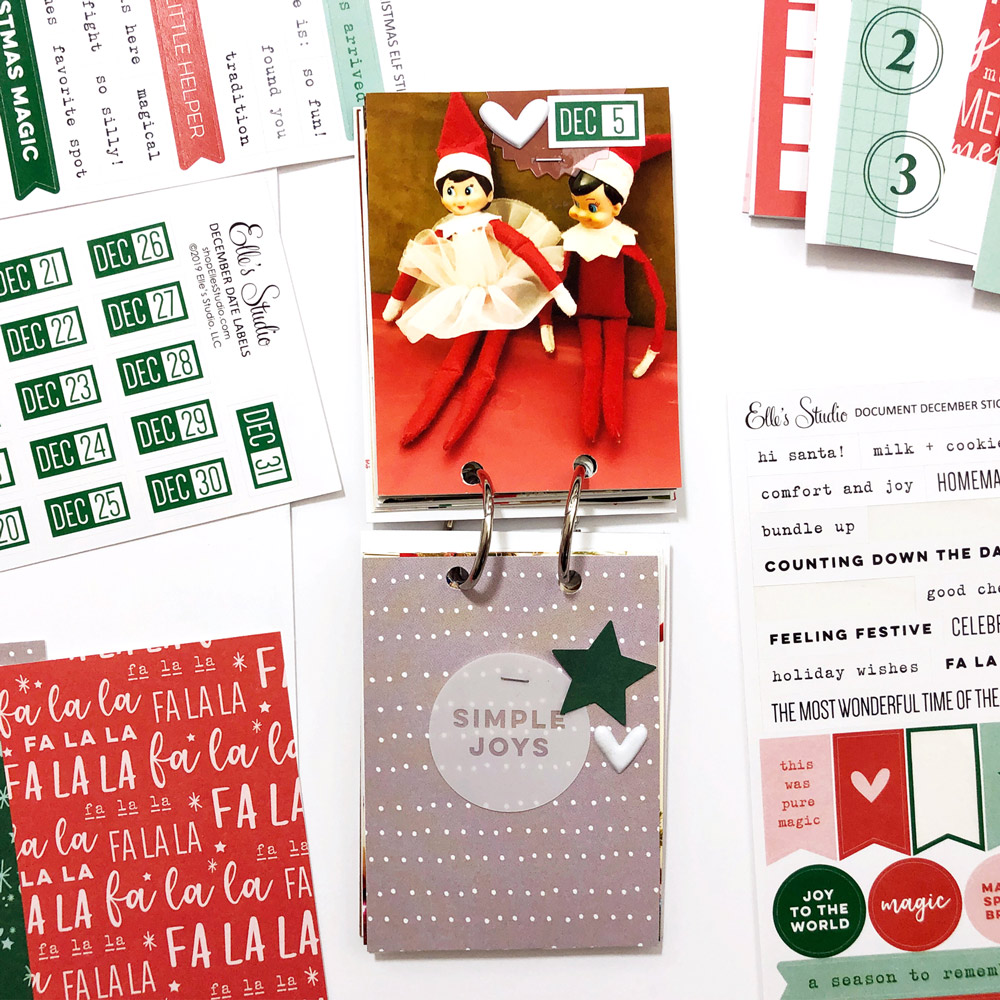
Sabrina | Using my Document December 2019 Kit this year, I decided to create two separate mini album projects that I’ve had on my mind for a while, but have never got around to! One of the projects is documenting our Elf on the Shelf elves. My family has two: Melvin and Matilda, and I wanted to document their adventures in 2017. I decided to create a 3″ x 4″ album with some chipboard that I had left over. I then hole punched the top of the photos and the cards at the papers to bring the album together.
Overall this album is a pretty simple, but it was a fun album to put together! I use lots of stickers and layers and tags to bring it together. I’ll also included some journaling on a few of the photos using labels and the stamps as prompts.
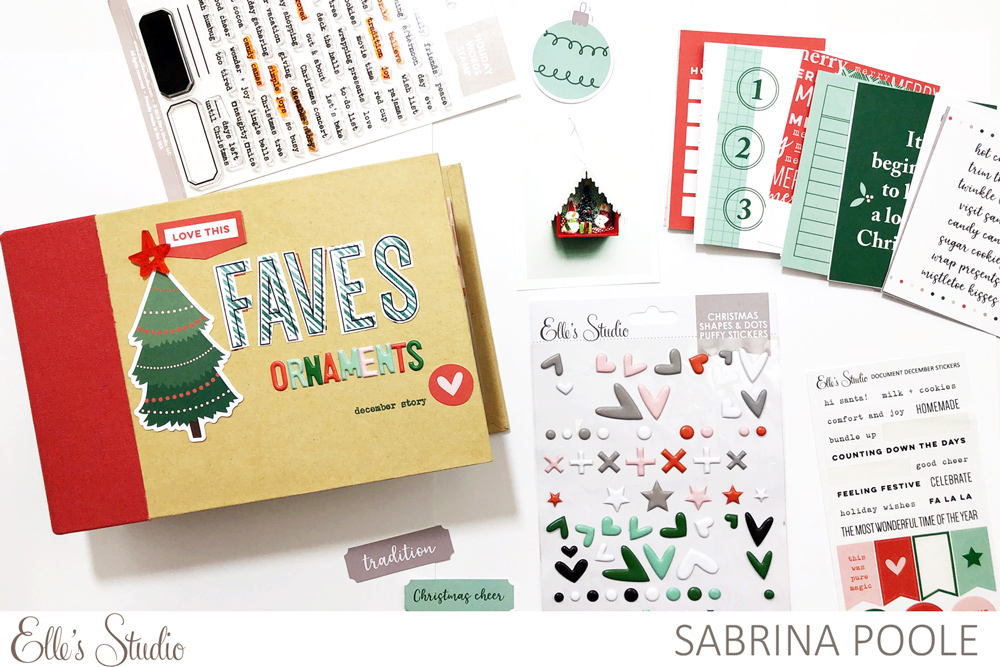
For my second project I decided to create a favorite ornaments 4″ x 6″ album. On the cover I stamped the word “Faves” using the Candy Cane Large Jane Alphabet Stamp and the Large Jane Alphabet Stamp Outline to outline the letters. I cut those letters and decorated the cover with some diecuts and an acrylic star for the tree.
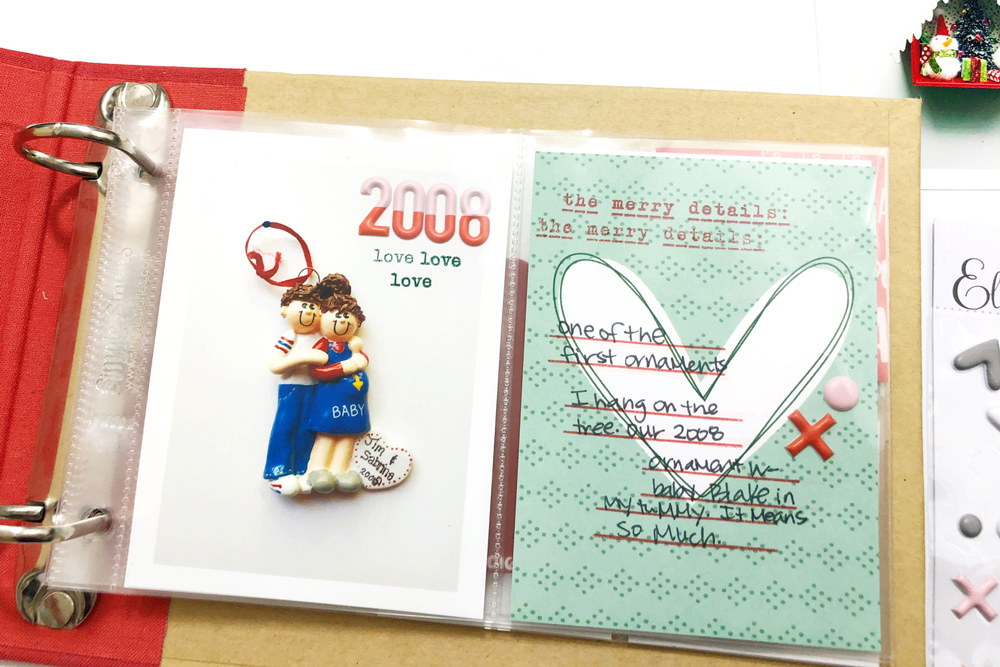
I started with an ornament from 2008, using a 3″ x 4″ tag from the Document December 2019 Kit to write the story that goes along with the ornament. I plan on adding to this album all through December!
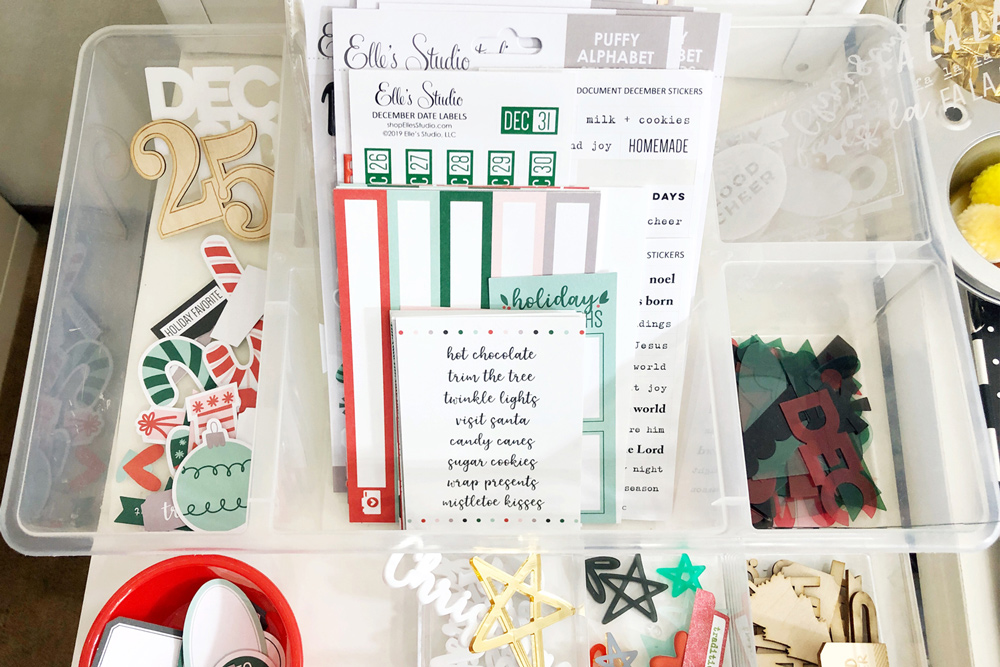
To organize my Document December supplies, I used a IKEA plastic organizer with divided sections. They are inexpensive and I use them to organize a lot of things in my craft room. I have one section for acrylics and diecuts. The two big sections hold all the stickers and the 6″ x 8″ papers plus the Document December stamps.
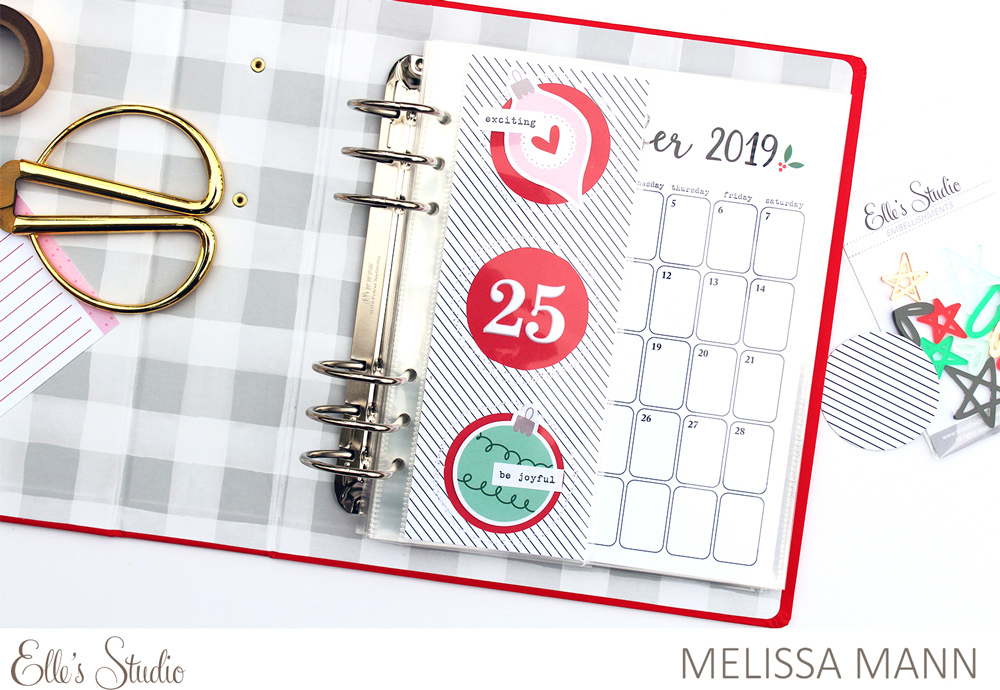
Melissa | Hello, friends! This is Melissa with you and I’m so excited to be using the Document December 2019 Kit and extras to capture the magical holiday season.
This year, I am using a 6″ x 8″ album with a variety of different page protectors. I created my opening page for my album using a 3″ x 8″ page protector and cut down one of the patterned papers included in the kit. I punched three circles in the paper and backed the negative space with solid red paper.
I used my sewing machine to stitch the circles in place, then placed two ornament die-cuts in the top and bottom circles and used the number puffy stickers from the Document December Kit to place the number “25” in the middle circle.
On the other side of this page, I typed up a portion of the poem “A Visit from St. Nicholas” onto vellum, which I layered over the striped pattern paper from the Document December Kit. I’m going to use the December calendar on the next page and will probably embellish it with some stamping and puffy stickers!
I typically don’t follow a set day-by-day schedule for my albums, but instead I choose to document memorable moments, actions, special baking, and other things that make the month of December a magical experience! Have fun setting up your project this month!
Wow, those were some great ideas, right? We hope you will use them to start prepping for your Document December project—whatever form that may look like! Stay tuned for more December inspiration coming your way next week, when four more design team members will share their ideas for how to make this the best December project yet!
We love out talented design team members because they help us to think of fun and creative ways to use our product. Today, Candace Perkins is here to share a fun and unexpected way to use our newest metal die, Everyday Tabs. With our without the Everyday Tabs Stamp, this die can come in handy on your projects. Let’s see how she used it!
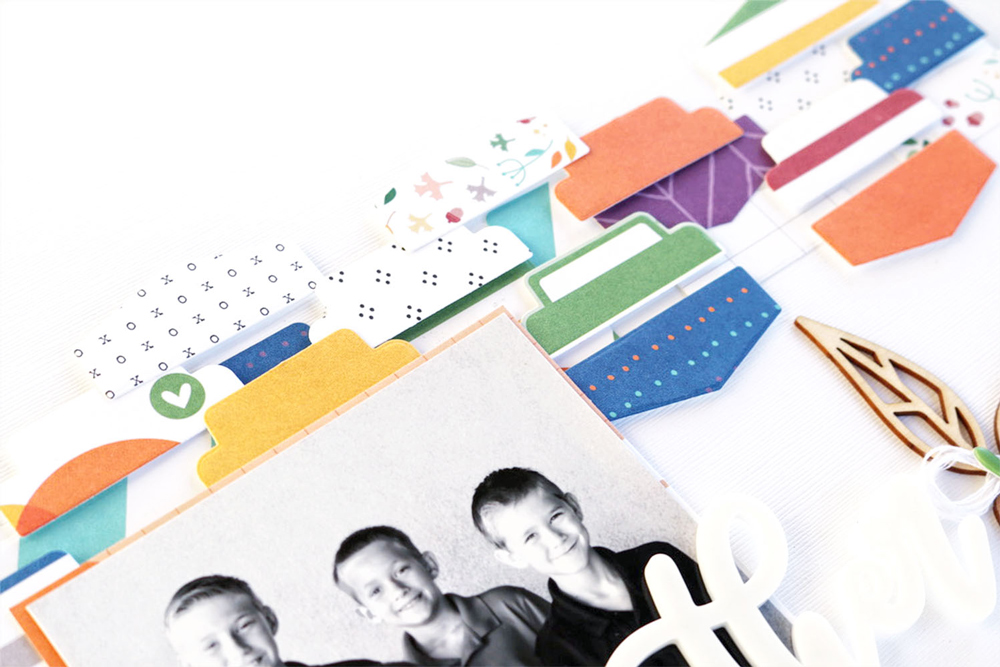
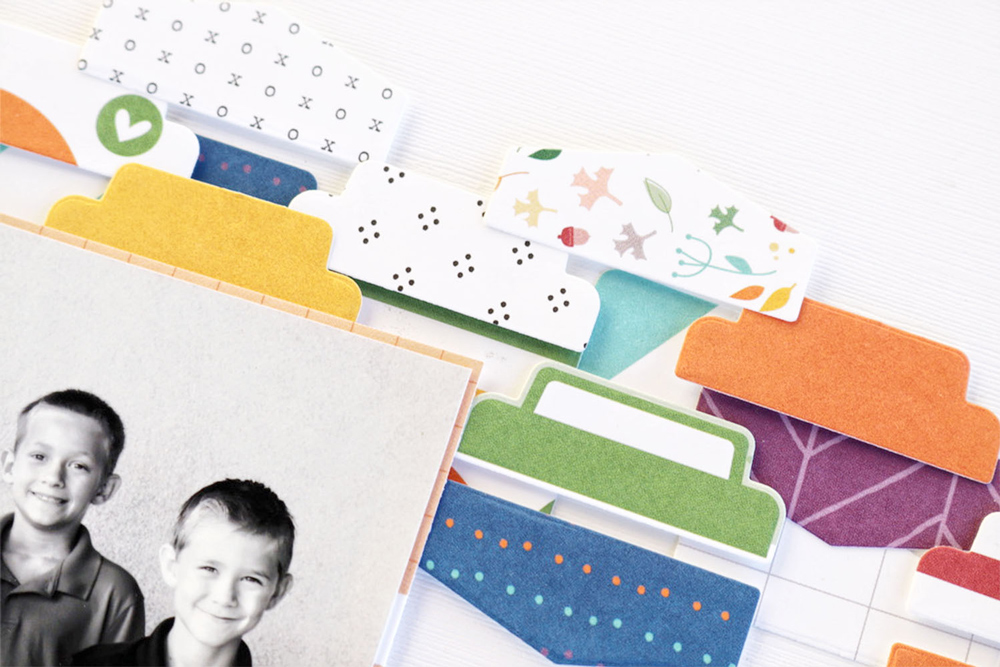
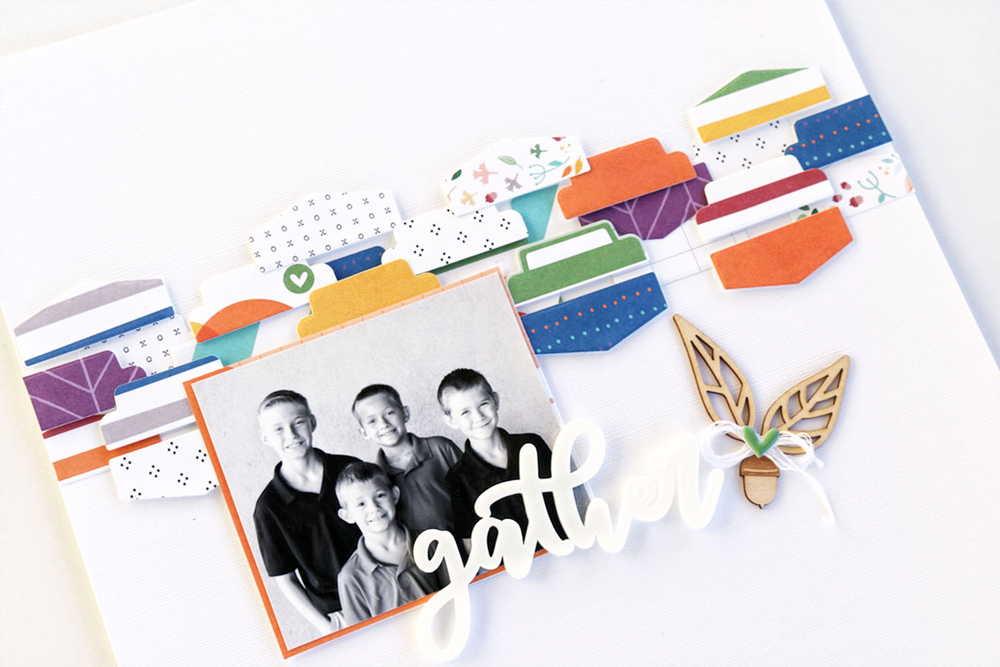
Hello friends! It’s Candace with you today to share a fun project using the Everyday Tabs Metal Die. I love working with dies and finding new creative ways to use them. For today’s project I wanted to use the dies to create a layered background on a 12″ x 12″ layout. Here is a look at the final layout and layered design I created using the dies:
First, I used the Metal Die to cut lots of tabs from the various cards in the October 2019 Kit. Next, I started moving and arranging the tabs around the page to create a design that is both creative, but balanced.
I chose to first put a base of tabs directly onto the cardstock and then I popped up additional tabs with foam adhesive to create more dimension and interest on the page.
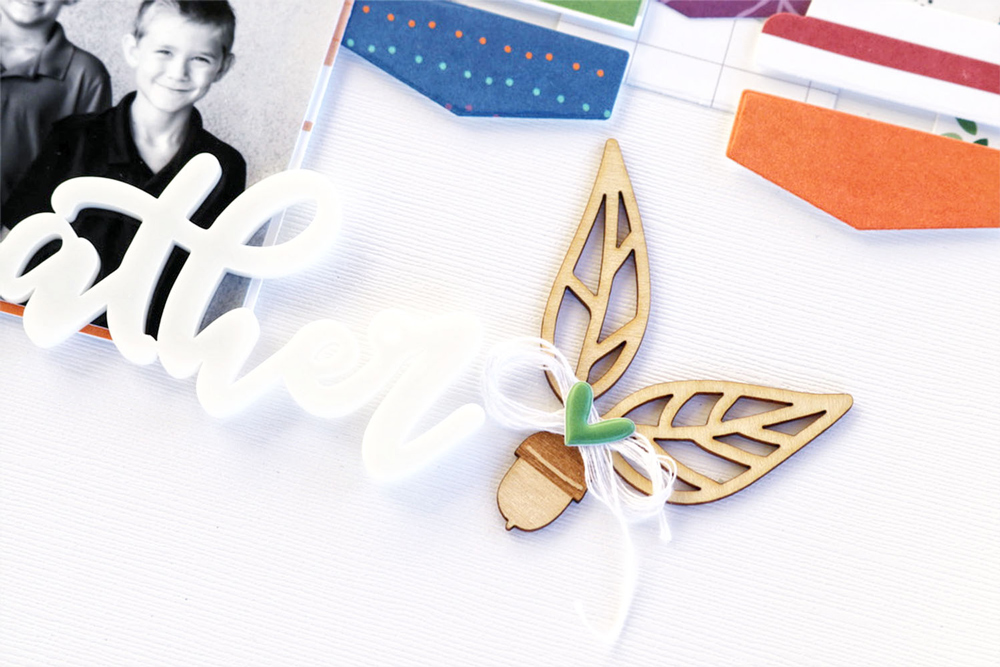
To create my title I added the Gather Acrylic piece along the bottom of the photo. I love that the white on white is an easy way to add a subtle and soft title that doesn’t compete with the bold colors and patterns on the tabs. On the side of the acrylic piece, for just a bit more embellishment, I added two Wood Veneer Leaves along with a twist of twine and topped it off with a puffy heart sticker from the Autumn Puffy Stickers sheet.
I love this simple and clean layout created with a base using the Everyday Tabs Metal Die! How will you chose to use the fun tool on your projects?! We would love to see how you use the tabs in fun and creative ways! Post your projects on Instagram using the tag #EllesStudio, or share your project in our Elle’s Studio Facebook Group!
Thanks for stopping by! Have a great day!
Comments Off on Not Your Everyday Layout with Candace Perkins | Share This
Bwah ha ha! Happy Halloween, Elle’s Studio friends! We’re excited to share a spookingly fun version of “Inspired By” with you today—when one of our teammates scraplifts another using a completely different set of product, using their own style! Today Suzanna Lee is here to frighten you into creating , and we know you’ll love the inspiration that she chose, as well as her new project. Let’s take a look!
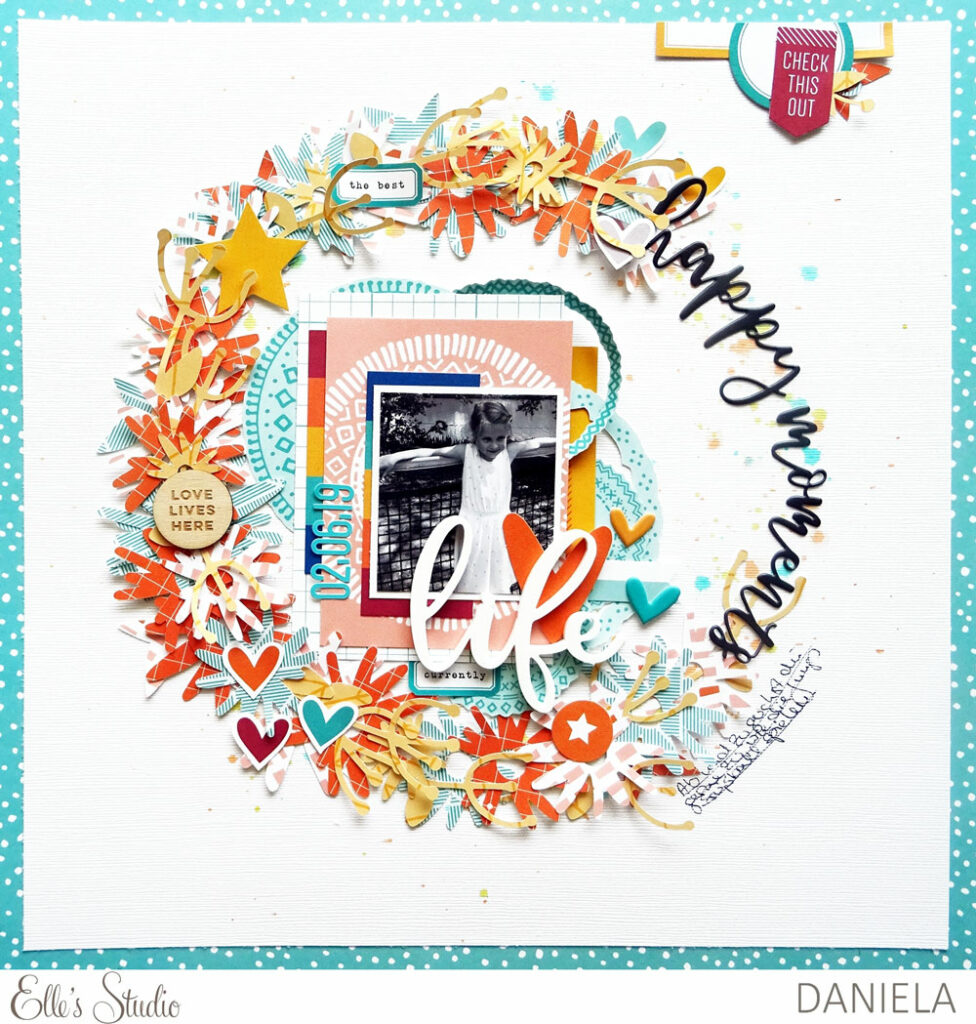
Happy Halloween my friends! It’s Suzanna here today to share with you a spooky Halloween treat: a scrap-lift that I did of one of Daniela’s September gallery layouts, using the October 2019 Kit and add-ons. I’m a huge fan of Daniela’s work, so much so that this is the second scrap-lift I have done using one of her projects as inspiration. Here’s Daniela’s layout that inspired me:
Here is what I created based on her inspirational layout:
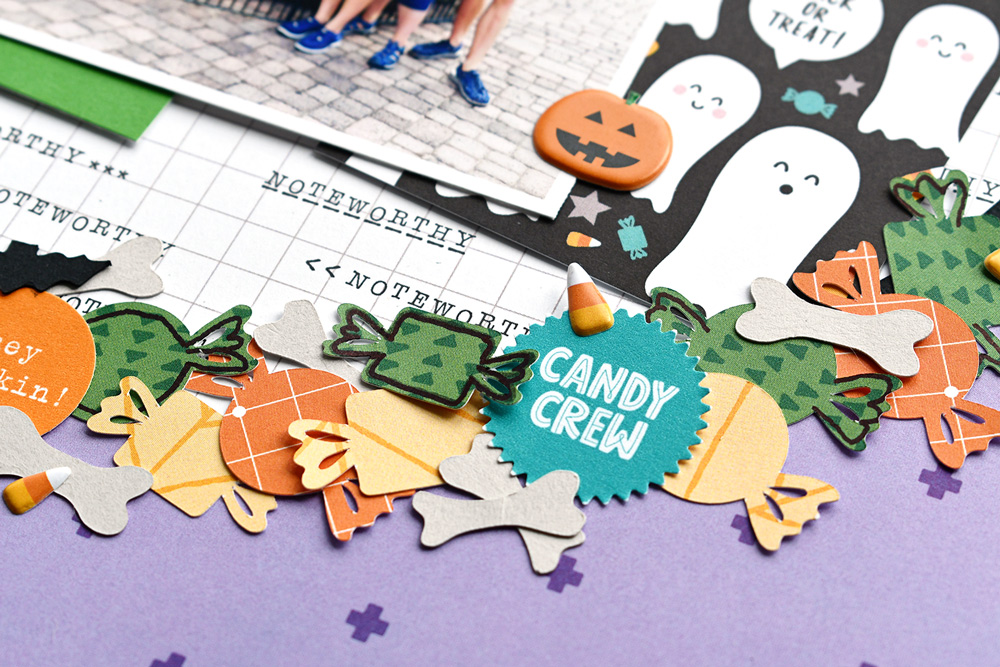
There were several things that grabbed my attention on her layout: the large circle with the photo in the center, the layers behind the photo and the “wreath” of goodies with the title built into the wreath. Being that today is Halloween, I had to spookify Daniela’s layout—it only seemed fitting!
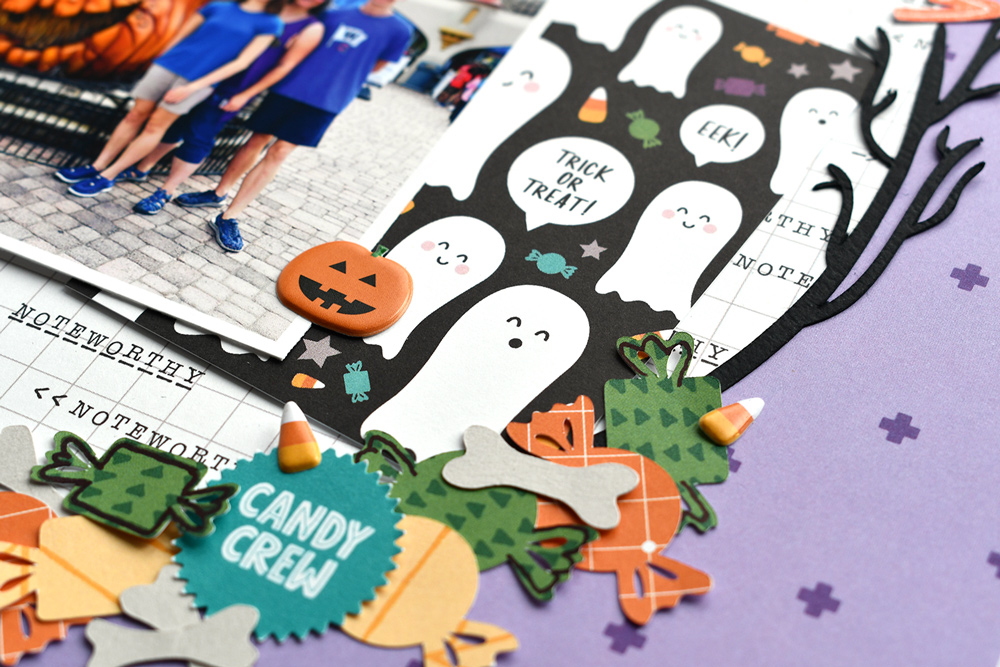
The floral wreath that Daniela created using digital cut files and an assortment of embellishments really stood out to me and were what I focused on for this scraplift. As the theme of my layout is our trip to HalloScream at King’s Dominion, a theme park done up for Halloween, I amended the elements I used to suit the theme. A mix of candy and bone die cuts from the October Cut Files, puffy sticker candy corn pieces from the Halloween Puffy Stickers and the circular elements from the Autumn Fun Printables were just the treat filling necessities!
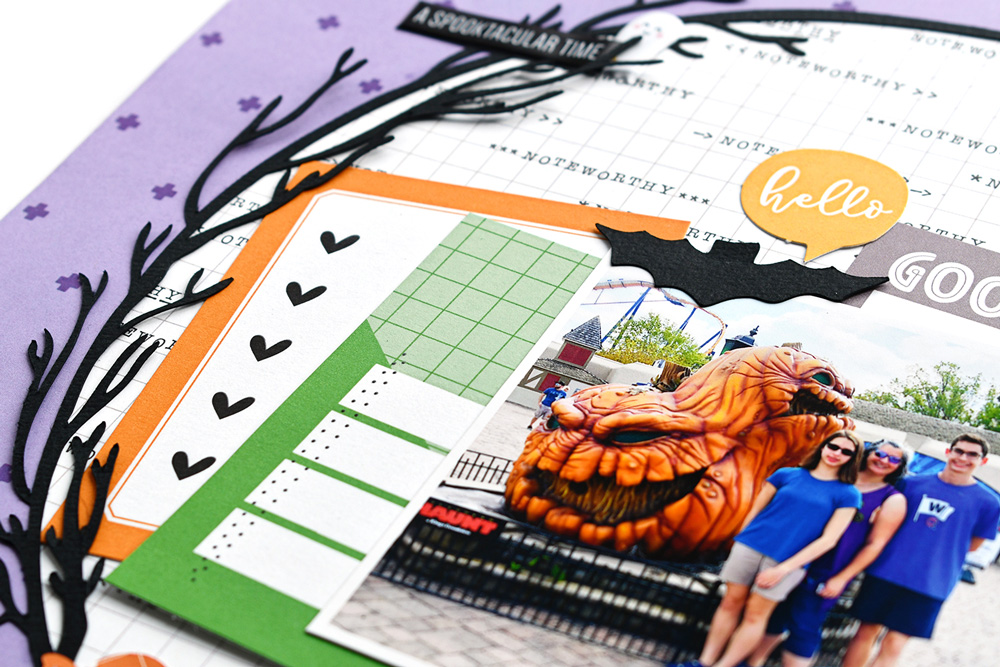
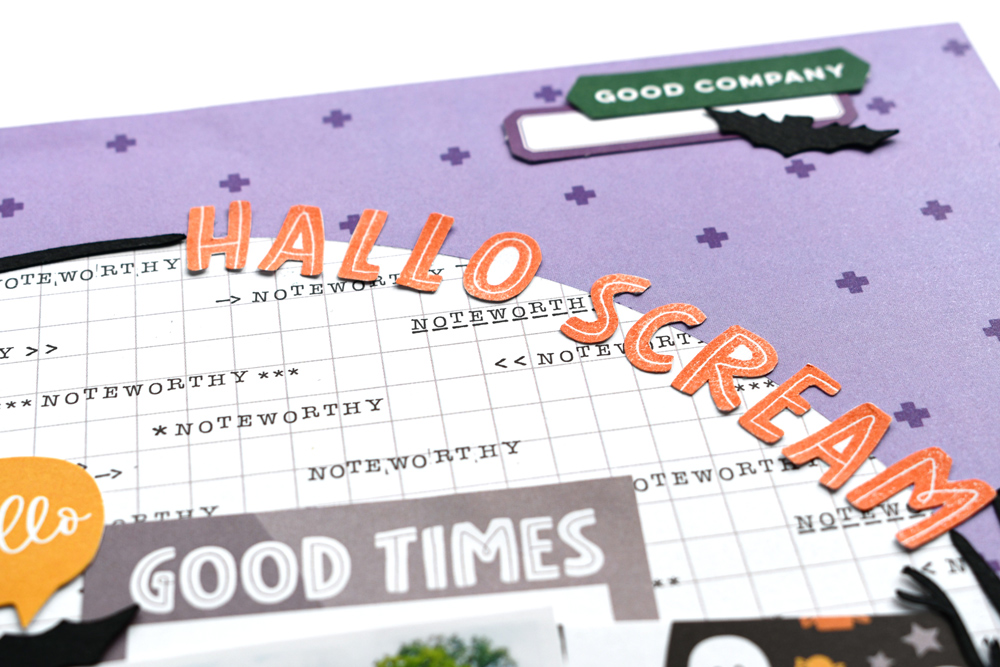
Having chosen to use a colored background instead of the white that Daniela used, added a spooky tree die cut to form my circle, leaving the base to add the plethora of Halloween goodies. This allowed for a bit more scene creating—more true to my style of memory keeping. To create balance around the circle, I worked my title into the design, stamped with the Winifred Alphabet Stamp in orange ink.
I combined both tags from the October Kit and the Halloween Journaling Tags to create layers behind the photo. Aren’t the ghosts in that card to the right of the photo just perfect?! That has to be my favorite tag released this month!
Have you been inspired by any of the design teams projects? Have you been so inspired that it has inspired you to incorporate an element of that design into your own? Or scrap-lift the page altogether? We would love to see how our projects have inspired you. Be sure to use the hashtag #EllesStudio on Instagram or share in our Elle’s Studio Facebook Group so that we can find your design team inspired projects! Thanks for stopping in today!
Comments Off on “Inspired By” Halloween Edition with Susanna Lee | Share This
Downloading digital cut files is a quick process, and once your paper is chosen and cut, card designs can come together in no time at all! Melissa Mann is here with us today to share just how cute these October Cut File card creations can be. Let’s take a look!
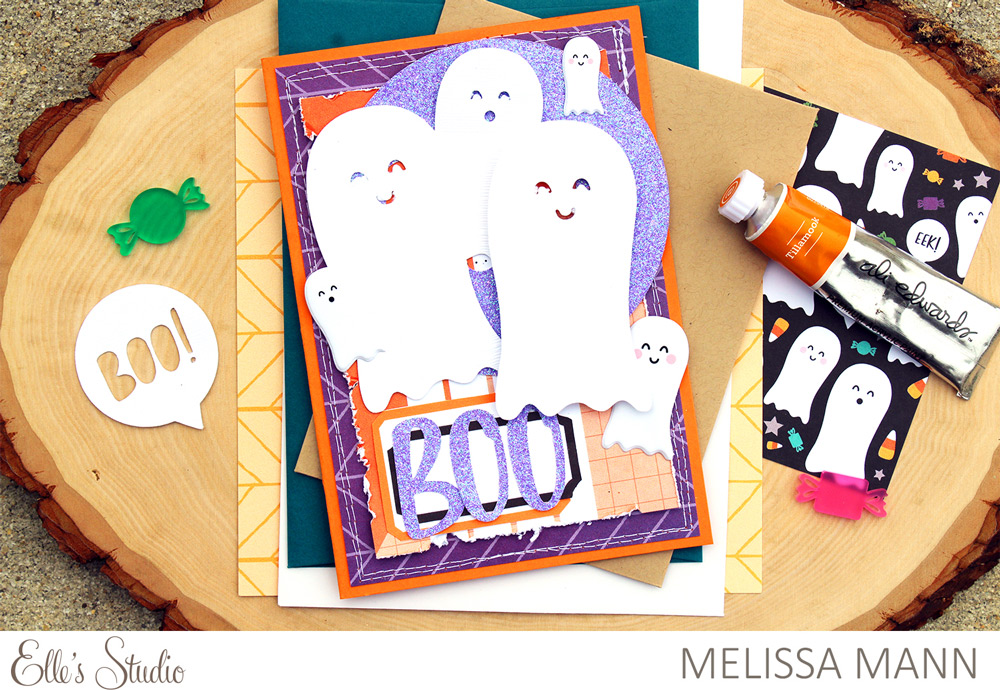
Hello, Elle’s Studio friends! This is Melissa here with you today and I’m sharing a couple of quick and easy Halloween-themed cards with you today that you can create using the latest October Cut Files in time for your festivities tomorrow!
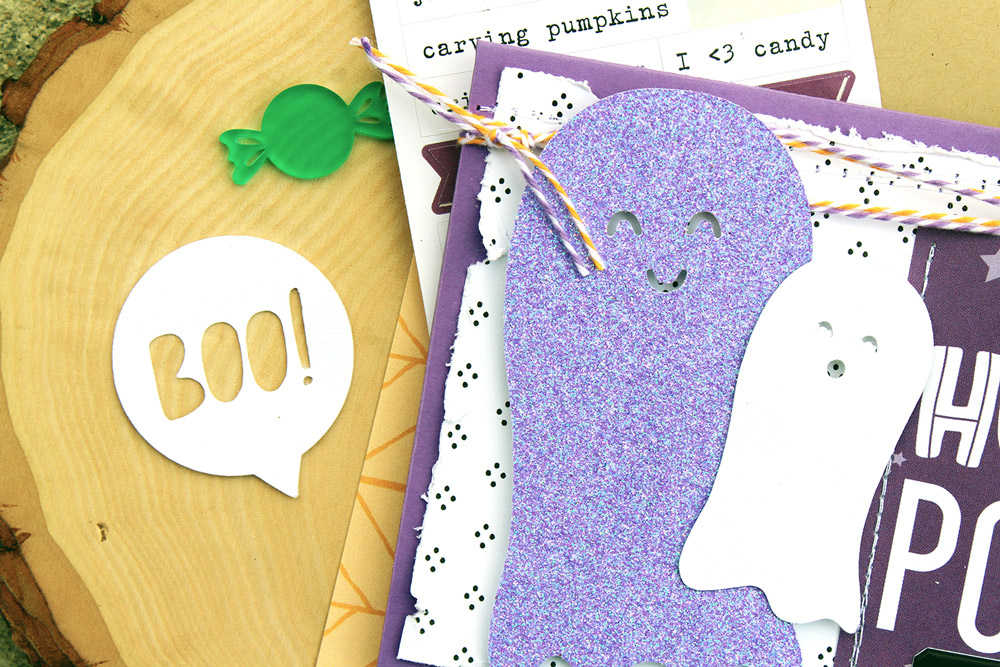
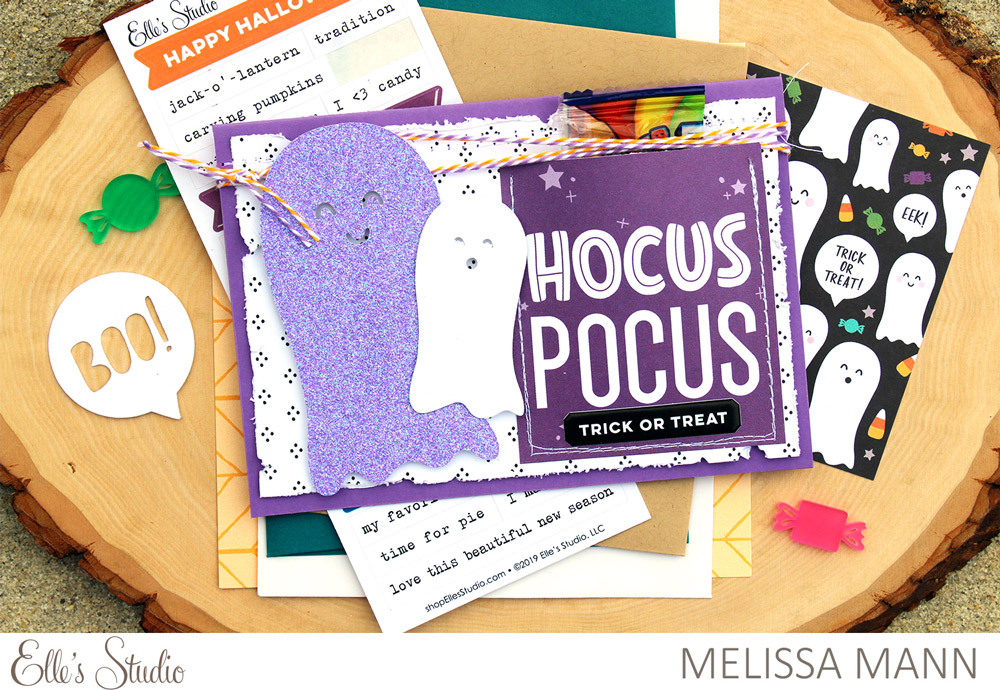
I really loved the purple “Hocus Pocus” 3″ x 4″ Halloween Journaling Tag and wanted to use that on one of my cards. I decided to cut this tag down slightly, trimming the top and bottom. My idea was to stitch it down to the patterned paper background on my card and use it as a candy pocket!
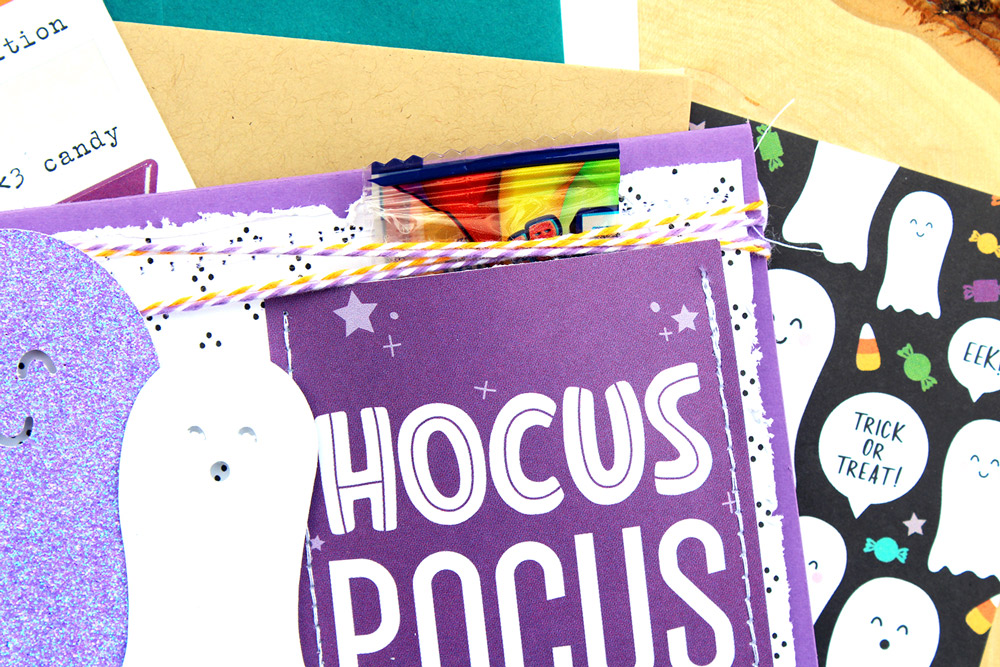
It was just the right size to slip a giant jelly candy in, and made for a fun treat on this card. I used the ghost October Cut File and first cut a sparkly purple ghost, layering a white ghost on top. I finished off my card with a Halloween Puffy Sticker phrase and some baker’s twine around the top!
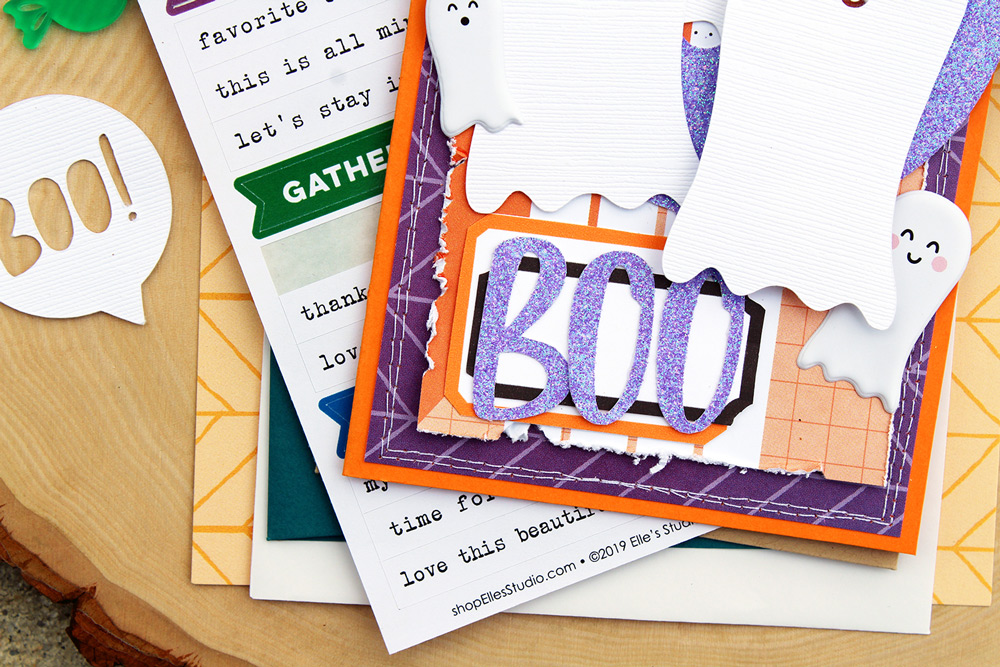
For my second card, I layered some purple and orange cardstock and patterned paper from the Home Sweet Home 6 x 6 Paper Stack to create the base of my card. I again used the ghost October Cut File (it’s just too darn cute!) and layered several ghosts on the front. I backed them with glittery purple paper which I cut the “BOO” quotation bubble from, and used the negative letters from that for my card’s sentiment, which I placed on two layered October Print and Cut Labels!
It took just about 25 minutes to cut the October Cut File ghosts out using my Silhouette and create these two cards! Don’t forget that the awesome digital files that are available every month can be used on any project you are working on—including cards! Thanks for stopping by!
Comments Off on Last-Minute Bootiful Card Creations with Melissa Mann | Share This
Halloween is just around the corner, and a little planning on how you will document it will make recording those special, frighteningly fun memories quick and easy! Let’s hear a few tips from Jess Forster, and find out how she is approaching Halloween documenting in pockets!
When it comes to scrapbooking Halloween, I love using the purple, orange, black and white colour combinations. To me, it represents the dark and spooky feeling of late October and a night filled with trick or treating! Using the goodies from Elle’s October release, I documented my family’s most recent Halloween adventures from 2018. Have a look:
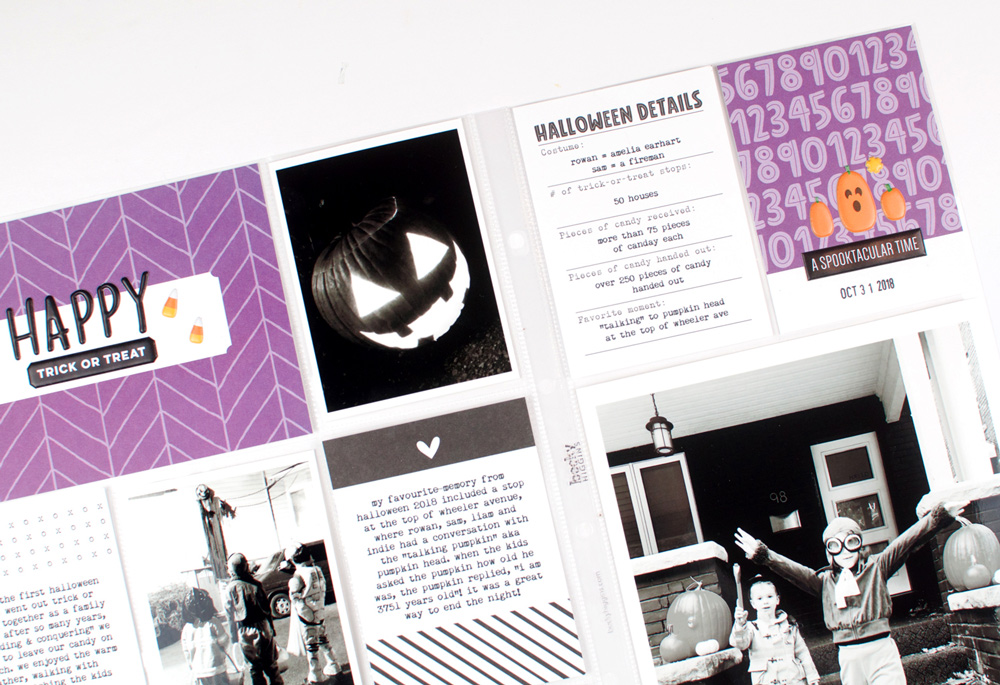
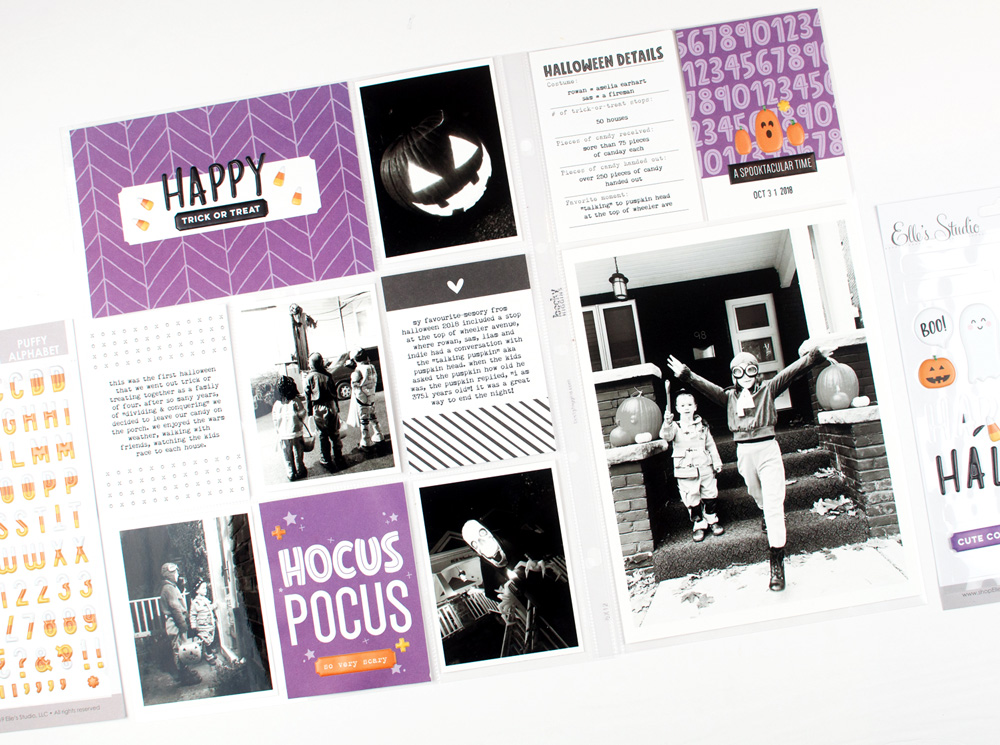
In this 9″ x 12″ + 6″ x 12″ spread, I decided to focus on capturing the trick-or-treating aspect of October 31st. Now that my kids are older and can stay up past 7:30 pm, they were eager to visit as many houses as they could in a short period of time. In years past, we focused a lot on dressing up in fun costumes as opposed of going door to door. This was the first year that my son could keep up with my daughter and they certainly made use of their time outside. Hooray for a warm, non-rainy Halloween night!
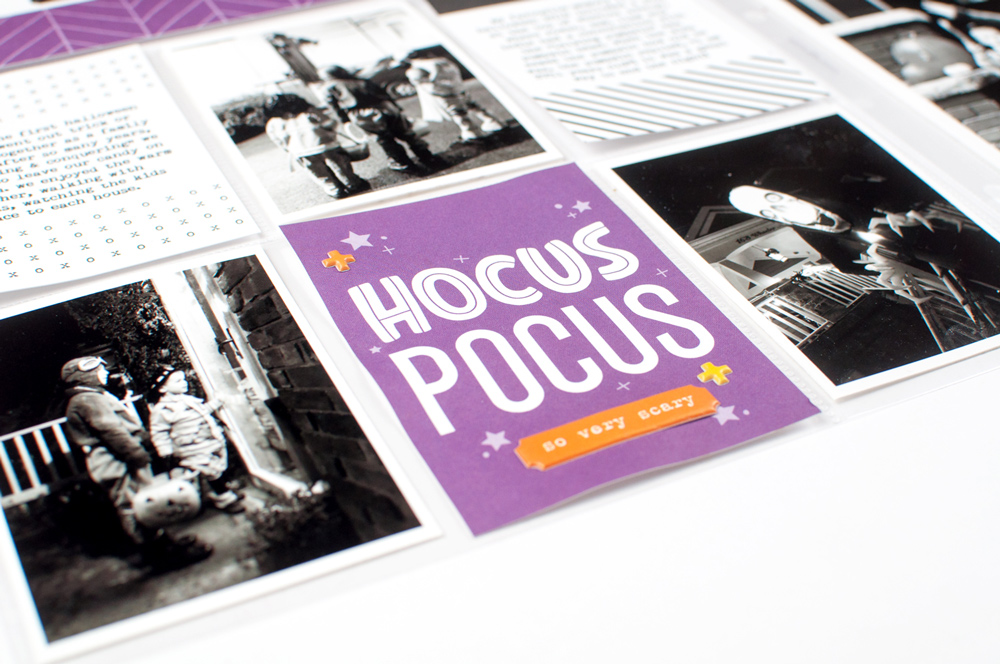
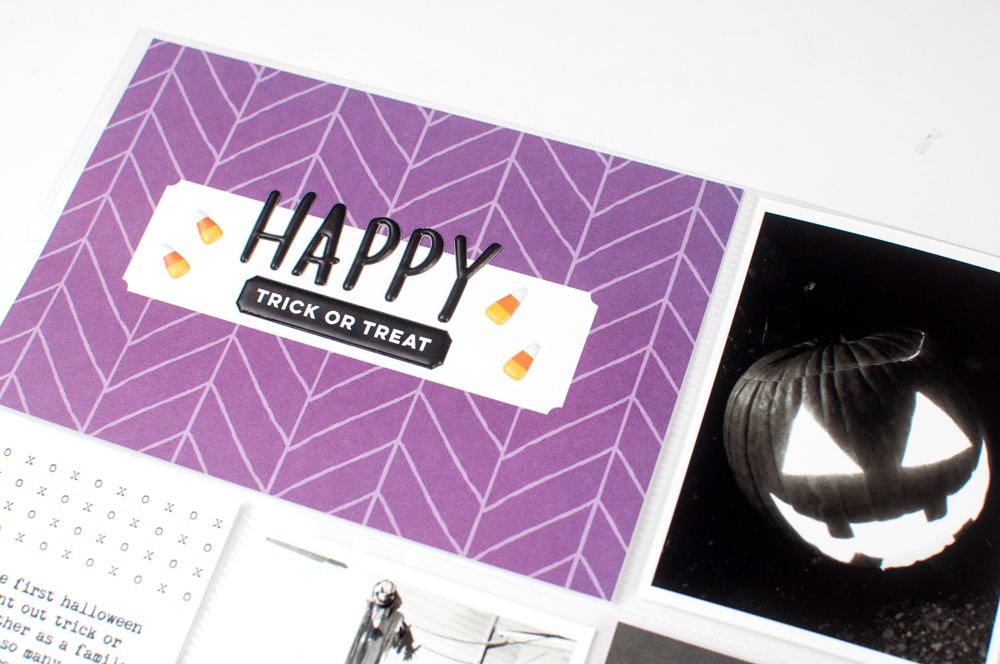
Starting this page, I focused on using a monochromatic colour scheme. I loved the 3″ x 4″ “Hocus Pocus” filler card from the Halloween Journaling Tags, so I paired it with the purple, black and white journaling cards from the October 2019 Kit. I created my own unique title pocket using the 4″ x 6″ purple tag and pairing it with the “Happy” and “Trick or Treat” puffy stickers from the Halloween Puffy Stickers. I could have easily kept the colour scheme simple, but I added some pops of colour and dimension using the orange candy corn pieces from the Halloween Puffy Sticker. I simply added the date and a few of the pumpkin puffy stickers to the 3″ x 4″ numbers purple card. P.S. The candy corn is a complete throwback to my childhood! I love the sleek design and the nostalgic reference!
To focus on the small details, I incorporated the “Halloween details” journaling tag from the Halloween Journaling Tags set into this layout. Although I used the prompts from last year, this card can serve as a great way to help focus your storytelling from Halloween 2019! Don’t forget to have it on hand during your Halloween outing.
Lastly, I switched the photos from colour to black and white to keep my design consistent, but also it was a bonus as to keep them small to hide any imperfections due to night time photographs. Halloween can be a tricky time to document, but with some great colour combinations in your journaling tags, paired with some adorable puffy stickers, you can stuff your pockets with goodness! Happy Halloween to all who celebrate! Stay safe and thanks for looking!
Show us how you record your Halloween memories this week using our October kit and add-ons on Instagram using the hashtag #EllesStudio and in our Elle’s Studio Facebook Group! We can’t wait to see your spooktacular memories documented!
Comments Off on Pocket Page Style: Documenting Halloween Night with Jess Forster | Share This
This is the time of year when we reflect on the things that we are most thankful for, and for most of us, the special people in our lives top that list! Today Jen McMurtrey is with us to share a pocket page that documents a special relationship that she made with a fellow scrapbooker, using our October 2019 Kit and add-ons, and we know you will love it! Let’s see what she made:
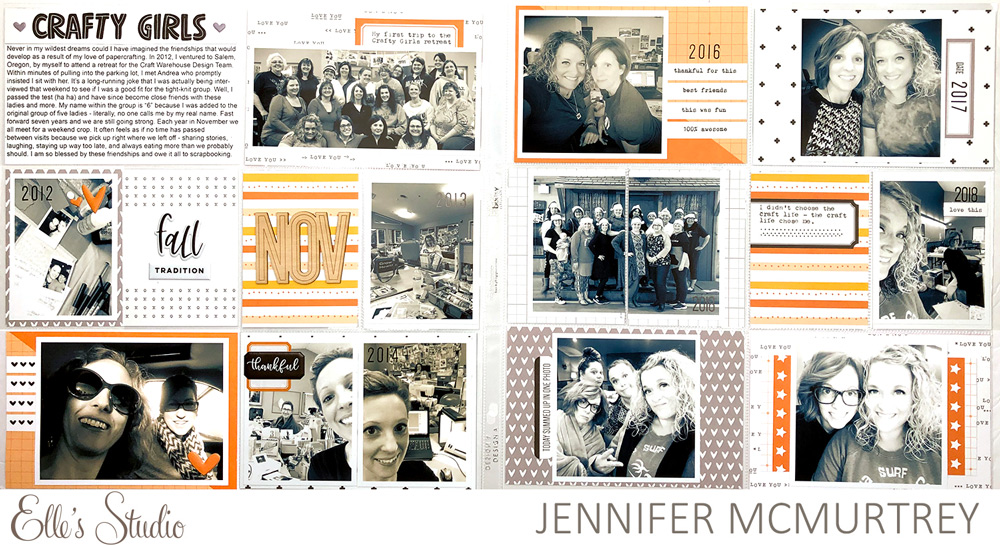
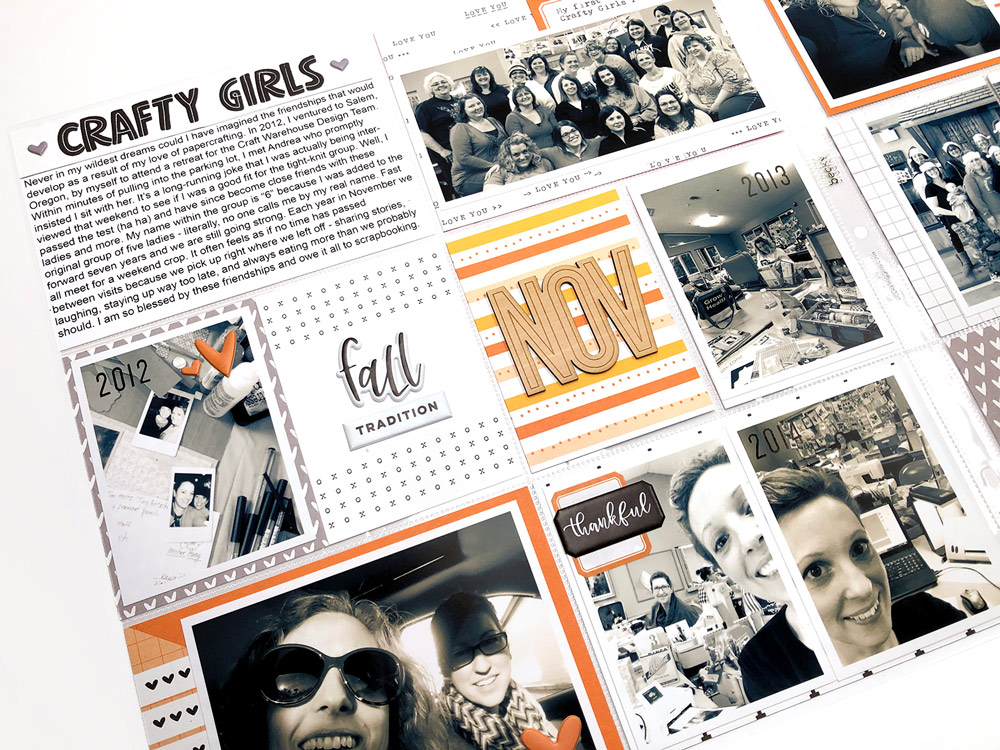
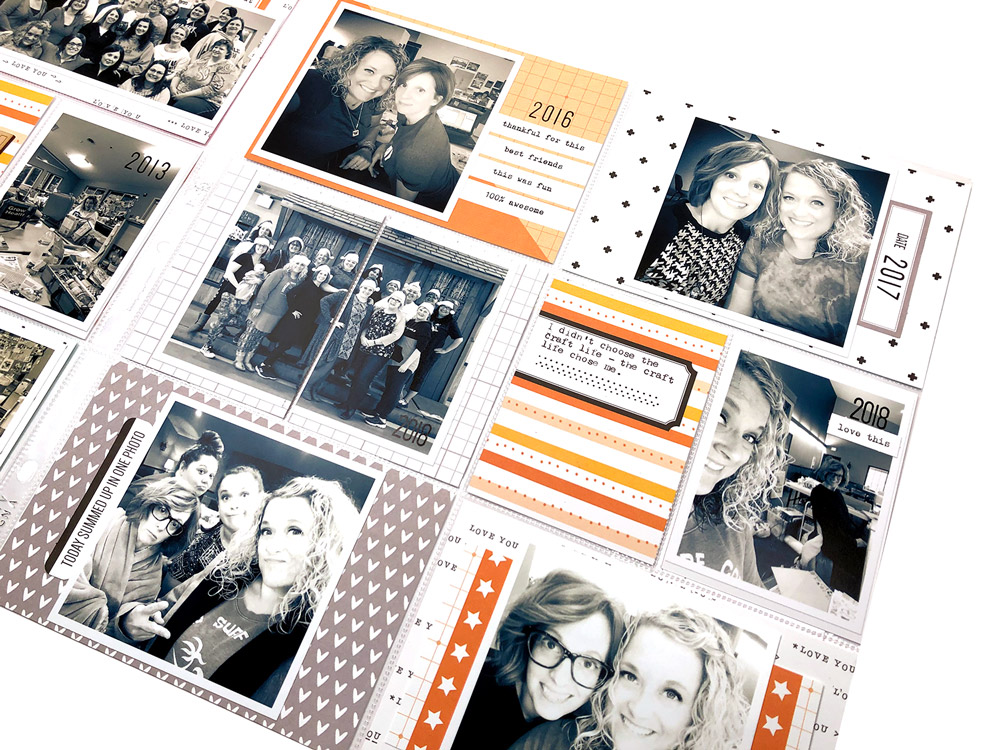
I am always amazed by and thankful for the wonderful gifts that scrapbooking has brought to me. At the top of that list are the many wonderful friendships that I have formed through this hobby—especially the relationship with my best friend Andrea. We met by chance over seven years ago and have been inseparable ever since (despite living across the state from one another). Today’s layout documents the friendships that have been born though my meeting Andrea and how special they are to me.
After Andrea and I met, I was invited to attend a yearly crop with her group of crafty friends. I attended for the first time in November 2012 and have been going each year since. I used a double-sided 12″ x 12″ pocket page spread to document memories from each of those crops. I can’t wait to add the 2019 story, as I will be heading over to see everyone again in a couple of weeks!
To keep my layout cohesive, I decided to print each of the photos in black and white. Not doing so created too much color and it felt too busy.
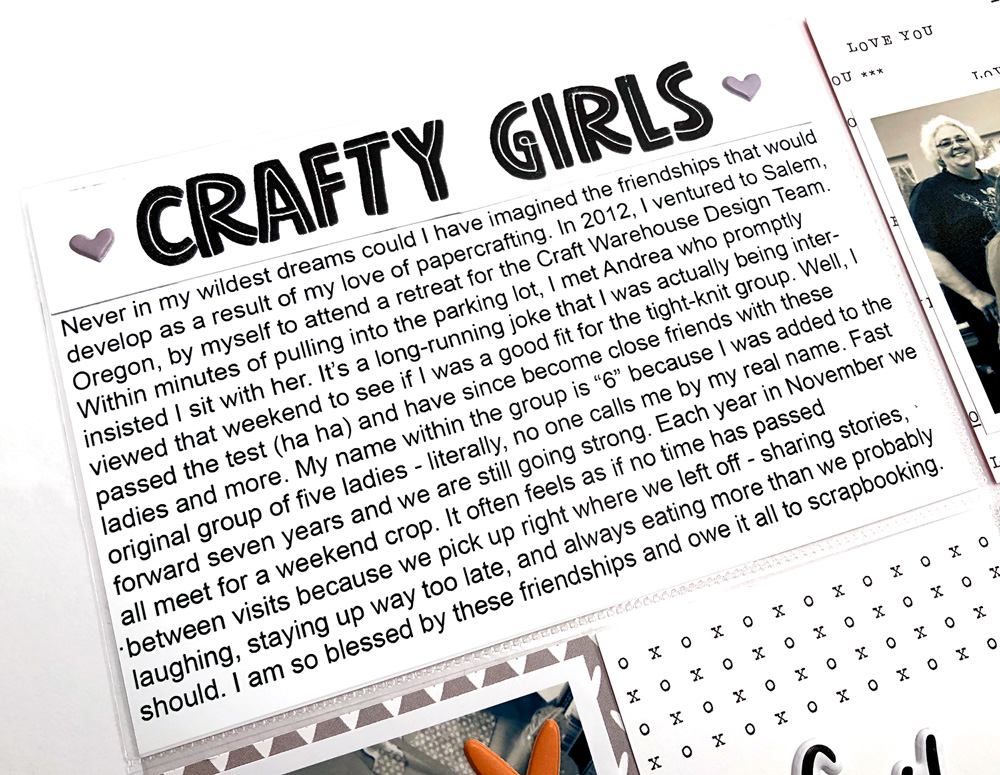
I stamped the Crafty Girls title using the new Winifred Alphabet Stamp on a piece of white cardstock and adhered it above the typed text of my story. I ended up doing it this way because I printed the story on photo paper and didn’t want to mess it up in the case of a stamping mishap (I usually have at least one when stamping).
Once the photos were all printed, I laid them out on top of the pocket pages and began playing with layout ideas. I knew I wanted to keep them in chronological order, but I was having a hard time getting everything to look right. This was when I stepped away for the night and came back to it the next day. This really works when I am struggling to finish a project or am having issues with the design.
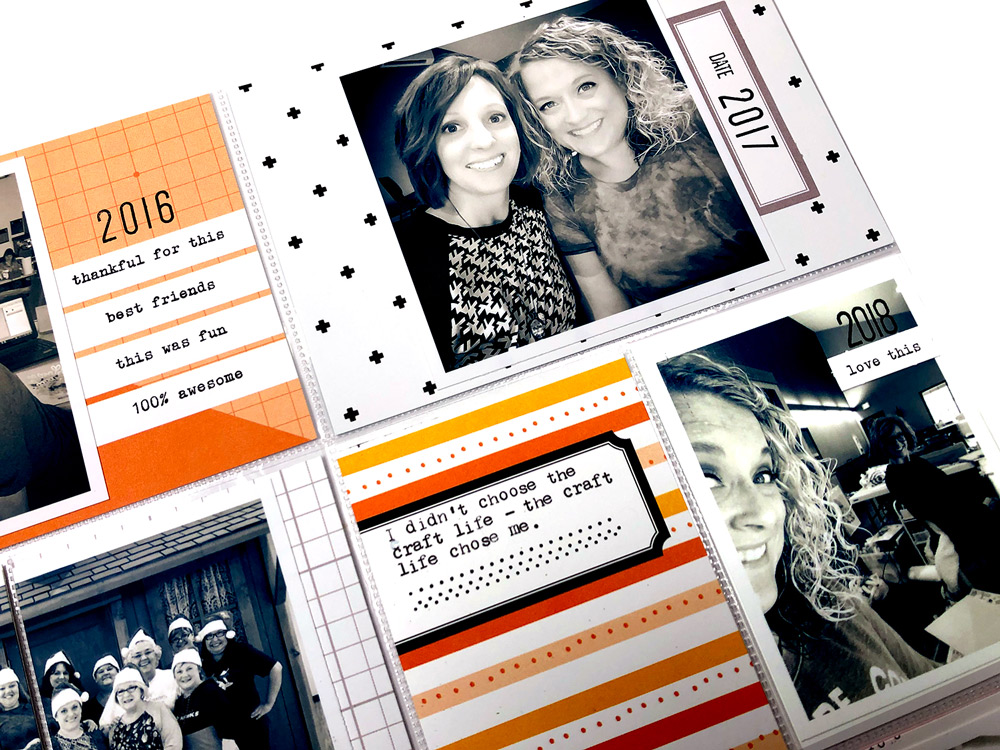
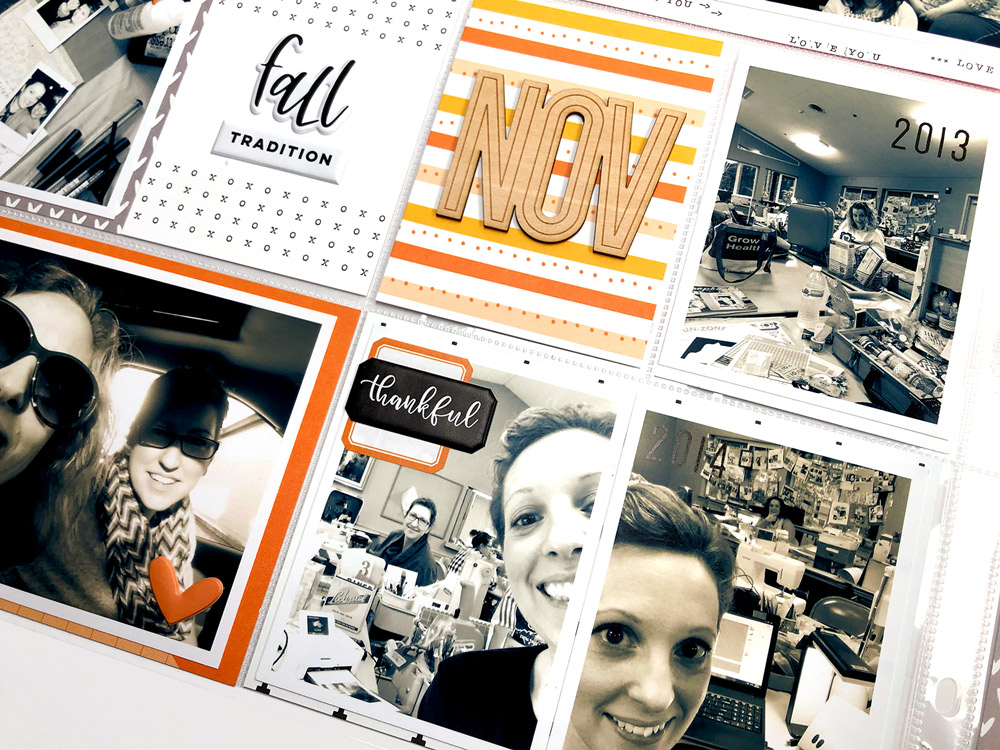
To again keep everything cohesive, I used the Mini Dated Stamp and added the year on each of the photos. I love the clean look and the way it ties all of the photos together.
There is a lot going on in this layout, so I kept the color scheme simple and added minimal embellishments. The new Everyday Tabs Stamp was perfect for this with its sentiments, hearts, and cute dotted lines.
Thank you so much for stopping by today! I hope you are inspired to document stories about the special relationships in your life that make your heart happy.
Share how you are documenting special relationships using our products on Instagram using the hashtag #EllesStudio, or in our Elle’s Studio Facebook Groupwith fellow ES fans!
Comments Off on The Gift of Scrapbooking with Jen McMurtrey | Share This
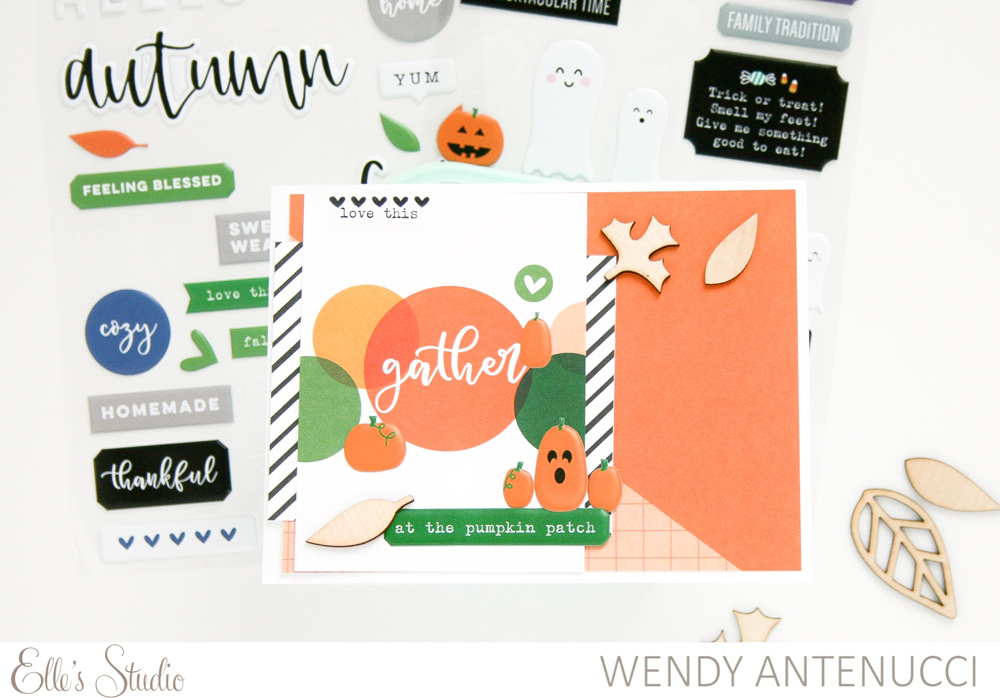
Cute pumpkins and candy treats are meant for everyone—even those who do not celebrate Halloween, and design team member Wendy Antenucci is with us to share two lovely greeting cards meant to make anyone smile! Let’s take a look at how she took some of our October 2019 Kit and add-on Halloween products and made them work for her non-Halloween designs!
Hello everyone! It’s Wendy here today with a two new autumn inspired cards. I loved the Halloween products included in the October 2019 Kit and add-ons, but we don’t participate in Halloween activities. So, what do you do? You repurpose!
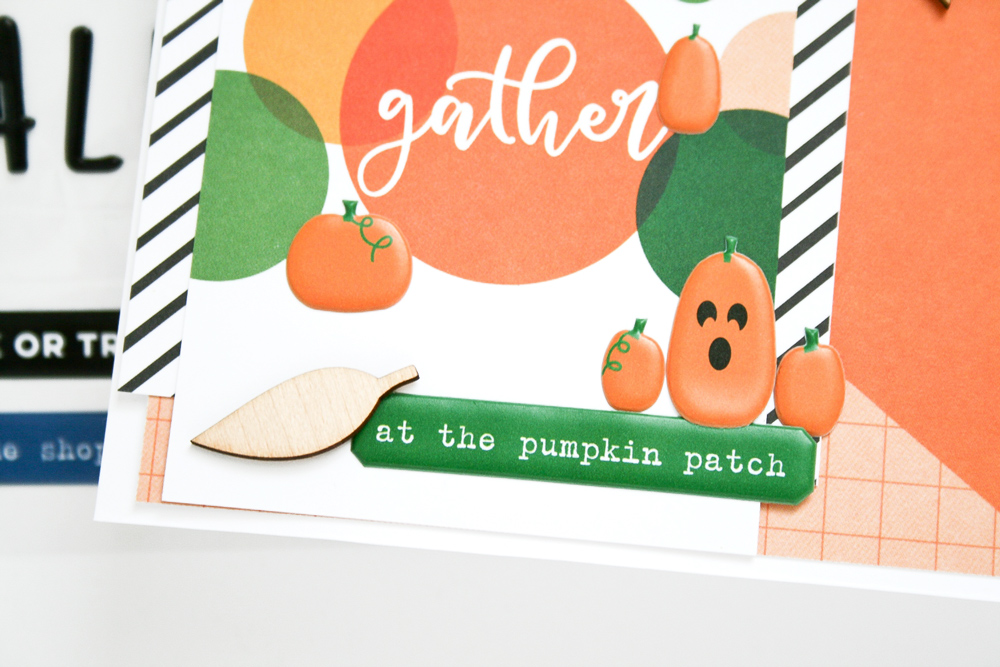
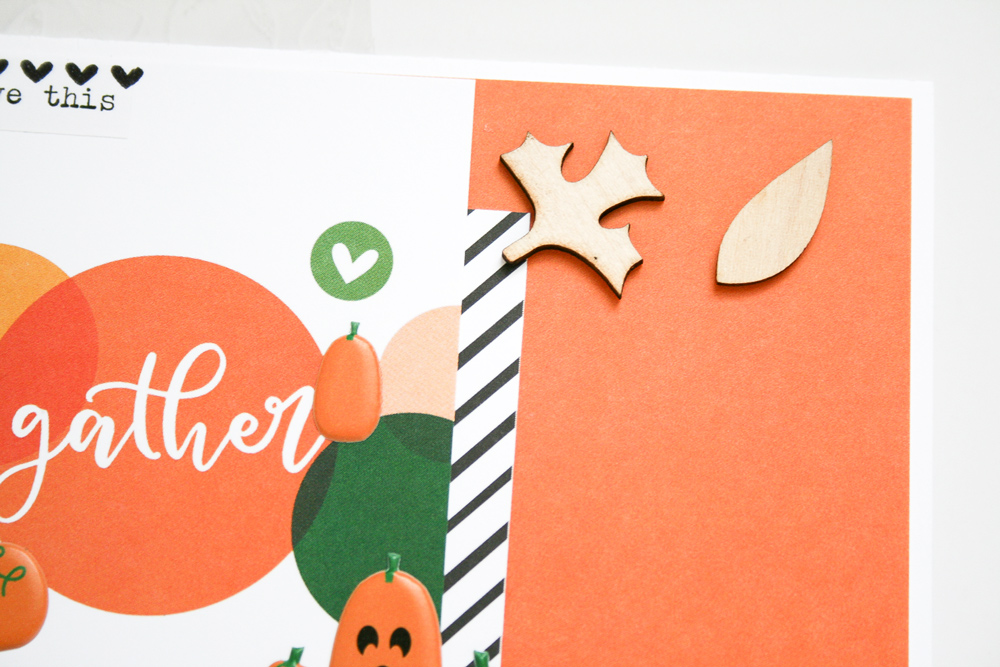
I love the “gather” 3″ x 4″ tag from the October 2019 Kit and I thought it would create the perfect backdrop for a pumpkin patch inspired card.
The Halloween Puffy Stickers included such cute pumpkins that I used with the addition of the Wood Veneer Leaves to set the fall theme of this card. Now if we could just get some fall down here in Florida, it would be perfect!
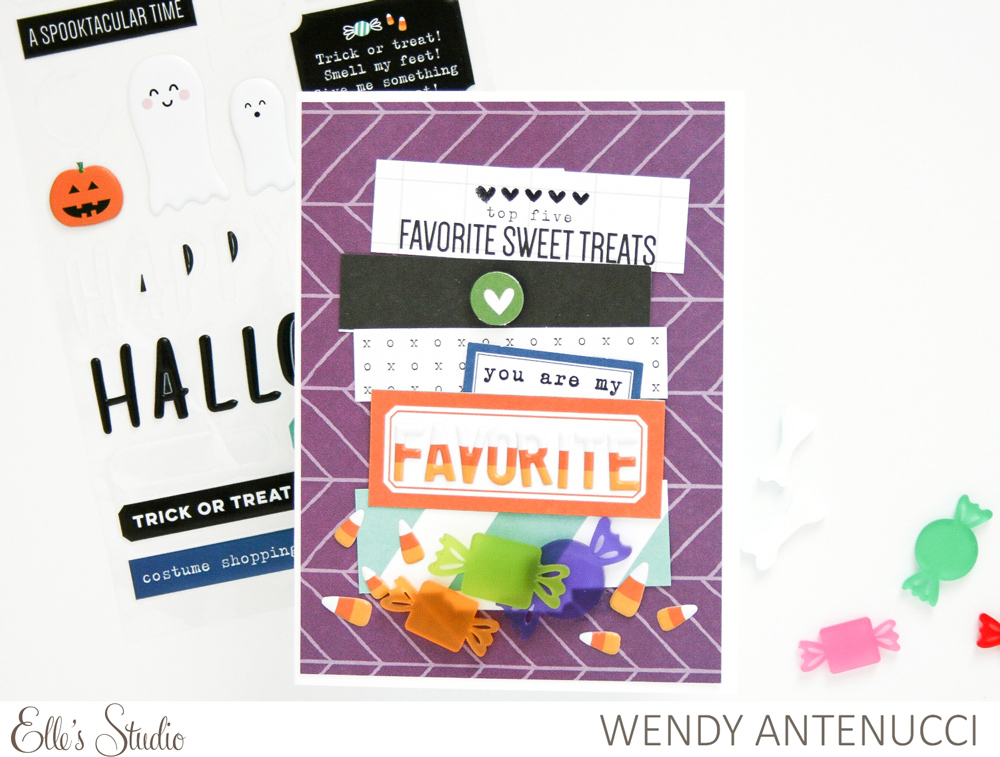
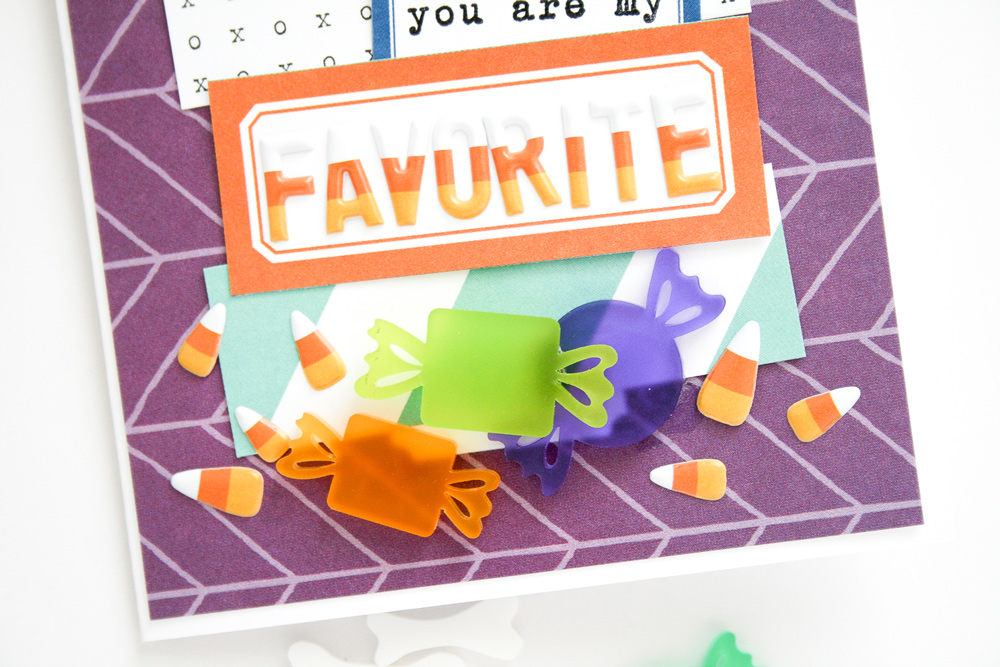
Who else has candy corn and other candy around their house at this time of year? Ummmm, I love candy, so I wanted to make a candy inspired card!
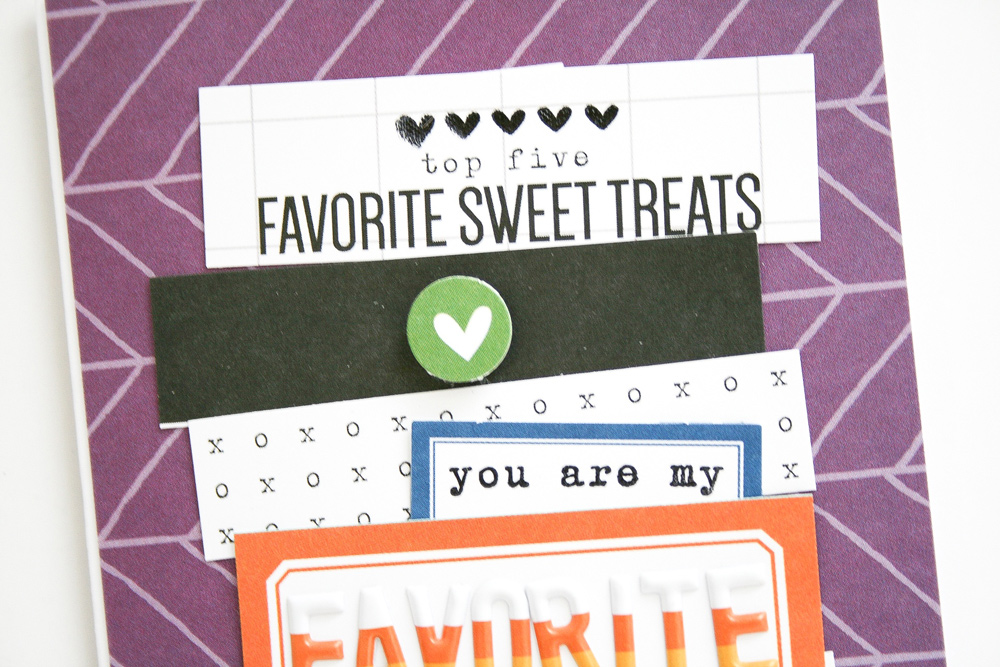
Instead of making this card about my favorite tri-colored candy, as seen on the Halloween Puffy Stickers, I chose instead to create a card with the sentiment, “you are my favorite.” The Halloween Acrylic Treat candy and candy corn from the Halloween Puffy Stickers were the perfect additions to add to the bottom of the card.
Some leftover strips from various 3″ x 4″ tags in the October Kit added to the feel of a pile of candy. The words “you are my” from the Title Builder Vol. 3 Stamp were the exact words I was looking for to make the card a favorite.
I love being challenged to create using products that might not be my first choice. It is so fun to stretch yourself and see where you can go—the sky is the limit! Now where did I hide that peanut butter pumpkin…
Comments Off on Favorite Fall Cards with Wendy Antenucci | Share This
Today we say goodbye to guest designer Ingunn Markiewicz, but not until she shares one more pocket page spread with us! You’ve seen her share beautiful pockets from an autumn family hike and document Halloween party fun, and today she is sharing a well-loved fall tradition in pockets! Perhaps your family shares in this tradition, too? Let’s take a look!
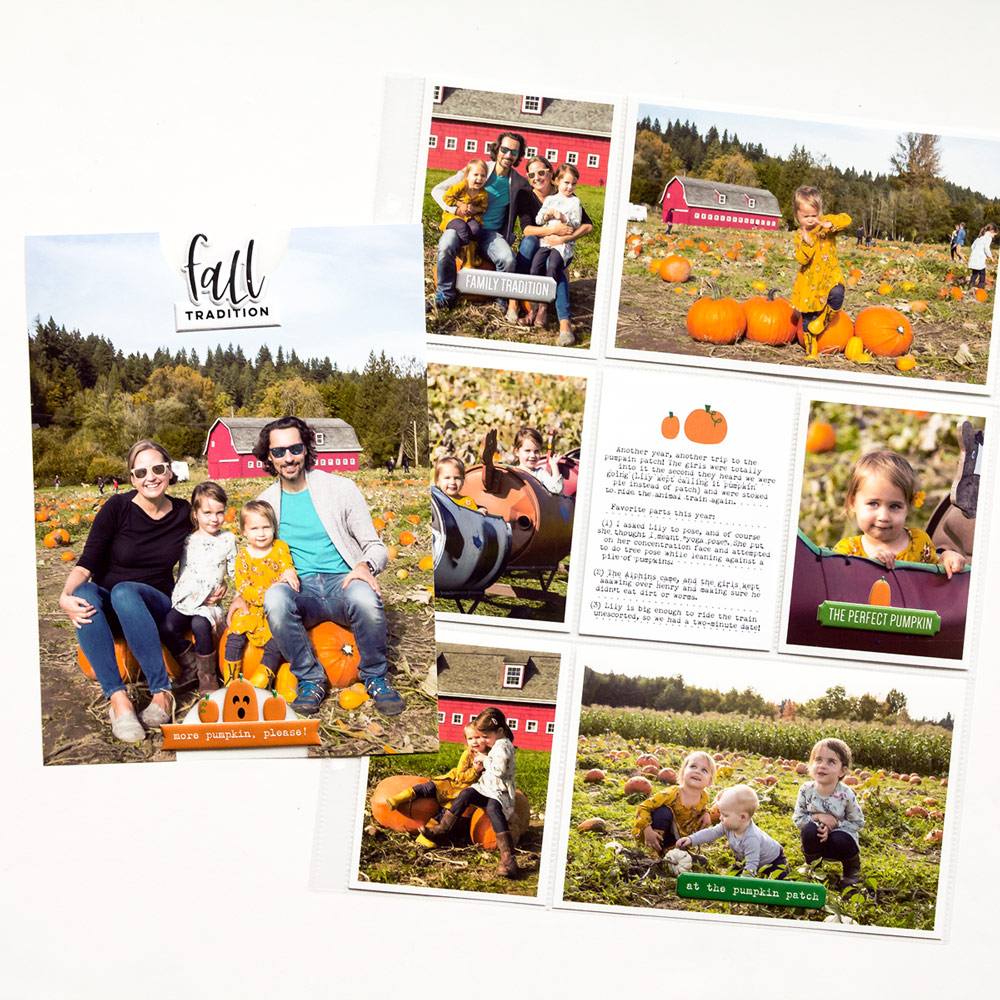
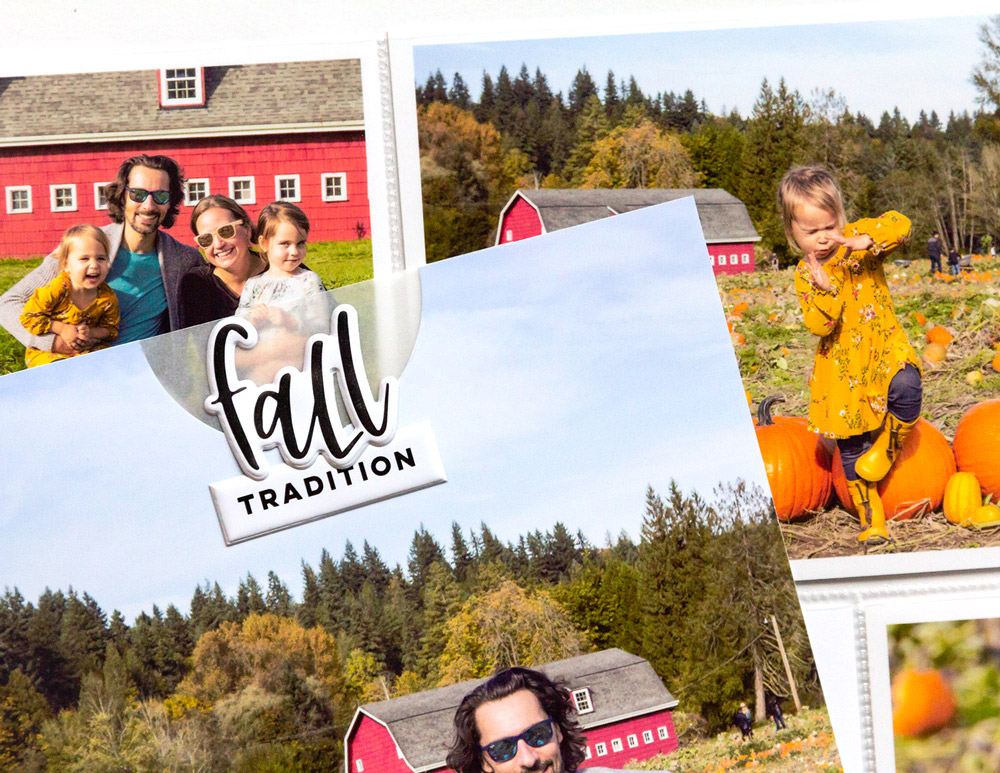
October is coming to an end, as evidenced by the thick blanket of soggy leaves I keep slipping on outside, and I’ve really enjoyed bundling up inside while listening to the rain and making my Elle’s Studio projects! I’m so thankful that I have a hobby that keeps me going through the cold and wet months of the year. For my final project, I wanted to document the most autumny of autumnal events – going to the pumpkin patch! I know it’s a cliche, but the whole family just loves it. It’s only a matter of time before we go all in wearing matching plaid shirts and clutching pumpkin spice lattes.
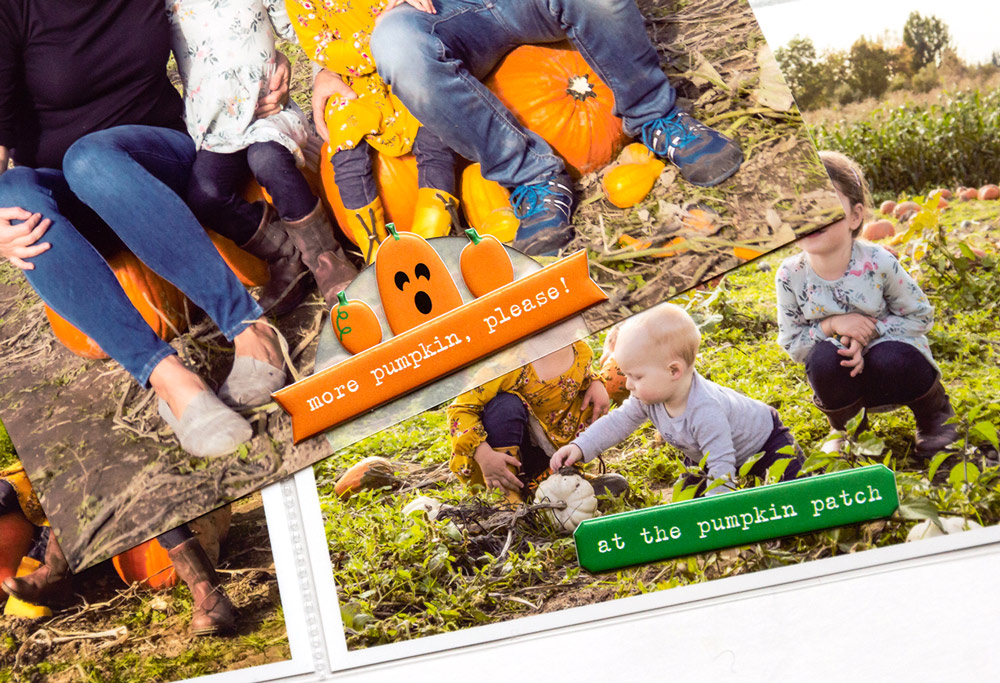
I chose my favorite of the photos and printed it at 6″ x 8″, then laid the adorable pumpkin Halloween Puffy Stickers on top to see how they would fit. They didn’t really show up well on top of the busy background right where all our shoes were, so I decided to use my trusty circle punch to create a background for the stickers. I cut out a circle, adhered a piece of vellum to the back, and then arranged my pumpkins and the orange banner from the Autumn Puffy Stickers on top.
I decided to do the same thing to the top of the page as a repeated element, then combined two of the Autumn Puffy Stickers to say “fall tradition” for my title.
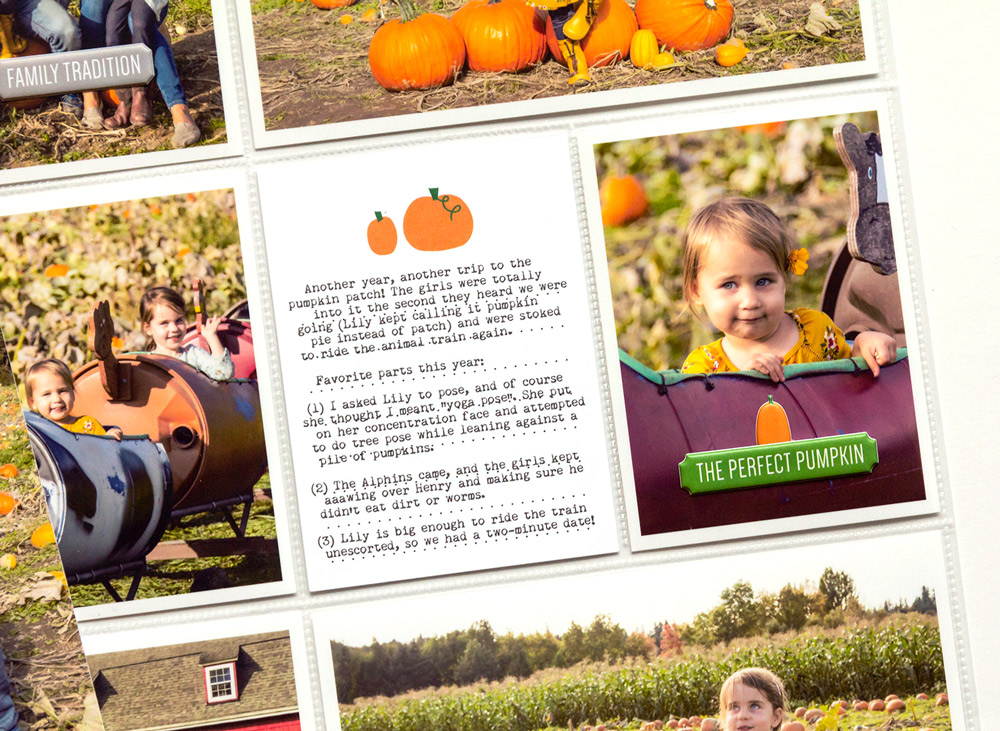
I printed the rest of my photos to fit a 9″ x 12″ divided page protector, then ran the adorable pumpkin journaling tag from the Halloween Journaling Tags through my printer. I love the look of typewritten journaling, so I tried to recreate that look here by starting my lines in different random places.
I added more puffy phrase stickers to the negative space in three photos to finish the spread. I love how this one turned out: it is clean, simple, and focused on the photos, just the way I like it!
Thank you so much for letting me share my projects with you this month!
My name is Ingunn and I was born and raised in beautiful Norway, but now live in the equally beautiful Washington with my husband, two little girls, and our Italian greyhound. I love hiking and running in the mountains and then coming back home to relive those memories through scrapbooking! This hobby is incredibly therapeutic for me. I’m on the Ali Edwards Creative Team and love to focus on big photos, journaling with an overload of feels, and simple design. I mostly share my stuff over on my Instagram account!
Be sure to follow Ingunn’s Instagram account for more pocket page inspiration. Thank you so much for inspiring us this month, Ingunn! We have loved having you guest for us!
Comments Off on Fall Traditions with Guest Ingunn Markiewicz | Share This