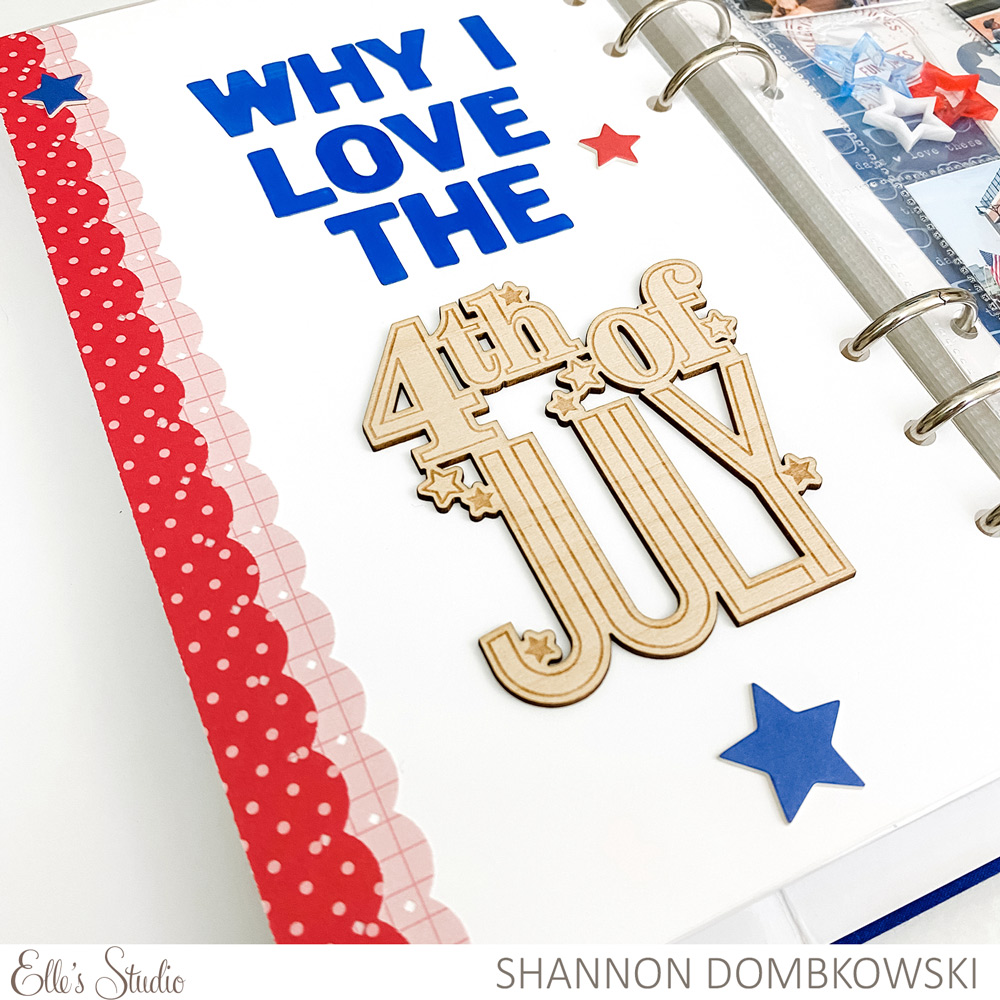
Hey there crafty friends! It’s Shannon with you today, and happy [almost] 4th of July to my friends in the United States! I’ve always loved the 4th of July. I grew to love it even more in 2008 when my first daughter was born on the holiday! I am super excited to share a layout all about my love for the 4th of July with you. Let’s take a look at the first side.

Supplies: June 2021 Kit, Stars and Stripes Chipboard Stickers, Navy Parker Acetate Alphabet Stickers, 4th of July Wood Veneer, Patriotic Acrylic Stars, Good Times Paper Stack, Celebrate Summer Stamp
While I’m focused on the 4th of July on this layout, you could use this method for any holiday. Most of us have a ton of photos from holiday celebrations so a fun little insert with lots of pockets for photos is a great way to get all of your photos into your album. Let’s look at how I did the second side of the album.

Now for the details. I am all about a huge title taking up a full page. It makes such a bold statement! I knew the 4th of July Wood Veneer had to be a part of my title. I also can’t seem to get enough of the Parker Acetate Alphabet Stickers lately so I knew I had to use those. Here’s a hint that I recently learned about how to make those acetate stickers look their best on your pages: use a bone folder or old credit card or something of the sort to smooth them on. This will make sure the whole alpha or shape is stuck to the page without any air bubbles.
How about using a bunch of 3 x 4 inch tags outside of pockets? As I was flipping through my tags and pulling out the red, white, and blue ones I had thrown them down on my work surface in a messy pile. I liked the way that it looked and decided that’s how they would go on my page. I cut two patterned papers from the Good Times Paper Stack into 3 x 4 inch size to fill in some holes and then added die cuts to embellish. I never would have thought to use the tags this way!
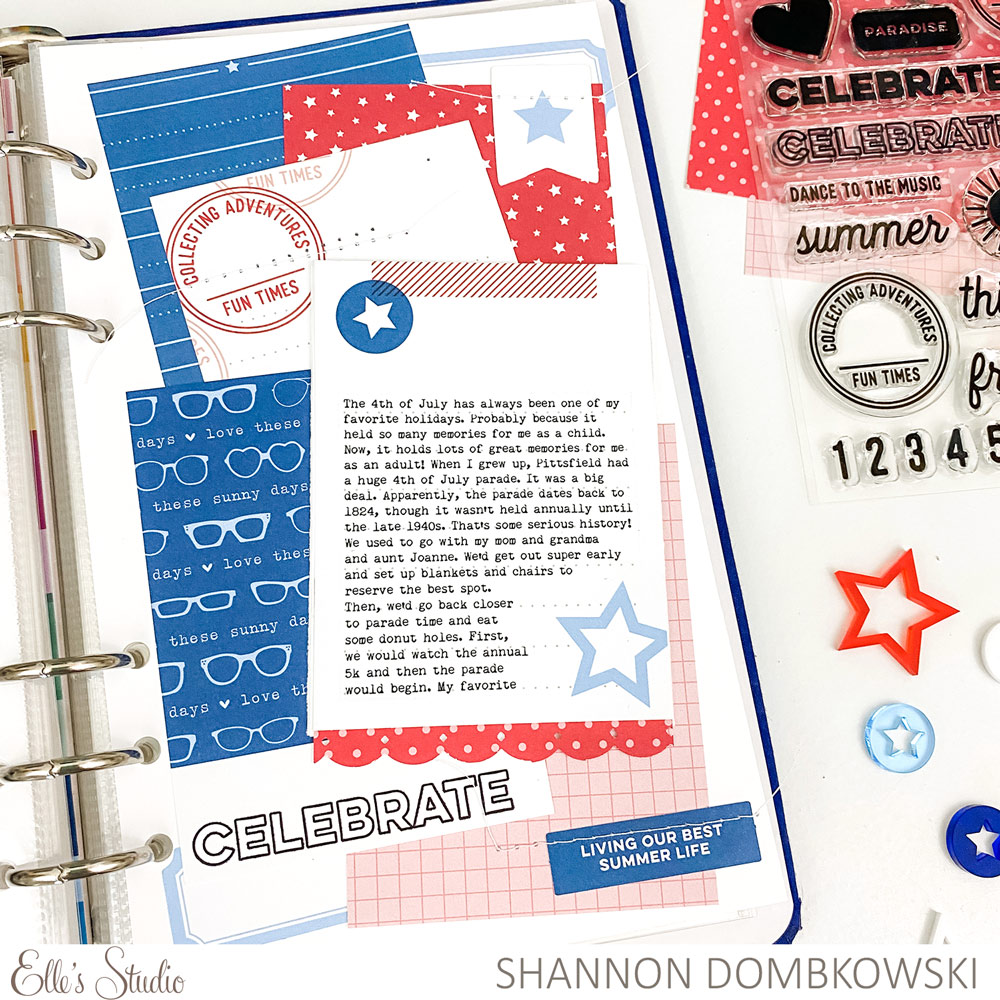
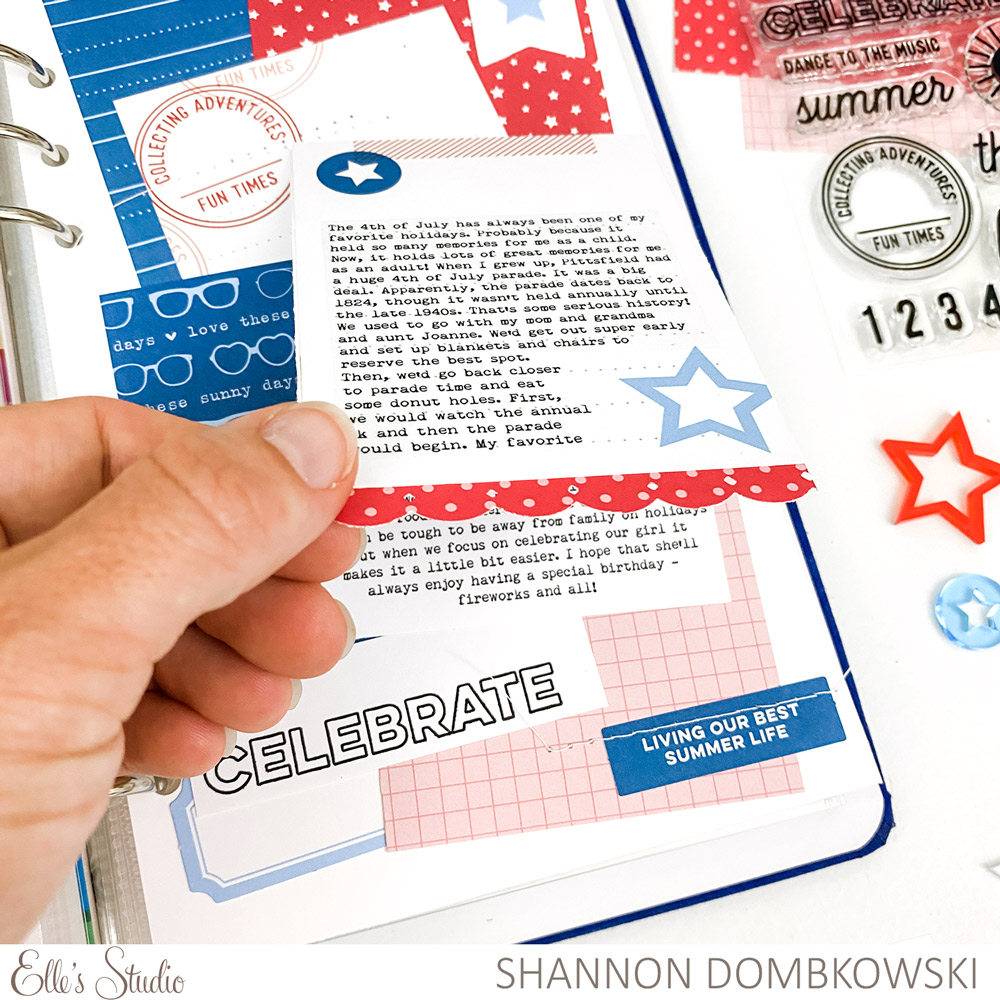
I had a lot to say about the 4th of July. I used clear sticker paper to add my journaling to the physical 3 x 4 inch tag from the June Kit. Then, I typed two more 3 x 4 inch tags worth of journaling! To get it all on my page, I made it int o a flip up. To set that tag apart from the others, I added a scalloped border at the bottom. By differentiating it from the rest, anyone looking at my album will know to flip up to read more.
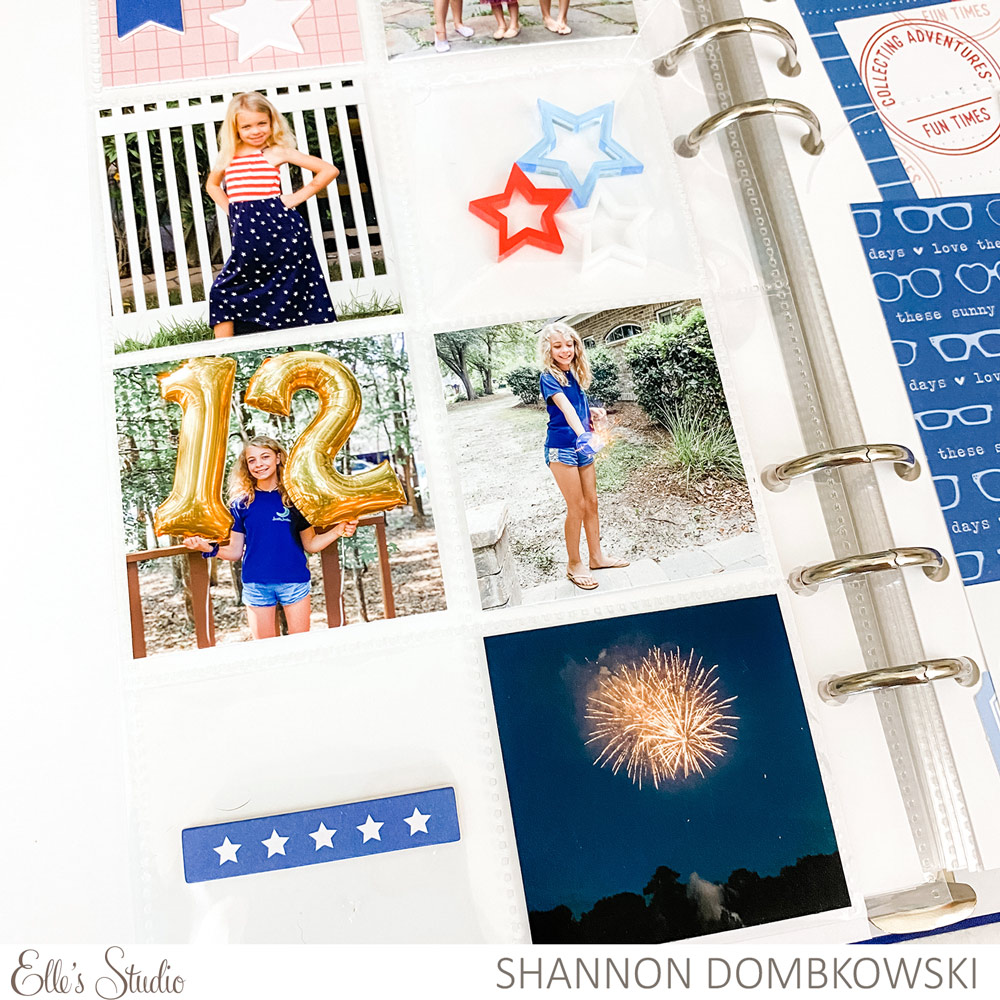
Finally, let’s talk about the pockets that didn’t have photos. I knew that I wanted to leave some of them open. I put white paper behind these so you can see them better. In one, I made a shaker pocket of sorts. The Patriotic Acrylic Stars look the same on the front and the back so they’re perfect for a pocket like this. I just added stitching to close up the top of the pocket. On the other pocket, I looked for two Stars and Stripes Chipboard Stickers that were the same shape and size. That way, you can’t see the back of one sticker from the opposite side. I just linked up the stickers and stuck them to the outside of the page protector.
As I said, you could do this for any holiday, birthday, day trip, or other event with lots of photos. I hope I’ve give you some inspiration to get those occasions documented!

Share your 4th of July projects with us! Post on Instagram using the #EllesStudio hashtag or join our Elle’s Studio Facebook Group and share on the discussion board. We can’t wait to see your pages!