Hello, Elle’s Studio friends! Photo-taking is a big deal to all of us scrapbookers, which makes the Say Cheese Stamp a go-to set for us to use in documenting. Not only is the stamp set very useable and practical for our needs, but there is also a matching Metal Die available! Whether you are documenting something serious, or something playful as I have today in my traveler’s notebook, you will turn to this stamp and die often. Today I’m using watercolors, embossing, inking in two colors, pencils, and patterned paper to show of this stamp and die! Let’s take a look!
Supplies | November 2019 Kit, Shapes and Dots Puffy Stickers, Wood Veneer Holiday Phrases, ‘Tis the Season 6 x 6 Paper Stack, Say Cheese Stamp, Say Cheese Metal Die, Mini Dated Stamp
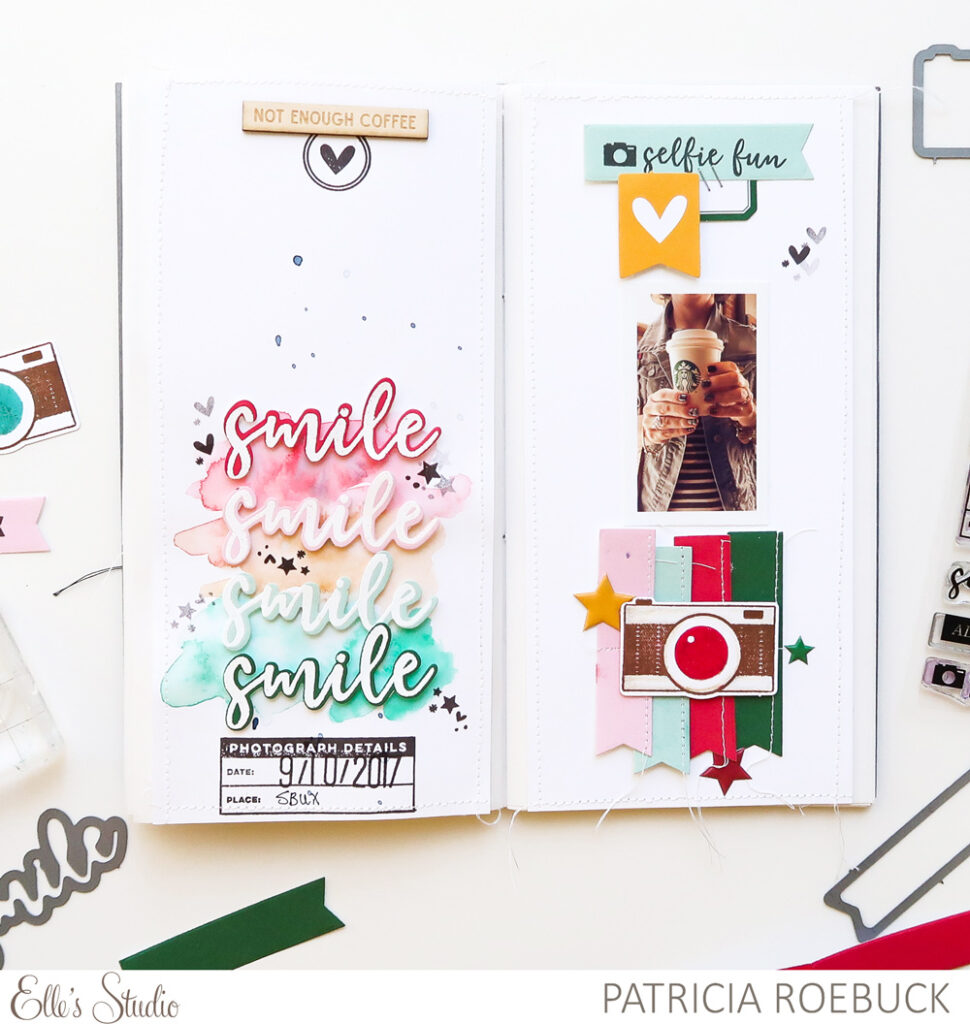
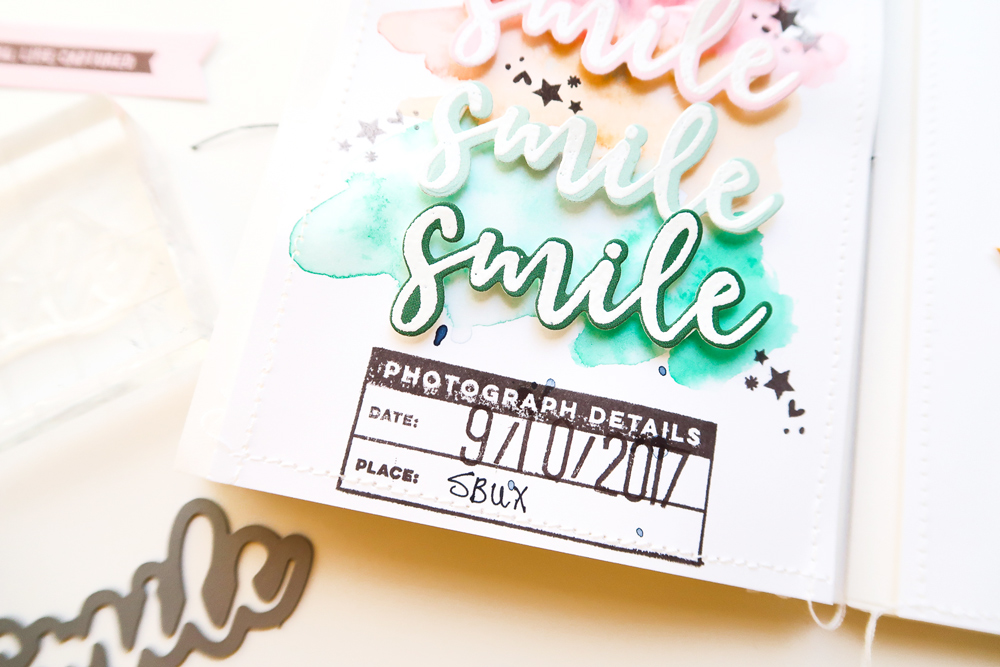
To create color and repetition on the left side of my traveler’s notebook, I heat embossed the sentiment “smile” from the Say Cheese Stamp onto four of the solid pattern papers from ‘Tis the Season 6 x 6 Paper Stack and used the matching Say Cheese Metal Die to cut. On a separate piece of white cardstock, I added watercolors, concentrating on green and red as the dominate colors with a touch of yellow in between.
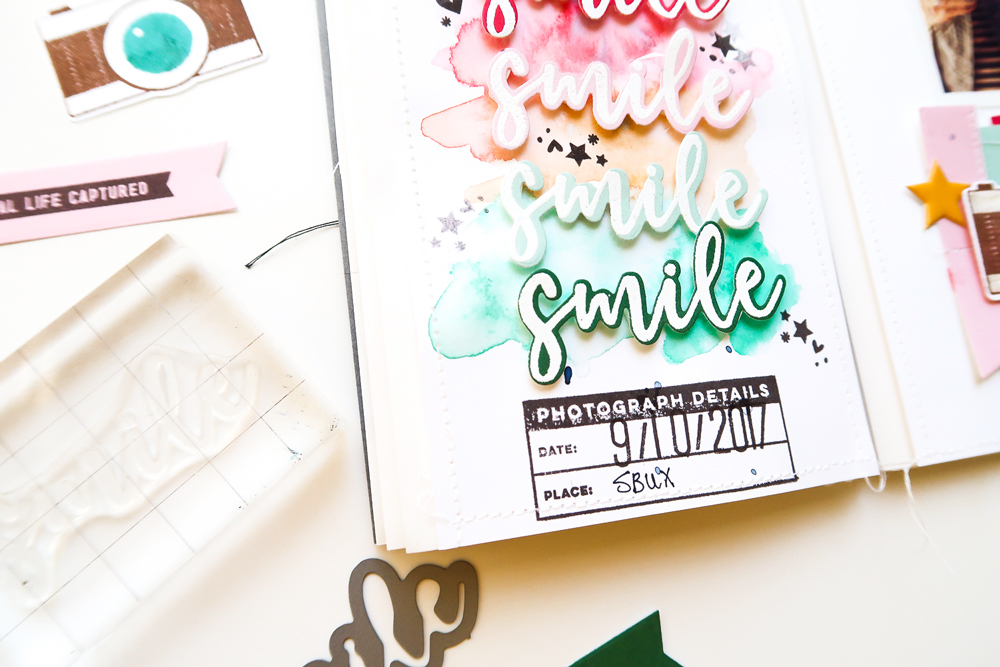
I added a few watercolor splatters with my paint brush, then added some second and third generation stamping around my watercoloring once dried. I used foam adhesive on the back of the ‘Smile’ stamps and die cut images to add more dimension. I then stamped the “Photograph Details” block from the Say Cheese Stamp to the bottom, adding the date with the Mini Dated Stamp.
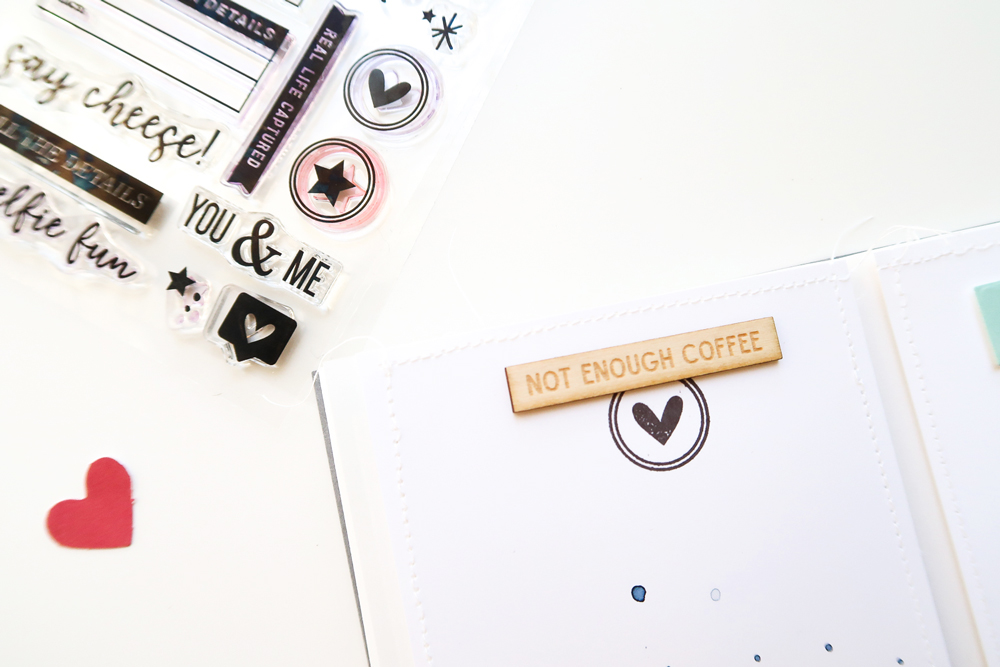
For the top of this page, I didn’t want to take away from the look of my watercolor and heat embossing design, so I only added a heart with circle from the Say Cheese Stamp and the Wood Veneer Holiday Phrases. I stitched all the way around in white thread with sewing machine, and adhered my page inside my traveler’s notebook.
Working again on a separate piece of white cardstock for the right side, I placed my photo in the center, then used the banner metal die from the Say Cheese Metal Die using the same patterned paper I used on the left. I machine stitched with white thread on each banner and staggered them under my photo. I used a MISTI tool to ink the camera image from the Say Cheese Stamp in brown, used a baby wipe to remove the brown from the center, then stamped onto white cardstock. I then re-inked the camera in red, used a baby wipe to remove the red from the body of the camera and stamped again to create a single stamped image with two ink colors! Next, I used pencils to lightly add color to my camera and foam adhered it to the top of my banners.
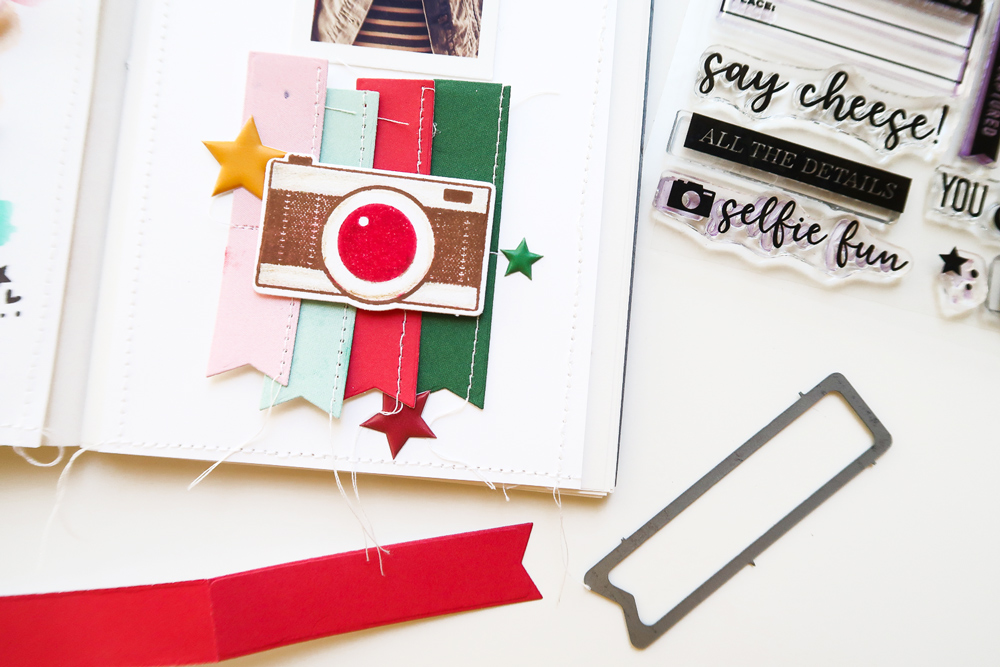
I finished the top with a cluster of die cuts from the November Kit, and added another banner die cut using the Say Cheese Metal Die and the ‘Tis the Season 6 x 6 Paper Stack. It was a perfect spot to add my stamped title, “Selfie Fun,” using the Say Cheese Stamp. I then finished the page with stars from the Shapes and Dots Puffy Stickers to balance with the left side, as well as repeating the stitching around my page before adhering it to my traveler’s notebook page base.
I hope these ideas of heat embossing, stamping in more than one color, using die cuts for stamping onto or creating a cluster, coloring your images, adding just simple stamping in either a single stamp or a second and third generation look help to jumpstart your next project! Enjoy!

Share how you are using the Say Cheese Stamp on your projects on Instagram using the hashtag #EllesStudio, or in our Elle’s Studio Facebook Group!