We hope by now that you’re really enjoying your October Kit and add-ons, but if you need a bit more inspiration to create this weekend, Meghann Andrew is here to show you how she combined the October goodies with our Title Builder stamps to create something fantastic! Let’s take a look at her project:
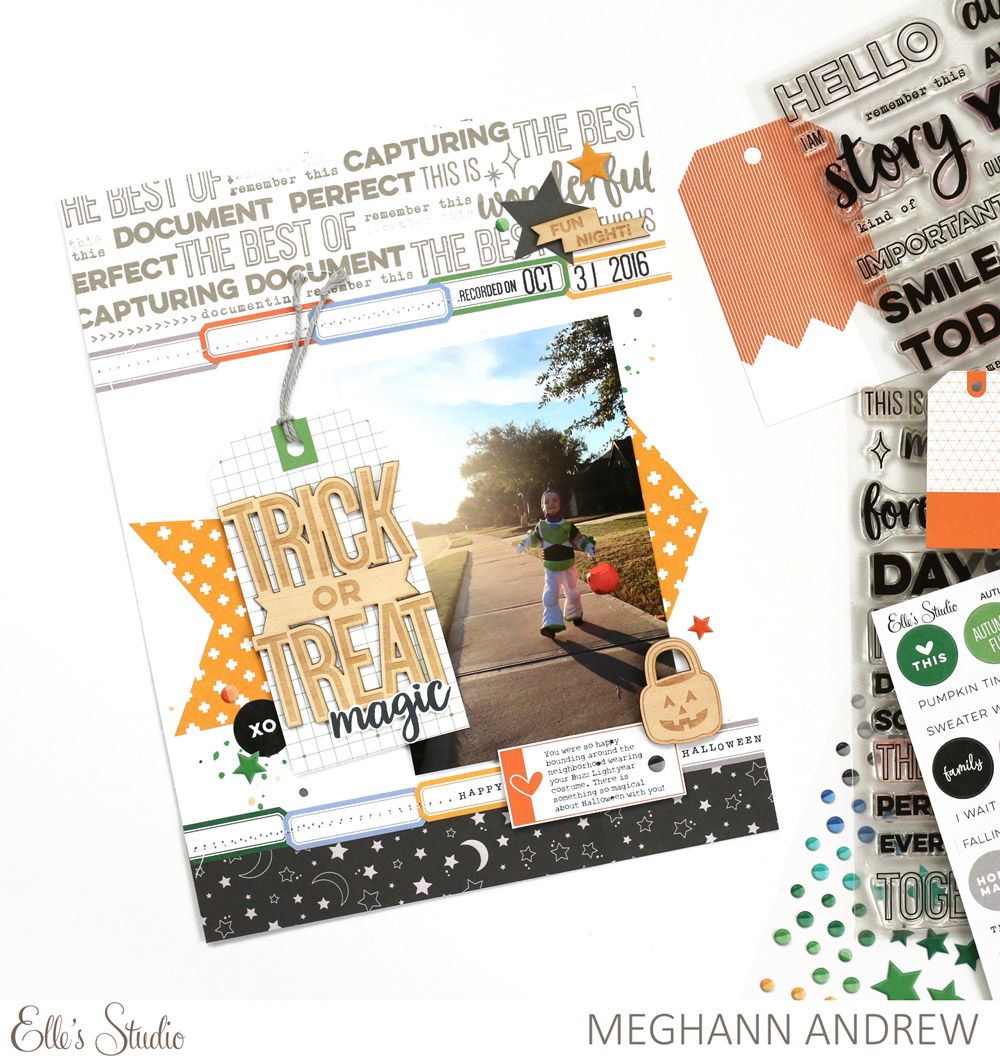
Hello there and thanks for stopping by the blog today! It’s Meghann with you, and as you already know, I love our Title Builder stamps! Elle and I designed them to make creating titles easy for your projects, but they can also be used for so much more! On the new 8-1/2″ x 11″ layout that I’m sharing with you today, I used both the Title Builder and Title Builder Vol. 2 stamps to create a graphic border at the top of the page.
Supplies | October 2018 Kit, Autumn Shipping Tags, Autumn Fun Stickers, Stars and Dots Puffy Stickers, Halloween Wood Veneer, Trick or Treat Wood Veneer, Sweater Weather 6 x 6 Paper Stack, Title Builder Stamp, Title Builder Vol. 2 Stamp, Mini Dated Stamp
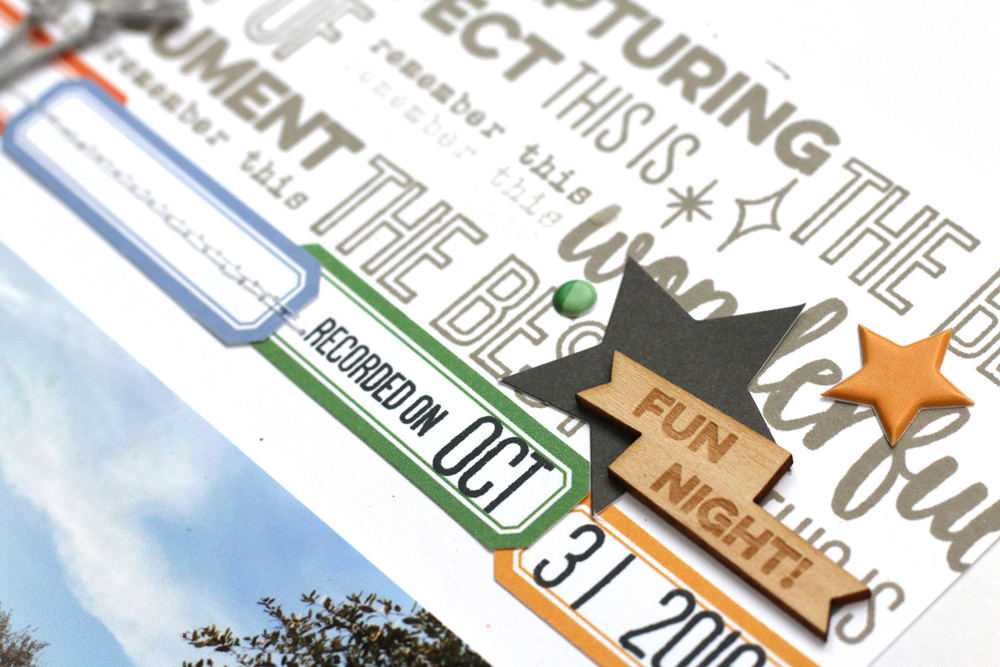
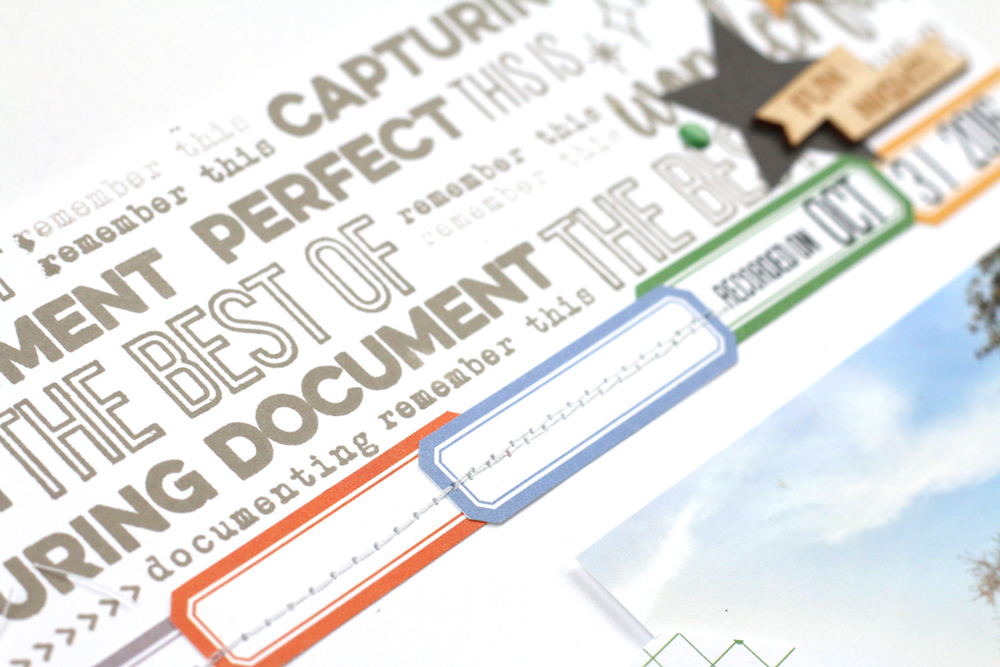
Using gray ink, I created a pattern of words on the top of my layout, using words from both the Title Builder and Title Builder Vol. 2 stamps. To keep this layout under 30 minutes to complete, I decided to stamp only the top 3″ of the layout, then added labels cut from a paper in the Sweater Weather 6 x 6 Paper Stack to finish off the pattern.
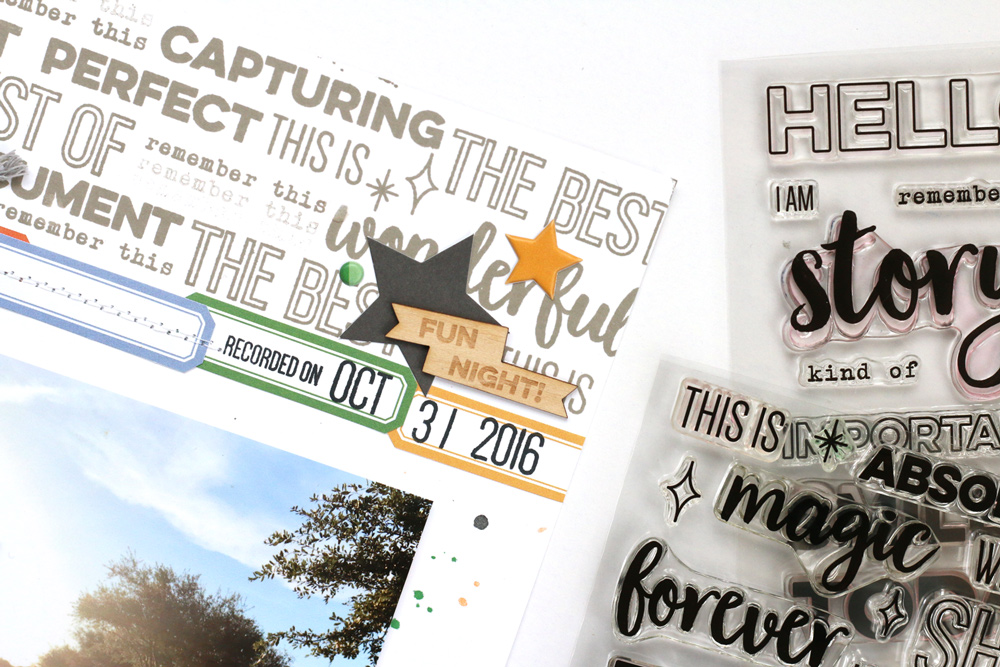
These awesome labels also held my date, which I stamped using the Mini Dated Stamp and served as a shelf for a fun embellishment cluster of a black star from the October Kit, the “fun night” Halloween Wood Veneer piece, and the Stars and Dots Puffy Stickers.
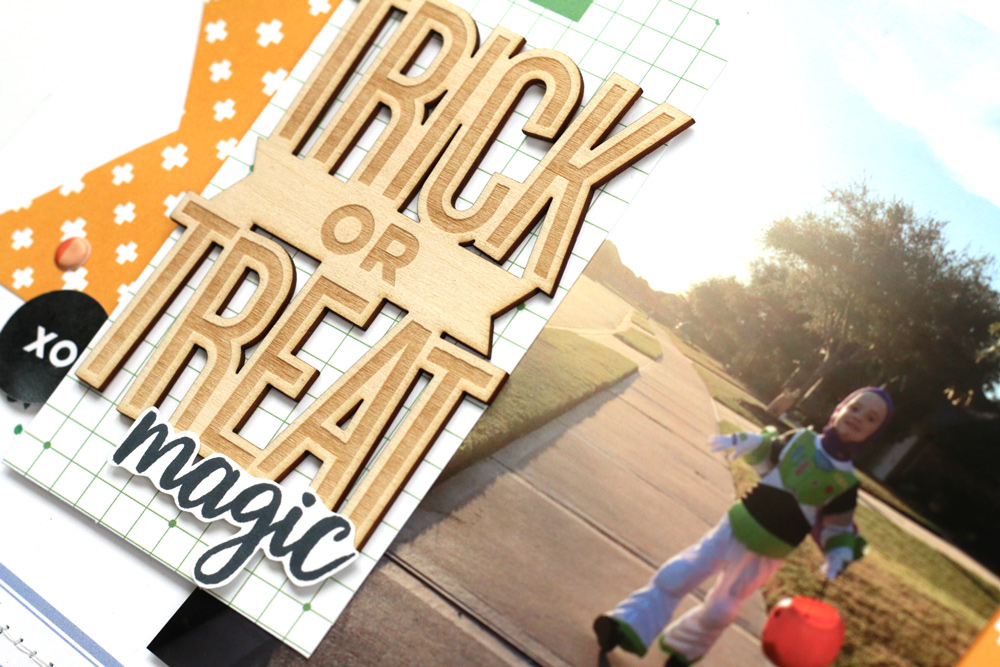
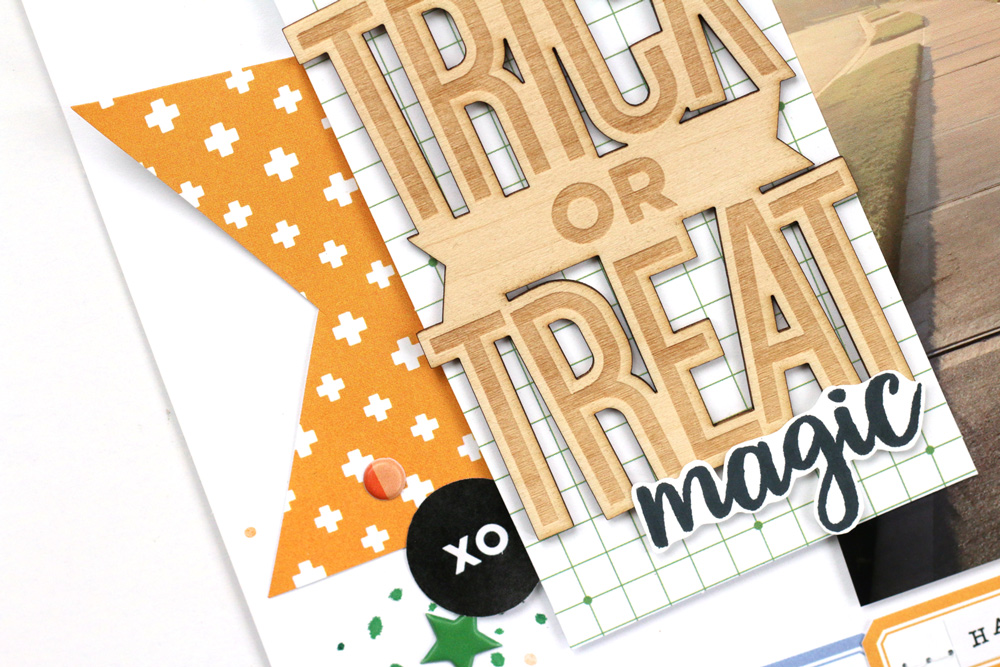
I also used the Title Builder Vol. 2 Stamp to add to my title! These stamps pair perfectly with acrylic, alphabet stickers or wood veneer, and I added the word “magic” to the bottom of the Trick or Treat Wood Veneer piece, which I adhered to the large Autumn Shipping Tag. I love how this large, dominant title looks right next to the photo of my little walking down the street while trick-or-treating.
To keep the focus on my title and photo right in the center of my layout, I added a lot of color running straight through the center, using the yellow pattern from the Sweater Weather 6 x 6 Paper Stack—my favorite in the stack! The bright yellow helps to balance the weight from the top to the base of my layout.
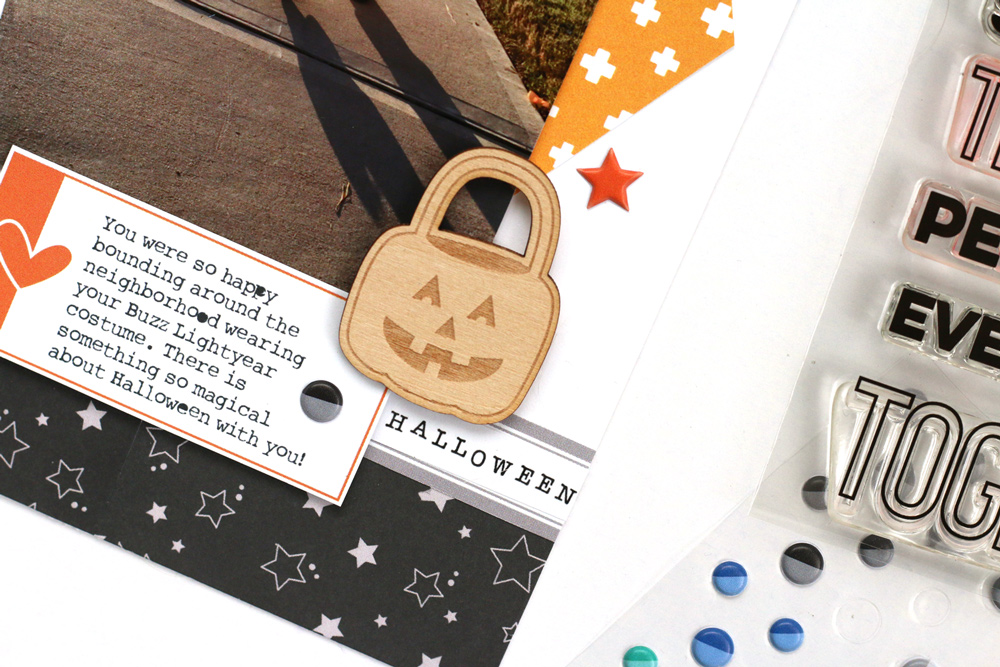
At the base of my layout, I wanted to balance out all of the pattern from the Title Builder words at the top of the page, so I decided to place a row of the black and white star paper from the Sweater Weather 6 x 6 Paper Stack. To mimic the top, I again added colorful labels to the top edge, which served as a space for me to add a journaling spot, cut from a 3″ x 4″ tag in the October Kit, the “Happy Halloween” Autumn Fun Sticker, which I cut in half to spread across two labels, and the adorable treat bag wood veneer from the Halloween Wood Veneer, sitting on top.
I loved the combination of the Title Builder collection with the October Kit and extras! These awesome products helped me create such a fun Halloween layout. I hope you’ll pull out your Title Builder stamps and get to work stamping not only your titles, but also on your layout backgrounds!

Trick-or-Treat Title Builder Magic with Meghann Andrew