There are so many different ways to add more photos and words to your projects while still keeping a clean, fresh design, and today Suzanna Stein is going to show us one that you will flip over! Let’s take a look:
Hey there, crafty friends! I’m so excited to share this project with you! Today I’m focusing on the Noteworthy collection, and more specifically, the journaling tags from the collection. Journaling tags are one of my favorite supplies for any project. They’re so versatile and I’m always thinking of new ways to incorporate them into my projects!
Supplies | Jane Alphabet Stickers — Teal, Puffy Heart Stickers — Summer Mix, Shapes and Dots Puffy Stickers, Hazel Alphabet Stamp, Days of the Week Stamp, Noteworthy Journaling Tags, Noteworthy Word Labels, Noteworthy Blank Labels, Noteworthy Bits and Pieces, Noteworthy Puffy Stickers, Noteworthy 12″ x 12″ Paper Collection
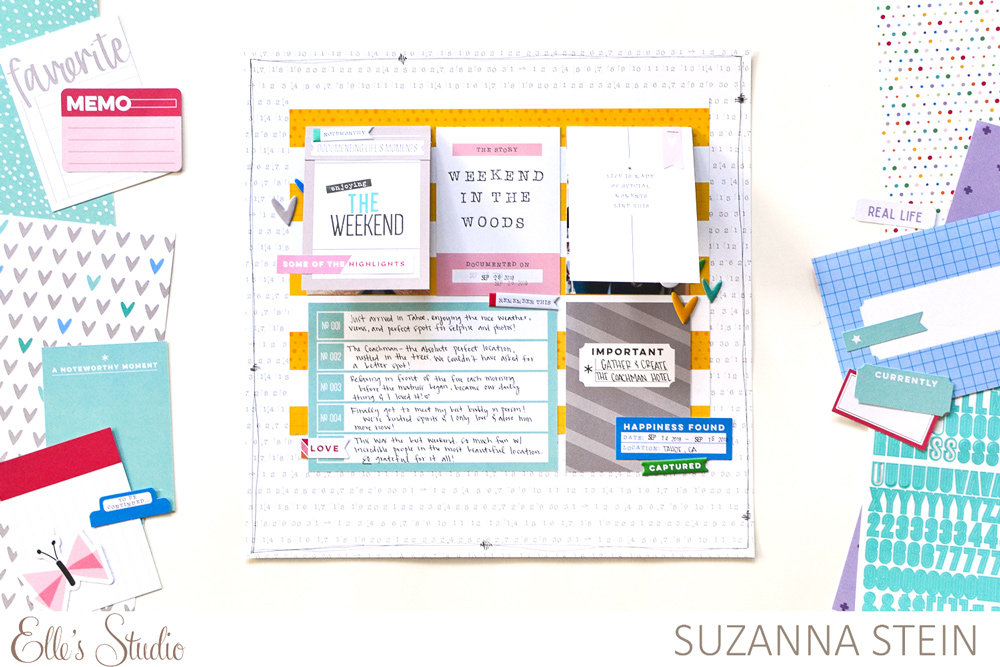
This project was such a fun one, right from the start. I decided to jump a bit out of my comfort zone by using a patterned background, and I skipped the mixed media I would normally add to go with a grid layout.
I chose a few photos I knew I wanted to document, printed them in 3″ x 4” size and decided to use the Noteworthy Journaling Tags to create flip-ups on my layout. By doing this, I was able to add 4 photos (and could have added even more!), a ton of journaling, plus some small details – all without making the layout feel overwhelming and crowded.
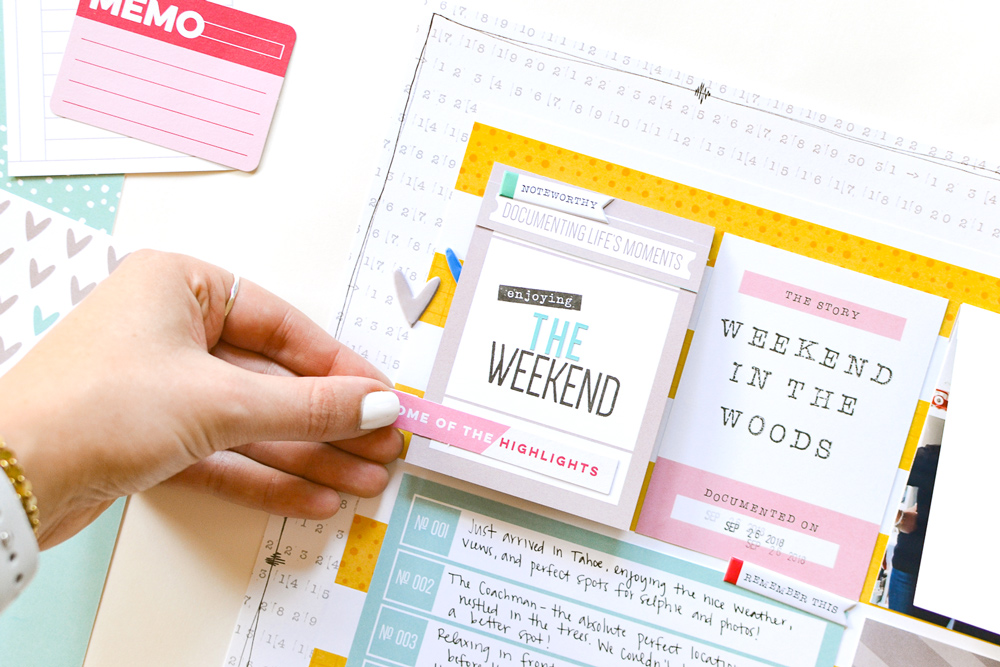
On the left journaling tag, I added my title, using the Days of the Week Stamp and Jane Alphabet Stickers. Then I added Noteworthy Word Labels and Bits and Pieces to embellish the area around the title.
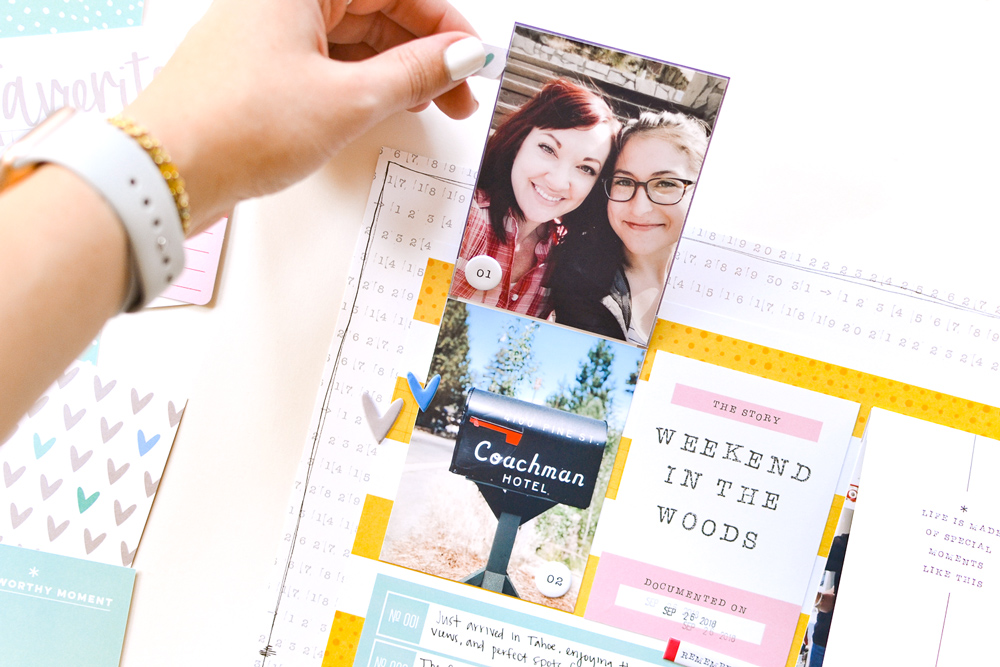
When you flip the card up, there are two photos. I used folded Noteworthy Blank Labels to create the hinges. I simply folded the labels in half, then adhered it between the journaling tag and photo on the top, and behind the photo on the bottom.
I added a journaling tag to the center, without a hinge, and added the name of the event where the photos were taken, stamped with the Hazel Alphabet Stamp along with the date I created the layout.
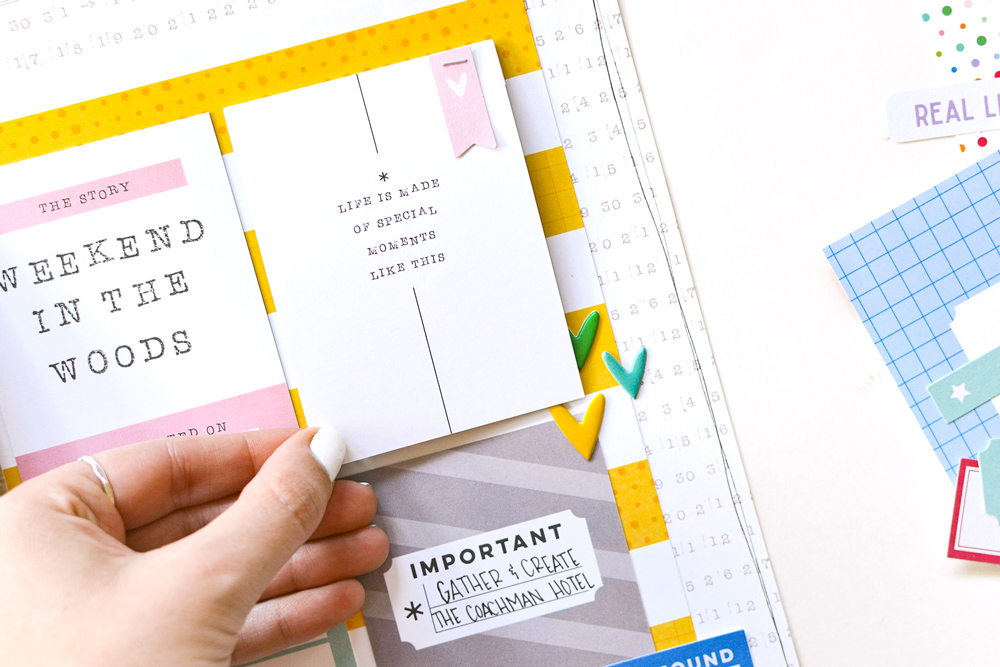
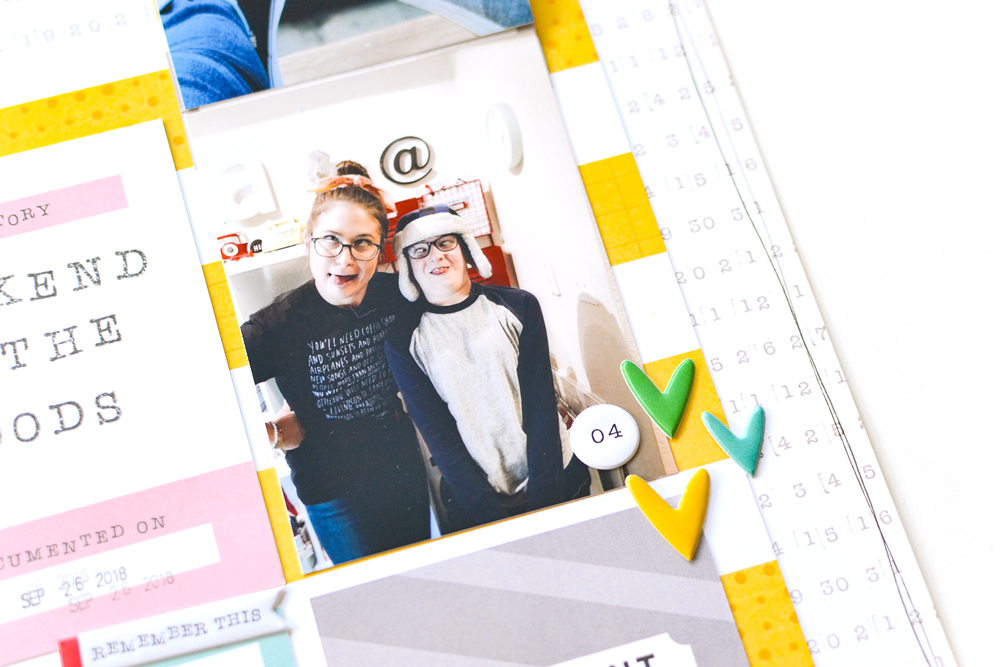
For the right journaling tag, I chose one with a quote that summed up some of my feelings about the photos I was documenting, then embellished with die cuts from the Noteworthy Bits and Pieces.
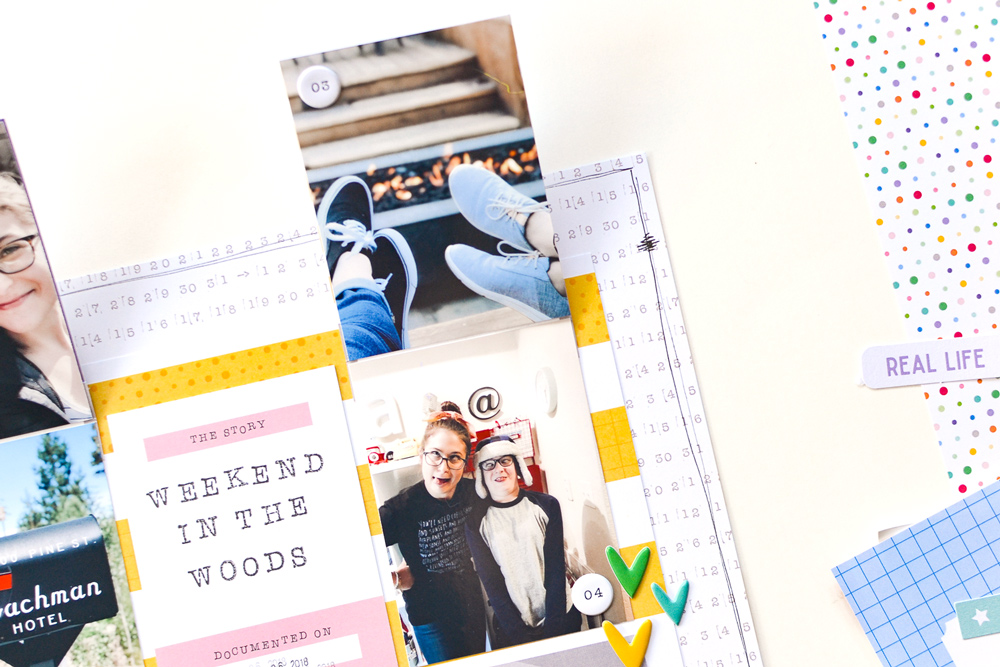
Again, using the same hinge technique, I tucked two photos behind the journaling tag. You’ll notice that each of the four photos is numbered using a puffy sticker. Those numbers correspond with the journaling on the 4″ x 6” Noteworthy Journaling Tag below the photos.
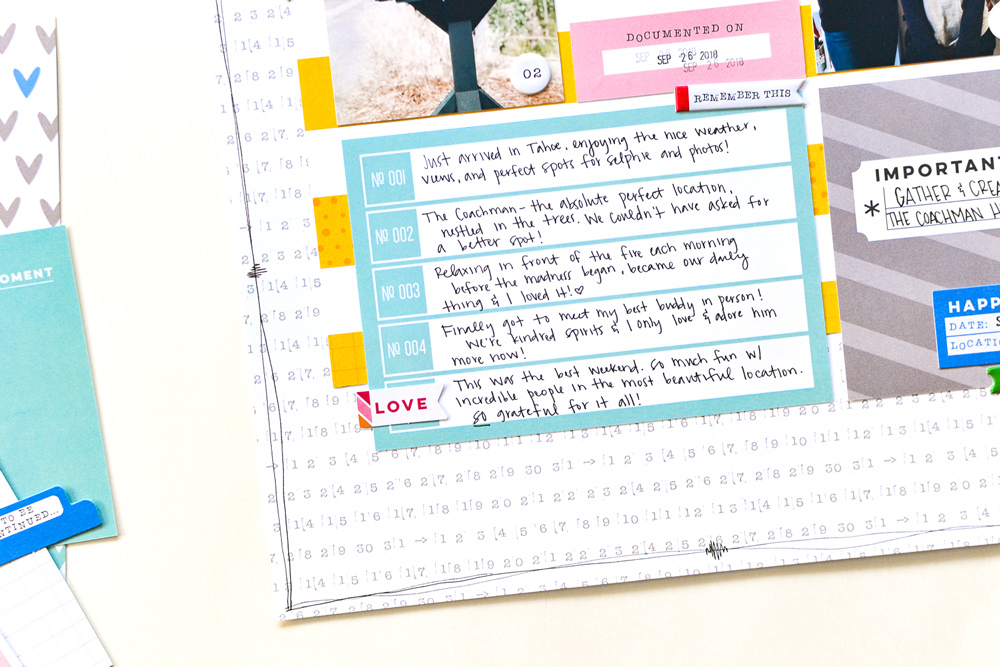
Since I chose to only include four photos, I covered the fifth number on the tag with a die cut and used the space next to it to share my thoughts as a whole on the memories.
I finished the layout with some clusters of Puffy Heart Stickers, Noteworthy Puffy Stickers and die cuts. I also added a label over a journaling tag to add the name of the location, the city, and the dates the event took place.
This is a perfect way to add multiple photos to your layout, without the layout looking crowded. I could have added more flips to the other journaling tags on the layout to include even more photos!
I hope this gives you some inspiration on how to use your journaling tags for more than just pocket pages, and how to create multi-photo layouts that are easy on the eyes. I can’t wait to see what you choose to create next with your journaling tags!

Flipping Out with Suzanna Stein