Today we’re excited to welcome our third special guest this month, creating with our new Let’s Go Traveler’s Notebook Kit, Theresa Doan! Theresa’s notebook pages always contain the perfect mix of photos, stamping, journaling and embellishment, and we can’t wait to share what she’s created using our new kit! Let’s take a look:
Hello everyone! My name is Theresa Doan and I am here to share a few layouts I created in a recent travel journal, using the new Let’s Go Traveler’s Notebook Kit! This is my fourth year using traveler’s notebooks for scrapbooking, journaling and planning. The size is just perfect for me, and not bulky. I can easily throw one into my purse for day to day planning and journaling or traveling. It’s not unusual for me to have two or three with me at the same time! For this travel journal, I documented a recent trip to Oregon.
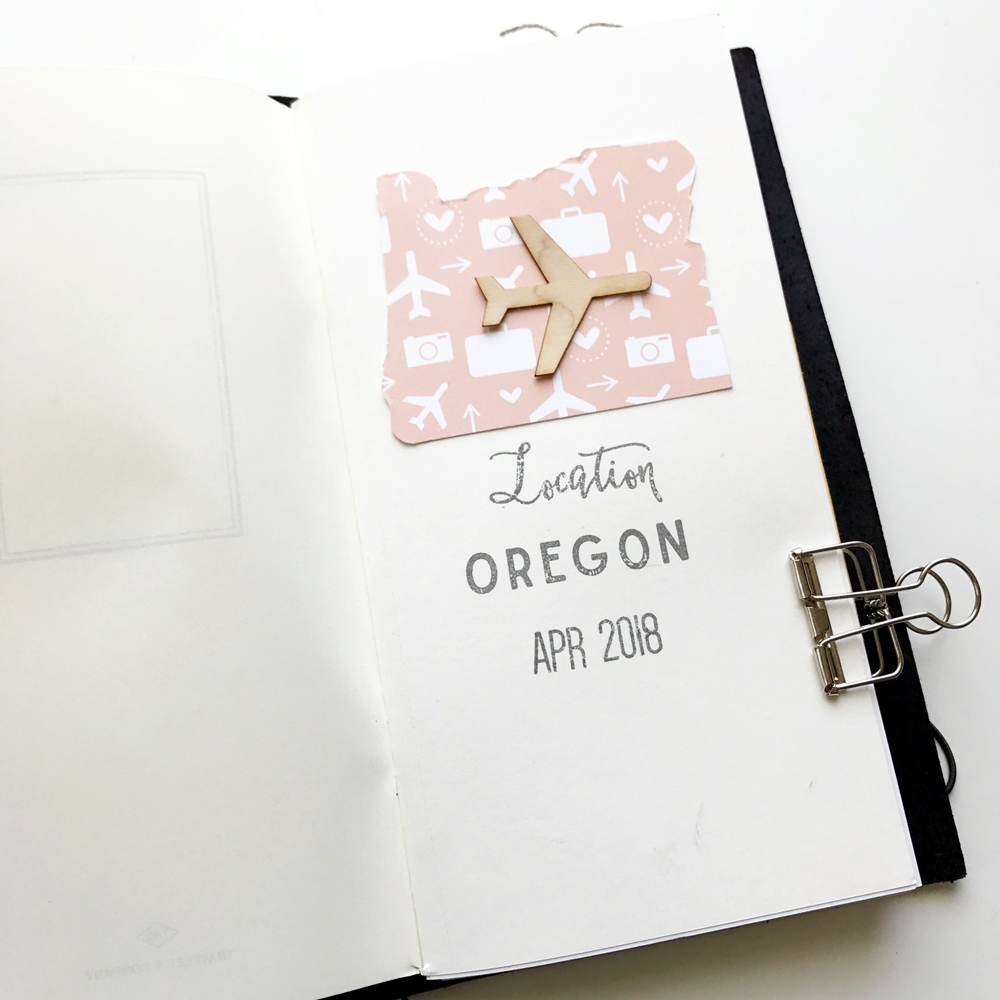
For my title page, I used one the pink travel icon patterned paper in the kit to cut out the state of Oregon. I did this by simply printing out an outline of the state I found online, and using that as a template. I adhered the airplane wood veneer on top of the state cut out. Next, I stamped “location” using the Let’s Go Stamp included in the kit, but I decided to not use the box part of the stamp. I covered the lines on the box with washi tape while I inked the stamp, then quickly peeled off the washi tape before stamping onto my page. I stamped “Oregon” below that using the Solid Stanley Jr. Alphabet Stamps, as well as the month and year of our trip using the Mini Dated Stamp.
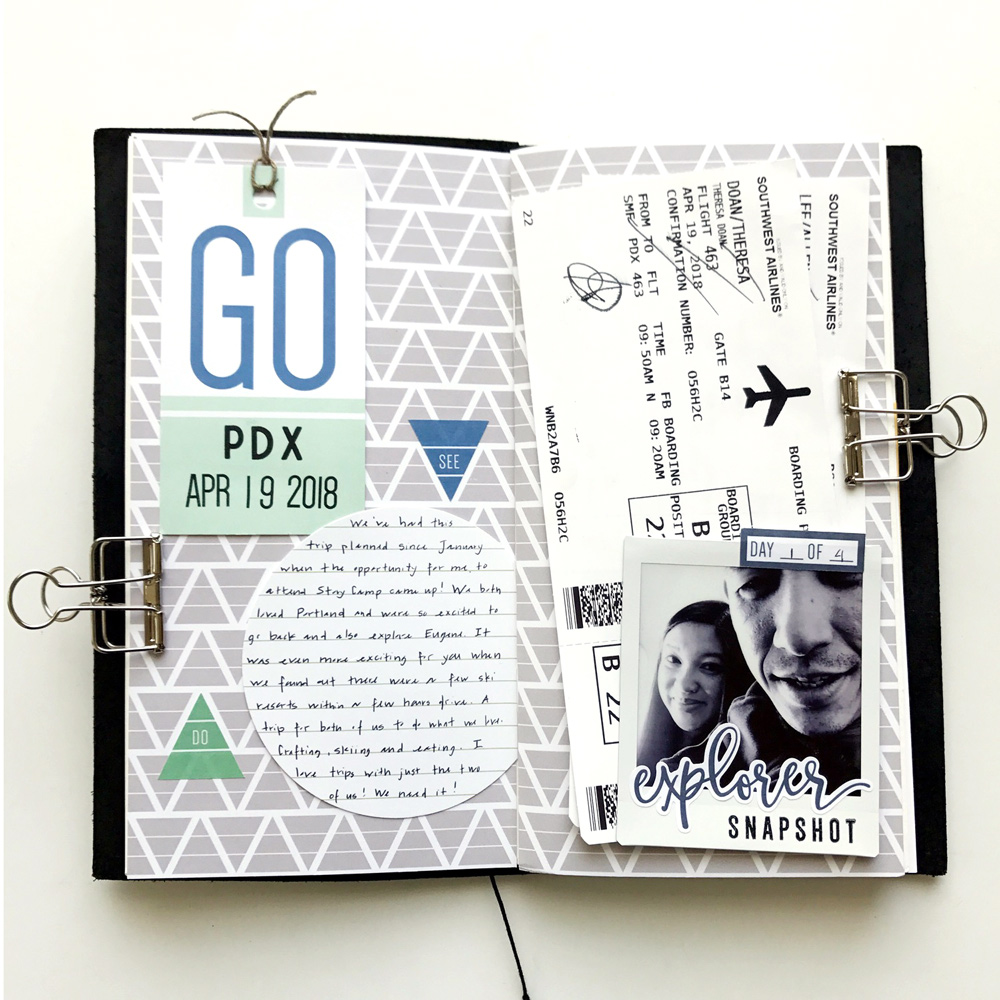
On this first layout, I wanted to include journaling about the reason for our trip, as well as our boarding passes. This is a pretty standard beginning to all of my travel journals. I started by adhering the grey and white patterned paper into my notebook. I took the “GO” tag and stamped the Portland airport code on it as well as the date of our flight.
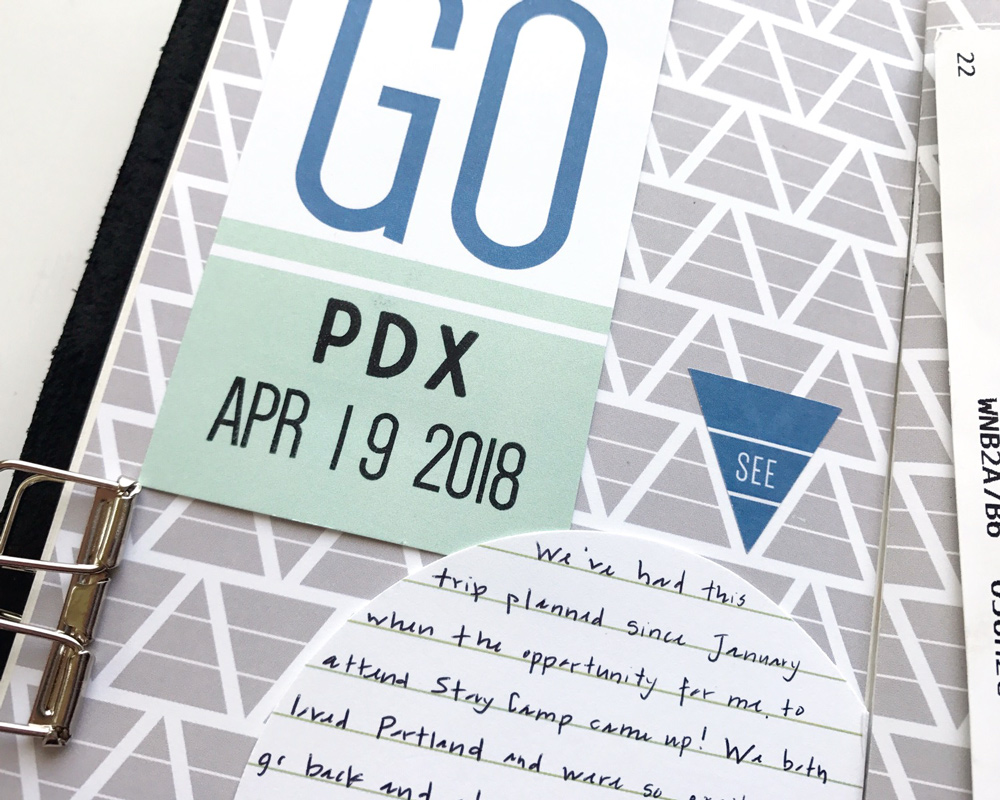
I cut out a partial circle out of the ledger patterned paper to use for my journaling. I finished this page with the “SEE” and “DO” triangle stickers which I lined up with the grey triangles on the patterned paper.
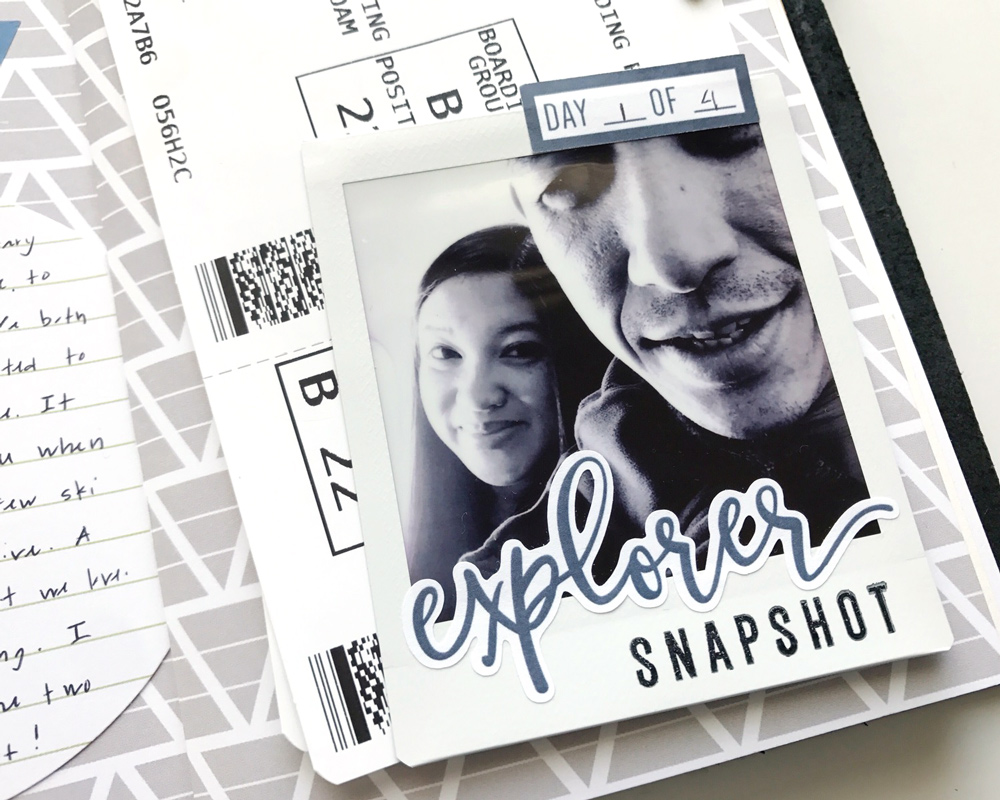
On the next page, I added our boarding passes and stamped an airplane on them. Boarding passes always fit perfectly into traveler’s notebooks. I always make sure to get a printed one rather than use electronic boarding passes. I then printed a photo with my Instax Share printer of my husband and I on the flight. I stamped “snapshot” on the photo with Staz On ink, which I always use on photos to prevent any smearing. I added a few stickers to this page as well.
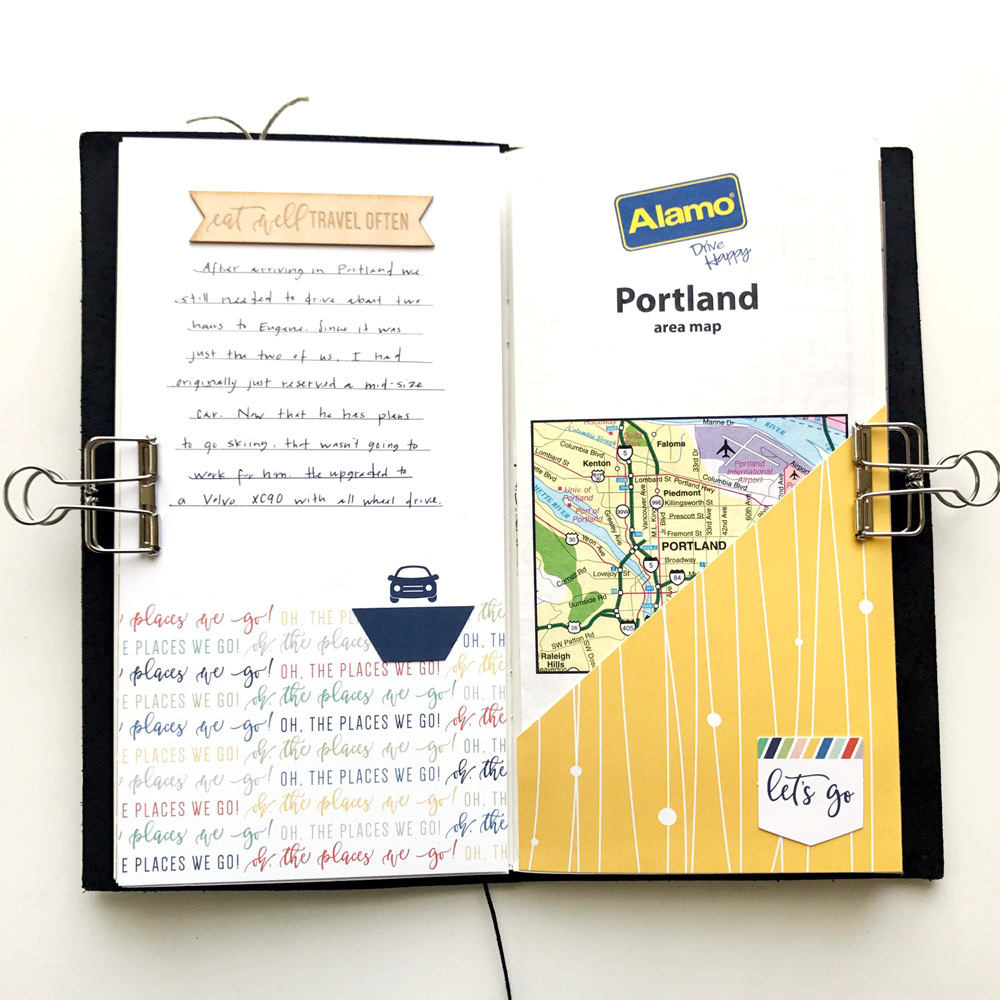
After our flight, we weren’t quite done with our journey. We still had a two hour drive down to Eugene from Portland. We had a little change of plans when we went to pick up our rental car and I wanted to make sure I documented that. I chose the “oh, the places we go” paper for my journaling, using a ruler to draw lines of varying lengths to journal on above the pattern before adding the “eat well, travel often” wood veneer piece above my journaling and a die cut with a car below.
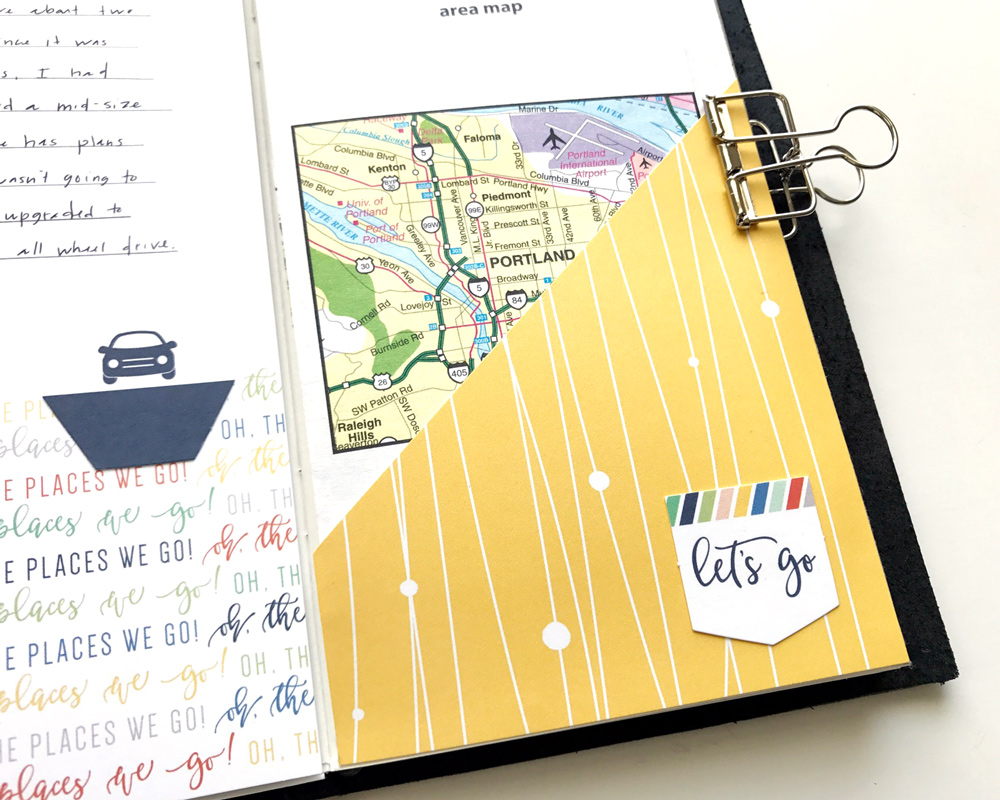
One thing I always make sure to get when we rent a car is a map of the city we’re visiting from the car rental agency. We never actually use the map, with all the map apps on our phones, but I think it’s a great memento. Sometimes I cut bits and pieces to use in my journals. For this journal however, I decided to make a pocket to place it in. I took the yellow patterned paper, and cut it at and angle, adhering it on the bottom and right edges, leaving the angled side open. I placed the map in my pocket and added the “let’s go” die cut on top. These pockets are great for memorabilia like maps, pamphlets that open up and other bits that you may not want to have permanently glued into your journals.
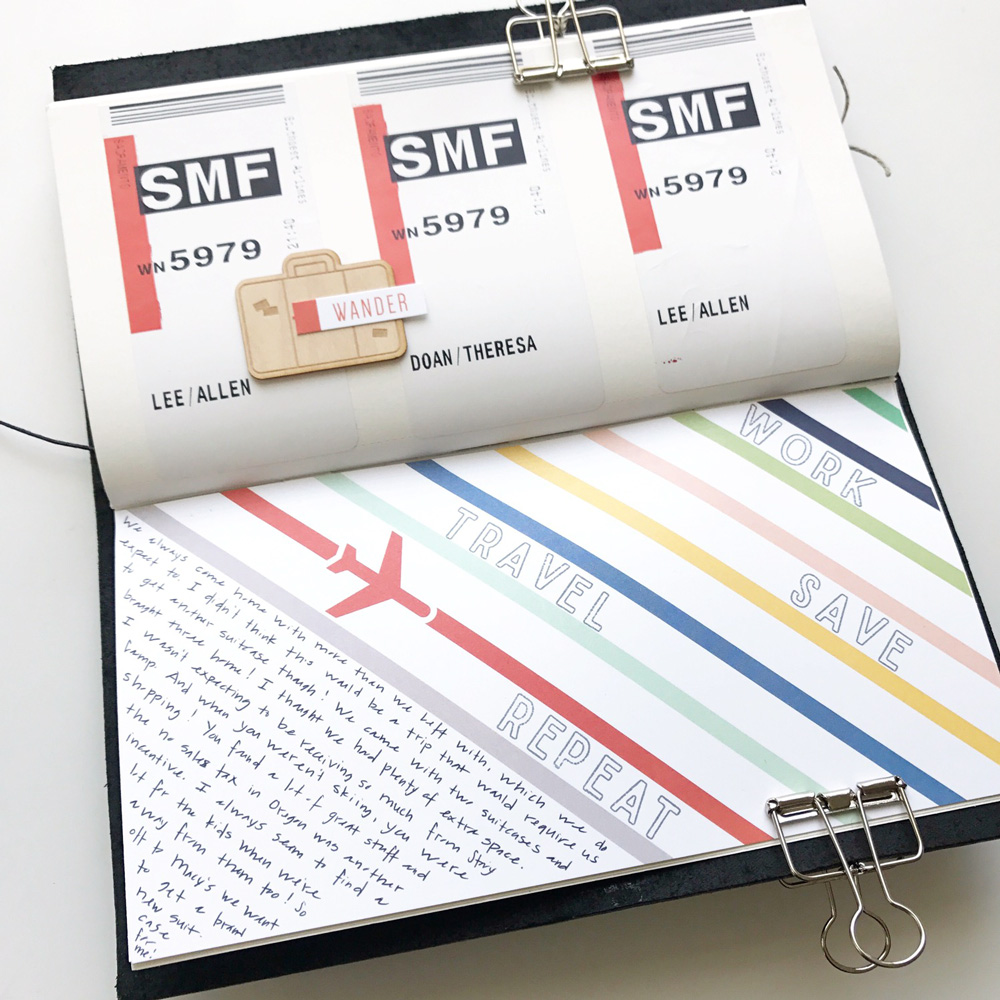
On my third layout, I used the airline luggage tags from our checked in suitcases. Luggage tags are another item I always make sure to save and add to my journals. They contain all your flight information and make a great memento.
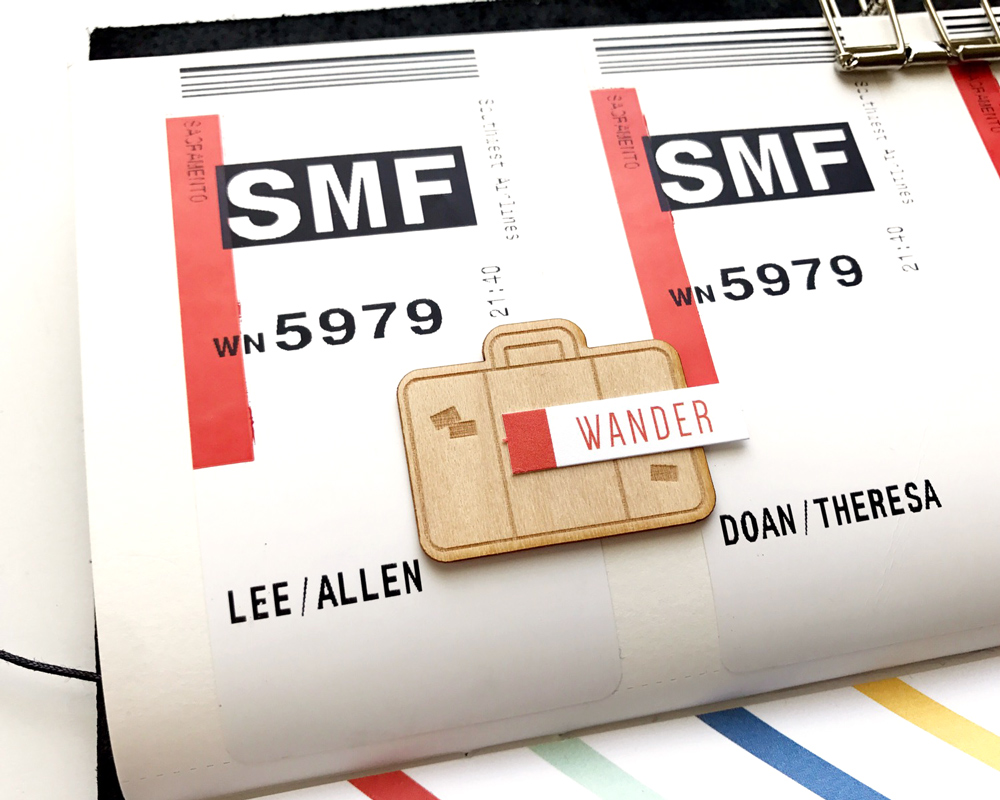
My husband and I always seem to come home with more bags than we left with. This trip was no exception. We left with two and came home with three! I cropped all three luggage tags so they would fit on one page, then added a wood veneer suitcase and the “wander” die cut that matched the luggage tags perfectly.
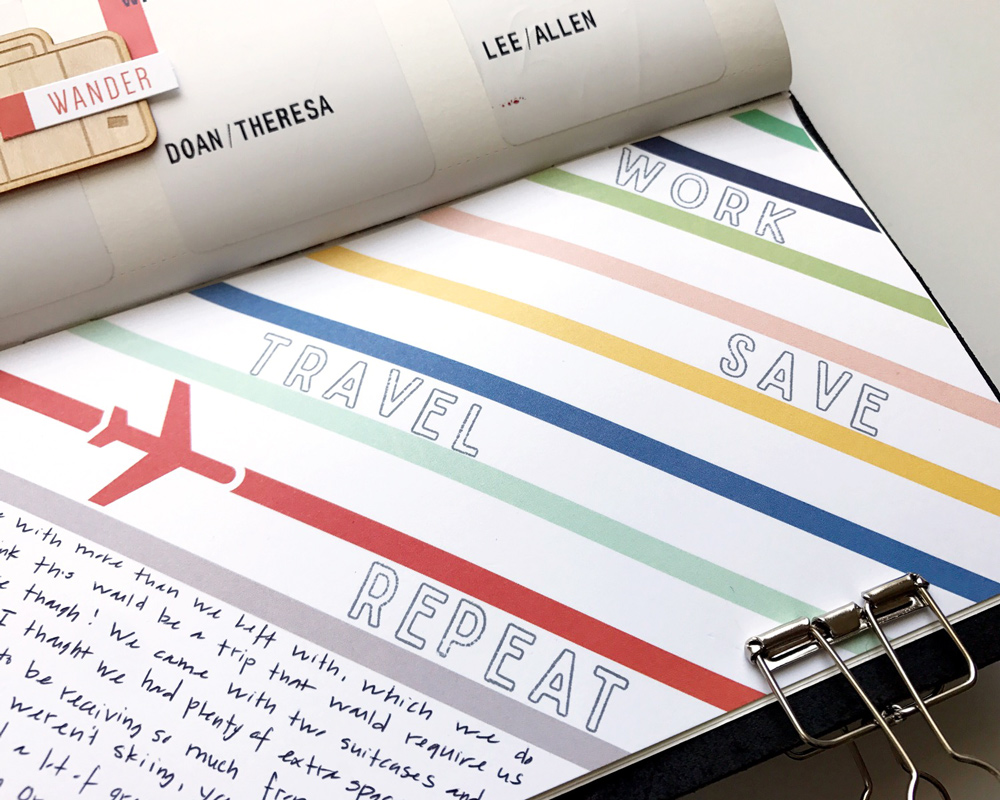
I chose the diagonal striped paper with the airplane for my last page. I stamped “work, save, travel, repeat” in between the stripes using the Outline Stanley Jr. Alphabet Stamp. The large blank space at the bottom of the page was the perfect spot to add my journaling, which I kept at the same angle as the stripes above.
Thank you so much for stopping by and taking a look at my projects! I had so much fun working with the Let’s Go Traveler’s Notebook Kit. If you haven’t given a traveler’s notebook a try, this is the perfect kit to get started with summer break trips just around the corner. I can’t wait to see what everyone creates!
Supplies | Let’s Go Traveler’s Notebook Kit, Stanley Jr. Alphabet Stamp — Solid, Stanley Jr. Alphabet Stamp — Outline, Mini Dated Stamp

Hello! My name is Theresa and I live in Northern California with my husband and our three kids. I’m a stay at home mom and I love to read, travel and document everything. I started scrapbooking 15 years ago when my oldest son was born. I started with traditional layouts, then moved on to Project Life and I have been obsessed with traveler’s notebooks and memory planning over the last few years.
Want to see more of Theresa’s traveler’s notebook pages? You can find her work at her blog and her Instagram feed!