Digital files are a great tool to keep on hand to use over and over again, but how often do you pair your digital printables with your cut files? Amanda-jayne Baldwin is inspiring us to do just that with a lovely layout that she’s sharing with us today, and we couldn’t love it more! Let’s find out how she did it:
Hi creative friends! Welcome back!
As you probably already know, I am just crazy for our monthly digital cut files, and today I am expanding on that love with Digital Cut Fun: Part 2! (If you missed Digital Cut Fun you can go back and check it out HERE.)
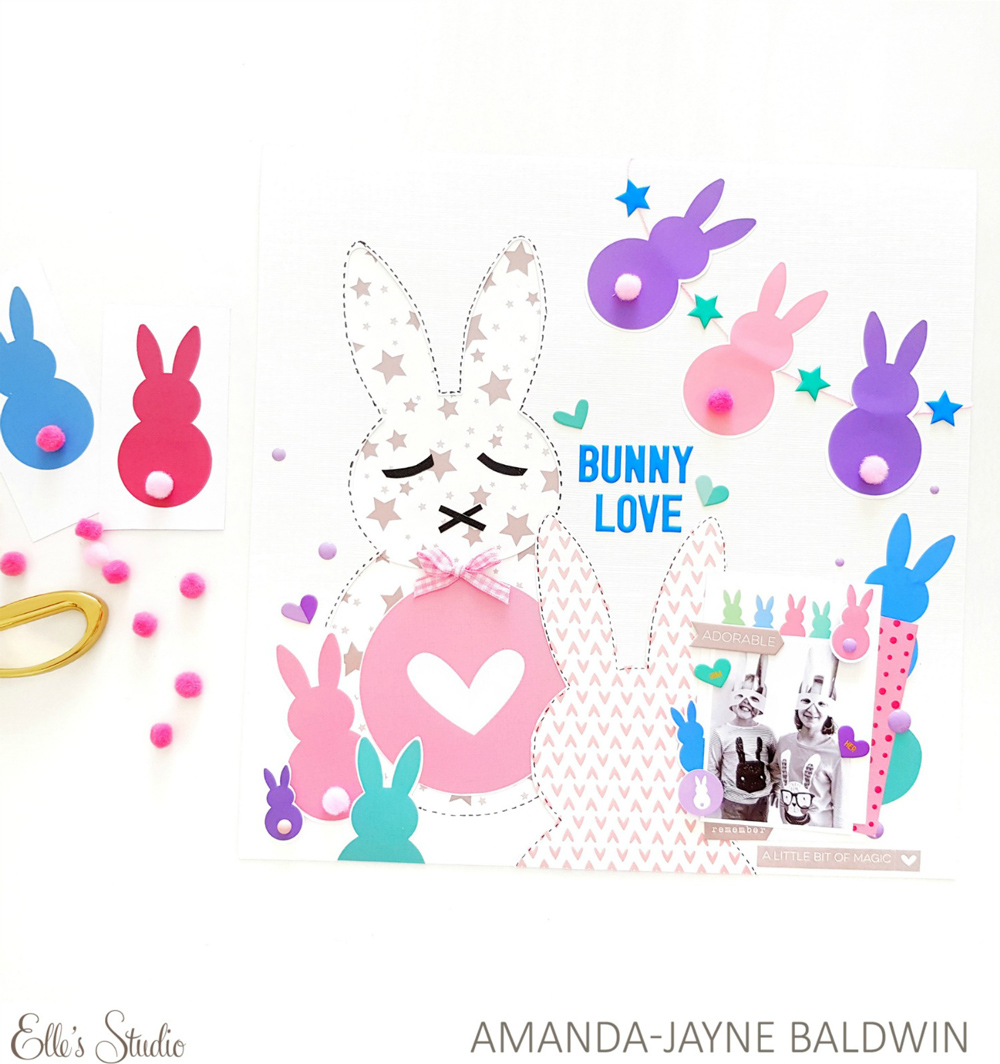
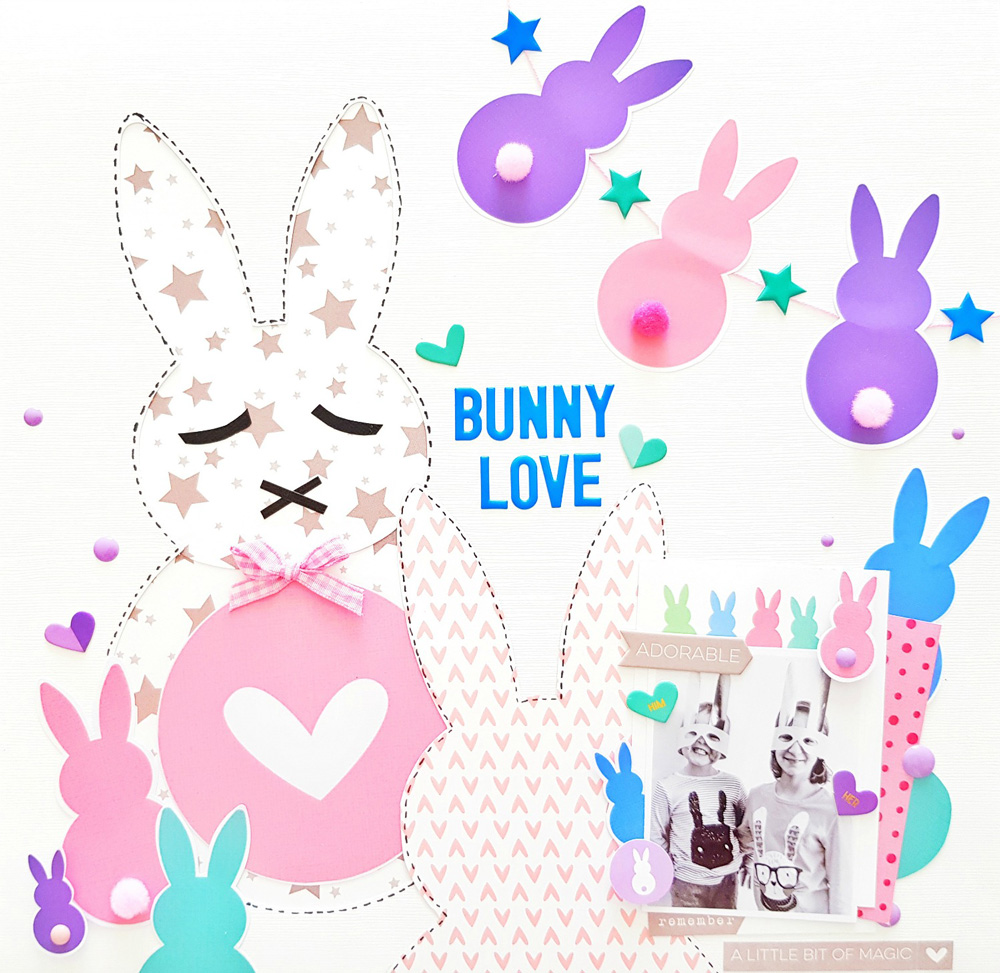
Today’s focus is on combining our awesome digital files with our monthly printable designs—yay! I just adore all the cute bunny designs in the latest Happy Day Printables and couldn’t resist creating an Easter page with them!
Supplies | March Digital Cut Files, Happy Day Printables, March 2018 Kit, Big Moment Phrase Stickers, Heart Of Gold Chipboard Stickers, Puffy Star Stickers, Cerulean Blue Puffy Alphabet Stickers, Enamel Dots, Live Laugh Love 6″ x 6″ Paper Stack
Oh the cuteness! Does it get any sweeter than this?!! And yes, yes, yesssss to all the bunnies!
You’ll be surprised just how super easy it is to re-create this look! Simply open the Happy Day Printables and select the images you wish to print. Edit sizes according to your needs & print away! I was super lazy and selected my images and just hit the ‘share’ & ‘print’ options in Microsoft Windows. I selected my sizes according to the options in Print Pictures. It’s honestly that easy!
Fussy cut them out (or if you’re really clever, print & cut with your Silhouette Studio software) and voila! Rabbit season! I especially love the heart icon, which I over-sized to create the cut file bunnies tummy with!
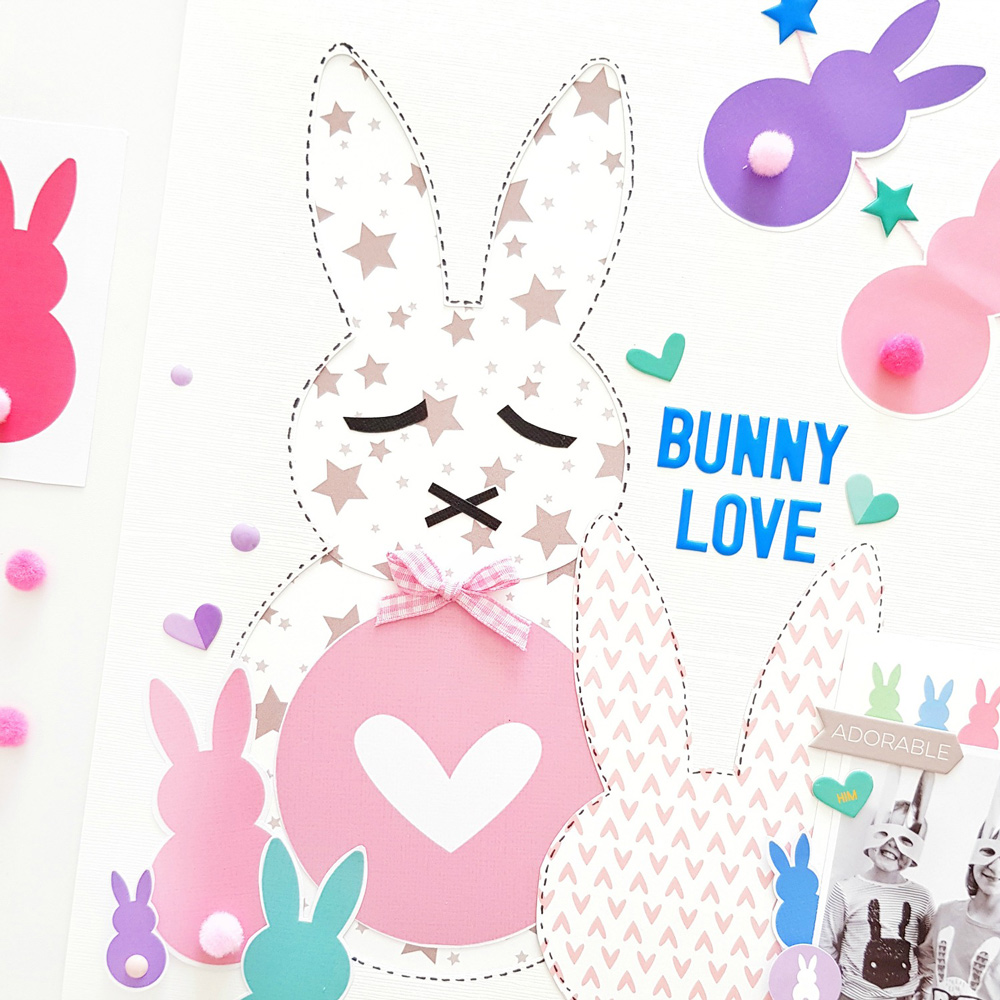
Speaking of cut files, here’s how I created those sweet big feature bunnies: Enlarge the white tail bunny digital design in the March Digital Cut Files to 11 inches in height, left align the image and cut it out with white cardstock. Keep the cut out to use as a future template, and use the bunny ‘hole’ or negative to back with patterned papers. I love the softness and whimsy of the gray stars design in the Live Laugh Love 6″ x 6″ Paper Stack. As I opted to use 6″ x 6″ papers, I rounded the bunny chin & glued it over the other sheet of paper to avoid the appearance of join marks. I then added that extra large heart icon to create the bunny tummy. So cute! Using black cardstock scraps, I snipped out a nose and eyes for our sleepy bunny. A pink bow and faux stitching with a black felt tip pen completed the main rabbit.
For the second patterned paper rabbit, you will need your previously rabbit die-cut template. Position the template over the paper you wish to use. I chose the pretty pink hearts from the Live Laugh Love 6″ x 6″ Paper Stack because they coordinated perfectly with the heart icon printable, and then it’s a simple trace & cut! SO easy! Apply the faux stitching and glue into position.
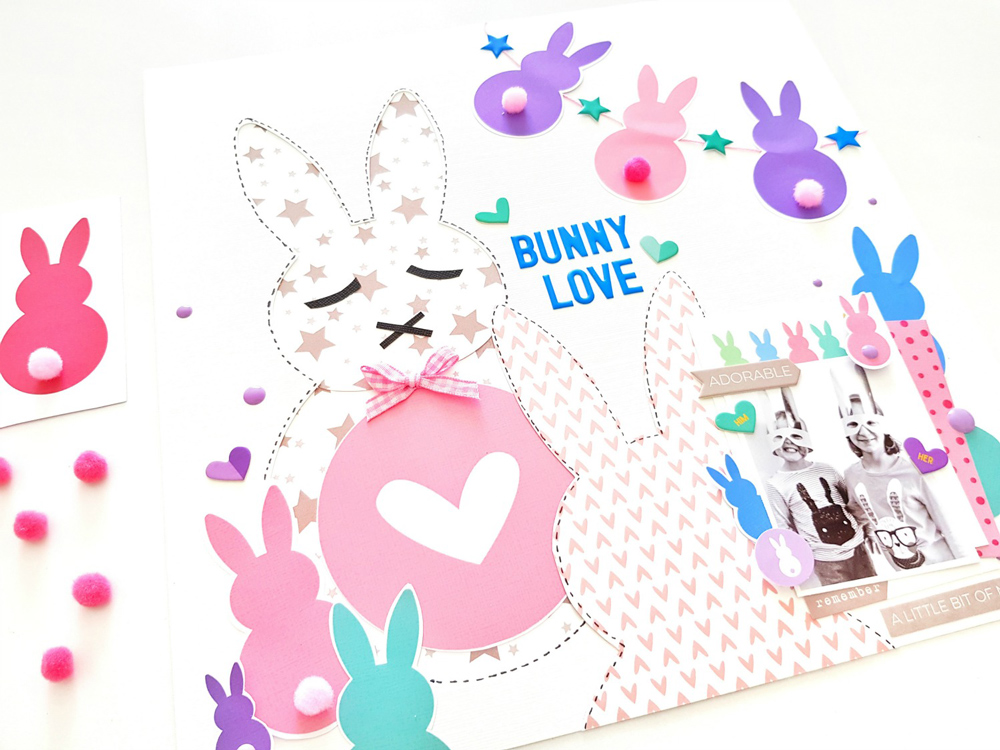
Now it’s time to make the bunny banner!
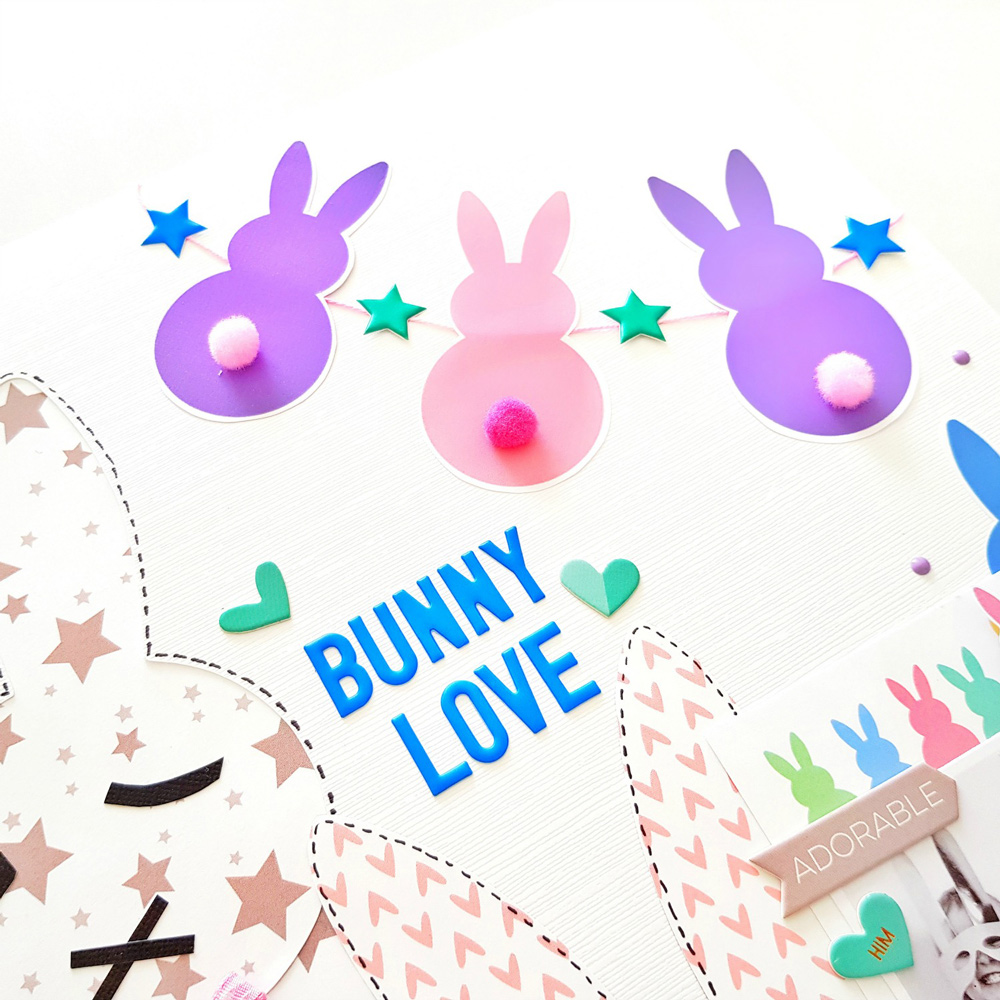
Suspend some baker’s twine onto the top right hand corner of your page, and glue into place. Take your Happy Day Printables bunnies and adhere them to the string like flags. Divide each bunny with a Puffy Star Sticker, and add a pom pom cotton tail to each one! Adorable!
You can also use more of your printed bunnies to both adorn & layer underneath your photo.
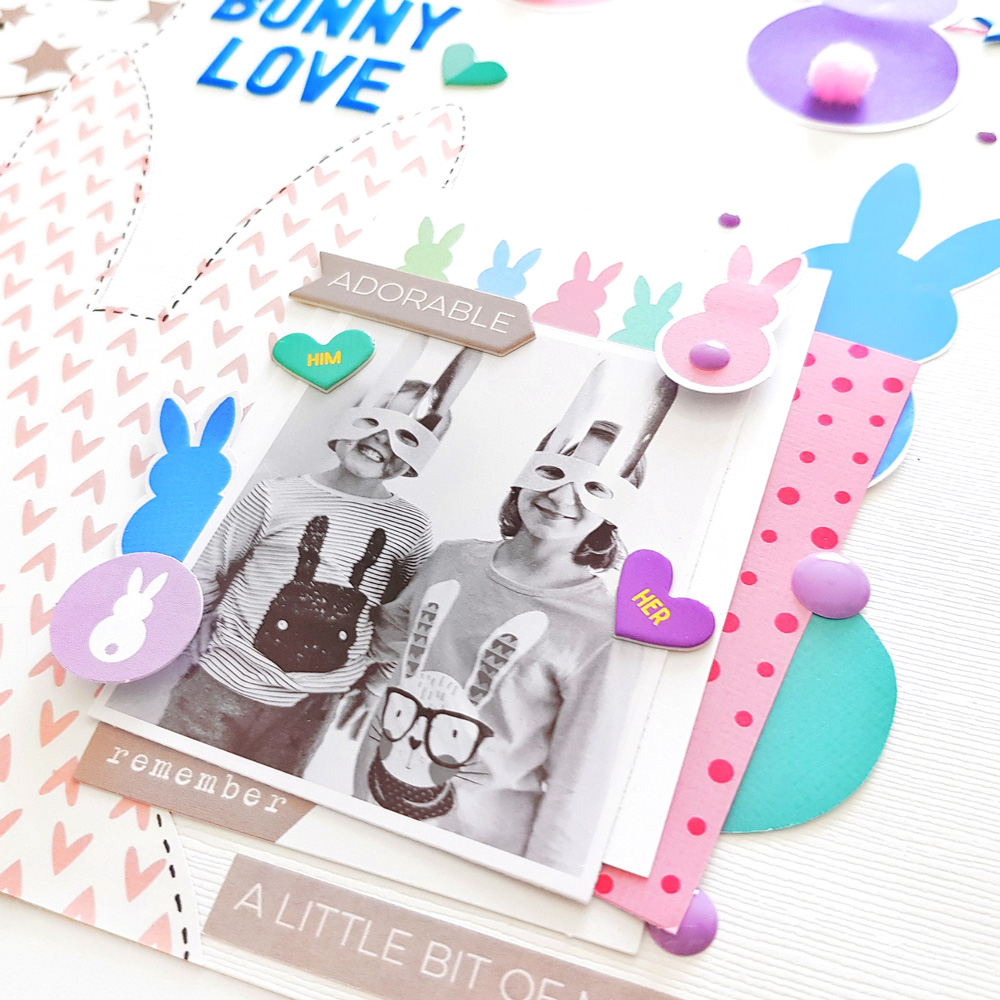
You’ll also spot a few items from our March 2018 Kit here, like the cute purple bunny die-cut circle.
I added more of the printed bunnies to the left side of my feature rabbit, too, and completed my layout with Cerulean Blue Puffy Alphabet Stickers, Enamel Dots & Heart Of Gold Chipboard Stickers.
Simple, fun and oh so perfect for Easter memory keeping!
Layering cut files with printables is super easy and looks so effective! I hope you’ll give this technique a try!
Thanks so much for visiting today!
Digital Cut Fun: Part Two with Amanda-jayne Baldwin