Sometimes it is easier to purchase a pre-made treat, but it is so much for fulfilling when we give handmade. Today, Meghann Andrew, a self-professed queen of parties, is sharing a fun and EASY treat bag that can be made over and over again for a large group. Let’s see what she created:
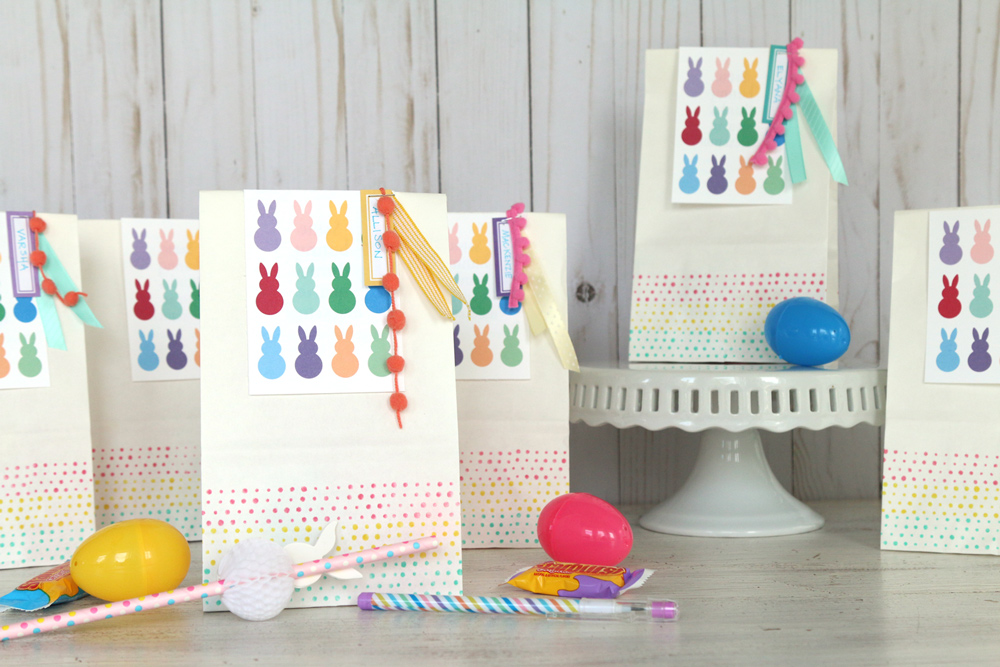
Hello there! I LOVE throwing a party, and one of my favorite parts about party crafting are the favor bags! I love making unique goody bags that look as pretty on the outside as the rest of the party, so for my daughter’s Easter celebration at school, I wanted to give each of her classmates a little, colorful treat. The best part? These bags are easy to duplicate in large quantities, so they are perfect to create for all of the kiddos at your Easter party using just three products!
Supplies | Happy Day Printables, March Labels, Happy Moments Stamp
First, I started off by adding a bit of color and pattern to the base of my white paper sacks, which I purchased at my local craft supply store. I grabbed the awesome dot pattern from the Happy Moments Stamp, some pink, teal and yellow ink (my bags are a matte finish, so I used a dye ink. If your bags have a sheen, you may want to try a pigment ink or permanent ink, instead.)
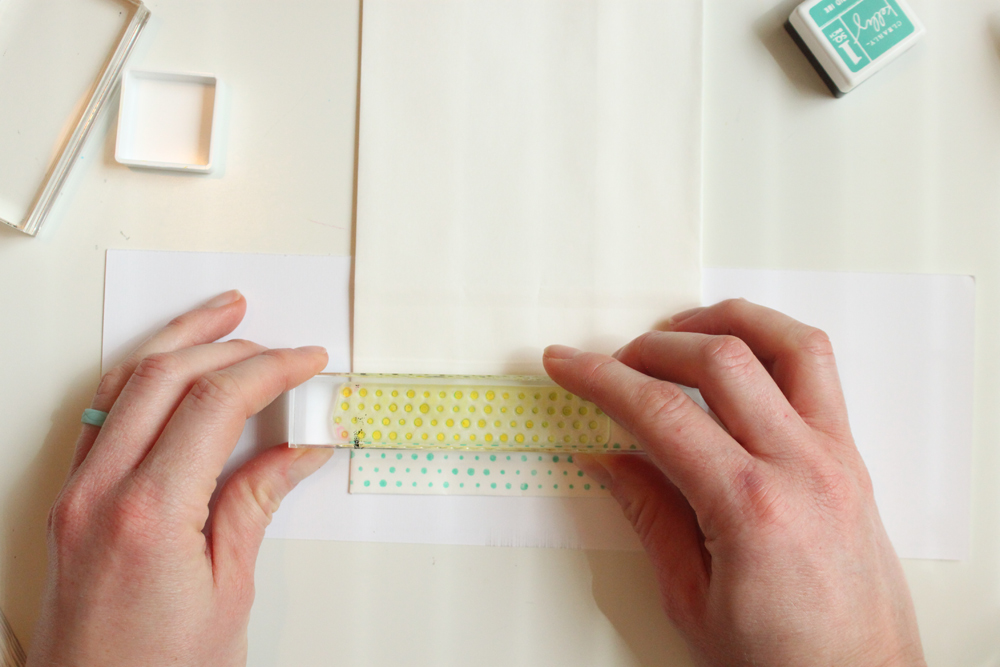
To make the process faster, I stuck with the same color ink and stamped all of my bags before moving on to the next ink color, starting at the base of the bag with teal ink. This saved time cleaning the stamp in between colors.
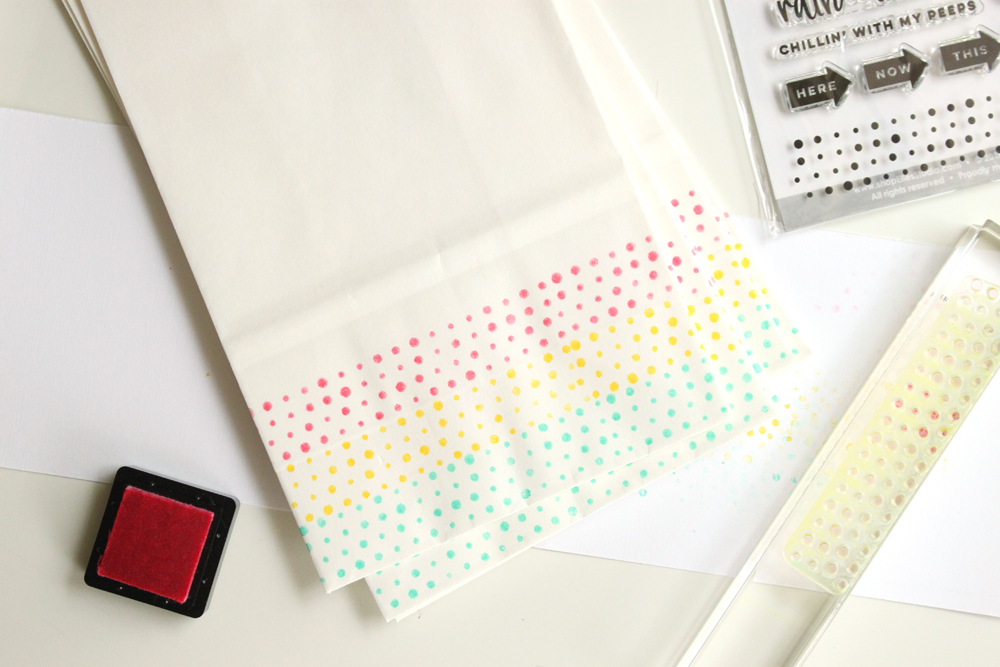
I love how bright and colorful this made my bags, and it was simple to do with the Happy Moments Stamp!
Next, I opened the Happy Day Printables folder and grabbed the bunny tag PNG file, opening it in Photoshop Elements. It is already sized at 3″ x 4″, so I arranged as many as I could on an 8-1/2″ x 11″ sheet, printing it on smooth cardstock without any borders.
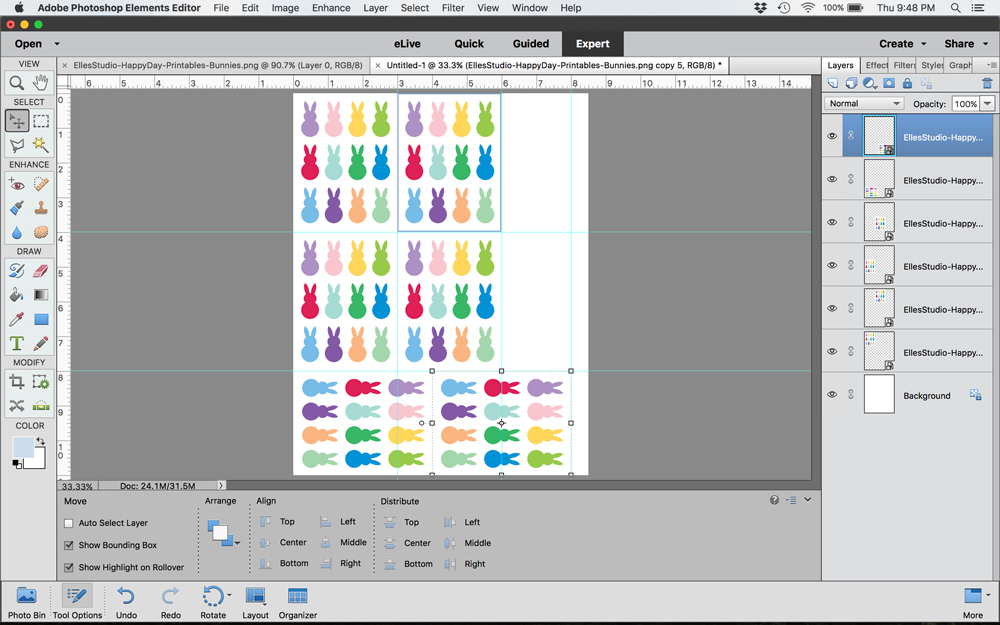
After my six tags were printed, I wanted to add a little note to the back side. I created a new 3″ x 4″ white background image, then added a little note from my daughter to her classmates.
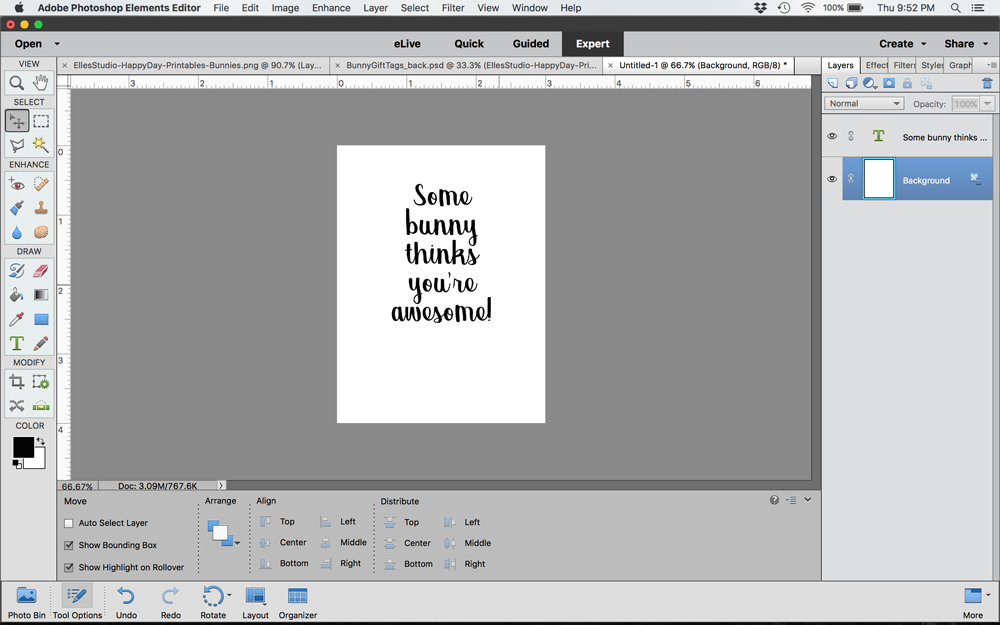
Once that was flattened (by clicking Layer > Flatten Image) I went back to my bunny tag page. I saved it before I made any changes, then flipped the image to create a mirror image of the page, keeping my guidelines in the same place. Next, I deleted each of the bunny tags, and in place, added the note tags where the bunny tags would have been placed.

Doing this means that I can just print this sheet on the backside of the bunny tags to create a double-sided tag!
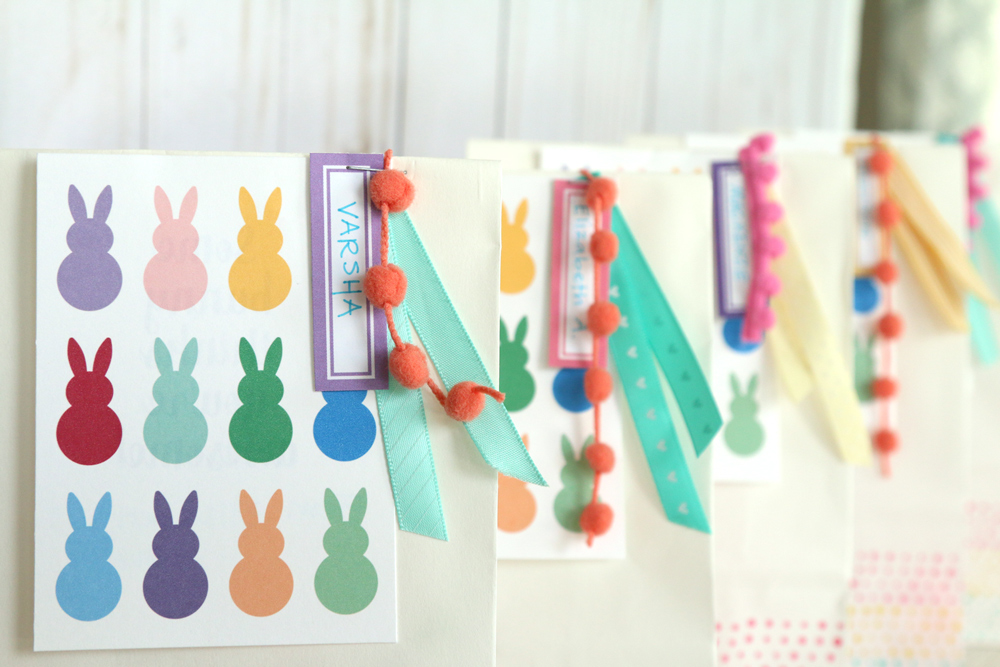
Once these were printed, my daughter wrote her name at the bottom of each of the tags, then I wrote the recipients name on a colorful March Label. I held these two together, while adding in small, colorful pieces of ribbon and pompom trim, and stapled all four elements to the top of the bag.
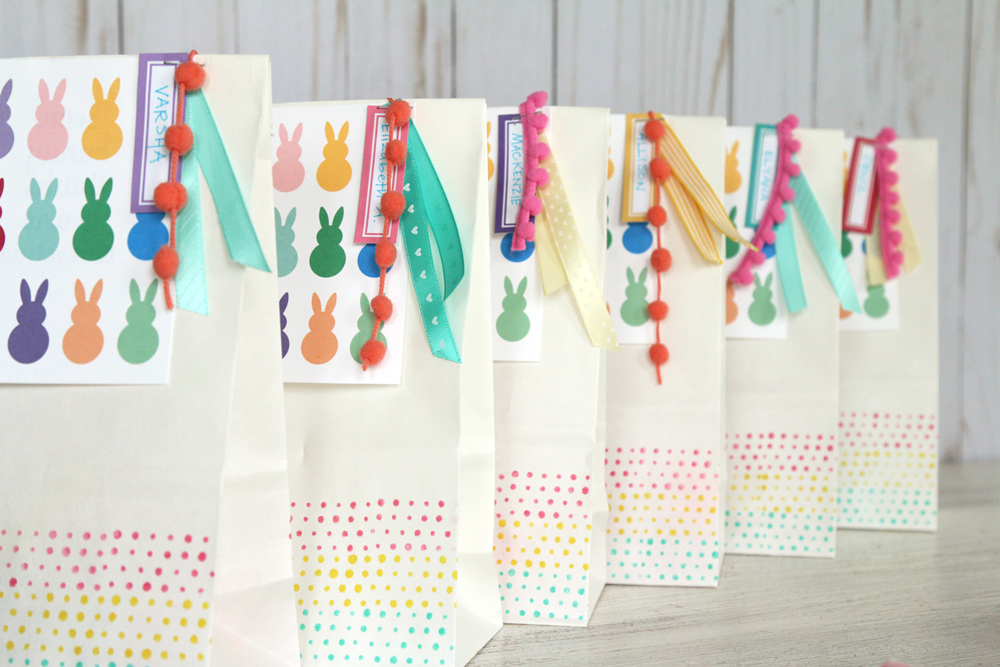
These colorful, spring-like Easter bags come together in no time, which is a good thing when you have to make 27! Happy creating, and celebrating!

We would love to see your Easter treat bags, too! If you’ve been inspired by this post, share your goody bag project on Instagram using the hashtag #EllesStudio! You could win a gift certificate to the shop, and be featured here on our blog just for sharing!