We are SO excited to announce one of our favorite paper crafters as our March guest designer—Natalie Elphinstone! We chose Natalie because, just like us, she is a BIG fan of color, and that shows when you look at her Instagram feed. Please join us in welcoming her, and let’s take a look at what she created to share with us today!
Hi everyone! My name is Natalie Elphinstone and I’m so excited to be here as a guest designer for Elle’s Studio this month.
I find it really easy to create with Elle’s Studio designs because they’re just so universal and adaptable. Classic patterns and bold colours means I can always match photos with products every single time. When I sat down to create today I ended up with not just one but two layouts to share with you!
The first one uses the March 2018 Kit and add-ons because I think it’s just as fun to use these cards on layouts as they are to slip into pocket pages.
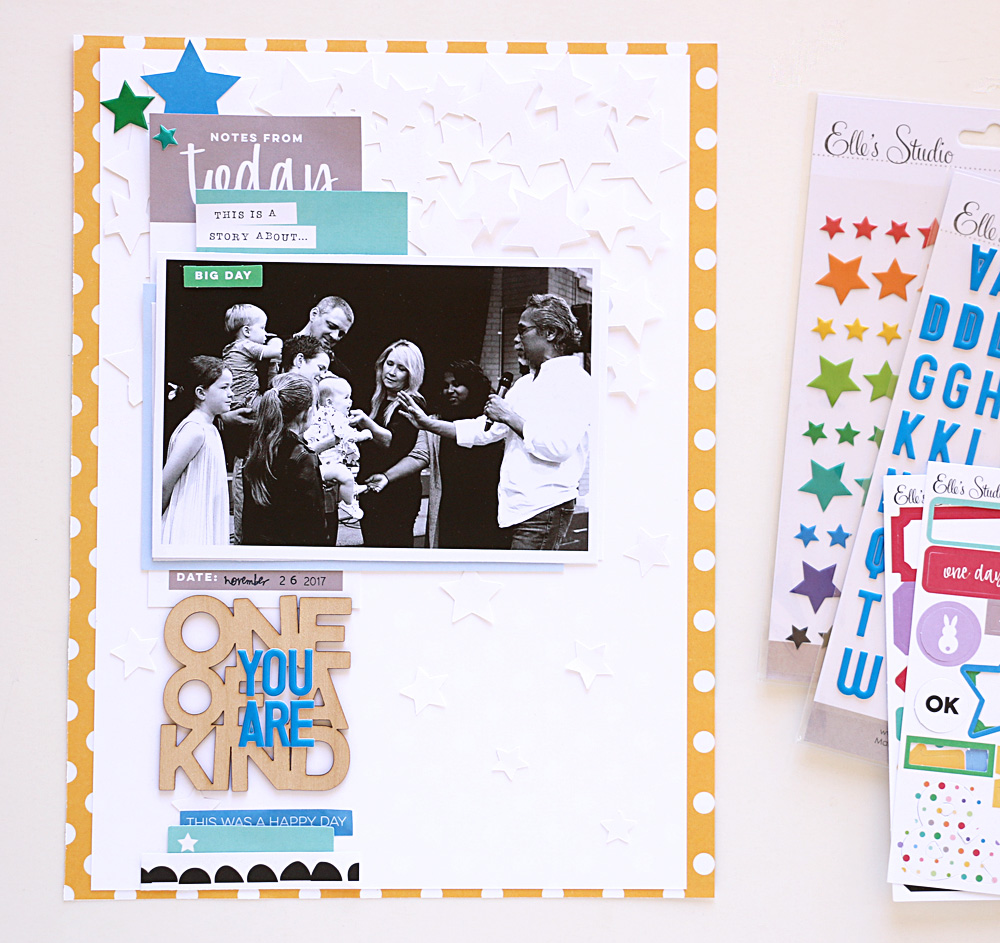
Supplies | March 2018 Kit, March Digital Cut Files, Big Moment Phrase Stickers, One of a Kind Wood Veneer, Puffy Star Stickers, Cerulean Blue Puffy Alphabet Stickers, Live Laugh Love 12″ x 12″ Paper Collection
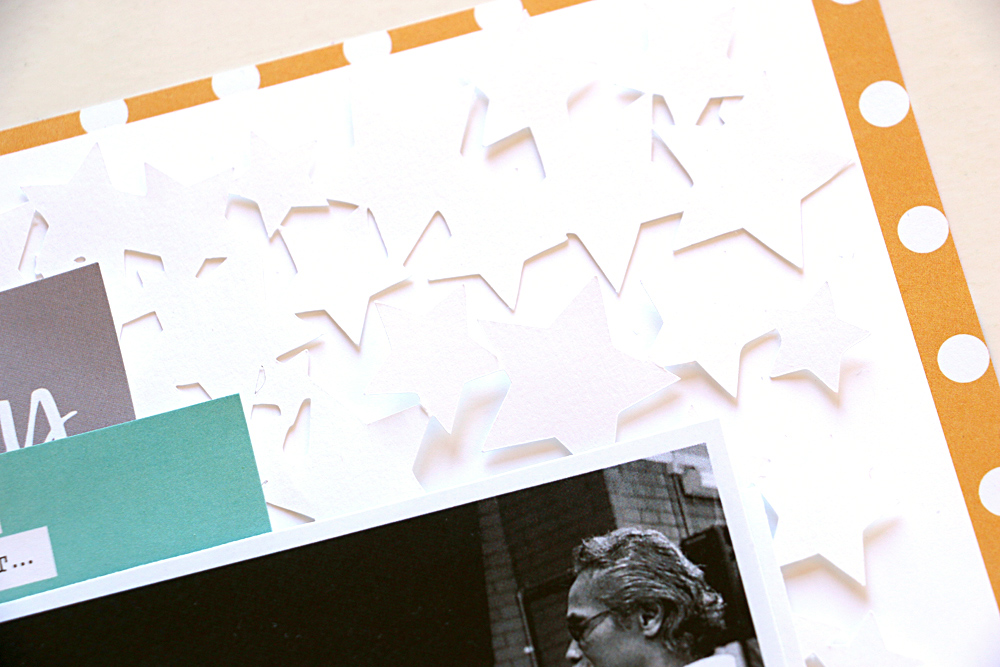
I started by busting out my old Silhouette machine to cut the star patterned background using the March Digital Cut Files. I admit, it’s been a long time since I used my cutting machine, but the digital files this month had me searching for my power cord as soon as I saw them! I went for a white on white look which creates a fabulous background detail without being too overwhelming. (Although it’s shockingly difficult to photograph!)
I was desperate to use the One of a Kind Wood Veneer as my title on this page for Shiloh’s baby album. My littlest girl might be the fourth child, but she’s already proving she’s got a unique personality—she’s not following in the footsteps of my other kids at all! I completed the title with some Cerulean Blue Puffy Alphabet Stickers layered on top, and I love this mix of different textures!
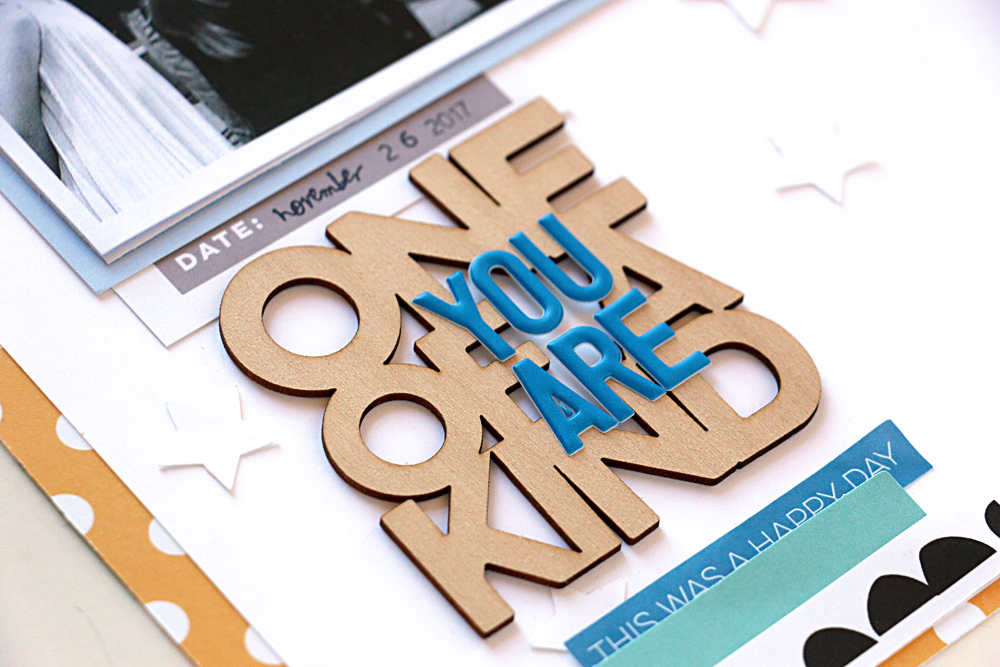
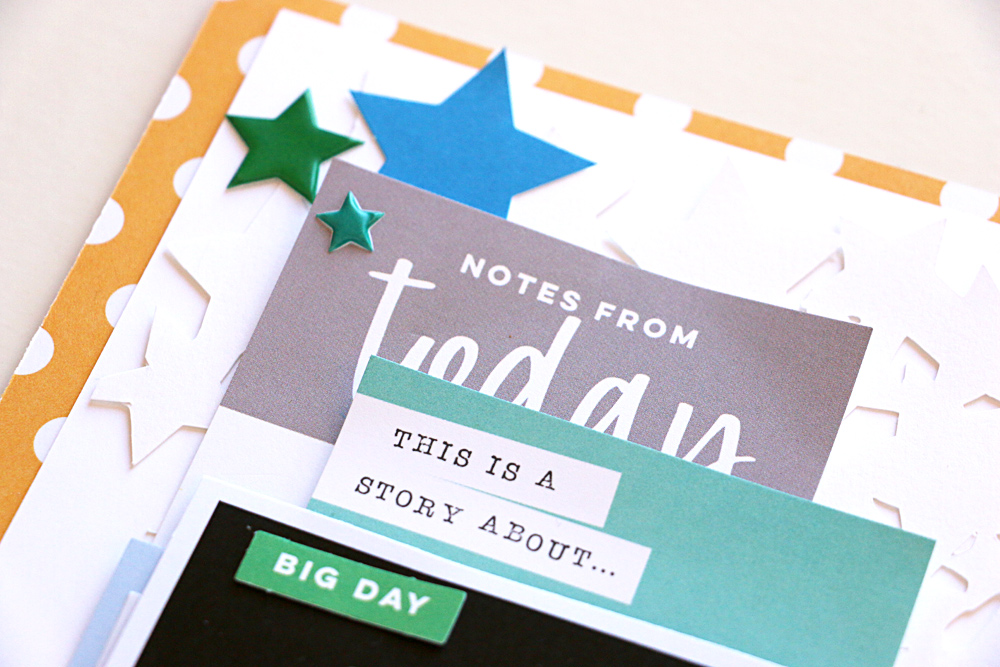
At Shiloh’s dedication (similar to a baptism) she had many prayers and words spoken over her that I wanted to record. I typed them all up and printed them out onto a 4″ x 6″ tag from the March 2018 Kit and paper that I’ve slipped behind the photo. The photo is attached by a single staple behind the ‘big day’ diecut so that you can lift it up and read the journaling underneath.
Next, I used a couple of 3″ x 4” tags from the March 2018 Kit to create even more layers behind my photo. One of them I cut in half so it could stick out both the top and bottom, and I finished off the page with more diecuts, stickers and Puffy Star Stickers. I like to have lots of layers and embellishments, but my trick to keep it from becoming too busy is to use a limited colour palette, and keep it all lined up. On this page I’ve clustered everything down the left hand side and your eye should follow that direction easily rather than having things scattered all over the page.
Supplies | Letter and Number Stickers — Black, Shapes and Dots Puffy Stickers, Live Laugh Love Double-Sided Journaling Tags, Live Laugh Love Wood Veneers, Live Laugh Love 12″ x 12″ Paper Collection
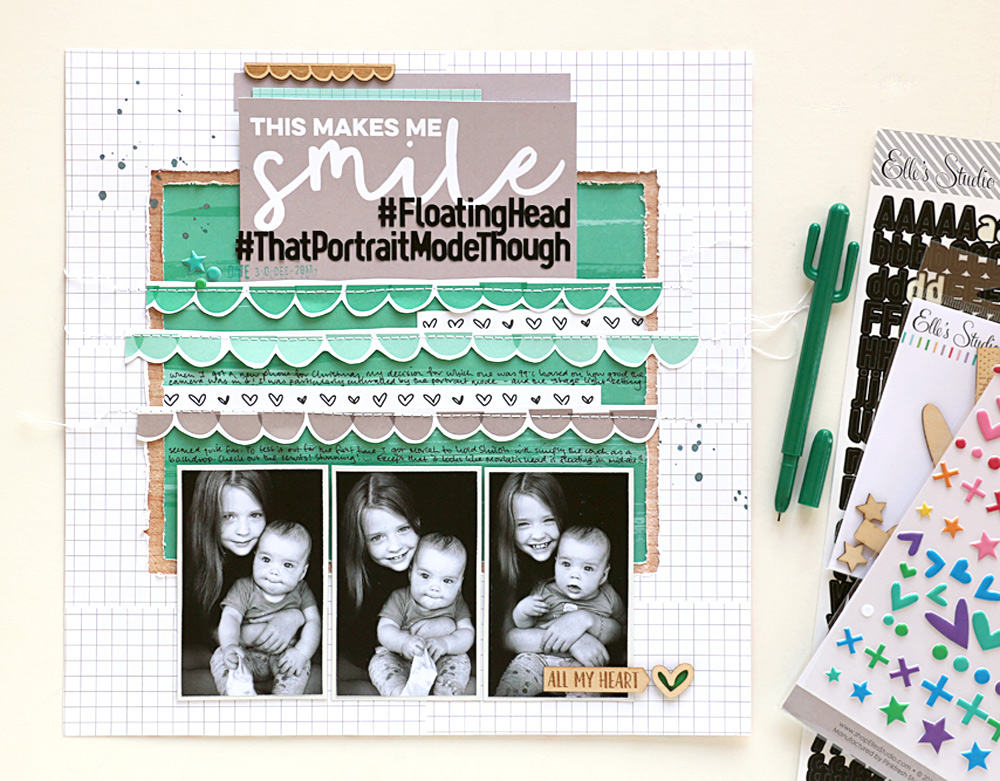
My second layout was created with the Live Laugh Love collection. I love all of the bright and happy colours in the collection but once again decided to limit myself to just a few of them – this time choosing the greens, greys and a touch of woodgrain. Another advantage of scrapping in this way is that it means you can choose a different colour palette each time and end up with multiple projects from the same collection which all look completely different from each other.
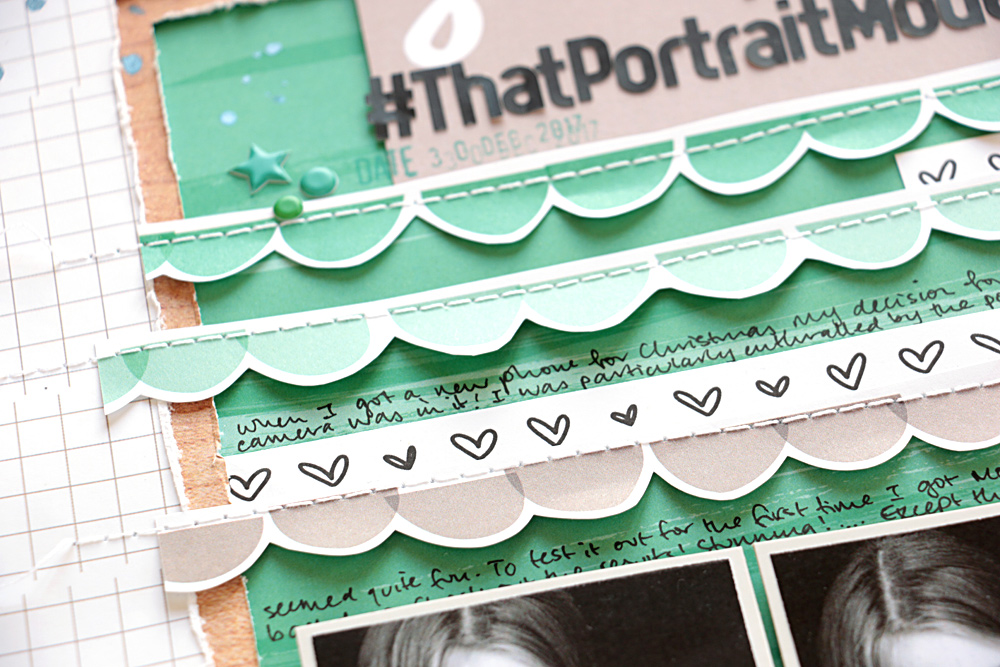
I was inspired to do some fussy cutting for this layout and thought the scallop pattern from the Pennants paper in the Live Laugh Love 12″ x 12″ Paper Collection would look good strung across the length of my page. I wanted it to look like it was attached to something though, so came up with this idea of constructing a ‘frame’ within my layout.
Rather than layering the green paper on top of the woodgrain paper on top of the white background paper I did it the other way around. I actually cut a square out of my white paper, then backed it with the woodgrain paper before cutting a smaller square out of that one, and finally backing it all with the green paper. Was this more difficult method worth it? I’m not sure! But it did make me feel like I was being very creative!
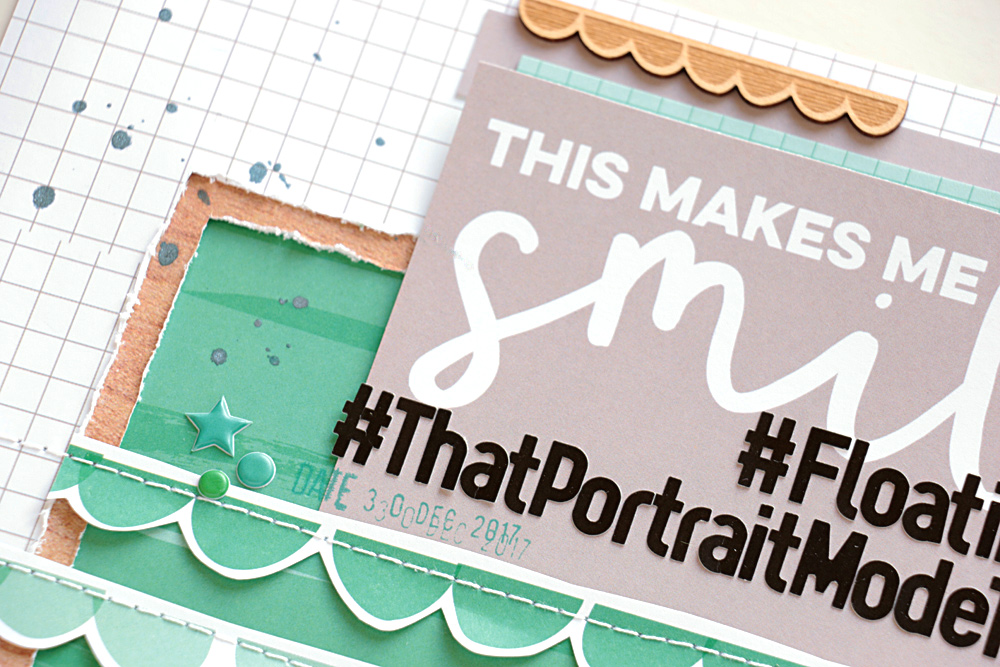
Now if you’re wondering about my crazy title that’s fair enough! I tell the story in my journaling, but basically it came about when I got a new phone for Christmas and I wanted to test out the camera functions. There’s one setting called ‘stage light mono’ which takes these dramatic black and white shots that I love, but which on this first attempt made it look like Moriah’s head was floating in mid-air!
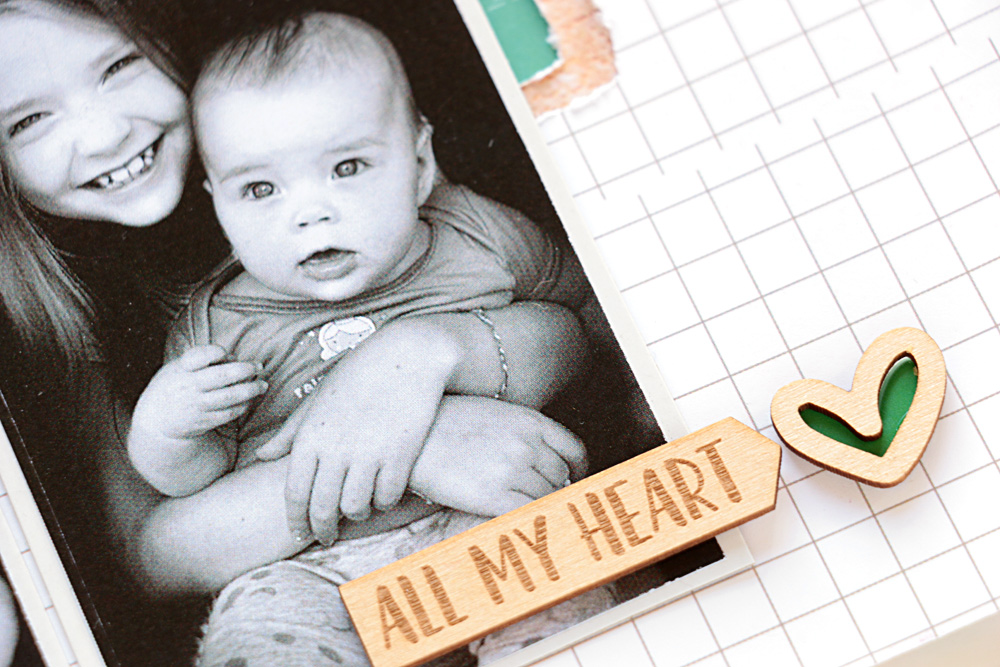
The photos made me laugh though, and hence why I used this 4″ x 6” tag from the Live Laugh Love Double-Sided Journaling Tags for the title. For my hashtag subtitles I used the Letter and Number Stickers in black to balance out all that black in the photos. Since they were so long I made sure to use a ruler to line them up properly! And lastly, I finished the layout off with a couple of Live Laugh Love Wood Veneers, as well as some Shapes and Dots Puffy Stickers.
Thanks for letting me share these layouts today. I’ll be back again next week with some different projects to show you!

I’m Natalie and I’m waving hello to you from the bottom of Australia! I’ve been paper- crafting since the birth of my fist child which must make it over 11 years now! I’ve gone on to have 3 more children who are 8, 3 and 8 months so I’ve got plenty of photos to scrap and lots of stories to tell.
In my ‘other life’ I’m a doctor specialising in Obstetrics and Gynaecology and I feel very lucky to have delivered over 1000 babies. My heart and my days are full, and very very happy!
You can find me sharing my creative journey and family life on Instagram, Facebook, and YouTube.
Thanks so much to Natalie for sharing these beautiful layouts and for being our guest designer this month! If you’re not following Natalie, what are you waiting for?! We love her beautiful, creative and colorful style, and can’t wait to share what else she’s created with Elle’s Studio products! Come back next week to see more creations from this talented designer!
Creating in Color with March Guest Natalie Elphinstone