We love all of our new product on offer this month, but there’s something really great about the Cork Speech Bubbles! They’re graphic and add perfect sayings or icons to any project. Plus, they have a great texture that allows them to stand apart from the paper. We challenged three of our design team members—Candace Perkins, Suzanna Stein and Meghann Andrew to use them on their projects. Let’s see what they created!
Supplies | February 2018 Kit, Icon Printables, February Blank Label Stickers, Cork Speech Bubbles, Shapes & Dots Puffy Stickers, All the Details Stamp
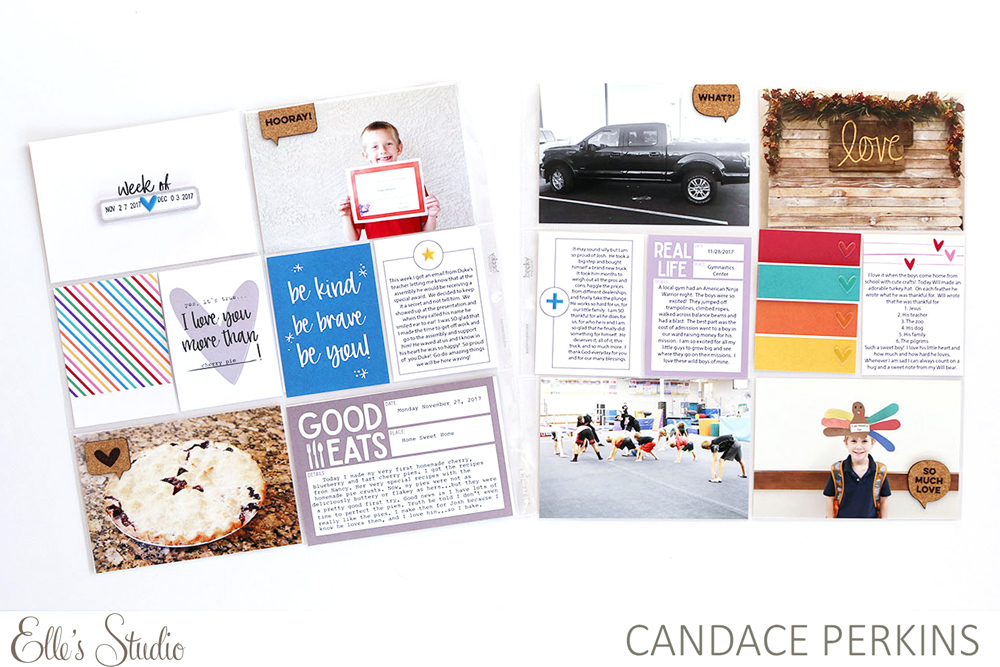
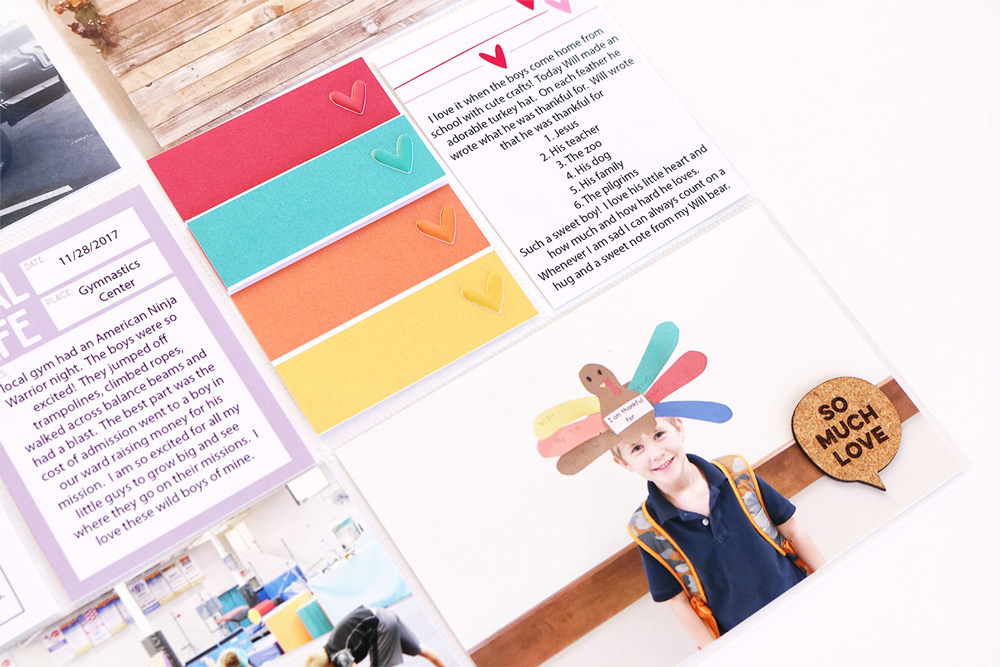
Candace | I adore cork, and because these speech bubbles are the perfect size they fit in the pockets without too much bulk and are the perfect embellishment for any week. For my pages, I chose to spread the speech bubbles around the layout on various 4″ x 6″ photos. I found that the cork not only added the perfect final touch to the spread, but also highlighted the overall stories for the week.
I can’t wait to see how you use these cute speech bubbles in your pocket page scrapbooking!

Supplies | February 2018 Kit, Cork Speech Bubbles, Love You Die Cuts, Live Laugh Love Double-Sided Journaling Tags, Live Laugh Love 6″ x 6″ Paper Stack, Family Fun 6″ x 6″ Paper Stack, Family Fun 12″ x 12″ Paper Collection
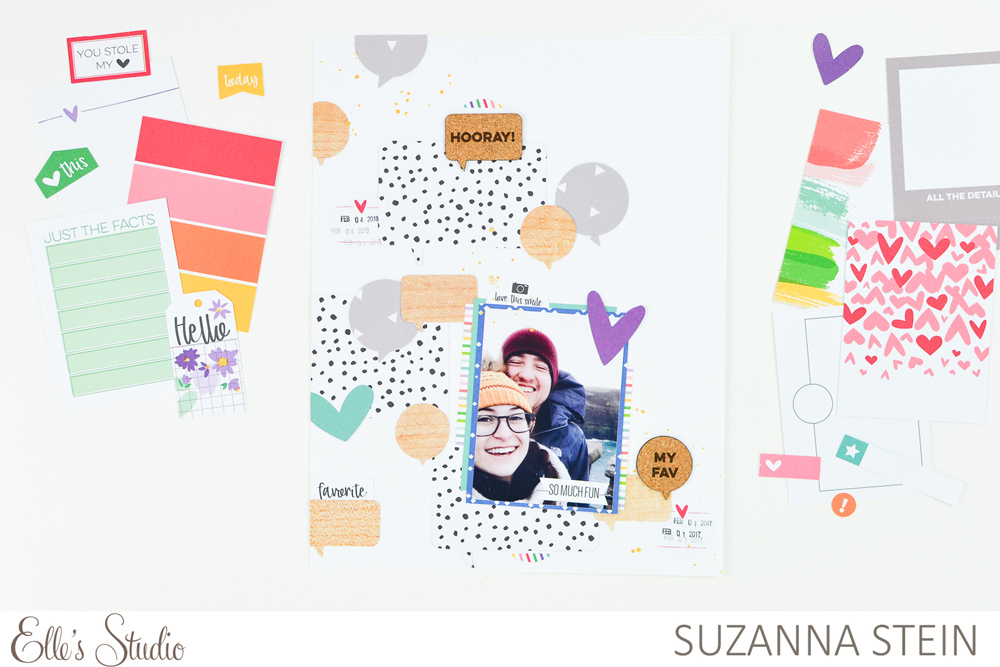
Suzanna | I’m so excited to share this layout I created, focusing on the Cork Speech Bubbles! I knew I wanted to create larger versions of the two speech bubbles I chose, so I grabbed some of my favorite Elle’s Studio patterned papers and fussy cut various sizes.
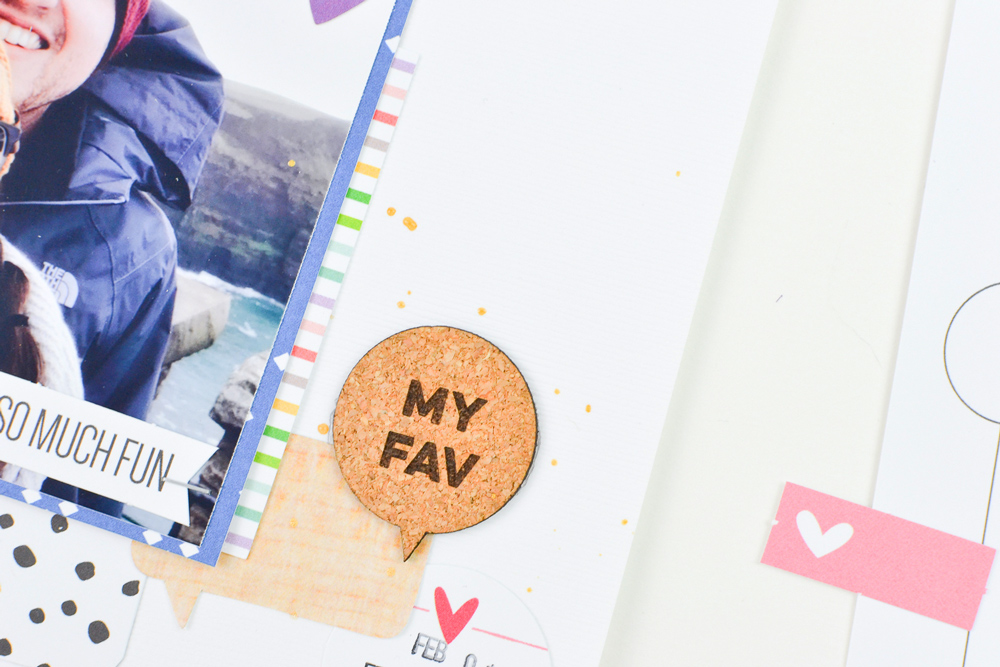
From there, the layout came together quickly – I layered the speech bubbles around the layout, added my photo, and embellished! I finished it off with some gold splatters and smaller die cuts from the February 2018 Kit. I hope this layout gives you a little inspiration on how to use the cork speech bubbles in your next scrapbook layout!

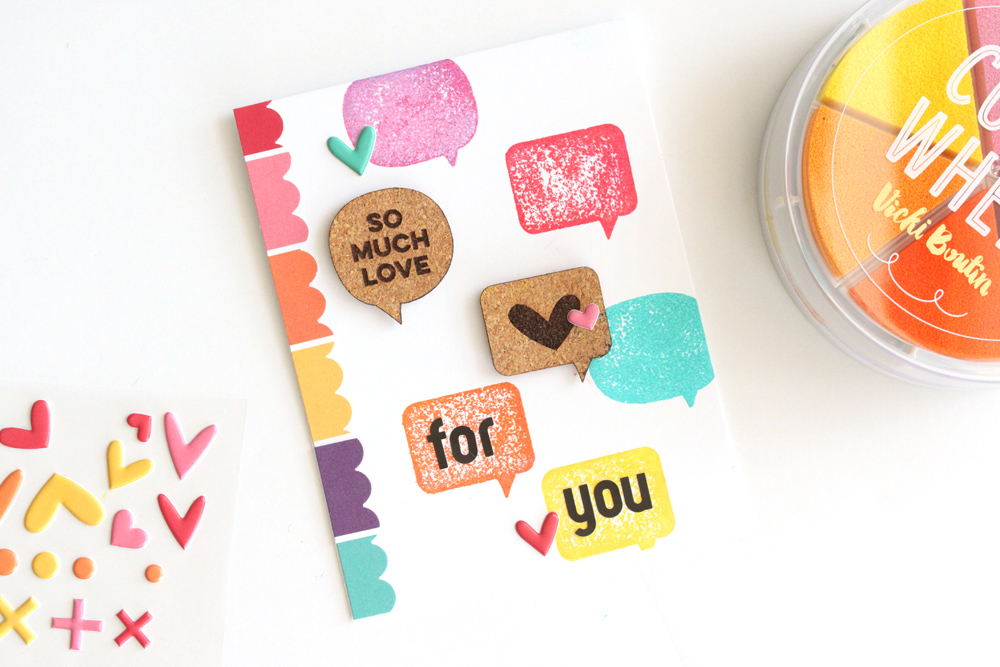
Supplies | February 2018 Kit, Cork Speech Bubbles, Shapes & Dots Puffy Stickers, Letter and Number Stickers — Black
Meghann | Cork has a great textural quality, and because of its surface texture, it makes a great temporary stamp surface! To create the colorful speech bubbles that adorned my card background, I simply adhered the front side of two different shapes of the cork speech bubbles to acrylic blocks using temporary roll-on adhesive. I inked the back sides up with pigment ink, so that the ink stayed on the cork surface, and stamped onto my smooth, white card background, being sure to apply even pressure.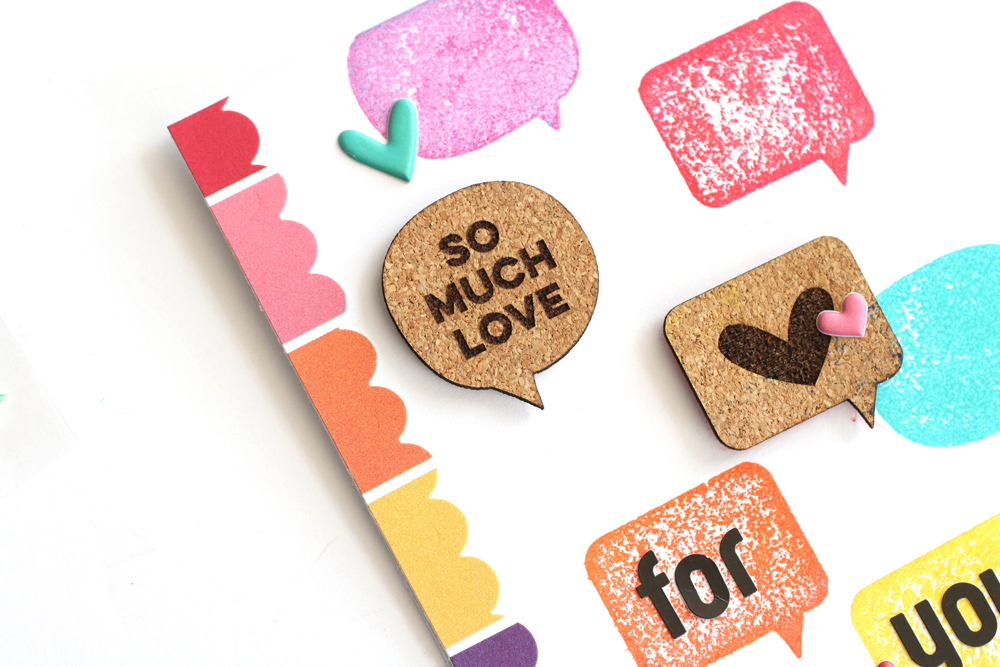
I love that the stamped image isn’t perfect—it adds to the texture on the background. After I stamped the speech bubbles, I simply wiped the ink off of the back with a paper towel until it was no longer inked, added foam dimensional adhesive to the back, and adhered to my card front. The bubbles double as stamps and embellishments! To continue my sentiment, I added “for you” using the black Letter and Number Stickers.
To add more of the rainbow design, I punched a scalloped edge on the two colorful striped cards from the February 2018 Kit and added them along the left side, then embellished with Shapes & Dots Puffy Stickers. This is definitely a technique that I will be using more often with my cork shapes. If you don’t have pigment ink, try using a thin layer of acrylic paint, too!

We’d love to see the creative ways that you’re using the Cork Speech Bubbles this month! Share your project on Instagram using the hastag #EllesStudio, and you could win a gift certificate to the Elle’s Studio shop, and be featured here on our blog!
One Product, Three Ways: Cork Speech Bubbles