 Gather your Elle’s Studio February kit, Key to my Heart wood veneers, and Always + Forever stamp because today Paige has put together this inspiring layout and a step-by-step tutorial to go along with it!
Here’s how Paige’s layout came together: 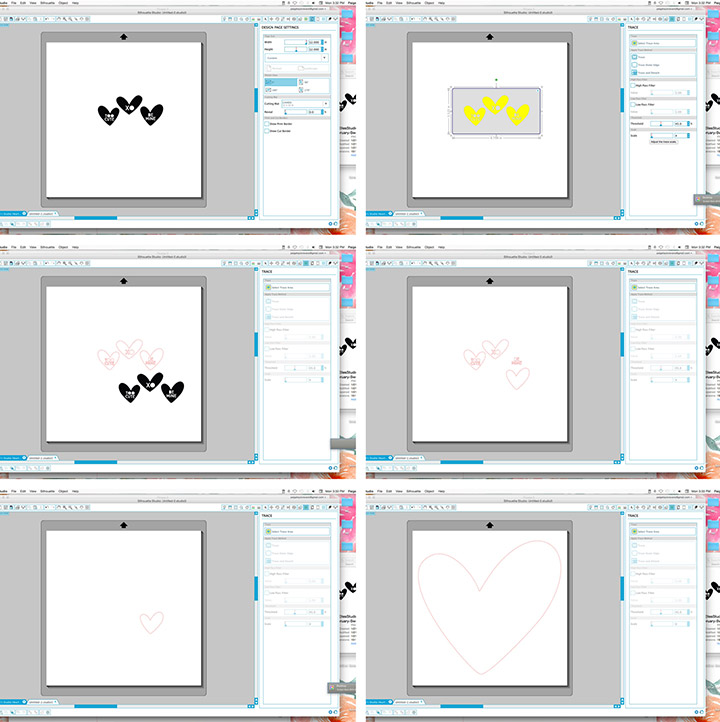 1. Start with the SVG hearts from the February digital that include the cut lines, OR turn the PNG files into cut files – open a new Silhouette document then drag and drop the PNG. Select the “Trace” function and outline the hearts. Push the “trace” button. Delete the PNG. Ungroup the hearts, delete the words and all but one of the hearts, and supersize the remaining heart.
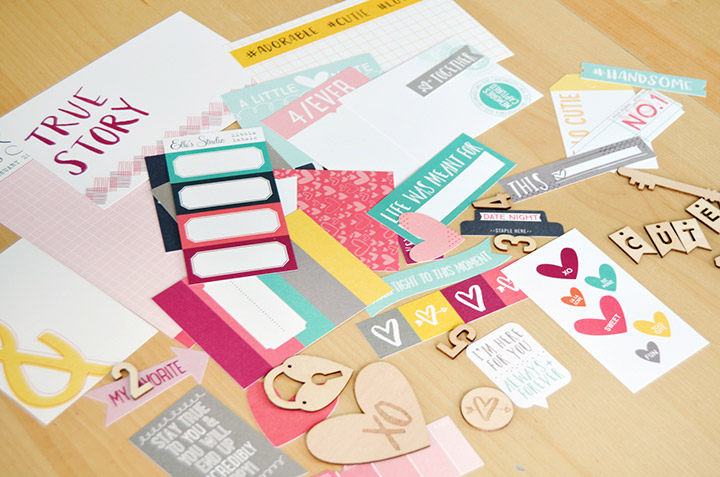 2. Gather the Elle’s Studio February kit supplies!
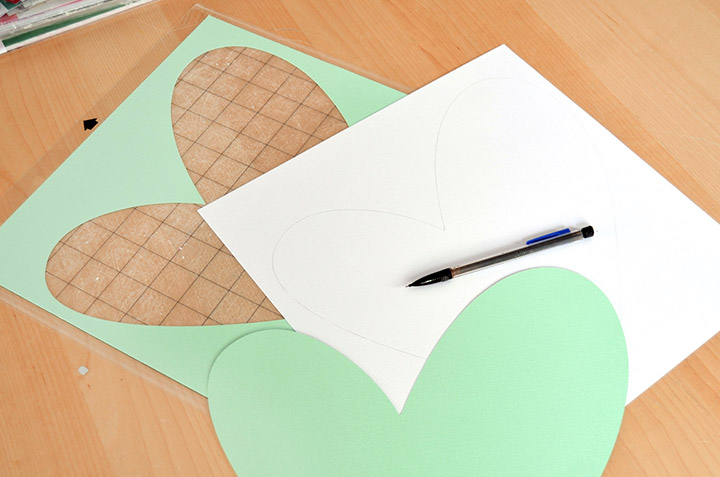 3. Die cut the large heart from scratch cardstock, peel off the large heart, then lightly trace it with a pencil onto the center of a white cardstock layout background.
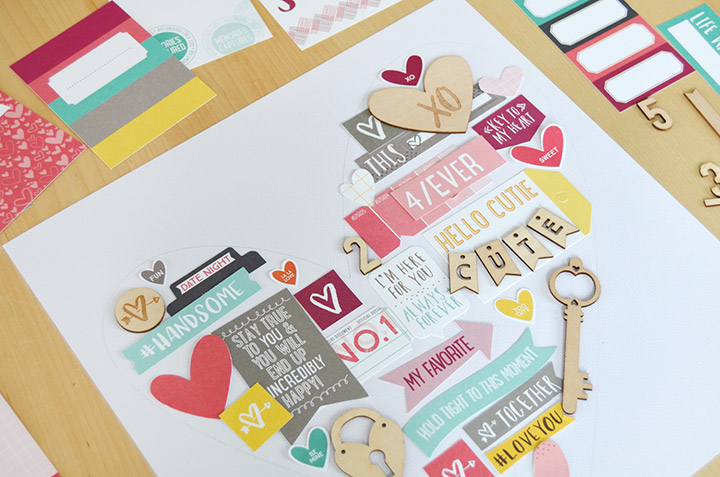 4. Begin piecing and placing February kit elements inside the heart. Don’t glue anything down until you’ve decided where to place the photo and are happy with the placement of everything.
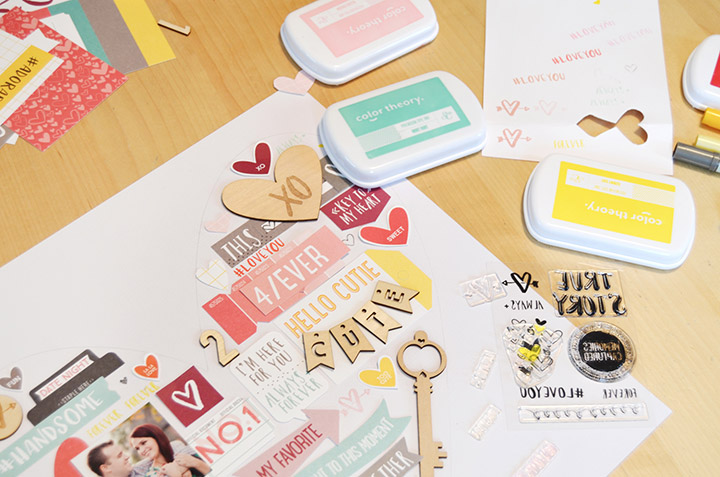 5. In the smaller open spaces, stamp images and phrases from the Always and Forever coordinating stamps.
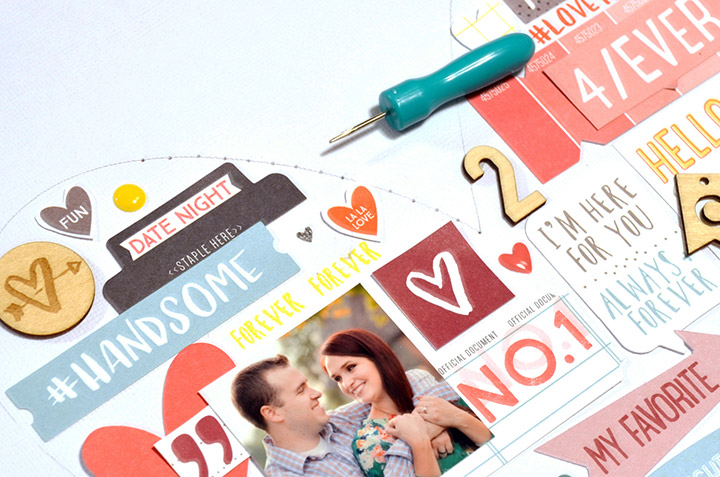 6. Pierce a hole every 1/4″ through the pencil-drawn heart then erase the pencil lines.
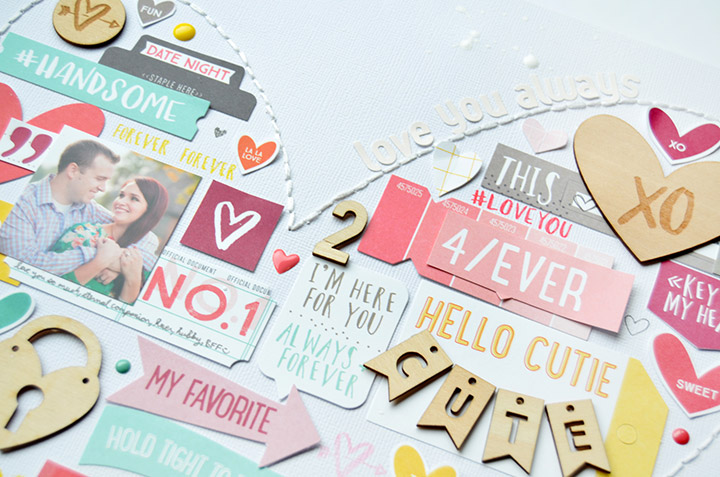 7. Backstitch through the holes using white thread.
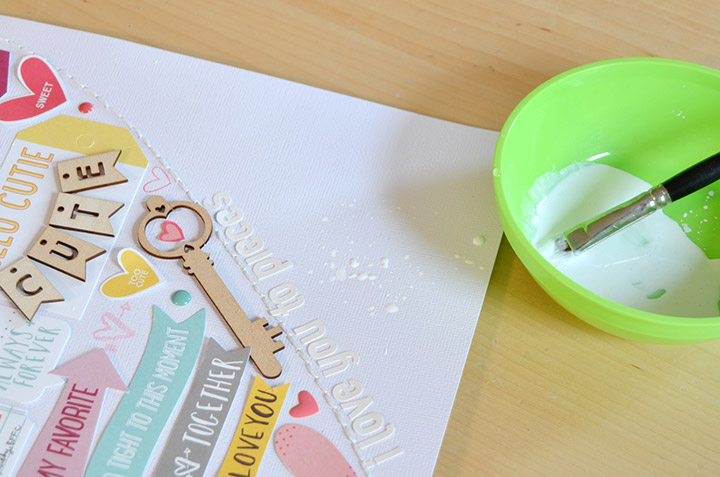 8. Splatter white paint around the layout.
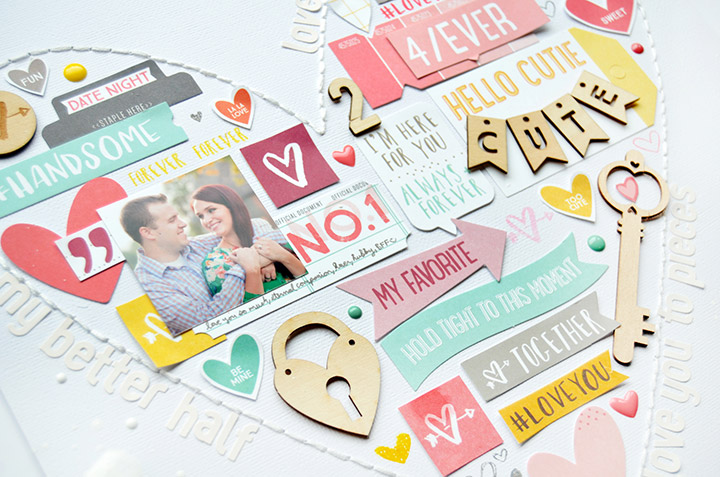 Products used: Elle’s Studio Exclusive February kit, Key to my Heart wood veneers, Always + Forever stamp, Letter and Number stickers – white, and February digital cut files.
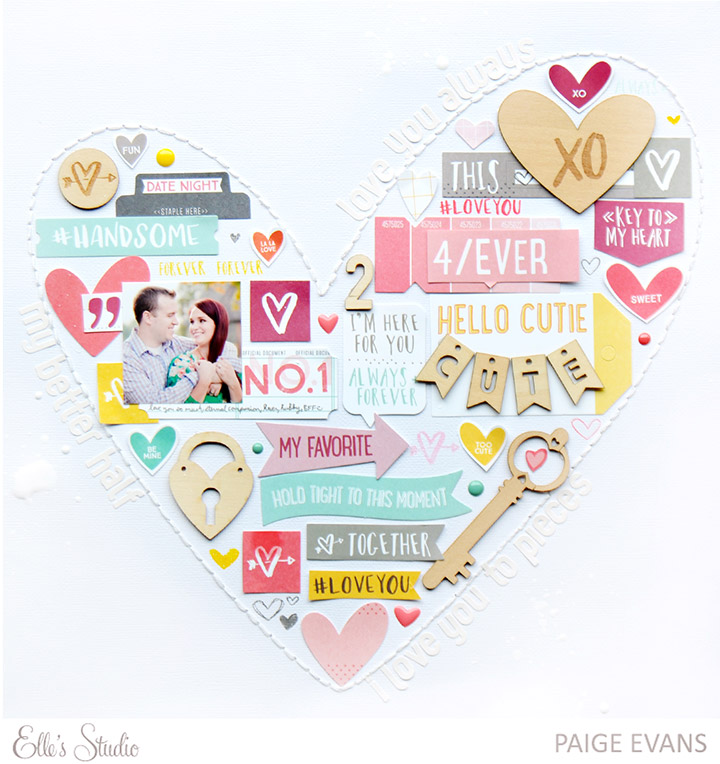
Thank you for sharing your step-by-step process with us and inspiring us today, Paige – we love how everything came together to make a fun collage!
Pingback: CraftCrave | DigiFree | CraftCrave