
 I’m Samantha Sibbet and the mom to two lovely little girls, married to my sweetheart and the happy owner of a big chocolate lab that follows my every move. After being at home for many years, I returned to the classroom this year and I am teaching inner city second graders in San Diego. Scrapbooking is still one of my favorite ways to get creative and I just never ever tire of shopping for all the cute little embellishment bits and the gorgeous designs that keep coming out! You can see more of my work at my blog.
 A couple of years ago I had the privilege of working with Elle’s Studio on the very first Design Team. Each month we created a few projects for the blog and those layouts are still some of my favorites, I love the journal cards from Elle’s Studio and they are a cute and fun way to preserve one of the most important parts of this hobby, the journaling!
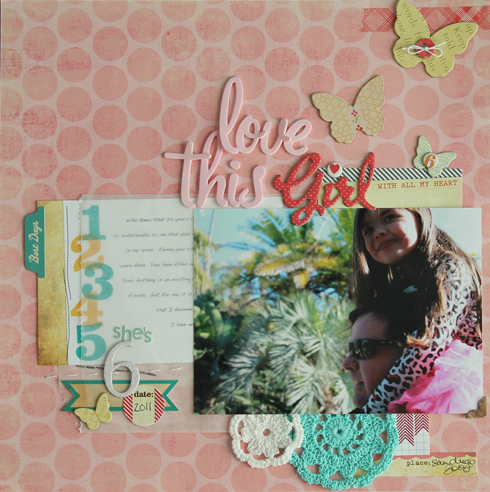
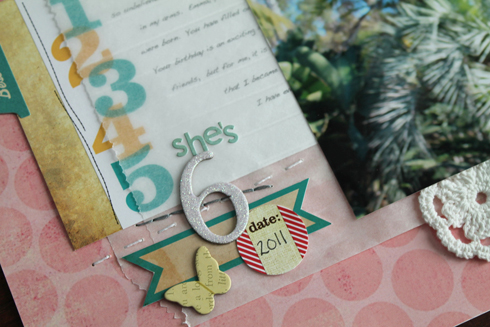
For today’s layout, I used one of my new faves…this picture of my daughter Emma riding on my husband’s shoulders. We were leaving the San Diego Zoo, she had just had her 6th birthday party there. I love her sweet smile of contentment and the hot pink tulle gathered around her daddy’s neck is kind of sweet too.
Here’s how this layout came together:
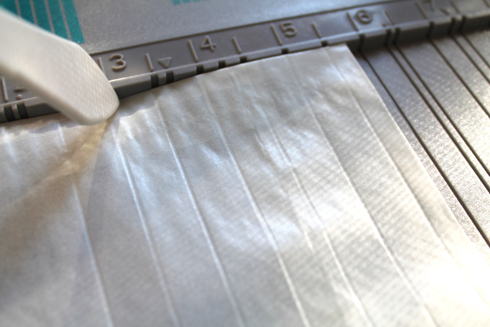
1. I started my layers with a glassine envelope that measures 5.75 in. x 9 in. I adhered the back of it and put in a few hand stitches so that the journal card would not slide down, it will slide out to read easier. Before I hand stitched the glassine envelope to the background paper, I scored .5 inch lines on it with a scoring board.
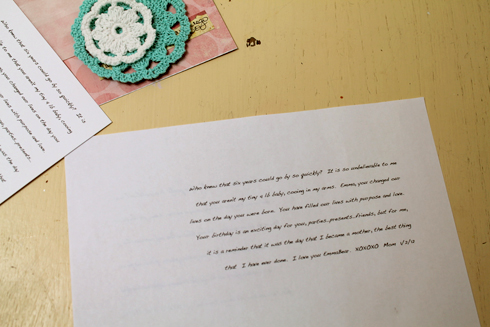
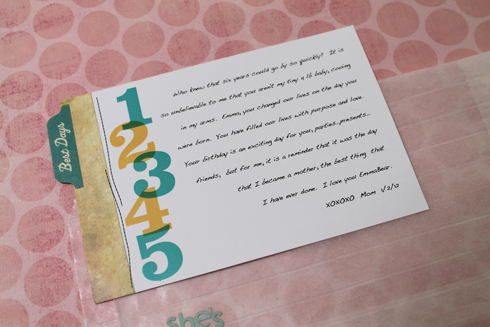
2. For the journaling card, I love the list of numbers going down the side and thought it would be fun to add the 6 for her age. I attached a tab sticker to the card and printed the text with a computer printer. To line up the text on the journal card, I printed the text on a regular piece of paper and when I was satisfied with the text size and layout, I adhered my Elle’s Studio journaling card over the text with repositionable adhesive and ran it through the printer. The printer prints in the exact same place, this time onto my large journaling card. The adhesive was easy to rub off with my fingers and I just slid it into the glassine envelope pocket.
 3. Whenever I know that I am placing layers under a photo, I only put adhesive on the middle of the photograph’s back, this way I am free to tuck all kinds of sweet nothings under my pics.
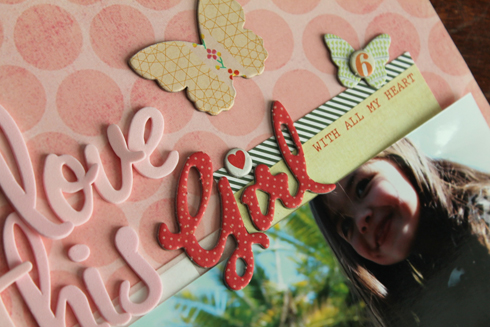
4. Tuck in the “With all my heart” card, the crocheted flowers, and date strip.
5. Add the title, a little tape across the top and sprinkle on a few butterflies.
Thank you to Elle’s Studio for having me today, love creating with Elle’s Studio and I love the new products!

It’s time for a giveaway! We are giving away the Elle’s Studio products used on this layout:
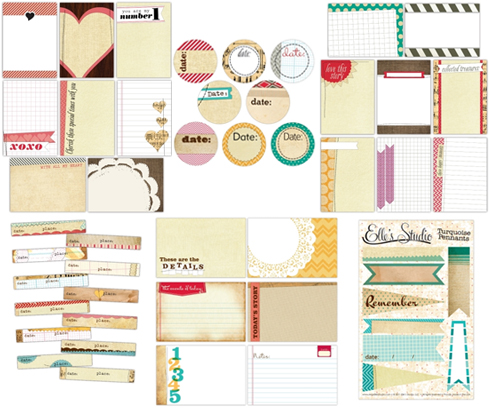
One and Only Note Tags, Date Tidbits, Collected Note Tags, Handmade Layers Date and Place Strips, Everyday Large Journaling Tags, and Turquoise Pennants.
Just leave a comment to be entered to win – one comment per person, please! Then, check back next Sunday to see if you have won!
Name:
Address:
Prize: January 1st
Comments