 We are so excited to share this project with you in detail! We came across Kerry Lynn’s Halloween Countdown Calendar and fell in love – it was exactly how we imagined our cut out numbers could be used!
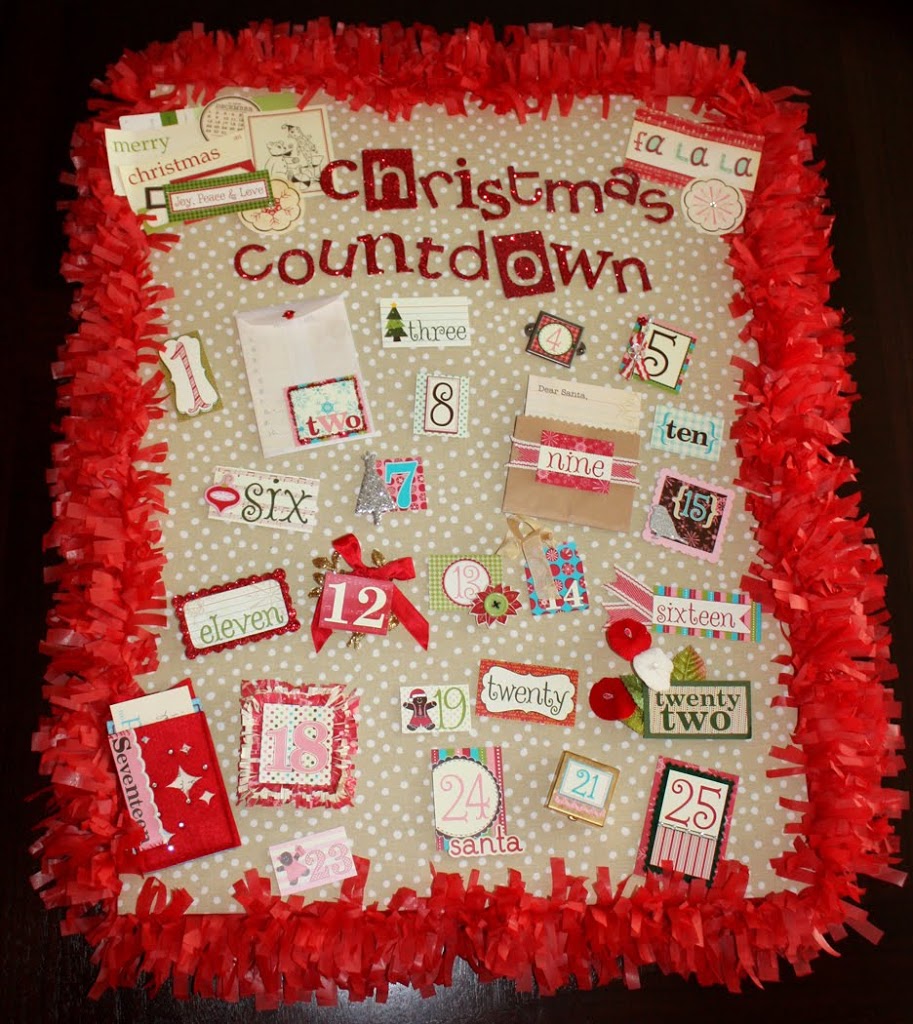 We were super thrilled that this project received a ton of good feedback at CKC Seattle and we promised everyone that we’d be doing a full detail posting on the Advent/Countdown Calendar. This post is FULL of photos, tips and product listings to help you create your own!
We’ve also added a little kit to the shop that is full of the Elle’s Studio items we used to make our countdown, seen here below: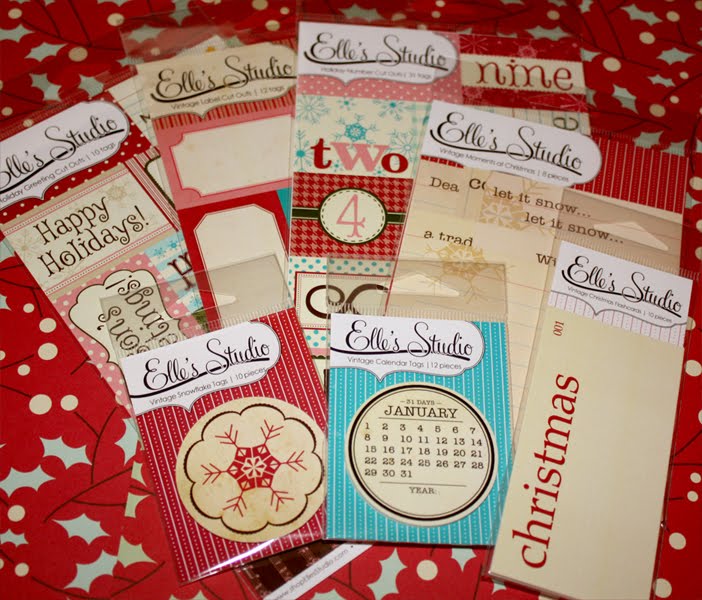 Alright! Now for the details 🙂
We started with a blank sheet of sheet metal. I picked mine up from my Dad, but he suggested that people could also buy them from any home improvement store like Lowe’s or Home Depot. Make sure your metal is magnetic, aluminum is NOT, so do not buy that!
The sheet metal was covered in 1 yard of fabric and we ran our tissue fringe around the edges and glued the fringe on the back side. Now you are ready to decorate the front!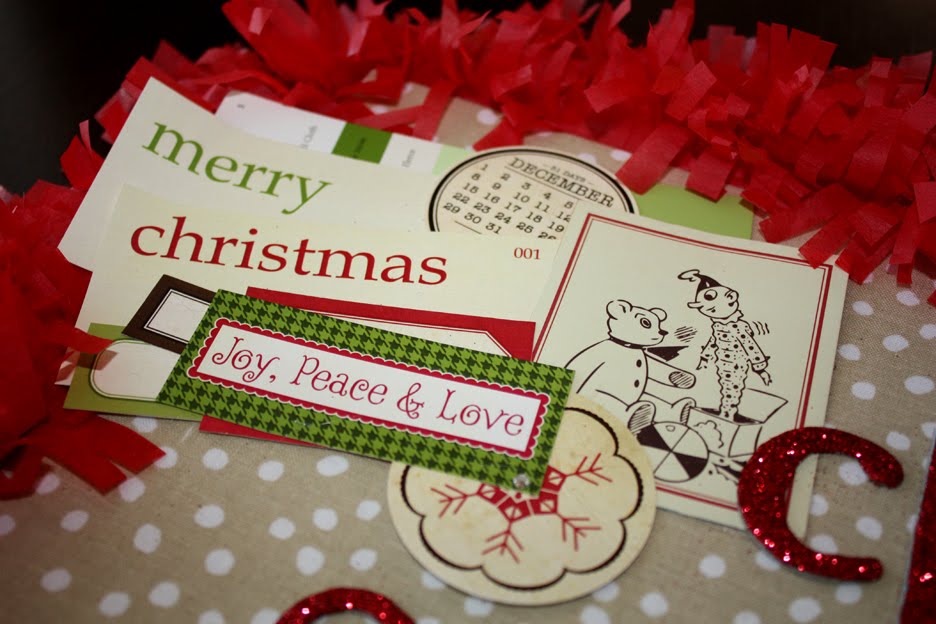 In the top left hand corner we made a little collage out of our items (Christmas flashcards, Holiday Vintage Snowflakes, No Year Vintage Calendar, Cut Outs: Holiday Greetings, and Cut Outs: Vintage Holiday Labels) and a tag cut from a piece of “Jolly By Golly” Cosmo Cricket paper.
For the “Christmas Countdown” letters we dug into our stash of chipboard letters and pulled the letters we needed from three different fonts that were similar in size. We love the look of combining fonts, it gives it extra special detail. Since the chipboard letters were all different colors, we covered each letter in glue and topped them with some Martha Stewart glitter. Let them dry overnight!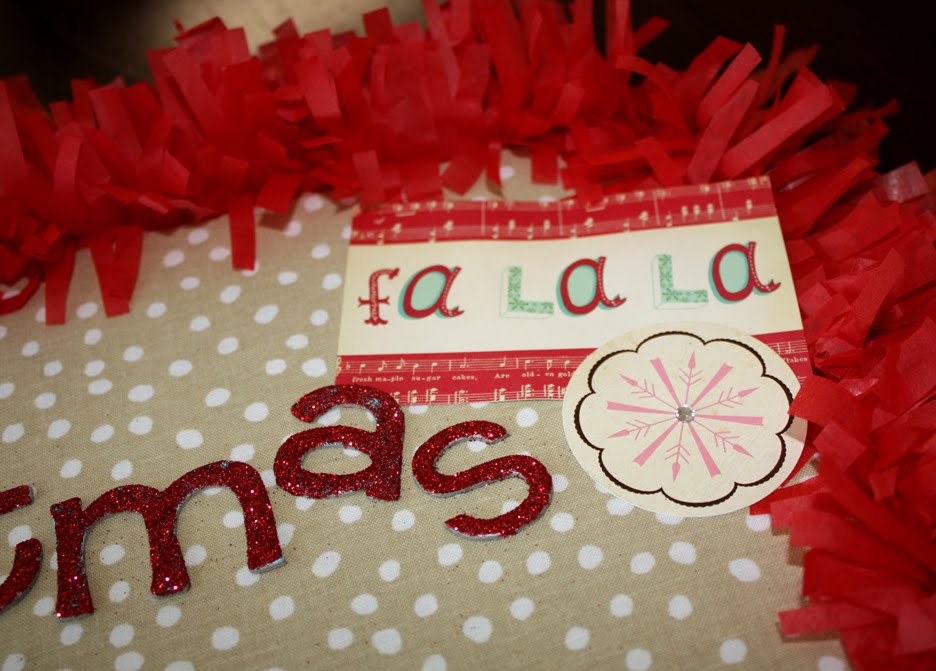 For the left side we used another tag cut from a piece of “Jolly By Golly” Cosmo Cricket paper and another Holiday Vintage Snowflake tag. We also added a rhinestone in the center of the snowflake 🙂
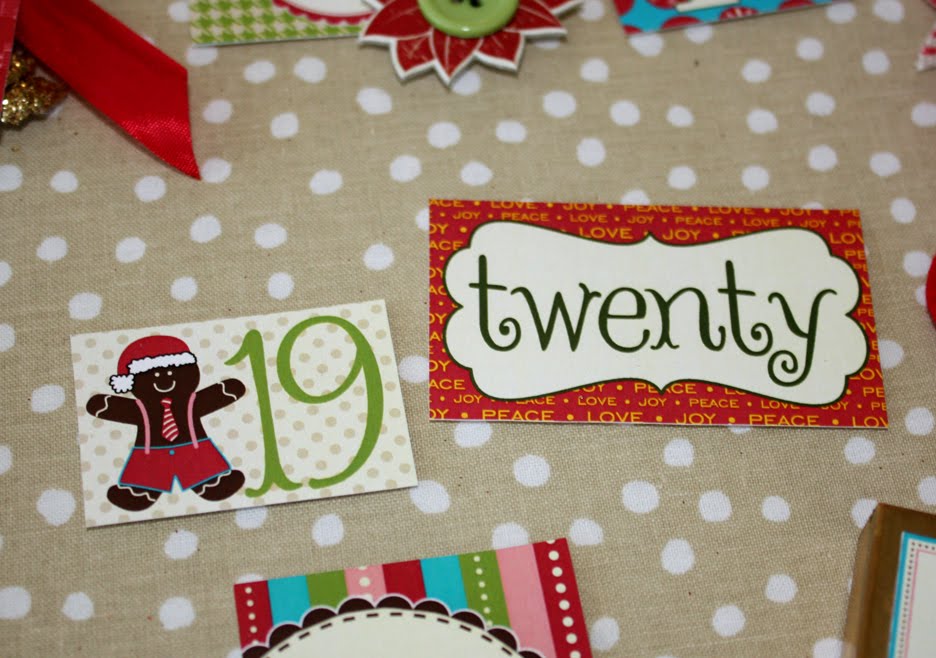 For the numbers we used our Cut Out: Holiday Numbers 1 – 31. These numbers worked great and are already decorated just enough that if you wanted to, you could just cut them out and be done! They look great without extra embellishments, so if you are limited on time this Christmas season, no worries!
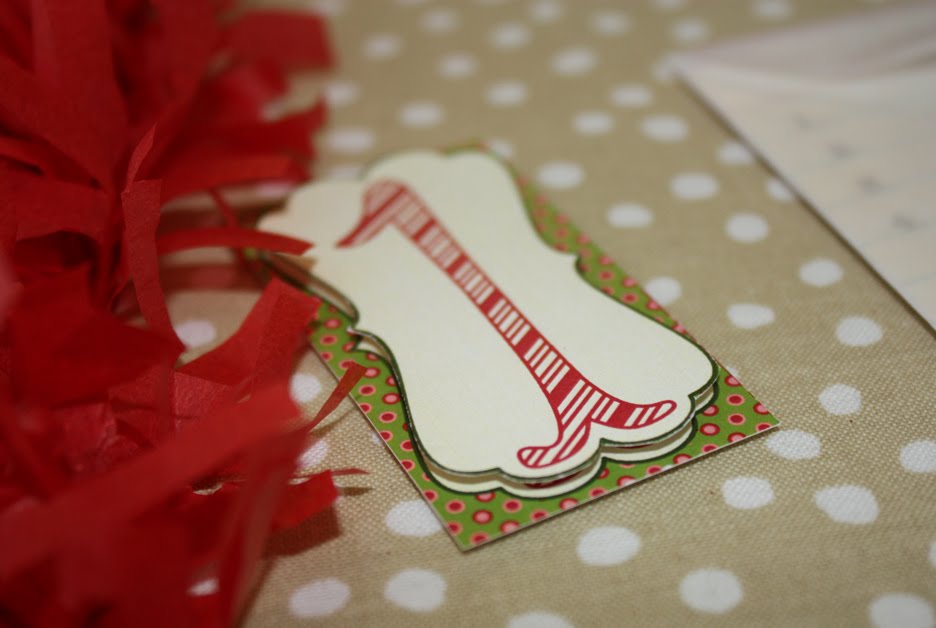 But, if you do want to embellish the tags, you can! Or you can do half embellished, half not. Whatever you have time for 🙂
For numbers 1, 8 and 24 we cut two of the same numbers out, then cut extra off of one set and added some pop dots and adhered them back to themselves. The extra depth it gave looks amazing!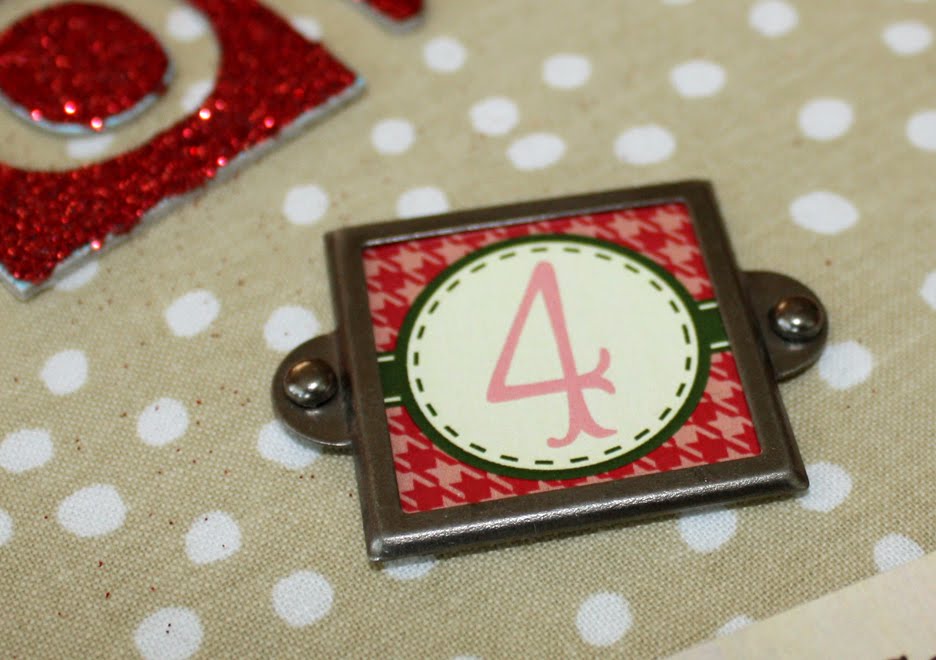 Digging into your stash for this project is a must! We had some of Making Memories Vintage Finding frames that worked out perfectly with our numbers.
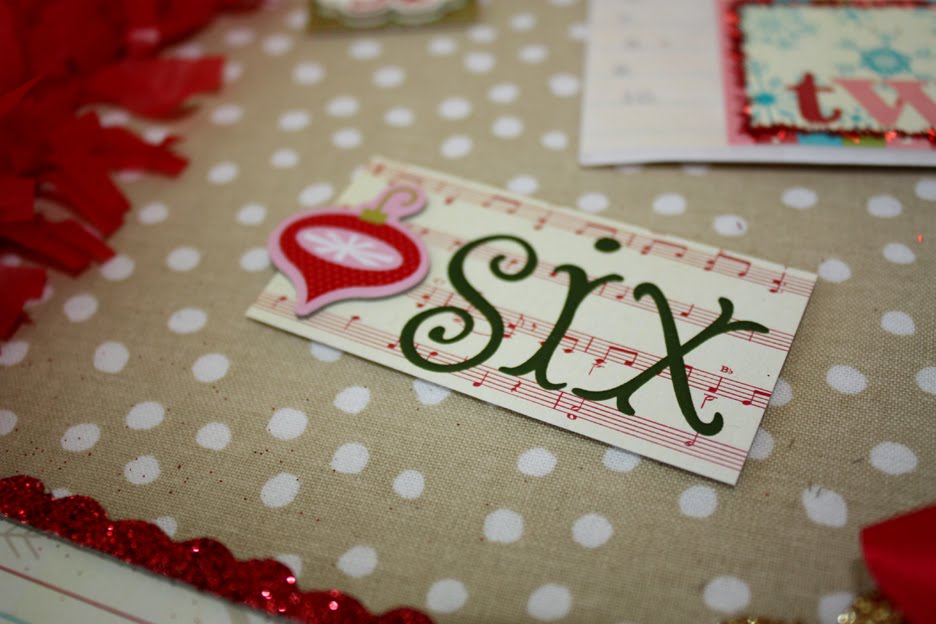 We also embellished some numbers with chipboard shapes! This ornament shape above came from KI Memories Good Tidings chipboard sticker set. The colors matched perfectly!
 And, this chipboard and button combo came from Making Memories Mistletoe button flowers – again, the colors matched great.
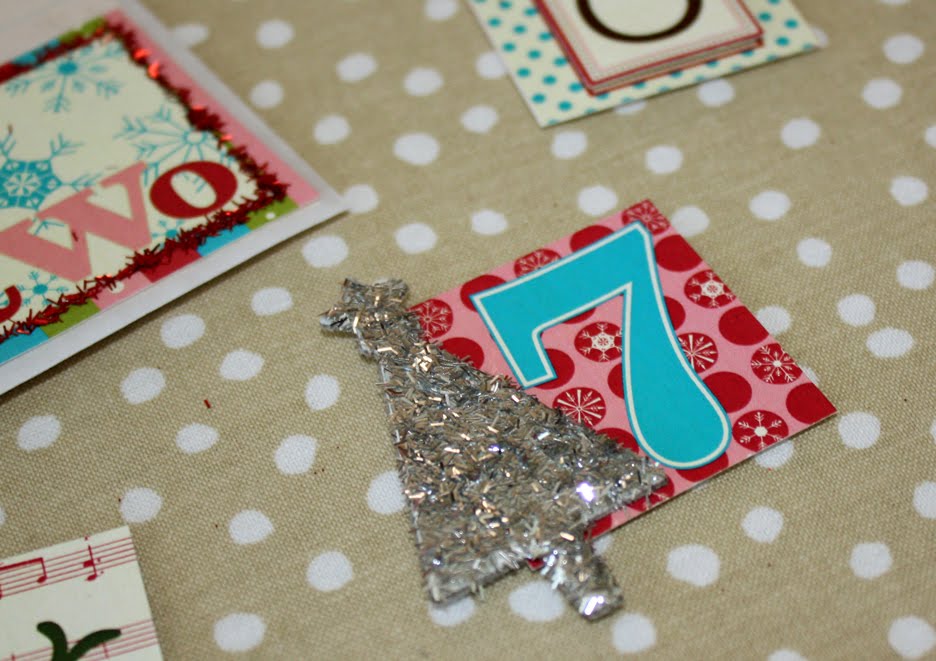 If you have chipboard items that you want to use, but the colors won’t match, you can always cover them in glitter! This tree was glittered before, but we wanted more so we added some sliver tinsel glitter from Martha Stewart – this was my first time using tinsel glitter and it is a must have for your vintage holiday projects.
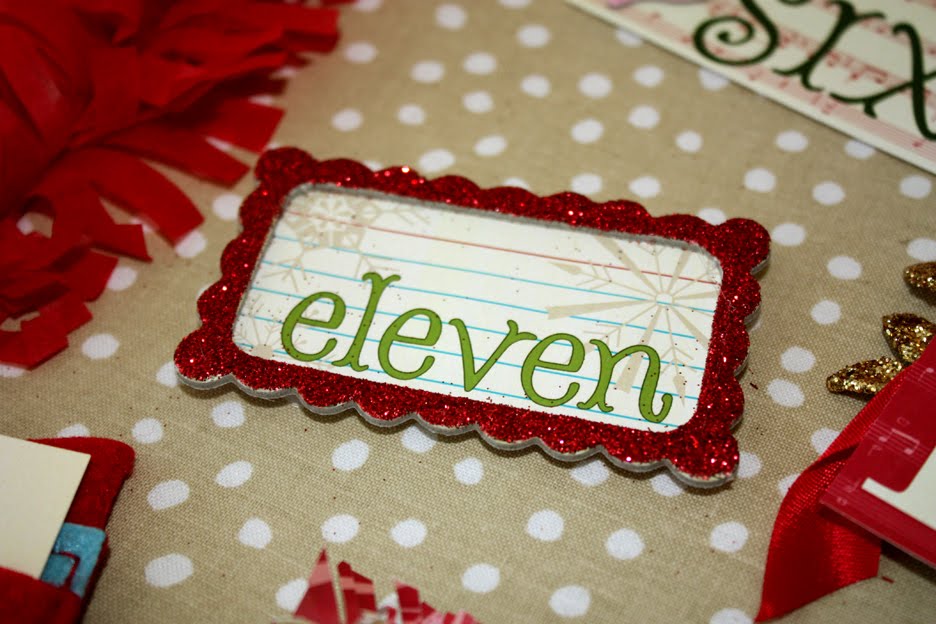 Same here with our frame – it was a Sassafras frame from another line, so we covered it in red glitter.
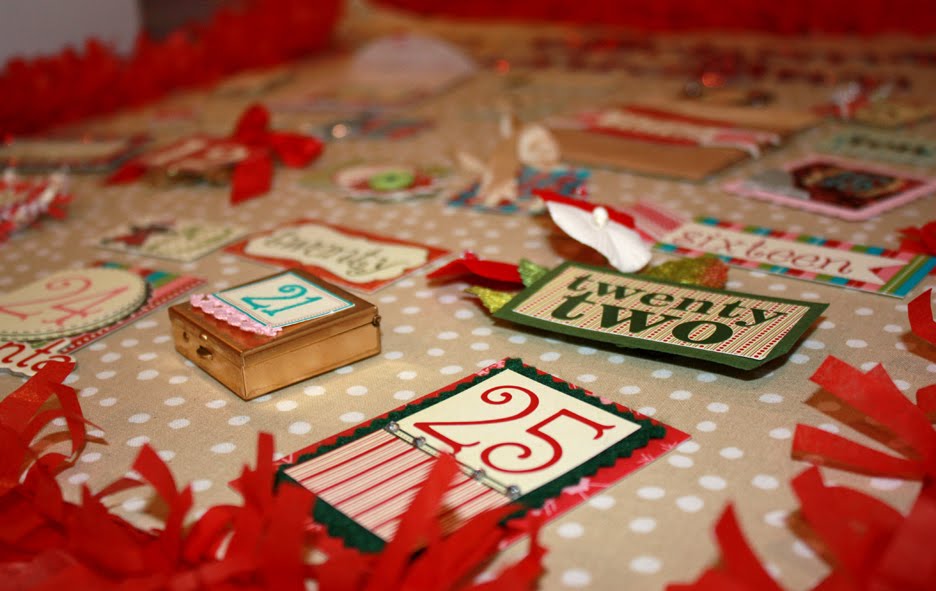
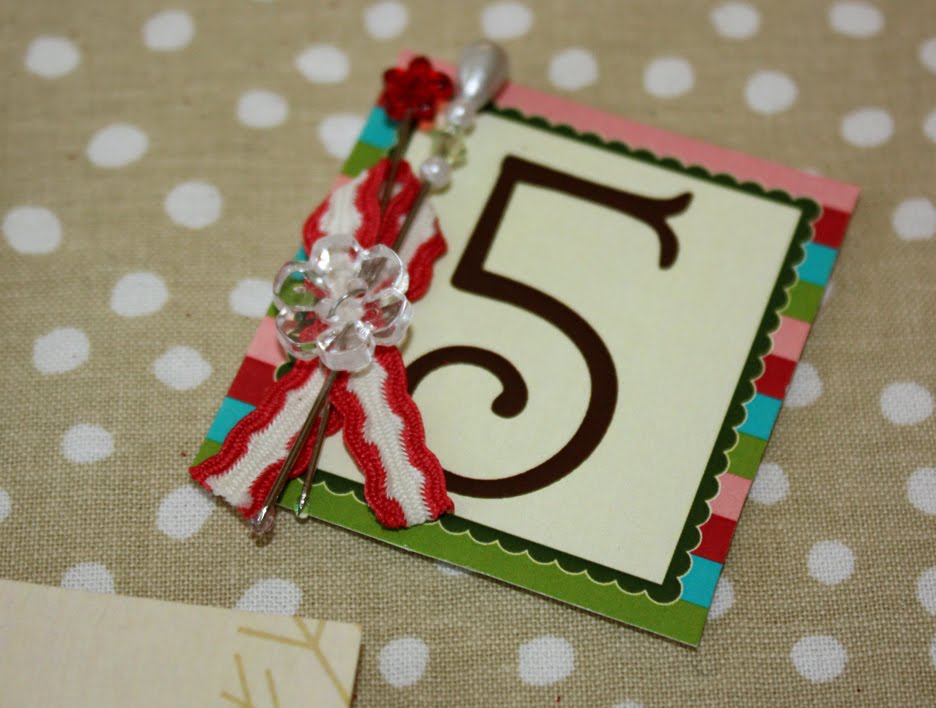 Our number 5 was embellished with a ribbon, glass button and hat pins.
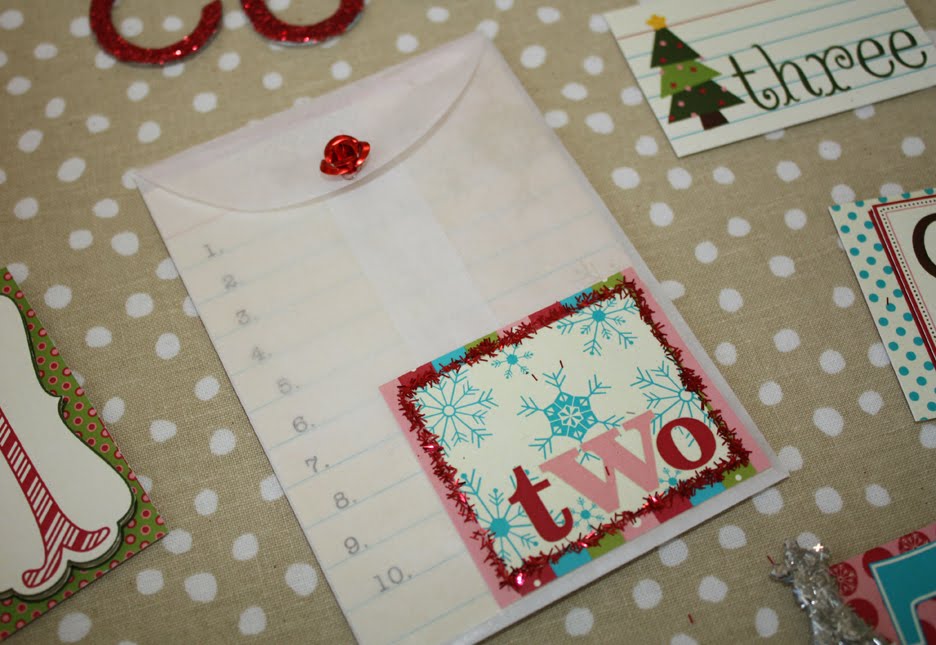 Alright, we know just putting the numbers up each day is fun… but we made it even more fun by making some of the days interactive! So, you’ll always keep them guessing what the next day will bring! Day 2 lets you make a wish list and then tuck it back into the envelope – this will be fun to either add to your December Daily album or keep it in the envelope to look back at next year. We used the wish list tag from our Vintage Moments at Christmas set.
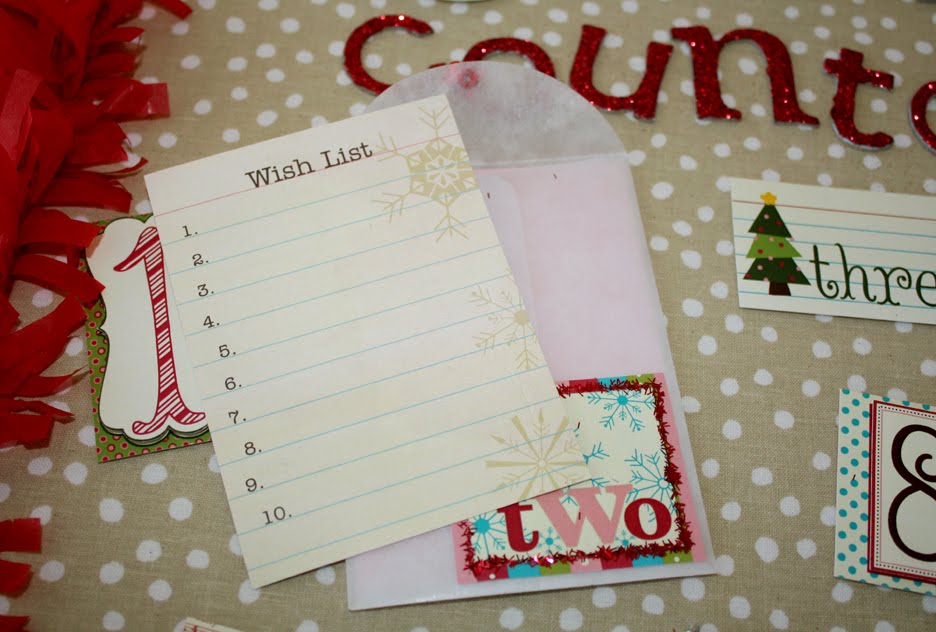
 And, we made day nine the same way! Maybe they can write the letter and take it to Santa when they get their photos taken or mail it to him… or you can sneak it into your album 🙂 The Dear Santa tag was also from our Vintage Moments at Christmas set.
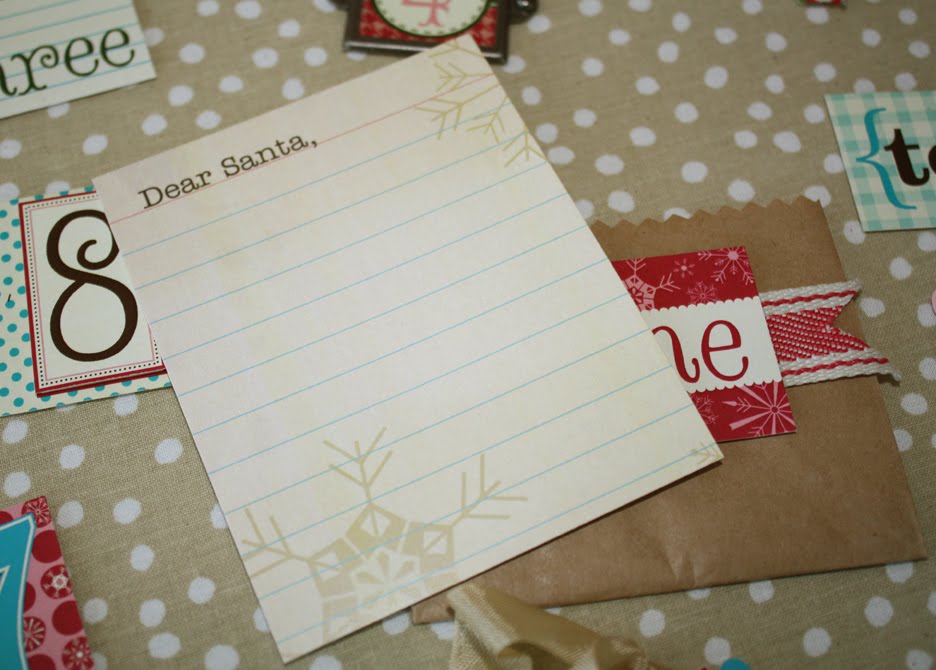
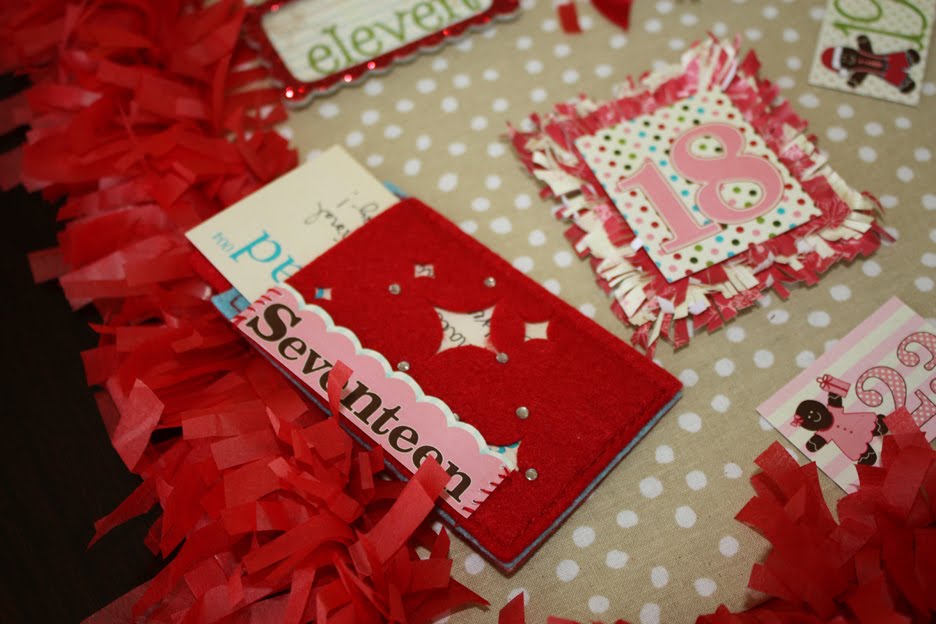 Day 17 uses a Starbucks Gift Card holder from a couple years ago (yes, I save those things, they are just too cute to throw away).
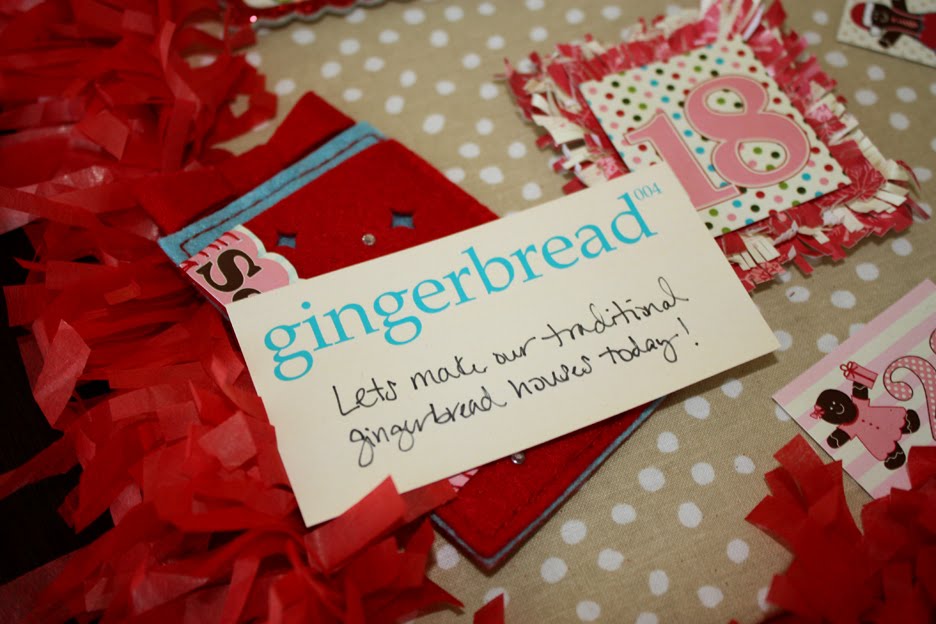 Our Vintage Flashcards fit inside perfectly! That was a fun surprise 🙂
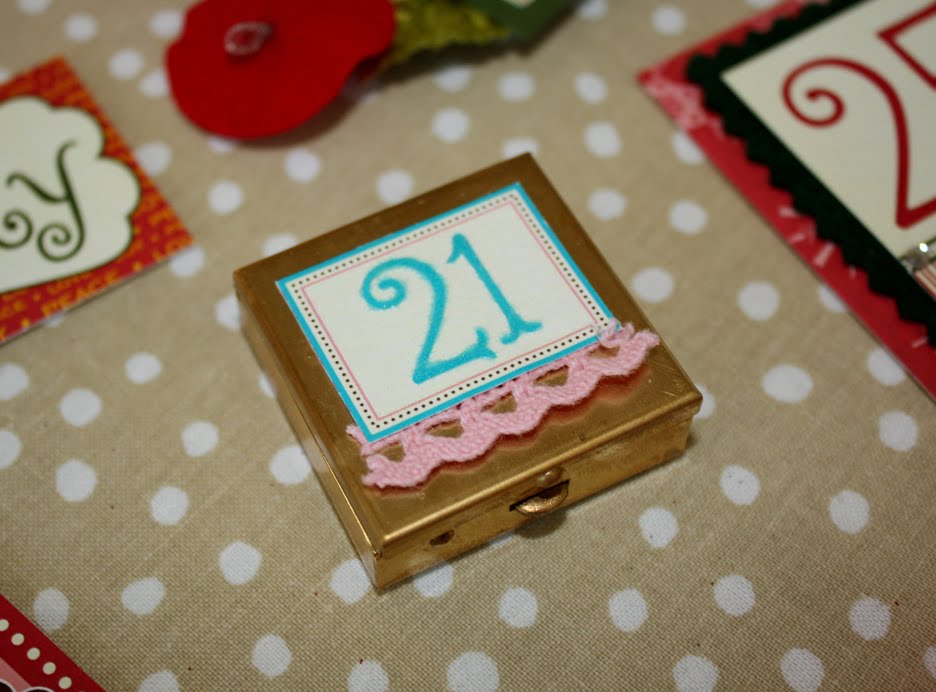 Day 21 uses a 7gypsies metal box that opens! We used some flocking powder and glued it over the number, it looks amazing in person, very vintage! Are you wondering what’s inside?
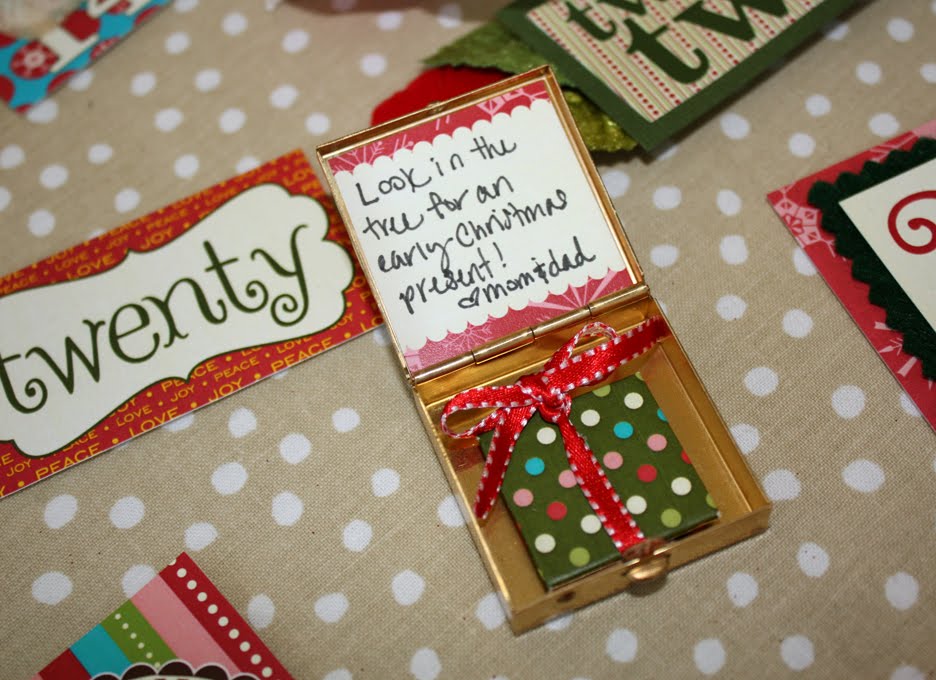 That is an awesome surprise! Everyone loves an early Christmas present!
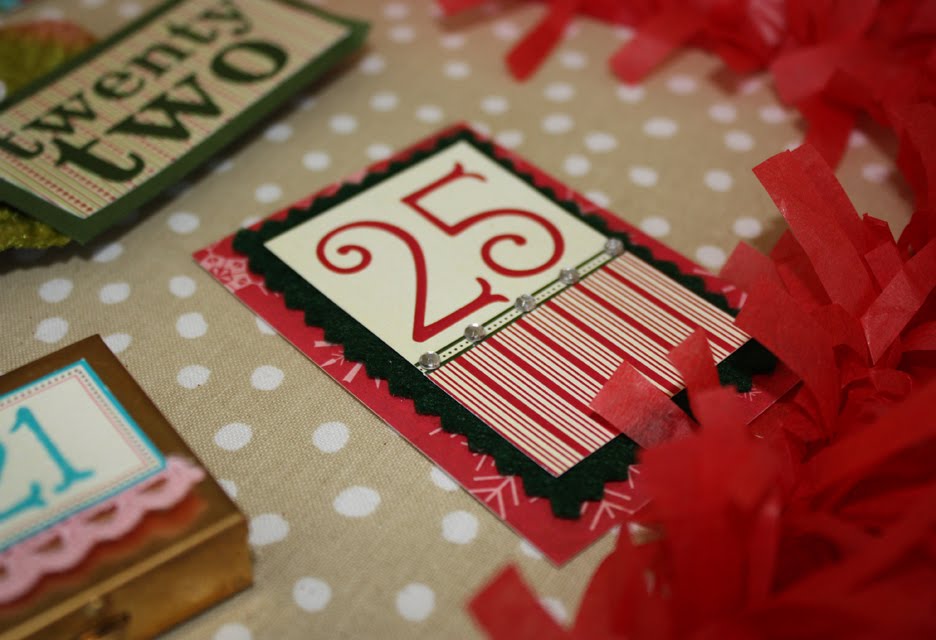 Number 25 was embellished with green felt, rhinestones and a piece of paper from our Holiday Papers.
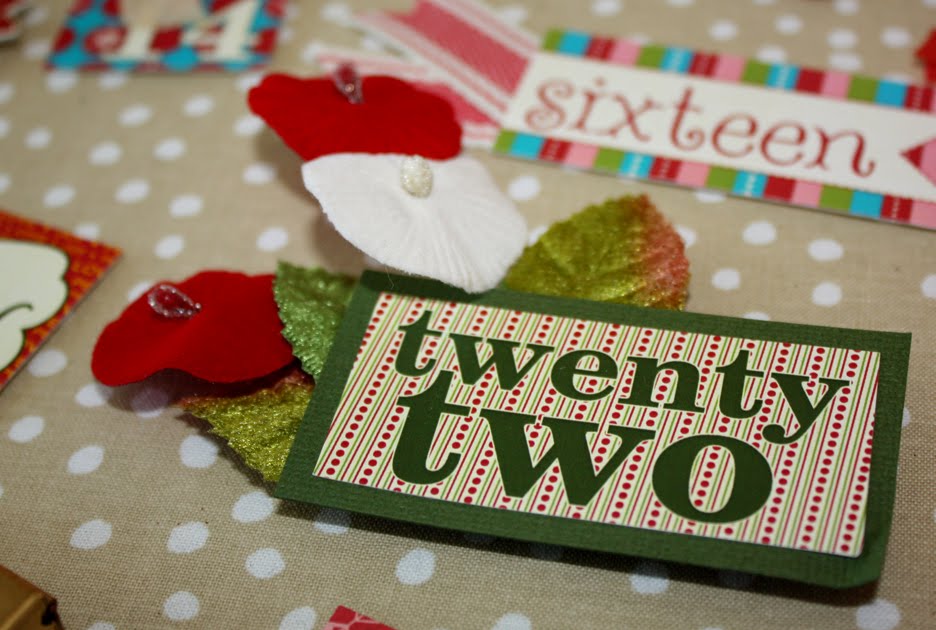 Day 22 was lined with green paper out of our Holiday Bazzill Paper Pack and some Making Memories Vintage Finding flowers.
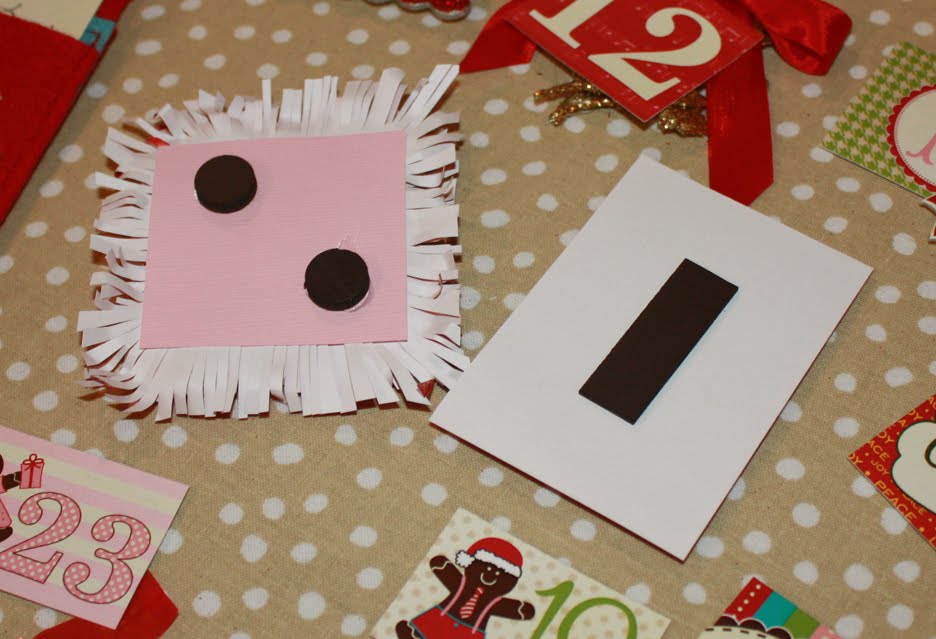 After each number was embellished, we turned them over and glued a magnet on the back. We used two different magnet thicknesses to give varying depth to our project. Some needed more magnet than others, it just depends on how heavily embellished your numbers are.
Now you’re ready to count down the days until Christmas! This project was so much fun for me to make, and it was quite relaxing and addictive! The night I made it I couldn’t put it down to get some sleep and ended up staying up until 1 am, LOL! I was so pleased with the end results and that I got to use up some supplies I had in my stash – it was the best of both worlds 🙂
If you have any questions, please feel free to post them in the comments and I’ll try to answer them there!
Thanks so much for stopping by!
xo, Elle
ps. Are you on the newsletter list? If not, you can sign up here. There will be a newsletter going out soon that you don’t want to miss 🙂
Comments