Inspired By Pattern Scraps with Stacie Watson

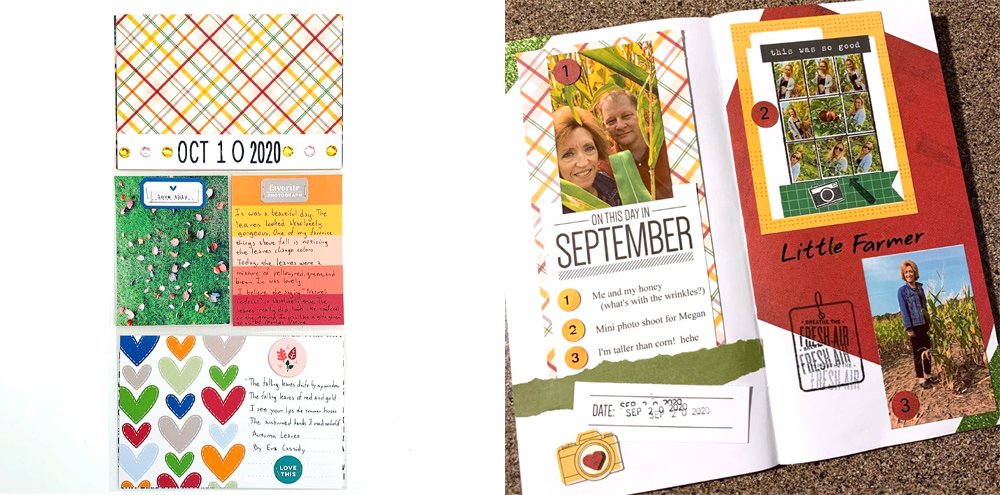
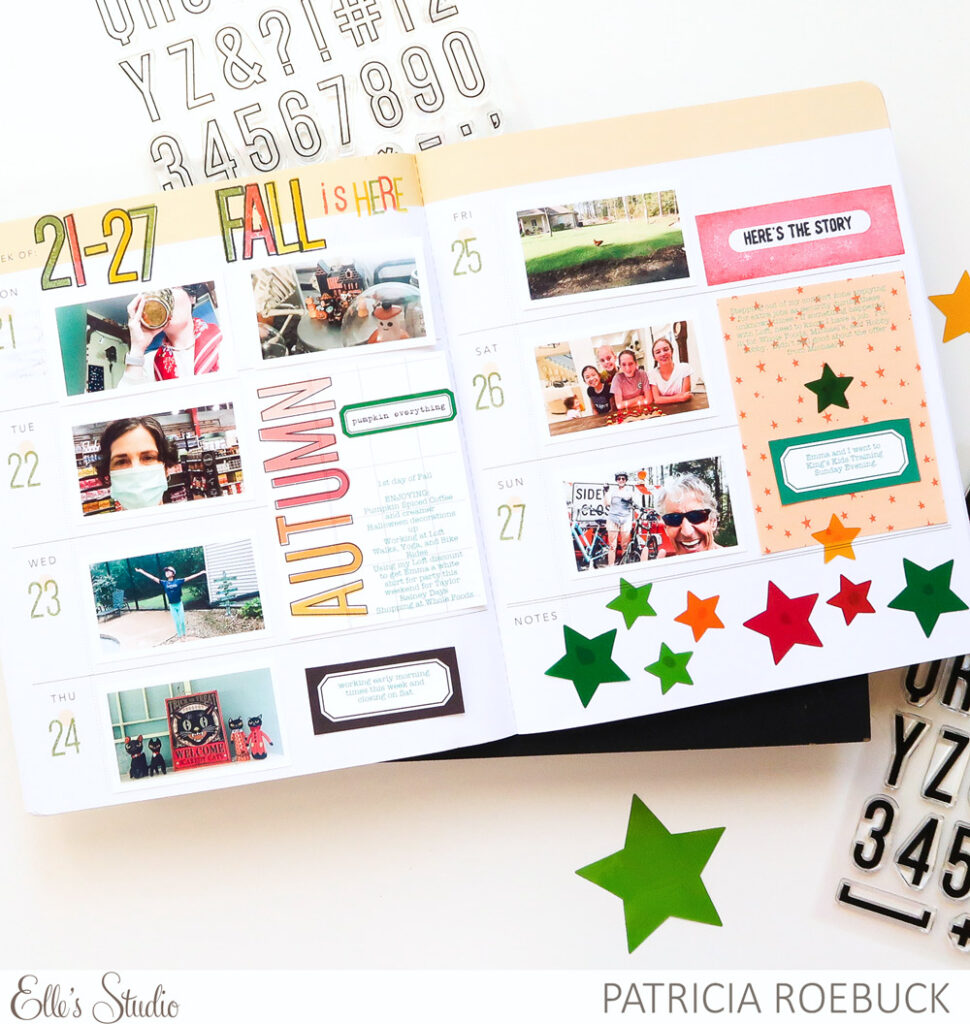
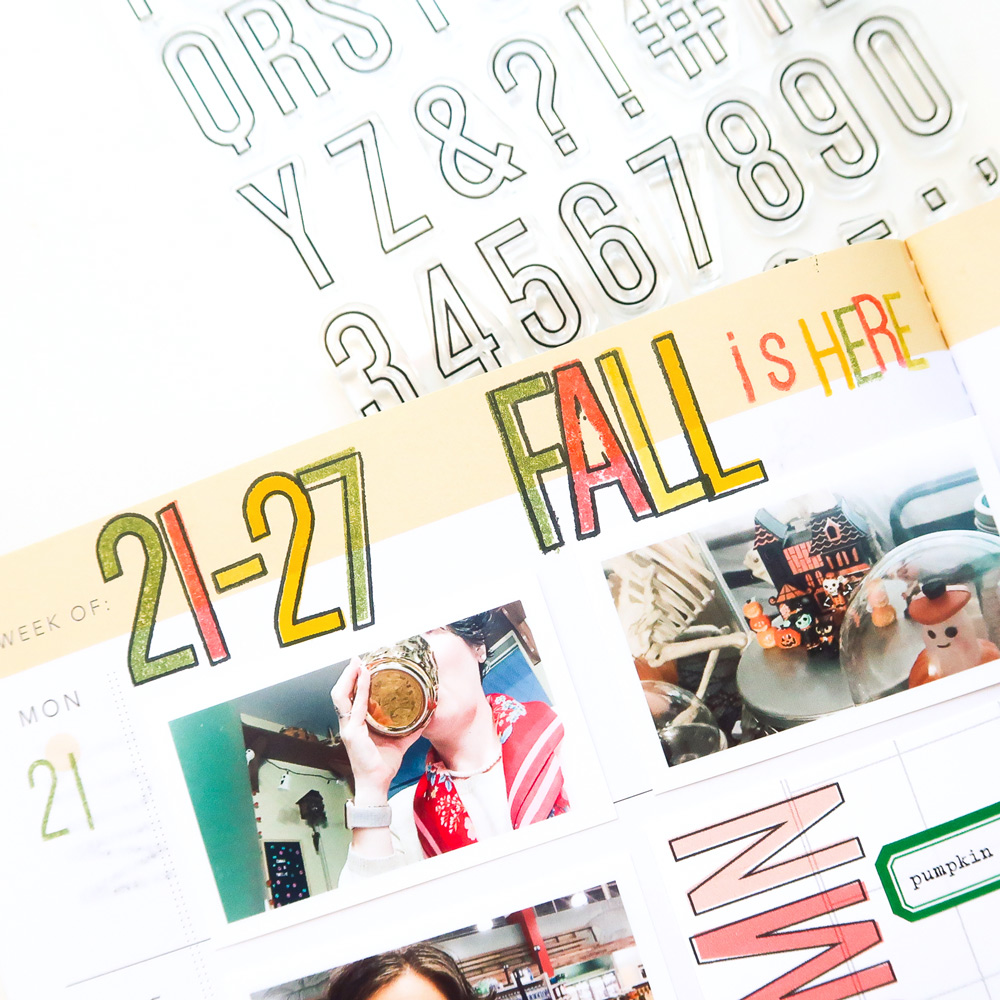
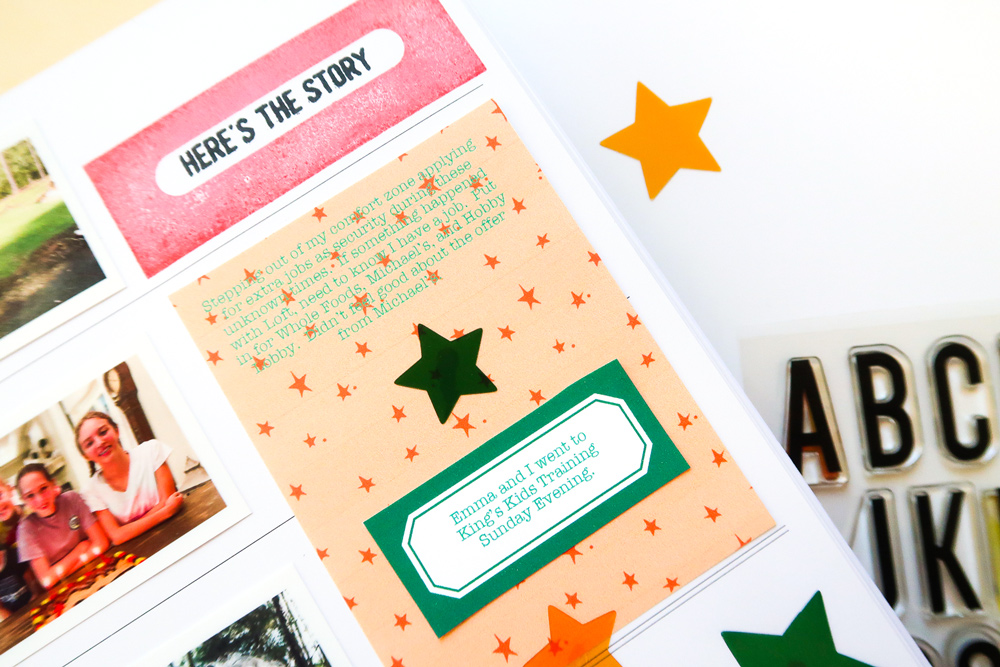
Hay hay, scrappy friends! It’s Stacie back with you today to share how I used some of my scraps leftover from my October kit and extras to create a simple and quick layout. As one month ends and a new one starts, I like to take a last look at my current kit and extras that are on my desk and see if there is anything that sparks any creative ideas before I break apart the products and put them away. This time it was some scrap pieces of paper from the Autumn Days 6 x 8.5 Inch Paper Stack that sparked the creative idea. 

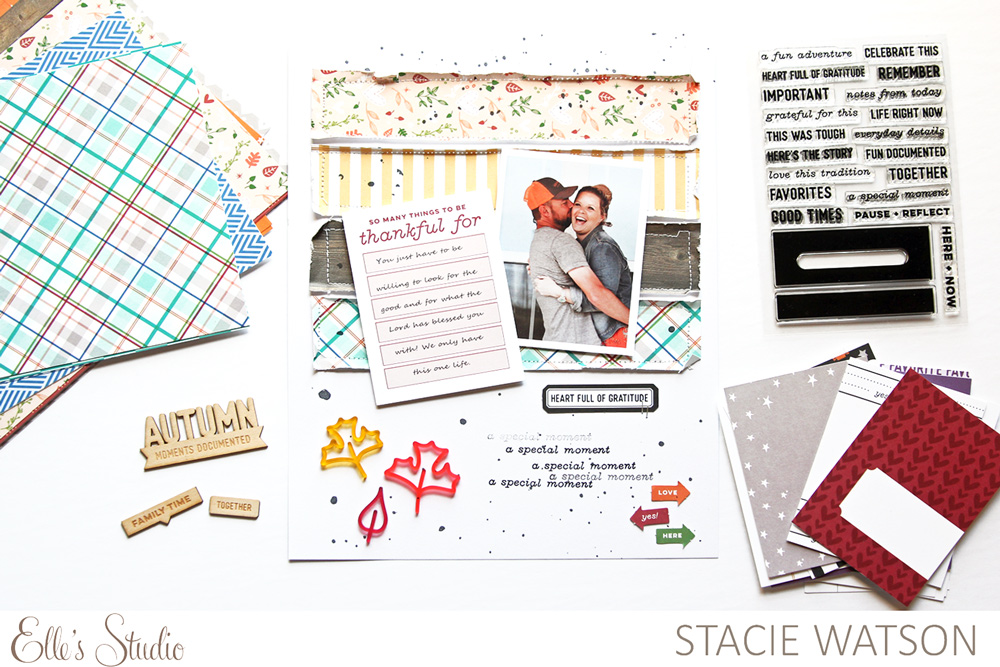
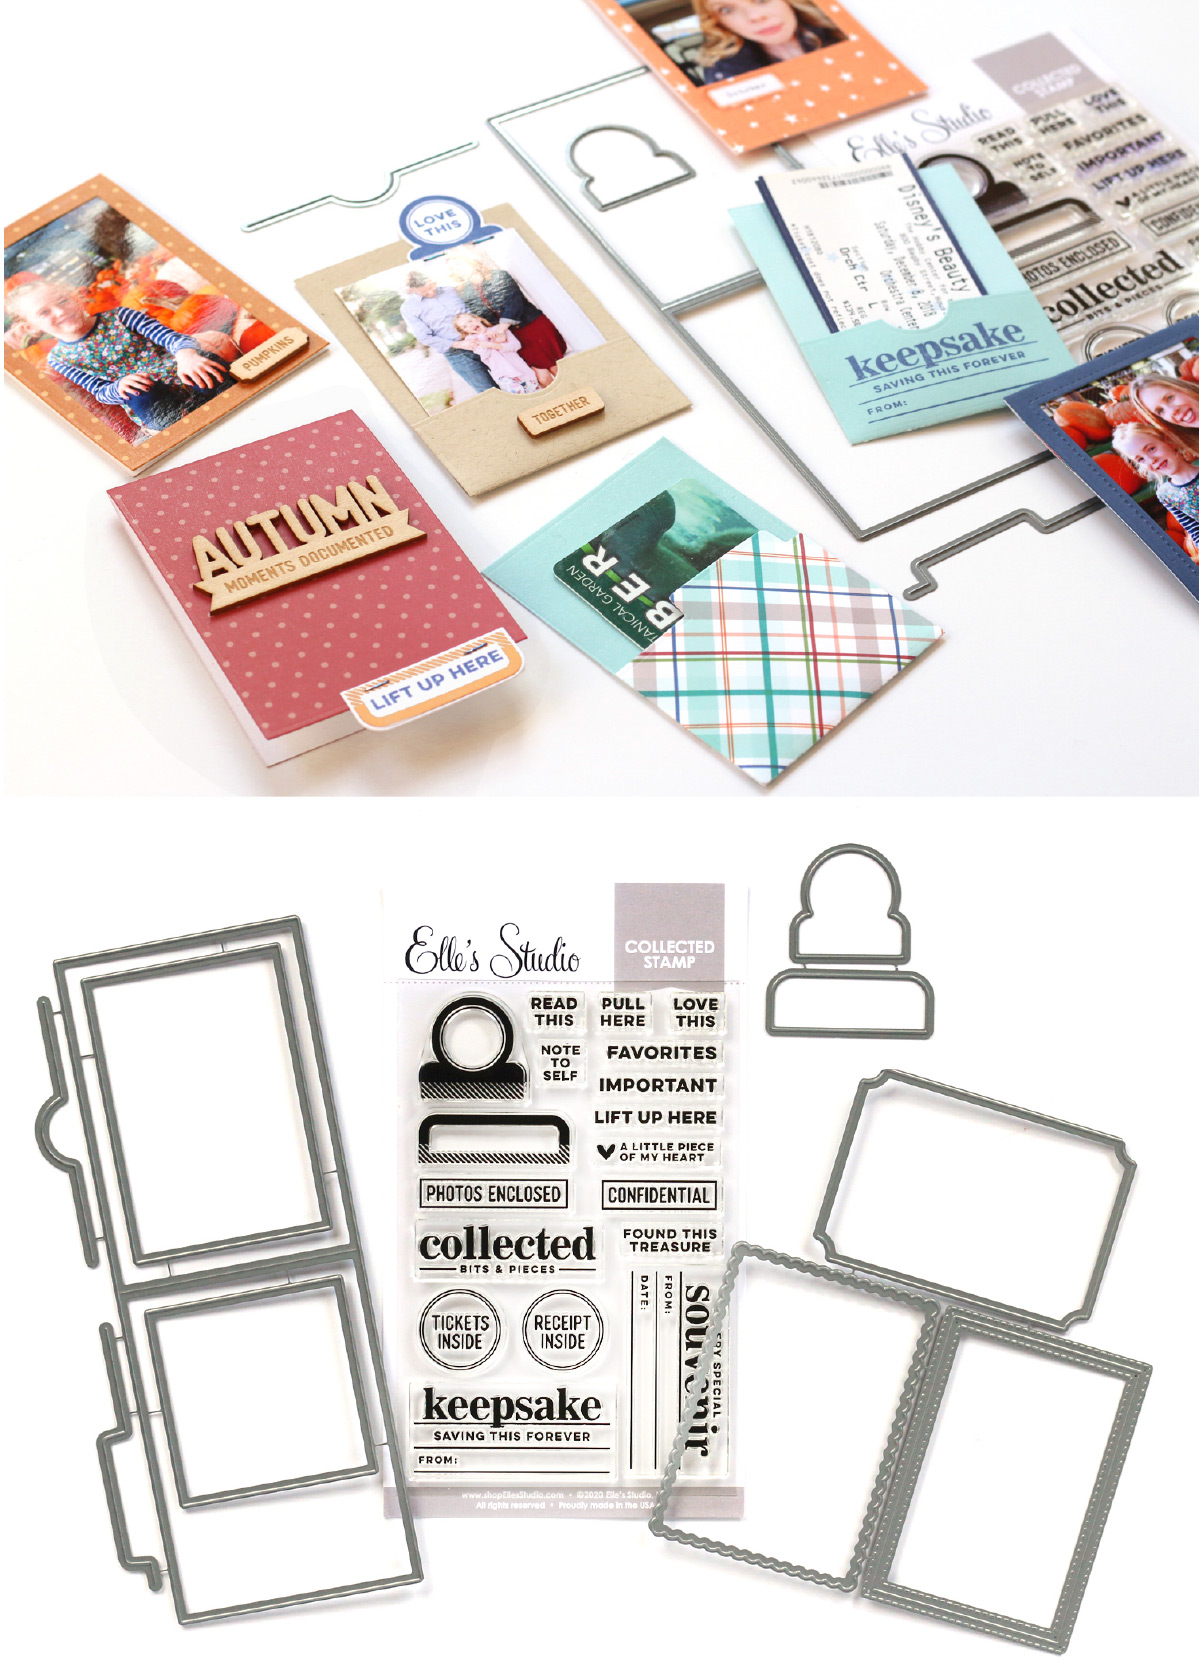
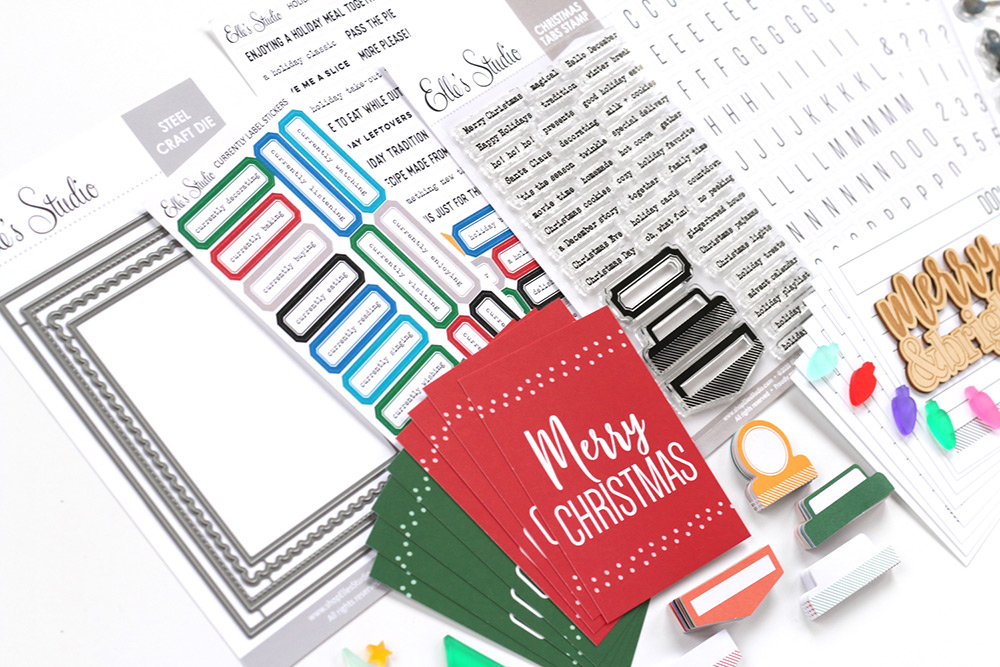
Supplies | October 2020 Kit, Acrylic Leaves, Autumn Days 6 x 8.5 Inch Paper Stack, Documented Stamp

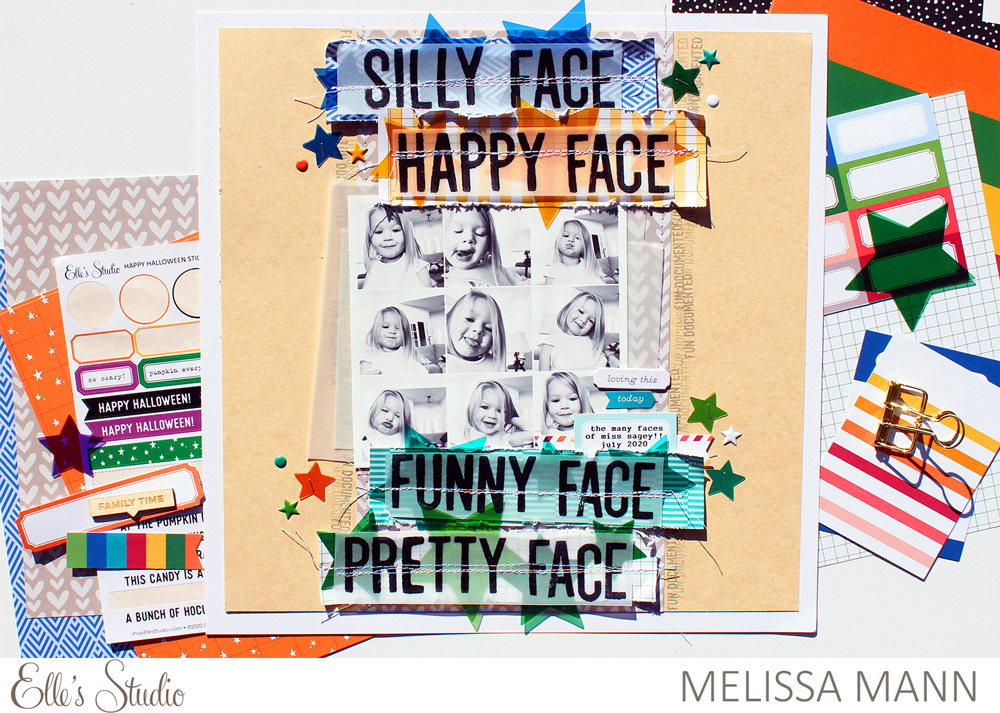
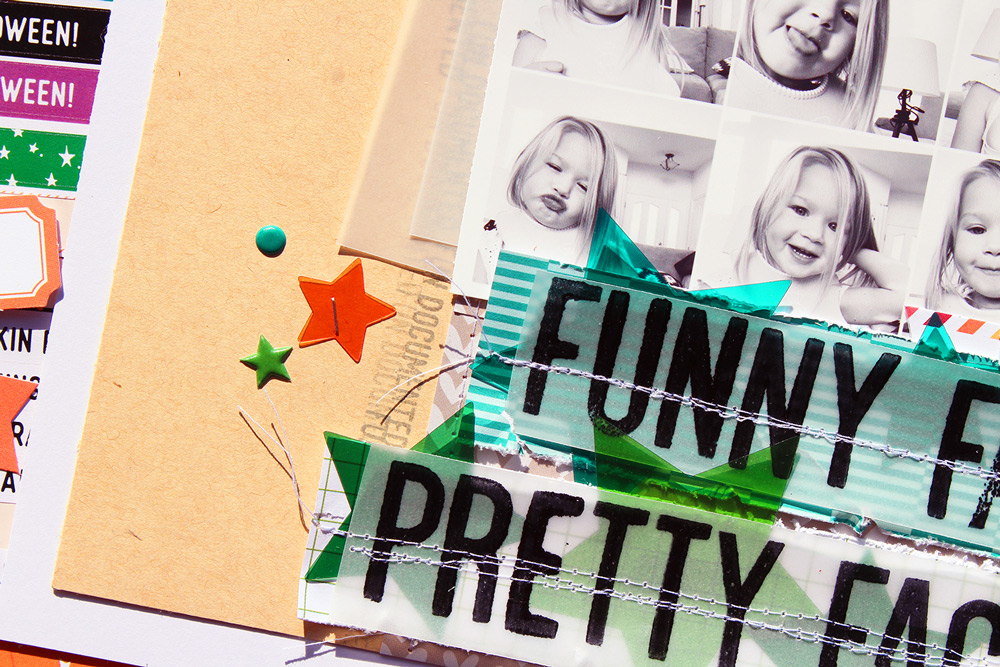
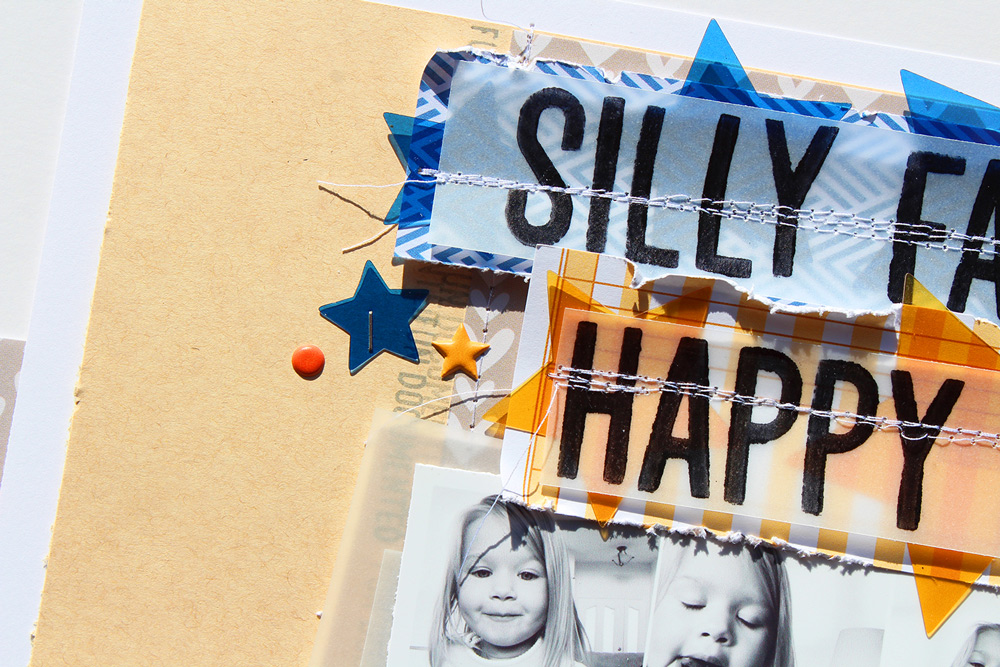
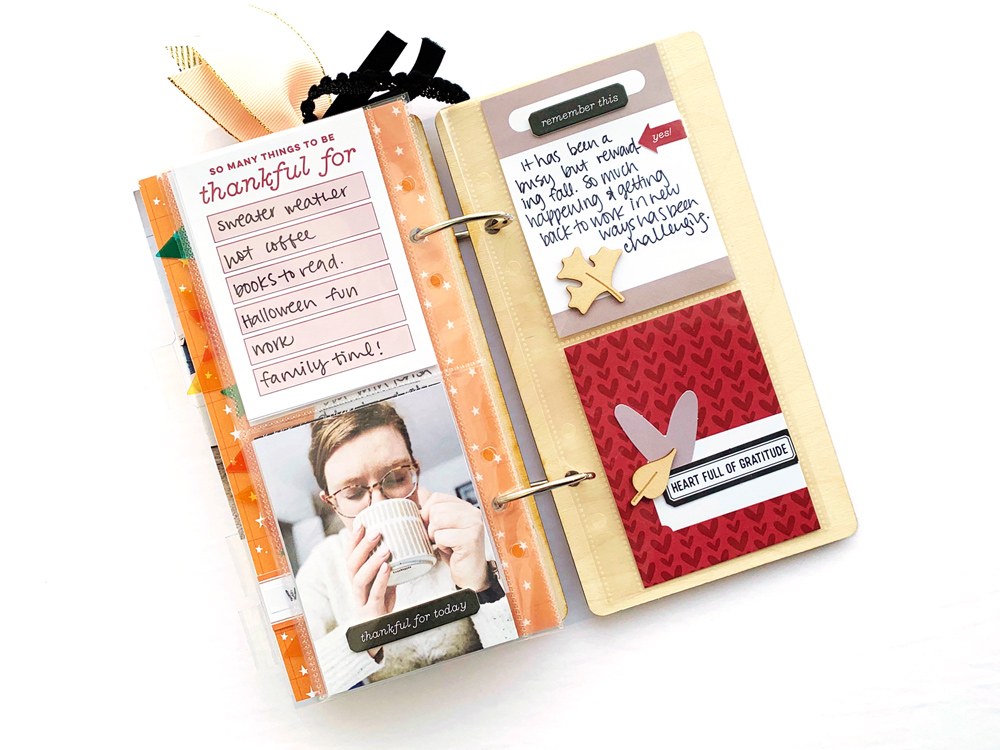
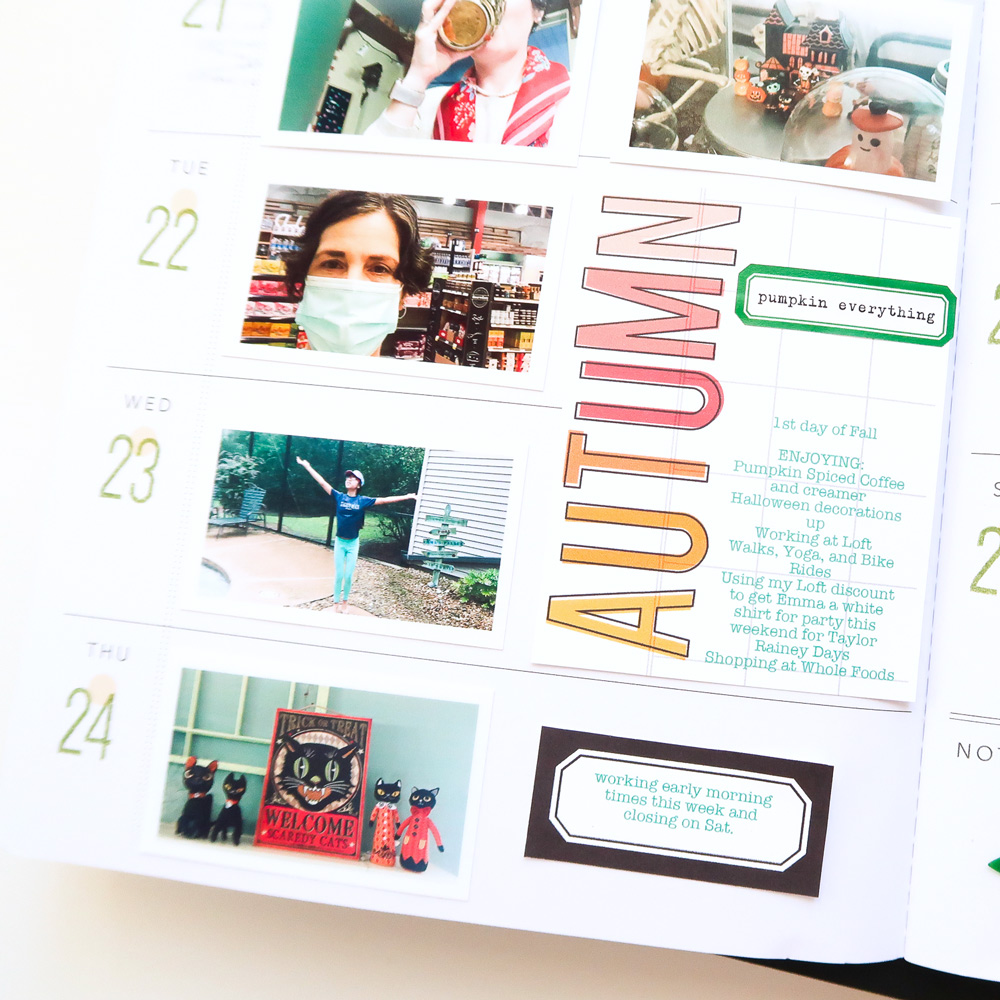
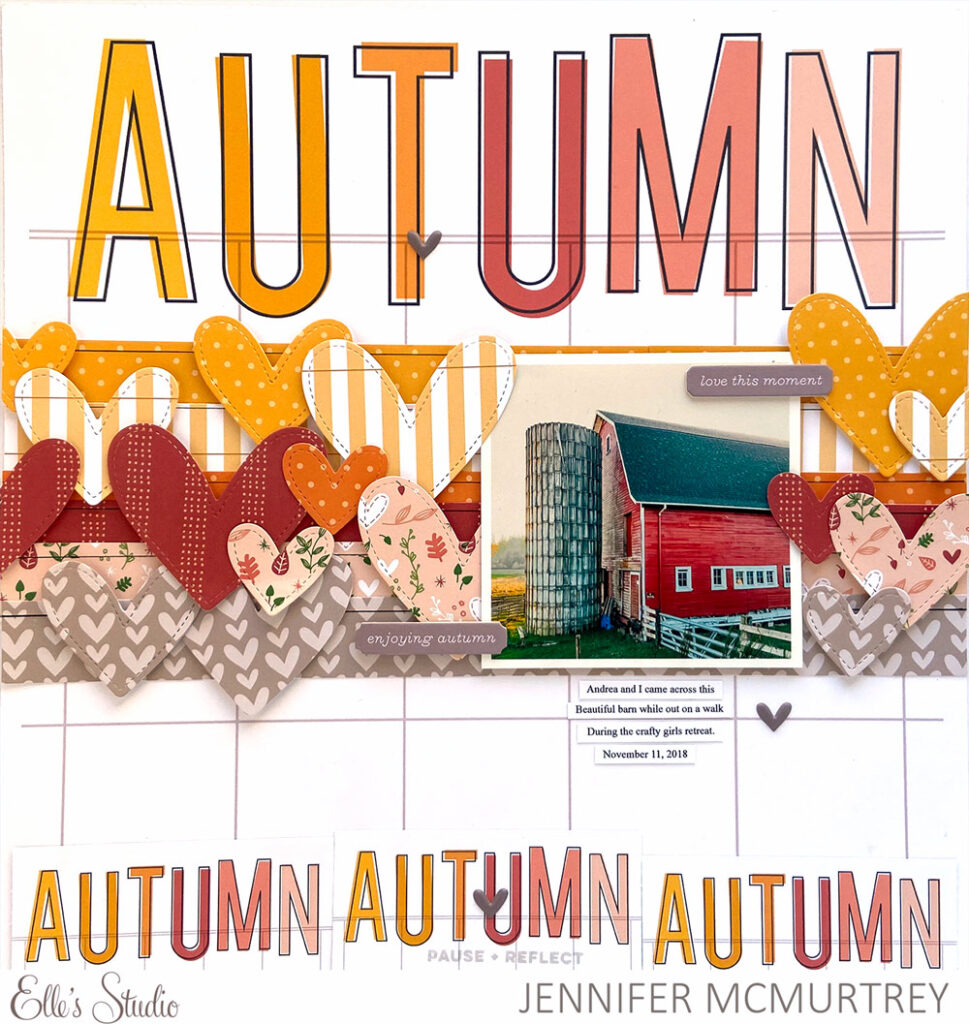
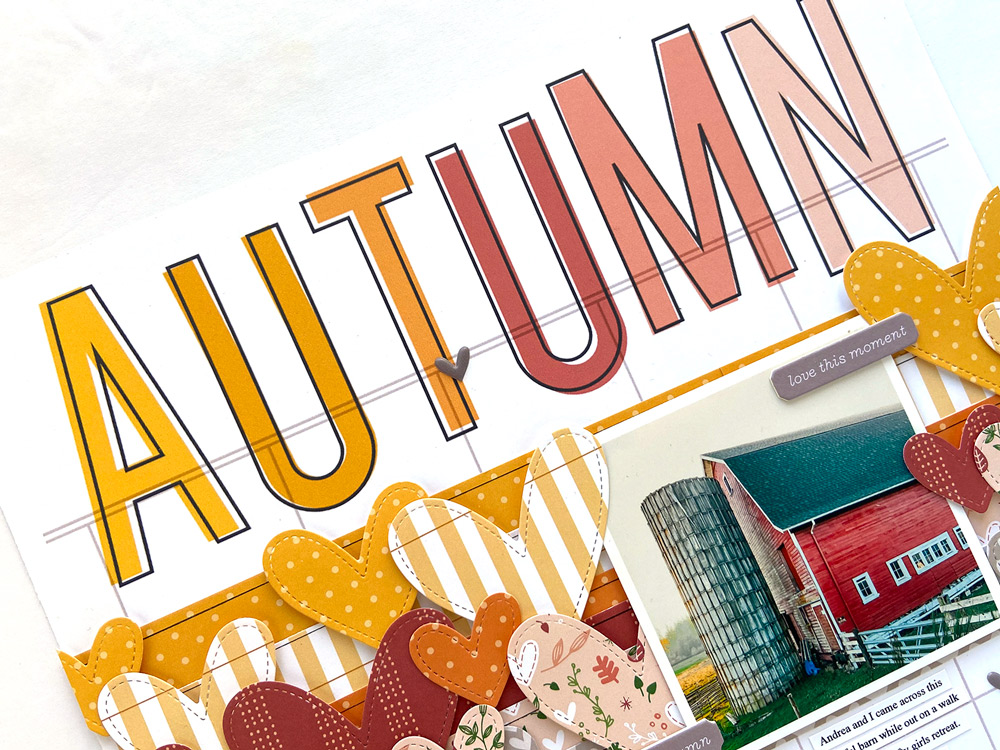
I created this layout by cutting four of the patterned papers from the Autumn Days Paper Stack to 7″ x 1.5″. After the papers were adhered, I decided that I wanted to give the page some texture, so I dusted off my sewing machine and sewed around the edge of each piece of paper. I added even more texture to the page by folding and ripping the edges of each piece of paper. After I had sewed all of the pieces to the page, I simply went back around the edges folding them up and down and even adding in some rips here and there. 

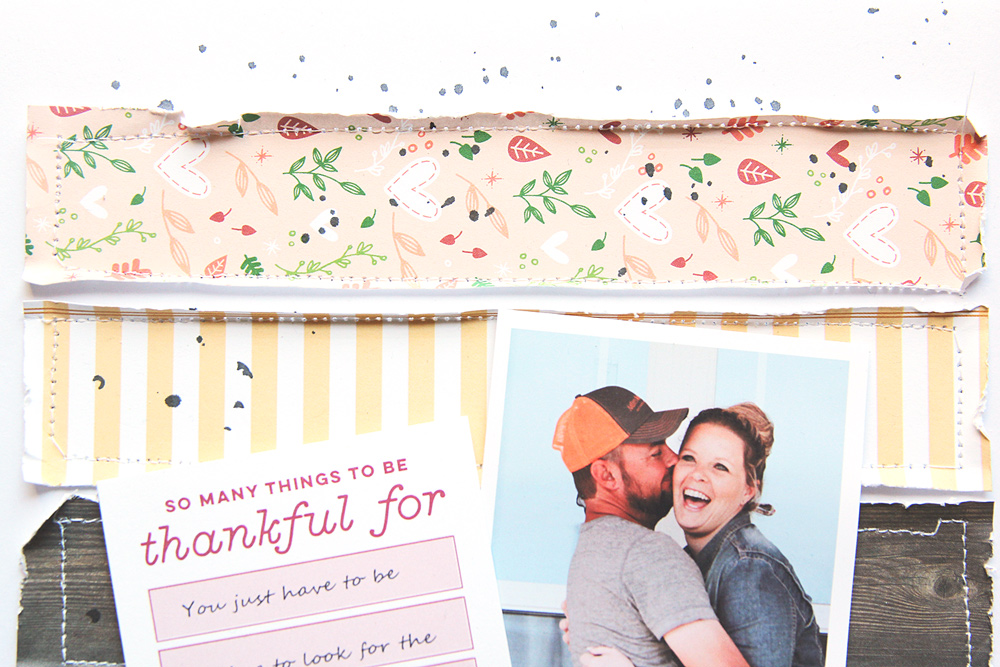
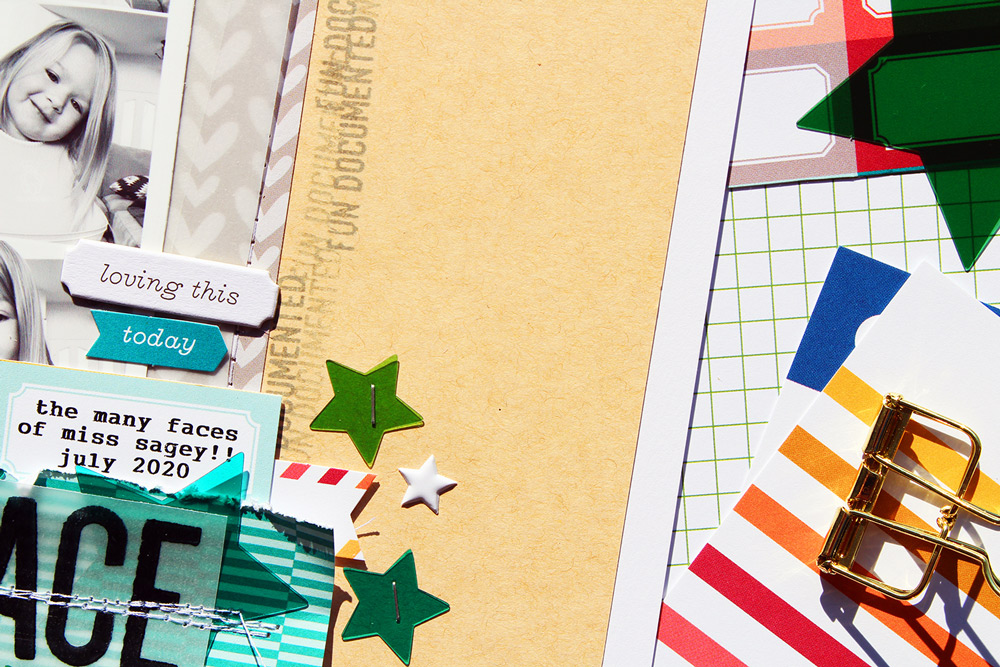
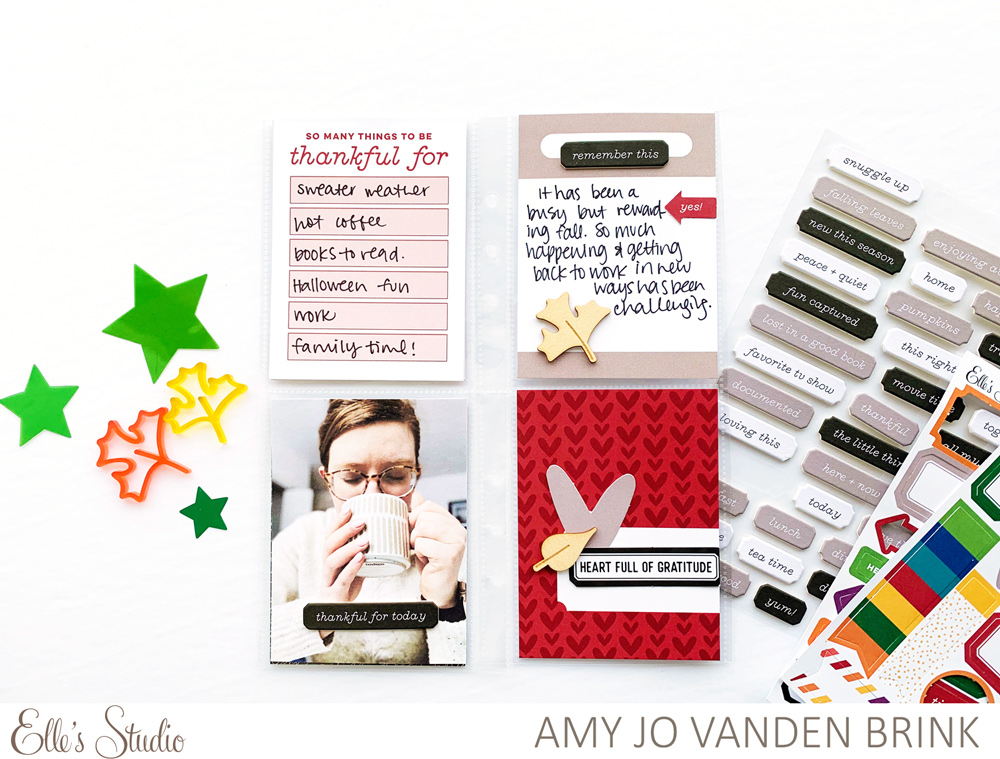
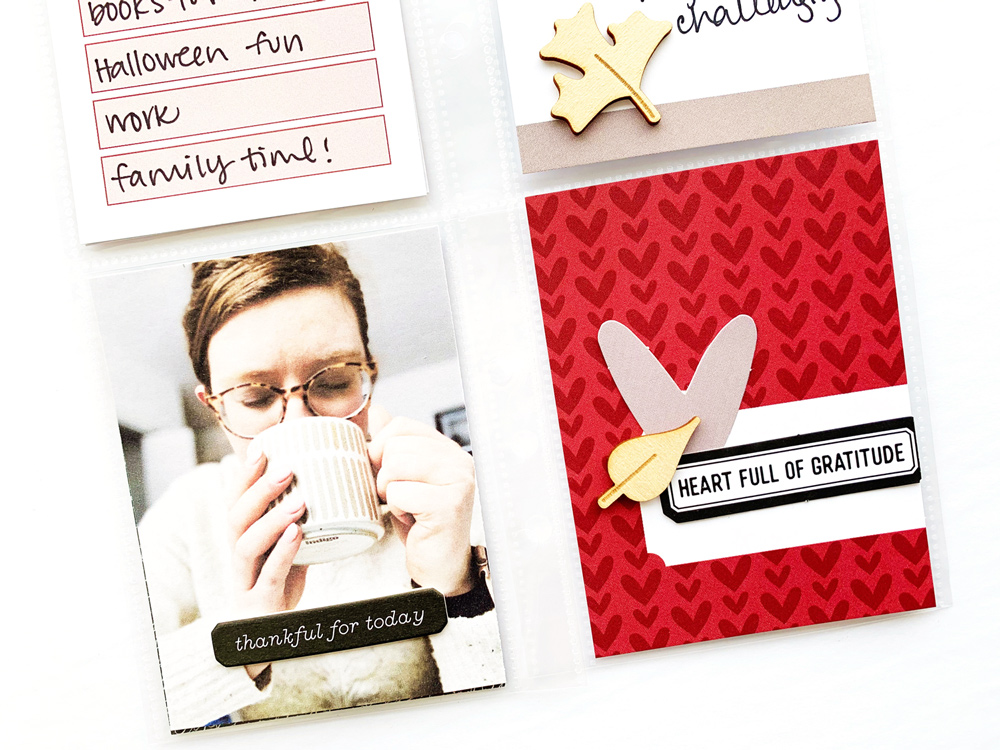
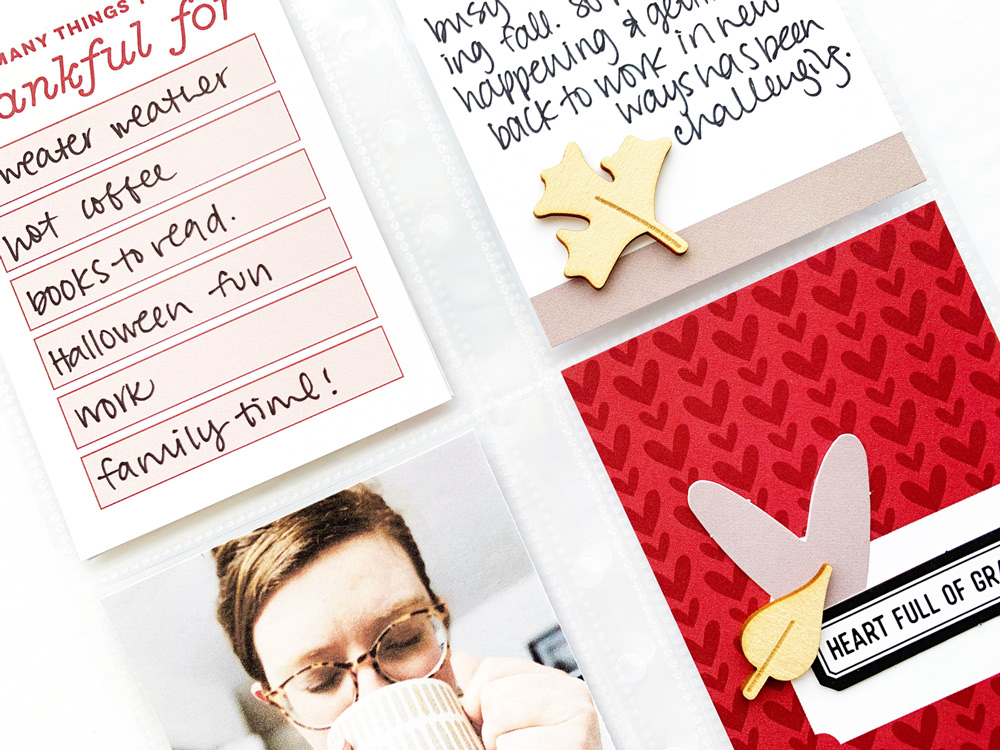
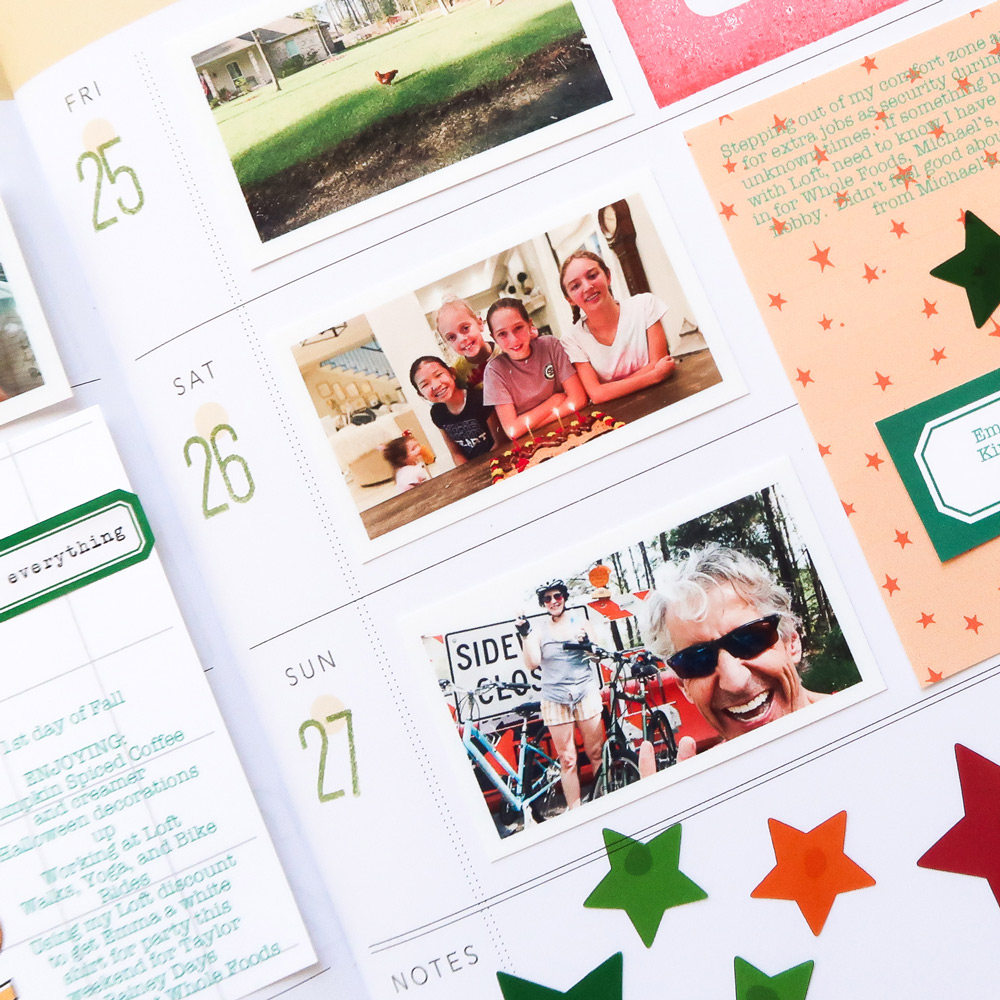
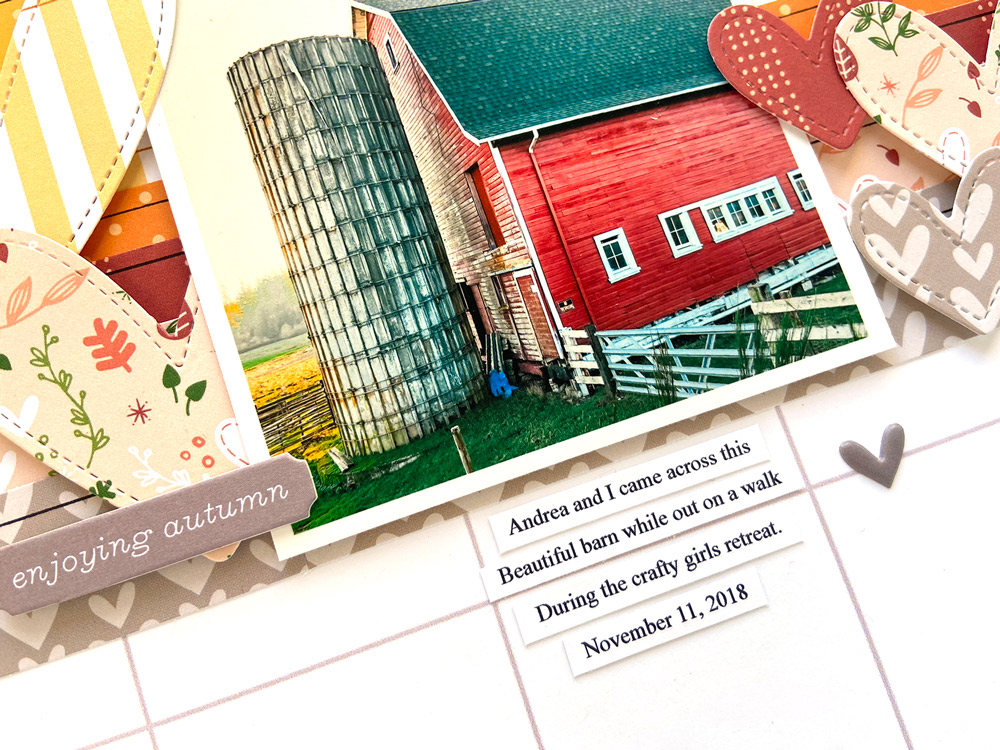
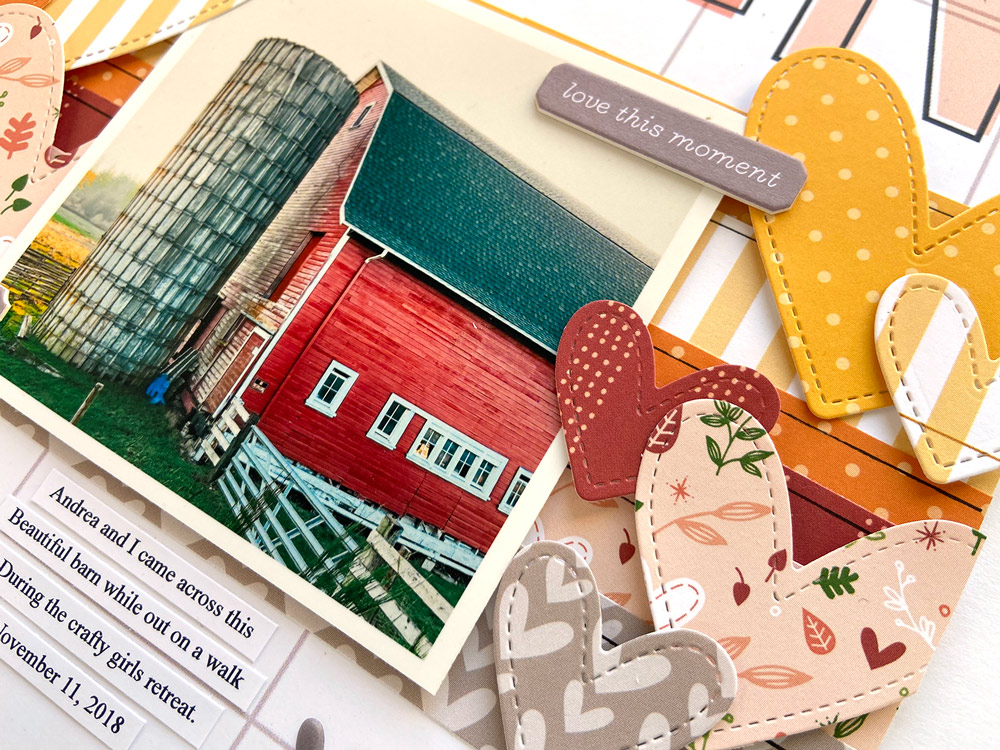
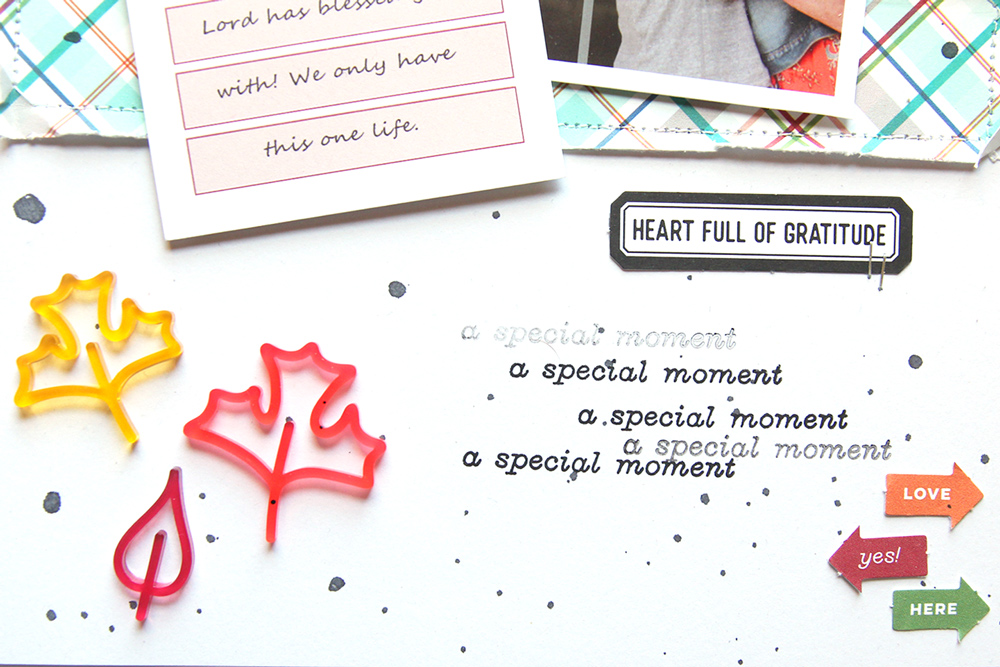
I love the way the messy sewing and ripped paper seems to add just the right amount of texture to the page. Of course if you don’t like that type of look, you just need to make sure that you sew right at the edge of the paper. Next, I chose the “so many things to be thankful for” journaling tag from the October 2020 Kit and printed out my journaling on it. I added the journaling tag and my photo to the page with foam squares to pop both off the page. 

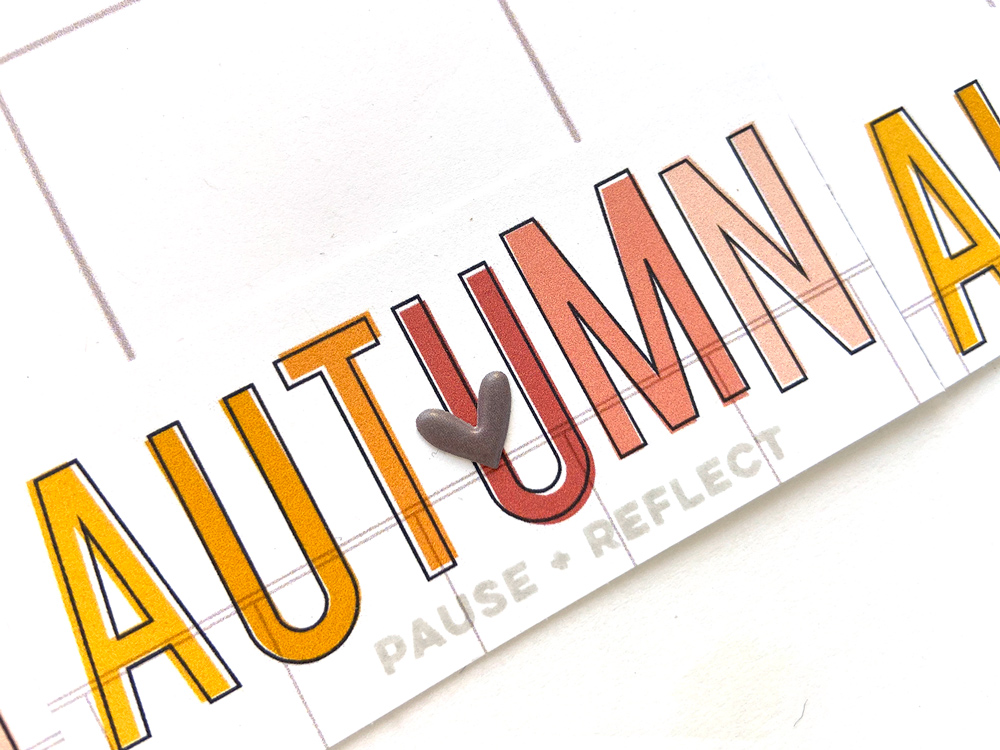
When I have an embellishment that I love, like the Acrylic Leaves, and only have a few left, I like to use them all on my project in a cluster. Of course for me no project is complete without some stamping! I used one of the phrase stamps from the Documented Stamp. To finish off the layout I added some of the October die cuts from the October 2020 Kit

This layout was very simple, came together quickly, and I managed to use some of my stash! Win-win in my book! I hope this has inspired you to use your stash and get creative. Thanks so much for stopping by!

Show us how you are creating with the last pieces from October kit and add-ons! Share your project in our Facebook Group, or on Instagram using the hashtag #EllesStudio!

November Design Team Sneak Peeks

We are just two days away from our November kit and add-ons reveal and we are so excited to be able to share these fun sneak peeks of amazing projects our team made using all the new products that will be available soon! Our November reveal will be full of exclusive products that we’ve designed and will have you ready to document your November stories and take you right into the month of December!

Not a subscriber? Don’t wait any longer! You can pre-order our November kit now and lock in our $9.99 kit price by starting a subscription today! You’ll want to choose our SUBSCRIBE & SAVE option to get signed up and start your subscription with our November kit. We will then hold your kit and you’ll be ready to bundle and save at our November 10th reveal! Details on how to bundle with your subscription order will be emailed to you once you have purchased this product.

Kit subscribers, don’t forget! Along with being able to bundle any products from our shop that will ship for FREE with your kit during our 24-hour bundling period, starting on the 10th at 8:00 am Pacific each month, our subscribers will also have access to special discounts on select items! Above is a preview of our November discounts and savings that will be available for our subscribers during our November bundling period! These discounted items can be found in our SALE section during our 24-hour bundling period, and you must be logged into your kit subscriber account to see them. If you haven’t subscribed to our kit, sign up now to take advantage of these special offers on November 10th! Quick note: Our kits and add-ons are available without a subscription each month, too.

We are excited to share that this reveal will include a new die set that we’ve designed to help you create perfectly layered cards! Use the dies to cut your layers, then add one of our card front tags and chipboard embellishments, that we will also be adding to the shop on the 10th, and you have a beautiful card created in no time! You could also use this die to create shaker cards, add wood veneer or stamped sentiments, and MORE! There are so many fun ways to use this die, and we can’t wait to see the cards you create!

Along with our new card die, we will also be restocking our Pocket, Frame, and Flip-Up dies and bundle at our November 10th reveal! Creating custom pockets, frames, and flip-ups for your pocket pages is now easier than ever with the new innovative products we’ve designed and we can’t wait for you to see how they work! Here is a video by Meghann Andrew to show you them in action:

We are so excited to share all of these new products with you and to see how you use them on your projects! Make sure you set your alarm and mark your calendar for Tuesday, November 10th at 8:00 am Pacific! We hope to see you there!

October #EllesStudio Spottings on Instagram

Searching through the #EllesStudio hashtag on Instagram provides so much inspiration, and this month, it was hard to choose only six projects to feature today! Congratulations to these lovely crafters who created and shared their work with us:

It’s time to create Christmas cards, and if you have a lot to make, simple is best! Using stamps, like our Large Jane Alphabet Stamp in stripes, help to create a statement card greeting, like Laura created here on the left! What an awesome, graphic design! On the right, Kelly used our Magical Memories collection to record some amazing Disney moments. Aren’t her pockets stunning?

Let’s talk pattern! Lacey did an amazing job of combining the patterned papers from our Autumn Days Paper Stack in such a fun way on the layout on the left, and we love that she accented the page with our neutral Stitched Hearts Wood Veneer! The layout on the right by Amy contains no pattern, but beautiful mixed media paired with our Puffy Heart Stickers in the same hues. Simply stunning!

The final two projects make the most of our September 2020 Kit! On the left, Emily included a beautiful fall photo that coordinated perfectly with the kit contents. It’s a match made in paper crafting heaven! On the right, Susan created a gorgeous fall traveler’s notebook spread to record the highlights of her month that we just love!

Just for sharing their projects, these six paper crafters will each win a $10 gift certificate to the shop! Thank you so much for posting your projects and using the #EllesStudio hashtag, ladies! Please email us at info@shopellesstudio.com to claim your prize!

Will YOU be featured next month? Simply use our products on your next project and post to Instagram using the hashtag #EllesStudio for a chance to be featured here on our blog, and win a gift certificate to the shop! We can’t wait to see what you create!

More Medium Jane Inspiration with Melissa Mann

Hello! This is Melissa, and today I’m sharing a layout that features the brand new Medium Jane Alphabet Stamp! I love the Large Jane Alphabet Stamps and this new medium size will become a new staple in my craft room!

Supplies | October 2020 KitOctober Labels, Thankful Chipboard Label StickersAutumn Tiny Shapes and Dots Puffy Stickers, Acetate Stars, Documented Stamp, Autumn Days 6 x 8.5 Inch Paper Stack, Medium Jane Alphabet Stamp — Solid

I really wanted to let these Medium Jane stamps shine on my project. I used some muted colors for my background layers and put a big collage of photos together of my niece; I also edited the photos to black and white so the colors in the photo did not distract from my BIG title that I was planning to stack down the length of my layout.

I stamped my Medium Jane Alphabet title on vellum using Staz-On ink. While that ink was drying, I trimmed strips of pattern paper from the Autumn Days Paper Stack to be slightly bigger than the vellum pieces. I layered the Acetate Stars in corresponding colors on top of the patterned paper and then layered my vellum title strips on top of that. Everything was stitched down using my sewing machine.

Once I had all the title strips completed, I layered my photo collage on top of gray patterned paper from the Autumn Days Paper Stack and more vellum and placed it in the middle of the kraft cardstock. Once this was in place, I placed the layered title strips above and below the photo and adhered them to the background. 

Once I had the main pieces of my layout in place, I typed my journaling on one of the October Labels and placed it in the lower right hand corner of my photo along with a Thankful Chipboard Label Sticker and a die-cut from the October 2020 Kit. I sprinkled some more of the smaller Acetate Stars around the layout and placed some of the Autumn Tiny Shapes and Dots Puffy Stickers around them.

We would love to see how you are using this new Medium Jane Alphabet Stamps, available in both solid and outline! Be sure to share with us in our Facebook group, or on Instagram using the hashtag #EllesStudio.


Thanks for stopping by!

Setting Up 2021 For Success with Candace Perkins

Our new 2021 products are designed to help you get ready for a new year of memory-keeping, and over the next few weeks our design team will be sharing ideas and tips on how they are preparing their albums for their stories and photos. We hope their insights will help you decide on a plan, and ultimately set up a successful plan for how you plan to record 2021! First, let’s hear from Candace Perkins!

Hello, Elle’s Studio friends! It’s Candace here to share some tips and tricks on how I prep my album for documenting success for the upcoming year. Can you believe this year is almost over?! It feels like it has been the longest year ever! I think I am not alone when I say that I am excited to document a brand new year. I found myself so excited as I was preparing this project for 2021 and the new Elle’s Studio 2021 products helped me prep my album. 

The first thing that I do to set up my memory keeping for the new year is to purchase a new 12″ x 12″ album and fill it with page protectors. I find that when I decide on a memory keeping pattern for the year it helps me organize thoughts and stories and makes pages come together in a snap. By deciding ahead of time which page protectors and photo sizes I will use, I don’t have to spend time making basic layout decisions and I get to spend the time on the fun of creating and storytelling. 

I will start out my 2021 album with a title page showcasing a variety of family photos and the beautiful Large 2021 White Acrylic. To start each month I will have a 9″ x 12″ page protector that will stand as a bookmark for each month.  Each of these “bookmarks” will have a photo of the month, a quote tag, a Highlights From This Month 3×4 inch Journaling Tag and a 2021 Calendar.  To make the bookmark stand out against the 12″ x 12″ page protectors that follow, I will add a 2″ tab stamped with the month. By creating a monthly pattern I always know how to start the month leaving more room for creativity.

As the year goes on it is easy to get behind on memory keeping. One of the easiest ways I stay on top of my album is by printing off the previous weeks photos every Sunday. By editing and printing on a weekly basis, it helps me stay on top of the most time-consuming parts of memory keeping. This also allows me to sit down at any time to create spreads and capture stories. Even if I get behind on the journaling, I have the photos printed and organized.  

What are your favorite ways to prepare your albums to collect the stories of the next year?  Share with us how you are prepared to document!  

Have a great day!

Supplies | 2021 Calendars, Highlights From This Month 3×4 inch Journaling Tags, Monthly Cardstock Stickers, Large 2021 White Acrylic, Daily Tabs Stamp

A Polka Dot Punch with Tracey Fox

Are you as in love with the new Jewel Polka Dot 6 x 8.5 Inch Paper Stack as I am? The colors are so great, and you just can’t beat a classic polka dot pattern as a scrapping staple. There’s something about this pack of polka dot papers that inspired me to play with the design element of repetition, and I had fun doing just that on this layout! 

Supplies | October 2020 Kit, Happy Halloween StickersThankful Chipboard Label StickersAutumn Tiny Shapes and Dots Puffy Stickers, Autumn Wood VeneersJewel Polka Dot 6 x 8.5 Inch Paper Stack, Medium Jane Alphabet Stamp — Outline

Before I dug into the paper stack, I chose my photos for this page about a wonderful, socially distant evening visit on our friends’ back patio and laid them out in a band across the page. My very fall-themed photos of our fire, pumpkin chili, and s’mores went perfectly with the October Kit, and I chose some of the tags and die cuts from the kit to layer under and on top of the photos. I adhered my band of photos close to the bottom of the layout, which left a lot of space on the top half of the page to play with the colorful Jewel Polka Dot Paper Stack patterns!

After choosing the paper colors that matched my photos the best, I used the outline Medium Jane Alphabet Stamp to stamp my title on them and then cut the letters out. I LOVE these new stamps and how they add an additional size option for creating striking titles on my pages. My title fit perfectly across the layout! Once I had glued down my title, I grabbed my trusty star punch and punched stars out of the same papers I had used for my title. I laid them out in a grid in the same color order I used for my title, but in order to add some breathing room, I threw in a few white stars to break up the pattern. The repetition of the stars, color pattern, and most importantly, those awesome polka dots creates a sense of unity and consistency on the page.

To finish up this layout, I typed some journaling on my typewriter and adhered it in strips to the free space along the bottom of my layout. I also added some of the Happy Halloween Stickers and Thankful Chipboard Label Stickers around the page, and for an organic touch on this otherwise very graphic layout, I added the pretty wood veneer leaves from the Autumn Wood Veneers. I just love that additional touch of fall they brought to the page.

How are you using the Jewel Polka Dot Paper Stack? It’s classic polka dot pattern is so versatile, and the rich colors are so perfect for so many different projects. I highly recommend picking up this pack, as well as the Polka Dot Journaling Tags and the Bright Polka Dot Paper Stack in the shop!

Show us how you’re using our newest polka dot patterns on your projects! Post your project in our Elle’s Studio Facebook Group, or share on Instagram using the hashtag #EllesStudio!

A Cozy Pocket Page Entry with Amy Jo Vanden Brink

Hello, ES friends! It’s Amy Jo, and I’m back with a great project today that uses a bunch of my October kit and add-ons. I love when you can choose a specific color scheme from the main kit to work with, and I had to get the burgundy and grey pieces together for a little entry into my fall album.  

Supplies: October 2020 Kit, Jewel Journaling Tags, Thankful Chipboard Label Stickers, Autumn Wood Veneers

I started with the “thankful for” and hearts burgundy tags and then looked through the October Kit die cuts for pieces that would coordinate. I also grabbed some of the Autumn Wood Veneers and the Thankful Chipboard Label Stickers to add some embellishment to my photos and a bit of a title for the gray Jewel Journaling Tag.

From there it was a simple matter of adding my journaling and slipping the tags into the pockets.

I love how cozy this little layout turned out—it captures the warm and bright fall that we have been having here so well, and I was excited to get to use all of the little pieces from the October kit and add-ons that I’ve been loving!  Here is what it looks like in my little album:

Thanks for checking out my project today!  Do you have a lot of pieces left from your October products, or are they as well used as mine?

Share what you’re creating with your October kit and extras with us! Post in our Elle’s Studio Facebook Group or on Instagram using the hashtag #EllesStudio!

Documenting Autumn in a Memory Planner with Patricia Roebuck

Hello, Elle’s Studio Friends! I find myself turning to digital elements or cut files often to help give me a jumpstart in my creative process. Today I want to show you how creating with the Autumn Printables set the design, flow, and a colorful way to add fall journaling in my memory planner!

Supplies | October 2020 Kit, Autumn Printables, Happy Halloween Stickers, Acetate Stars, Documented Stamp, Medium Jane Alphabet Stamp — OutlineMedium Jane Alphabet Stamp — Solid, Jane Alphabet Stamp

I started by using the “autumn” tag from the Autumn Printables as the focal point on the left side of the planner for three reasons. One: this was the week of the first day of fall; two: the colors; and three: the empty space for journaling. I am creating in my memory planner, but this could easily apply to a pocket page because I kept the size of the tag as is: 3″ x 4″.  I would normally create a collage of different sizes of photos and make the tag smaller, but I used all of the same sizes of photos instead and framed them around the original-sized tag. I also tried something new on this spread: I changed the color of my journaling. Since I have so many warm colors from the tag’s letters, I went with green for a contrast and a nice complement to the fall hues.

Keeping with the inspiration from the “autumn” tag, I used the Medium Jane Stamps in Solid and Outline for the dates of the week and to emphasize that we are now onto a new season! I used the Jane Alphabet Stamp in the smaller font to number each day using green to create balance with the green I created with the journaling, the Halloween Stickers, and the additional stamping at the top.

I kept the same design on the right, using a complementary tag from the Autumn Printables.

This tag is a great complement to the tag and colors on the left.  Although there is no white space, there is white space in the sense of a simple pattern on the tag that allowed me to add journaling in the same green I used on the left.  For additional journaling, I used the smaller Autumn Printables in black and green, one framing the tag on the left, and this green one right on top of the tag. I just trimmed and adhered it after it was printed. To finish, I used the Documented Stamp above the tag to balance the color and design, then sprinkled the bottom with Acetate Stars.

The Autumn Printables really made this come together quickly, pushed me to try a different design in my memory planner, and to use a different color for my journaling that really adds to the flow of the overall design and colors of my spread. I hope you try adding these printables to your planner or in your pocket pages. We would love to see what you create in our Facebook Group, or on Instagram when you use the hashtag #EllesStudio!

A sneak peek of our November 10th reveal!

Our November kit + coordinating add-ons reveal is almost here and we can’t wait to share with you all the new and exclusive products that will be available soon! Our reveal will be full of the perfect products to document your November stories and take you right into the month of December! This month, our November kit will include 3 – 4 x 6 inch tags, 18 – 3 x 4 inch tags, and 26 die cuts!

Not a subscriber? You can pre-order our November kit now and lock in our $9.99 kit price by starting a subscription today! You’ll want to choose our SUBSCRIBE & SAVE option to get signed up and start your subscription with our November kit. We will then hold your kit and you’ll be ready to bundle and save at our November 10th reveal! Details on how to bundle with your subscription order will be emailed to you once you have purchased this product.

Kit subscribers, don’t forget! Along with being able to bundle any products from our shop that will ship for FREE with your kit during our 24-hour bundling period, starting on the 10th at 8:00 am Pacific each month, our subscribers will also have access to special discounts on select items! These discounted items can be found in our SALE section during our 24-hour bundling period, and you must be logged into your kit subscriber account to see them. Quick note: Our kits and add-ons are available without a subscription each month, too.

We are excited to share that this reveal will include a new die set that we’ve designed to help you create perfectly layered cards! Use the dies to cut your layers, then add one of our card front tags and chipboard embellishments, that we will also be adding to the shop on the 10th, and you have a beautiful card created in no time! You could also use this die to create shaker cards, add wood veneer or stamped sentiments, and MORE! There are so many fun ways to use this die, and we can’t wait to see the cards you create!

Along with our new card die, we will also be restocking our Pocket, Frame, and Flip-Up dies and bundle at our November 10th reveal! Creating custom pockets, frames, and flip-ups for your pocket pages is now easier than ever with the new innovative products we’ve designed and we can’t wait for you to see how they work! Here is a video by Meghann Andrew to show you them in action:

We are so excited to share all of these new products with you and to see how you use them on your projects! Make sure you set your alarm and mark your calendar for Tuesday, November 10th at 8:00 am Pacific! We hope to see you there!

Sketch Day with Jen McMurtrey

Hello friends! It’s Jen today with a bit of autumn inspiration using the October Kit and add-ons. When I am stumped creatively, as we often find ourselves, using a sketch is one of the go-to methods I rely upon to kickstart my mojo. Today’s sketch certainly did that for me:

For bit of back story, I have been holding onto this picture for some time waiting for just the right product to use it with. Honestly, I have never taken such a beautiful photo, and I am not sure I ever will again. While the picture has been printed and sitting on my craft table for quite some time, I had yet to use it on a project. After seeing the Autumn Printables, I knew I’d found a home for this special photo.

Supplies | Autumn Printables, Thankful Chipboard Label Stickers, Autumn Tiny Shapes and Dots Puffy Stickers, Jewel Polka Dot 6 x 8.5 Inch Paper Stack, Autumn Days 6 x 8.5 Inch Paper Stack, Documented Stamp, My Heart Metal Die

You’ll probably notice that my finished layout does not exactly match the sketch, but that is okay. The purpose of a sketch, I believe, is to use it as a starting point and draw inspiration from all or parts of it for inspiration. I was immediately drawn to the stripes on the background of the sketch and began there.

To create my background using the Autumn Printables, I enlarged the “autumn” tag as much as possible to make it fit across a piece of 12” x 12” white cardstock. Because the actual size is much smaller, I duplicated the enlarged file, rotated it, and lined up the grids using Photoshop. Next, I printed it using my large format printer.

To mimic the stripes from the sketch, I pulled papers from the Jewel Polka Dot Paper Stack and Autumn Days Paper Stack that coordinate with the colors in the printable. Next, I used the same papers with the My Heart Metal Die and cut several hearts that were then layered on the stripes around the photo.

To keep the overall aesthetic of the project neat, I typed rather than hand wrote my journaling and placed the strips of text below picture.

To give more texture to the photo, like the sketch, I added Thankful Chipboard Label Stickers to two corners.

Along the bottom of the layout, I added three more of the “autumn” words from the Autumn Printables in their actual 3” x 4” size. The base of my layout needed a bit more color and this seemed the perfect solution. In the center, I stamped the “pause + reflect” sentiment from the Documented Stamp using light grey ink to match the grid lines. 

Lastly, I added three grey hearts from the Tiny Shapes and Dots Puffy Stickers, which add the perfect finishing touch.

Thank you for stopping by today! I hope you have been inspired to create using the beautiful Elle’s Studio October Kit and add-ons as much as I was. Remember to share your projects on social media using the tag #EllesStudio, or head to our Facebook Group and share with fellow ES fans so we are sure to see them!