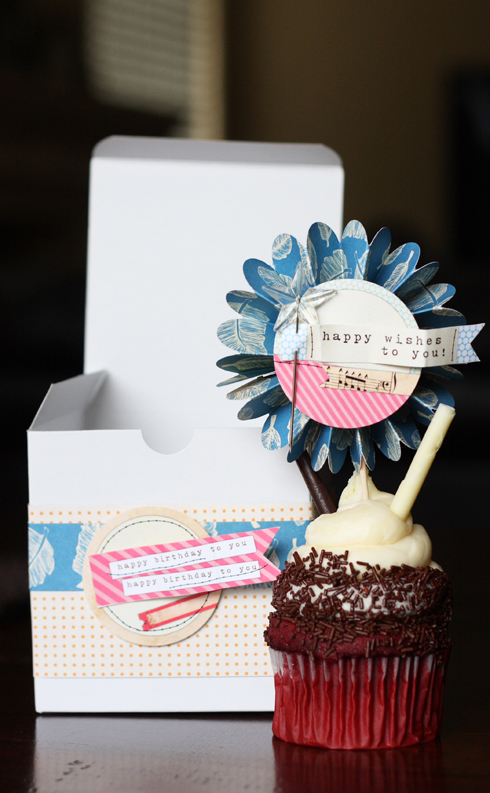
We have a winner to announce from the post below! The person who one the spot in the class May with May is…
Thank you all for entering and stopping by!
We have a winner to announce from the post below! The person who one the spot in the class May with May is…
Thank you all for entering and stopping by!
I love details and layers in my scrapbooking, and when I saw the new Handmade Layers collection I squealed with delight!! I do love my hand written journaling on my layouts, and these banners and journaling papers are just the thing for some springtime scrapbooking fun.
What I had the most fun with was using the journaling elements as my key pieces, and just adding bits of paper, stitching, and a few jewels and such to compliment the simple page. I often have so many random notes that I want to share about a photo or moment in time – and I really like the end result.
The details in the Handmade Layers collection really inspired me to punch bits of paper, add colorful stitching, and otherwise add detail and layers to my creation. Love it!
Speaking of wanting to share – I have a new class now open for registration that is all about scrapbooking + fun at Big Picture Classes. I’d love to give a seat away to one of you lovely blog readers here at Elle’s Studio – so just leave a comment to be entered to win! One winner will be drawn on Wednesday, March 30th!
Happy crafting.
-May
May Flaum is a lifelong crafter who has been working in the scrapbook industry for eight years. In addition to teaching classes across the USA and on-line she has worked with many top manufacturers, has been published numerous times, and has written articles for both ScrapbookUpdate.com and EllaPublishing.com. She can be found most days blogging at www.mayflaum.com when she is not back in her studio crafting up new fun goodies and
I had this white owl hanging around the house for awhile, trying to find the perfect spot to put it in… But it just looked so plain and needed something to spice it up. Then, I purchased the Martha Stewart Glitter Pack (half price at our local craft store in town!!) and saw the pink and gold glitter in the kit and the idea just hit me!
The BEST part of this tutorial is… you can glitter anything! Literally, anything you can put glue on you can glitter! Think of all the fun stuff you could pick up at second-hand stores and glitter?!
This little guy needed some glitter! I could have covered the entire thing in the same color, but wanted the piece of wood he was sitting on to be gold instead.
Start with your glitter opened and your glue ready. You’ll want to paint your glue on with a paint brush in a nice thick layer.
Work in small patches at a time so the glue doesn’t dry on you. And, when doing multiple colors of glitter, you’ll want to start at the top and work down.
Once you have all of the one color done, you’ll want to let it dry a little before you start with the second…
Make sure you let it dry overnight and you’re done! I just LOVE how the glitter catches the light – it looks so pretty! I’m now in full glitter mode 🙂 Thinking about tea cups and tea pots… monograms… oh man!
Happy glittering!
xo, Elle
Our March Inspiration Gallery is now live and it is full of amazing things. I love what spring brings to scrapbooking… butterflies, pennants, beautiful colors and more! Plus, a ton of their projects use our new line, Handmade Layers, so if you’ve recently purchased anything from that line, you can get extra inspired!
Make sure you check it all out here, at our website – each one of our current design team members did an outstanding job! Thank you so much, ladies!!
xo, Elle
We are sponsoring Scrapbook Circle’s Weekend Warm-up Challenge #4 – Create a layout composed of mixed alpha’s.
Hop on over there to participate and maybe win some Elle’s Studio goodies! And, while you’re there, don’t forgot to check out the March kit, it even includes some Elle’s tags!
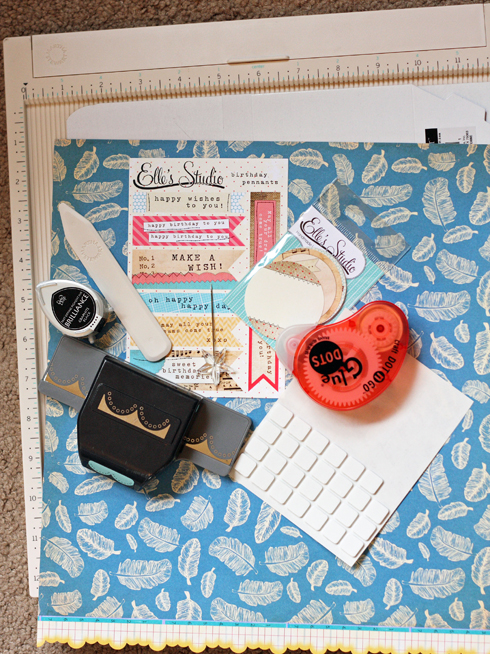
Step One: Gather your supplies:
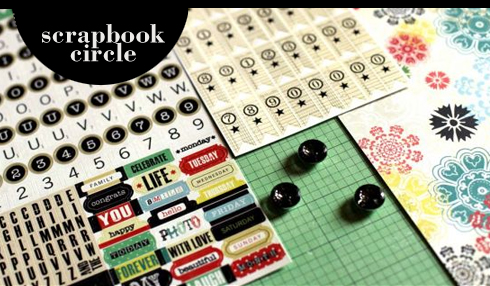
12×12 pattern paper
Border Punch
Elle’s Studio Handmade Layers Circle Tags (smaller ones)
Elle’s Studio Handmade Layers Birthday Pennants
Glue Dots
Pop Dots
Scoring Board/ Bone Folder
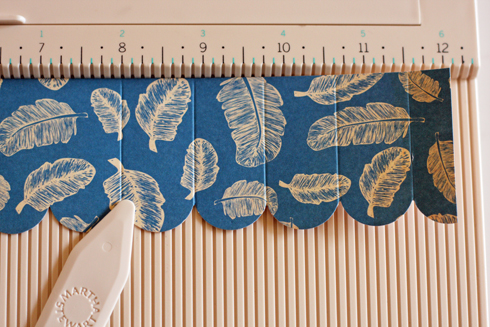
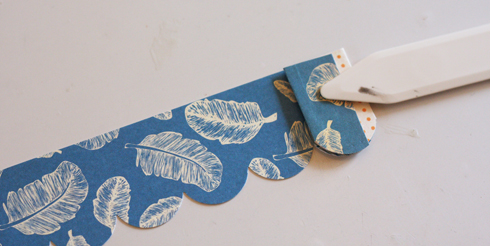
Step Two: Cut 2 1.5″ x 12″ strips of pattern paper
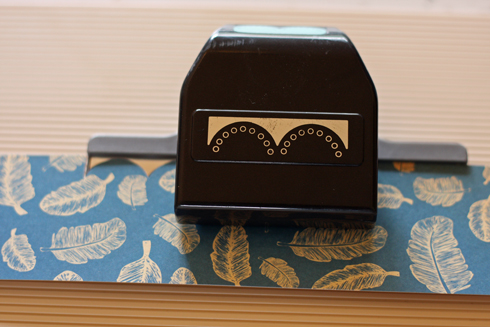
Step Three: Trim the edges with the border punch.
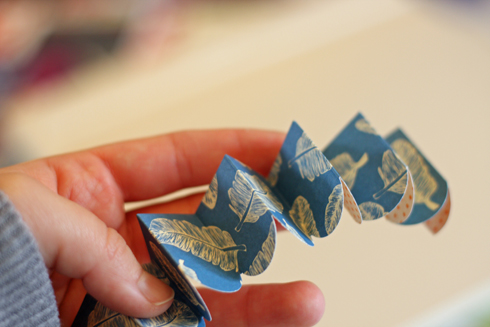
Step Four: Use a scoring board to make creases in between each curve. If you don’t have a scoring board, simply accordian fold at each curve and flatten with a bone folder.
Step Five: Accordian Fold Your Pattern Paper (you can skip this step if you didn’t use the scoring board.)
Step Six: Attach the pattern paper to each other on one end so they make a 1.5″ x 24″ strip.
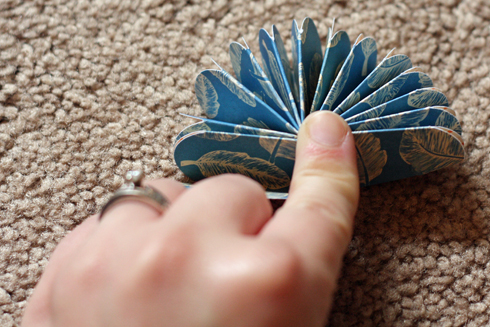
Step Seven: Fold the paper into a cricle, and glue dot the two ends together… (this is the difficult part. If it doesn’t do it the first time, don’t give it up.)
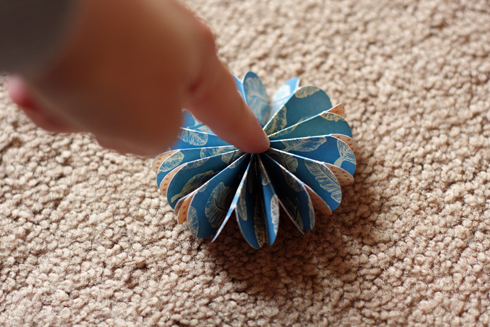
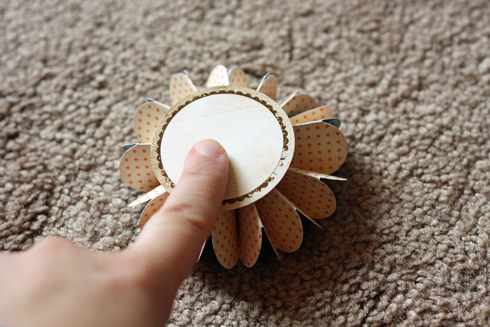
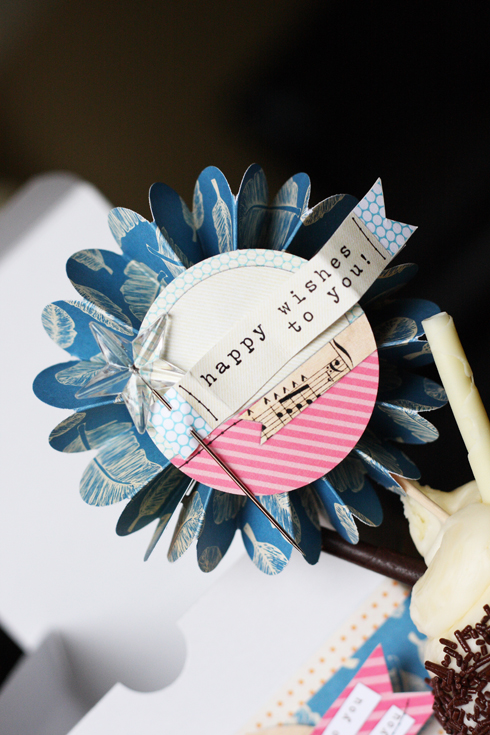
Step Eight: Use pop dot to adhere a circle on the front and back of the flower. (I found it holds better this way!)
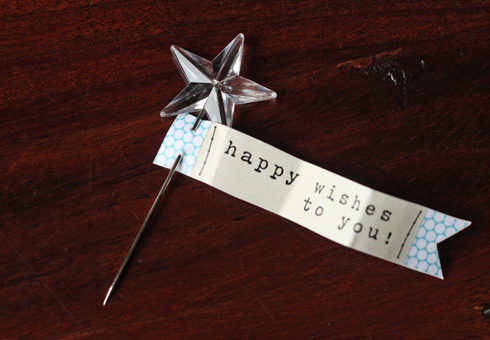
Step Nine: Crinkle your banner and insert a stick pin. Attach to your flower.
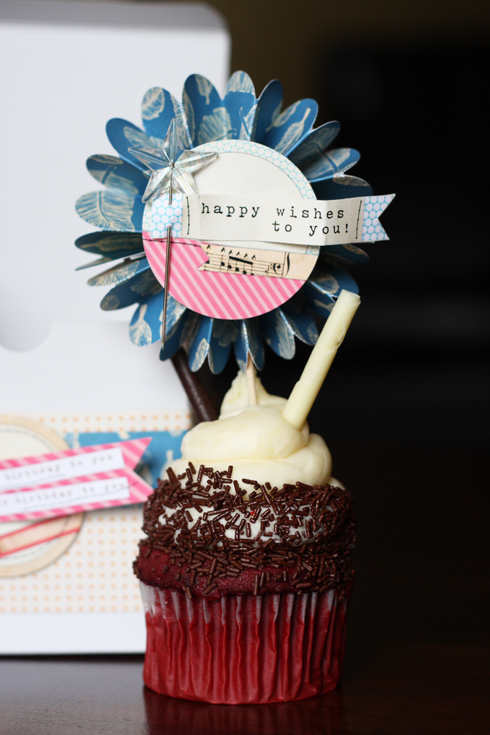
Step Ten: Use a glue dot or 2 to attach a toothpick to the flower. Stick in cupcake & enjoy it’s cuteness! 🙂
It’s One Buck Wednesday and we have two items up for $1, today only, in our digital shop! The (correct) items that are $1 today are:
Ledger Love Notes – super cute for journaling and/or leaving sweet notes around the house.
These Moments of Love – these are great for journaling, too! There is a range of sizes from large to small in this set.
And, our new digital item this week is our photo tabs, which where a freebie from a couple weeks ago:
If you missed downloading these, you can now purchase them for $2.99 at our digital shop.
I love seeing things that other people love in “things I Love” posts around the web and I couldn’t resist putting one together! There’s lots of stuff I love out there, but right now, here are some of my favs:
3 feet balloons – can you imagine these at a birthday or special occasion?! Bake It Pretty has them in stock! Photo found here.
Tara’s Art Quilt has me dreaming about quilting. It’s absolutely stunning and beautiful!
A fox in a cup? So sweet 🙂 Christy linked me up to that one via facebook!
This sweet little owl house is too cute for words – and the swing?! Eeek!! I love 🙂
That’s all for this week – I’d love for you to leave your favorite things in the comments if you want! Browsing the internet is so much fun!
—————————————————————————————————————————-
“Things I Adore” posts are a new blog series. These posts are non-sponsored and I am in no way affiliated with the person(s) behind these products or the products themselves. These are honestly things I just love and wanted to share with you!
WOW – your comments made our weekend celebration so special! Thank you all so much for every word 🙂 They mean so much to us! We are so excited for the years ahead, especially since we get to spend them with you! It’s going to be great!!
We have four winners to announce from the post below! The four winners of the $40 gift certificate are:
Aimeslee at March 13, 2011 11:07 PM
Please email us asap!
Huge thank yous to all who stopped by and your amazing words! Love you all!!
xo, Elle
First, we want to start today off by thanking YOU! You’ve been with us and supported us for four amazing and wonderful years and we are so thankful and feel so blessed for each one of you! Without you, these last four years wouldn’t have been possible! Also, a big thank you to our facebook fans and twitter friends! We love you all!!!
So, we want to celebrate today with a giveaway for you!
Just leave a comment to be entered to win! Four people will each win a $40 gift certificate to our shop! We will draw the four winners first thing on Monday morning 🙂
Thanks so much for stopping by and celebrating with us!
xoxo, Elle