Happy Traveler’s Notebook Accidents With Jen McMurtrey

Sometimes our projects don’t always turn out the way that we intend—a bottle of mist spills on our desk, or we don’t line up that stamped image just perfect, but the best crafters are the ones who can work through these happy accidents—like design team member Jennifer McMurtrey! She’s with us today to share a new traveler’s notebook spread that we think is just perfect, even though Jen had to pivot from her original plan. Let’s see what happened!

Hello Elle’s Studio friends! It’s Jennifer today with a summer-themed traveler’s notebook layout using the July 2019 Kit and add-ons, which turned out perfectly after a couple of happy crafting accidents!

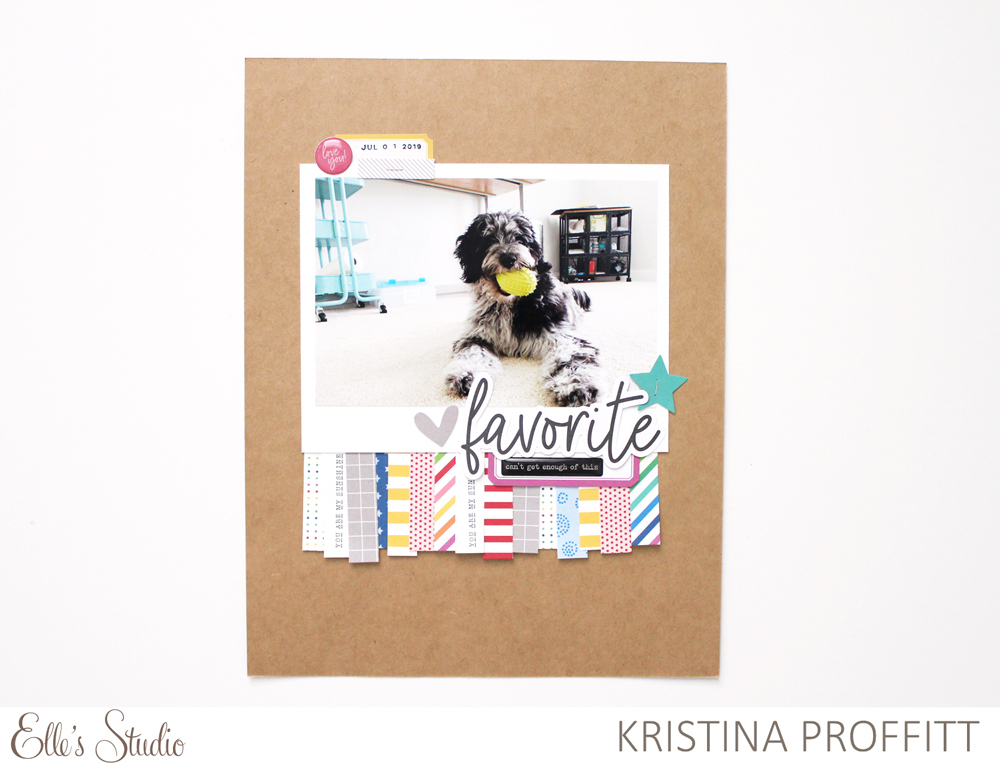
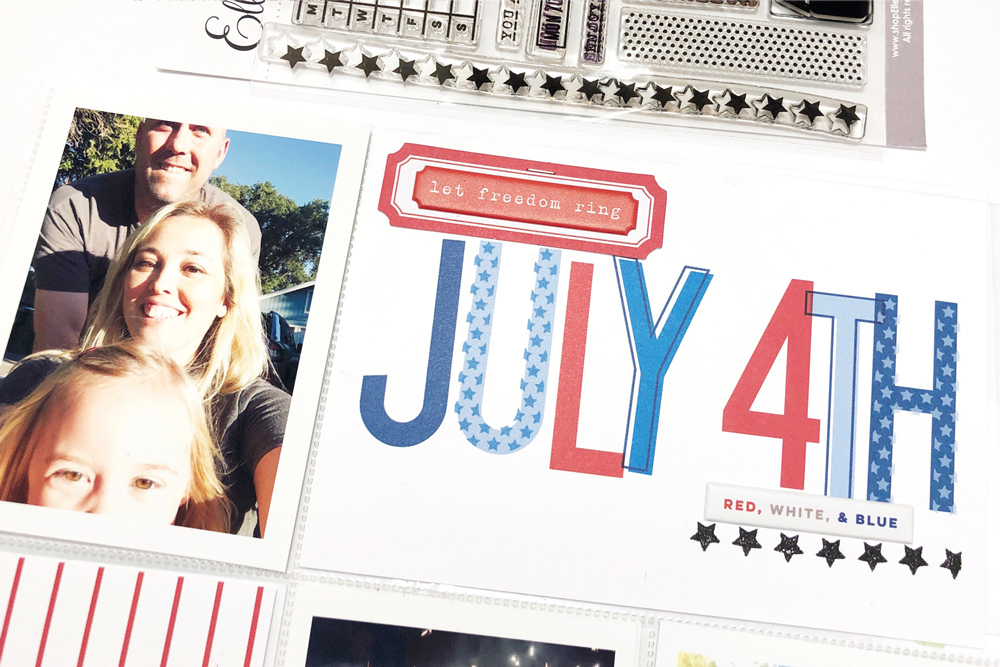
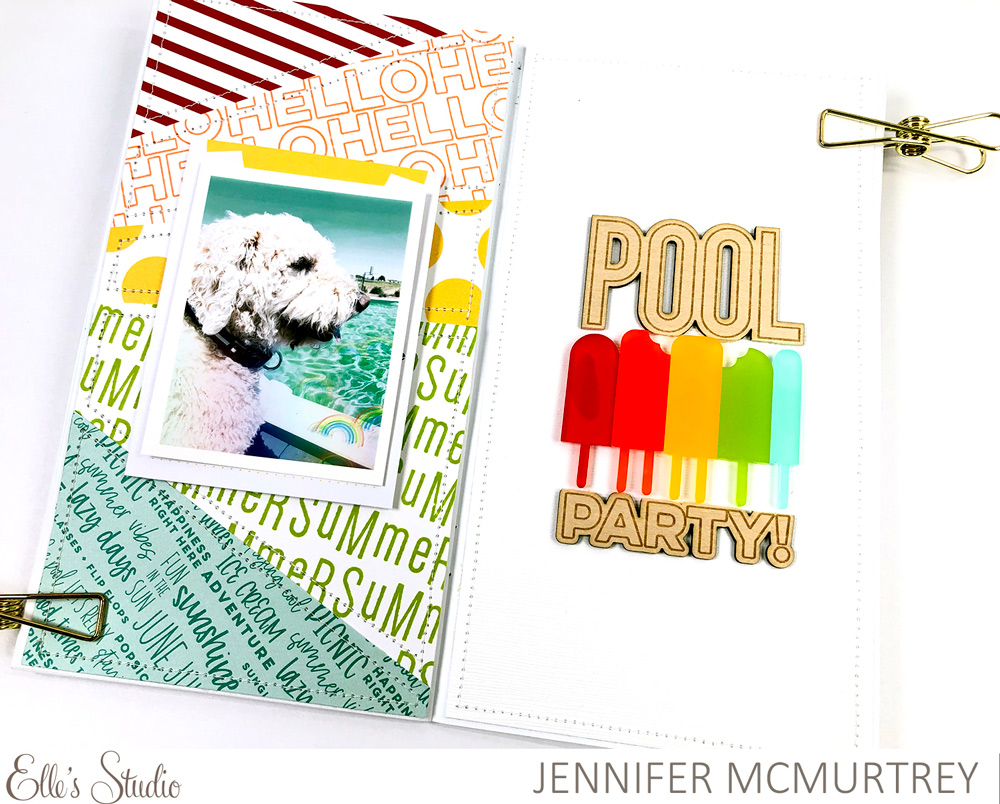
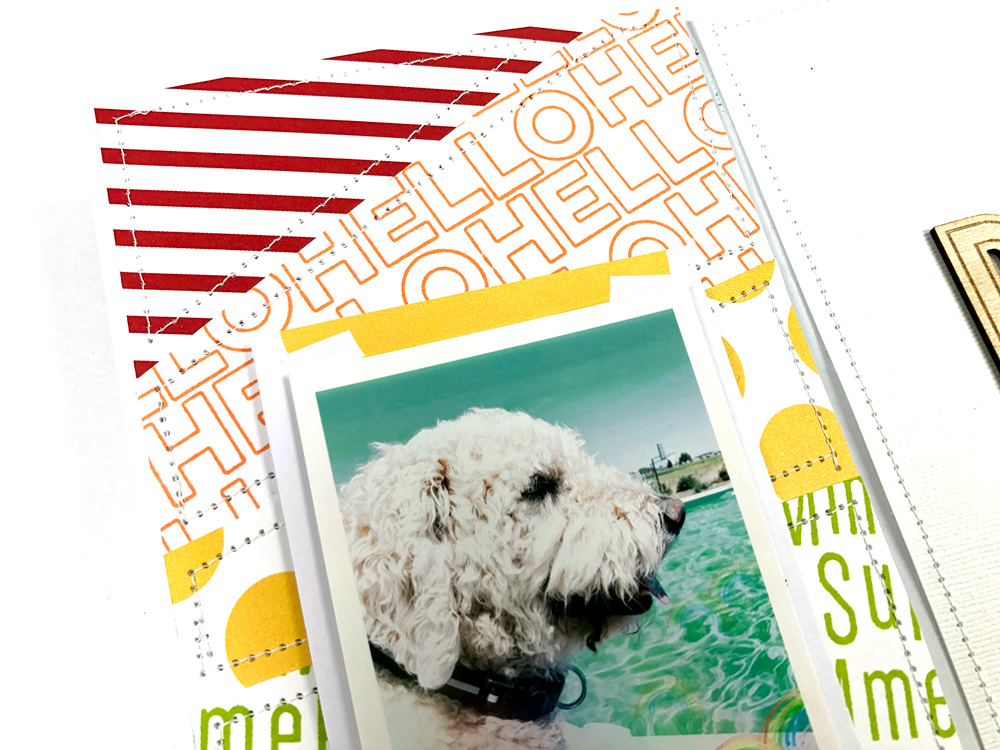
As much as I love taking photos of my kids when they’ll let me, my next favorite subject is our dog Mabel. Considering she follows me everywhere I go, I am never lacking in opportunities to get a good shot of her and this picture is no exception. I love how she is staring at the water, lost in thought.

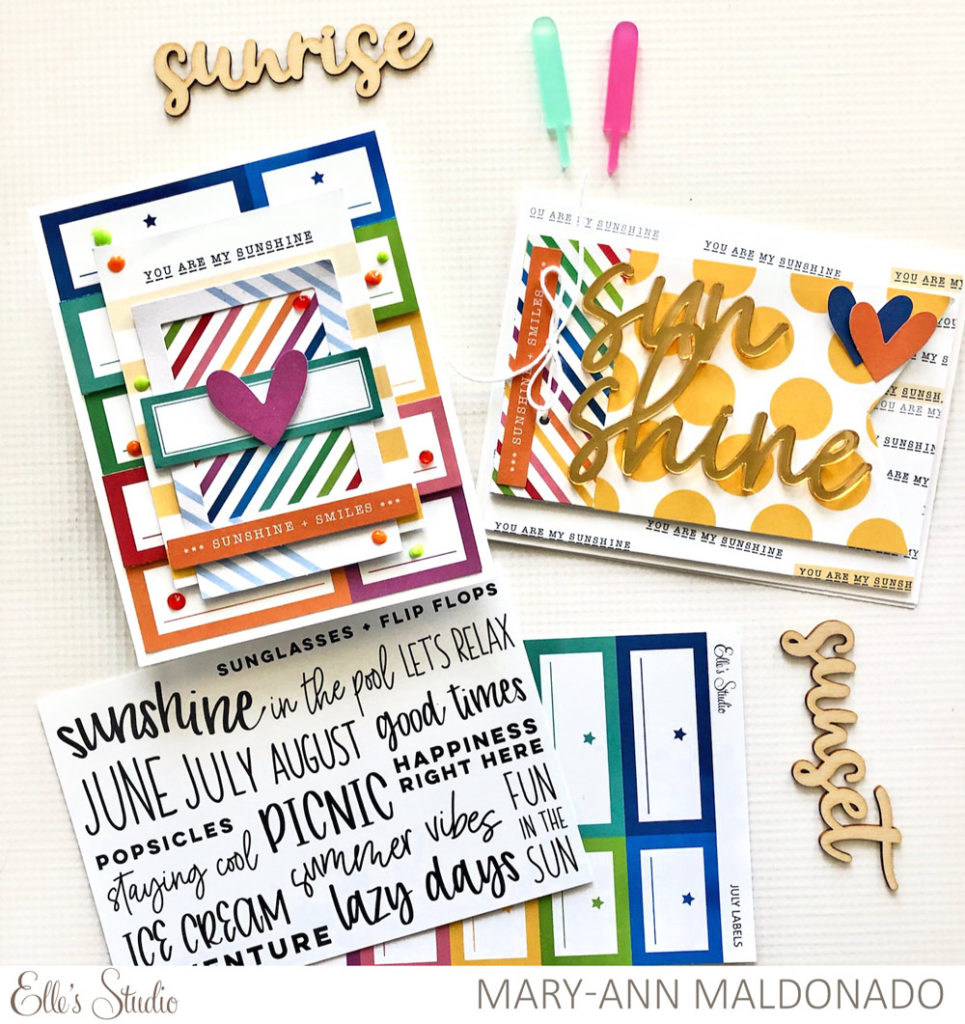
Supplies | July 2019 Kit, Happiness PrintablesJuly Blank Label Stickers, Pool Party Wood Veneer, Large Acrylic Popsicles, Sunshine 6 x 6 Paper Stack, Title Builder Stamp, Jane Alphabet Stamp

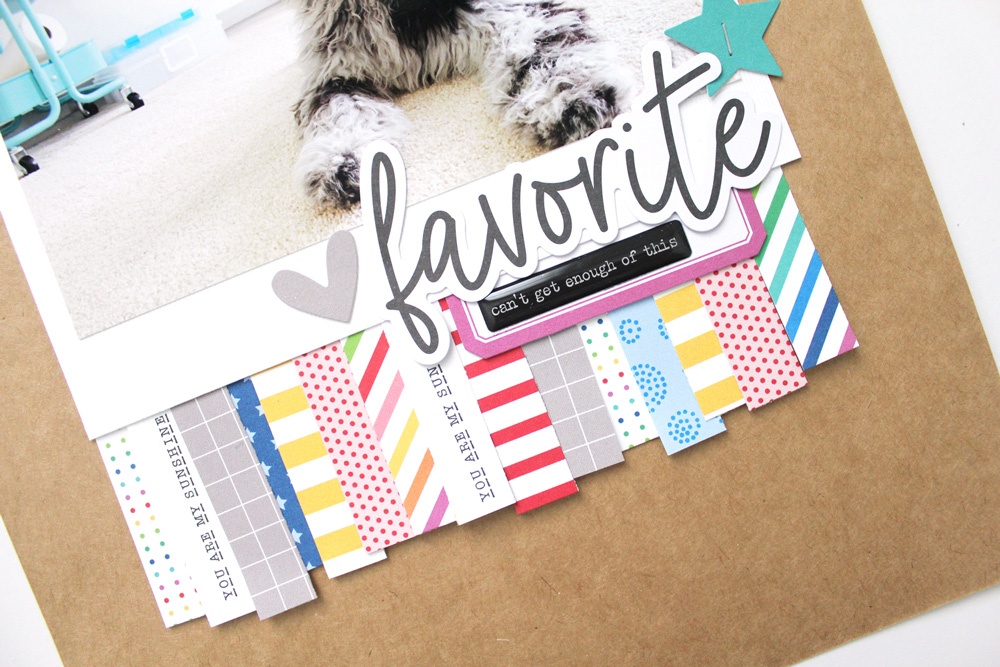
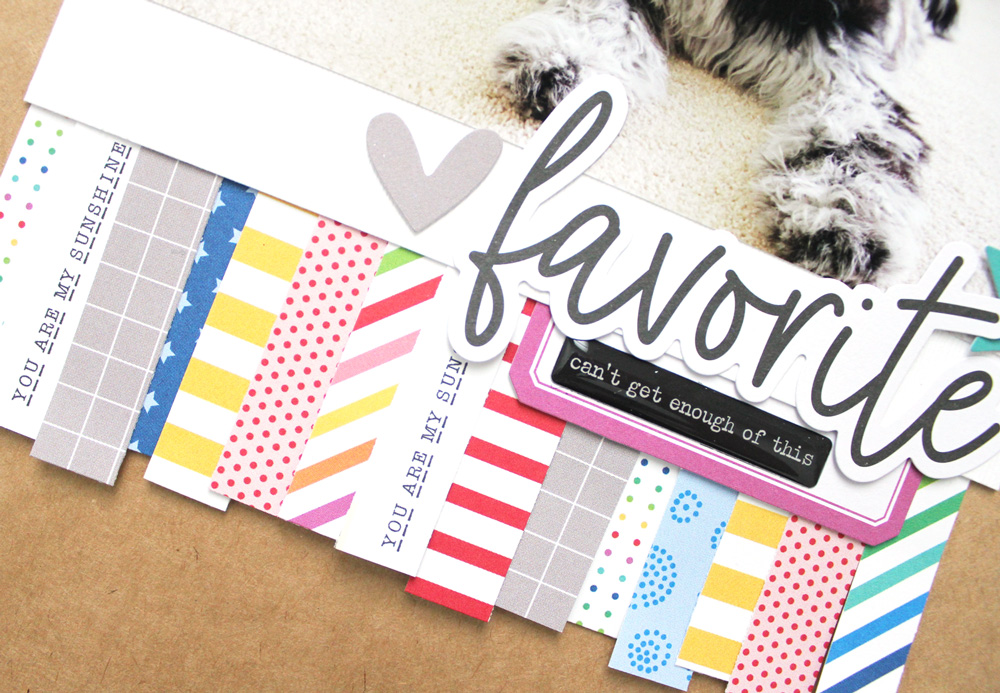
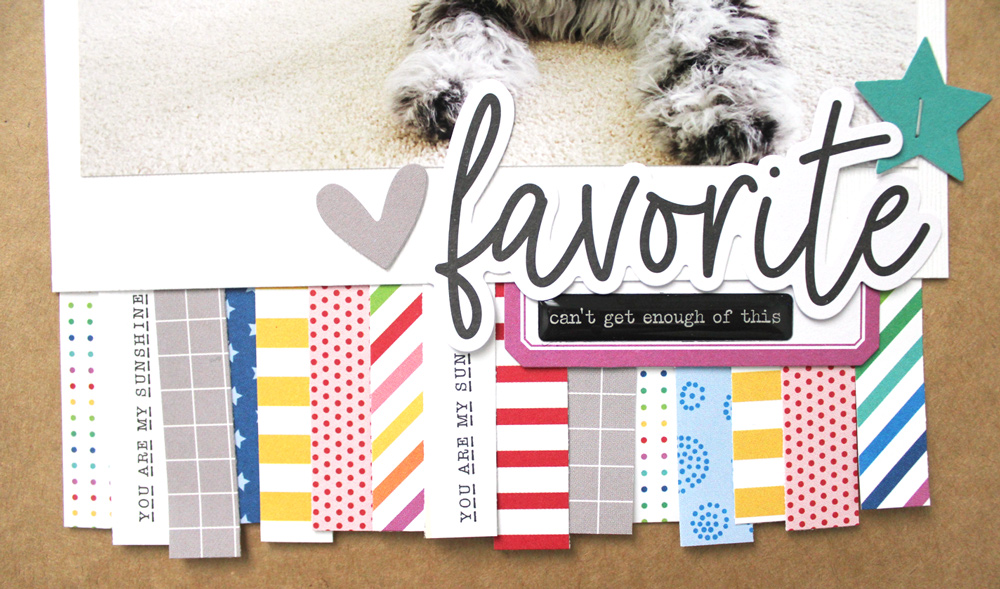
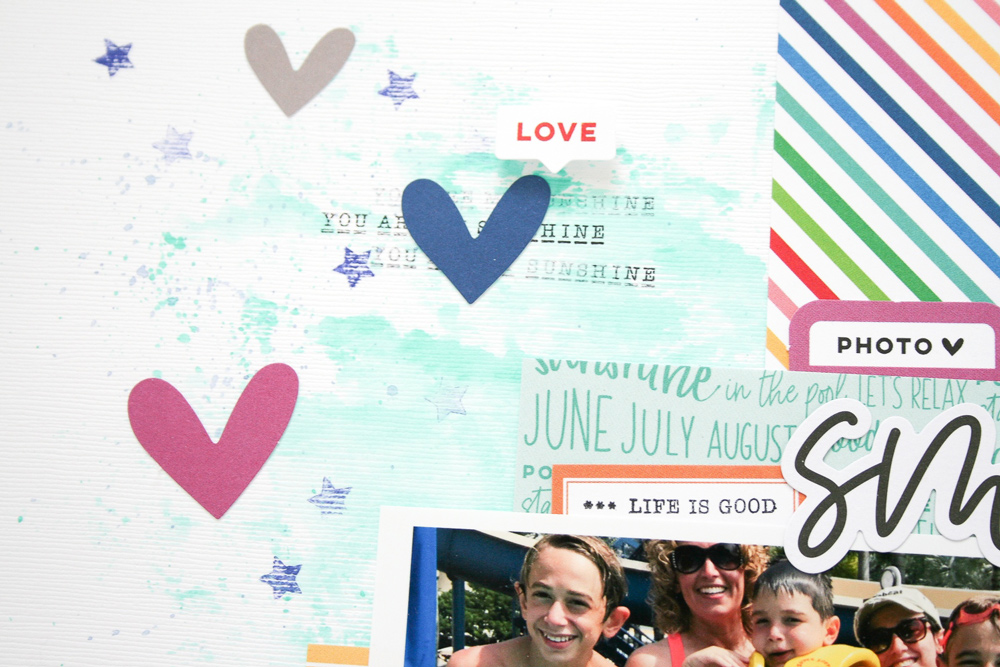
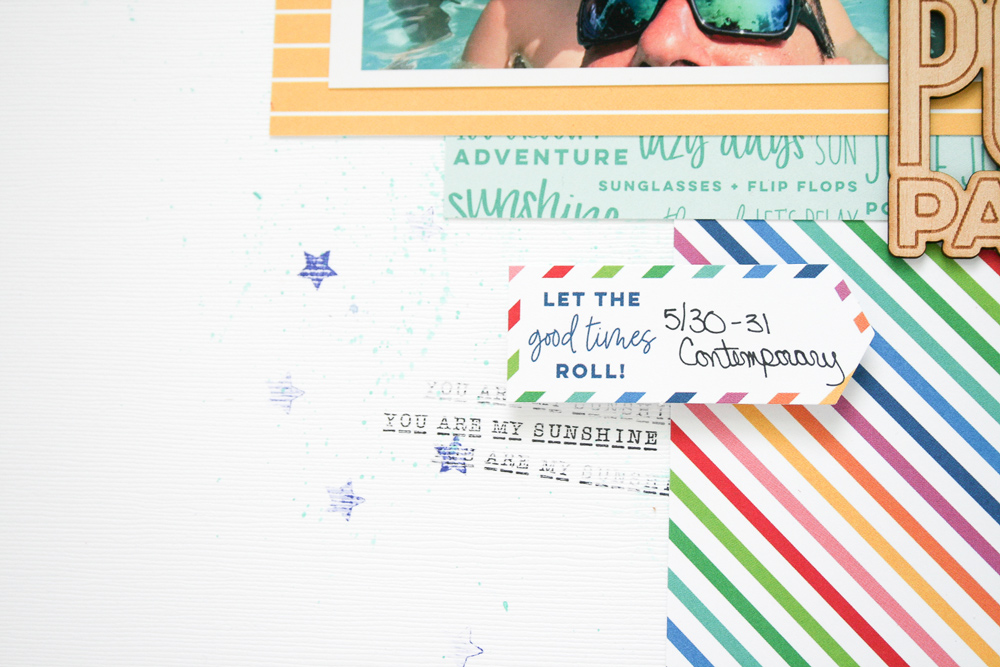
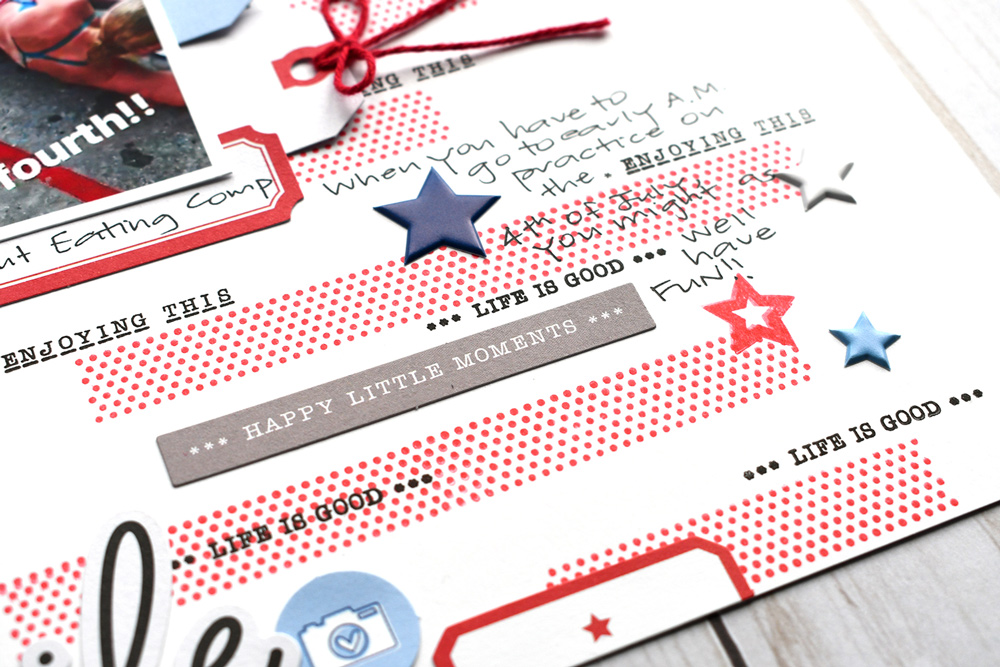
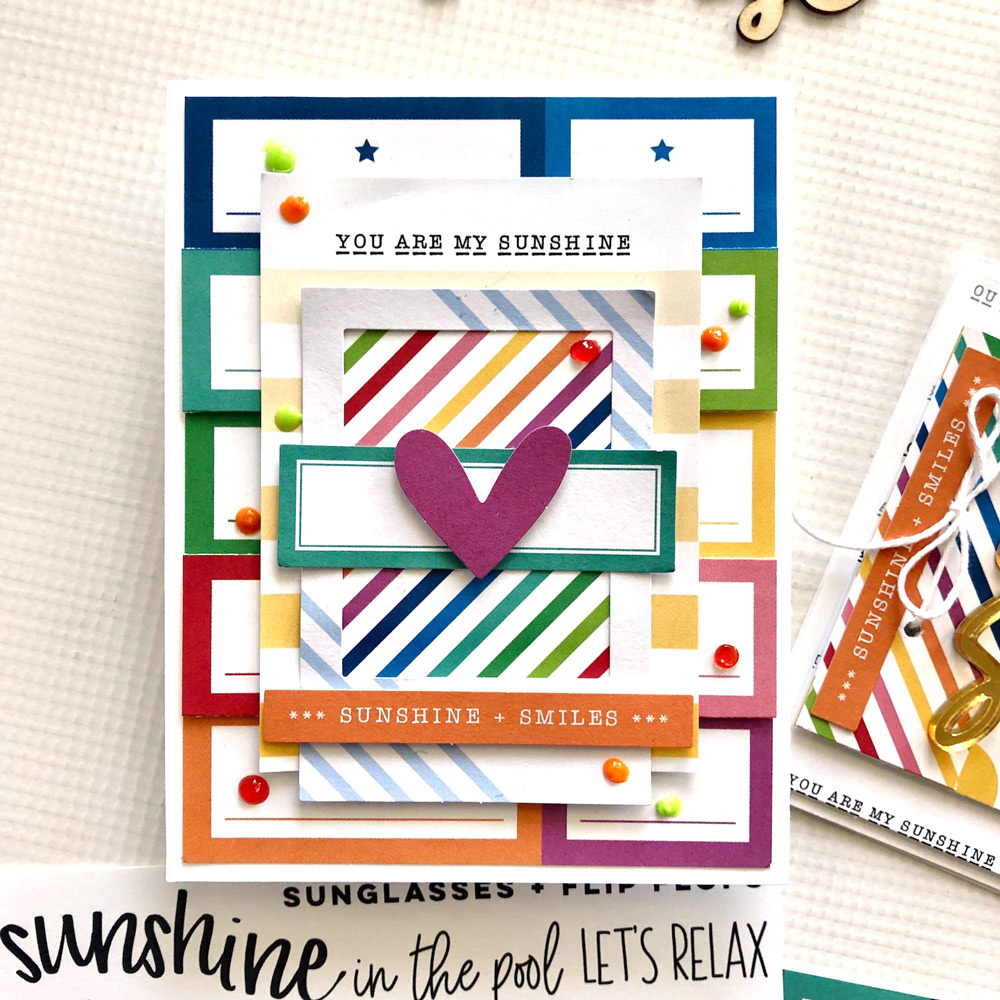
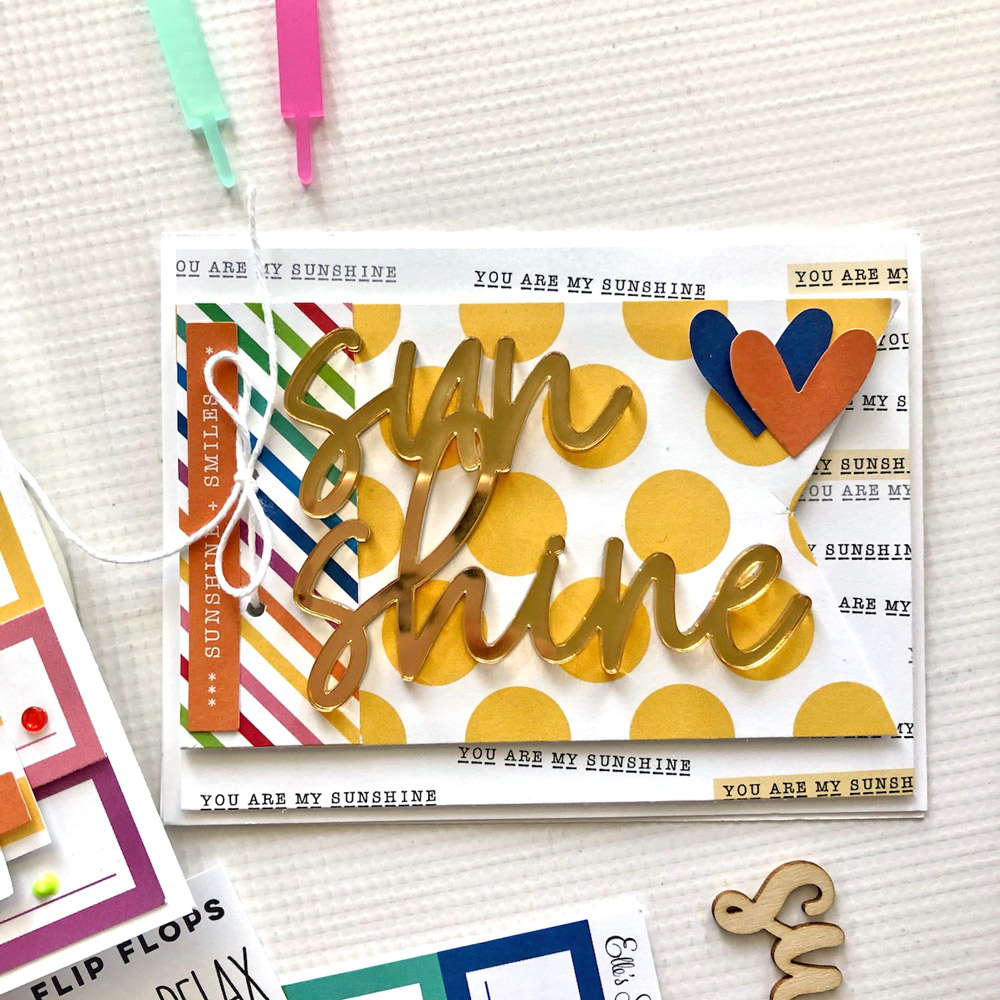
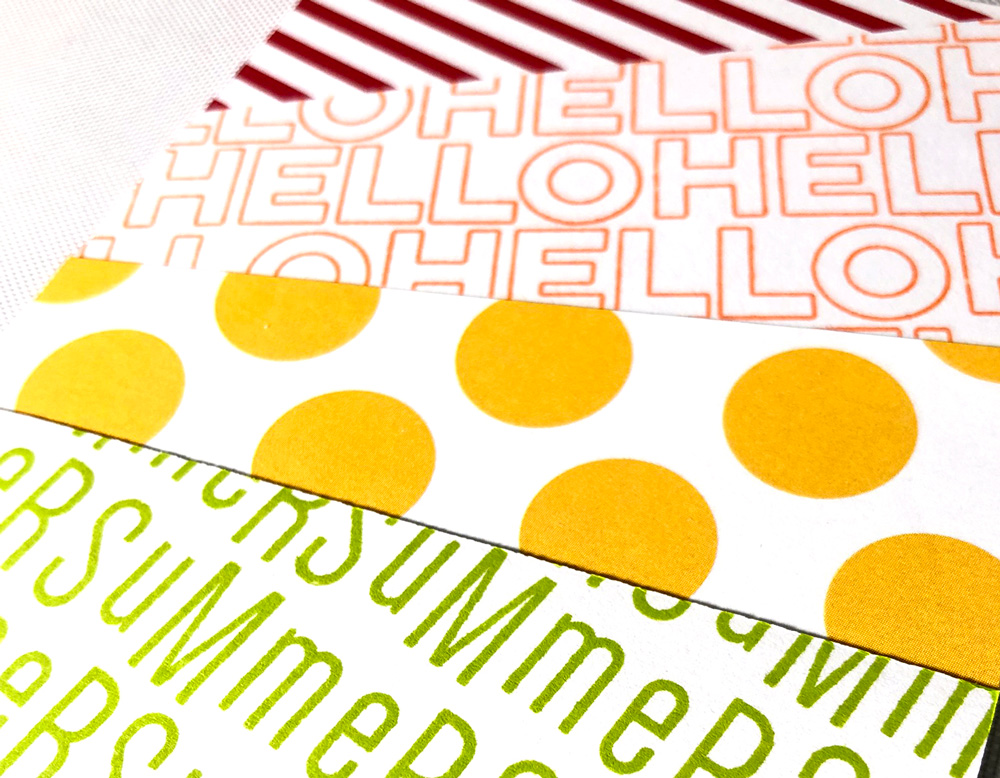
The bright, colorful Large Acrylic Popsicles were the starting point for this project. To create the bursts of colored paper on the left side of the layout, I used a combination of patterns from the Sunshine 6 x 6 Paper Stack as well as the Title Builder and Jane Alphabet Stamps. First, I used orange ink and stamped the “hello” sentiment from the Title Builder Stamp onto a piece of white cardstock until the background was full. Next, I followed the same steps and stamped “summer” using the Jane Alphabet Stamp and green ink.

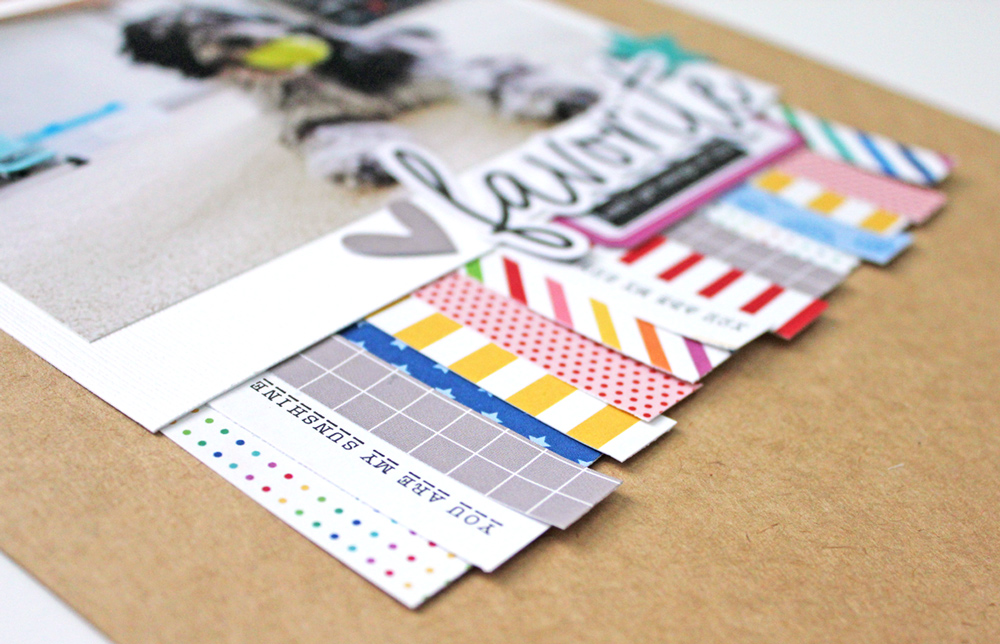
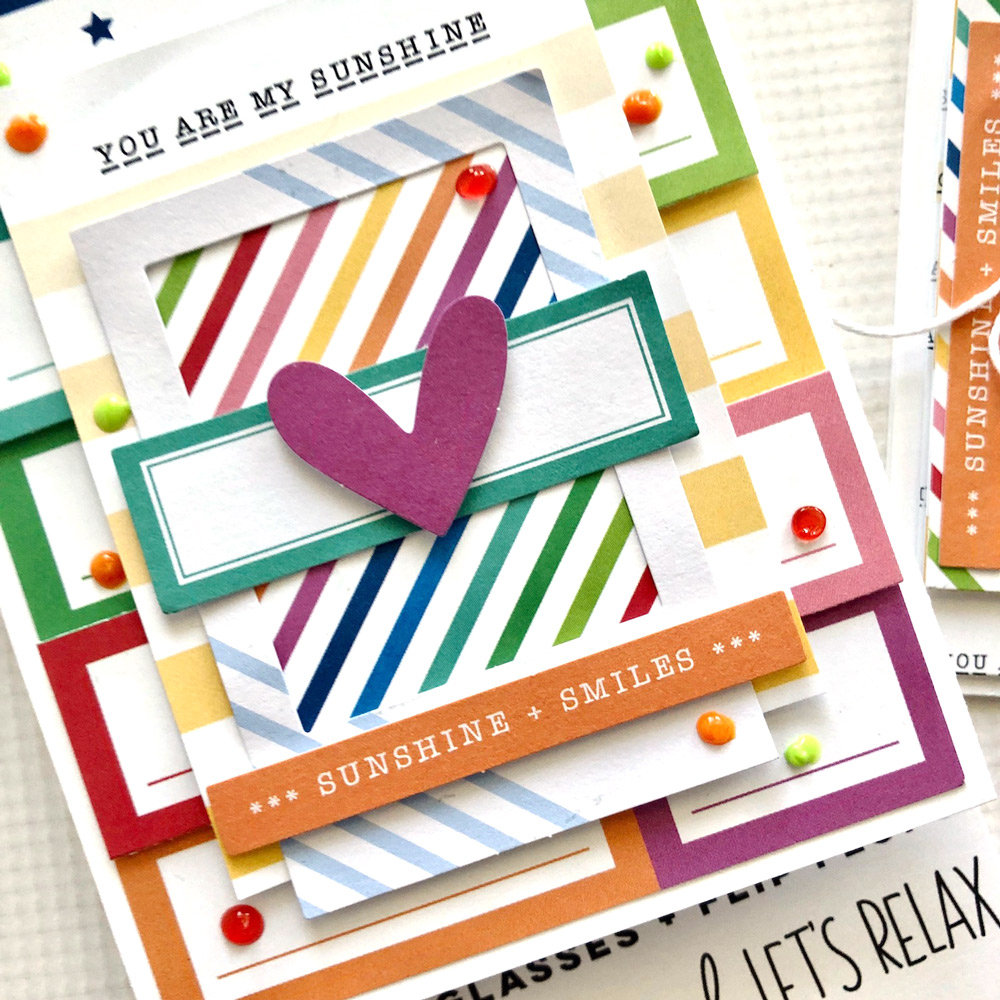
The patterned and stamped papers were placed on a piece of cardstock that was cut to fit my traveler’s notebook. Once I had them positioned where I wanted, I machine stitched each piece in place to give the background more texture.

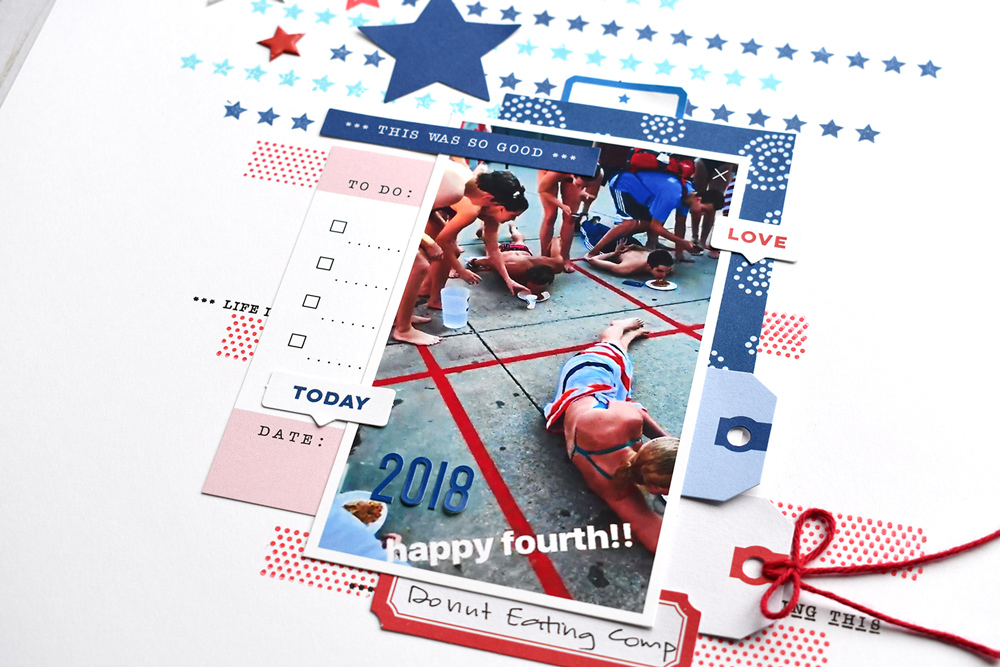
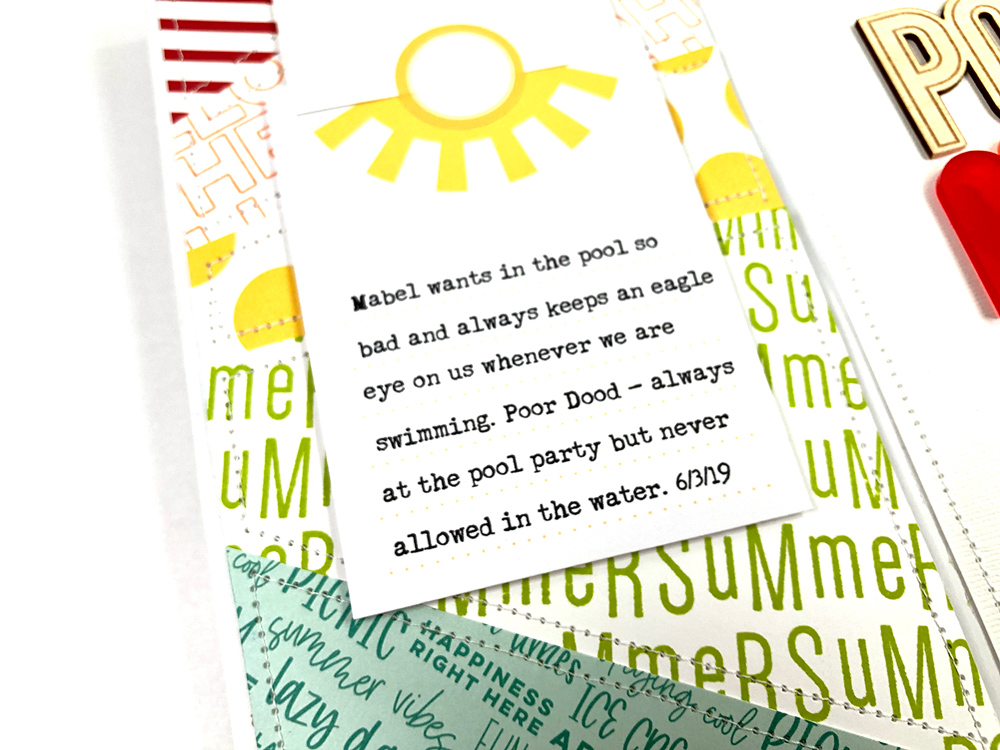
To keep the layout clean, I used a journaling tag from the Happiness Printables and placed it behind the photo of Mabel.

When first looking at the photo, you don’t notice that it is attached to the journaling tag using one of the July Blank Label Stickers. When the photo is lifted, the sticker holds it in place and looks as if it’s part of the sun on the card. Admittedly, that was a happy accident!

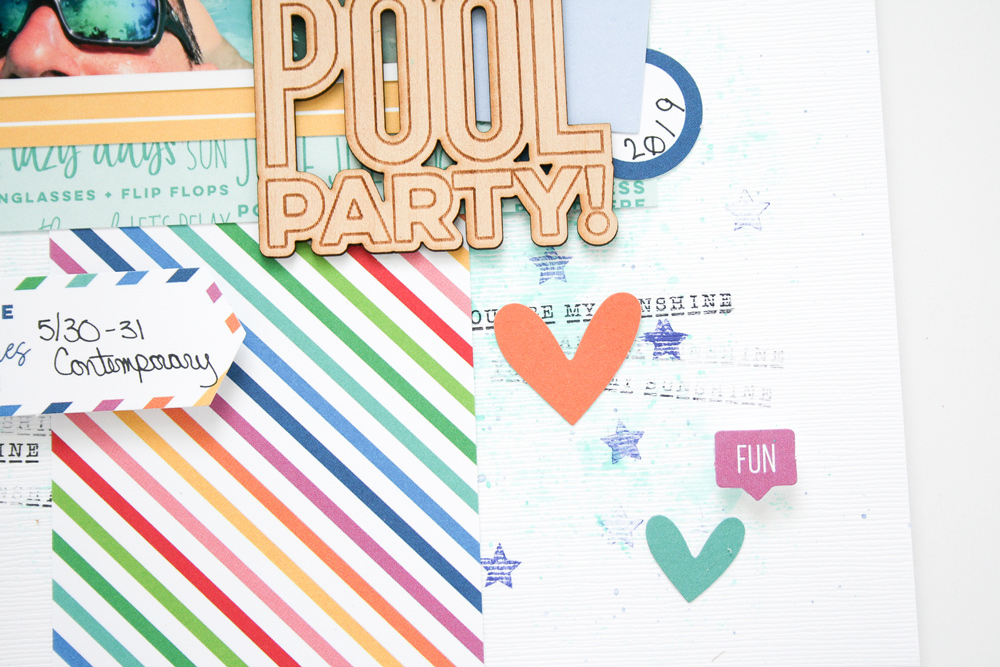
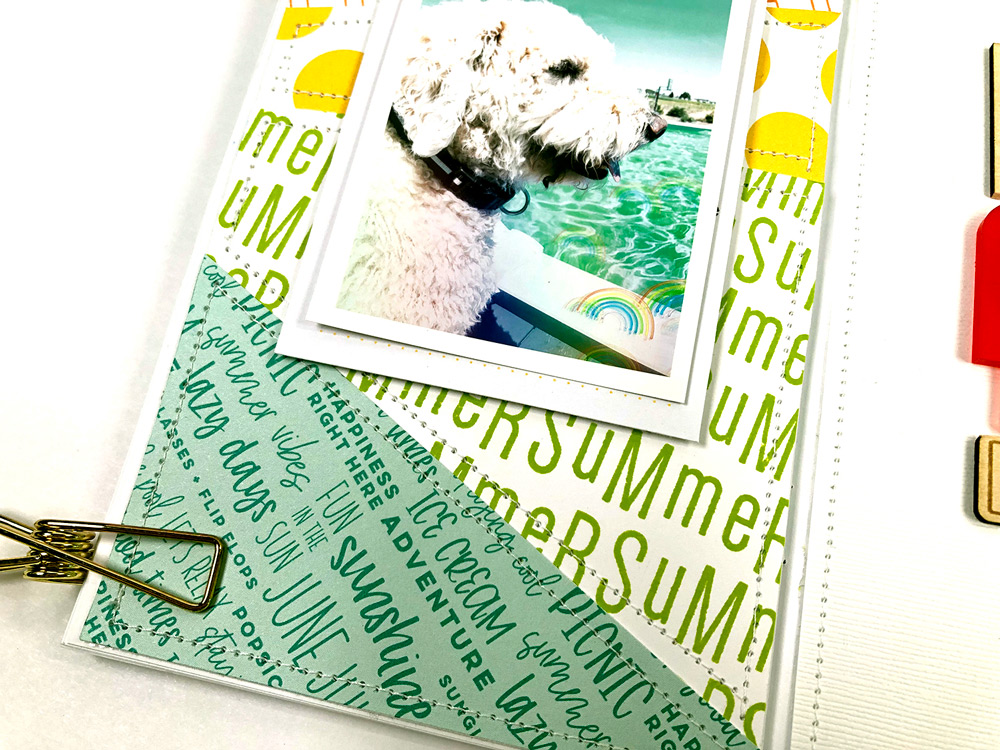
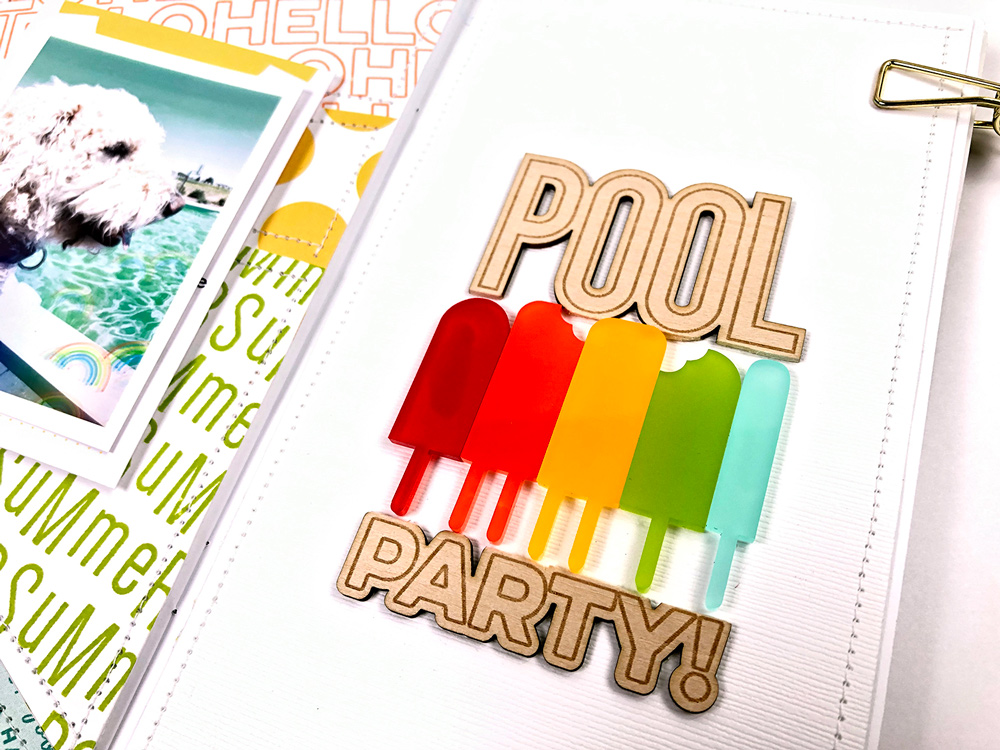
On the right side of the layout, I machine stitched around the border of white cardstock to give it texture and tie it into the left side. About this time, I noticed the Pool Party Wood Veneer was no longer on my table—sadly it was under my foot where I’d just stepped on it and broken it in half. When life gives you lemons . . . you sand the rough edges of your broken wood veneer and make it work. 

I have to admit that I was pretty disappointed when I broke the wood veneer, but I am actually pleased with how it turned out. The neutral wood with the bright Large Acrylic Popsicles is stunning on the white background.

The July 2019 Kit and add-ons are so much fun and can be used in so many ways: on cards, in traveler’s notebooks, and larger layouts. I hope you’ve been inspired to get creative, and work through those crafting accidents!

Sunshine In A Stack with Kristina Proffitt

How many of y’all are just oooohing and ahhhhing over that super cute Sunshine 6 x 6 Paper Stack? I know that I am…STILL! I just love patterned paper and I love how great the 6 x 6 size is to use in so many projects. It’s perfect for cardmaking, pocket pages and layouts! LOVE! Today I’m going to show you a very simple way to utilize the amazing paper in this paper pack—and a bonus—it’s always a great way to use all of the scraps up that you might have, too! 

I’ve been wanting to get this photo of my dog Marlie in my album and so I decided that spotlighting it as a 8.5″ x 11″ layout would be perfect. I printed out the photo to 4″ x 6″ and then put a piece of white cardstock behind it to mimic a polaroid picture look. 

Supplies | Shine Die Cuts, July Blank Label Stickers, Everyday Goodness Epoxy StickersSunshine 6 x 6 Paper Stack

I chose to use a kraft cardstock background for the entire layout because, honestly, I’m secretly wanting the kraft cardstock to make a comeback (ha!) and I think it just makes the white and the colors/patterns in the paper POP! 

All I simply did was cut strips of the patterned paper from the Sunshine 6 x 6 Paper Stack and adhered them in a jumbled way underneath the white cardstock of my photo. I made them all the same width, but you could also choose to use different widths. 

I did make sure that I scattered the lengths of each piece to give it more depth. I just love how it turned out. It’s a great burst of color and pattern! 

I adhered a few of the Shine Die Cuts around the photo and then used some labels and a couple of the Everyday Goodness Epoxy Stickers

As you can see, I didn’t adhere the strips all the way to the cardstock—just the tops so that there is a bit more dimension to the layout. It’s got a sweet, whimsical feel to it. 

Snag this beautiful Sunshine 6 x 6 Paper Stack while supplies last—the uses for it are endless and it’s just SOOOO pretty! You’ll be pulling out this paper for all sorts of projects, and trust me, it’s named perfectly because it’s like sunshine on your projects: so bright and fun! This photo isn’t the only thing making me smile right now, these papers are too!

Show us how you’re using the patterns from your Sunshine 6 x 6 Paper Stack in your projects by sharing in our Elle’s Studio Facebook Group, or on Instagram using the hashtag #EllesStudio!

Pool Party Fun with Wendy Antenucci

You’ve probably enjoyed some warm summer days in the sunshine lately, and our July Kit and add-ons are in the shop to help you document them! Wendy Antenucci is with us today to share a new layout that records some pool party fun, and we know it will make you want to “splash out” and try one of the beautiful techniques that she used! Let’s take a look!

Hello everyone! It’s Wendy here today with a layout using the July goodies—oh they are so right up my alley!  Here in Florida we do a LOT of swimming, so I decided to document one of our swimming outings.

Supplies | July 2019 Kit, Shine Die Cuts, Pool Party Wood Veneer, Sunshine 6×6 Paper Stack, You Are My Sunshine Stamp

We have several of these identical pictures from previous summers, so I was excited to snap another one. To really make my photo shine I chose one 4″ x 6″ photo. I always start my layouts with a photo block, which includes my photo and some matting. Here I used the Sunshine 6×6 Paper Stack and some of the tags from the July 2019 Kit.  

Often my title is a part of my photo block, and today’s title was created with the Pool Party Wood Veneer, which I also matted on a tag from the July 2019 Kit. I chose to use some ink splatters behind my photo block to further the pool theme.  The scattered hearts, splatters, and stamping furthered my theme by adding the splash factor!

I love to tuck little tags here and there, not to grab your attention, but when your eyes do land on those areas you are able to see more pieces of the story.  The smile die-cut word was a perfect addition from the Shine Die Cuts, as it is often difficult to get eight of us smiling (or at least looking decent) at the same time!

Finally, a spot to record the details is always a necessity on my pages. It is amazing how easily those moments can be forgotten when they seem so precious at the time! The striped paper from the Sunshine 6×6 Paper Stack that ran vertically through my page added an anchor to my picture, a touch of fun and the perfect colors for our summer swim party!  Thanks for joining me today, don’t forget to tell your story and add in those details.

July Design Team Inspiration: Volume Three

Hey friends! We’re back to share the last round of design team inspiration with you using the July Kit and add-ons! If you need that boost to pull out your kit to create today, we know these projects will provide that inspiration for you! Let’s take a look!

May 2019 pocket page spread by Wendy Antenucci – supplies used | July 2019 KitShine Die CutsPuffy Star Stickers, Large Acrylic Popsicles, You Are My Sunshine StampLarge Jane Alphabet Stamp – Solid

Pool Party by Daniela – supplies used | July 2019 KitShine Die CutsPuffy Star Stickers, Pool Party Wood Veneer, Sunshine 6 x 6 Paper StackYou Are My Sunshine StampMini Dated Stamp

Sunshine Today traveler’s notebook spread by Patricia Roebuck – supplies used | July 2019 KitPuffy Star Stickers, 4th of July Puffy Stickers, Sunshine Gold Acrylic, Large Acrylic PopsiclesSunshine 6 x 6 Paper StackYou Are My Sunshine StampMini Dated Stamp

Down by the Seashore by Melissa Mann – supplies used | July 2019 KitJuly 2019 Digital Cut FilePuffy Star Stickers, Teal Puffy Alphabet Stickers, Typewriter Keys Puffy Alphabet StickersSunshine 6 x 6 Paper StackYou Are My Sunshine Stamp, Large Jane Alphabet Stamp – Polka Dot, Large Jane Alphabet Metal DieNoteworthy 12″ x 12″ Paper Collection

We Remember by Kristina Proffitt – supplies used | July 2019 Kit, Shine Die Cuts, 4th of July Journaling Tags, 4th of July Puffy Stickers, Mini Dated Stamp

Pool Party by Tracey Fox – supplies used | July 2019 Kit, Puffy Star Stickers, Pool Party Wood Veneer, Sunshine 6 x 6 Paper StackYou Are My Sunshine StampMini Dated Stamp

The Scrap Gals by Jennifer McMurtrey – supplies used | July 2019 Kit, July Labels, Shine Die Cuts, Puffy Star Stickers, Sunshine 6 x 6 Paper StackYou Are My Sunshine Stamp, Large Jane Alphabet Stamp – StripesMini Dated Stamp, Large Jane Alphabet Metal Die

Awesome Time by Suzanna Lee – supplies used | July 2019 KitShine Die CutsPuffy Star Stickers, Lime Green Puffy Alphabet Stickers, Cerulean Blue Puffy Alphabet StickersSunshine 6 x 6 Paper Stack, You Are My Sunshine Stamp, Noteworthy 12″ x 12″ Paper Collection

There is so much more inspiration to come your way daily here on the blog, so be sure to stop back to get more ideas on how to make the most of your July Kit and extras!

Going For a Stamped Background with Suzanna Lee

Hiya scrappy peeps! It’s Suzanna here today! What are your feelings about stamps and stamping on your projects? I find that there tend to be two camps: you are either a stamper and aren’t phased by stamping on projects or you are terrified that you might horrifically ruin the project you have put a ton of time and effort into. Which are you? I’m hoping that by the end of this blog post, you will find that you TOO can stamp on your projects and that, truly, it is DO-ABLE, especially with Elle’s Studio stamps. They are so versatile and user friendly!

Supplies | July 2019 Kit, Shine Die Cuts, 4th of July Puffy Stickers, You Are My Sunshine Stamp

The whole background of this layout was created with stamps from the You Are My Sunshine Stamp which was released this month. Just stamps! It’s simple. But it’s incredibly effective, don’t you think?

I used two shades of blue ink with the line of stars at the top, left of the layout. As I moved down the page, I also tried to move gradually across the page, creating a diagonal line from top left to bottom right. The idea was to mimic the American flag. The red and white stripes are the polka dotted stamp, stamped twice, side by side. I used a ruler to help keep things lined up, you can’t see the seams on the bottom two rows. There is a definite learning curve to the process, which you can see in the upper stripes. I knew I was going to cover these with the photo, so I wasn’t worried.

My original intent has been to keep the elements on the top left of the layout blue, and those on the bottom right red. However, I really preferred having the sprinkling of both stamped and puffy stars (from the 4th of July Puffy Stickers) as a mix. The brightness of intermingled color moves you eye along that diagonal line better.

I also stamped “enjoying this” and “life is good” from the You Are My Sunshine Stamp amongst the red and white stripes. This added a series of subtitles to the page.

Bits and pieces from the July 2019 Kit and the Shine Die Cuts surround the photo. This is a combo swimming and 4th of July layout in that it’s a photo of my son in a donut eating contest on the morning of July 4th. When you have to get up early on a holiday and go to practice, you better believe there needs to be fun involved or these teenagers will have no part of it!

So? What do you think? Do you think you can do it; stamp on your project? If it’s the background and you’re stamping first, it’s completely doable! Go for it! I believe in you! Thanks for stopping in today!

Show us how you are using our stamps in your papercrafting projects! Share on Instagram using the hashtag #EllesStudio! You could win a gift certificate to the shop and be featured here on our blog!

Best Picture Ever Documented with Daniela

Our new Title Builder Vol. 3 products can be combined with any products from our included in our latest July release to create something truly special, and design team member Daniela is with us to share how easily it can be done, on a funny, colorful layout. Let’s see what she created!

Hi friends! It’s Daniela with you to share a new layout today! I had the pleasure to play with the new Title Builder products and I can tell you, this set is so, so fun! Again, we not only have the best words and phrases in this set, but also wood veneers and acrylics available in the Title Builder Vol. 3 Bundle. I love the many possibilities that this bundle offers because you can combine all the words in so many different ways!

For my layout I picked a picture that always makes me laugh. It shows my daughter after getting home from the New Year’s Eve party we had at our friends’ house. We got home at about 2 am. My daughter has never been up so late before, and she had such a good time and was so proud that she managed to not fall asleep before the turn of the year. She even stayed awake on the drive home. When we got home, I just took off me shoes and turned around to see my daughter sleeping on the stairs. The little pea must have been so exhausted that she fell asleep right away! I took a picture of her before taking her to bed. This is such a fun memory and the picture is one of my favorites, so I wanted to highlight it on a layout. This is how it turned out:

Supplies | Title Builder Vol. 3 Bundle, July 2019 Kit, Magical Memories Acetate Die Cuts, Magical Memories Acrylic Hearts and Stars, Pink Puffy Alphabet Stickers, Sunshine 6 x 6 Paper Stack, Noteworthy 12″ x 12″ Paper Collection

I created a big title that covers the middle of the cardstock in a line with the center of this line lined up with the photo mat. I love combining different textures, so I used the Title Builder Vol. 3 Stamp, the Acrylic and the Wood Veneer (all available in the Bundle) together and added some shiny acrylics and Acetate Die Cuts from the Magical Memories collection.

Some color splashes here and there and black drops attenuate the strict composition. To have a balanced page, I only used purple/pink and turquoise pieces for this page. I also stamped “good life” from the Title Builder Vol. 3 Stamp in the same tone of purple as the little tab that is placed under the picture.

The main elements on this page are those created with the Title Builder Vol. 3 Bundle. I only used a small amount of paper: one tag from the July Kit, and a paper heart fussy cut from another tag. I also added stripes cut from the Sunshine 6 x 6 Paper Stack and the manufacturer strip from one of the papers in the Noteworthy 12″ x 12″ Paper Collection.

I hope you like the way I used the newest products in the Elle’s Studio shop and I can’t wait to spot exciting titles created with the Title Builder Vol. 3 Bundle on social media! Have a great day!

July Design Team Inspiration: Volume Two

Hello Elle’s Studio fans! We hope that you have enjoyed the design team blog posts this week using the July Kit and add-ons, and today we have a fresh round of inspiring projects using our newest products all in one place for you! Let’s take a look at their layouts, pocket pages and traveler’s notebooks!

Summer Favorite by Meghann Andrew – supplies used | July 2019 KitJuly 2019 Digital Cut File, July Labels, Shine Die CutsPuffy Star Stickers, Large Acrylic PopsiclesSunshine 6 x 6 Paper StackYou Are My Sunshine Stamp, Title Builder Vol. 3 Stamp, Mini Dated Stamp

May pocket page spread by Steph Grimes – supplies used | July 2019 Kit, Shine Die CutsPink Puffy Alphabet Stickers, White Puffy Alphabet Stickers, Puffy Star Stickers, Puffy Heart Stickers – Spring Mix, Sunshine 6 x 6 Paper StackYou Are My Sunshine Stamp, Magical Memories Stamp, Jane Alphabet Stamp

Yes traveler’s notebook spread by Nathalie Leonelli – supplies used | July 2019 KitShine Die Cuts, Puffy Star StickersSunshine 6 x 6 Paper StackYou Are My Sunshine StampMini Dated Stamp

Pool Party by Mary-Ann Maldonado – supplies used | July 2019 Kit, On This Day In July Journaling TagsJuly Blank Label Stickers, Puffy Star Stickers, 4th of July Puffy Stickers, Large Acrylic PopsiclesPool Party Wood VeneerSunshine 6 x 6 Paper Stack, Noteworthy 12″ x 12″ Paper Collection

July Creative pocket page spread by Sabrina Poole – supplies used | July 2019 Kit, July LabelsShine Die CutsPuffy Star StickersYou Are My Sunshine Stamp

July 4th pocket page spread by Candace Perkins – supplies used | July 2019 Kit, 4th of July Journaling Tags4th of July Puffy Stickers 

July traveler’s notebook spread by Jess Forster – supplies used | July 2019 Kit, On This Day In July Journaling TagsShine Die CutsPuffy Star Stickers, 4th of July Puffy StickersSunshine 6 x 6 Paper StackYou Are My Sunshine Stamp

Stay tuned for one more inspiration post coming your way next week, but until then, you’ll be able to find more ideas using your July Kit and add-ons here on the blog, on our Instagram feed and in our Elle’s Studio Facebook Group!

Fun Times and Magical Memories with Tracey Fox

With all of the colors, patterns and embellishments found in the Magical Memories collection, it’s easy to coordinate your paper craft project to your favorite Disney character, which is exactly what Tracey Fox did on the layout she’s sharing with us today! Let’s take a look!

As a big theme park fan and Disney lover, I just adore the Magical Memories collection so much! I used lots of the items from the collection to create this page about meeting Donald Duck on my latest trip to Disney’s Hollywood Studios.

Supplies | Magical Memories Journaling Tags, Magical Memories Phrase Stickers, Magical Memories Acetate Die Cuts, Magical Memories Puffy Stickers, Magical Memories So Much Fun Wood Veneers, Magical Memories Acrylic Hearts and Stars, Magical Memories Fun Times Acrylic, Magical Memories Stamp, Cerulean Blue Puffy Alphabet Stickers, Black Puffy Alphabet Stickers, Noteworthy 12″ x 12″ Paper Collection

I laid out the initial design for my layout by putting three small photos of our meet-and-greet with Donald together to resemble a photo strip, adding a larger photo to the side. I knew right away that I wanted to use the collection’s Fun Times Acrylic, and I used it along with the the Cerulean Blue and Black Puffy Alphabet Stickers to build my title above and below the larger photo. A couple of the colorful Magical Memories Acetate Die Cuts worked perfectly behind the white acrylic piece to make sure it was readable against the my white cardstock background.

My favorite part of this layout design is the curve of embellishments I added to encircle my photos. There are so many fun embellishments in the Magical Memories collection that I had no trouble selecting an array of varying blue, yellow, and wood items from the Magical Memories Puffy Stickers, Acetate Die Cuts, Acrylic Hearts and Stars, and the So Much Fun Wood Veneers. I loved using the wood veneer shapes to build a Mickey head on my page, because I’m making sure to add a “hidden” Mickey on every layout in my Disney album. The teeny, tiny asterisk stamps from the Magical Memories Stamp provided a lovely touch of “pixie dust” around the circle.  

I balanced out the other side of the layout with some 12 inch strips of coordinating papers from the Noteworthy 12″ x 12″ Paper Collection, a cute scallop acetate piece, and some sentiment stamps from the Magical Memories Stamp. The final touch on the layout was the most perfect phrase from the Magical Memories Phrase Stickers that says “hugs for my favorite character!” As much as I love the Disney characters, Donald really is my favorite, so I am so glad that this collection so perfectly helped me scrap these great photos.

Thanks for stopping by today and for checking out my layout! What magical memories are you documenting using the awesome Magical Memories collection? I hope you’ll share them in the Elle’s Studio Facebook Group so we can take a look!

Sunshine Greeting Cards with Mary-Ann Maldonado

You don’t always need a reason to send a card. Just receiving something handmade in the mail is enough to brighten someone’s day, and the cards that Mary-Ann Maldonado is sharing with us today are sure to do just that! Let’s take a look!

Hello Elle’s Studio fans! Man, do I love making cards; especially with the goodies from the monthly kit and extras. I typically make several with my left overs each month to mail. I adore mixing colors and creating layers with different patterned papers and topping them with fun embellishment!

Today I’m sharing two different cards created with the SAME July 2019 Kit and extras, but they turned out completely DIFFERENT!  

Supplies | “You are my sunshine” card: July 2019 Kit, July LabelsShine Die Cuts, Sunshine 6 x 6 Paper Stack; “Sunshine” card: July 2019 Kit, Shine Die Cuts, Sunshine 6 x 6 Paper Stack, Sunshine Gold Acrylic


I have been trying to use the monthly labels differently each month. Last month, I added them as they are behind my photo as a base. On this card using the July Labels, I cut the sheet in rows. I backed every other color strip with foam for dimension for a different, fun and colorful way to use the labels!

Color color color! Pattern pattern pattern! Mix it up! It all goes together if you just give it a try!  I don’t think there is a project I create that doesn’t have color or foam tape for dimension.  I also used foam behind the sentiment from the Shine Die Cuts.

For this fun card, I mixed colors and patterns again. The 4″ x 6″ journaling tags in the July 2019 Kit create the perfect base to a card. On this card, I trimmed down the yellow polka dot journaling tag to create a banner.

Apparently my theme for these cards is sunshine! I added the Sunshine Gold Acrylic with a thin line of wet glue. What more does a project need?  Just a touch of patterned paper, layered heart die cuts and a big ‘ole’ acrylic! Sometimes, when you finish a project, you just need something a little extra.  I decided on a touch of twine. It was too late to wrap it around the banner, so I pierced through the entire front of the card and threaded the twine through, tying it in a bow.

Thanks so much for stopping by and I hope you create some sunshine greetings to make someone’s day with your July Kit and extras!

Patriotic Pockets with Sabrina Poole

Most of us just celebrated the 4th of July, and maybe you have a collection of photos on your phone or DSLR of picnics, patriotic decorations and fireworks! How will you document them? Today Sabrina Poole is with us to share how she documented her holiday, and we know that it will inspire you to use your July Kit and add-ons to do the same! Let’s take a look!

Hey everyone! This is Sabrina and I am so excited to show you my patriotic 4th of July spread, and I hope it inspires you to document your festive holiday photos, too!

Supplies | July 2019 Kit, 4th of July Journaling Tags, Shine Die Cuts, 4th of July Puffy Stickers, You Are My Sunshine Stamp, Everyday Phrases Vol. 2 Stamp

I documented our summer 2018 adventures in a 9″ x 12″ album and I knew that the 4th of July holiday needed a double page spread. I picked out lots of firework photos and also made sure to include photos throughout the day from all the activities. Fireworks photos are easy to come by, but capturing little things from the day are just as important as well—like my daughter jumping for joy with the sparklers, or my husband so happy with his bag of fireworks.

Once I had all my photos printed, I got out the special 4th of July Journaling Tags and 4th of July Puffy Stickers—the foundation for my spread. The first tag I chose was the July 4th 4″ x 6″ tag because that made for a perfect title! I then stamped some black stars from You Are My Sunshine Stamp and added 4th of July Puffy Stickers with one matted on a red label from the Shine Die Cuts.

My next step was to build, or add fun details to my various 3″ x 4″ tags. I added more 4th of July Puffy Stickers, stapled on die cuts from the July Kit, and the Shine Die Cuts and added stamped sentiments. I loved using the various 4th of July themed products to add to my journaling tags. Not only did it make my tags more personalized, but it creates great movement around the spread. 

For my main journaling spot, I used the colorful star label tag from the 4th of July Journaling Tags and documented some favorite parts of the day. I also added a red banner from the 4th of July Puffy Stickers and the “documented” die cut from the July Kit

Overall, this was such an awesome and challenging (in a good way!) spread to put together. I tend to forget to document this holiday, but these new Elle’s Studio products helped make documenting it easy! I hope this project and the Elle’s Studio goodies help you document your 4th of July memories!