Spring is a great time to get out and explore—the weather isn’t too cold or too hot, the grass is getting greener and we’re coming out of our winter hibernation period! Guest designer Shannon Dombkowski is with us to share her third and final project this month, documenting a fun day out at a nearby museum. Whatever the adventure, our March kit and extras can help you document it, as Shannon shows us today! Let’s take a look:
Hello crafty friends! This is Shannon and I’m back with my third and final guest designer project for the month of March. I’m so thankful that I had the opportunity to share my projects with you! I love Elle’s Studio and the products they put out.
We like to do a lot of exploring. Big or small adventures: we like them all! It’s no surprise that the theme of my third project is exploration again. This page documents our trip to the Georgia Sea Turtle Center during a day trip to Jekyll Island in Georgia.
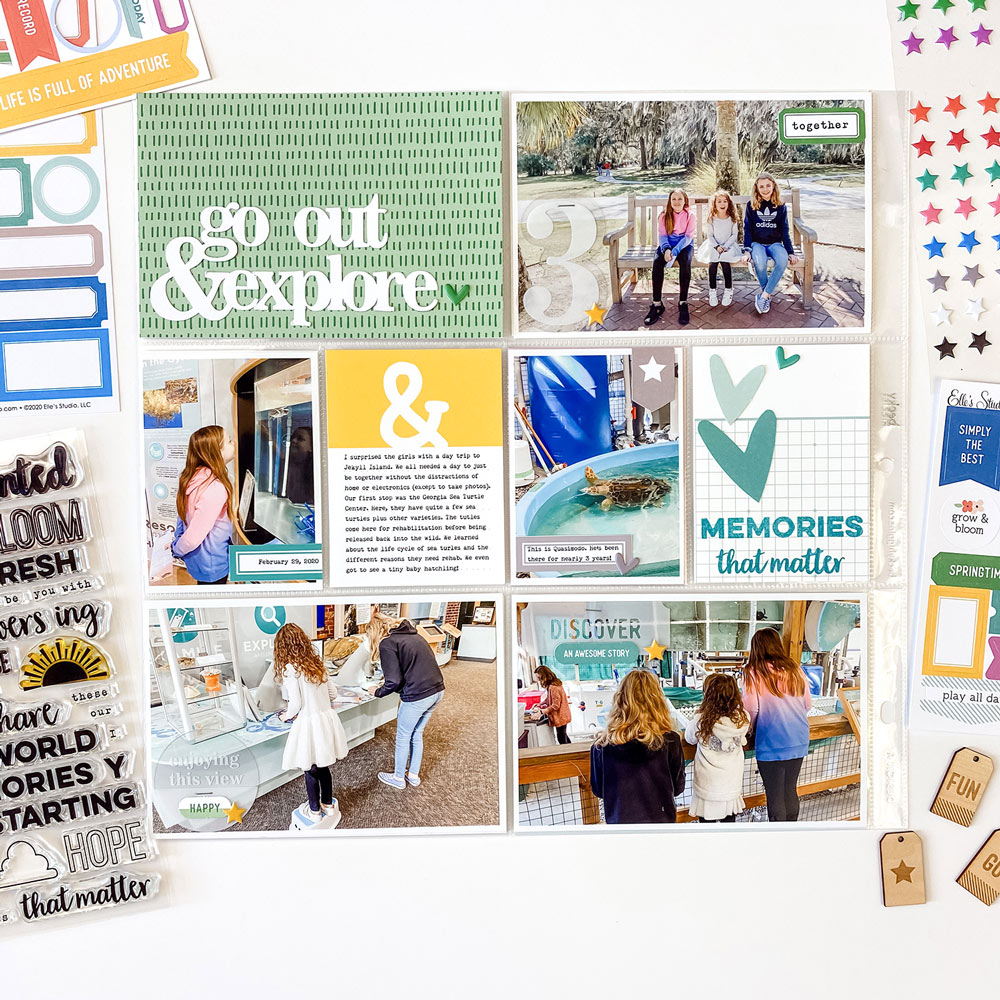
Supplies | March 2020 Kit, March Cut Files, Flourish Printables, Go See Do Acetate Die Cuts, Tiny Shapes and Dots Puffy Stickers, Flourish 6 x 8.5 Paper Stack, Title Builder Vol. 4 Stamp
I created a title for the page using the “go out & explore” die cut from the March Cut Files. I kept the background pattern simple using a piece of patterned paper from the Flourish Paper Stack. I didn’t want it to be too busy, which would have made my title difficult to read. The puffy heart adds a subtle, monochromatic touch.
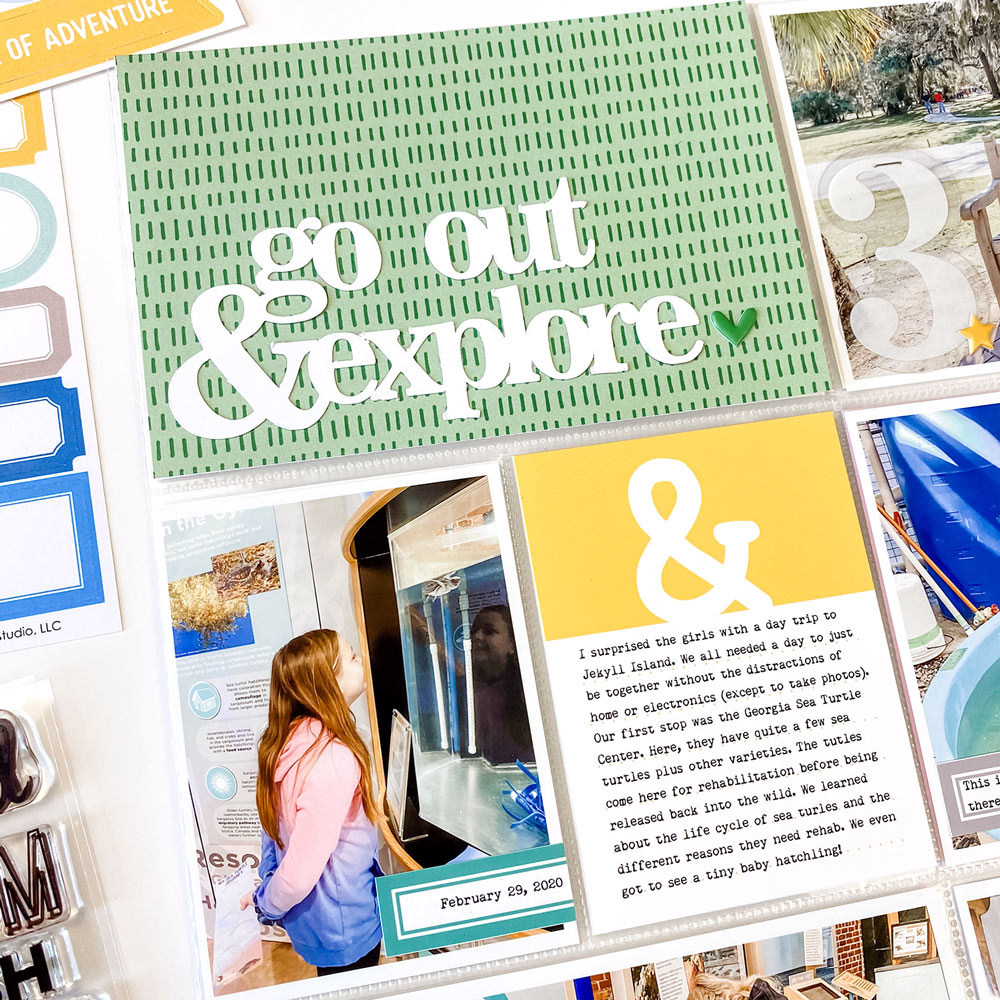
I just love the variety of shapes and phrases in the Go See Do Acetate Die Cuts. They come in a great variety of sizes. Since I used them on my 4″ x 6″ photos, I was able to go with a larger shape. Despite the large size, it doesn’t overwhelm my photo because it’s translucent. I did want to draw the eye to the acetate so I added a die cut from the March 2020 Kit and a Tiny Shapes and Dots Puffy Sticker to each of the pieces around my page.
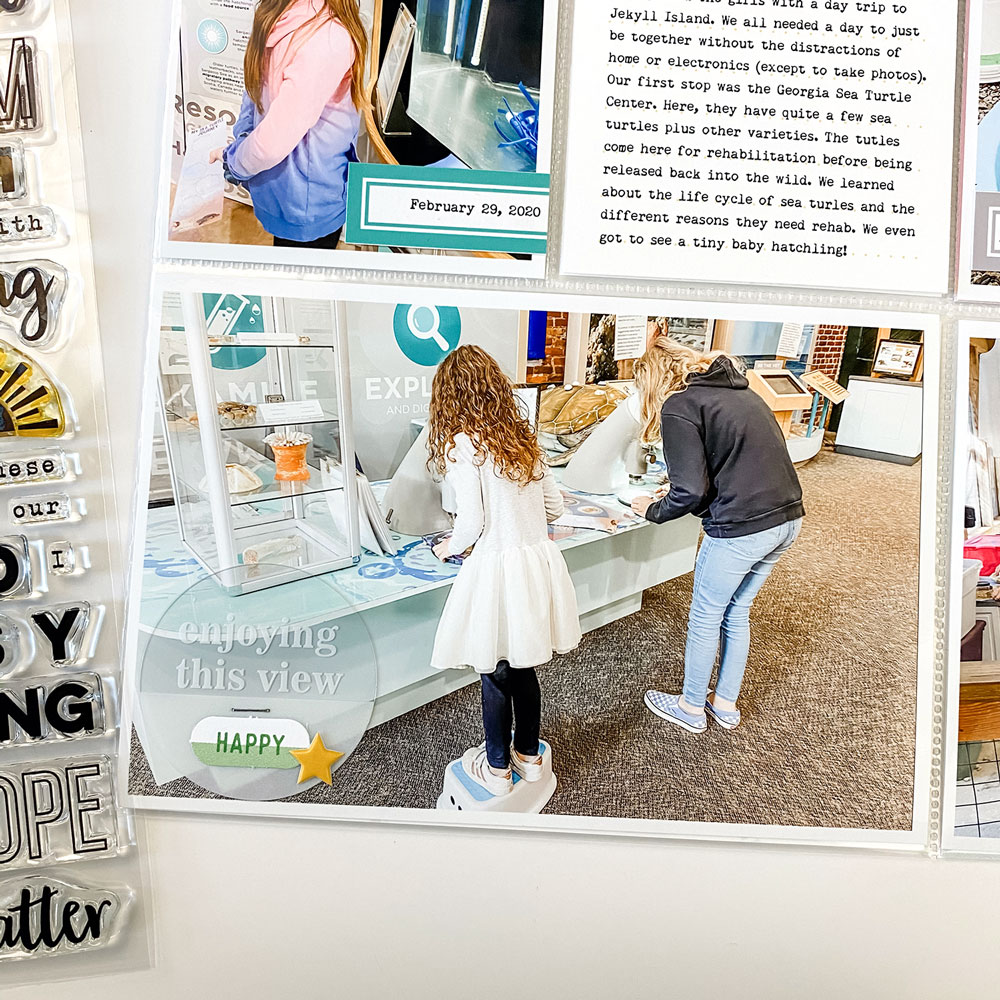
Of course, I had to pull out my Title Builder Vol. 4 Stamp again for this page! This 3″ x 4″ journaling tag is from the Flourish Printables. I used the stamp set, die cuts, and a puffy heart sticker to add my own design to the page. I wanted to make them look like they’re fluttering up out of my sentiment. It leaves plenty of white space, but also acts as a guide for the eye to move around the page.
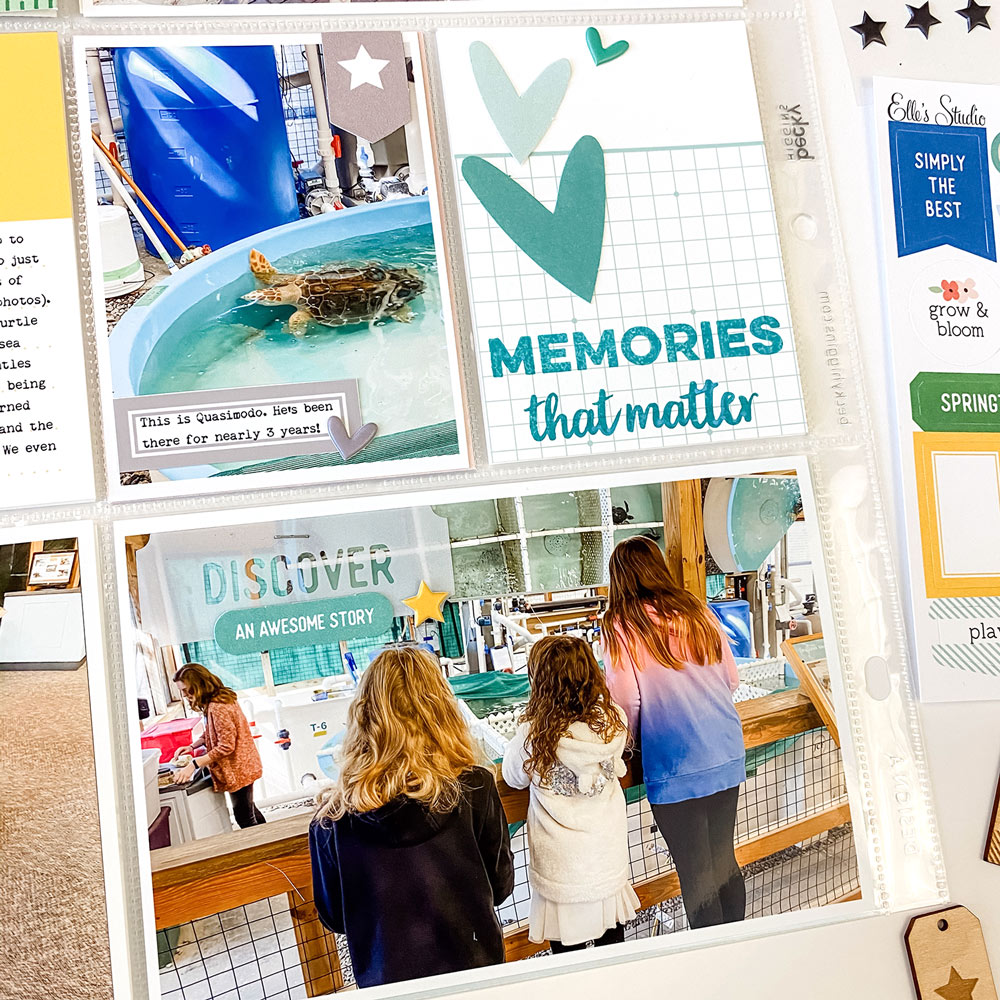
Finally, let’s talk about typing on the journaling tags! Both 3″ x 4″ tags on my page, along with the labels on my photos, are from the Flourish Printables. I pulled the entire PDF into Photoshop so I could add my journaling before printing. The tags and labels that I didn’t use on this page were added to my stash with the rest of the kit. If I have a lot of journaling, as I did on this tag, I like to type it out.
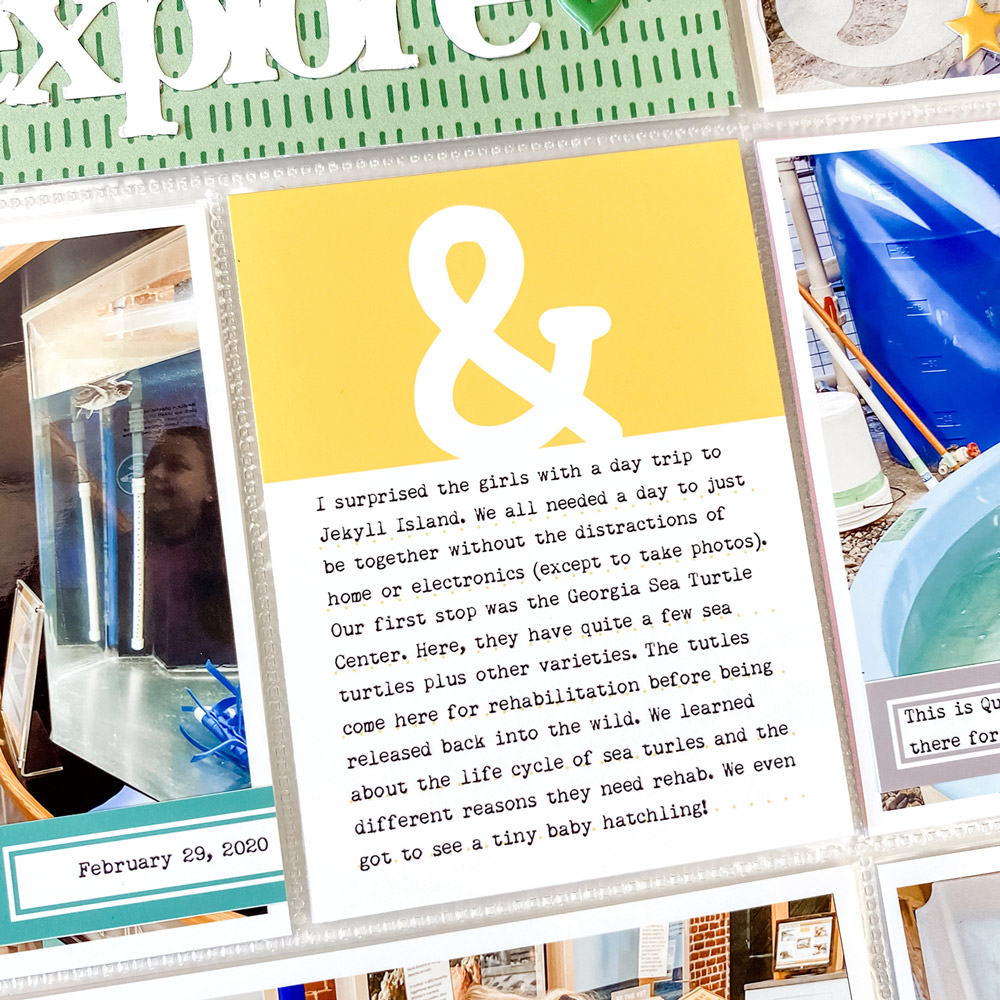
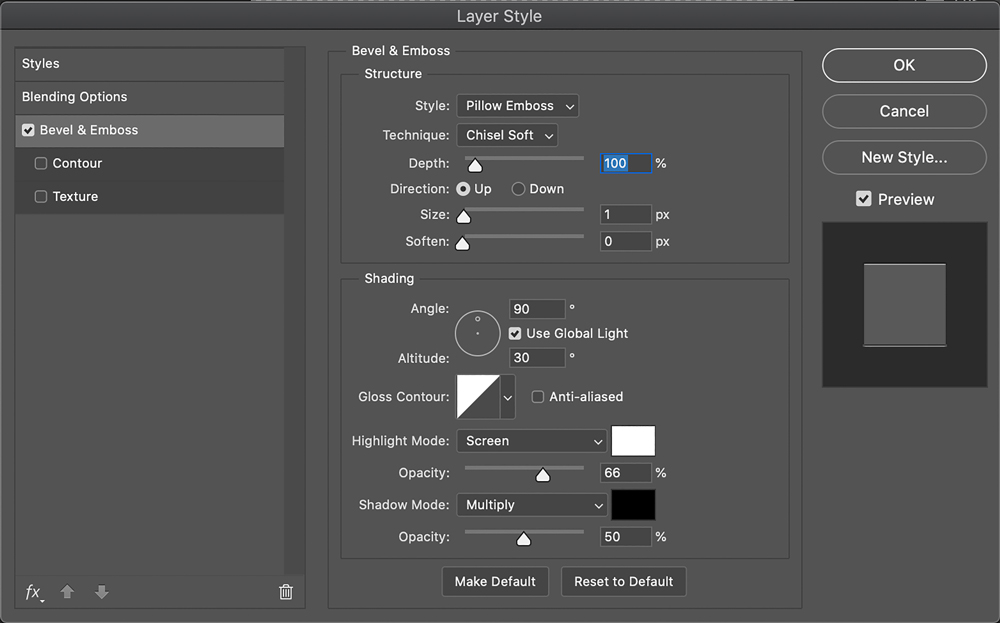
I prefer a typewriter font for my journaling. I also like that it has that kind of embossed or stamped into the page look when it’s printed. It’s subtle, but it’s there. It helps the font have that realistic typewritten look. This is a trick I learned many years ago when I was a digital scrapbooker and I’ve carried it with me to my traditional/hybrid days. Once you’ve typed your journaling, make sure your layer is selected. Then choose Layer —> Layer Style —> Bevel & Emboss. Change the settings to match the screenshot below and you’ll have a slightly embossed look to your journaling!
I hope you’ve picked up a few ideas, and maybe you’ll even try typing on your digital journaling tags! Thank you for following along with me this month!

Hello there! I’m Shannon. I was born and raised in New England but now live in coastal Georgia with my husband, our 3 daughters, and our rescue dog. I’ve been crafty for as long as I can remember – always creating journals, collages, and photo books. I created a scrapbook of our wedding in 2007 and then jumped right into scrapbooking again when our first daughter was born in 2008. Between 2008-2015 I dabbled in both digital and paper scrapbooking and was published in several scrapbooking magazines. Then I stopped – abruptly and completely. It wasn’t until 4 years later, in August 2019, that I decided it was time to start scrapbooking again. My creativity was dormant for 4 whole years and it feels great to be back! Now, I’m a happy hybrid scrapbooker and I work in pocket pages of all sizes, travelers notebooks, and memory planners. When I’m not scrapbooking, I can often be found running, reading, or sipping coffee. I love being outdoors and discovering new adventures with my family.
Be sure to follow Shannon’s Instagram feed to keep being inspired by her pocket pages and traveler’s notebook spreads. Thank you so much for sharing your beautiful projects with us this month, Shannon!
