Hi everyone. I’m happy to be back with a cute, fun and simple camera card and tutorial for you today! 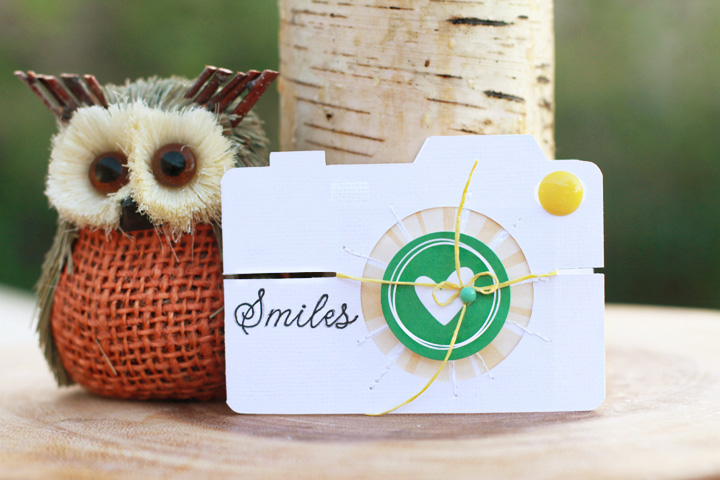
 Here’s how to do it:
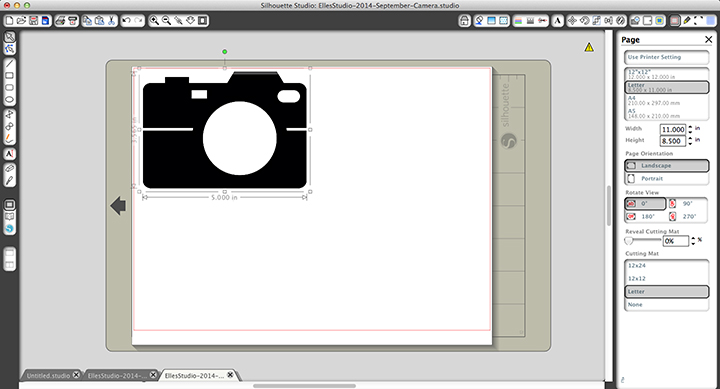
- Open the camera image in Silhouette Studio
- Resize the image. I used 5″ wide because I have a Portrait and that size worked well for me but you can select any size you prefer based on your die cut machine you have.
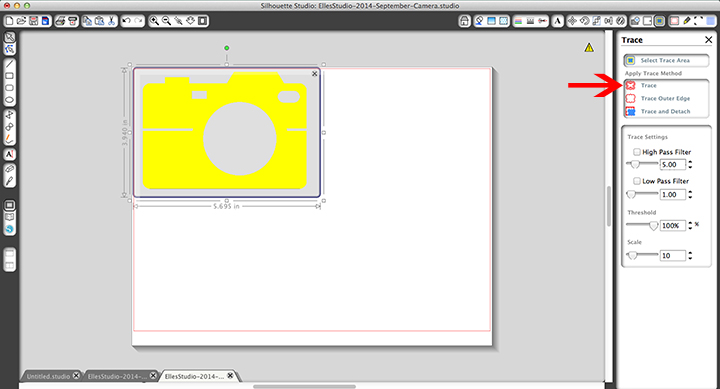
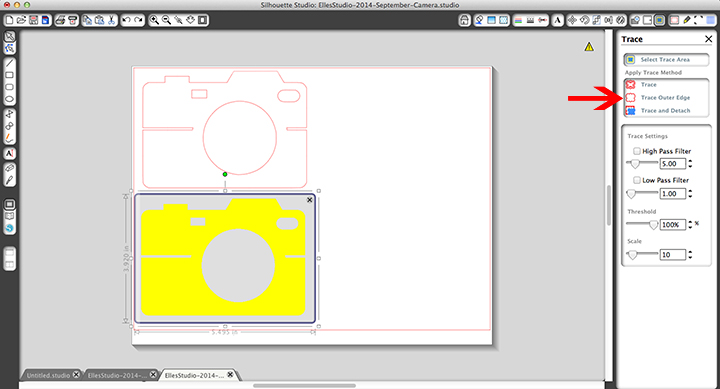
- Trace the image. You’ll need 2 different shapes. For the front of the card select the “Trace” method.
- For the back of the card select the “Trace Outer Edge” method. Also, don’t forget to uncheck “High Pass Filter” and change the “Threshold” to 100%
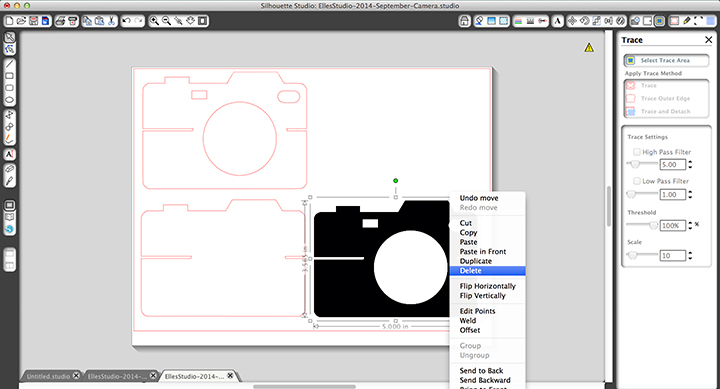
- Delete the png file. You won’t need it anymore.
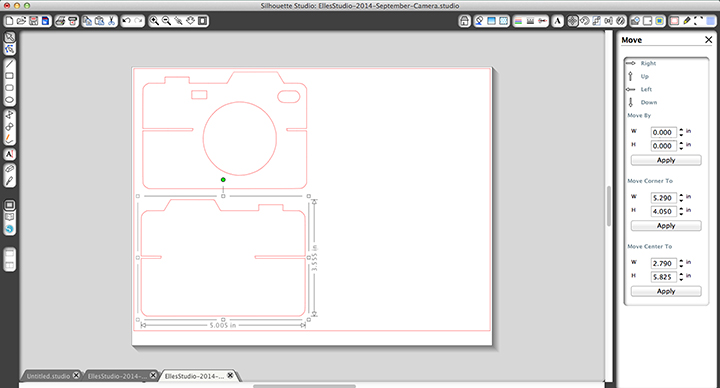
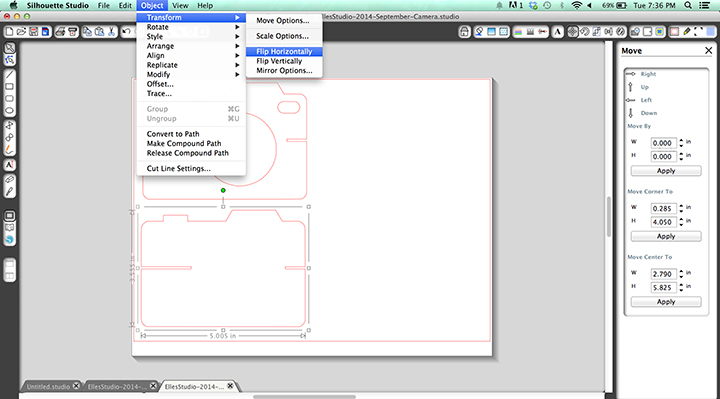
- Now, here’s the important part: you need a mirror image so when the card closes all the edges align perfectly. To do this, select the back (bottom) image and go to Object, Transform, Flip Horizontally.
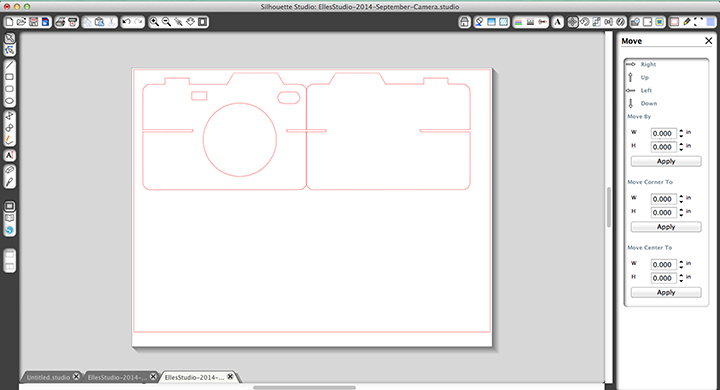
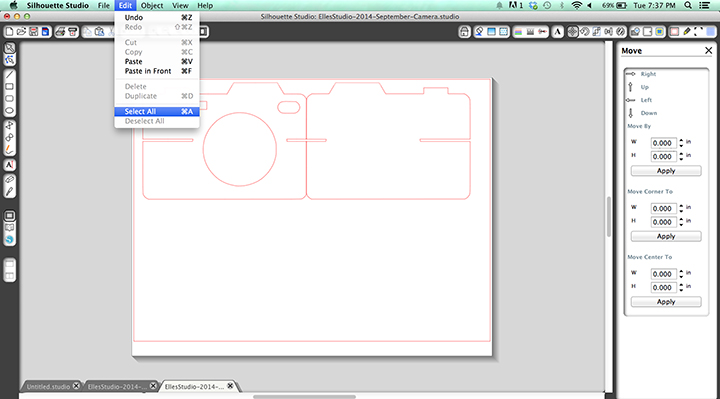
- Place the images side by side, making sure all the lines match perfectly
- Now we need to delete that middle line so you end up with just one cut instead of two. Go to Edit, Select All
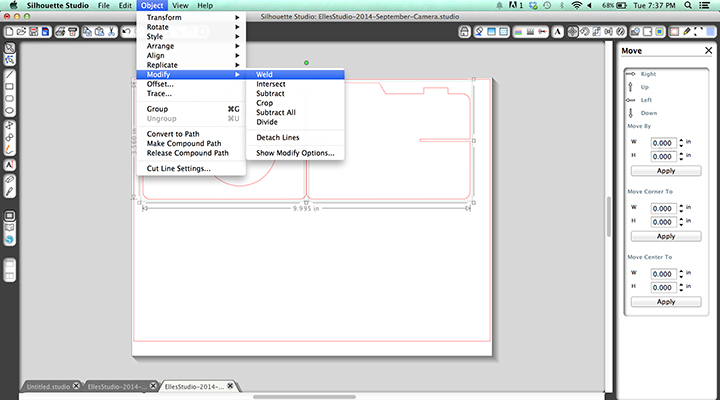
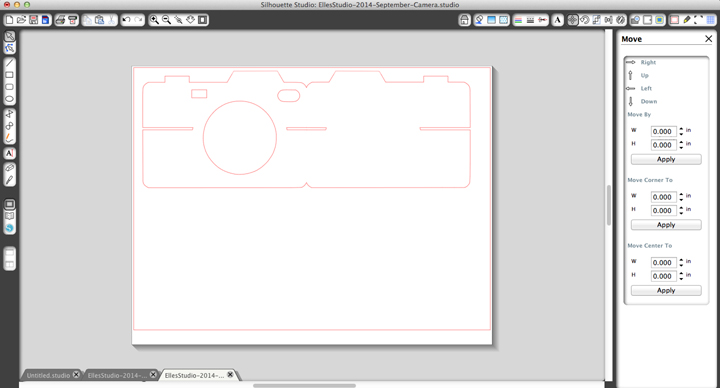
- Go to Object, Modify, Weld. Tada! Your card is ready to be cut 🙂
- Cut, fold and embellish!
What I love most about this card is that you can customize it for any occasion. My “Smile” card is bright and cheery. I used a white base and embellished with a starburst paper and heart tag. I added some texture by sewing along the lines on the paper, wrapped cord around it and finished with candy dots.
The “Thank You” card is what I call funky fallish 🙂 I used a kraft colored cardstock for the base and backed it with vellum. I then layered some label tags, stamped the sentiment and embellished with fall leaves and sequins.
I hope you found this tutorial helpful. Please let me know if you have any questions at all!
ELLE’S STUDIO PRODUCTS USED:



Pingback: CraftCrave | DigiFree | CraftCrave