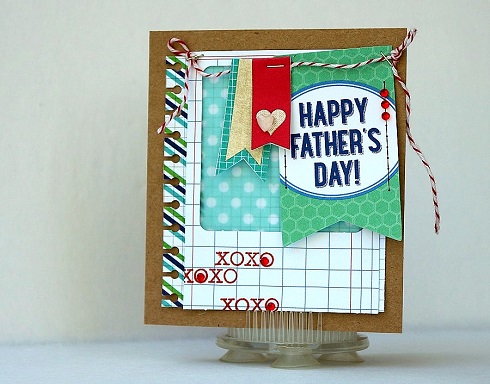
Hello and happy weekend!! We’re back today with a couple of fun father’s day cards. Sarah Webb designed this one with a great combination of frames, banners and masculine colors. I love it!
- Cut vellum and adhere to back of polariod frame
- Run edge of large journaling tag through border punch, trim off tab
- Adhere journaling tag to card base and polaroid frame on top of tag
- Adhere Father’s Day sentiment to top right corner of polaroid frame
- Add the twine and adhere two more labels to create a banner on the card
- Stamp the base of the polaroid frame and add jewels
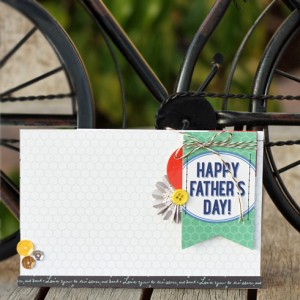
I made the ‘Happy Father’s Day’ tag, from our monthly kit, pop and stay the center of attention by adding just a little color behind it.
- Start with a white card- 4×6
- Attach a 4×6 journaling card to the front
- Wrap twine around the tag and attach to card with foam dots
- Add a red snippet and rossette behind the tag
- Cut a strip of paper and attach to bottom. Sentiment reads: “love you to the stars and back“
- Embellish with buttons and sequins
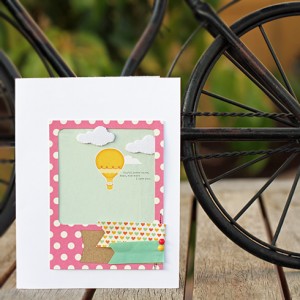
And finally, a not-so fatherly but perfect for spring card. I used the ‘kit’ I made for this blog post 😉
- Start with a white card- 4.25×5.5
- Cut the green paper to fit inside the frame. Sentiment reads: You’ll never know, dear, how much I love you
- Create banners with patterned papers and tape
- Layer and arrange with existing banner
- Embellish with candy buttons and clouds
- Attach frame to card
Supplies:


Comments